Tronxy X5SA Review: With Kit and Caboodle
Rating

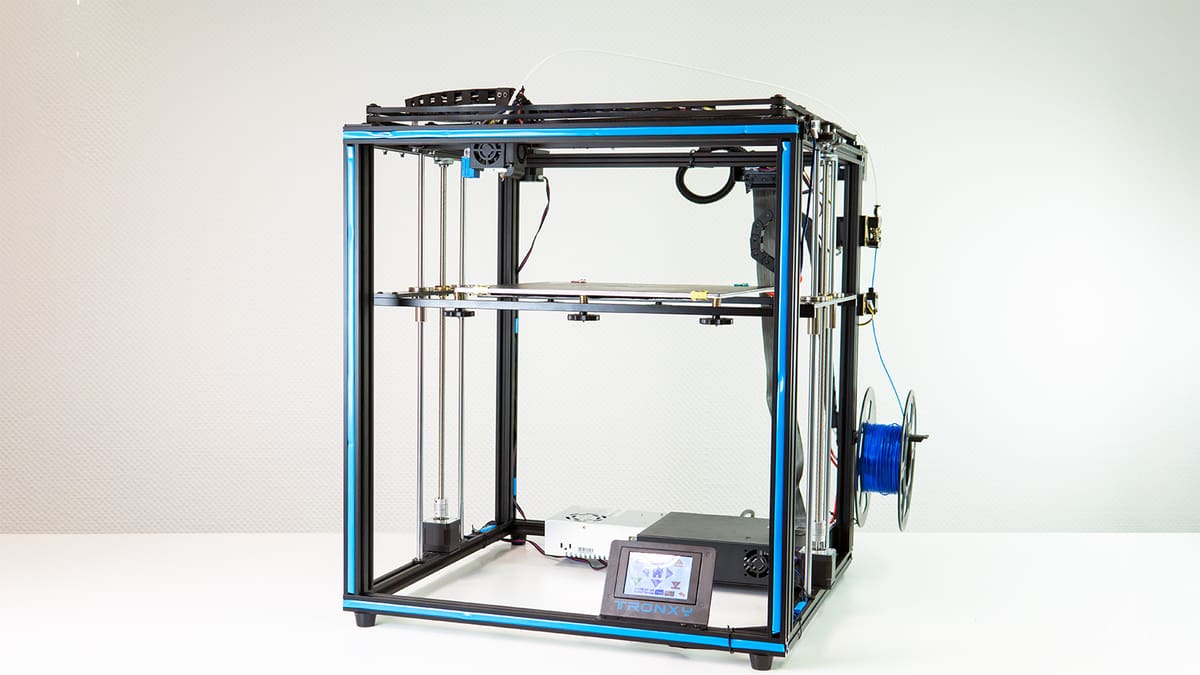
With a 330 x 330 x 400 mm-sized print bed and a $350 price tag, the Tronxy X5SA has all the makings of a bestseller. Read on for our review of this large-sized CoreXY 3D printer kit.
When Tronxy released the X5S in 2018 for about $300, it was kind of a big deal. The CoreXY designed 3D printer kit was dead cheap considering the 330 x 330 x 400 mm build volume it offered, and it quickly became a bestseller.
Following that success, Tronxy released a string of upgraded versions of the X5S, many of which offer improvements on elements original users found problematic.
The first improved version of the X5S is the Tronxy X5SA, which largely took care of the issues of its predecessor, while also adding some convenient features to boot (if you already have the X5S, you can buy an upgrade kit rather than getting a whole new X5SA).
So, does the improved Tronxy X5SA once again hit that sweet spot with enthusiasts around the 3D printing world? The feedback online is certainly mixed. While there are tinkerer fans of this monster cube, others report serious issues with the printer.
We’ve got ourselves a unit in the office and taken it for a spin. Fasten your seatbelts, kids.
Verdict

Pros
- Large build volume
- Auto-leveling
- DIY-kit lets you get to know the printer
Cons
- Constant bed leveling needed
- Cable chain rubs on belts
- Superglue-like build plate
The Tronxy X5SA has potential. Its larger-than-usual build volume and semi-automatic bed leveling are features almost unheard of in its price range. However, the printer needs a lot of tweaking, maintaining, and, ideally, upgrading to outperform similarly-prized, out-of-the-box workhorses such as the Creality CR-10 V3 or Artillery Sidewinder X1.
In the hands of an experienced and dedicated maker, the X5SA is a solid starting point. It could even become a valuable addition to your workshop, providing you are willing to spend a significant amount of time and money on the printer. For first-time 3D printing explorers, this path could prove tiresome.
The Tech
The Tronxy X5SA is a CoreXY 3D printer design that comes as a DIY kit– two characteristics that set it apart from the sea of pre-assembled cartesian XY 3D printers. Whether that’s for better or worse, we’re about to find out.
CoreXY
In general, CoreXY printers are cube-shaped. The print head moves by employing two long timing belts, each of them connected to a stepper motor while the print bed rides up and down the Z-axis on lead screws and guide rods.
Due to the frame design and how the axes move, CoreXY printers have several advantages over other Cartesian (X/Y/Z-coordinate) 3D printer styles. One such example would be that the motors are stationary, meaning there are fewer vibrations and less torque and a gentle increase in print speed.
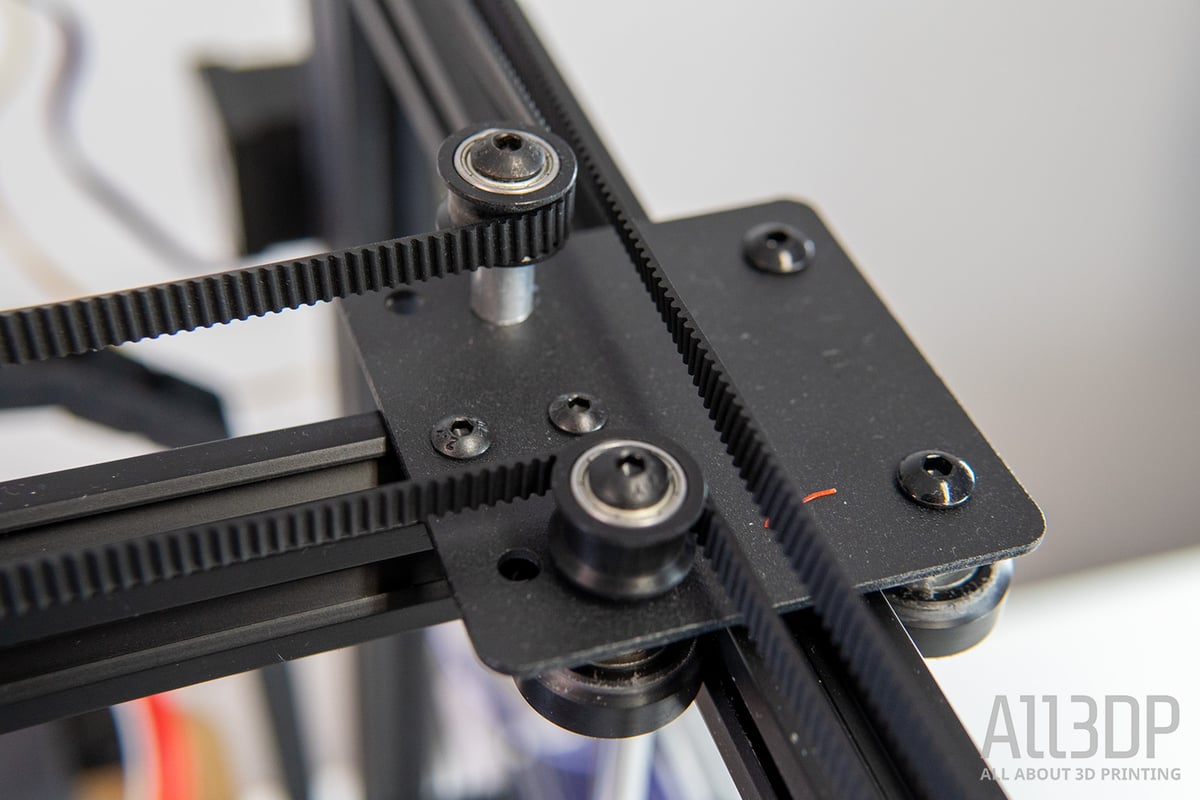
However, its strength is also its biggest weakness. While belts are essential to CoreXY design’s functionality, they also cause problems if they are not aligned properly or if the tension is off. During assembly, getting this right is a crucial step that can spare you a lot of troubleshooting down the road. Unfortunately, there is no belt-tightening system in place. Not only can it be daunting trying to get the right tension when assembling the printer (not just for first-time tinkerers), but those belts will loosen over time and will need tightening again at a later date.
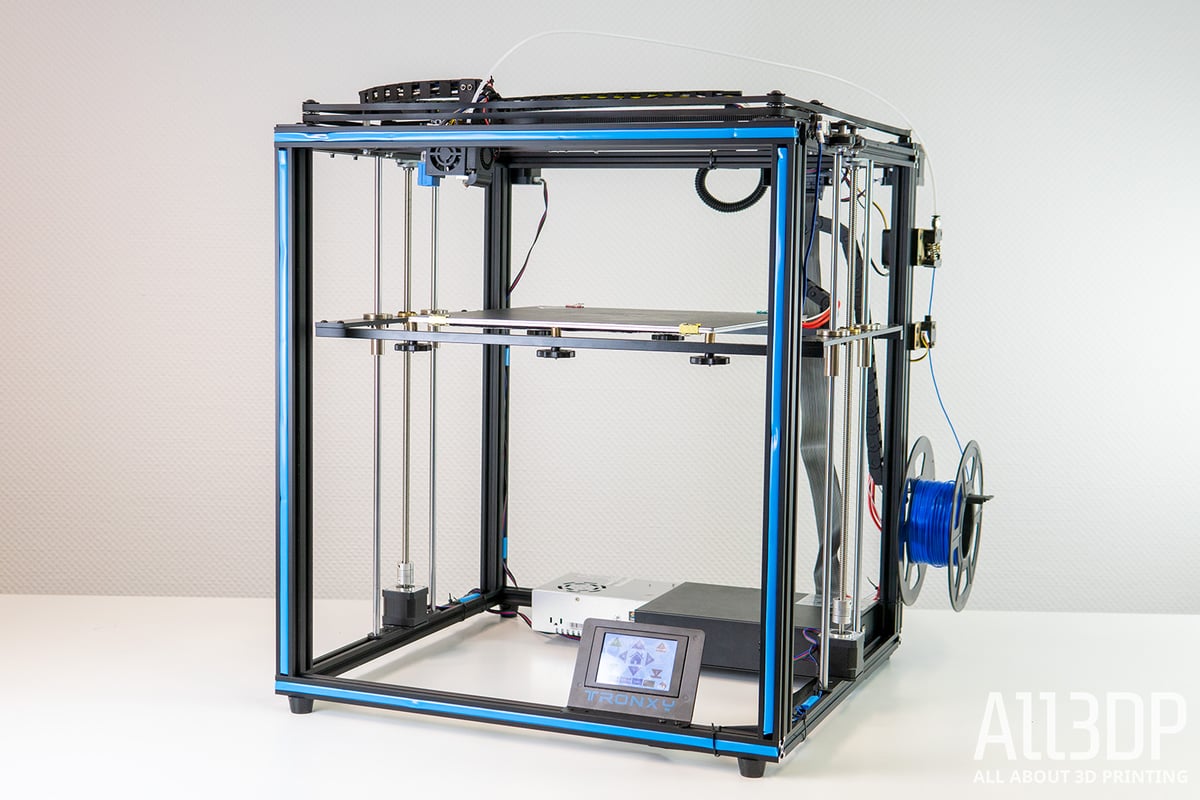
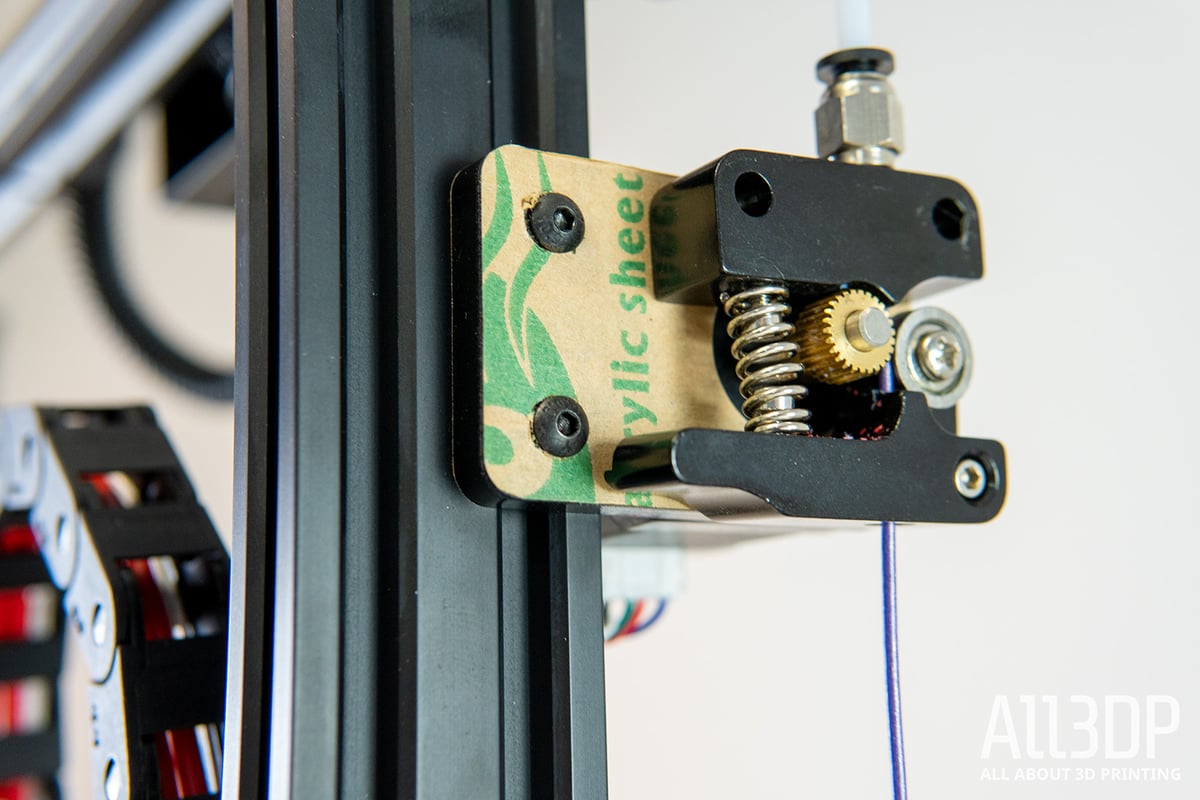
The cubic frame of the Tronxy X5SA consists of a mix of 20×20 and beefy 20×40 aluminum extrusions. Assembled correctly (make sure they’re tight), the printer is plenty rigid. Overlooking the use of acrylic for stepper motor and extruder mounts, this skeletal printer feels reassuringly solid.
Considering that the gantry is exposed to a fair bit of vibration when in operation (CoreXY system or not) and that the belt system can pile strain on top of that, it would’ve been nice to see some support angles as standard. There are 3D printable community designs out there, though, to retrofit the printer with.
Print Bed
Inside the gantry resides the larger-than-usual, 330 x 330 mm-sized print plate. Typical for the CoreXY design, the print plate moves up and down the Z-axis, running here on two lead screws and guided by guide rods. With 400 mm of printable Z-axis height, the printer can be home to some huge prints.

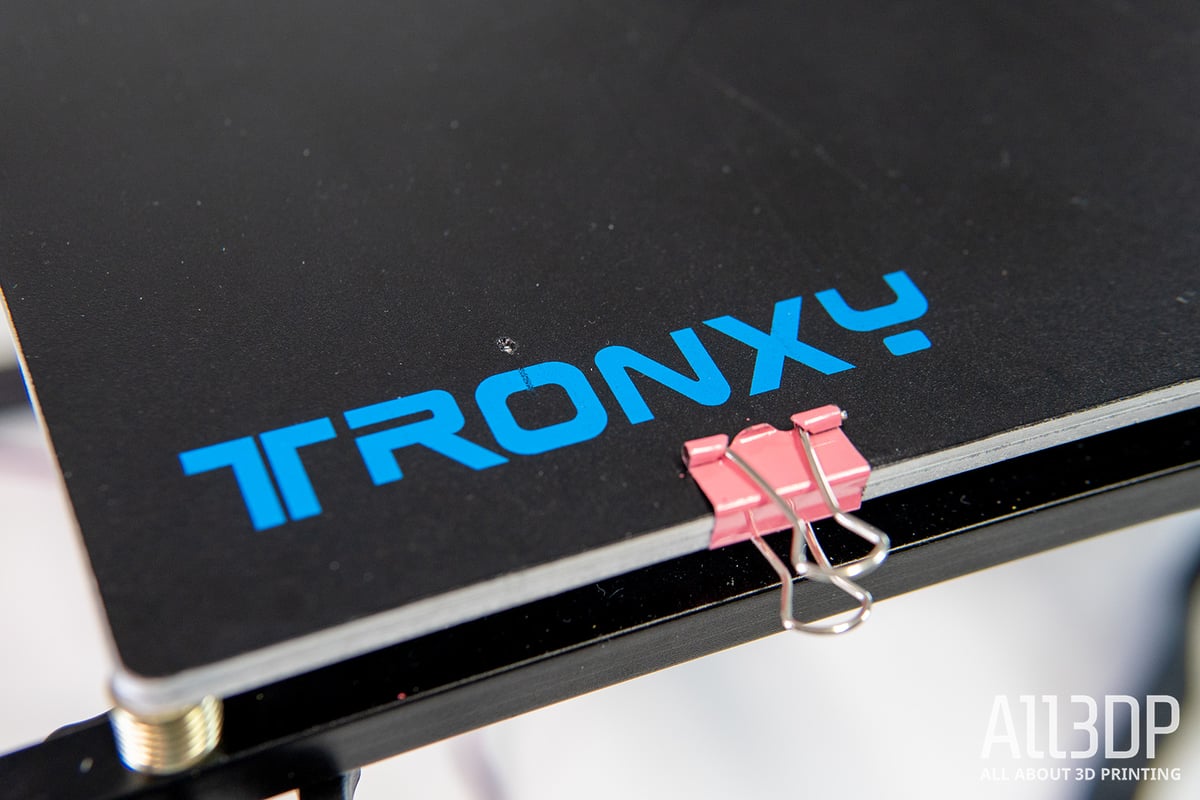
The print bed itself is insulated, 24V powered, and heats up rather quickly and evenly. The removable print surface is held in place by four clippers and features a Buildtak-like surface. Unfortunately, the print bed is not flexible and – never thought we’d say this – adheres too well to prints, to the point where blunt force is necessary to remove them. Partway through testing we flipped the bed over and whipped out the painters’ tape, which is something we never thought we’d be typing in a printer review in 2020.
Hacking at the build plate will typically undo any bed level you had, but even if you try to sidestep this by removing the bed from the printer altogether – no dice. Even with the fingers of an Operation pro, the bed will most likely lose its level, which in turn means you must go through the process of re-leveling the bed before almost every print.

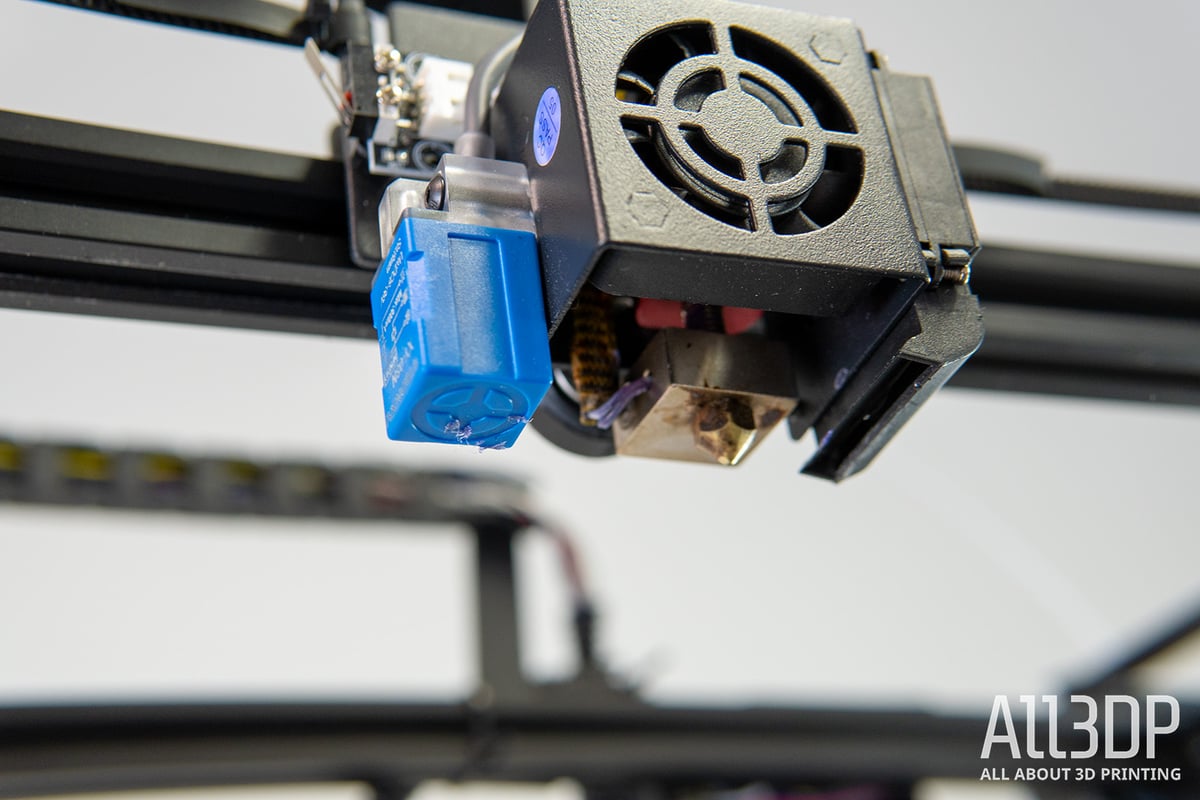
On top, the Z-axis motors are not coupled, nor do they feature an endstop. The bed-leveling probe, attached to the print head’s left side, takes on that task. This means, however, that you should make extra sure to have the plate suspended level on both lead screws when setting it up (again, watch out not to unhinge it during operation) as the probe is more error-prone than a physical endstop and can lead to the nozzle drilling into the plate. To see if the plate suspension is level, we would advise getting (or 3D printing) two identical sized objects you can pin down in between frame and suspension to get the same height.
Automatic Bed-Leveling
Although we would have preferred the Z-axis to be equipped with endstops (like the X- and Y-axis are), let’s not escape the fact that the automatic bed leveling probe is a prominent feature on the X5SA. This system is a rarity at its price point, taking away some of the pain of repeated bed-leveling that’ necessary with this printer.
The probe will measure a mesh of 16 points across the print bed and show you the differences in levels and where you need to adjust the six bed-leveling knobs to compensate. Strictly speaking, it’s actually assisted-automatic bed leveling, but we’d still take it over the manual ones.
The Looks
The Bowden-style extruder is mounted onto the frame’s backside and feeds the filament via long PTFE tubing towards the hotend. The wiring for the hotend and printhead is routed via a drag chain towards the back of the printer.
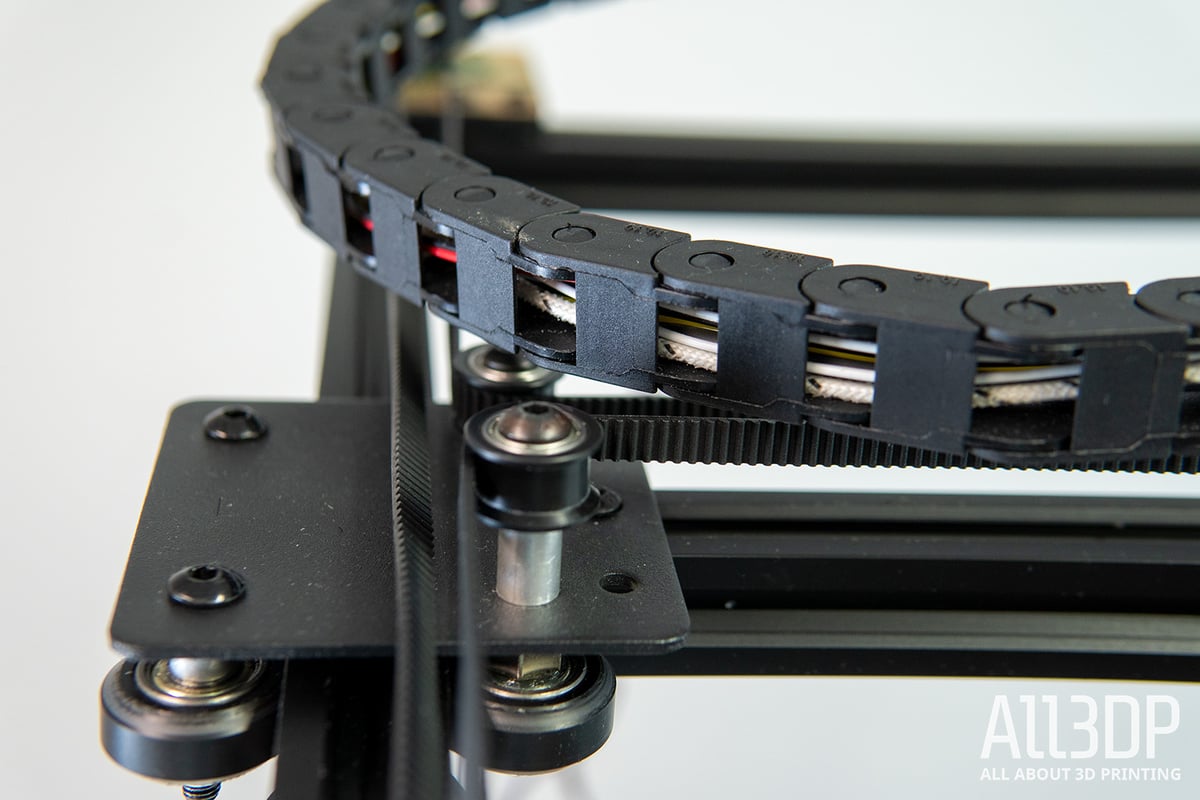
The cable chain helps mitigate some of the DIY-look the printer clearly exudes (even with two cable chains, there is still a bunch of wiring floating around freely), but the suspension is somewhat poorly chosen, as its weight drags it down and rubs against the belt. A similar problem can be observed with the PTFE-tubing. It’s not quite long enough, and when homing the print head (in the left front corner), the tube is stretched almost to its max and can interfere with the belt. Again, 3D printable upgrades are available online and should be considered when planning to print long term with it.
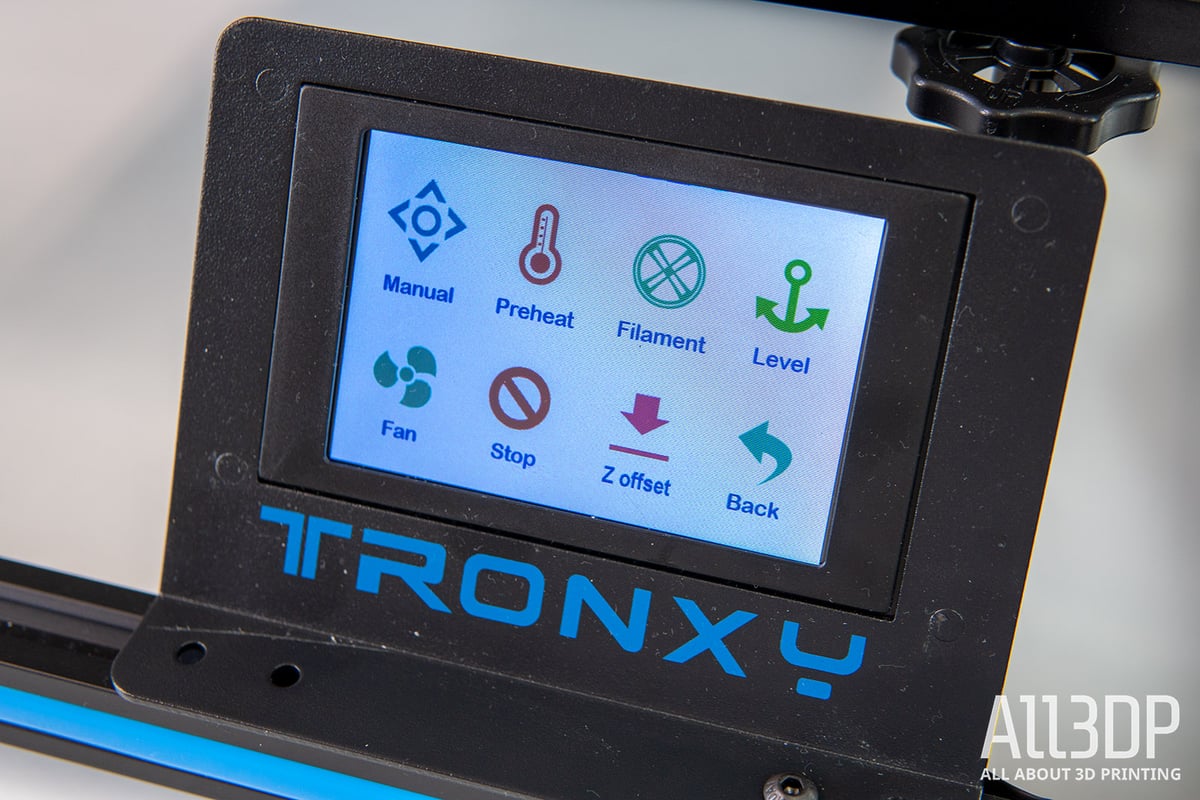
The X5SA’s PSU is mounted in the printer’s back, with a 3.5-inch color touchscreen in the front.
Assembly
Unlike many new 3D printers, it’s up to you to assemble the X5SA. Before you get to cross the tricky bridge of belt-tightening, there’s about a 5-6 hour assembly to get through.
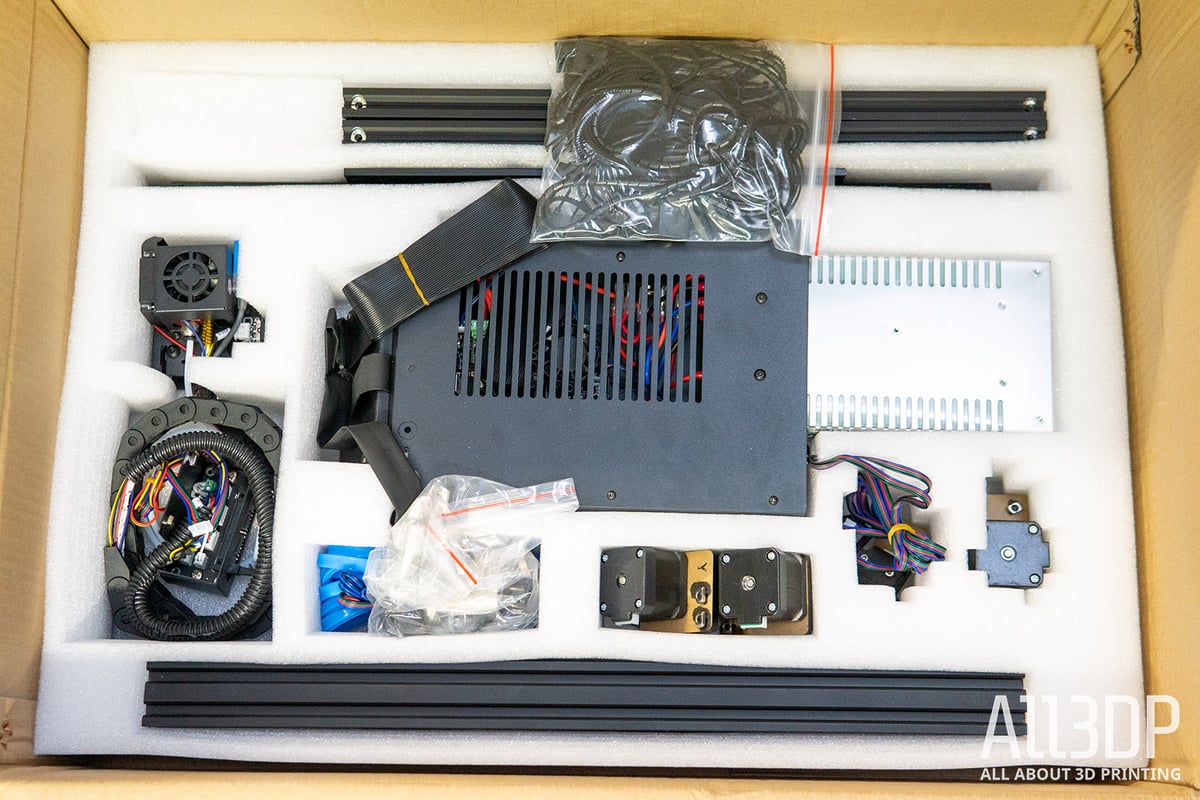
Only a few parts of the Tronxy X5SA come pre-assembled, the PSU and hot end among them. The rest is an assortment of rods, plastic, and a multitude of washers and nuts to assemble on your own. It turns out the kit ships with about twice the amount of screws, nuts, and washers than you need to complete the build, which is a little confusing if you’re not in on this little tidbit of generosity from Tronxy, and complete the build with a Lowe’s worth of parts left. On the plus side, there are plenty of screws and T-nuts left for any mods you 3D print for the printer.
In general, the assembly instructions lack clarity and will almost certainly cause substantial frustration for the unversed hobbyist or first time builder. Save yourself the headache and consult YouTube.
It’s worth noting that the quality of fit and finish of some parts left a lot to be desired – nothing major, but little things here and there that add up over time.

Yes, kits will be kits, and you can’t really complain too much about the fact that you have to assemble the printer. However, one thing we would change would be the belts. Yeah, you know it by now, Core-XY printers hinge on the right belt tension; that is why we would have preferred pre-cut belts in the right length. This would put inexperienced users in the right ballpark when tensioning the belts for the first time.
A strength of the X5SA is that it is pretty much a blank canvas. Everything is accessible, so you can easily swap out or upgrade the parts that bother you. Our first motion would be the PTFE tubing and drag chains.
Printing
Printing with the Tronxy X5SA got off to a rocky start. After patting ourselves on the back for the assembly, we found out that one of the few things we didn’t assemble was causing problems – the hotend. After only a few short layers, the nozzle clogged, leading to under-extrusion and, eventually, to no extrusion at all. With the problem identified (blocked PTFE tubing), the test prints followed.
Just like the printer itself, the printing experience needs some, if not a lot of tinkering to get the best out of it.
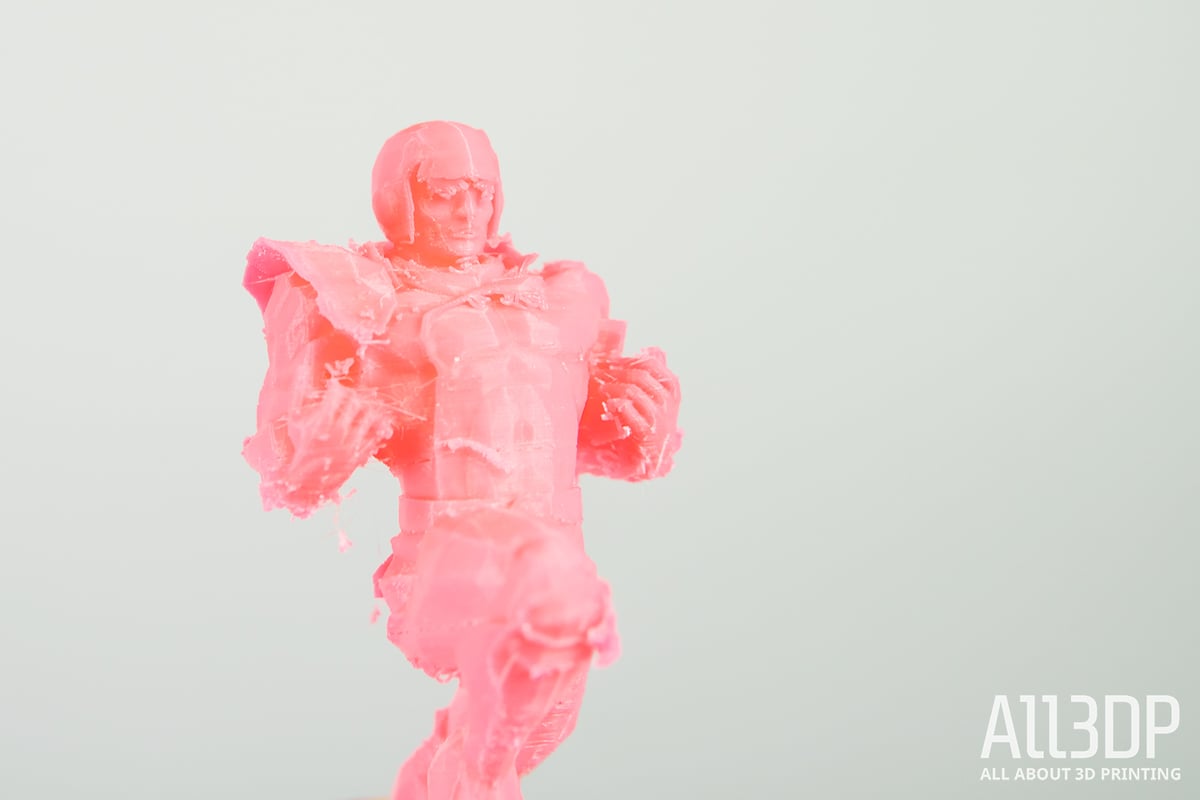
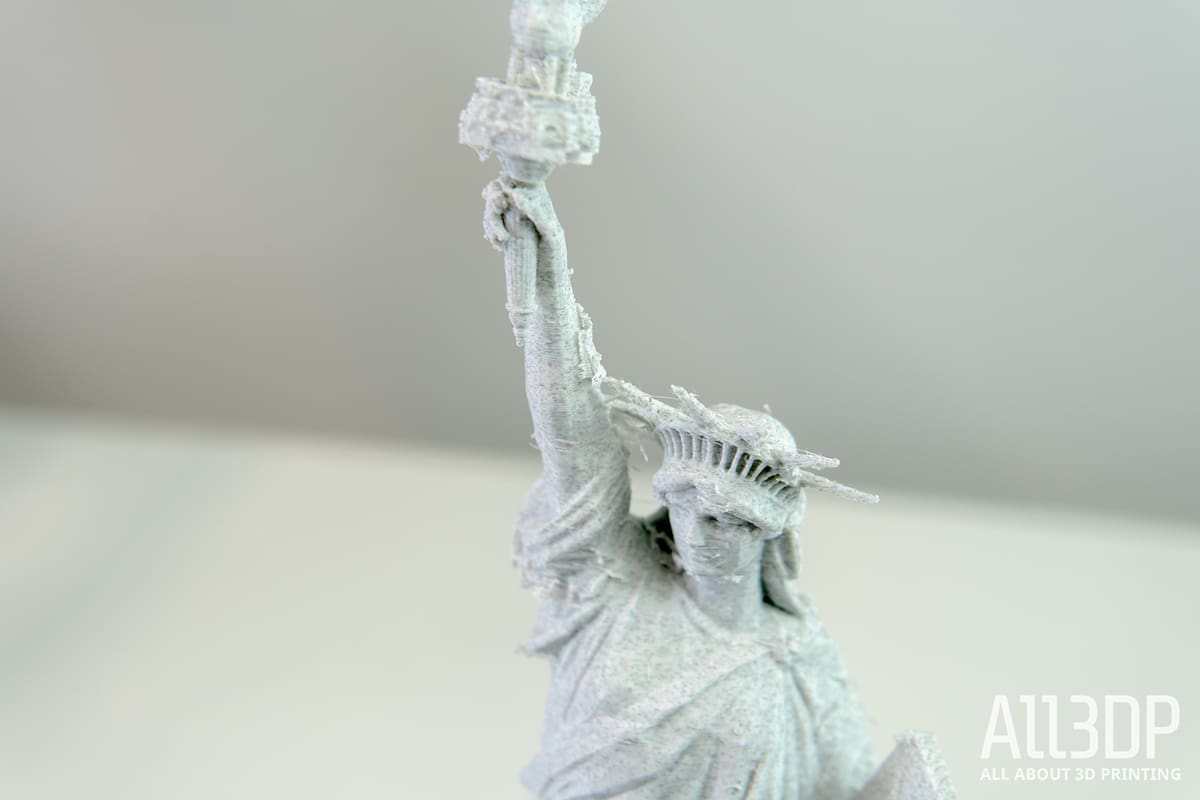
Again, you should make sure that everything is screwed down tight (don’t forget the belts), or you will be facing ghosting, ringing, and layering issues all day long. Even so, the printer still suffers from a fair bit of stringing and nozzle oozing and left us quite frustrated.
Going at the slicer’s retraction settings brought some improvements, especially at lower speeds and simpler objects, but printing inconsistencies continued on high-detailed parts.
Our key takeaway from printing with the Tronxy X5SA is that you need to check, check, and recheck everything before spending some time fine-tuning the print settings. We suspect that no two printers here will be the same.
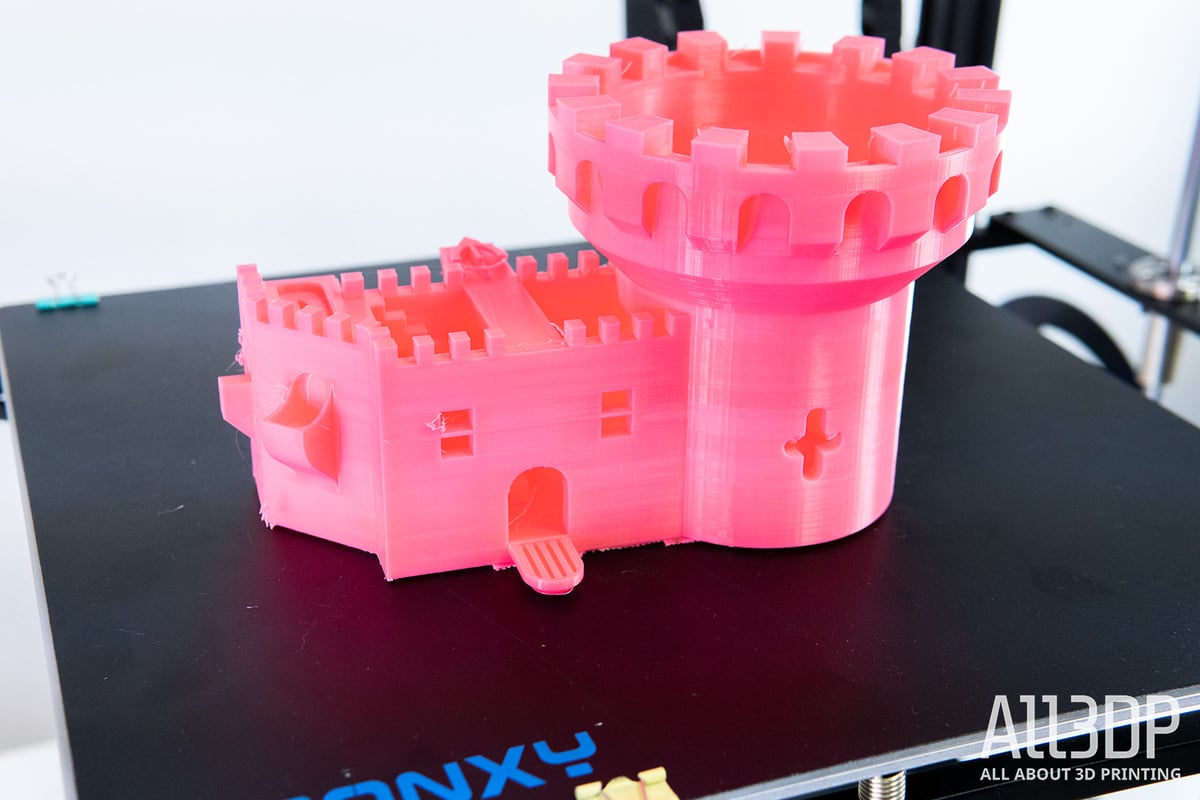
The X5SA can very well if you put enough fine-tuning into it, but it is a long way from the fire-and-forget experiences you’ll have with factory assembled printers.
The Slicer
The Tronxy X5SA comes with Tronxy Slicer – a proprietary skin of Cura (15.04.06) that, even with the expert mode on, allows for only rudimentary print control. Special care should be taken, particularly regarding retraction, as the default settings for the X5SA seem to be universal and not catered to the printer. On top, we found the Tronxy Slicer to be radically underestimating how long a print will actually take to print.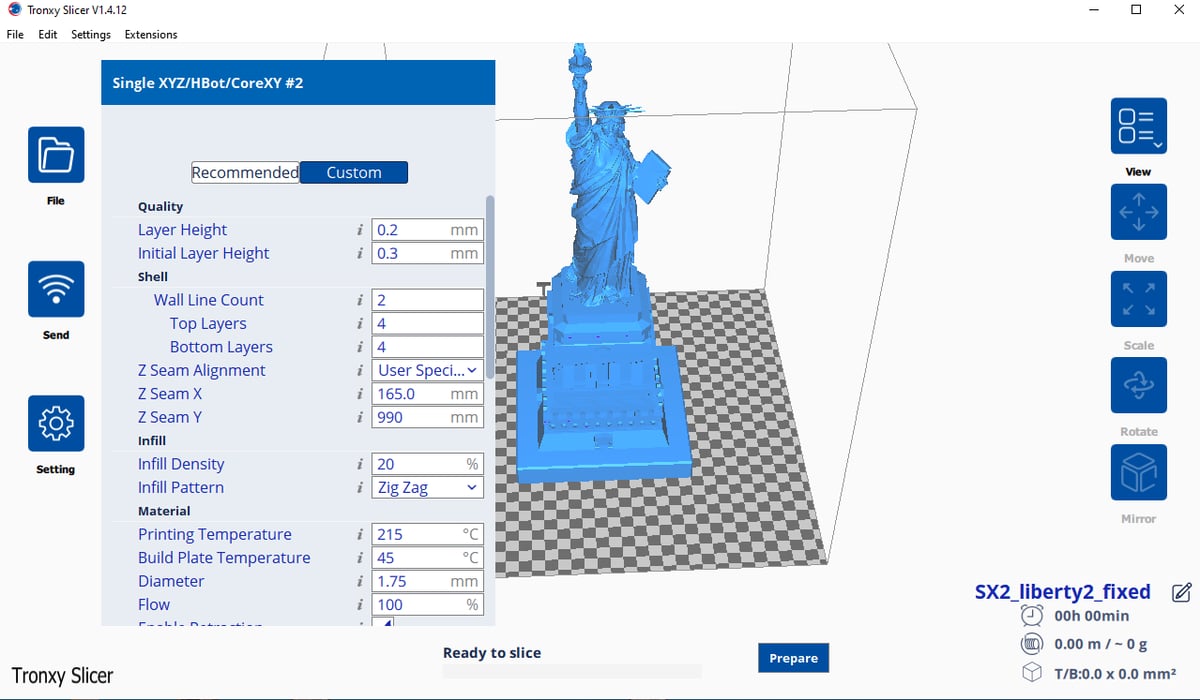
Alternatively, you can switch to a more versatile slicer (for example, Cura, for which there is an X5SA profile) and gain greater control over your prints.
Is It Worth It?
At the time of writing this, the Tronxy X5SA can be picked up for around $300, which is a staggering price tag for the printer’s large build volume and semi-automatic bed-leveling. Any printer with these attributes gets us weak at the knees.
But (saw this coming, didn’t you), there is a big bag of caveats with the X5SA. It is far from a fire-and-forget experience you would have with a recent large Creality printer or the Artillery Sidewinder X1. On its own merits as a kit, the X5SA falls a little short simply for how rough around the edges it is and how utterly frustrating we expect it would be for a beginner trying to make the most of what, really, is quite the bargain.
For experienced 3D printing hands, though, the Tronxy X5SA seems to be a solid foundation for customization. It’s a niche printer for tinkerers that know exactly what they’ll be doing with it. We do not doubt that in the right hands, it’d be a beast of a printer. But out of the box, it’s frustrating.
Features

Here are the Tronxy X5SA’s features, and how it differs from the Tronxy X5Sa-Pro.
Filament Run-out Detection
Every time we think this feature has finally become standard, we wind up testing a new machine that still doesn’t have filament run-out detection. So, with that in mind, it’s nice to see this extremely handy feature on the Tronxy X5SA and it’s a good call on Tronxy’s part because if you’re printing parts as large as this printer lets you, you’re bound to run out of filament at some point.
Resume Print Function
Similarly, this machine is also able to resume a print after a power failure. Again, a great feature to have in general, but especially when you’ve got some large prints you’ve already sunk tens of hours into.
Auto bed leveling
Take the hassle out of leveling this bed and let the machine do it itself, sort of. You’ll need to follow its instructions and adjust it once it has taken note of the bed’s position.
Touchscreen
One of the more obvious differences between the predecessor, the X5S, and the X5SA is the 3.5 touch screen, which replaces the old LCD screen. This makes it a lot easier to navigate the printer functions.
Other features
Some other features in the Tronxy X5SA are its Bowden extrusion system, a heated bed, and an improved stepper motor.
How does it differ from the Tronxy X5SA Pro?
Many of the features in these two machines are the same, with the exception of three: The Pro has a double guide rail system to improve stability and increase print accuracy, it has more metal parts, and it also has a Titan extruder. The main difference then really comes down to the materials you can print. Since the Pro has the Titan extruder, it can handle some materials, like TPU, better.
Tech Specs
General Specifications
- Technology: Fused deposition modeling (FDM)
- Year: 2019
- Assembly: Kit
- Mechanical arrangement: CoreXY
- Manufacturer: Tronxy
3D Printing Properties
- Build volume: 330 x 330 x 400 mm
- Feeder system: Bowden
- Print head: Single
- Nozzle size: 0.4 mm
- Max. hot end temperature: 275°C
- Frame: Aluminum, sheet metal
- Bed leveling: Auto
- Connectivity: USB, TF memory card
- Print recovery: Yes
- Camera: No
Materials
- Filameter diameter: 1.75 mm
- Third-party filaments: Yes
- Materials: ABS, PLA, TPU, nylon, carbon fiber, PVC, HIPS
Software
- Recommended slicer: Tronxy Slicer, Cura, Simplify3D
- Operating systems: Windows, Mac, Linux
- File types: STL, OBJ, G-code
Dimensions and Weight
- Frame dimensions: 639 x 580 x 658 mm
- Weight: 11.5 kg
Similar Printers
You may also be interested in the following printers:
For further information, feel free to check out our Best CoreXY Printers Guide.
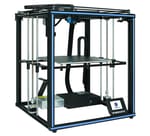
Tronxy X5SA-Pro
While the Tronxy X5SA Pro and Tronxy X5SA share many of the same perks, such as auto-leveling, filament run-out detection, and the same print volume, the primary improvements rest in the printer’s performance.
The double guide rail system is said to provide more stability amd the inclusion of the Titan extruder enables users to print with a more expansive list of 3D printing filaments, specifically flexible materials like TPU. Depending on where you’re shopping, the Tronxy X5SA Pro can cost anywhere from $40 to $100+ more than its predecessor.

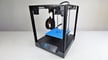
Two Trees Sapphire Pro
The Two Trees Sapphire Pro has been in the spotlight for a while and for good reason. The CoreXY printer has precision linear rails for the X- and Y-axes, a dual-drive extruder, an auto-bed leveling probe, a 32-bit mainboard, and TMC 2208 silent stepper drivers. Boasting a smaller, 235 x 235 x 235 mm-sized, build plate, it is similarly priced at ~$300.

License: The text of "Tronxy X5SA Review: With Kit and Caboodle" by All3DP is licensed under a Creative Commons Attribution 4.0 International License.
CERTAIN CONTENT THAT APPEARS ON THIS SITE COMES FROM AMAZON. THIS CONTENT IS PROVIDED ‘AS IS’ AND IS SUBJECT TO CHANGE OR REMOVAL AT ANY TIME.