Generally reserved for the construction industry, concrete 3D printers are enormous machines capable of producing unique structures and habitable homes. Both the price and sheer size of concrete extruding hardware makes it off-limits to the everyday consumer, but that doesn’t mean a desktop 3D printer can’t be used to create objects from this heavy-duty building material.
This Instructables post from Further Fabrication showcases how to design and 3D print molds for concrete objects. By harnessing some basic design skills and a desktop 3D printer, it’s actually quite easy to cast objects from concrete.
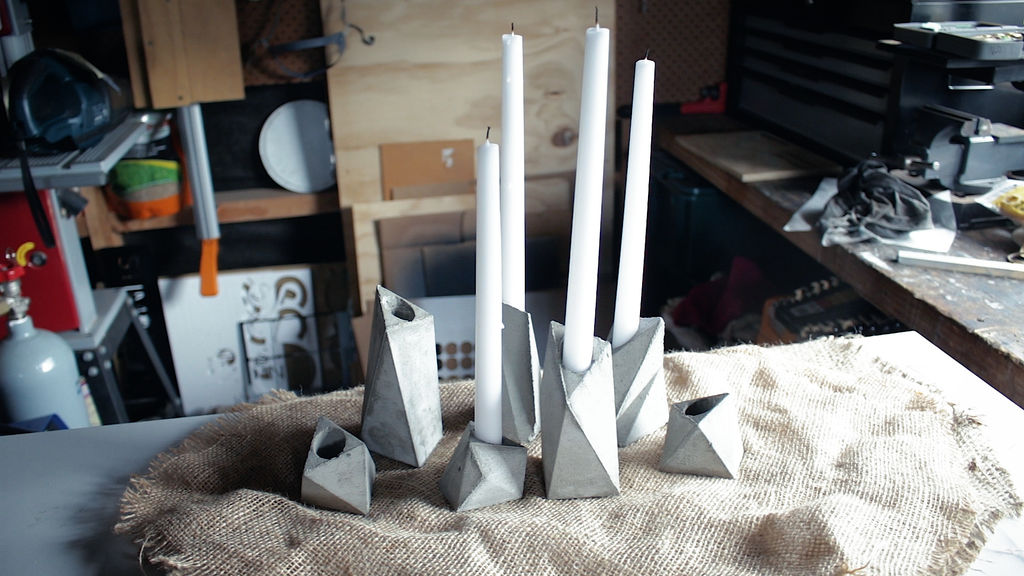
The maker behind this project walks readers through every step of the process, from designing the molds to filling them with the concrete mixture. In this example, he creates candlestick holders that have a smooth and modern geometric look. Here’s a brief overview detailing how you can create 3D printed molds and cast your own concrete objects.
How to Create 3D Printed Molds for Concrete Objects
Before you can cast your concrete objects, the first step in the process is designing the mold. Further Fabrication uses Autodesk Fusion 360 CAD software to shape the candle holders. In this article, we’ll focus more on the dirty, hands-on part of the project. However, if you want to learn about how Further Fabrication designed the candlestick holders, you can check out his extensive write-up in the first section of the Instructables post.
To correctly cast objects from concrete, you’ll need a couple of non-printable materials, including the concrete mix itself (obviously) and some form of lubrication, such as petroleum jelly. Once the mold design prepared, it’s time to print it out. If you’re following along with the candle holder example, the designer suggests printing them at a 0.3mm layer height and 10 percent infill.
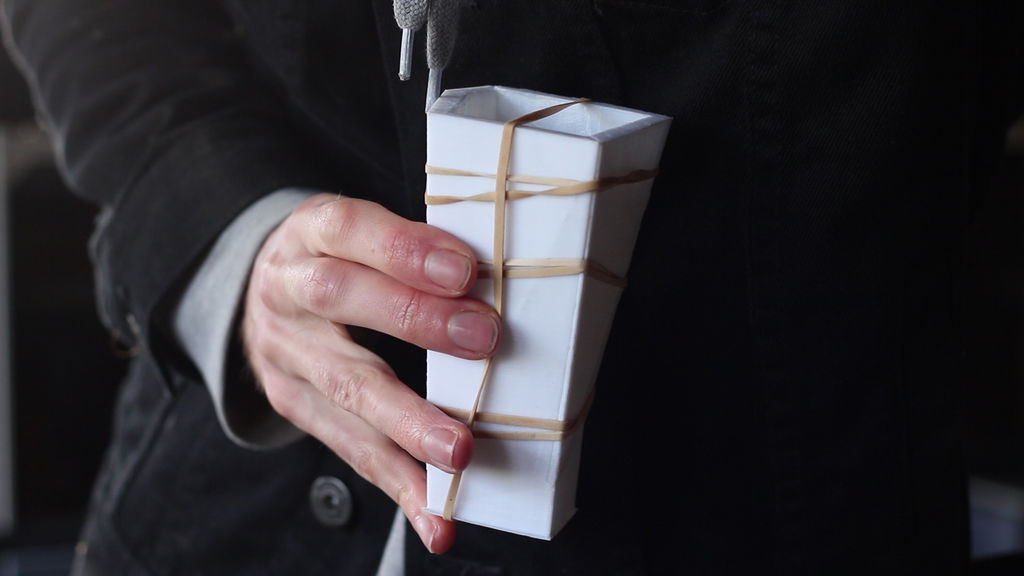
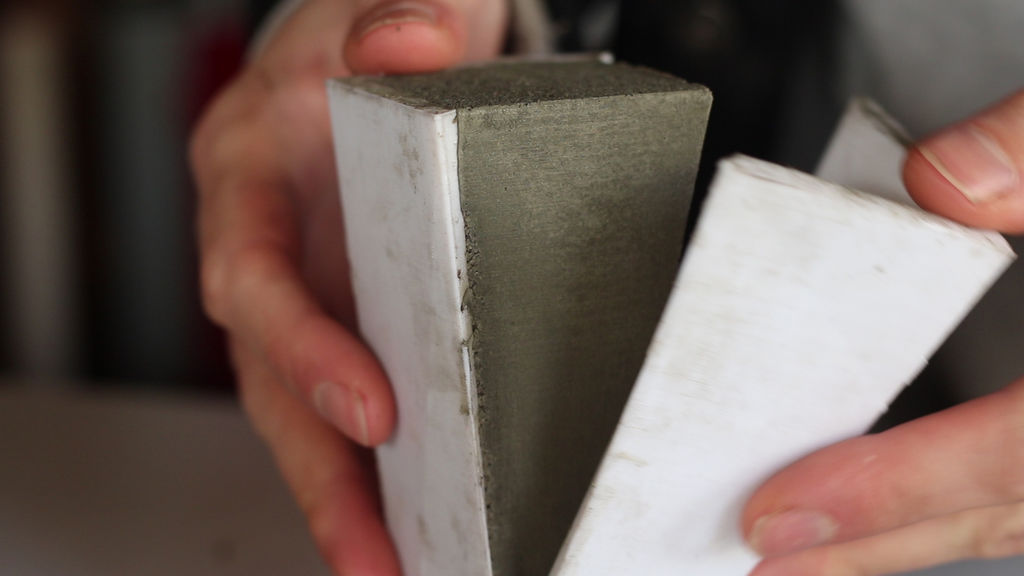
After the two halves of the mold are printed, you can take a chisel and smooth the area where the two parts will join together. If you want to go above and beyond, Further Fabrication also recommends using a few layers of primer to achieve a smoother finish.
Now comes the fun part…casting concrete! But before you can get your hands messy with the concrete mix, you first need to prepare the mold. The inside of the 3D printed mold needs to be lubricated to prevent the concrete material from sticking to the sides. Further Fabrication makes it a point to tell readers that every nook and cranny should be coated in petroleum jelly before the casting process can begin.
Next, take the bag of concrete and mix it with water until you get a “wet pancake batter consistency,” allowing it to flow freely within the mold. When pouring the material into the mold, stop about a half-inch from the top and bang the mold a few times to get rid of any air bubbles.

After you fill the mold to the brim with concrete, let it sit for a while until it hardens. You can test whether it’s ready or not by forcing your fingernail down upon the top of the mold. If you leave an imprint in the concrete, it’s not done casting yet. If there’s no mark left on the surface, you’re ready to remove the mold and excavate your concrete object!
To do this, lift away one side of the mold and tap it gently to get the concrete to slide out. You should leave it out for a few days to make sure that it’s thoroughly dried. Lastly, you can use some sandpaper to improve the surface finish, followed by applying some concrete sealer to wrap things up. And there you have it, your very own concrete objects cast from a 3D printed mold!
This post originally appeared Nov 04, 2018.
License: The text of " Create Concrete Parts with 3D Printed Casting Molds" by All3DP is licensed under a Creative Commons Attribution 4.0 International License.