Solid metal parts from filament has dramatically expanded access to 3D printing metal for a wide audience of professionals who had been priced out of the technology. Today, printing with metal filament, also called bound metal deposition (BMD) or metal deposition modeling (MDM), is used for everything from small replacement parts to injection molds. Once a novelty, real metal parts from desktop-size 3D printers using metal-infused filament is becoming serious business among professionals.
For consumers and small businesses however, the bloom is off the rose it seems as the complexity of metal filament 3D printing is more widely understood and the initial hype is quelled.
Still, making metal parts from metal filament is not only up to 90% cheaper than other metal 3D printing technologies for single pieces or low-volumes, but it eliminates many of the safety requirements often associated with metal 3D printing using loose metal powder and lasers, all while offering the same design freedom and very similar part quality.
Metal filament is not without its own challenges. Parts do not come out of the printer ready to use. They must be debound and sintered in a furnace, which requires that your send your printed parts to a third-party, unless you have the equipment — the same used for metal injection molding — in house.
Nevertheless, more desktop fused deposition modeling (FDM) 3D printer makers today, including Anycubic, have launched printer profiles that enable you to print with metal filament on their affordable machines. Other FDM printer manufacturers, such as UltiMaker, Markforged, and BCN3D have launched kits that include the profiles, the filament, and the nozzles required to turn these polymer printers into metal printers plus coupons to have the parts sintered.
A third category of desktop 3D printers are those dedicated to metal filaments, such as Raise3D’s Forge1, Markforged’s Metal X, and Desktop Metal’s Studio System 2.
Even major 3D printing services, including Craftcloud, have added metal filament to their list of available materials making metal prints on demand even more affordable.
What kind of parts can this FDM metal option produce, and why might you want to use it? Here, we cover this method’s unique features and capabilities; then we’ll show how to print with metal filament and the mechanical properties you can expect. Plus, we explore the top 3D printers for printing metal parts from metal filaments.
| Name | Metal Filament | Debinding & Sintering | Build Volume | Printer Price |
|---|---|---|---|---|
| Markforged FX10 | 316L stainless steel | Markforged Wash-1, Markforged Sinter-2 | 375 x 300 x 300 mm | $100,000 (optional metal kit is an additional $19,000) |
| Markforged Metal X Gen2 | Markforged 17-4 Stainless Steel, H13 Tool Steel, A2 Tool Steel, D2 Tool Steel, Iconel 625, Copper | Markforged Wash-1, Markforged Sinter-2 | 250 x 220 x 200 | $99,000 |
| Desktop Metal Studio System 2 | Desktop Metal 17-4 PH Stainless Steel, 304L Stainless Steel, 316L Stainless Steel, CoCrMo, Nickel Alloy IN625 | Desktop Metal Furnace | 300 x 200 x 200 | $99,000 |
| Raise3D Forge1 | Ultrafuse 316L, Ultrafuse 17-4 | Raise3D D200-E, S200-C Furnace | 300 x 300 x 300 | $10,000 |
| BCN3D Epsilon W50 with Metal Pack | Ultrafuse 316L, Ultrafuse 17-4 | outsourced | 420 x 300 x 400 | $8,500 |
| UltiMaker S5 & S7 with Metal Expansion Kit | Ultrafuse 17-4 PH | outsourced | 330 x 240 x 300 | $10,000 |
What Is Metal Filament?
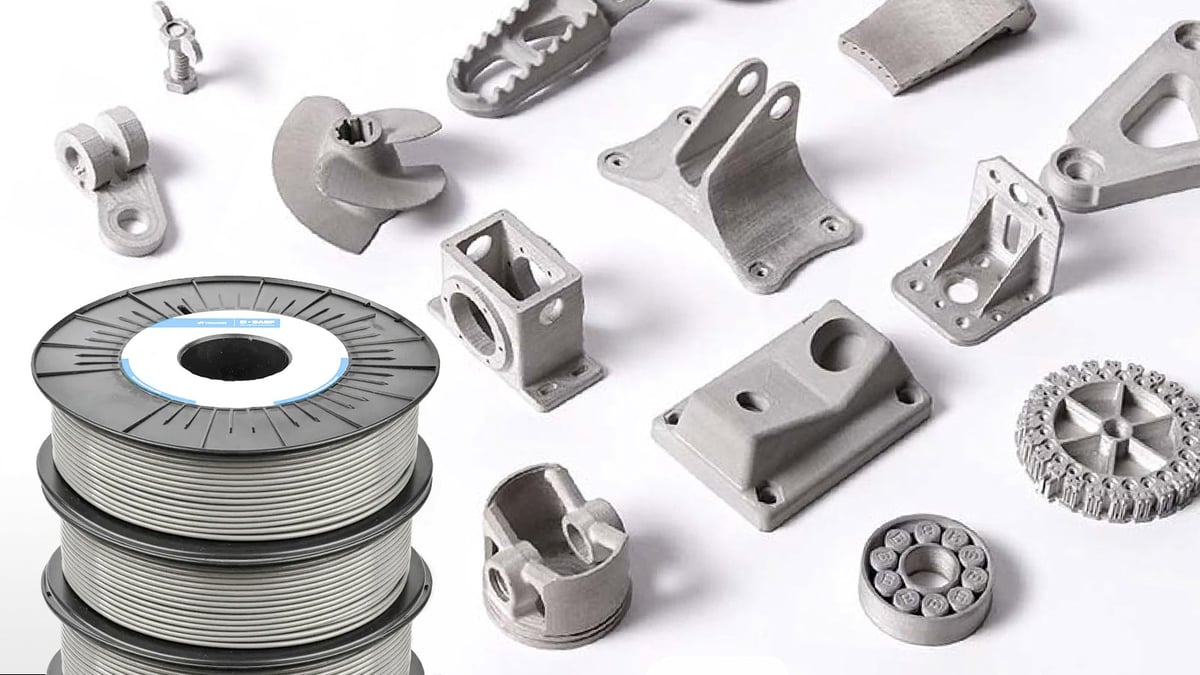
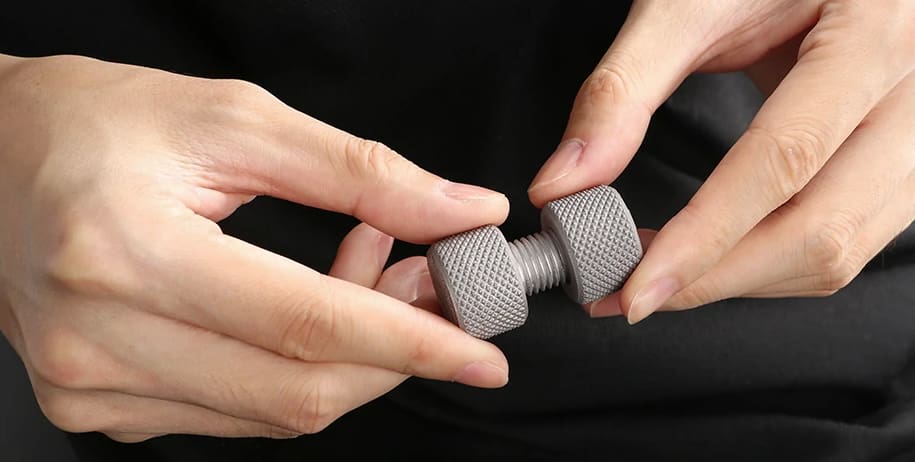
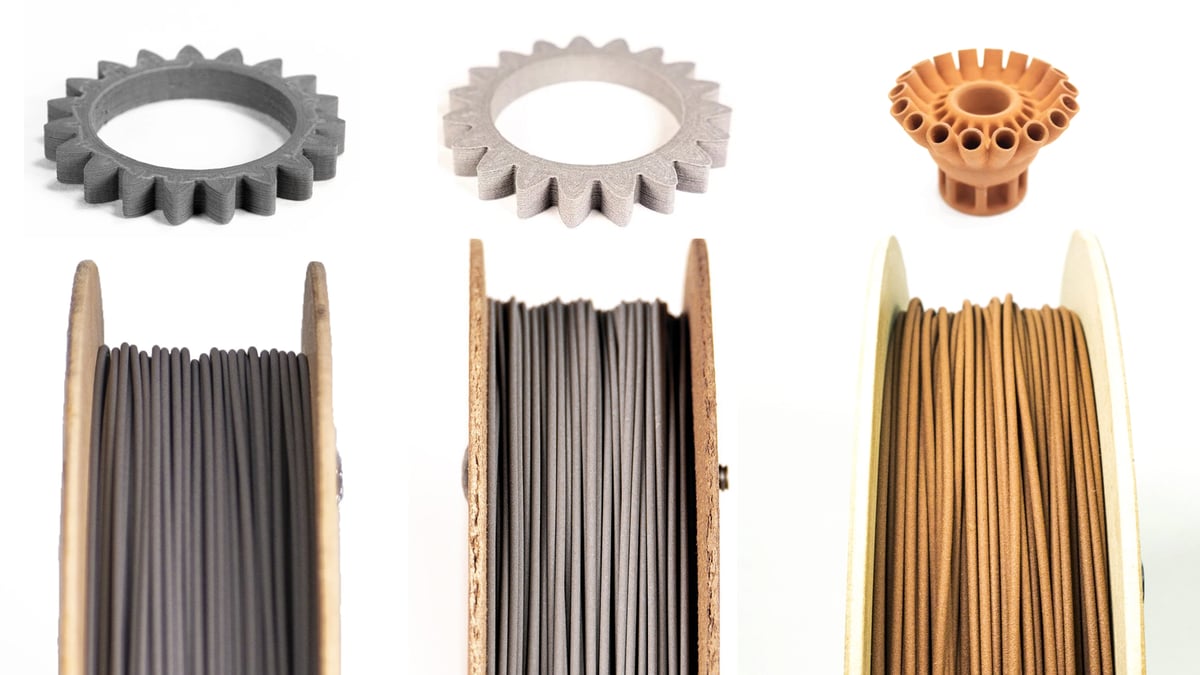
Metal filament for printing metal parts consists of a plastic base with metal particles evenly infused within it. Metal-infused filament for metal parts is a unique type of composite filament that can yield strong, chemically resistant, and nearly solid metal parts (98%+) when used properly.
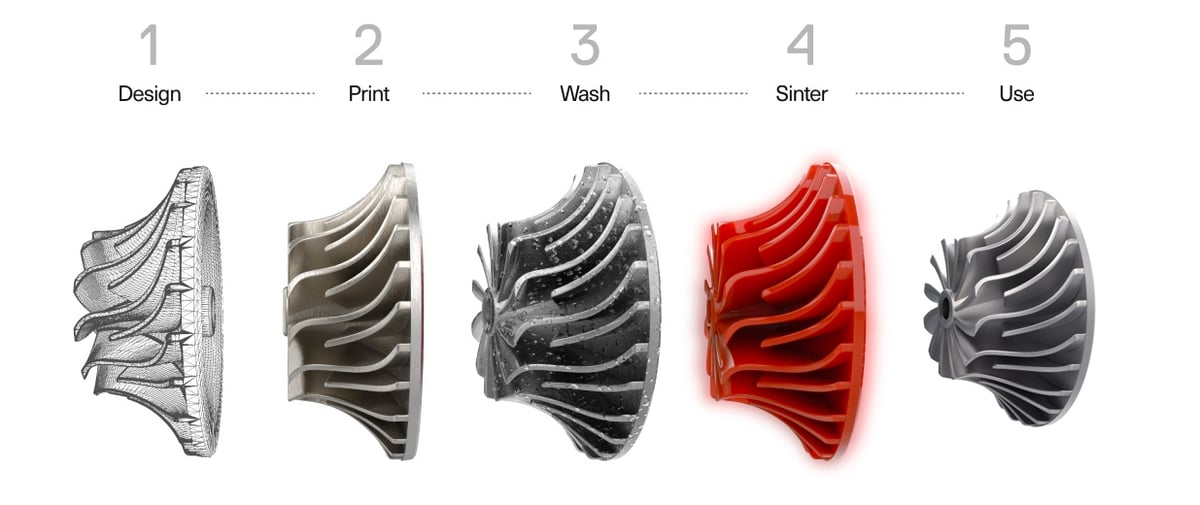
Unlike all other types of filament, metal filament for metal parts requires a 2- or often 3-step process after printing, which includes removing the polymer from the print in a chemical solvent and then putting the print in a sintering oven that condenses it into a metal part.
It’s not just metal-colored or decorative metal
Don’t confuse these metal filaments with those for decorative purposes. Metallic filaments that are simply named “aluminum” or “copper” to refer to their color, and some that are sold as PLA+metal include only 5% to 40% metal powder.
Some decorative metal filaments, such as Formfutura’s MetalFil Classic Copper and ProtoPasta’s iron-filled PLA, contain high percentages of metal powder (up to 80%), but are intended to simulate metal for appearance and weight only. These do not require any type of post-processing to remove the plastic but can be brushed, sanded, or polished to look and feel like metal. Apart from decorative pieces, these materials are ideal for visual prototypes of parts that will eventually be made of metal, either cast or 3D printed in another method.
How to Print with Metal Filament
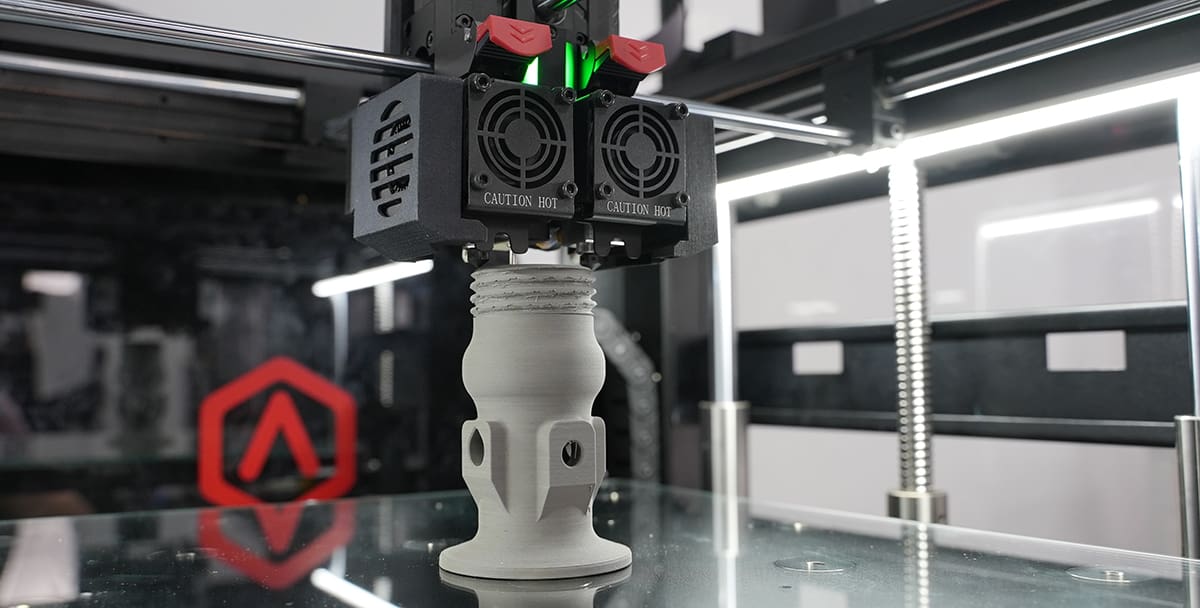
A key benefit of metal filament is how easy it is to print with on a regular 3D printer, but don’t be fooled. Although the filament will flow on just about any FDM printer with a heated bed and a hardened steel nozzle (that can reach the required temperatures of at least 180 ºC to 220 ºC), there’s a lot more to printing metal than you may think.
In fact, part design, orientation, wall thickness, and support structures are different using metal filament compared to any other filament type. For example, metal filament maker Forward AM says printing says printing with its materials requires a greater amount of supports compared to typical plastic filament. To print an overhanging feature, it is recommended to use supports with overhang angles under 45°, walls should be no less than 1 mm thick in the as-printed state, and bottom surfaces of parts must be flat to prevent cracking.
Finding the right print speed can also be a challenge if your printer maker hasn’t provided it. Metal filament prints relatively slowly. Depending on your machine and the design of your part, you should start printing with a speed of 30 mm/s or 40 mm/s, similar to the speeds used for printing nylon.
In theory, you can print metal filament on machines under $200, like an Ender 3 or Anet A8, but be sure to follow the design guidelines from your filament maker and your printer manufacturer if available. If you’re not provided with specific extrusion width, retraction distance and speed, infill, bed temperature, print speed, and other perimeters, you’ll spend a lot of time and money experimenting. Metal filament starts at $150 per 500 grams.
This is why certain printer manufacturer have “certified” the material for use on their machines, and others have not.
Manufacturers Makerbot, UltiMaker, Raise3D, and BCN3D have certified Ultrafuse brand metal filament for use on their printers and have worked with Ultrafuse maker Forward AM to develop ideal printer settings after long periods of testing and experimentation.
Bambu Lab has not yet certified any real metal-filled filaments for use on its machines. Metal filament maker The Virtual Foundry caused a bit of confusion announcing a collaboration with Bambu Lab — and picturing one of its machines on its website — in late 2024 but nothing has come of it yet. Metal filament is still experimental on Bambu Lab 3D printers.
Your Metal Parts Will Shrink
All metal filament-printed are subject to shrinkage while being post-processed (from 18% to 25% of their original volume, depending on the design and the brand of filament) because the plastic material in them is removed and the remaining metal is condensed. This brings an added degree of difficulty when printing functional parts where dimensional accuracy is a priority. However, the shrinkage factor is consistent, so you can scale your initial CAD models appropriately, and slicing software can calculate this for you automatically.
Forward AM’s Ultrafuse filament has a narrow shrinkage window of 16-17% on the XY and 19-20% on the Z axis.
Using Filamet brand metal filament from The Virtual Foundry, you can plan for the print to shrink about 5% for copper and bronze, and 10% for the steels using the company’s published debind/sinter process. The Z will show expansion if the debind process doesn’t go smoothly but should shrink just a bit more than the X and Y in a successful cycle. Overall, normal shrinkage is 7-10%, the company says. The final parts will be 80-85% dense, but parts can be sintered for longer, meaning more shrinkage and higher density.
It’s also helpful to know that Ultrafuse offers a comprehensive user guide that includes information on tolerance, shrinkage and scaling, wall thickness, and more.
The printer manufacturers below that offer the debinding unit and the sintering unit as a package offer workflow software that helps ensure that your parts meet design guidelines and that all the printing and sintering settings are optimized.
With filaments that skip the debinding phase, such as The Virtual Foundry, Nanovia, the green parts have to be buried in alumina powder during the thermal debinding phase, which is another material to purchase (if doing this step in-house) but less expensive than a debinding unit.
Design for Metal Filament
As we touched on above, if you’re used to printing with polymer filaments, know that there are some special design considerations when printing with metal filaments due to the debinding, sintering, and shrinkage. Your part may seem to print perfectly, but it could look very distorted once you pull it out of the furnace or get it back from your sintering service.
First, according to the metal filament printing guide developed by MakerBot (now a part of UltiMaker), height-to-width ratios should be kept under 3:1 and wall height-to-width ratios below 6:1 to prevent collapse or distortion during debinding and sintering. Also, according to MakerBot, “print parts as flat as possible and add as much support as possible to increase the survivability of parts during debinding and sintering. Through the strategic use of part orientation and support structures in the printing and post-processing phases, part collapse and deformation can be significantly reduced.”
Post-Processing Required
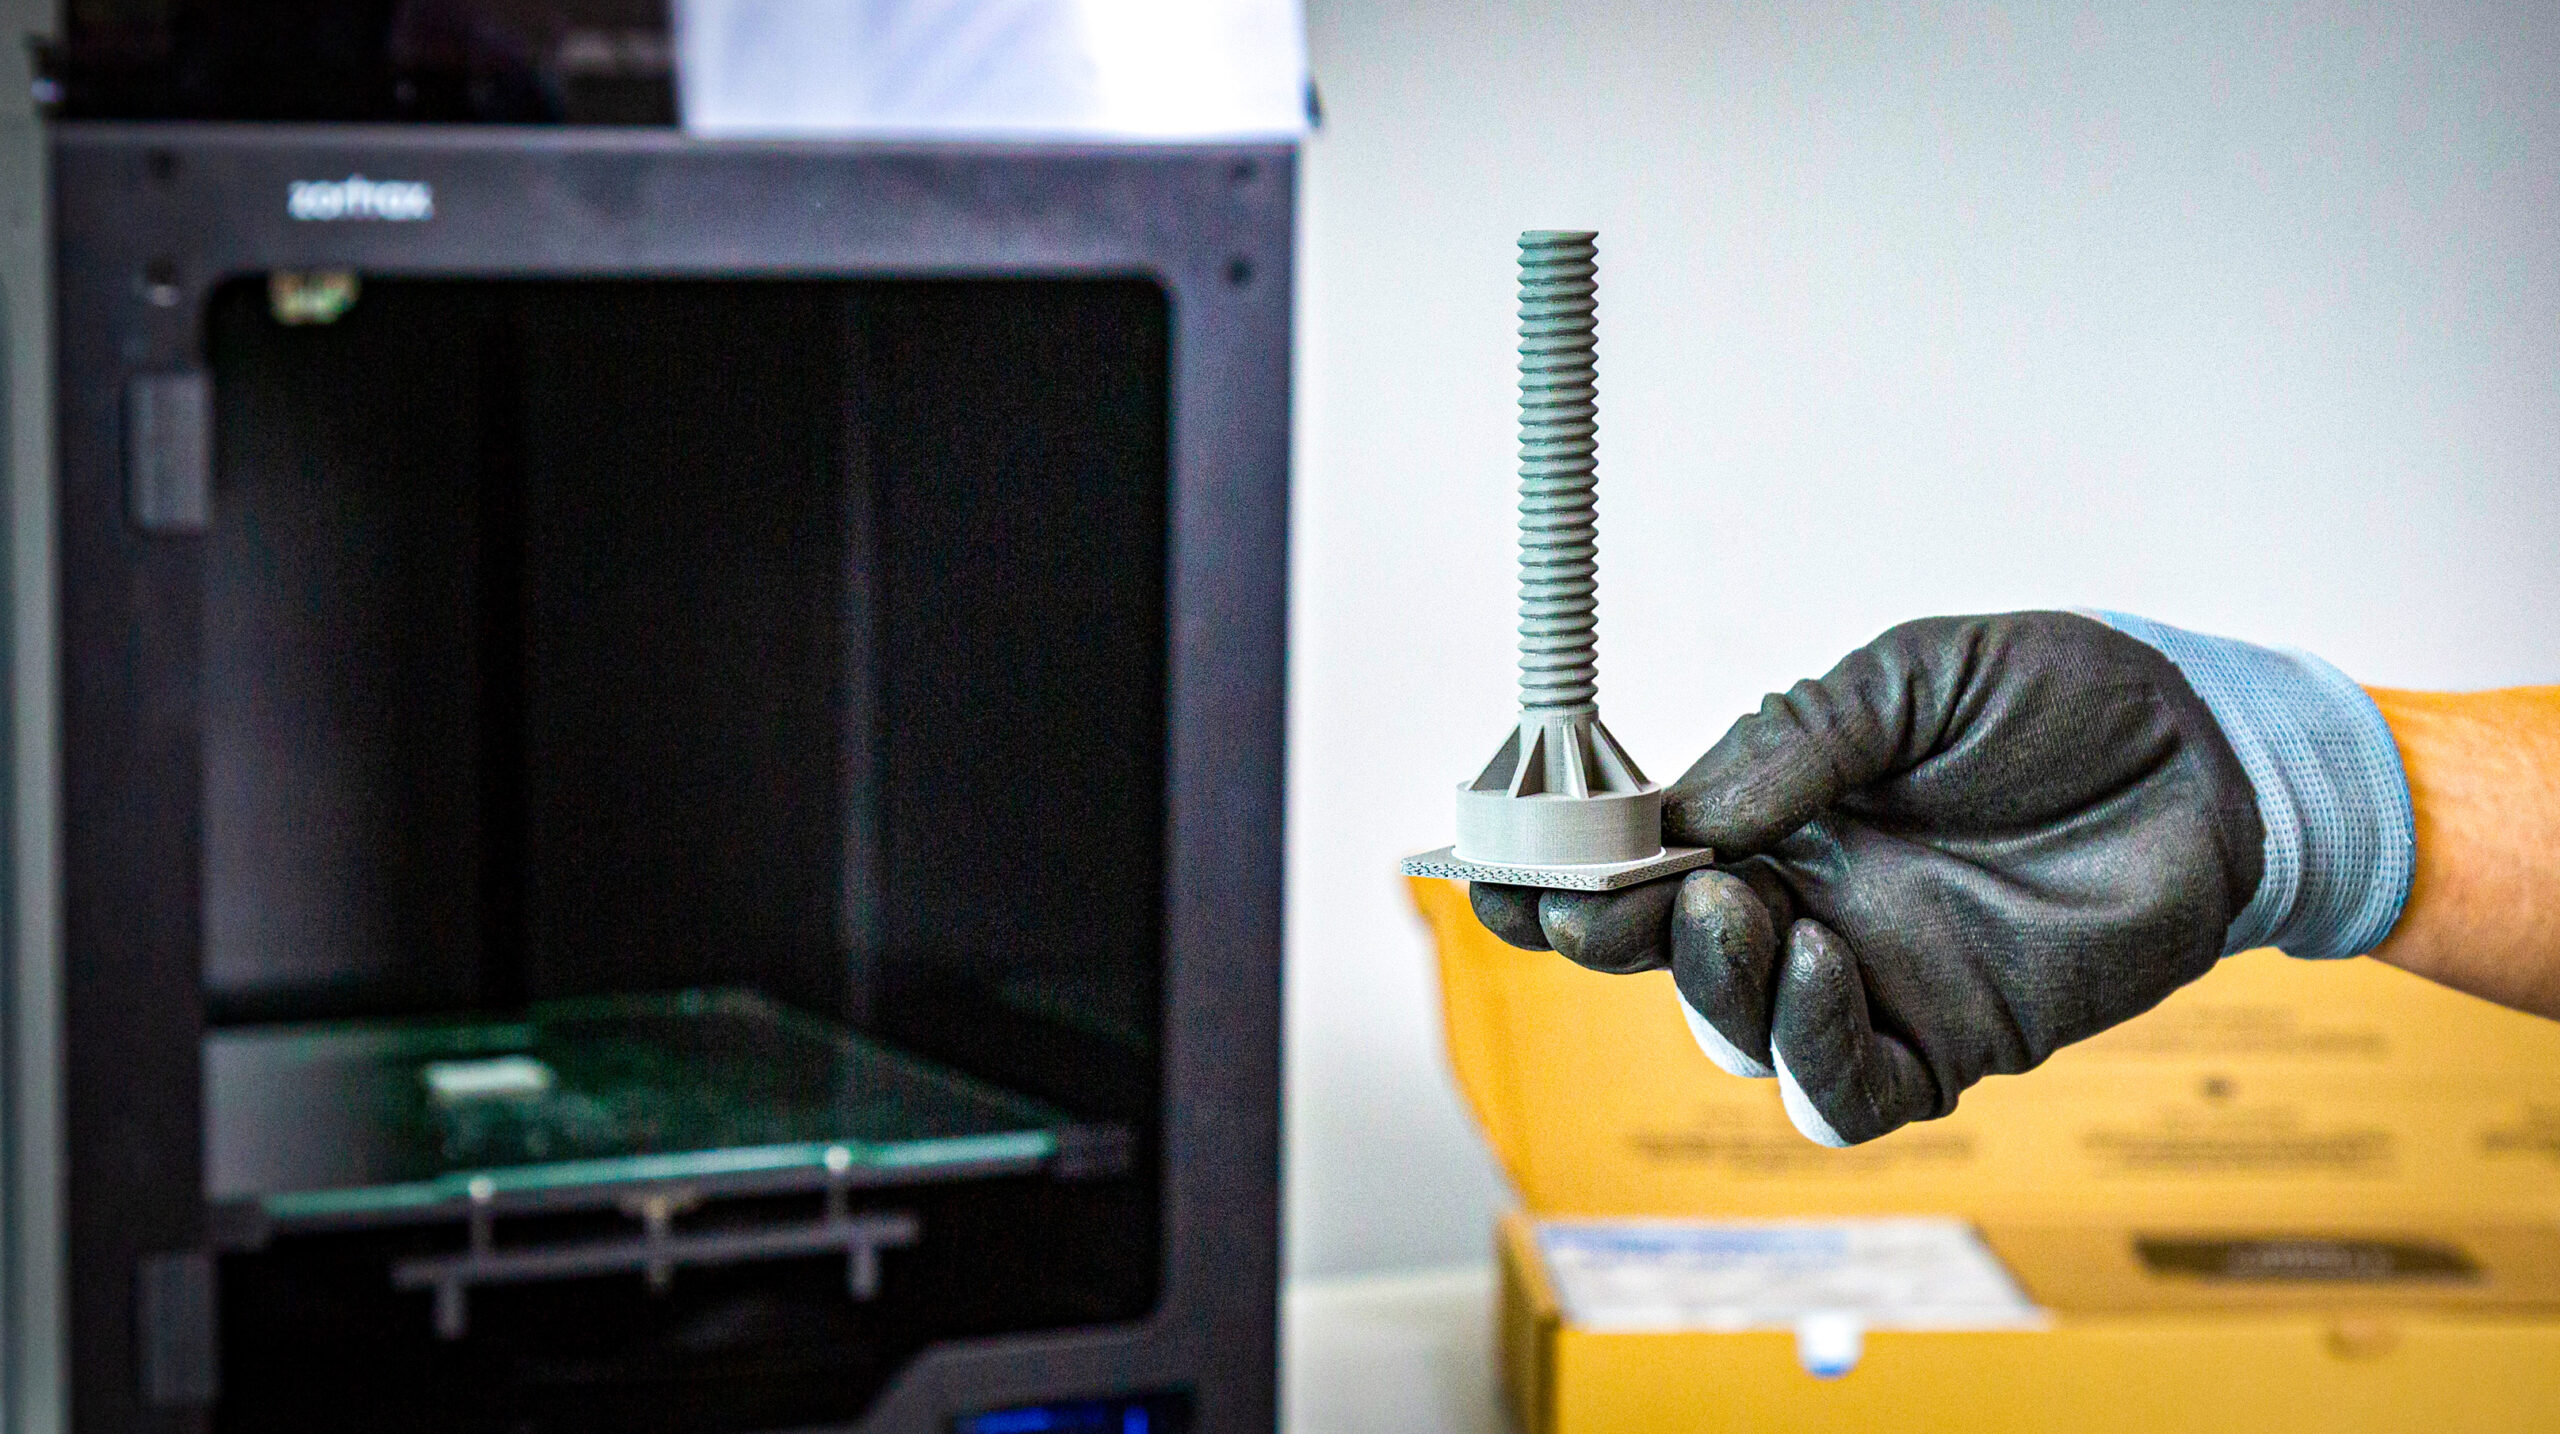
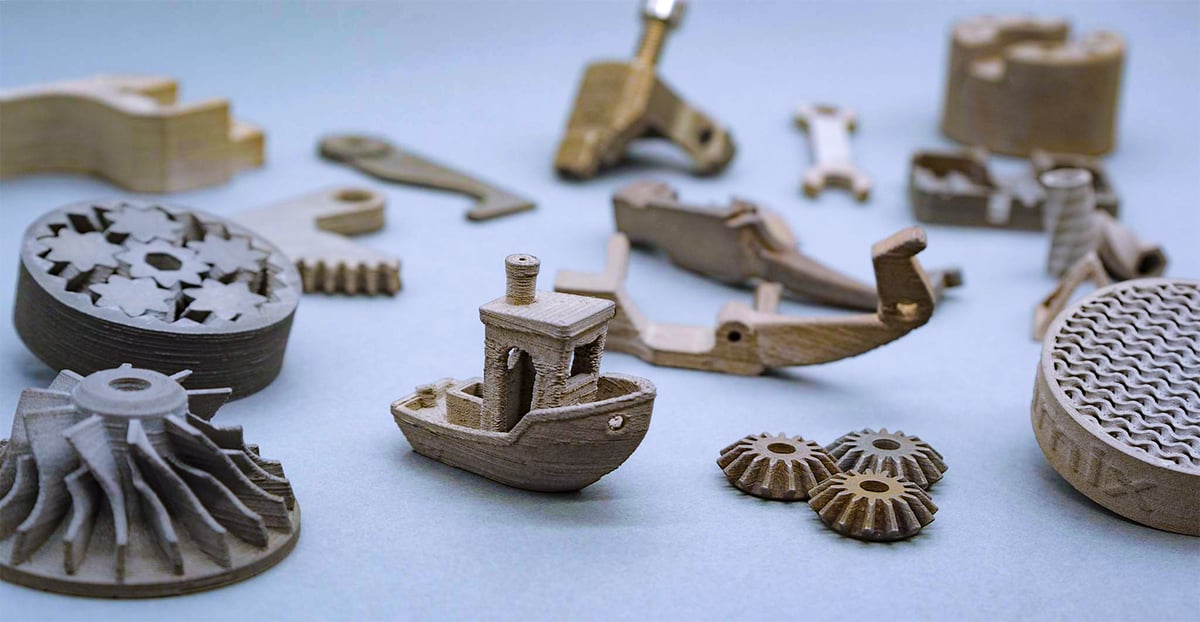
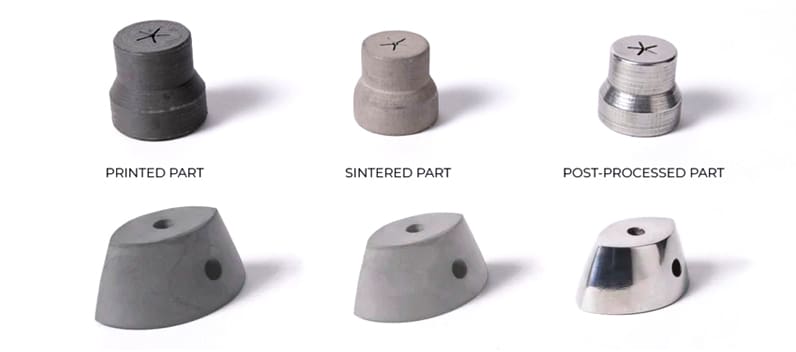
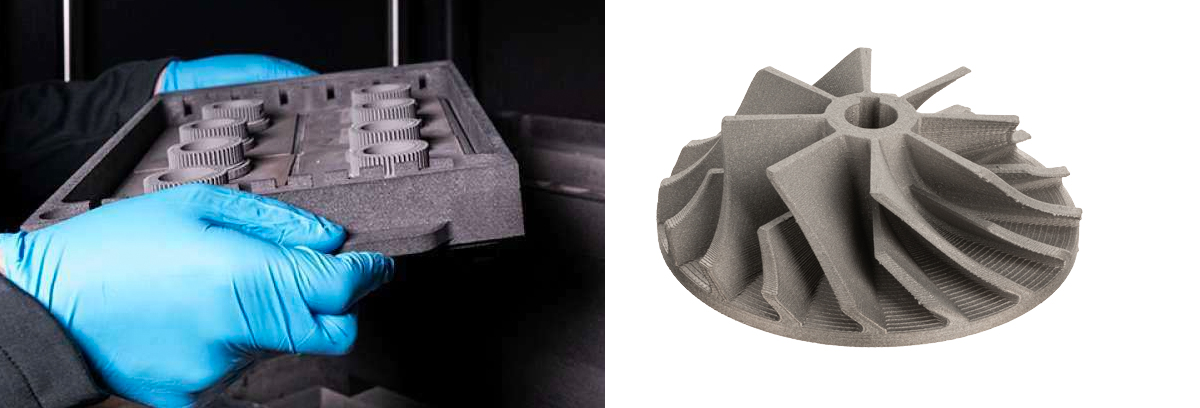
3D printing metal filament doesn’t yield strong or usable metal parts right off the print bed. In fact, the initial prints are known as “green” parts, are very brittle and present few metal characteristics. Post-processing is necessary.
After printing, a green part goes through debinding, which uses heat or solvents to dissolve the plastic or binder component. This step creates open-pore channels throughout the part. This porous part is called the “brown” part.
As an exception, Filamet brand metal filament doesn’t require chemical debinding, instead using heat from the furnace to remove the plastic binder. 3D printer makers Desktop Metal and Rapidia (which uses a metal paste, not filament) also have a printer-to-sinter 2-step process that skips the debinding step.
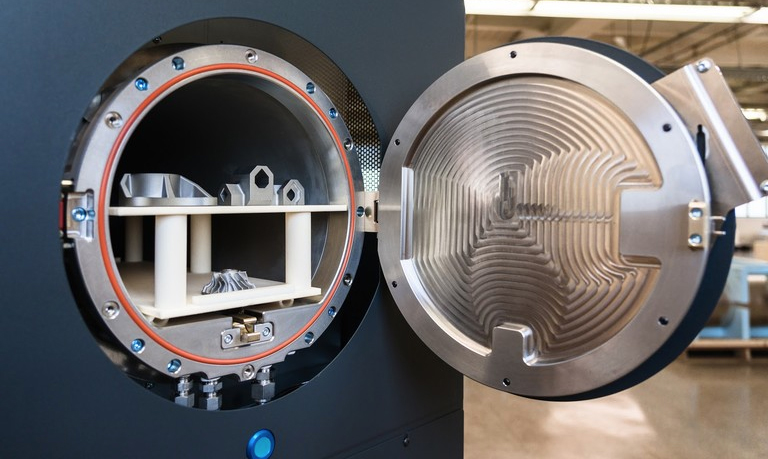
The brown part is then sintered in a furnace, which uniformly heats parts to just below their melting point, removing any remaining binder and fusing the metal particles to form dense parts. Most metal filament materials can be sintered in common kiln hardware as long as it can hold the sintering temperature for several hours.
Outsourcing Debinding & Sintering
At this point, you might be wondering about this extra equipment. Several manufacturers offer a suite of machines that include the printer, the washer or debinder, and the sintering oven. This enables you to complete the full process in-house and coordinate or automate the processes with one piece of software. However, you don’t have to own a debinder or sintering oven to 3D print metal parts.
Part of the economy of printing with metal-infused filament is that you don’t need post-processing equipment. You can send out your parts to be professionally post-processed. Two brands, Metal Ultrafuse and The Virtual Foundry offer recommended third-party services that will finish your metal parts and send them back. They even include a coupon covering the cost of your first five kilos of prints.
More on-demand 3D printing providers are also offering this service. In Europe, you can send your parts along with the STL file to Fastparts for debinding and sintering, as long as you used Ultrafuse brand stainless steel filament. In the U.S., you can turn to Matterhackers to buy “processing tickets” that coverca single package of Ultrafuse 316L printed parts that weigh a total of 1 kg or less.
Mechanical Properties of Metal Parts from Metal Filament
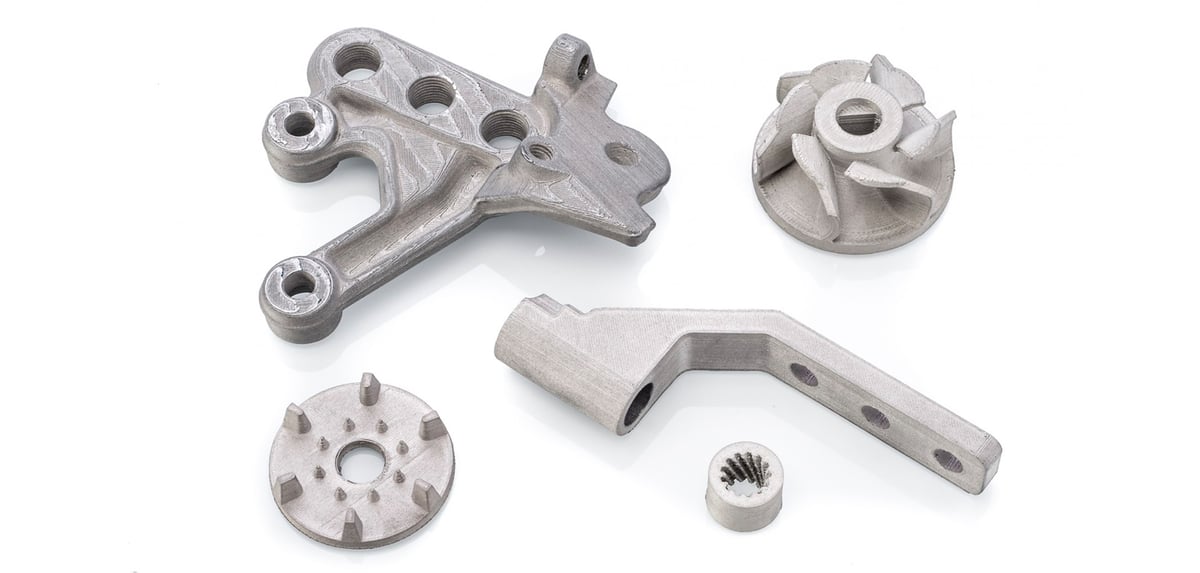
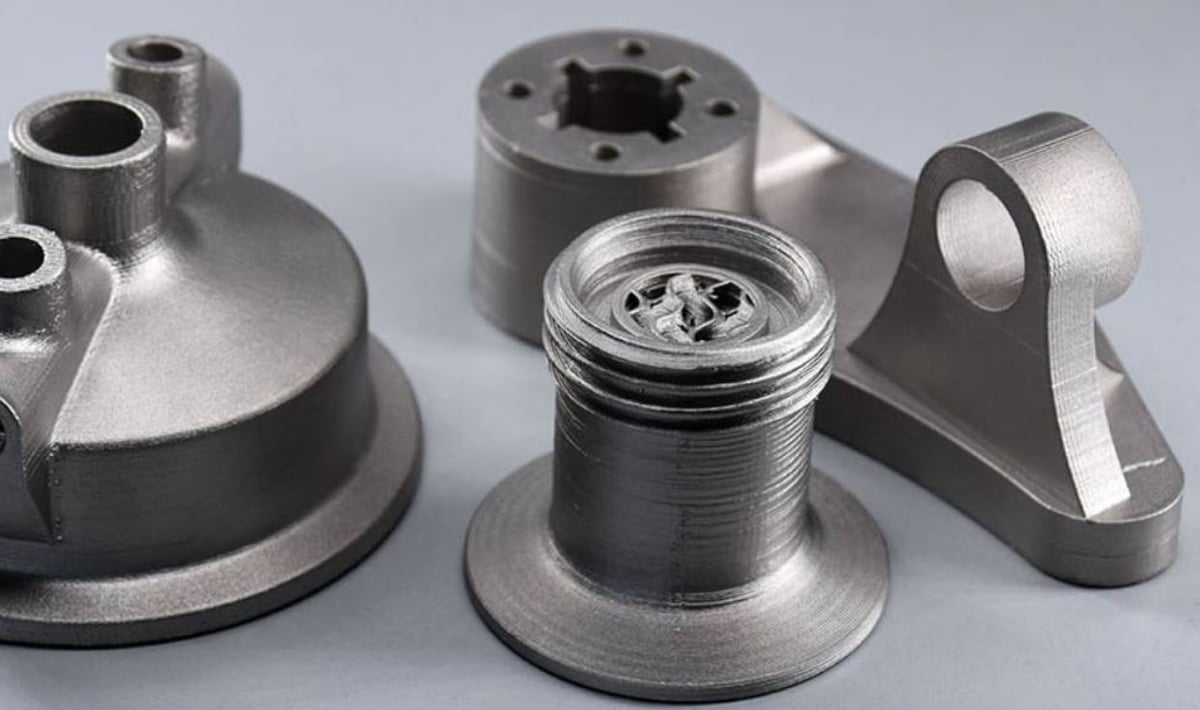
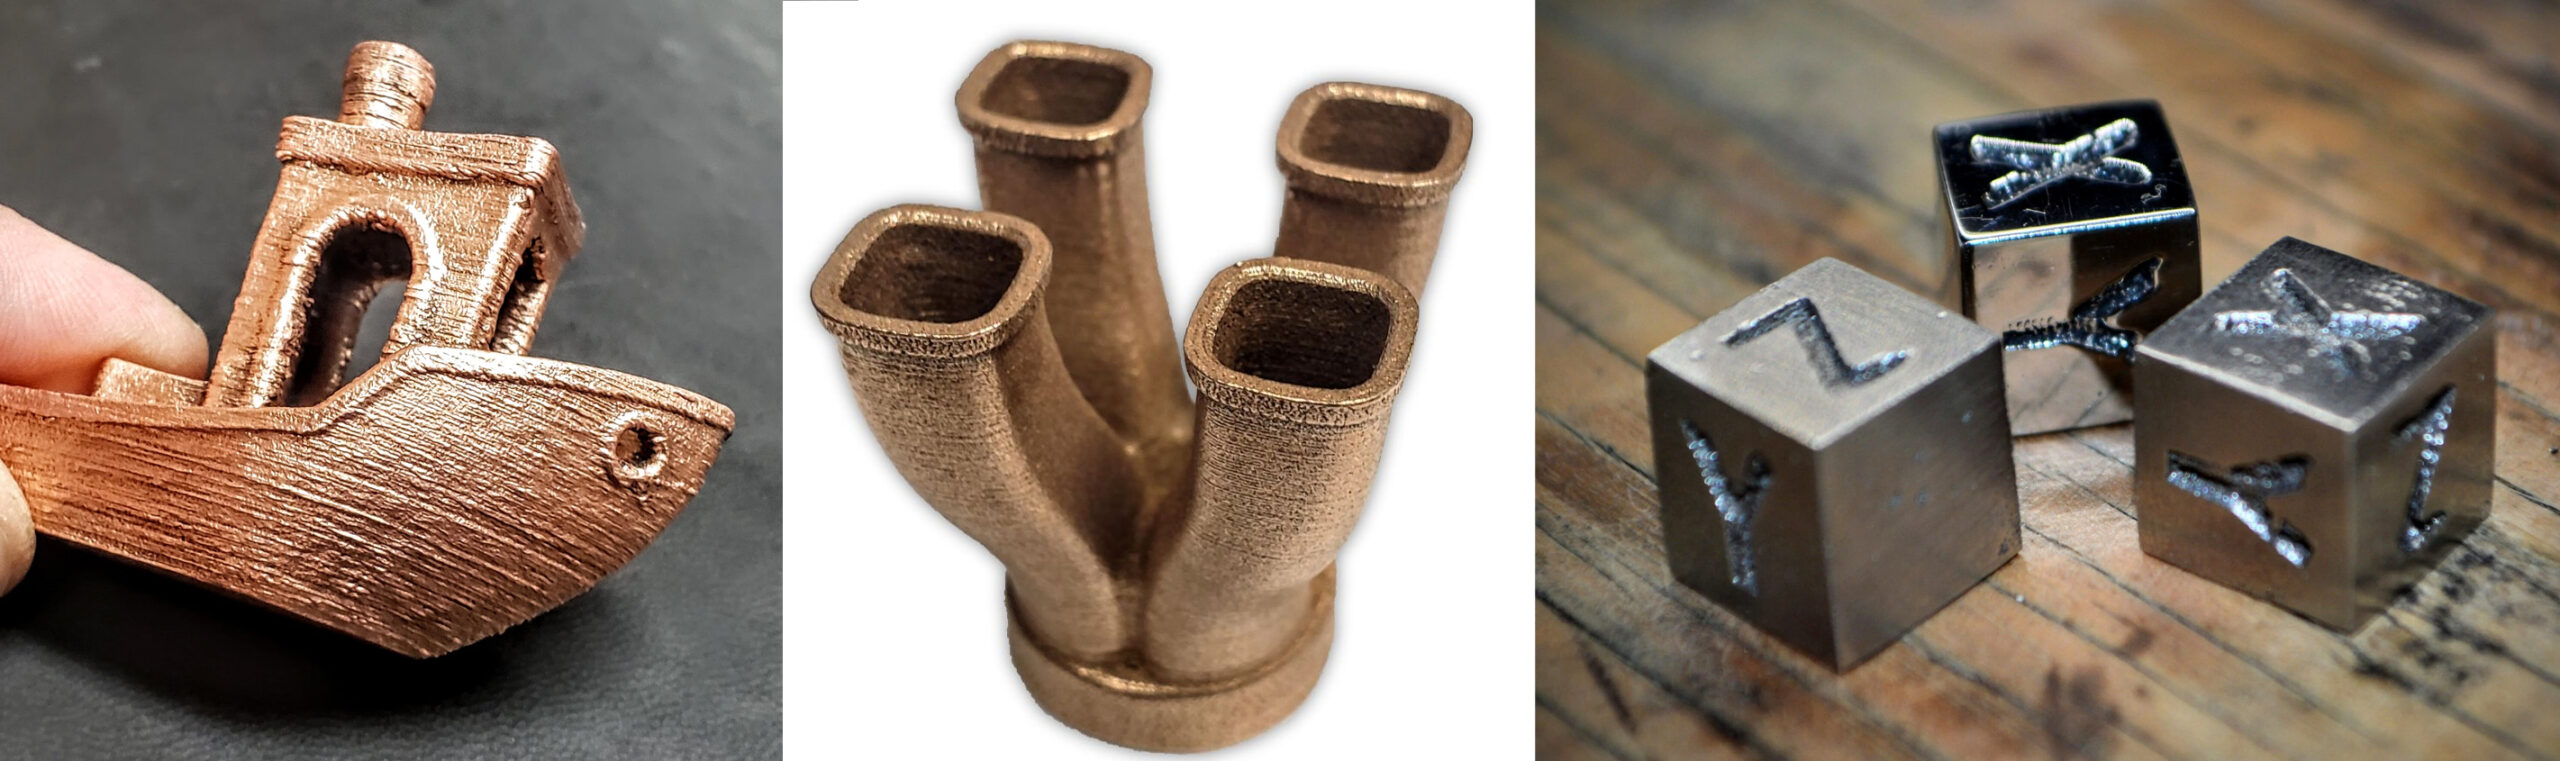
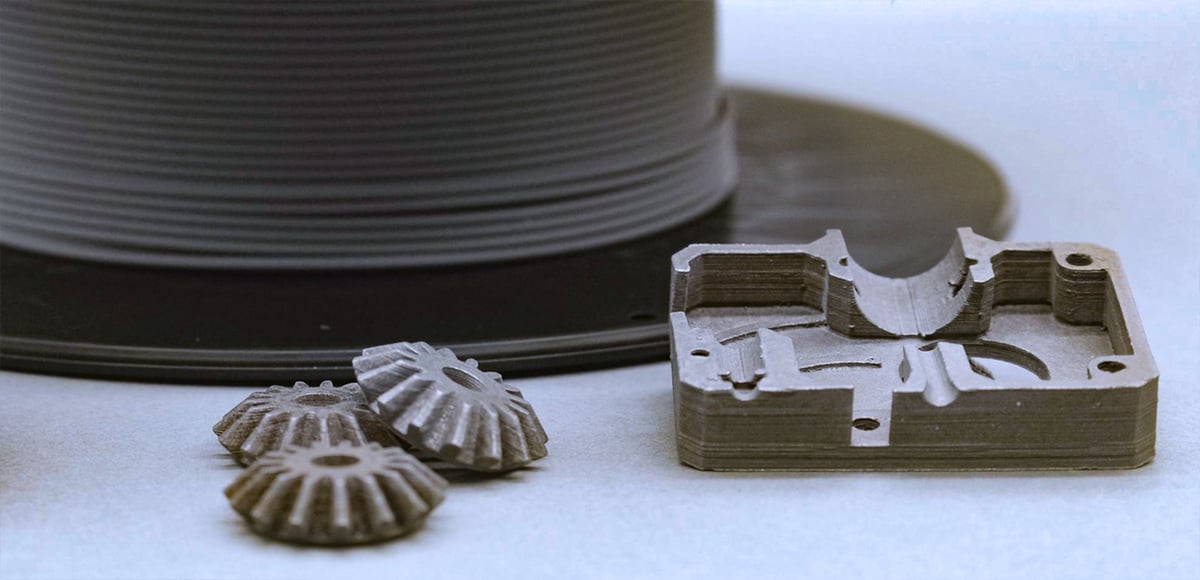
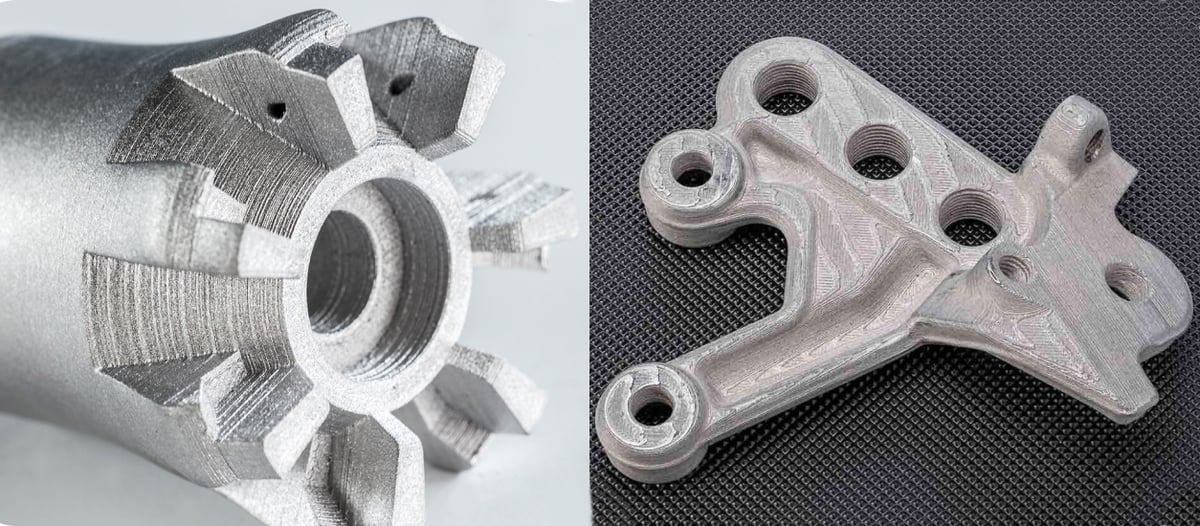
Metal filament has been available for a while now, and it’s been put to the test for a wide range of applications. It’s stronger than nearly all plastics used in standard, desktop FDM 3D printing and the final parts can exhibit the characteristics you look for in solid metal components when printed and processed correctly.
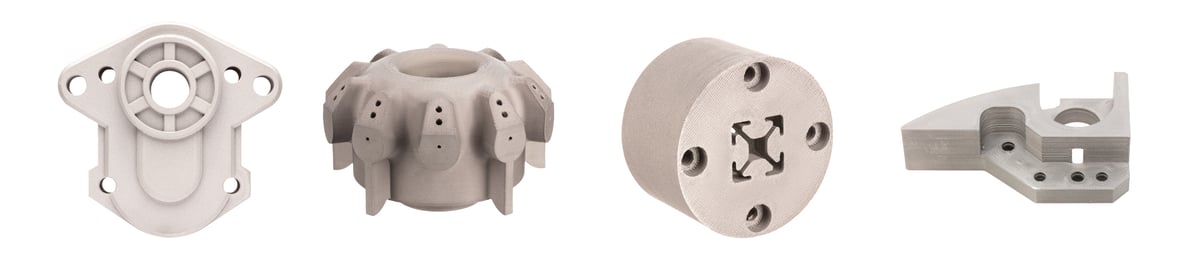
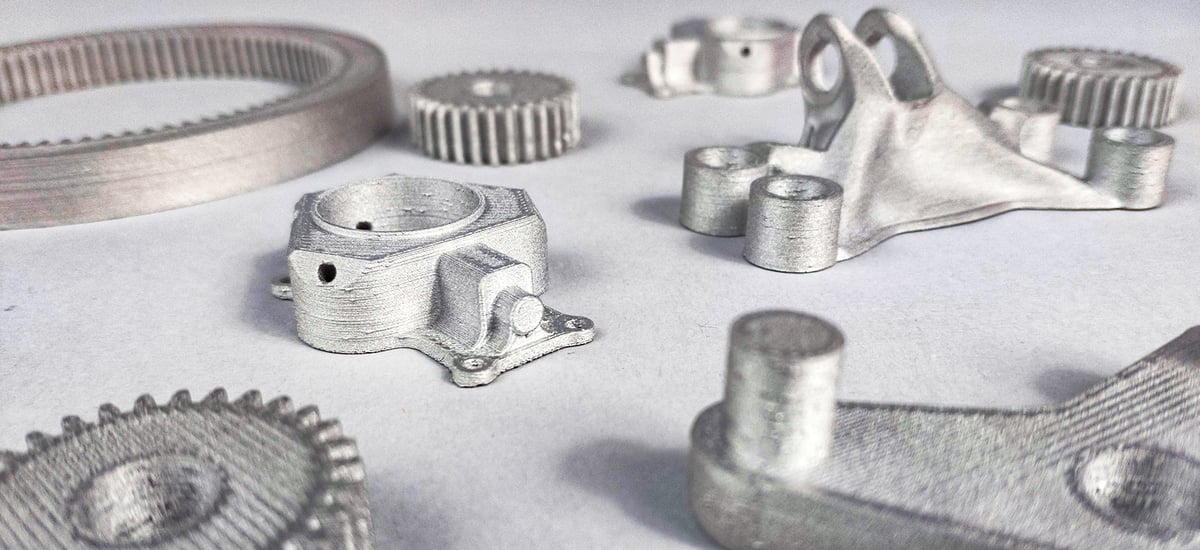
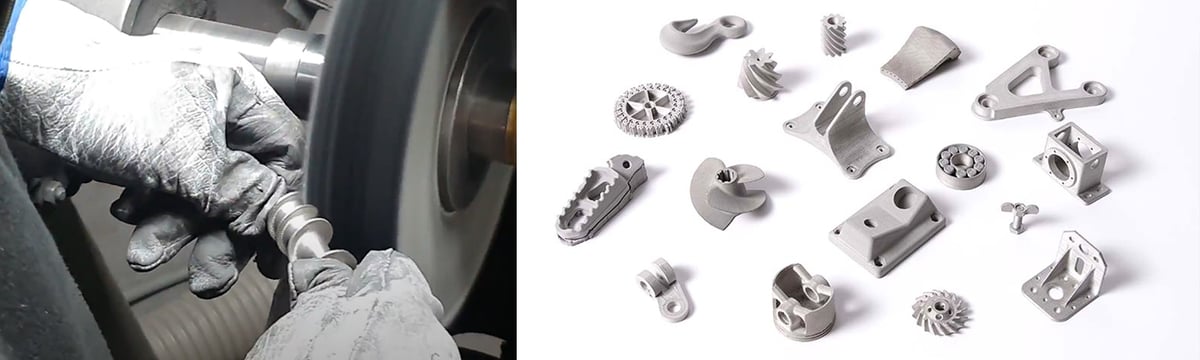
Typical applications include metal nozzles, gears, medical tool prototypes, and valves. Parts made with metal filament are generally not used for end-use parts that would take very high levels of stress.
Even though 3D printing with metal filament may not be suitable for applications with stringent strength requirements, the economic factors of producing dense metal non-critical components on an affordable FDM machine can outweigh their incompatibility for some high-stress applications.
Properties of Metal Filament 3D Printed Parts
When correctly 3D printed, metal parts produced with Ultrafuse 316l stainless steel filament have a tensile strength of 561 MPa in the XY (flat) and 521 MPa in the ZX (upright), Forward AM’s research shows. For comparison, an identical part manufactured with metal injection molding displayed a tensile strength of 540 MPa in both directions.
When it came to elongation at break, or the forces on the part as if it were lifting a heavy object, the 3D printed part was half as resistant along the layer lines (ZX) as the molded part but comparable in the XY direction. Print orientation, or determining where the layer lines will be, plays a major role in part performance.
Yield strength, or the stress corresponding to the point at which the material begins to deform, was significantly higher for the 3D printed part (251 MPa at XY, 234 MPa at ZX) than the molded part (180 MPa).

But what about the layers, you may ask, and a good question that would be. A recent study found that when the layer direction is parallel to the tensile direction, parts had much lower strength than when the layer direction was perpendicular to the tensile direction, as is the case with all FDM 3D printing. The study was not conducted using either Ultrafuse or Filamet but rather a 60% metal and 40% plastic binder material created for the experiments.
Ultrafuse’s technical data shows similar values in XY and YZ strength.
Nevertheless, 3D printed component design and printing orientation play crucial roles. To reduce the risk of mechanical instability, Forward AM recommends performing a “debinding stability simulation” before printing by following their online guidelines. This provides an estimation of internal stresses to evaluate the part’s structural integrity during debinding – and also gives a visual indication of which structural features are at risk.
This sintering simulation is offered as a service through Forward AM’s Virtual Engineering Services. With such tools, you can determine if metal filament printing is optimal for your parts.
Top Metal Filaments
Unless you’re using a 3D printer that only prints with proprietary metal filaments, such as from Markforged or Desktop Metal, you have a choice of metal filament, although there are currently only a few brands on the market.
Ultrafuse by Forward AM
- Ultrafuse 316L Stainless Steel: $500 per 3 kg spool
- Ultrafuse 17-4 PH Stainless Steel: $350 per 3 kg spool
Forward AM makes the market’s most popular metal filament, Ultrafuse. The company spun off from its parent company BASF, last year and promptly went insolvent. It is, however, working through the insolvency process and still making and offing its filaments, although with less predictable availability especially in the U.S.
Ultrafuse comes in 316L stainless steel and 17-4 PH stainless steel. Both filaments contain 80% metal powder in a proprietary polymer-based binder.
Ultrafuse 17-4 PH, also referred to as Type 630, is a chromium-copper hardened stainless steel that is both magnetic and maintains good mechanical and corrosion resistance at temperatures up to 315 °C. Ultrafuse 316L supports a broad range of applications, including tooling, jigs and fixtures, small series production, functional parts, and prototypes, the company says.
As you might expect, this metal filament doesn’t come cheap, with the cost per kilogram at around $129 and 3-kg spools for around $465 for Ultrafuse 316L and $349 for Ultrafuse 17-4 PH, also available in 1-kg spools.
Although this filament is significantly more expensive than standard polymer 3D printing filaments, according to Forward AM, it’s lower than many carbon-fiber reinforced PA filaments and dramatically lowers the cost for producing small and medium-sized metal components. Depending on the design and size of the part, it can be cheaper than any other metal AM technology. To support their claim, Forward AM says that printing with Ultrafuse 316L is 1.4 to 2 times cheaper than printing with most metal powders on industrial metal printers.
For post-processing, Forward AM just launched a Debinding and Sintering Portal where you can use the “post-processing ticket” you got from your filament resellers, such as MatterHackers and iGo3D, and send your parts away to be debound and sintered. With every spool of Ultrafuse 316L filament, you get one free processing ticket for up to 1 kg of printed parts. Additional processing tickets can be purchased on the portal.
- Diameters: 1.75 mm, 2.85 mm
- Spool sizes: 1 kg, 3 kg
- Material composition: 80% 316L stainless steel; 17-4 PH stainless steel with 20% thermoplastic binder
- Nozzle temperature: 220-245 °C
- Bed temperature: 90-100 °C
- Cooling: None required
- Print speed: 30-40 mm/s
- Build plate: Glass bed with glue stick
- Nozzle: Any abrasion-resistant nozzle (steel, ruby, etc.)
- Sintered part density: 7.85 kg/m3 (Ultrafuse 316L); 7.6 kg/m3 (Ultrafuse 17-4 PH)
- Average shrinkage: X & Y 16%, Z 20%
- Recommended initial scaling factors: X & Y 120%, Z 125%
- Technical data sheets: Ultrafuse 316L, Ultrafuse 17-4 PH
Filamet by The Virtual Foundry
- The Virtual Foundry 316L Stainless Steel: $700 per 3 kg
- The Virtual Foundry 17-4 PH Stainless Steel: $900 per 3 kg
U.S.-based material manufacturer The Virtual Foundry specializes in metal filament and offers nine kinds of what it calls Filamet, including 316L stainless steel, Inconel 718-34 F steel, titanium, copper, aluminum, and H13 Tool Steel.
The company’s stainless steel 316L filament contains around 85% metal and the company says it can be used on any FDM printer, the company says. However, follow the instructions carefully because you may need some add-on equipment. For example, to print with the company’s 316L, you’ll need a FilaWarmer to pre-warm the filament.
Filamet can be printed with a slightly lower nozzle temperature (205-235 °C) and a much lower bed temperature (40-50 °C). Another thing to consider is that TVF’s filament requires a 0.6-mm stainless steel nozzle, while you can use a more standard 0.4-mm diameter nozzle for Ultrafuse.
Due to Filamet’s high metal content, it can break more easily than standard PLA. TVF recommends hanging the spool right above the printer for printers with direct drive extrusion setups or next to or under the feeder for Bowden setups.
Per kilogram, prices range from $273 for 319L stainless steel, $121 for copper, and $832 for titanium. TVF offers printer profiles you can upload to your slicer software as a starting point for experimenting with the material.
For post-processing, TVF material requires only a one-step process, heating in a kiln. The company sells two sizes of kiln – Starter and Pro – and provides sintering instructions.
For customers without sintering equipment, TVF works with metal 3D printing service Sapphire 3D, outside of Chicago, to process prints at about $50 per small part.
- Diameters: 1.75 mm, 2.85 mm, pellets
- Spool sizes: 500 g, 1 kg
- Material composition: 80% 316L stainless steel or 17-4 PH stainless steel with 20% plastic polymer
- Nozzle temperature: 205-235 °C
- Bed temperature: 40-50 °C
- Cooling: None required
- Print speed: 30 mm/s to start
- Build plate: Any material, but with a layer between the print and the bed (e.g. blue painter’s tape or glue stick)
- Nozzle: 0.6 mm or larger, standard stainless steel
Zetamix by Nanoe
- Zetamix by Nanoe 316L Stainless Steel: $1,500 per 3 kg
- Zetamix by Nanoe H13 Steel: $1,500 per 3 kg
French materials manufacturer, Nanoe, offers a 316L stainless steel filament and an H13 tool steel filament. Both filaments contain about 52% to 55% metal within a binder so they are printable at a much lower nozzle temperature than other brands. The company says you can expect a 16% to 21.3% shrinkage depending on materials and design and final parts with 90% to 91% density. Per kilogram, prices are just under $300 for 500g of 319L stainless steel and H13 tool steel filament available through distributors worldwide.
Nanoe offers printing and debinding guidelines online: 316L, H13.
- Diameters: 1.75 mm, 2.85 mm
- Spool sizes: 500 g, 1 kg
- Material composition: 55% 316L stainless steel or 52% H13 steel
- Nozzle temperature: 180 °C
- Bed temperature: 30 °C
- Cooling: None required
- Print speed: from 15 to 50 mm/s depending on the shape of the part
- Nozzle: 0.6 mm or larger, standard stainless steel
- Recommended initial scaling factors: X & Y 120%, Z 125%
- Technical data sheets: 316L, H13
Mt 316L by Nanovia
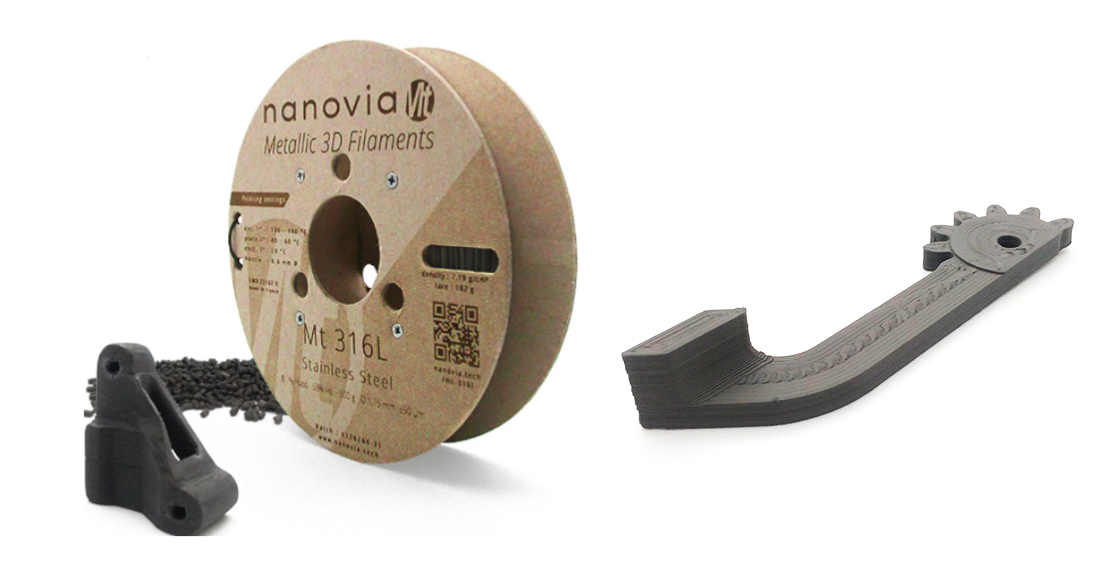
- Mt 316L stainless Steel: $900 per 3 kg
Another French materials manufacturer, Nanovia offers a 316L stainless steel filament with low carbon content. Due to its formula, printed parts can be directly sintered without any chemical debinding steps beforehand. Price per 500g is about $150.
The Mt 316L filament allows dense stainless steel parts to be printed with a standard 3D printer which can then be sintered without the need for chemical debinding. After sintering, Nanovia claims the result is a 100% stainless steel part.
- Diameters: 1.75 mm, 2.85 mm
- Spool sizes: 500 g
- Nozzle temperature: 170 °C – 100 °C
- Bed temperature: 40 °C – 60 °C
- Print speed: from 20 to 40 mm/s depending on the shape of the part
- Nozzle: 0.6 mm or larger, standard stainless steel
- Shrinkage: 10% – 15%
- Technical data sheets: 316L
Top 3D Printers for Metal Filament
Markforged FX10
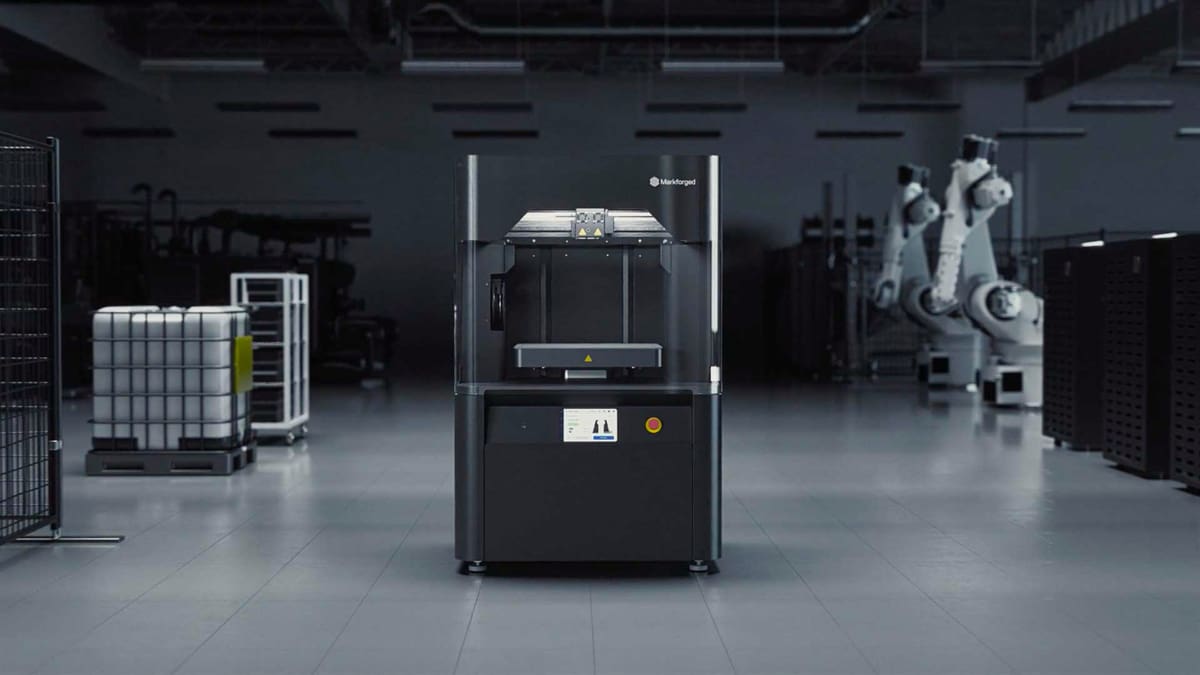
New newest 3D printer to enter the metal filament market is the FX10 from Markforged, which makes other metal filament 3D printers, but the FX10 is different: it can print continuous carbon-fiber nylon and also metal.
As the latest in the company’s fleet, the FX10 was already much faster and more advanced than the older models due to a new proprietary print file format, a stronger gantry with more powerful motors and CoreXY motion system, plus a direct drive extruder and a new extrusion system design.
Now, existing FX10 owners and new buyers can purchase the optional Metal Kit to enable metal extrusion 3D printing.
The FX10 Metal Kit ($19,000) consists of a swappable print “engine” that includes a metal-specific print head, material feed tubes, routing back, and dual pre-extruders. The swap takes about 15 minutes.
The Metal Kit, however, is not the same system as you’ll find in the company’s Metal X 3D printer first launched in 2019. Just as the FX10 is a step beyond the company’s previous composite 3D printers, the Metal Kit enables faster metal printing than the Metal X. Plus, the FX10’s print volume is larger than the Metal X’s (375 x 300 x 300 mm vs. 300 x 220 x 180 mm). Is the Metal X solution going away? CEO Shai Terem told All3DP that the Metal X solution has capabilities, like more metal material, that, are not yet available on the FX10, but eventually, the company does see the system replaced by the FX10.
Markforged makes its own 316L Stainless Steel filament priced at about $320 / 400cc.
Markforged FX10
- Build Volume: 375 x 300 x 300 mm
- Print Chamber: Heated
- Print Bed: Heated, Vacuum-Sealed Print Sheet, Auto Bed Leveling
- Min Layer Height: 125 to 250 microns
Markforged Metal X Gen2
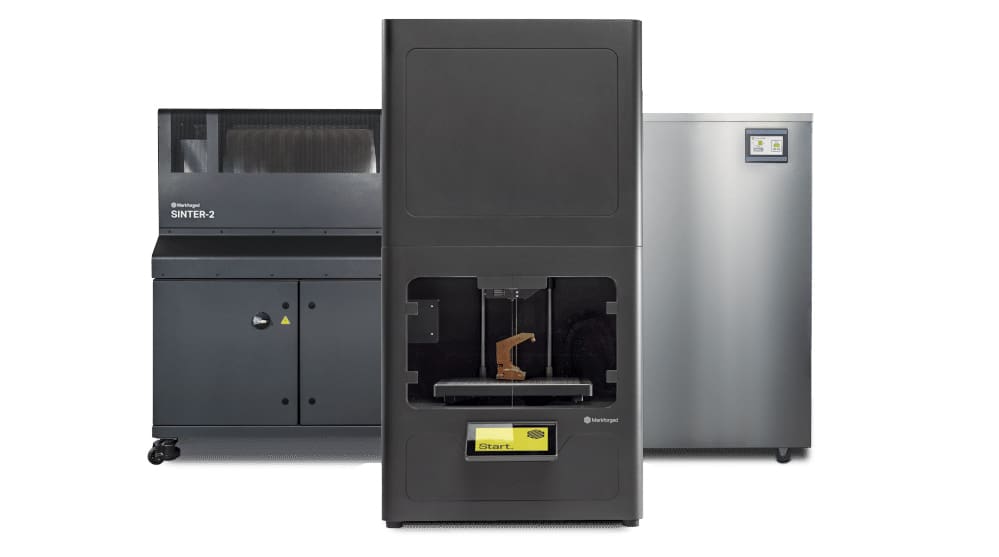
Markforged launched the Metal X in 2017 as the lowest cost entry point to metal 3D printing at the time, in comparison to the $500,000+ industrial machines on the market. A lot has changed since then, but the Metal X continues to be one of the go-to metal 3D printer solutions for thousands of customers worldwide.
The Metal X is a dual extruder 3D printer with a heated chamber and can achieve a 50-micron layer height.
Unlike most other printer makers on this list, Markforged offers six metals, including copper and Iconel, among its proprietary collection. Plus, each metal comes with a spec sheet detailing the mechanical properties you can expect from printed parts. For example, for copper, you can achieve a 98% dense metal part with an elongation at break of 45% and an ultimate tensile strength of 193 MPa.
Support removal is a complex topic in metal 3D printing and Markforged offers a relatively unique solution. In between the print and the supports, both printed in metal, is a thin ceramic release layer that makes popping out supports quick and easy without the need for tools.
Markforged offers a debinding unit, the Wash 1, and a sintering furnace, the Sinter 2, so you can bring the entire metal part production in-house and produce parts overnight, the company says. The Wash-1 immerses the green part in a special fluid that removes the primary binding material, leaving the part semi-porous so the remaining binder can burn off during sintering. The Sinter 2 furnace can reach 1300° C and sinters the full range of commercial grade metals from their brown (washed) state into fully dense metal parts.
The full metal 3D printing system is driven by the company’s cloud-based Eiger workflow software. The software enables you to store your digital part inventory so your metal parts can be printed out on any Metal X printer at any of your company’s locations. Eiger also features part simulation so you can validate part performance and print settings before you hit print.
The Metal X retails for around $99,000. The price for all three units is around $200,000. Materials range from $150 to $300 per 200cc spool.
Markforged Metal X:
- Build Volume: 250 x 220 x 200 mm
- Print Chamber: Heated
- Print Bed: Heated, Vacuum-Sealed Print Sheet, Auto Bed Leveling
- Min Layer Height: 50 micron
Desktop Metal Studio System 2
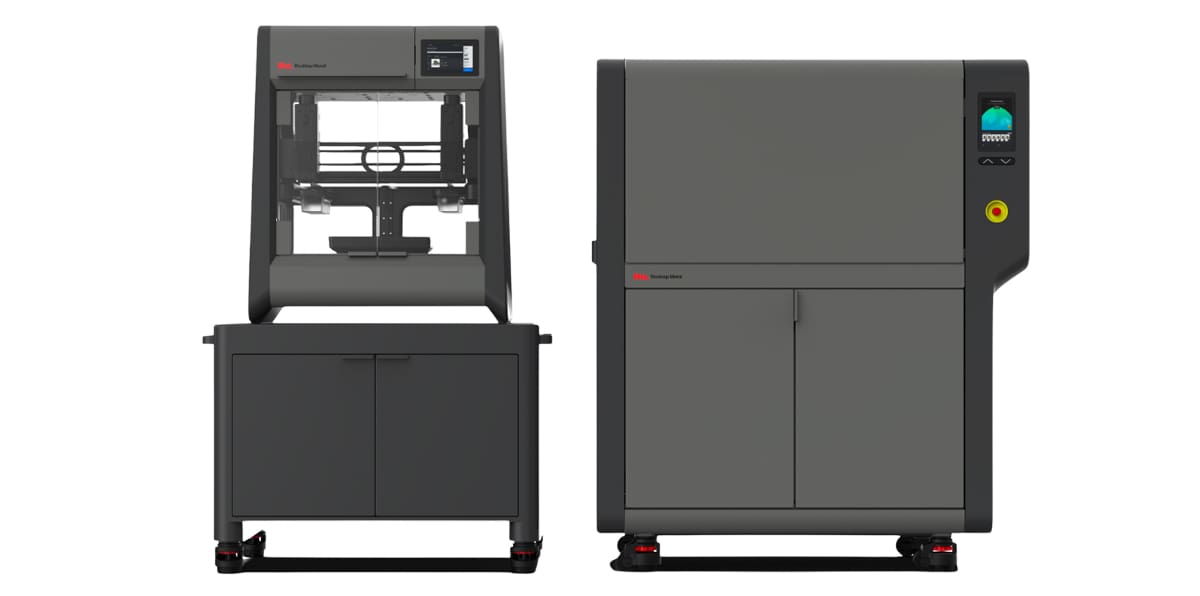
Desktop Metal was one of the trailblazers in bound metal deposition 3D printing that brought down the price and boosted the ease of use of metal 3D printers. Its Studio System debuted in 2016 and produces parts with densities of up to 98% – similar to cast parts. It doesn’t exactly print with filament on a spool, instead using what the company describes as bound metal rods. The metal powder bound with polymer binder into rods comes in a refillable cartridge system that allows you to load material during print jobs and store excess material safely.
All of the Studio Systems’ materials come with datasheets detailing the mechanical properties you can expect. Desktop Metal’s copper parts boast elongation at break of 37% and an ultimate tensile strength of 193 MPa.
After the release of the Studio System, Desktop Metal launched material technology that created a 2-step “printer-to-sinter” process, eliminating the debinding step. The proprietary material formulations allowed printed parts to be placed directly into the furnace without the need for the typical solvent debind phase, saving time, Solvent materials, and of course, the need for a debinding unit.
As one of the pioneers in this technology, Desktop Metal laid some of the groundwork that other printer makers follow. Its solution includes the printer, proprietary materials, proprietary software, its own sintering furnace, and separable supports featuring a ceramic interface material between the support structure and the part, allowing parts to easily be removed by hand.
The printer’s software takes the guesswork out of metal 3D printing since it automatically scales your part, orients it for the best printing and sintering, and generates separable supports. You upload your design and follow the onboard user interface for step-by-step guidance.
Built-in print profiles make part creation as easy as a few clicks, the company says. For users looking for greater control, Studio System 2 also offers more than 90 adjustable print parameters.
Designed to be the easiest-to-use sintering furnace made, the company says, the Studio System 2 furnace first heats parts to remove all binders from parts, then ramps up the temperature to near-melting. Built-in temperature profiles tuned to every build and material ensure uniform heating and cooling without the residual stresses introduced in laser-based systems, according to Desktop Metal.
Together, the Studio System 3D printer and furnace are about $275,000.
Studio System 3D Printer
- Build Volume: 300 x 200 x 200 mm
- Layer height (in green state): 50 microns
- Heated bed: 70 °C
- Max build weight (in green state): 6.5 kg
Raise3D Forge1
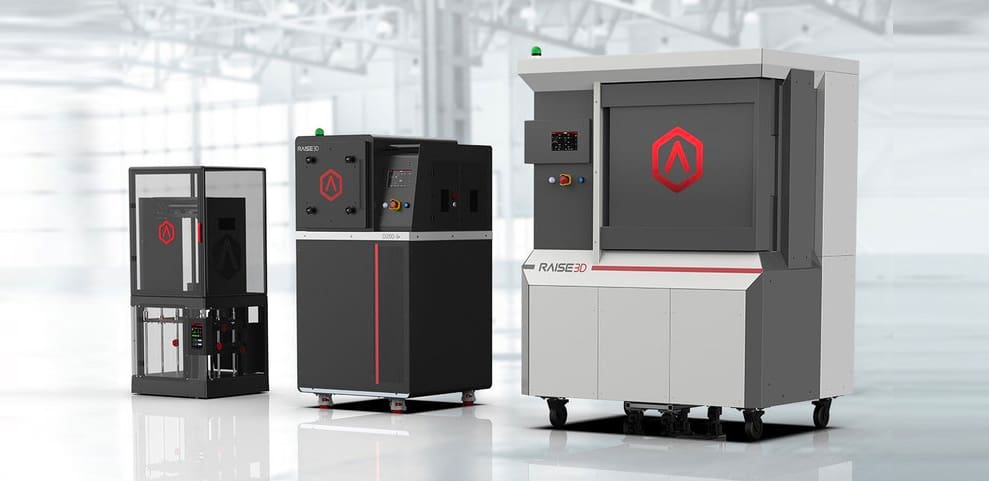
The Forge1 from Raise3D is a professional large-format metal 3D printer and part of the company’s MetalFuse solution, which includes the printer, the D200-E debinding device, and the S200-C vacuum sinter furnace that can reach 1,500 ℃.
With these three machines, Raise3D can offer a streamlined workflow for in-house metal part production with software that automatically accounts for print shrinkage so that the final size after debinding and sintering will be accurate and suitable for use, the company says.
The Forge1 printer boasts a dual-extruder, automatic bed leveling, filament run-out sensor, and HEPA filter with activated charcoal. The MetalFuse system prints with Forward AM Ultrafuse stainless steel.
The dual-extruder comes in handy printing with the Ultrafuse Support Layer, currently only available in Europe, which is an aluminum oxide material used for “layer isolation”. In other words, it enables breakaway supports as a separation layer between the support and the prints after sintering.
The Raise3D aims the Forge1 at small-scale production of end-use parts with outstanding mechanical properties. Printed metal parts are 97% dense metal. The company recently announced a new service where, for Forge1 owners, it validates and optimizes your 3D model design to ensure that it will achieve the best printing and post-processing results.
Ultrafuse 316L stainless costs about $500 for a spool of 3,000 grams. The 17-4 PH stainless steel is a little cheaper. The Forge1 metal printer retails for around $10,000. The price of the full suite of machines is not released.
Forge1
- Build Volume: 300 × 300 × 300 mm
- Filament Diameter: 1.75 mm
- Min. Layer Height: 100 microns
- Bed Temp: 120 ºC
BCN3D Epsilon W50 with Metal Pack
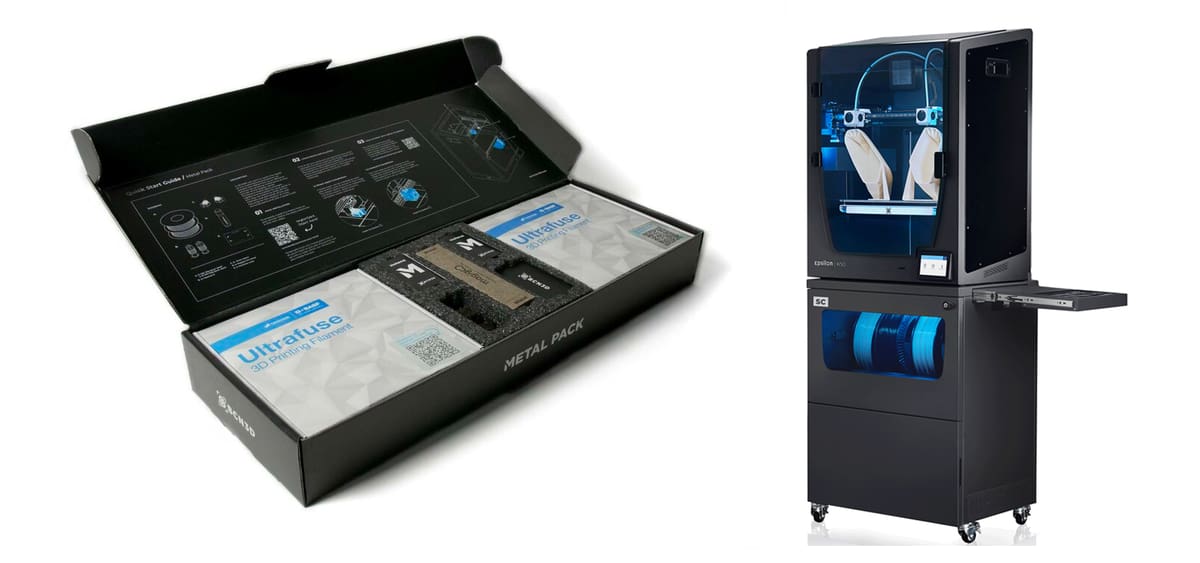
Printer maker BCN3D introduced its Metal Pack back in Nov. 2021 that includes Ultrafuse stainless steel filament (both 316L and 17-4 PH), the Magigoo adhesive, software, and two hot ends for about $1,200. BCN3D also offers specific design guidelines and process requirements for metal parts.
The Metal Pack is applicable to not just the W50, but the entire Epsilon line of 3D printers (W50SC, Epsilon W27, and W27SC), offering a range of sizes and price points for your intro to metal part production.
The Metal Pack is designed for the production of spare parts, functional prototypes, and tooling, and is mainly aimed at the pharmaceutical, food, automotive, aerospace, and manufacturing sectors, the company says. “The parts produced by this process have practically identical behavior to those produced by metal injection molding or CNC and offer an office-friendly solution with far more design freedom.”
BCN3D print profile for metal in its Stratos slicer avoids the internal tensions of the printed part during the printing process. After printing, debinding and sintering processes is carried out externally through the current Forward AM authorized network of service suppliers.
Outsourced debinding and sintering costs about $50 – $80 per kilo. The price of the Epsilon W50 printer alone is $8,500, while the Epsilon W27 is $7,000.
BCN3D Metal Pack includes:
- 1x 316L 3 kg Ultrafuse spool
- 1x 17-4PH 3 kg Ultrafuse spool
- 2x Hotend M
- 1x Magigoo Pro Metal
- 2x Brass Wiper
- Kit price: $1,200
Epsilon W50
- Architecture: IDEX (Independent Dual Extruder system)
- Build volume: 420 x 300 x 400 mm
- Heated bed: 120 ºC
UltiMaker S5 & S7 with Metal Expansion Kit
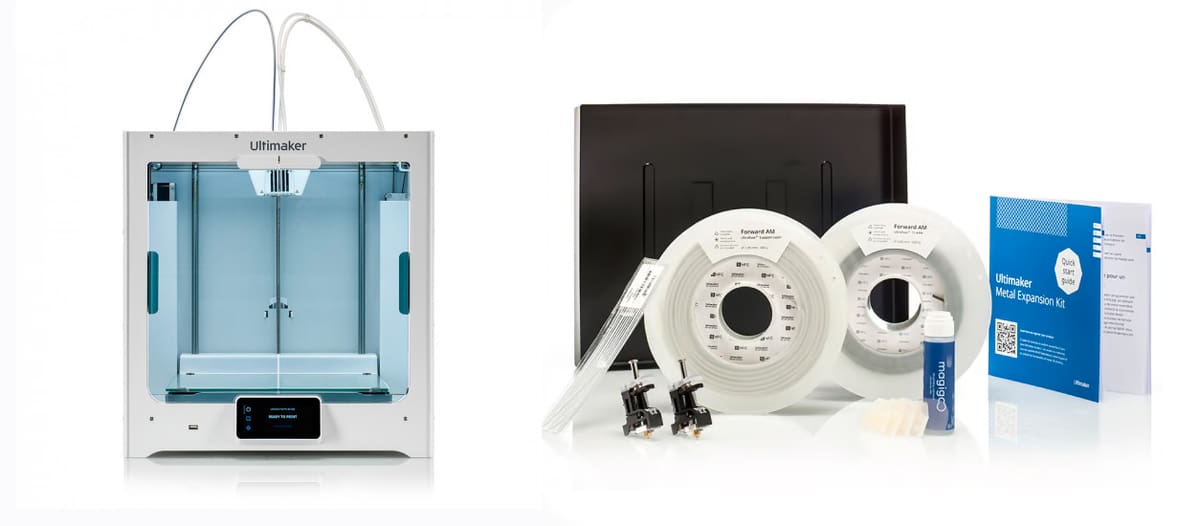
UltiMaker enabled users to print full metal parts on its S5 machine ever since the printer profile for Ultrafuse 17-4PH was released in 2021. But last year, Ultimaker unveiled a completely new metal 3D printing experience: the Metal Expansion Kit.
UltiMaker bundled everything you’d need to 3D print metal parts on your Ultimaker S5 into a kit, which includes the Ultrafuse stainless steel metal filament with a tag that enables your printer to automatically recognize the material and launch the appropriate print profile; Ultrafuse Support Layer filament (only available in Europe); two dedicated print cores; Magigoo Pro Metal adhesive; and access to Ultimaker 3D Printing Academy content to help you get the most out of your metal printing.
UltiMaker’s Cura software automatically assists with shrinkage calculations and other handy settings, which may make printing with metal filament far easier and more predictable than before.
“The Ultimaker Metal Expansion Kit is especially suitable for printing non-of-the-shelf parts such as tools, jigs and fixtures, replacement parts, functional prototypes, and auxiliary components,” says Andrea Gasperini, product manager at Ultimaker. “The kit provides access to a complete and validated 3D printing workflow.”
The Ultimaker Metal Expansion Kit includes:
- Forward AM Ultrafuse 17-4 PH (1 kg)
- Forward AM Ultrafuse Support Layer (300 g) (only in the EU)
- Packaging for green parts and a voucher toward post-processing
- Ultimaker Print Core CC 0.4
- Ultimaker Print Core DD 0.4
- Magigoo Pro Metal (50 ml) adhesive
- Free Ultimaker Cura software with optimized metal part-slicing features
- Access to exclusive metal FFF e-learning content on Ultimaker Academy
- Kit Price: $735
S5 Specs
- Architecture: Dual Extruder
- Print Volume: 330 x 240 x 300 mm
- Nozzle temperature: 180-280 °C
- Min. layer resolution: 20 microns with a 0.25 mm nozzle
- Price: $8,400

License: The text of "Quick Start Guide to 3D Printing with Metal Filament" by All3DP Pro is licensed under a Creative Commons Attribution 4.0 International License.
CERTAIN CONTENT THAT APPEARS ON THIS SITE COMES FROM AMAZON. THIS CONTENT IS PROVIDED ‘AS IS’ AND IS SUBJECT TO CHANGE OR REMOVAL AT ANY TIME.