Anet ET4 3D Printer Review: 10-Hour Testing

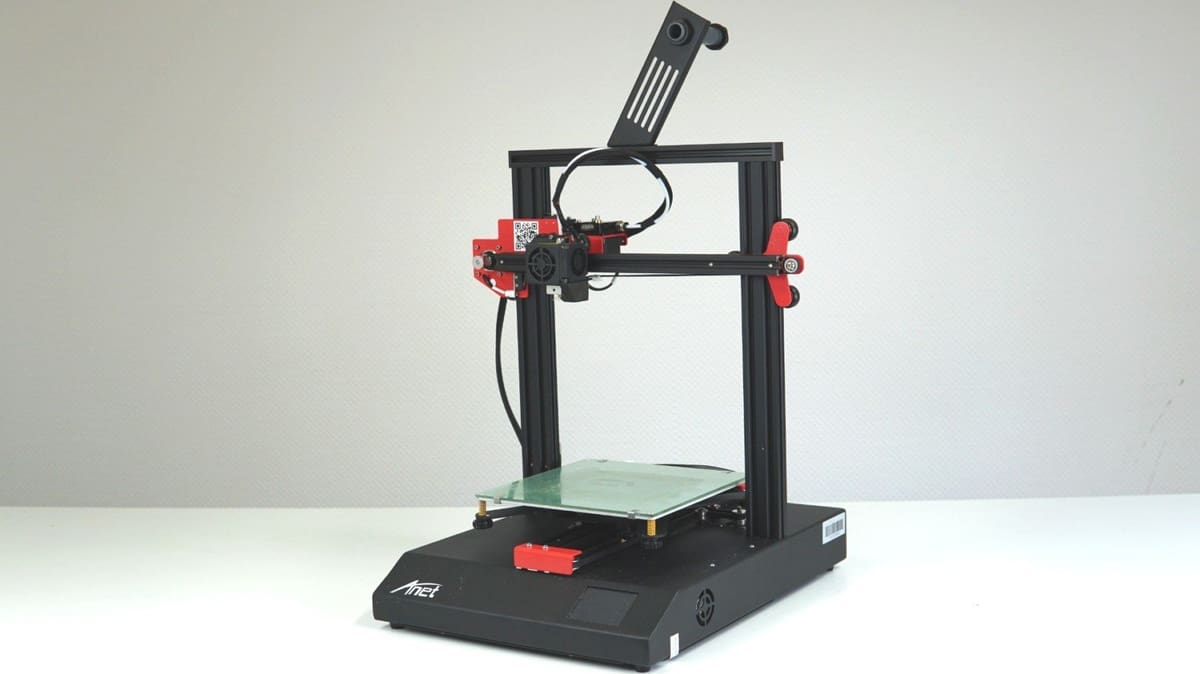
The Anet ET4 is a budget FDM printer with interesting features tucked neatly into its all-metal frame. Read our review to see what we found after 10 hours of testing.
Shenzhen-based 3D printer manufacturer Anet made waves in the 3D printing community with its tremendously popular A8 FDM printer. A sub-$200 kit, it had a price-to-performance ratio that, at the time, made it the most popular printer of its day. Unfortunately for Anet, easier to assemble and better 3D printers became increasingly affordable and the A8’s shining star quickly dulled. Equally cheap but better-performing 2019 Creality Ender 3, or the medium-sized Geeetech A10‘s were some of the budget but competitive threats for the A8.
Fast forward to today, and Anet’s newest horse in the race is the Anet ET4. This machine is undoubtedly modern, with a tidy all-metal construction and a 2.8-inch touchscreen interface. Retailing for around $279, the ET4 could is an aspirational candidate in the crowded budget 3D printer market. But is it? Read on for our thoughts after 10 hours of review, including testing and benchmarking.
Feature Check
So, what makes this budget 3D printer worth your money? With a more accessible entry market, the price should certainly not be the only card. Here are the features that make the Anet E4 special:
25-Point Auto-Leveling
Auto-leveling is becoming more common in budget FDM machines these days, and the Anet ET4 is no exception. The machine measures 25 points across the area of the print bed with a probe mounted next to the extruder and (theoretically) compensates for deviations. This will help you with an uneven bed and result in a better first layer performance across the 220 x 220 mm print area.
In our first test, however, the auto-leveling process placed the nozzle too close to the printing bed, resulting in a squished first layer – we had to adjust manually to compensate. This problem could potentially be fixed in a firmware update.
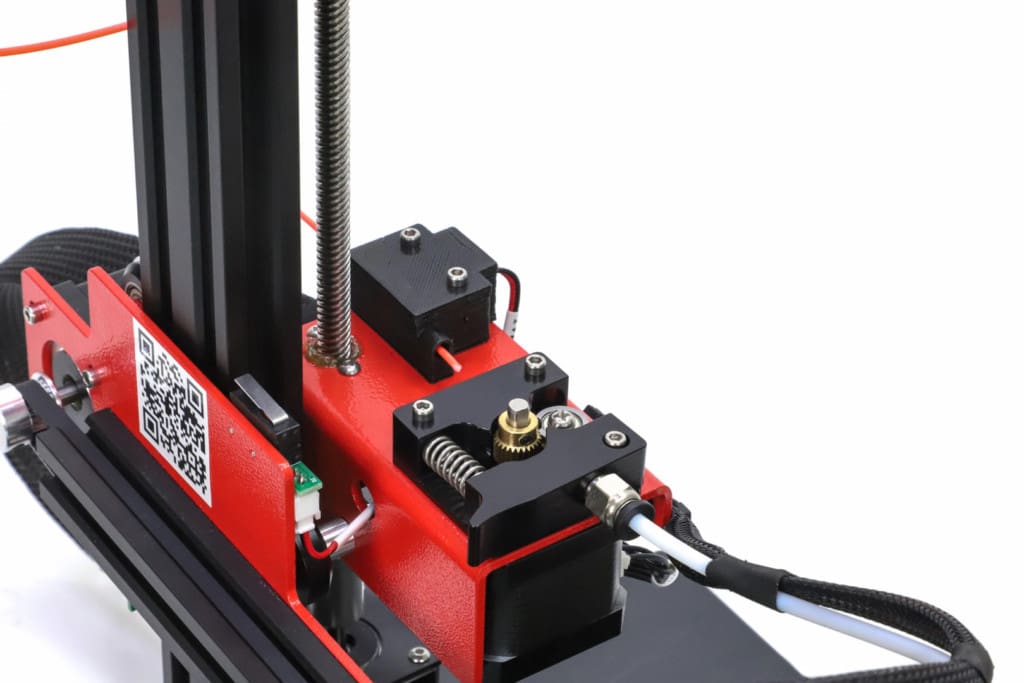
All-Metal Construction
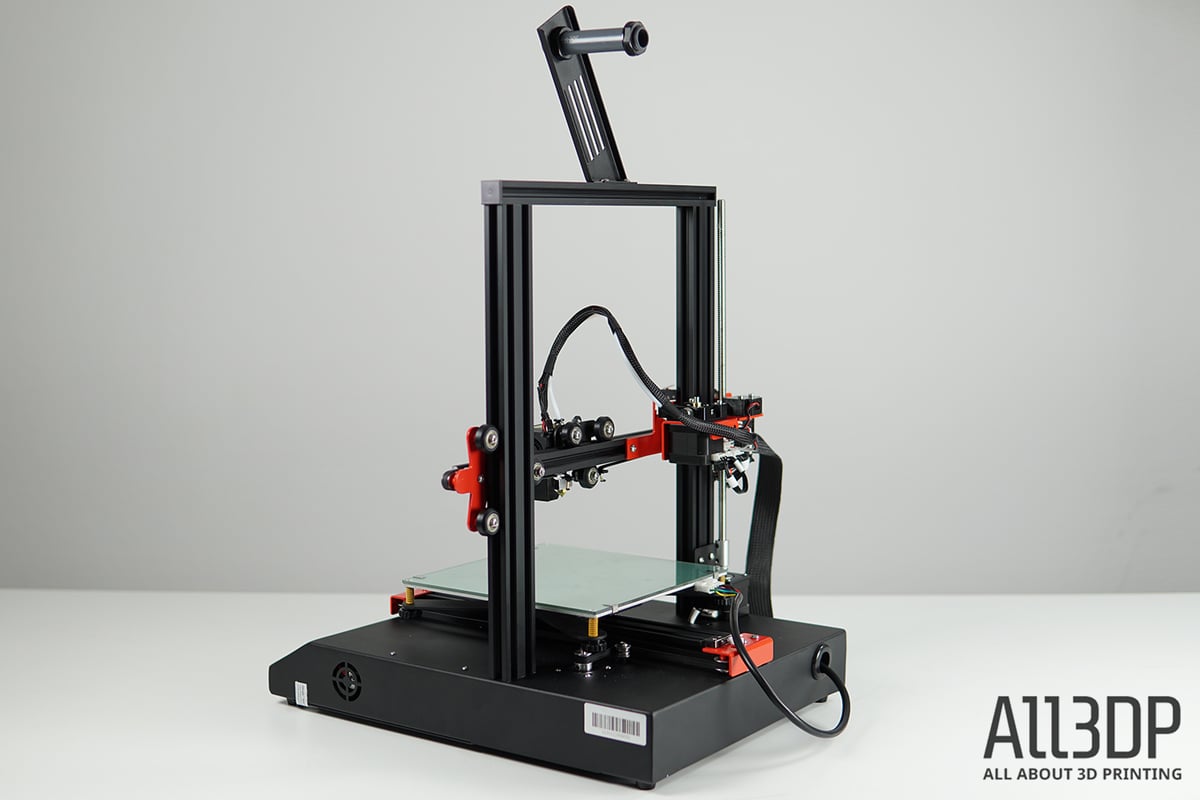
At first glance, the ET4 appears almost wire-free. The electronics are tucked neatly inside a sturdy sheet-metal control box beneath the print bed. This makes the printer easy to assemble, too, which makes for a pleasant setup experience for beginners.
Filament Detection Sensor
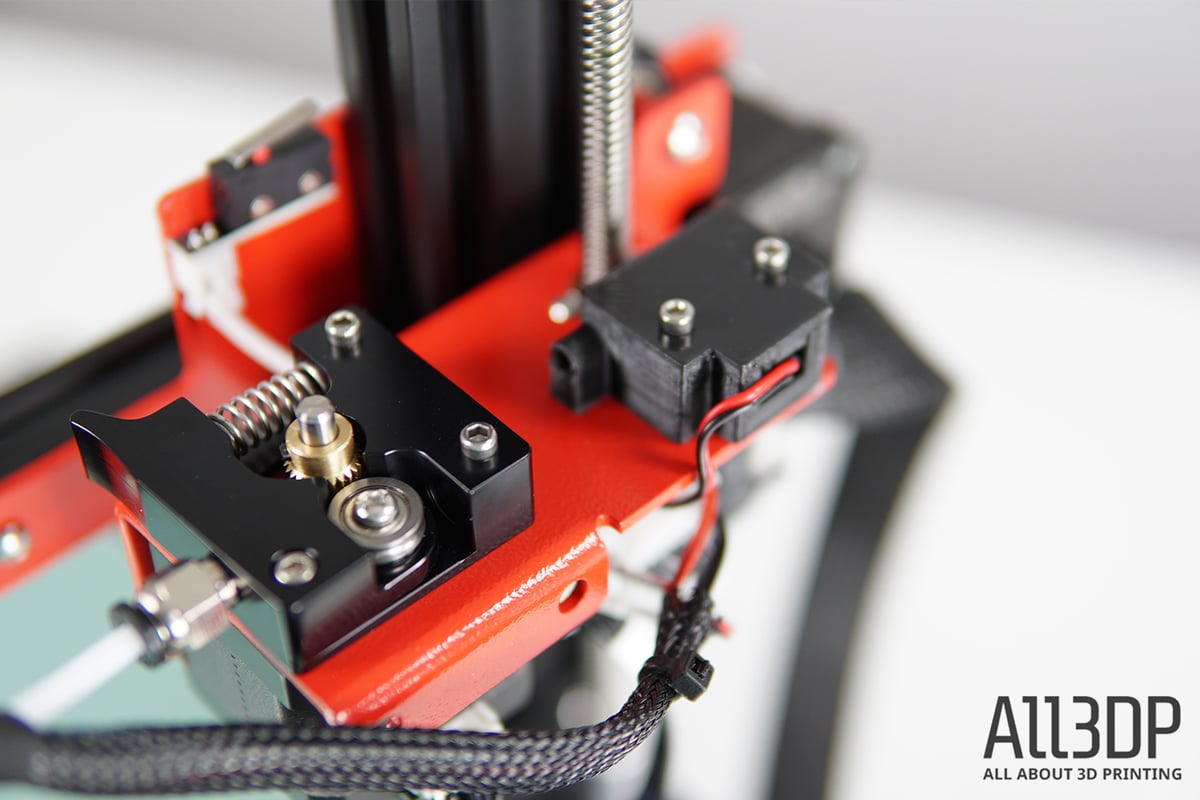
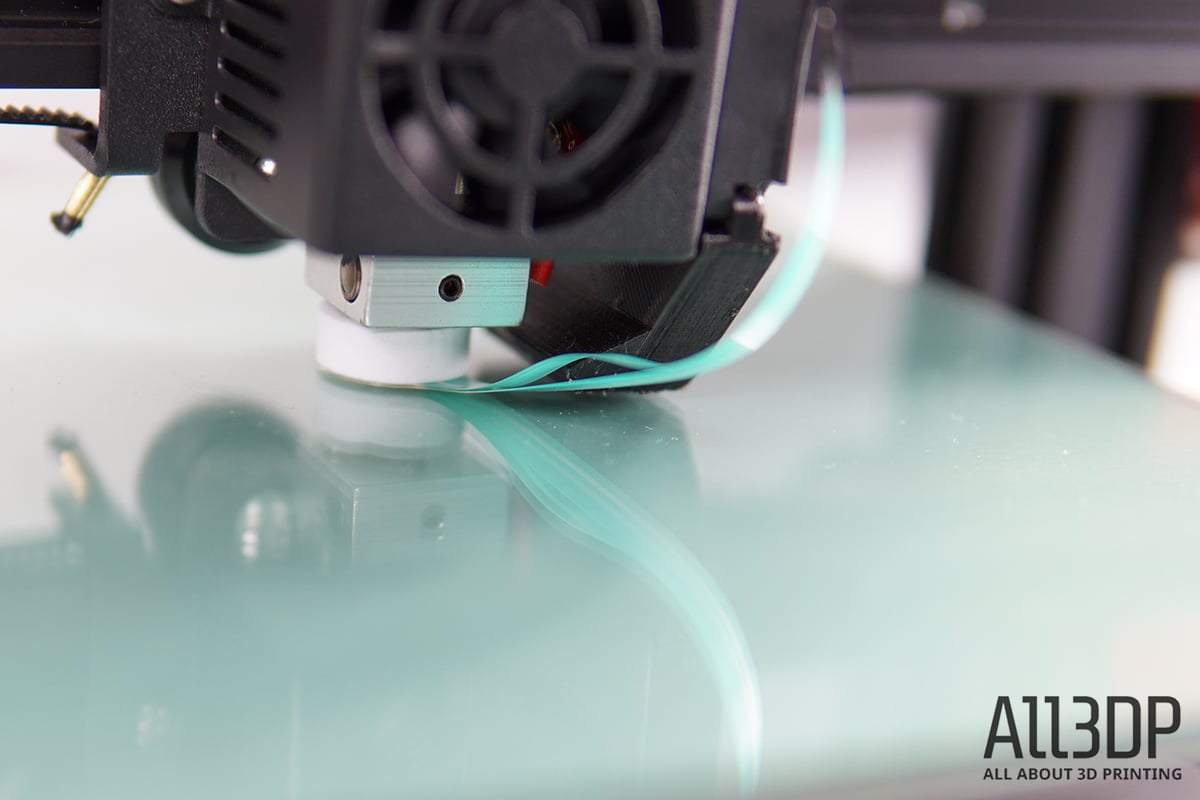
Before reaching the Bowden-type extruder, the filament enters two systems. The first is a filament runout sensor, displaying an on-screen message asking for new material. The second one transports the filament to the extruder.
The Anet ET4 knows when you run out of filament, and saves your print progress in case of a power failure — both features worked as advertised when tested.
Additional Features
Optional Trinamic Motor Drivers: Anet advertises some 256-microstepping Trinamic Drivers as an extra for approximately $15. With these drivers, Anet claims the ET4 will be “almost silent”, even when operating at full speed – we haven’t tested this feature yet.
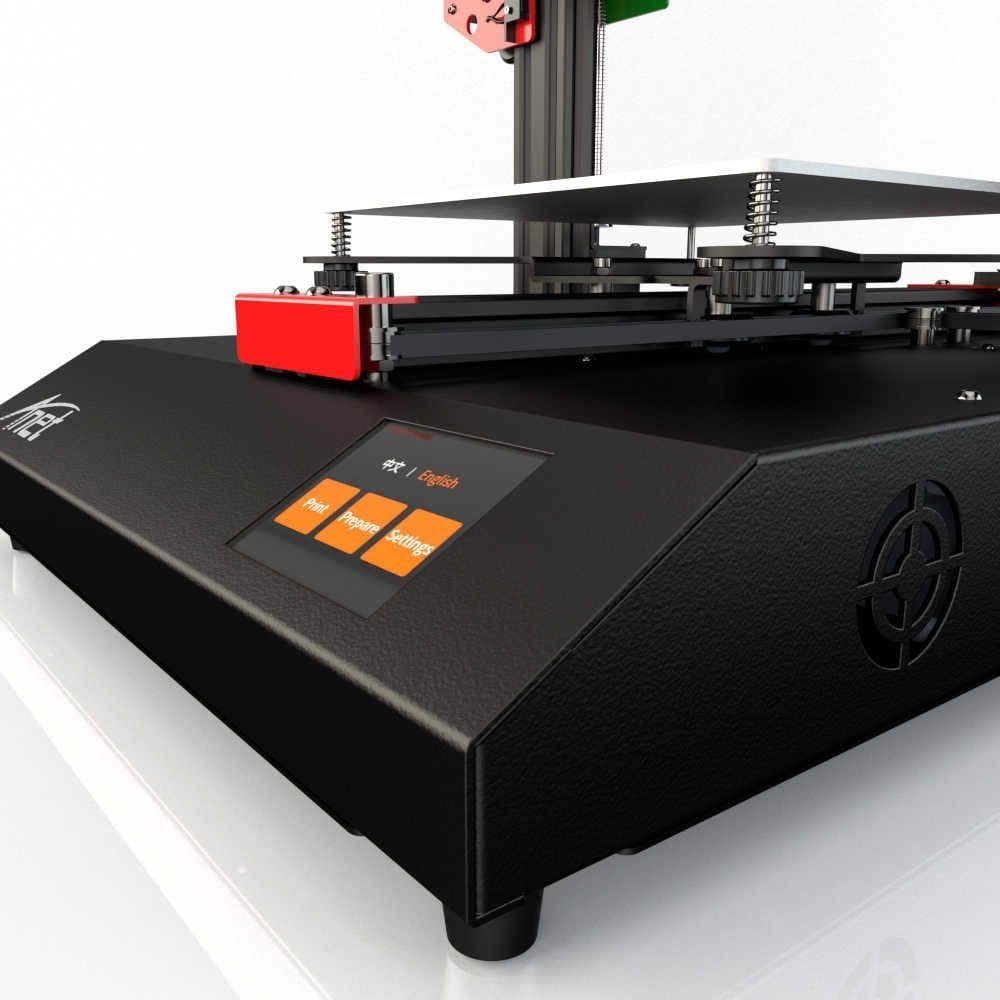
2.8-inch Touchscreen: We all know how frustrating it can be to fine-tune your settings with a fiddly plastic knob. Despite being an increasingly common feature, many budget printers (even at a slightly higher price tag) are still accompanied by a nob. The E4 offers a responsive touchscreen, allowing you to manipulate variables such as printing temperature and fan speed fairly easily.
Benchmarking
To get a first impression for our Anet ET4 review, we printed the two most popular torture tests on a new, freshly unboxed and unaltered machine, using PLA filament and averaged slicer settings for the ranges specified for the material.
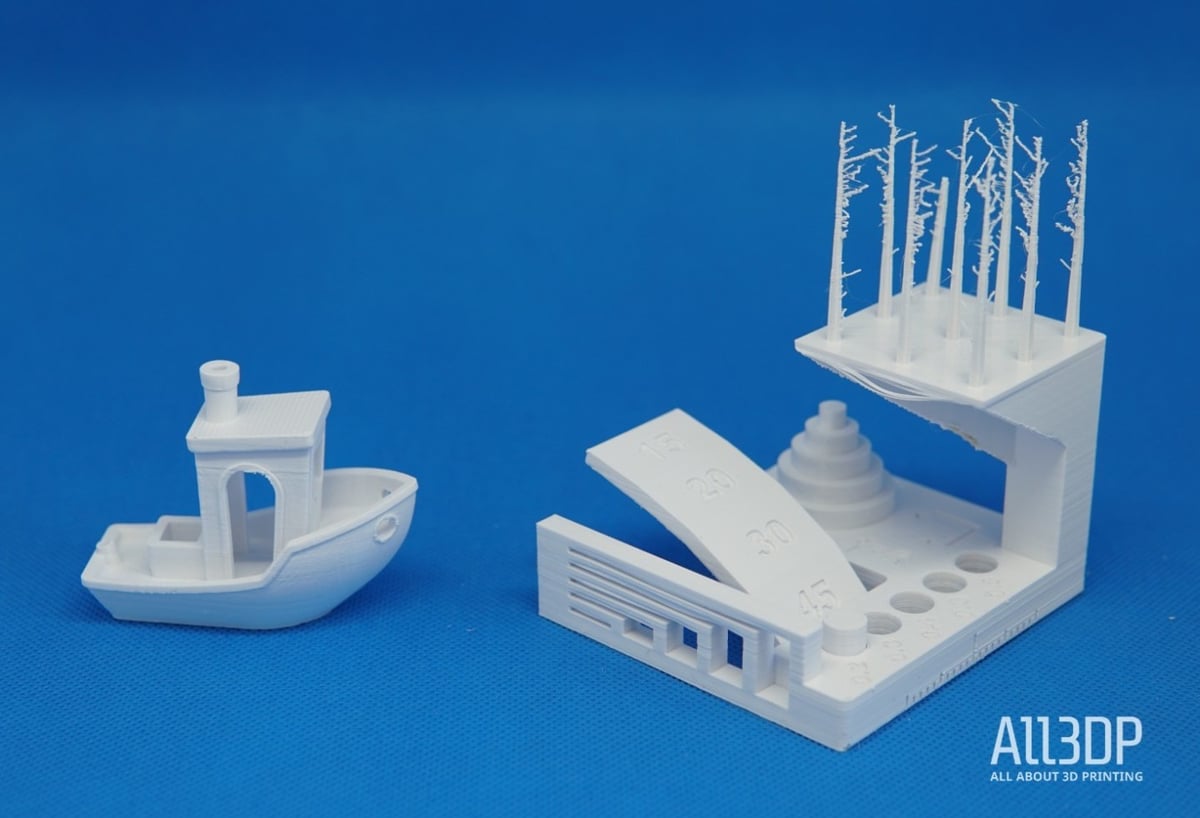
Benchmarking Object 1: Benchy
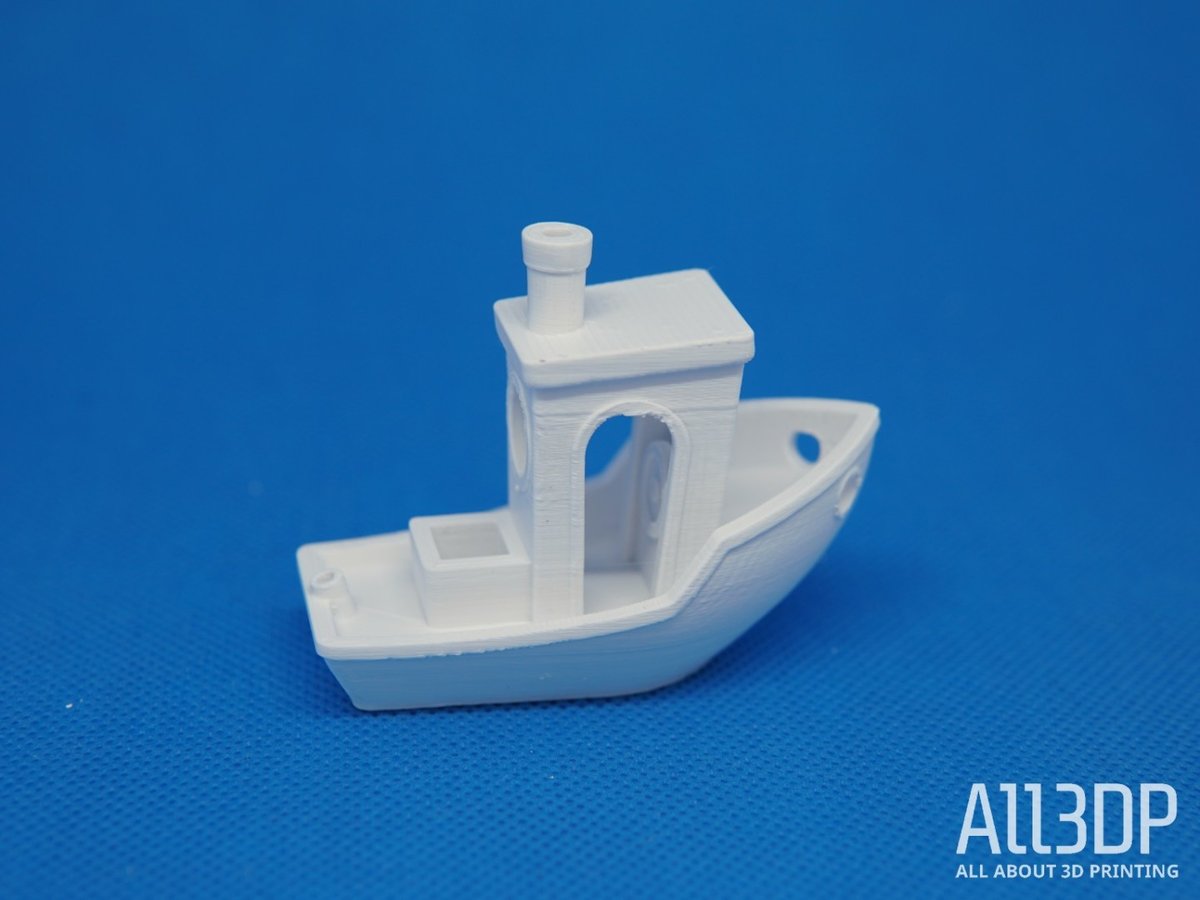
We used white eSun PLA+ filament. To prepare the Gcode, we used the Cura slicer that came on the USB drive included with the printer. The temperature was set to 215 °C and the bed to 60 °C.
It took us three attempts to 3D print a Benchy.
The first print was a disaster. The second print also didn’t turn out well, as, despite the 25-point bed leveling, the nozzle was way too close to the printing bed, squashing the first layer into the build plate.
We got decent results at the third try, then we measured the physical dimensions of the print (jump to the detailed results here).
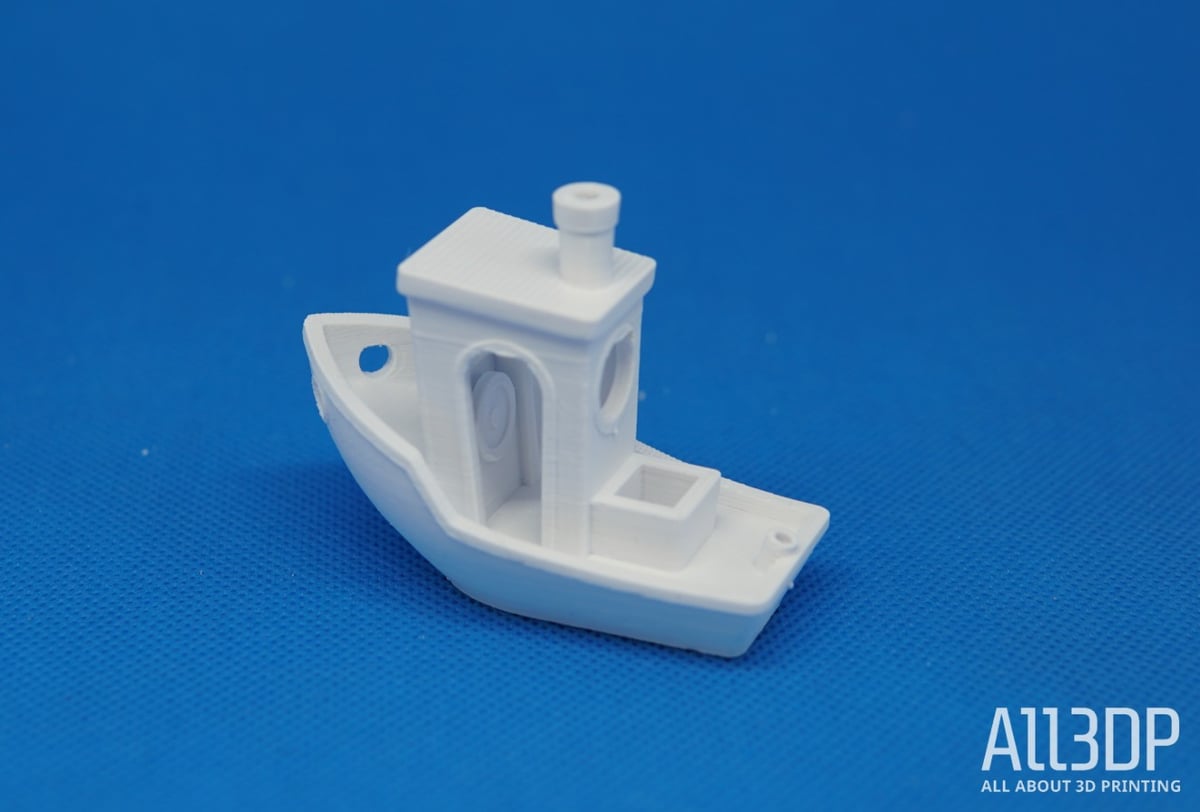
The Benchy overall turned out mediocre, the Anet ET4 Plus achieved 12 out of 15 points. The visual inspection revealed fewer problems.
- Surfaces: The main problem was ghosting, which can be solved by printing at a slower speed. The overall surfaces were okay, but a fat layer stood out throughout the right side of the Benchy. One layer was also under extruded at the door’s height.
- Details: When it came to the details, the rear window and hawsepipes had a visibly distorted diameter on the Y-axis, and the last few layers were poorly defined (slight over extrusion).
- Overall consistency: The print had minor inconsistencies, especially associated with the ghosting in the surface quality. Yet, the Benchy had overall a good Z-axis alignment.
Benchmarking Object 2: Kickstarter-Autodesk Test
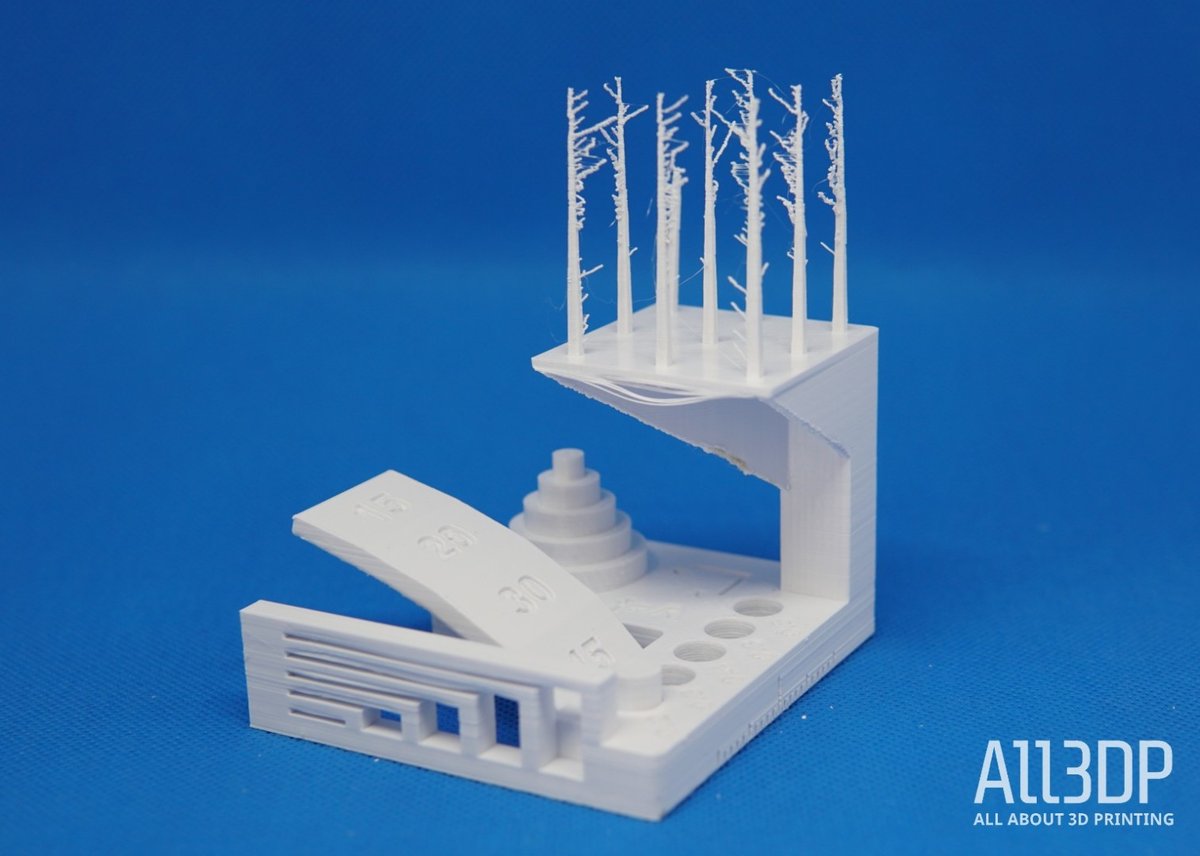
The Kickstarter-Autodesk test model looks at an FDM printer’s precision. We used the same white eSun PLA+ filament and the same temperature settings (215 / 60).
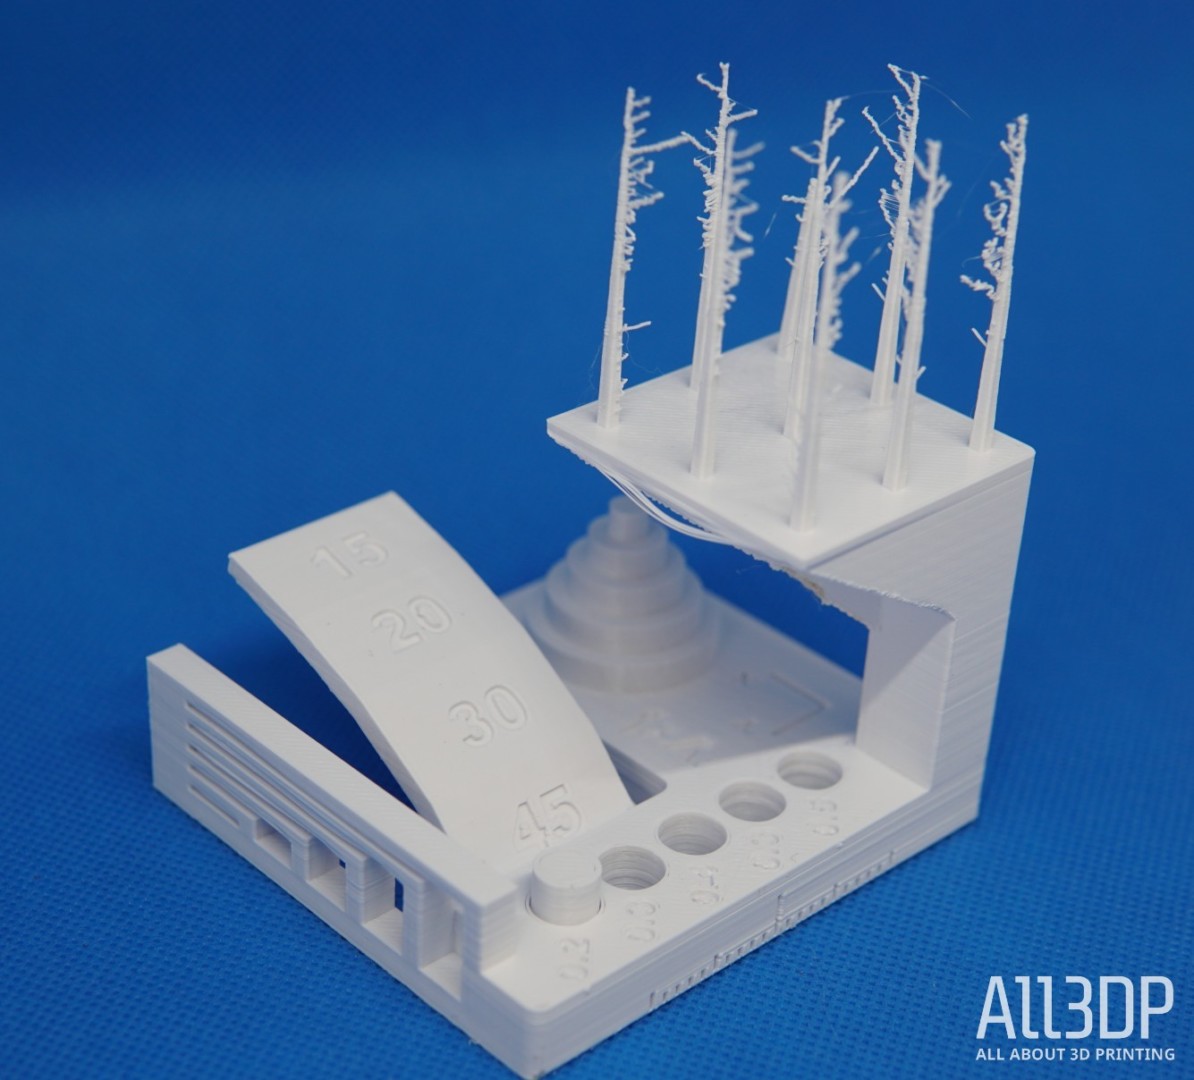
With a score of 18 out of 30 points, the Anet ET4 did mediocrely. Regardless, the fine negatives turned out good. We found problems with fine flow control, overhangs, and XY resonance.
- Surfaces: Again, the test object revealed echoing and rippling. some layers were slightly thicker than the rest, in particular at the bottom of the print. We also noted that the spikes platform was slightly offset in the XY plane with respect to the underlying structure.
- Details: The spikes turned out well in length – if it weren’t for thick stringing, as pictured above. the layers were also nicely defined.
- Consistency: The overall consistency was mediocre. You can see thick stringing lines over almost every spike, the bridges failed badly, and the first layer was inconsistent. Additionally, over extrusion was easy to spot in the spikes platform.
Benchmarking Verdict
The Anet E4 didn’t perform well in the physical dimensions’ tests, nor at our visual inspection. After approx. 10-hours of printing with the Anet ET4, we were underwhelmed with the results of the first prints. If you are willing to spend some time with the machine to get prints up to scratch, you do benefit from a sturdy printer with a decent feature set – but other companies offer similar features for less.
Another nuisance: The micro SD card is not recognized when you insert it in the printer. You must restart the machine with the SD card already inserted to get it working.
A final recommendation will be to make sure and check the tightness of the belts if the prints seem over rippling. In our experience, even after doing so the results might not be perfect, but it will significantly improve the outcome.
Technical Specifications
General Specs
- Technology: FDM
- Year: 2019
- Assembly: Semi-assembled
- Mechanical arrangement: Cartesian XY-head, i3 arrangement.
- Manufacturer: Anet
3D Printing Properties
- Build volume: 220 x 220 x 250 mm
- Feeder system: Bowden
- Print Head: Single nozzle
- Nozzle size: 0.4 mm
- Max. hot end temperature: 250 ℃
- Max. heated bed temperature: 100 ℃
- Print bed material: Glass
- Frame: Aluminum
- Bed leveling: Automatic
- Connectivity: USB, SD Card, Ethernet
- Print recovery: Yes
- Filament sensor: Yes
- Camera: No
Materials
- Filament diameter: 1.75 mm
- 3rd party filaments: Yes
- Compatible materials: Consumer materials (PLA, ABS, PETG, Flexibles)
Software
- Recommended Slicer: Cura
- Operating system: Windows, Mac OSX
- File types: STL, OBJ
Dimensions and Weight
- Frame dimensions: 440 x 420 x 480 mm
- Weight: 7.4 kg
Where to Buy
Currently, the Anet ET4 is available from these vendors:
Benchmarking Results
Here you find the detailed results of our initial testing of the Anet ET4. Our benchmarking procedure can be found below.
Benchy
- Overall length (60 mm ±1 % tolerance): 59.95 mm, 1 point given
- Overall width (31 mm ±1 % tolerance): 30.68 mm, 1 point given
- Bridge Roof length (23 mm ±1 % tolerance): 22.86 mm, 1 point given
- Chimney roundness inner diameter (3 mm ±10 %): 2.64 mm, 1 point given
- Chimney roundness outer diameter (7 mm ± 5 % tolerance): 6.87 mm, 1 point given
- Vertical overall-height (48 mm ±1 % tolerance): 47.51 mm, 0 points given
- Box depth (9 mm ± 5 % tolerance): 8.95 mm, 1 point given
- Box inner length (7 mm ± 5 % tolerance): 6.97 mm, 1 point given
- Box outer length (10.81 ± 5 % tolerance): 10.40 mm, 1 point given
- Box outer width (12 mm ± 5 % tolerance): 11.87 mm, 1 point given
- Box inner width: (8 mm ± 5 % tolerance): 7.96 mm, 1 points given
- Hawsepipe inner diameter left (4 mm ±10 % tolerance): 3.99 mm, 1 point given
- Hawsepipe inner diameter right (4 mm ±10 % tolerance): 3.93 mm, 1 point given
- Bridge front window width (10.5 mm ±5 % tolerance): 10.42 mm, 1 point given
- Rear window inner diameter (9 mm ±5 % tolerance): 8.87 mm, 1 point given
Overall, the ET4 scored 12 out of 15 points.
Kickstarter x Autodesk Test
- Dimensional Accuracy: 5 of 5 points (24.85 / 19.86/ 14.89 / 9.96 / 4.97)
- Fine Flow Control: 2.5 of 5 points (all spires were printed with intense stringing)
- Fine Negative Features: 4 of 5 points (4 pins were removable)
- Overhangs: 2 points (surface quality got worse at the 30° overhang)
- Bridging: 2 points (only two bridges were not touching the surface beneath it)
- XY Resonance: 0 points
- Z-axis alignment: 2.5 points (not visible)
Overall, the ET4 scored 18 out of 30 points in this test.
How We Benchmark
For the benchmarking element of our review, we use the following guidelines:
Unbox the printer: We unbox the printer and assemble it according to the manufacturer’s instructions. Deficiencies and errors are noted and build around according to the consensus online for the printer.
Filament: We use white eSun PLA+ filament. Temperature settings are 215 °C for the nozzle and 60 °C for the bed.
Printing: We print two test models — Benchy and the Kickstarter x Autodesk FDM 3D Printer Assessment — using the manufacturer-provided/recommended slicer and settings. If the printer ships without a dedicated slicer and profile, we generate a generic Cura profile using the essential information of the printer.
After the first print, we inspect the object for easily fixable problems (i.e., a loose belt or a poorly leveled print bed) and then print again. If the printer can’t provide a decent result after three attempts, we stop. Printers that fail to produce a test object receive zero points for the respective test object.
1. Benchy
The Benchy 3D printer torture test is one of the world’s most popular prints. It helps to measure the dimensional accuracy capabilities of your printer and helps highlight other visible print nastiness.
We measure our best Benchy print using digital calipers, scoring 15 criteria against their target value. A total of 15 points are available.
- Overall length: 60 mm
- Overall width: 31 mm
- Bridge Roof length: 23 mm
- Chimney roundness inner diameter: 3 mm
- Chimney roundness outer diameter: 7 mm
- Vertical overall-height: 48 mm
- Box depth: 9 mm
- Box inner length: 7 mm
- Box outer length: 10.81
- Box outer width: 12 mm
- Box inner width: 9 mm
- Hawsepipe inner diameter left: 4 mm
- Hawsepipe inner diameter right: 4 mm
- Bridge front window width: 10.5 mm
- Rear window inner diameter: 9 mm
To accommodate the difficulty and inaccuracies when measuring small features, we have implemented a sliding scale of tolerance in our scoring. The smaller the feature, the greater our allowance for deviation:
- 60 mm to 23 mm: 1 percent tolerance allowed
- 23 mm to 7 mm: 5 percent tolerance allowed
- 7 mm to 0 mm: 10 percent tolerance allowed
Finally, we do a visual inspection and note any flaws and problems we encounter.
2. Kickstarter x Autodesk FDM 3D Printer Assessment
The Kickstarter x Autodesk print exposes an FDM printer’s precision via six distinct tests in one object.
By pushing a printer’s hardware and software the system to the point of failure, the print reliably visible imperfections that can be used to assess the performance of the slicer, the extruder, and the motion system together.
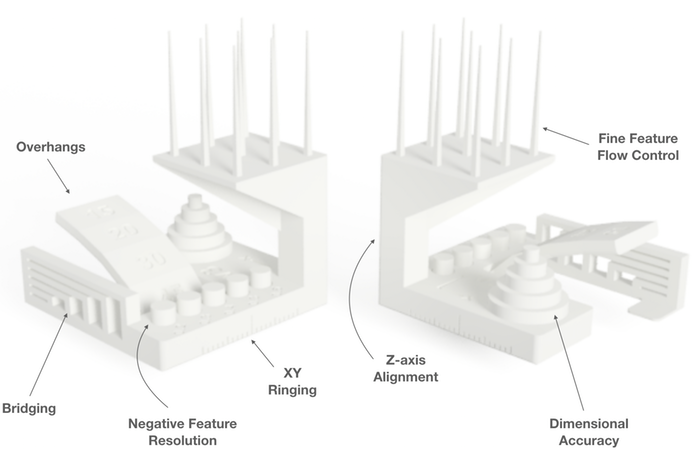
Here’s what’s getting measured.
- Dimensional Accuracy
- Fine Flow Control
- Fine Negative Features
- Overhangs
- Bridging
- XY Resonance
- Z-axis alignment
The tolerances and measurements are very detailed. You can find the exact measuring procedure on Github. The highest possible score is 30, indicating a very well-calibrated system.
It’s worth noting that these benchmarking tests are not a definitive measure of a printer’s worth. More an indication of a printer’s state out of the box with no-tinkering, it’s only after a full evaluation and in-depth review that we fully judge a 3D printer.
CERTAIN CONTENT THAT APPEARS ON THIS SITE COMES FROM AMAZON. THIS CONTENT IS PROVIDED ‘AS IS’ AND IS SUBJECT TO CHANGE OR REMOVAL AT ANY TIME.