Anycubic Chiron Review: Best Bed You’ll Never Sleep In
Rating
After a rocky launch, the Anycubic Chiron is slowly clawing its way back into people's minds. Read on for our review of this huge, Ultrabase touting beast of a machine.
First teased in the spring with a CGI video for something big, the Anycubic Chiron landed after not a little hype in the heady days of summer, becoming the hot topic for a nanosecond before promptly being pulled from the digital shelves.
The reason, you could argue is an admirable one, but altogether endemic of how budget 3D printers are produced and consumed these days.
Early units of the Anycubic Chiron were shipped to influencers and publications alike (All3DP included), alongside pre-sale units to those brave enough to drop their dollars on an unproven machine.
However, complaints about build quality, quality control and other niggles with this first wave of units quickly led Anycubic, it claims, to halt production while the kinks were ironed out. Tentatively re-released to retail at the end of August, the company is slowly scaling back up to meet what we must imagine is now a tempered demand.
Our experiences with an early Anycubic Chiron are detailed below. Since the company has now addressed myriad issues for subsequent units, some of it has possibly been rendered moot. However, judging our Anycubic Chiron loaded with the current firmware (1.2.8) and with a copy of the latest user manual in hand sheds some light on what has undoubtedly been a poor product launch of an okay — at least initially — but not great 3D printer.
Verdict
Pros
- A cinch to set up
- Ultrabase Pro print bed is exceptionally good
- Fast heating bed gets hot edge-to-edge
Cons
- Quality control issues
- Automatic bed-leveling isn’t automatic
- Quirks and irritants plague the printer
Verdict
Past experiences with Anycubic’s 3D printers suggest that the Anycubic Chiron should be a winner. The reality, however, is not the all-singing-all-dancing “CR-10 killer” we expected it to be. Our experience is of a 3D printer with some good ideas and a killer feature in the huge Ultrabase Pro print bed, held back by quality control issues, tedious automatic bed-leveling, and few other minor irritants.
Design
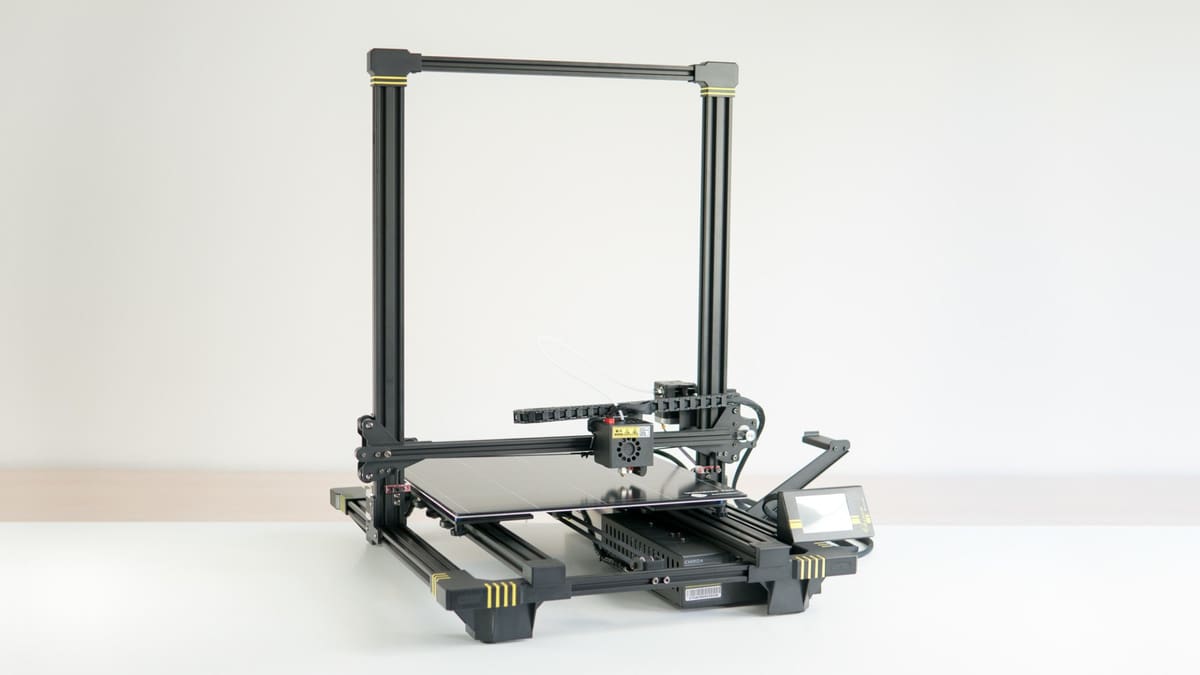
Betting big for the bargain buck, Anycubic’s stab at the large format desktop 3D printer has arrived in the Anycubic Chiron; a huge 400 x 400 x 450mm printing frame of black and yellow accents that, at the time of writing, costs you in the region of $400. It’s big, bombastic looking and, depending on how far down the Wikipedia rabbit hole you go, most likely named after a mythological Greek centaur.
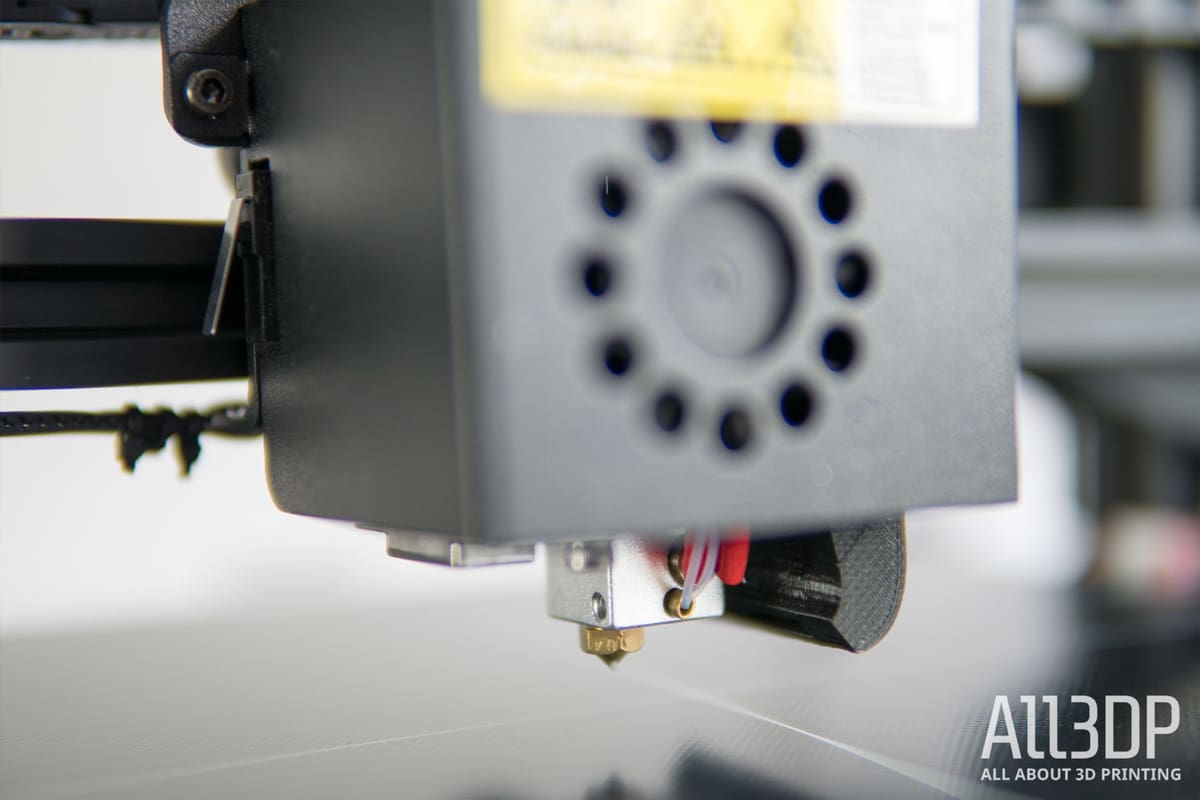
First teased with a focus on its ability to print flexible materials — with TPU kicks the in-your-face demonstration print that we’re sure broke a toe or two of the unfortunate foot model — the Anycubic Chiron certainly has the capability on paper. A Titan-like extruder with constrained filament path takes care of this and, paired to Anycubic’s E3D V6-like hotend, ensures a mostly frustration-free time.
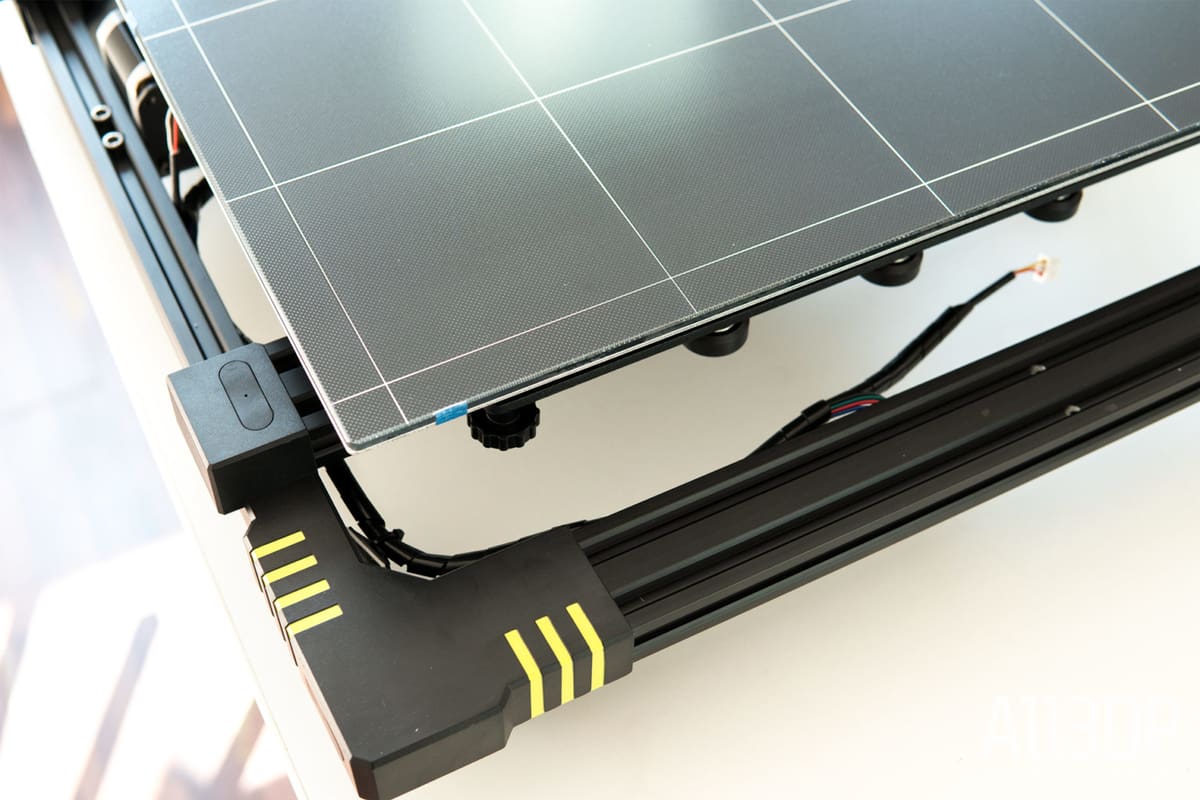
Printing takes place on a vast sheet of Anycubic’s proprietary Ultrabase Pro. As best we can tell, the only difference between the plain old Ultrabase (as ships on the Anycubic i3 Mega) and the Ultrabase Pro here is the size and some decorative patterning.
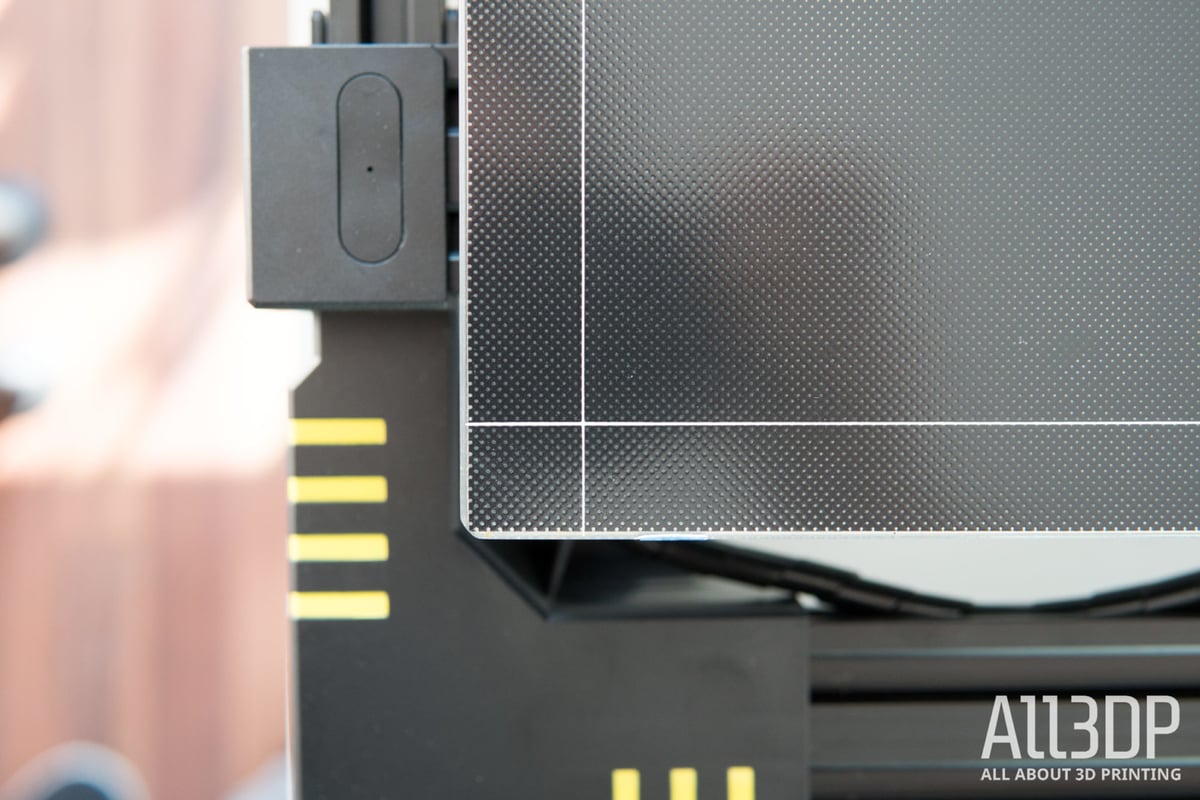
It’s still the same glass bonded to a faintly perforated grip sheet that effectively holds prints when hot, and releases them when cold.
The towering frame is constructed from aluminum extrusions secured with metal T-plates.
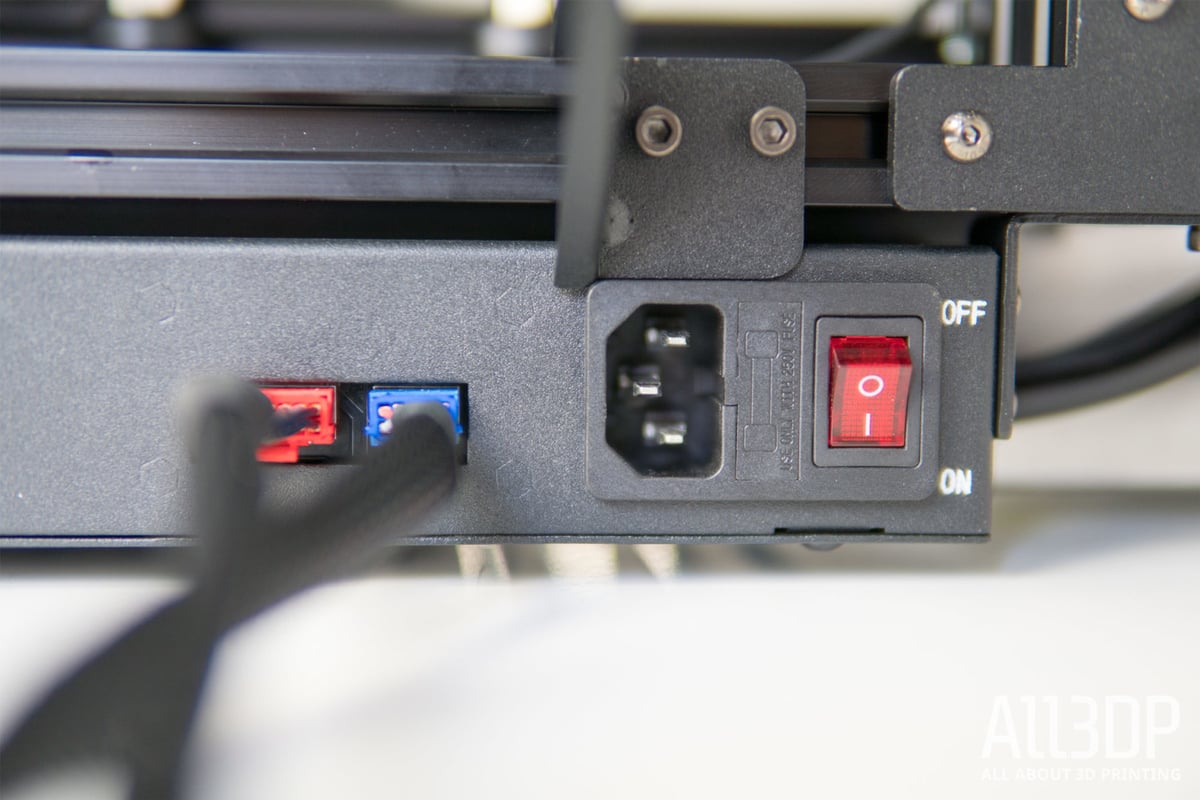
The base of the printer serves as home to a standard LCD power supply, Anycubic’s preferred Trigorilla mainboard, MOSFETs et al.
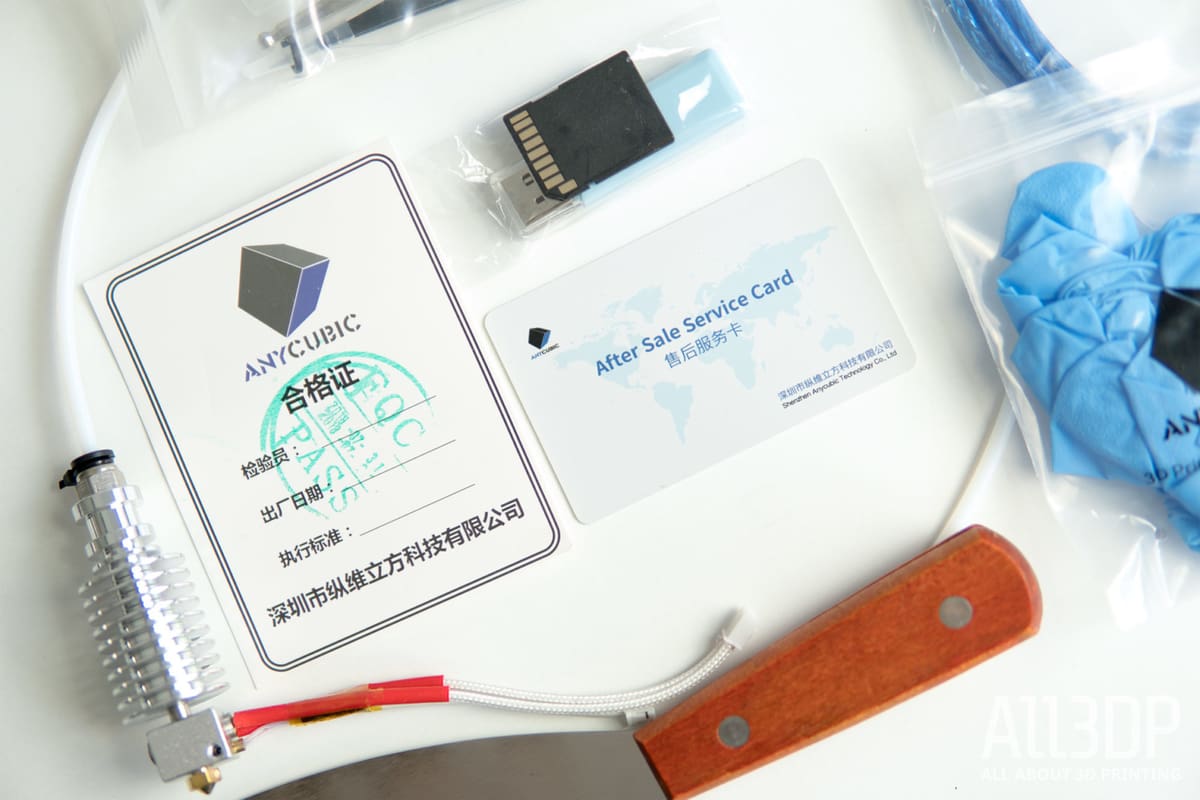
All ports and connections are located on the right-hand side of the base unit for ease of assembly, which in total took us a leisurely 25 minutes or so following the well written and illustrated assembly instructions.
Shipped in the increasingly common pre-assembled state — bed attached, hotend and extruder mounted and so on — the Anycubic Chiron is exemplary of the current state of “kit” hobbyist desktop 3D printers. A simplified build requiring minimal manual labor to rig the printer into shape is pretty much par for the course, and the Anycubic Chiron is no exception.
The Good
Anycubic has drawn upon the particular frame style popularized by the Creality CR-10, imparting its spin with some improvements.
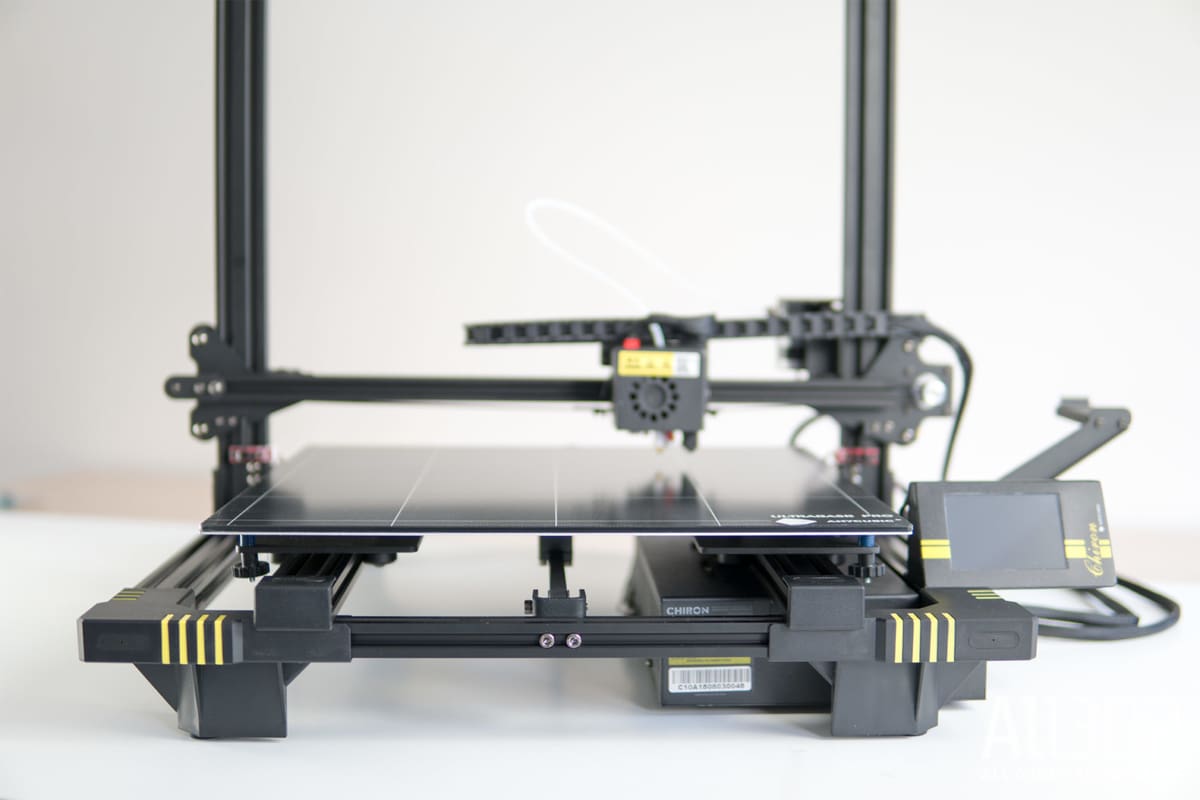
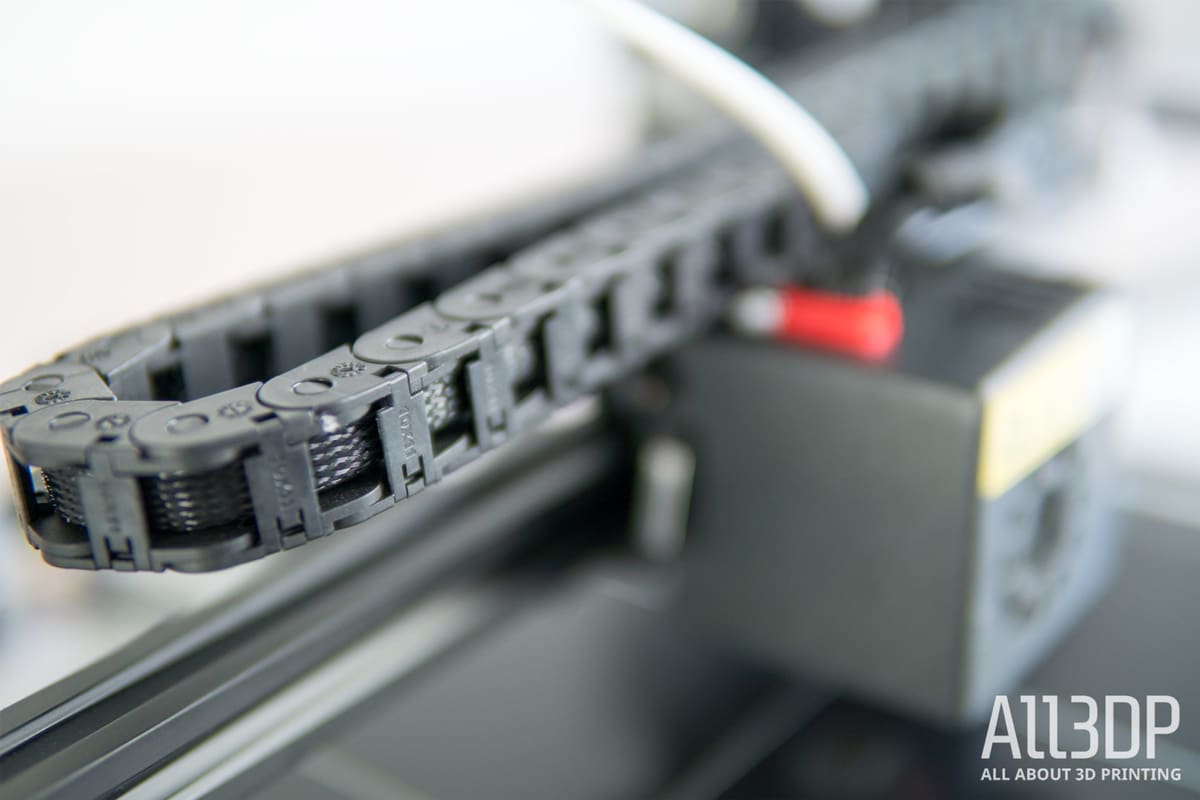
Overall the cabling and general appearance of the Anycubic Chiron is neat and tidy. A drag chain housing the thermistor, temperature probe, both fans and leveling probe cables keeps things organized, with the only projection from the hot end being the PTFE filament guide tube.
On a similar note the power supply, mainboard, and the other electronics are stowed in the base of the Anycubic Chiron, with cable connections, power, and USB inputs and SD card reader all facing out to the right-hand side of the printer.
The joy of queueing up a large print never gets old, and the Anycubic Chiron brings particular delight to this with its delightfully large build are of 400 x 400 x 450mm underpinned by a massive slab of Ultrabase Pro — Anycubic’s proprietary build plate.
Essentially a sheet of glass coated in Anycubic’s super tough and perforated adhesive film, the Ultrabase grips the vast majority of print materials with ease when hot, releasing them with little resistance when cold. It works remarkably well, avoiding the pitfalls of additional messy adhesives and unstuck prints. Two thumbs up.
Similarly praiseworthy is the 24v supplied heated bed. Going from cold to printing is a relatively quick process, and the aluminum sheet beneath the Ultrabase Pro reaches across the entire breadth of the bed, giving consistent heat and stable adhesion for larger prints.
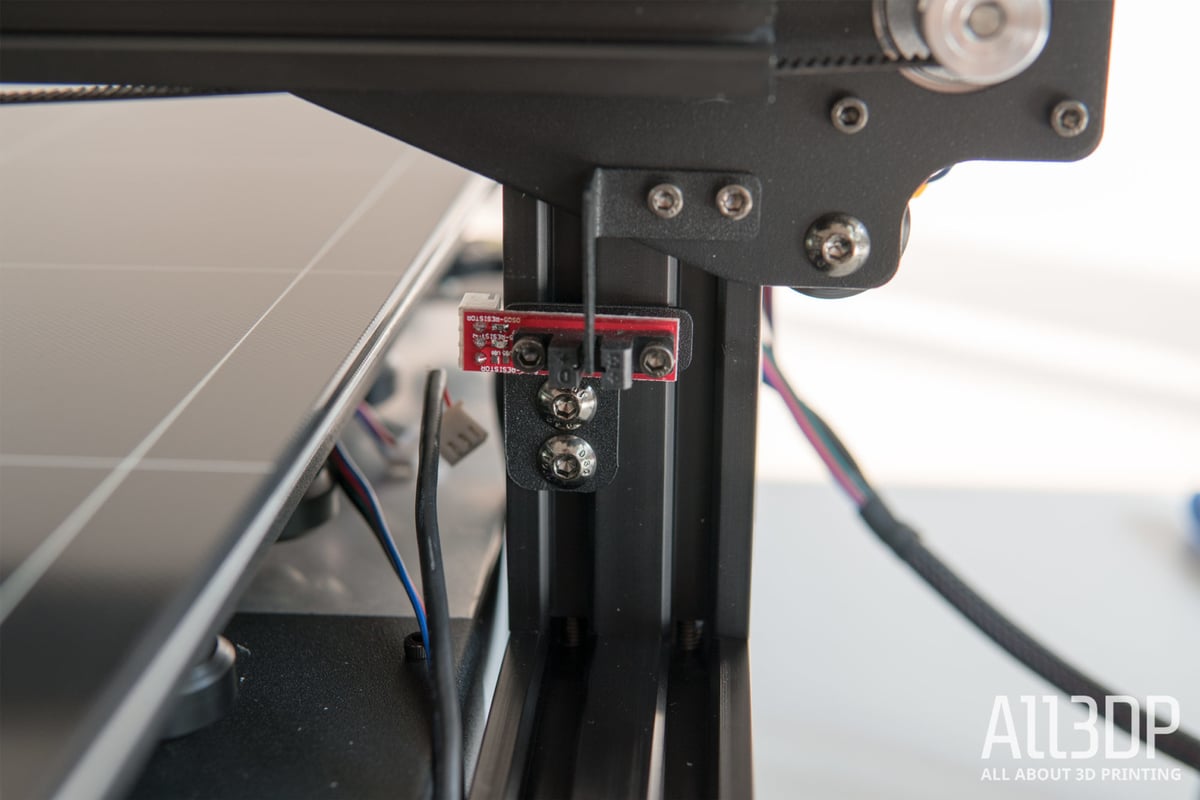
Dual Z-end stops ensuring a level X-axis on every home is a welcome addition.
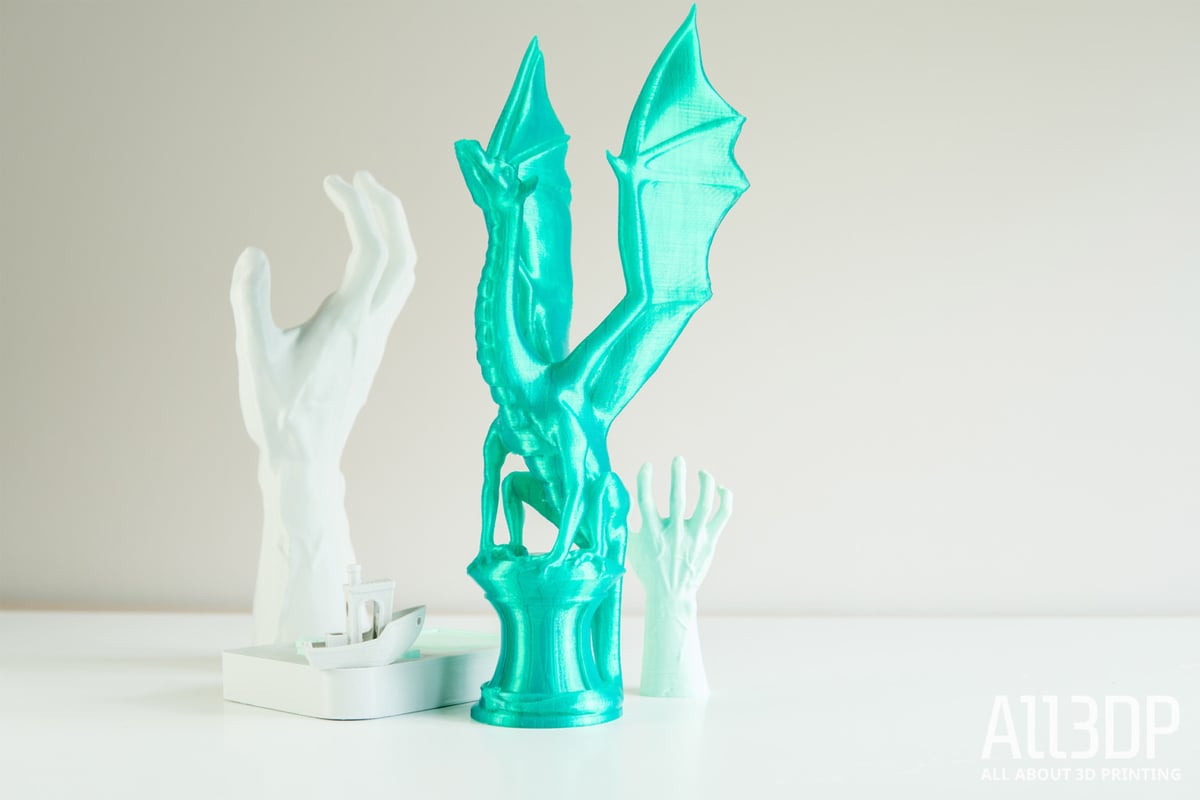
Printing with the Chiron is straightforward, accepting your garden variety of filaments, including the much-teased flexibles, with little incidence. The Titan-like extruder constrains the filament path well enough for even the noodliest of materials.
Peeking inside the control box in the base of the Anycubic Chiron presents you with an orderly arrangement of secure hot-glued connections. The heated bed receives its juice via a MOSFET, and not far from this we see sufficient grounding. So, in theory, there shouldn’t be any nasty shocks in this Anycubic Chiron’s future.
The Bad
Before the Anycubic Chiron’s hot-fix hiatus, we found ourselves at a loss a with the implementation of the advertised automatic bed-leveling.
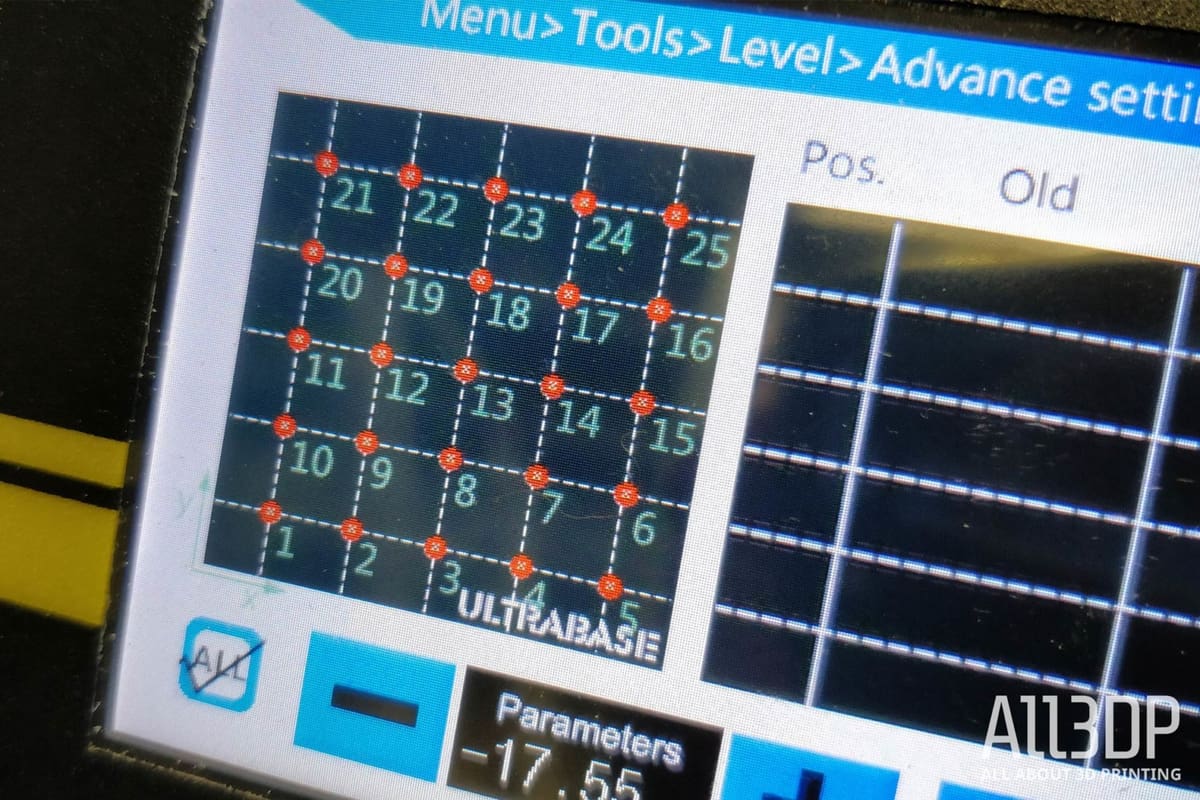
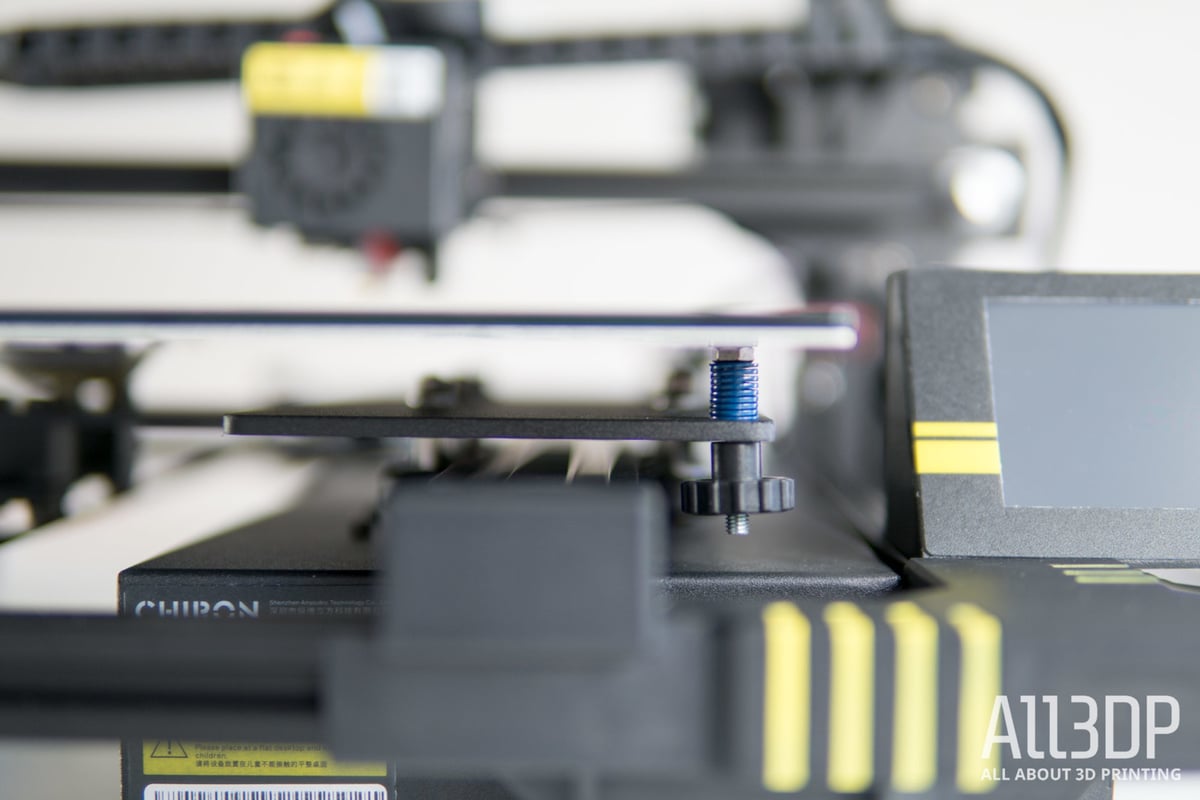
After affixing the magnetically attached mechanical bed probe, just about plugging it in using its stingily short cable and running the auto-probe routine — the only bed-leveling routine detailed in the user manual (remember that) — the Anycubic Chiron detects 25 points across its bed surface. Seemingly these measurements are then not committed to memory, and the subsequent test you are instructed to print displays wild variances in bed level, with no bonding to the bed in some areas and the nozzle scraping the bed in others.
To correct this, you must manually adjust the 25 points 0.05mm at a time using the Anycubic Chiron’s live Z-adjust option.
To us, that is not auto bed-leveling. That’s calibration and a mind-numbingly tedious calibration at that. The printer can’t operate with the probe attached, and no quick probing takes place before a print.
Skimming through the user manuals that accompanied both the printer as we received it and the post-fix update, there has been backtracking of sorts with the updated manual encouraging the user to manually level the bed. One small wrinkle here is that the teeny tiny thumbscrews underneath the bed are a royal pain in the proverbial to adjust. Too small, too tight and most likely never intended to be touched, given the initial omission of manual bed-leveling direction.
Another small point of grievance comes in the switching of filament dislodging a filament feed guide from the extruder. While not strictly necessary for non-flexible filaments, such an aid should not be so easy to accidentally knock loose from the printer, no less a small piece that’s easy to lose over the edge of a workbench.
Moving away from the physical and into the digital, we found ourselves underwhelming by the out-of-the-box print settings provided with the Anycubic Chiron.
For starters, the provided slicing software is an older (and arguably feature poor) version of Cura, and the default printing profile detailed by Anycubic results in pretty woeful prints.
At the time of writing, there are few tailor-made Anycubic Chiron profiles out there to download from the (understandably) small community. For a shortcut to better prints, we saw some success in hoisting a profile for the Creality CR-10S into Simplify3D (and making the requisite adjustments to the printer size in the settings). Of course, your mileage may vary, depending on your preferred slicer, but given the sheer volume of options and profiles for similar printers, a little experimentation will result in better prints.
Additionally, (and less a problem than an inconvenience) completed prints result in the bed retreating to the rear of the printer. The Chiron is a large printer, and even this writer’s gangly arms are too short to accommodate this quirk when removing prints. The extra step of disabling the motors or homing the bed is an inconvenience. A fix lies in adjusting the default end g-code your slicer outputs, but nevertheless it’s an out-of-the-box frustration.
The Ugly
As stated, our Anycubic Chiron was one of an early production batch known to suffer from inconsistencies and problems.
Notable to our unit, unwrapping the tape and ties that held everything in place for shipping resulted in a loose screw falling out of the printer.
Cue some minutes of awkwardly inspecting the machine from every angle to determine where exactly it came from — the bed carriage — and then several more passing over every other fixed screw to check they were tight. Not the best start, considering the included quality control card with a huge “Pass” stamp (are ironic quality control cards a thing?).
Further inspection of the pre-assembled elements of the Anycubic Chiron revealed loose pulleys under the bed that required a tighten to even engage with the extrusion, let alone provide stability.
The flip side of this is that other recipients of the early Anycubic Chiron appear to be perfectly happy with their printer. Such is the chasm in quality of units that ship.
This led Anycubic to pause production while it addressed the issues — but once resumed, to the broader internet and potential customers, these are the same machine. Reviews of the pre-fix printer may not necessarily explain the situation, so what you read may not reflect the state of the printer on the digital store shelves, even though on paper it is the same printer — same price, same specifications.
This is a problem for us as a publication reviewing 3D printers since it rapidly introduces obsolescence to our work. This is a challenge we’re looking into, with the aim being to accurately cover such such fast-paced evolutions in the near future.
Is the Anycubic Chiron Worth It?
We’ve reached a point where the 3D printers of this caliber/price/features are indistinguishable from each other in the absence of glaring flaws. The deal breakers and deal makers are in the minutiae; the quality of life improvements and so on.
The huge Ultrabase is a plus for the Chiron, ensuring consistent performance for bed adhesion and easy print removal. It heats fast, and prints stick well.
Regarding printing, the quality can be there — with the right slicer profile and fine-tuned settings any printer can sing over its stock configuration, and arguably the Anycubic Chiron is no exception. However, in our time with the Chiron we’ve found that bed adjustments to compensate for under extrusions and poor layer overlaps a constant battle. Where precisely the problem lies here, we’re unsure, but find a good base profile (other than the lackluster default settings) to build on makes a big difference.
The filament out detection works as advertised, as does the print recovery feature — although to use this the printer must home before resuming, sacrificing a fifth of the print area.
On the other hand, the advertised auto bed-leveling is little more than a trumped-up manual calibration procedure that does nothing to remove the effort from bed leveling.
Nuisances aside, the Chiron still boasts a bucketload of desirable features such as the fast heating bed and that Ultrabase coating for sticky print goodness.
On their own, these are tempting enough prospects, but consider that printers such as the Tevo Tornado and JGAurora A5 offer similar features for less. Regarding printing and the experience using it, we’d put the Anycubic Chiron in the company of those aforementioned printers. In the right hands good enough, but not without its flaws.
Specs
The Anycubic Chiron 3D printer laid bare is as follows.
Make: Anycubic
Model: Chiron
Technology: FDM
Frame: Cartesian
Year: 2018
Category: Desktop, preassembled
Print area: 400 x 400 x 450 mm
Max. bed temp: 100°C
Nozzle size: 0.4 mm
Max. nozzle temp: 260°C
Max. Z-axis resolution: 50 microns to 300 microns
Z-axis accuracy: 2 microns
X/Y-axis accuracy: 12 microns
Max. print speed: 100 mm/s
Max. travel speed: 60 mm/s
3rd Party material compatibility: Yes
Interface: TFT display
Boxed size: TFT display
Printer size: 651 x 612 x 720 mm
Packaged weight: – kg
Printer weight: 15 kg
Power input: 24V
Where to Buy
You can snag an Anycubic Chiron at the retailers listed below.
License: The text of "Anycubic Chiron Review: Best Bed You’ll Never Sleep In" by All3DP is licensed under a Creative Commons Attribution 4.0 International License.
CERTAIN CONTENT THAT APPEARS ON THIS SITE COMES FROM AMAZON. THIS CONTENT IS PROVIDED ‘AS IS’ AND IS SUBJECT TO CHANGE OR REMOVAL AT ANY TIME.