There are plenty of cliches relating to success and failure flapping about out there in the wild. You’ll more often than not spot them congregating on the great plains of LinkedIn, observed by hundreds, sometimes even thousands, of twitching businesspersons. “The road to success is always under construction”, ah yes, we sure know that’s commonly spotted.
“A difficult second album” is a rarer sight, though, and Bambu Lab will want nothing to do with the oft-sighted “sophomore slump”, given that it just released its second 3D printer – the P1P.
If Bambu Lab was a band, it’s likely coming in off the back of a chart-topping album. Its X1 and X1 Carbon are hot stuff and, by all accounts, shook up the desktop 3D printing scene. Striking while the iron remains hot, it’s launching the new P1P: a pared-back and more affordable alternative to the X1 printers.
The P1P retains the X1’s potential 500 mm/s print speed, has a 300 °C-capable all-metal hot end, Wi-Fi connectivity, advanced features such as input shaping and pressure advance, and a 256 x 256 x 256 mm build volume. It’s also compatible with Bambu Lab’s automatic material system (AMS). The price for all this? $699.
Join us as we review the P1P to find out if Bambu Lab has managed to achieve consecutive chart-toppers.
Verdict
Pros
- Incredible print speeds
- Simple yet advanced bed leveling
- Ease of use features
Cons
- The control screen feels outdated
- Proprietary replacement parts
- Imperfect default print profiles
Bambu Lab has brought some reformation to the 3D printing community with its fast-printing and well-rounded CoreXY 3D printers that take a lot of the futzing off users’ shoulders. The result is 3D printers that easy to use, accessible, and immensely enjoyable to print with.
The P1P is the latest entry, a pared-back version of Bambu Lab’s X1 series machine that does away with fancier features like a touch screen and lidar sensors, as well as the enclosure, to the effect that it’s much more affordable – $699 to the X1’s $1,199.
$699 is still a considerable sum for a 256 x 256 x 256 mm 3D printer, though, but the P1P does come with premium features like a PEI-coated flex plate and auto bed leveling, alongside advanced features such as input shaping and pressure advance. As of a couple of months ago, it was also upgraded to include a chamber monitoring camera and LED light strip as standard at no extra cost, too. Plus, it is also compatible with Bambu Lab’s $349 four-color AMS unit for multicolor prints.
With default print speeds of about 250 mm/s and the potential for even faster in its “Speed” and Ludicrous modes, the P1P can produce some rapidly-produced, high-quality prints. Depending on the material, a bit of tweaking to the print settings (mainly speed) might be advised to get even cleaner-looking prints, but for everyday materials, the P1P knocks it out of the park.
Although it’s the cheapest Bambu Lab machine, the P1P feels and behaves like the complete package. You can print your own side panels for it, personalizing the machine and making it your own. If you want fast, quality prints without lots of tinkering, the P1P offers an unbeatable package for the price.

The Tech
Industrial Look
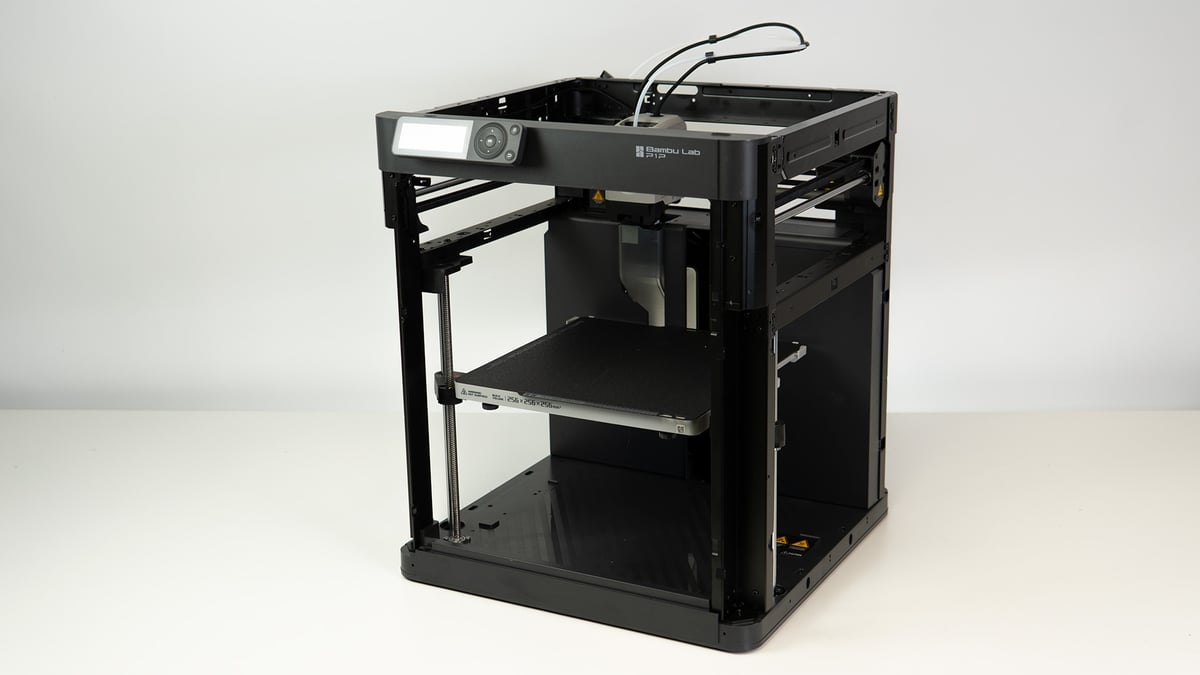
Bambu Lab’s P1P is, in many ways, a disrobed X1 series machine (the X1 and X1 Carbon are Bambu Lab’s other 3D printers). Stripped of its siblings’ flashy casings, the exposed screws and fixtures make this printer look pretty industrial. Arguably serving only a decorative purpose, paneling can be the icing on the cake that when it comes to a finished-looking product. It adds to the price, though.
Its brothers, the X1 and X1 Carbon, are fully enclosed, but they’re more expensive machines. So, in order to bring the price down, has Bambu Lab simply done away with enclosures?
No, not at all. Bambu Lab says this design is actually a feature in itself, with users able to decorate their own machines by printing their own custom cover panels and screwing them into place. Several such designs are available online from Bambu Lab, some for the sake of looking cool, some with some utility to them, such as a pegboard cover to store away your tools, and you can even design your own.
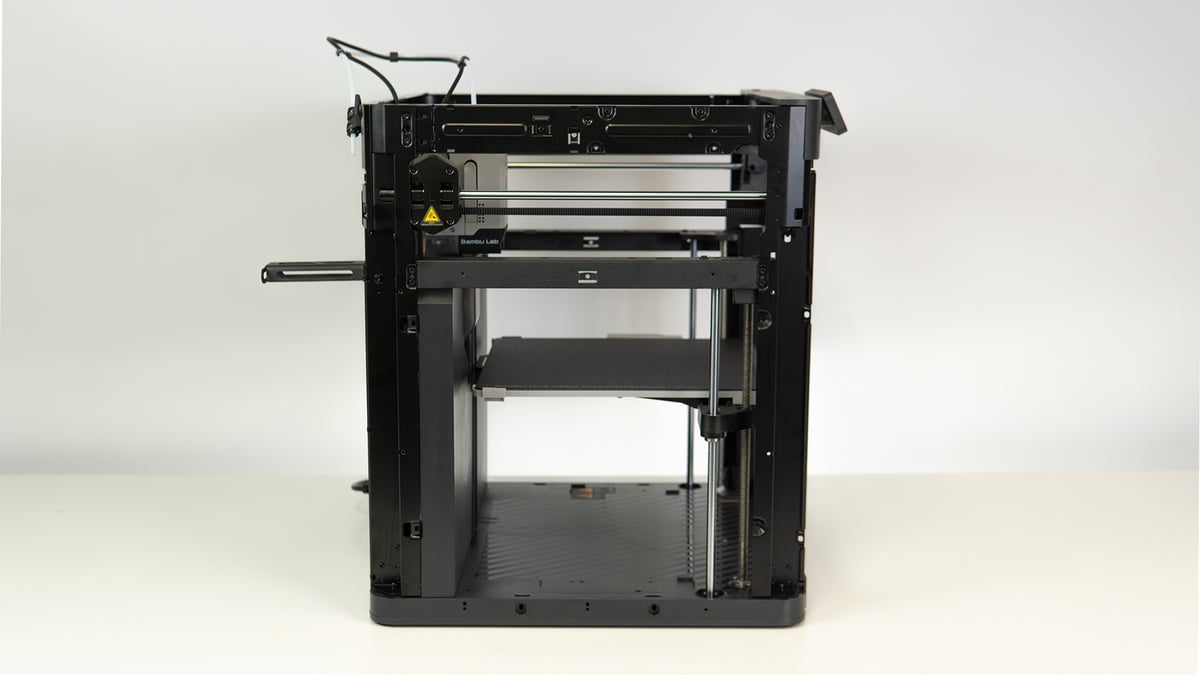
Technically, you don’t need to enclose the printer. It functions just as well without an enclosure, but to get the most out of a full range of materials and consistent printing results, an enclosed build zone is advised. Mind you, to get a fully-enclosed P1P, you’ll need a solution for a door and top cover as well.
On the other hand, this allows you to truly have an individual 3D printer with very little effort or advanced modding knowledge.
Kinematics
Underneath the absent enclosure, the P1P does not look unfinished in any shape or form. On the contrary, it comes with an impressive set of features.
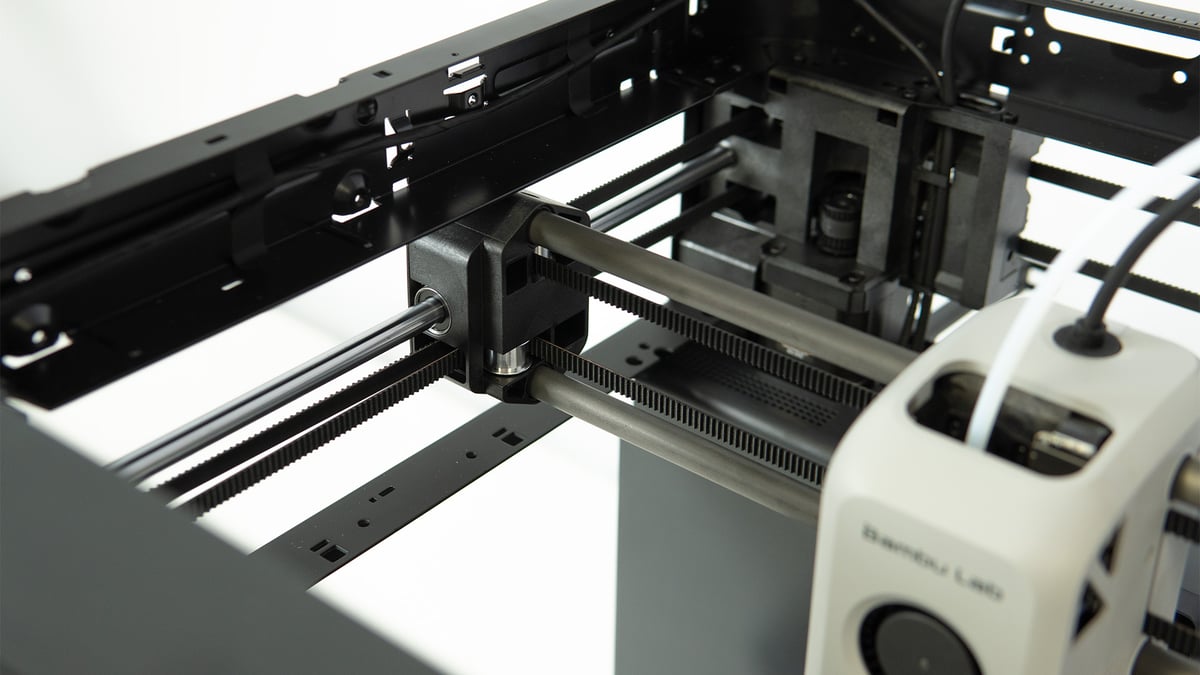
Starting with its kinematics: The P1P is a CoreXY printer, still something of a rare sight at the consumer level, which, in short, uses a combination of belts to move the X and Y axis in tandem for smoother, faster printing. The benefits of this motion system are clear. According to Bambu Lab, the P1P can print as fast as 500 mm/s. That’s twice as fast as the recently-reviewed Creality Ender 5 S1.
Like the X1 series machines, the P1P features linear rods on the Z- and Y-axes, as well as a carbon rod on the X for the stability and smooth movement that is essential to the fast printing speeds this machine can perform at.
Bed & Bed suspension
The P1P’s bed only moves up and down, rather than back and forth, resulting in less inertia on the print and faster printing speeds. The potential downside to this layout is flimsiness in the bed, as it’s essentially being suspended in mid-air.
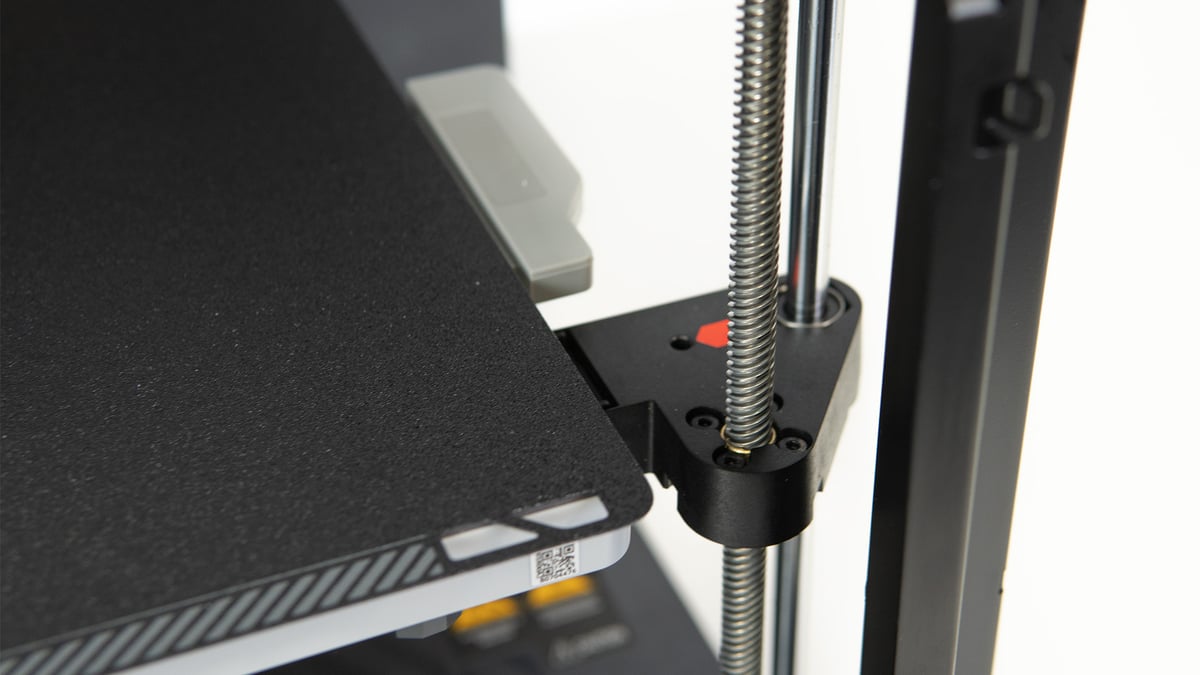
To counter any lack of rigidity, the P1P comes with a three-point suspended print bed with triple Z-axis lead screws and linear rods, Two in the front, one in the back. It leaves you convinced of its stability, and feels far superior to simply having the bed suspended only at the back.
The bed itself is an uncommon size, with 256 x 256 mm, which is partnered by the identical Z-axis height (256 mm). The bed itself is made up of a double-sided PEI-coated flex plate padded with the bed’s heating that allows for 100 °C on the thermostat – 10 °C cooler than the X1’s heated bed, why that is we can’t tell you though.
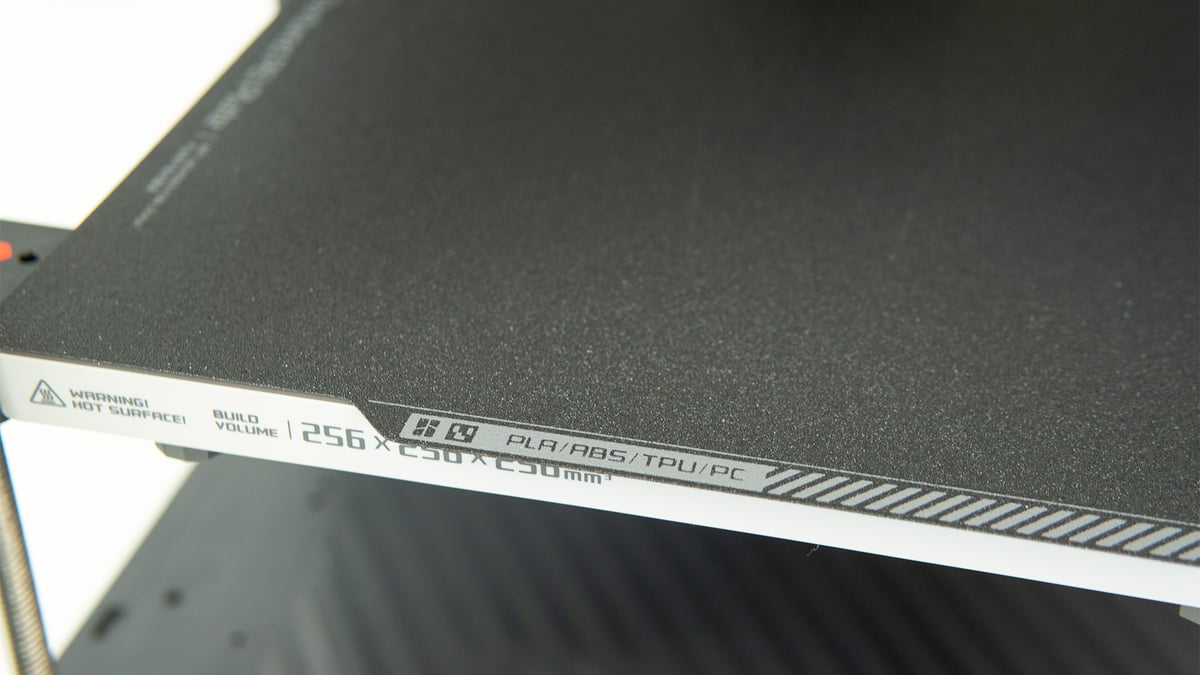
Having tested its thermal equilibrium, the P1P does fall a bit short on consistency, with the plate dropping off slightly at its fringes and not quite reaching the set temperature, but nevertheless providing prime adhesion without the need for adhesives – something the X1 can’t quite ascribe to. Who said the P1P is all downgrade?
Printhead
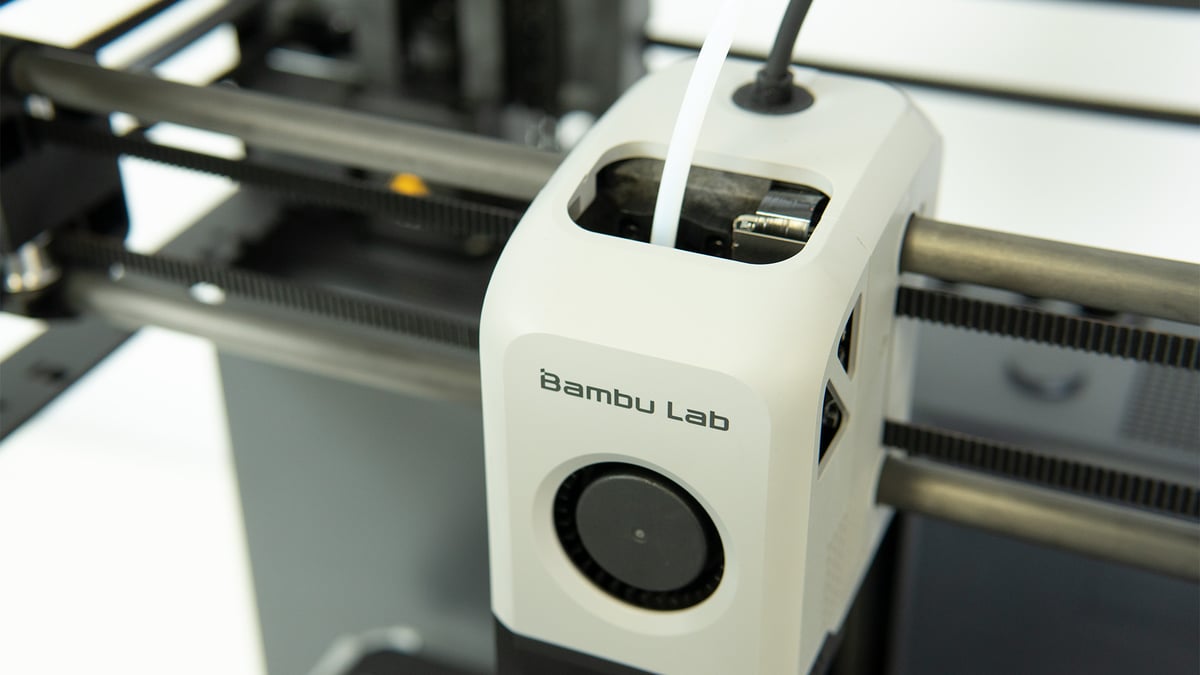
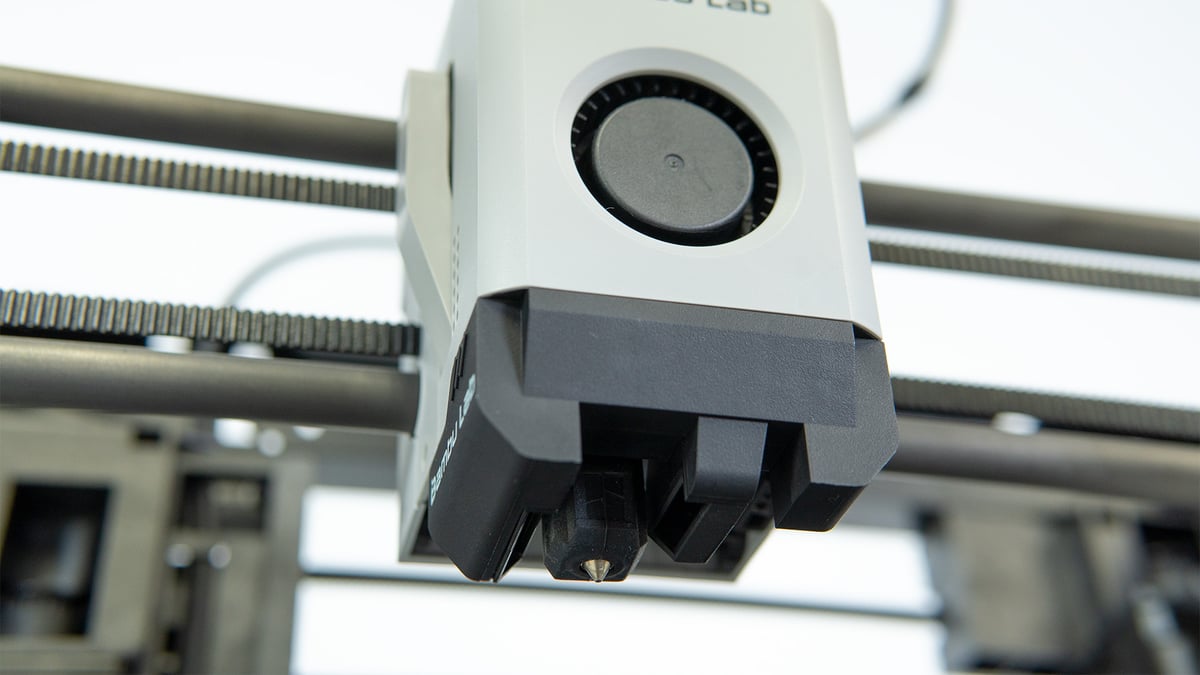
Not much differs for the print head, though, it is essentially the same setup as on the X1 series offerings – an all-metal hot end with a maximum printing temperature of 300 °C, fed by a direct extruder system slammed on top. Being all-metal and capable of sizzling temps, the P1P is cut out for more than just your everyday filaments and can dance with the more complex filaments like nylon and polycarbonates. You’d think that more abrasive materials, such as carbon-fiber-reinforced materials, are also on the menu, given its stainless steel nozzle, but you will really need to upgrade to a hardened steel nozzle first.
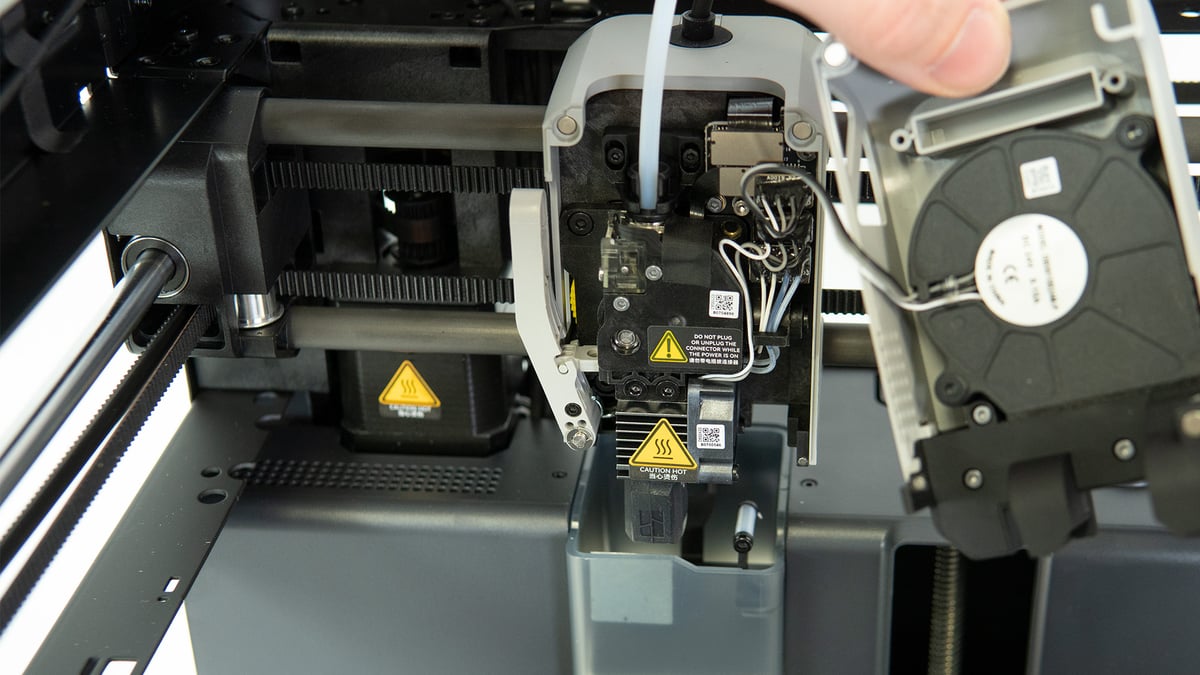
We say nozzle, but really it is the entire hot end that needs replacing – the nozzle is not replaceable. That’s not something most 3D printing tinkerers like to hear, especially if you just want to swap to a different size of nozzle, but this is due to the automatic leveling system the P1P uses. Handily, replacements and spare parts are reasonably priced at $10 -$20 a pop, and switching out the part in the printhead is easy thanks to the magnetic removable fan cover. This is by far one of the most accessible printheads we’ve come across over the years.
Rumble Pack
A closer look at the build plate reveals no leveling nuts. The P1P features automatic bed leveling, and when leveling, runs a dramatic procedure we’ve not encountered before. It’s a symphony of tapping and rumbling accompanied by a crescendo you wouldn’t necessarily attest to a leveling process but rather to the likes of a tumbling washing machine.
Unlike most leveling procedures where the printhead travels along the bed to probe multiple points, the P1P also runs a feature called active vibration compensation. The name says it all. Essentially the printer will shake to calibrate the vibrations and compensate for them during printing.
After shaking it up, the actual multipoint bed leveling takes place by means of repeated contact between the nozzle and the print bed. The Z offset is also automatically adjusted at the same time. This is interrupted again by the print head vibrating at different positions. The whole procedure takes about 6-7 minutes and the P1P will run it by default before every print. Once dialed in, you can also deselect the option though. It might come across as a bit excessive, but the results prove it right. First layers are clean, and prints generally come out great, given the blisteringly fast speeds and the accompanying vibrations.
UI
Truth be told, It’s been a while since we last saw a 2.7-inch monochrome display on a printer. If you haven’t gotten early-2000s MP3 player vibes from the P1P’s 192 x 64 pixels packing nugget, you didn’t live to see it.
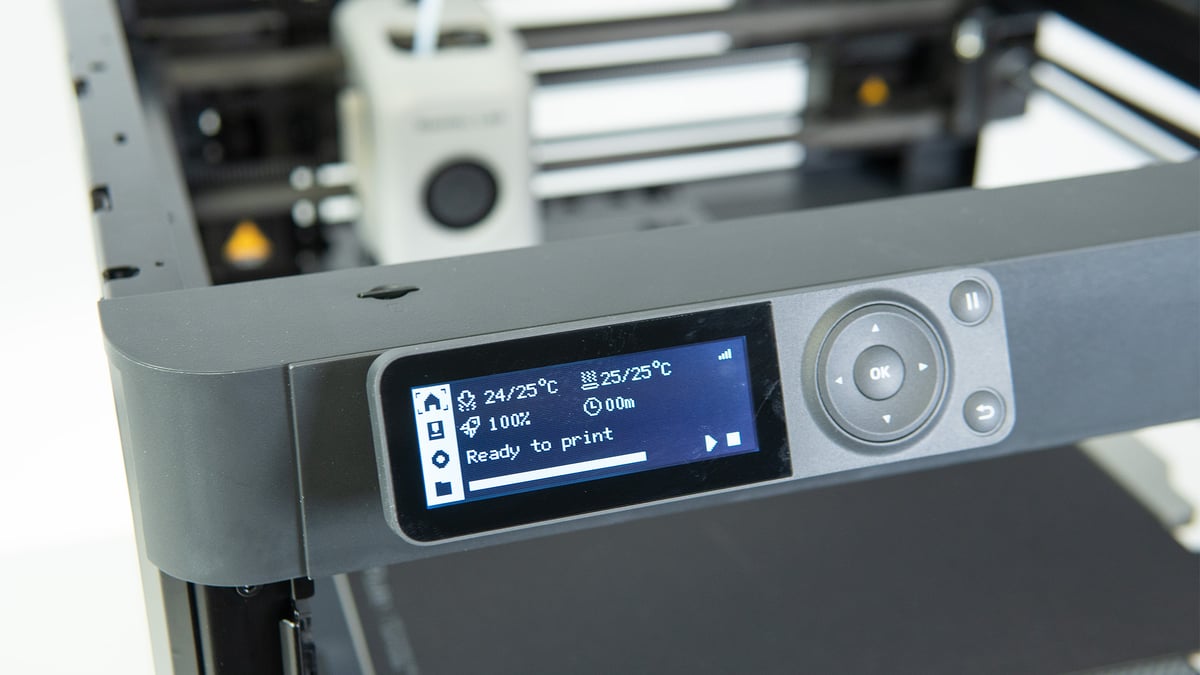
Navigation feels a bit cumbersome using the click wheel, and due to its small screen, you will have to make do with pictograms for most functions. In its defense, you will probably not make use of the screen all that much, as you can comfortably access most functions remotely via the slicer, but a few quirks remain. For one, while you can tell the printer to auto-unload filament, feeding it has to be done manually. For a sophisticated machine like the P1P, this feels like an easy miss. On the plus side, you don’t have to enter your Wi-Fi password via the click wheel – a QR Code and your mobile app will take care of it.
All in all, the UI certainly comes across as old hat, but the functionality is all there.
X1 Differences & Upgrades
There are a few potential upgrades available for the P1P, the most noticeable being the aforementioned enclosure, which you can print for yourself.
Other upgrades can be additionally purchased (or can be part of the deluxe pre-order package), such as an LED lighting strip for the build space or a 720p camera to monitor your prints. It’s not quite as detailed as the X1’s, but it should do the job just fine. There is also an additional, large, auxiliary part cooling fan available.
Features that are not compatible include the X1’s lidar sensor, which is used in the leveling process and to set the pressure advanced setting individually for every material. The P1P does feature pressure advance but uses preset numbers for it instead. On the other hand, this allows the P1P to use a PEI-coated print bed and not need a glue stick to adhere prints, as the sensor does apparently not work on the rough surface.
Also, the large and colorful touchscreen the X1 boasts is not compatible with the P1P, so you are left with the somewhat meager MP3 player-like display. You can hook up the Automatic Material System (AMS) to the P1P though, which allows you to print multi-material and color prints with up to four different spools. Check out the updates for this review for our experiences using the AMS with the P1P.

Printing & Usability
Unboxing and Setting it Up
On a normal day, assembling a 3D printer requires screwing parts together. For the P1P, it is actually the opposite – you’ll be unscrewing a few screws, as well as a few other little tasks.
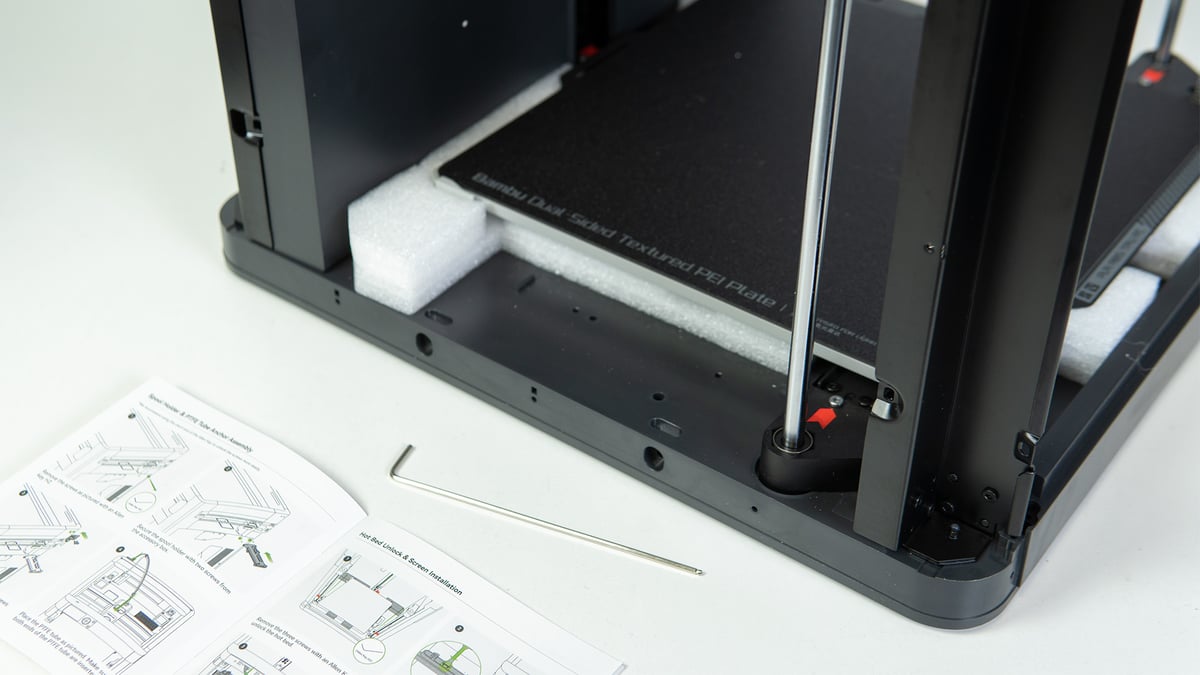
The P1P comes fully assembled and only really requires freeing from its transport locks, mostly comprising of three screws that keep the build plate secure during transport, some styrofoam, and a couple of cable binders. Really the only thing that needs putting together is the spool holder, the filament guide, and the control screen, which neatly snaps into place. Assembling a printer is hardly ever this easy and straightforward. Give it 20 minutes, and you’ll be ready to go.
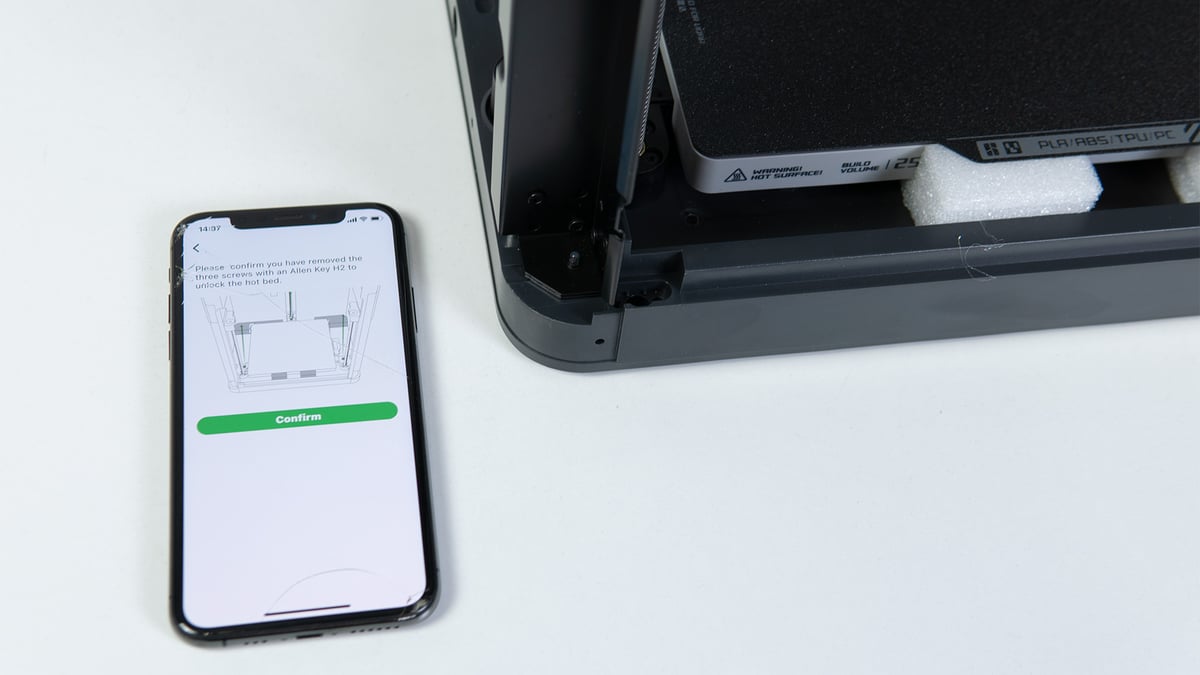
When first powering the printer, you will have to confirm a set of foolproof reminders that ensure everything is free to move. With that out the way, you can whip out your smartphone to scan the displayed QR code and connect your printer to your local network. Yes, you will need a smartphone to get the P1P started, although this shouldn’t pose too much of a hindrance these days. Once connected, the printer will run a set of self-diagnoses, checking that everything is properly connected and ready to go.
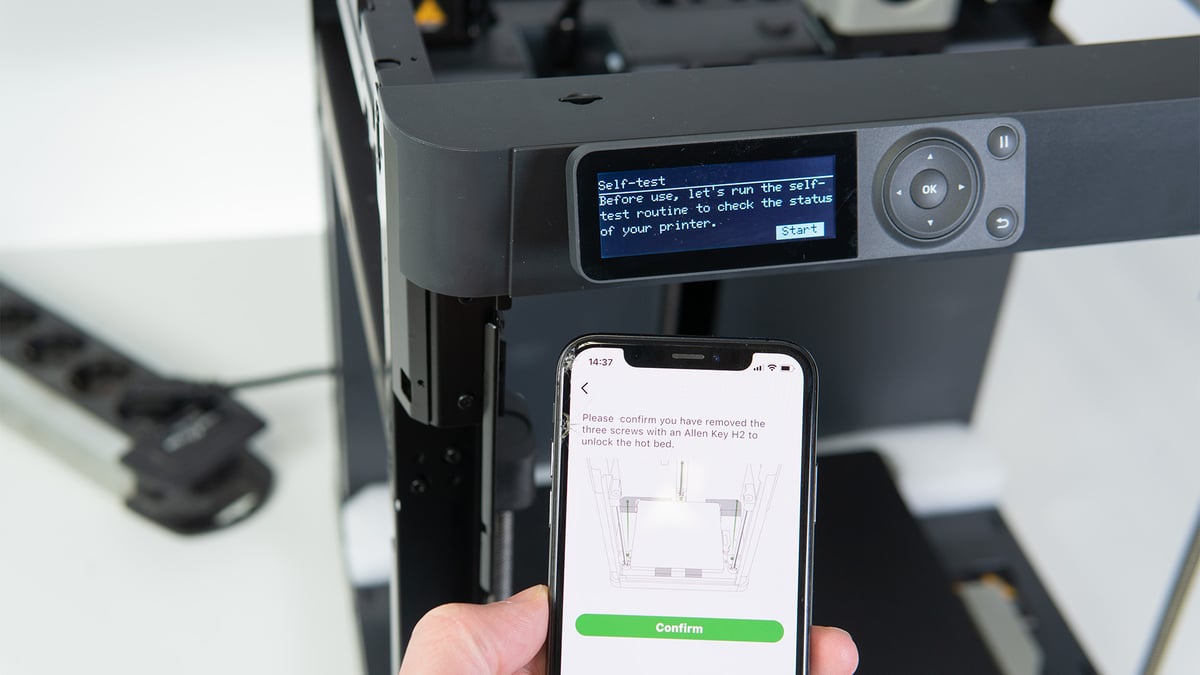
Now, don’t pull the plug in panic when your P1P starts to shake, rattle, and roll. The print bed and printhead will move into different positions and vibrate at different frequencies. Behind this noisy display is Bambu Lab’s automatic vibration compensation – also referred to as input shaping – to reduce ringing and ghosting in prints.
Once the crosscheck is completed, you are good to start. The printer comes with about half a dozen sliced prints on its MicroSD card, and you can fire one up right away. You will also find 3D printable parts for the add-ons, such as a LED bar housing, the auxiliary part cooling fan support, or even the holder for the AMS.
Besides a test print or two, you most likely won’t be using the MicroSD card much, though. Sending prints and monitoring them via Wi-Fi is the future, and the P1P is making use of it.
Bambu Lab Slicer
You’ve already hooked up your phone to your printer, which lets you monitor basic print settings, get notifications when prints are completed, as well access the camera view, should you have bought and installed it. Actual slicing of prints and sending them via the mobile app is not available though. For this, you need Bambu Lab’s slicing software, Bambu Studio.
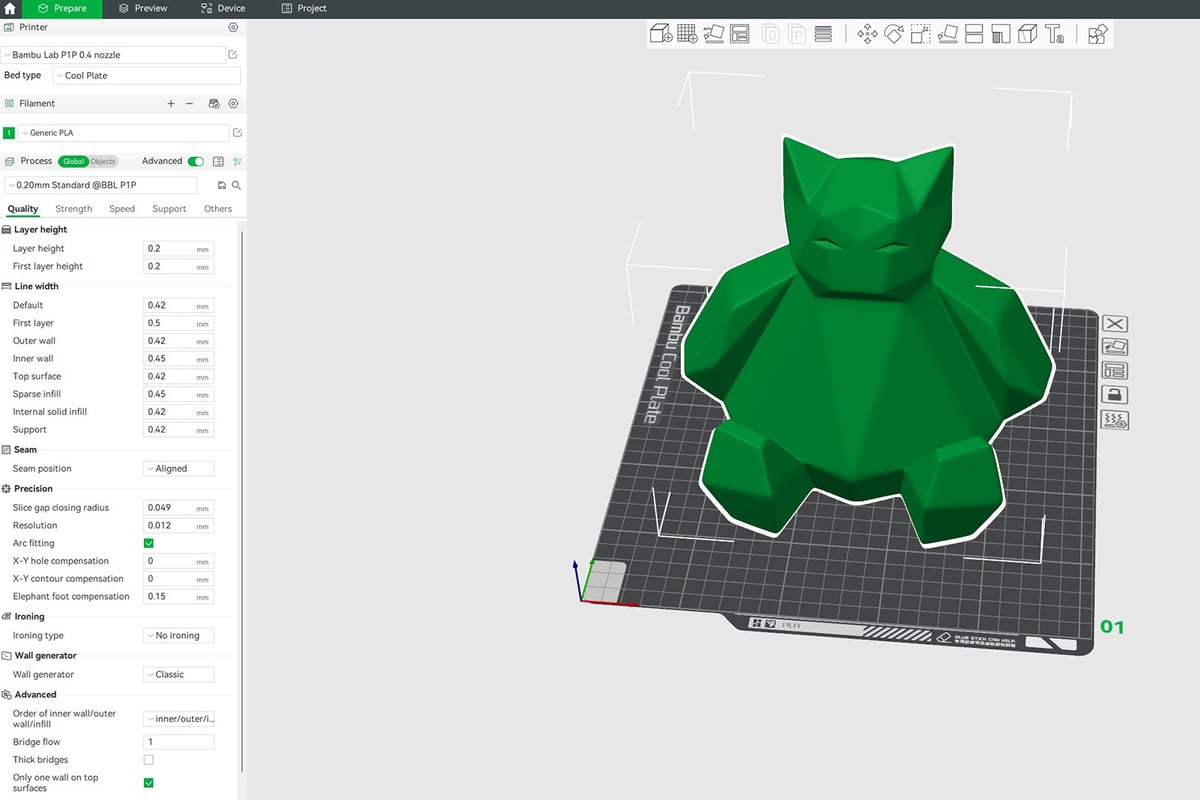
Simply log into your newly created account, and as long as you’re on the same network, the slicer will automatically connect to your printer. Bambu Lab has delivered pretty impressive software based on PrusaSlicer. Featuring all the bells and whistles, Bambu Studio is easy to navigate while offering all the tools needed for preparing prints. Whether newcomers or seasoned 3D printing veterans, Bambu Studio should cater to all.
Bambu Lab also has an extensive wiki to assist you with queries. If the printer does run into any problems, it issues an error code on the printer’s screen, as well as your mobile. The wiki should help you identify and fix the problem, often with quick video tutorials. Very neat, as you don’t have to browse countless subreddits to find a solution to your problem. If all else fails, there is always Bambu support to contact directly as well.
Purging and Printing
While unboxing, you might have noticed a strange little chute at the back of the machine, and if you’re wondering what that might be for, you will find out upon starting your first print.
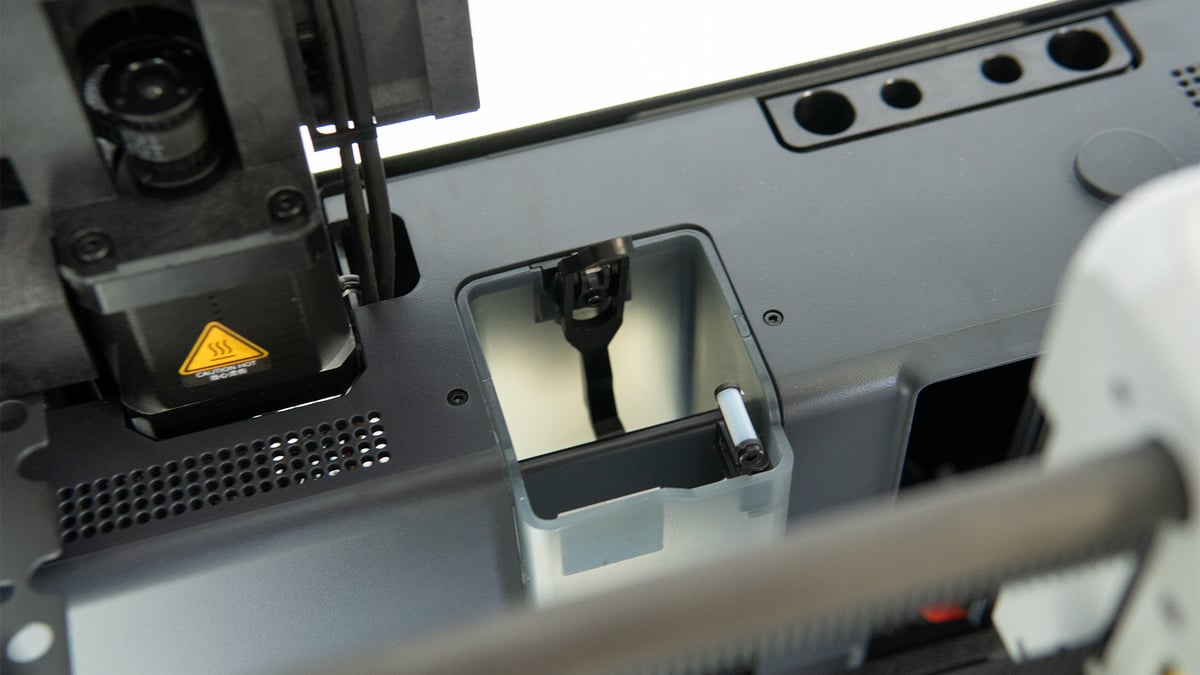
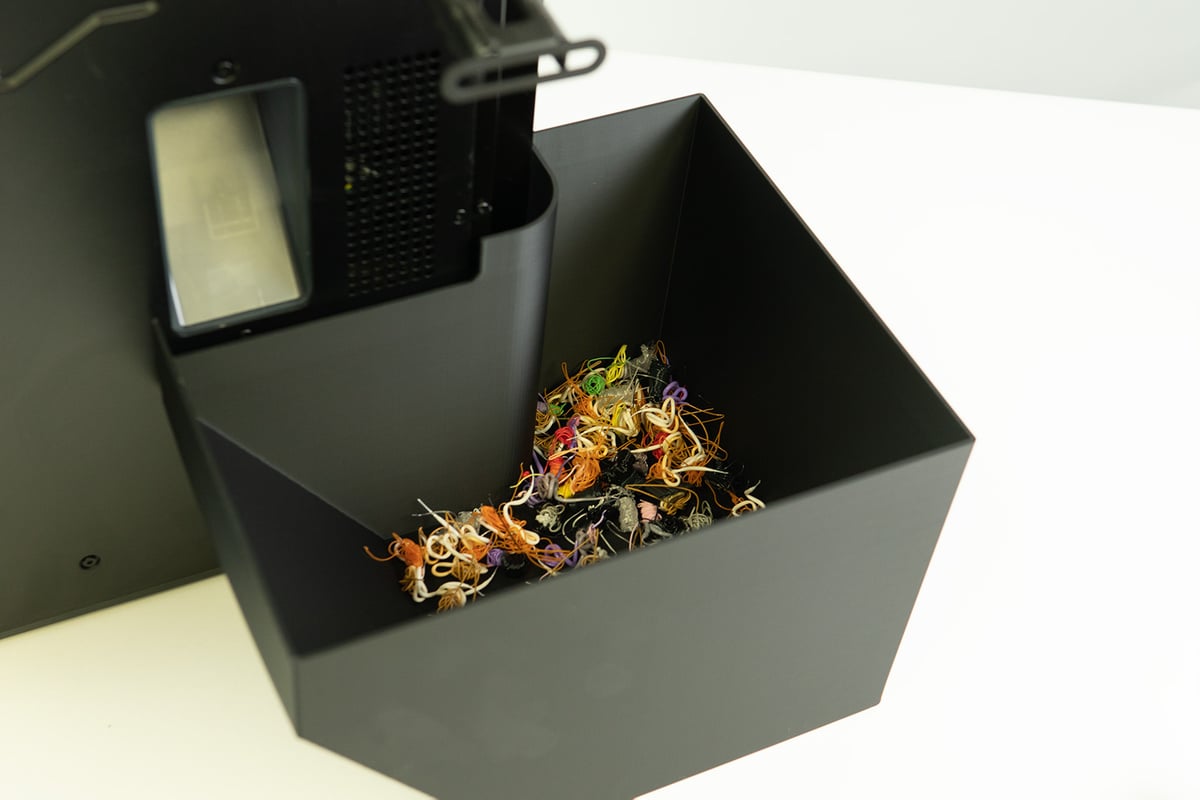
Instead of leaving a pile on your print bed, the P1P purges some filament down the chute before cleaning the nozzle via a brush. The idea behind it is to do away with purging towers for multi-material prints with the AMS, but even without it, the P1P drops a little heap before every print. A very neat solution, albeit a messy one. While this does make sure the right filament is extruded after a filament change, it also adds up to quite a bit of waste, accumulating behind the printer. Not nearly as much as with the AMS, though. Expect your printer to drown in filament piles with that add-on.
Bambu Lab is keen to point out that the P1P can print at claimed speeds of up to 500 mm/s . In reality though, print speeds float somewhere around the 200 to 300 mm/s mark, depending if its outer walls, infill, and anything in between. In any case, that’s still about three to four times the speed of your everyday Cartesian 3D printer, without a significant quality loss. On the contrary, print details do come out crisp.
This sees Benchys being produced at just over 17 minutes, around four to five times faster than your everyday bed slinger – and we haven’t even got to the P1P’s “Sport” or “Ludicrous” modes yet. You heard right, just like a Tesla, the P1P has different preset speed settings for you to power up with. Besides its standard mode, the printer also comes with a “Silent” mode (50% speed), as well as the “Sport” mode (124%) and “Ludicrous” mode, which sees print speeds increase by 166%. Not quite up there with the 500 mm/s, but ever so close.
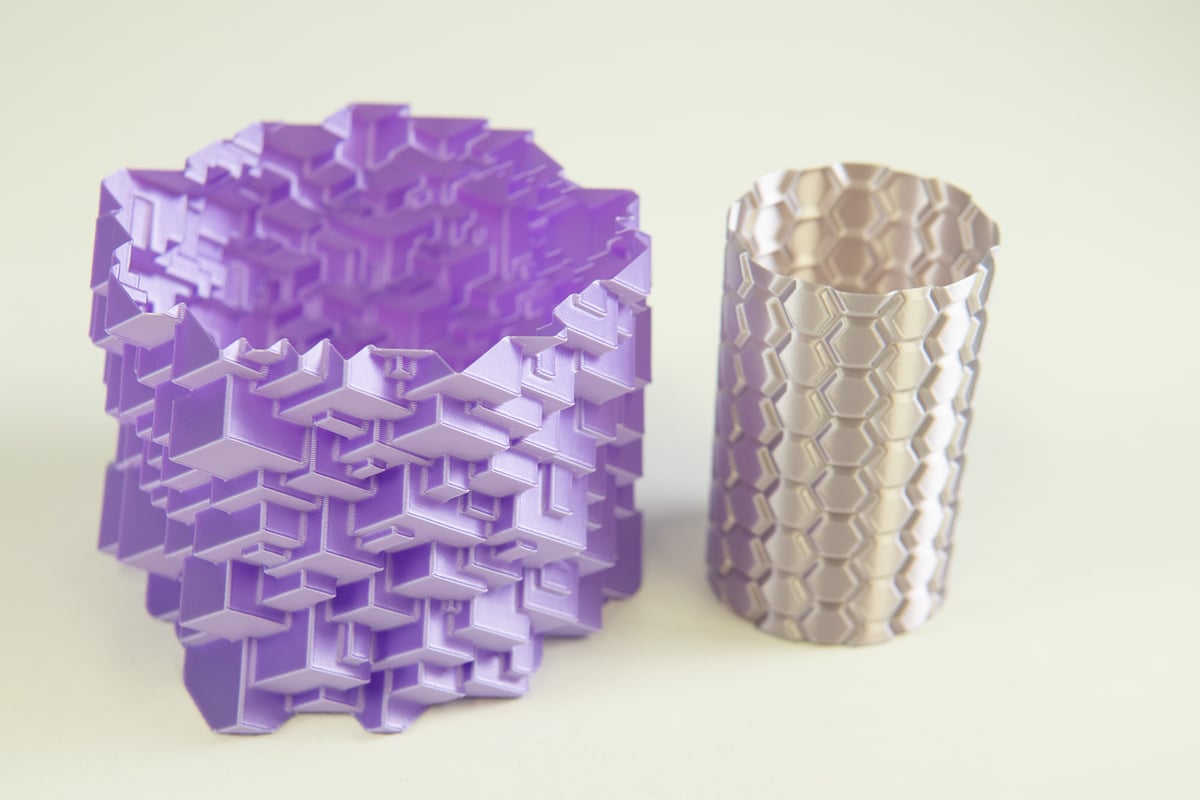
The part cooling on the P1P is excellent, even without the additional cooling fan, and overhangs and details come out great. We’ve pulled off some impressive prints in Ludicrous mode. When printing at those high speeds, we did end up using a glue stick for extra adhesiveness, though, since we encountered some prints rattling free from all the back and forth, especially those with a small footprint.
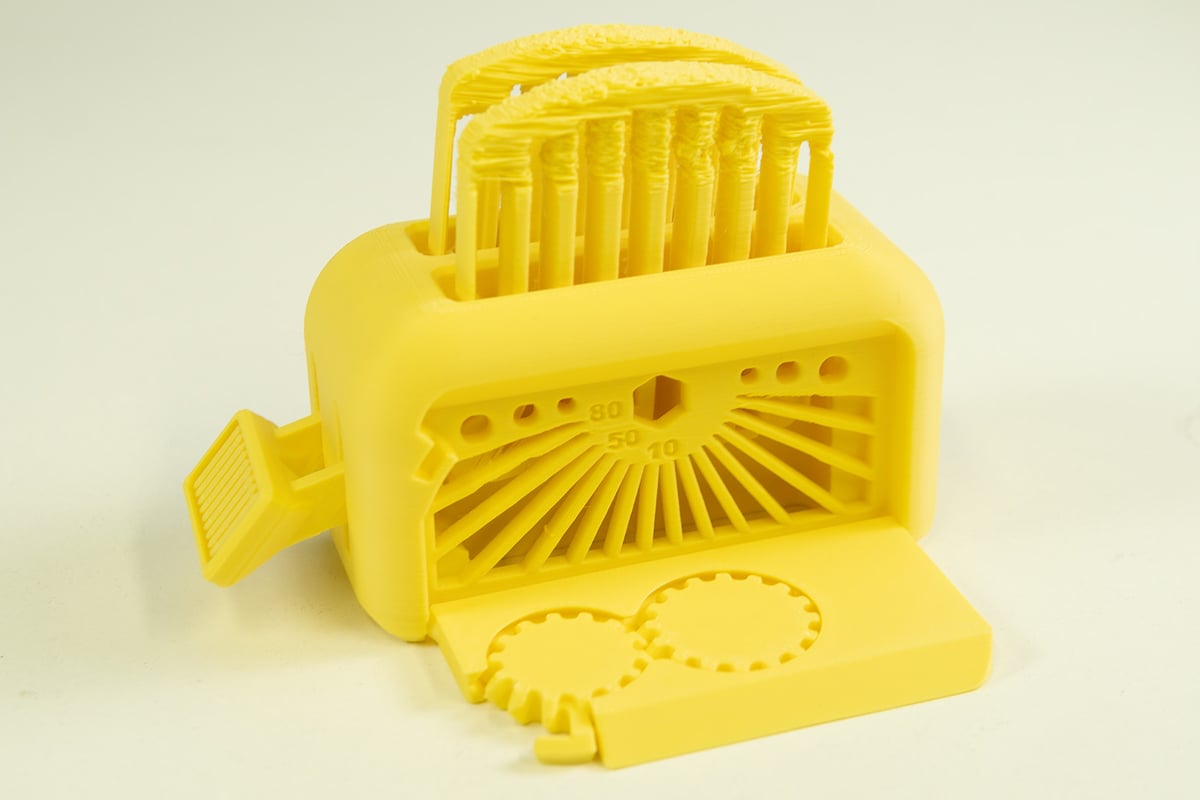
Thanks to its high-temp capabilities, the palette of filaments that can be printed with the P1P adds up to quite a list. It would be grand if Bambu Lab had actually provided different speed settings for different materials. The provided filament profiles in the slicer all print at the same speeds. We get it; the P1P can print fast. Nevertheless, you will get better results when you play around with the settings a bit, at least when it comes to more sensitive materials such as ABS, PC, and others.
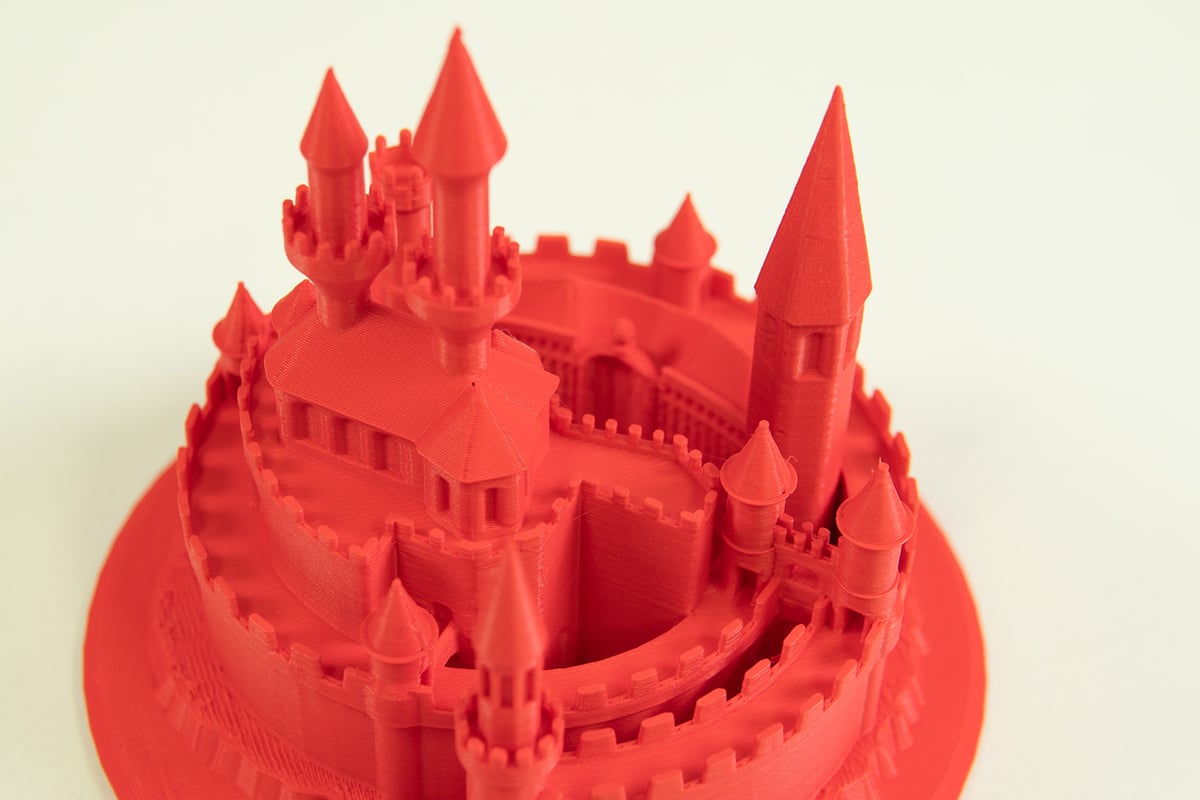
That being said, print results of everyday filaments such as PLA or PETG are above and beyond what you expect from the budget printers we see rotate in and out of our print lab so often. Despite its speed, ringing, detail loss, or stringing are not an issue, not least thanks to its input shaping and pressure advance settings. This allows for clean details even at high speeds.

Is It Worth It?
The Bambu Lab P1P is fast – and we mean fast – 3D printer, although its claimed print speeds of 500 mm/s most likely won’t be anyone’s cruising speed. Nevertheless, printing at an average print speed of 200 – 300 mm/s while achieving crisp details is enough of a feat on its own.
Current, off-the-shelf, 3D printers clocking in similar speeds are the Flsun V400 and Creality’s Ender 5 S1, both of which fall short on the default print quality of the P1P, though. Not least because of the P1P’s superb bed leveling and other ease-of-use perks. Thanks to “pro” features such as vibration compensation and pressure advance, the printer produces clean prints with minimal tinkering at high speeds.
Pair that with the capable, well-rounded Bambu Studio slicer and its accompanying mobile app, plus probably the best Wi-Fi experience we’ve had to date on a stock 3D printer, and you’ve got yourself a highly-advanced yet beginner-friendly 3D printer that is outright oozing with accessibility. Get it, unpack it, print with it – really, anyone can get great results from this printer in next to no time at all.
Yes, there are some downsides to it, such as the LCD screen being 20 years out of date and with convoluted operation, as well as the lack of an enclosure. The latter makes printing challenging materials that the P1P is generally set up to handle thanks to its 300 °C hot end, rather difficult. Also, the default identical speed settings aren’t always the best recommendations.
Nevertheless, for its price, currently $699, the Bambu Lab P1P outshines and, in large parts, outclasses other 3D printers in its price range. Anyone looking for a 3D printer that produces great prints with very little fine-tuning will get great joy out of the P1P.
That being said, if your budget allows for it, we would still recommend getting the X1 Carbon. For the P1P, you pay about $400 less, but you give up the lidar sensor, the enclosure alongside a glass top, the large touchscreen, and other features, such as the high-quality camera. While these are all features the P1P works great without, an even smoother printing experience and better handling of temperature-sensitive materials, await those stepping up to the X1 Carbon.
On the other hand, if you just plan to print PLA, PETG, and others, you can’t go wrong with the P1P as it is still far advanced from the competition in its price range.

Update – Software and Side Panels
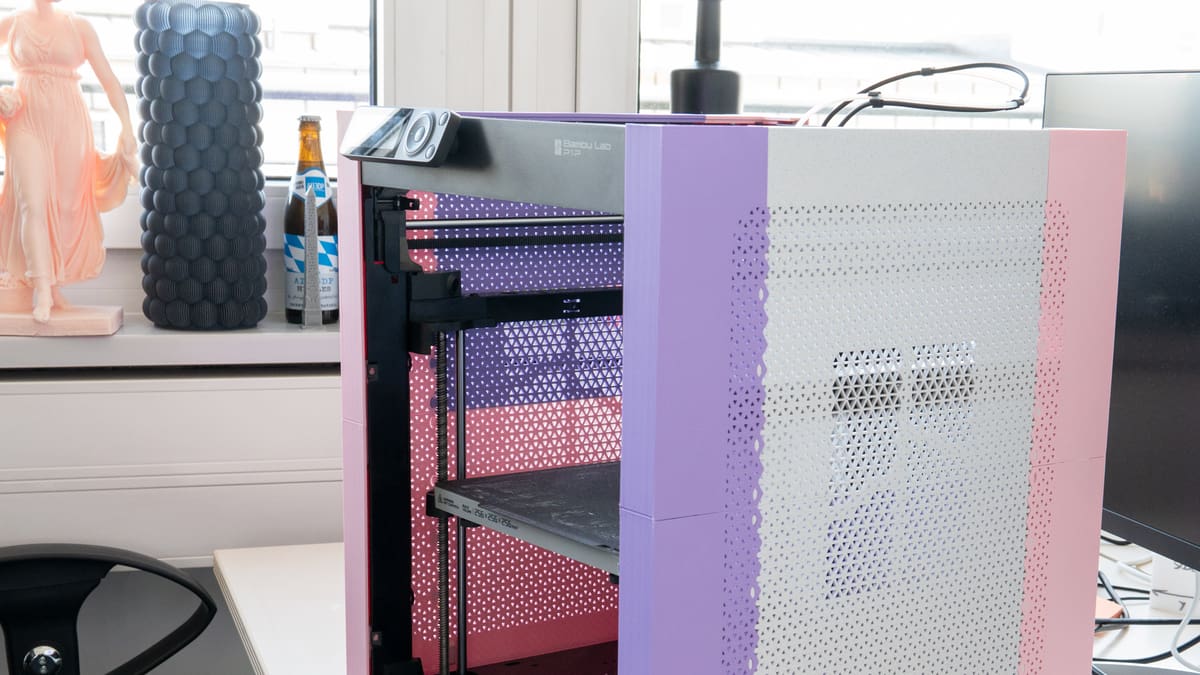
February 17, 2023 – Matt Mensley | One observation of the P1P during our initial review was that it was, in many ways, a disrobed Bambu Lab X1. Not a criticism but a shruggable statement of fact. It has no sides.
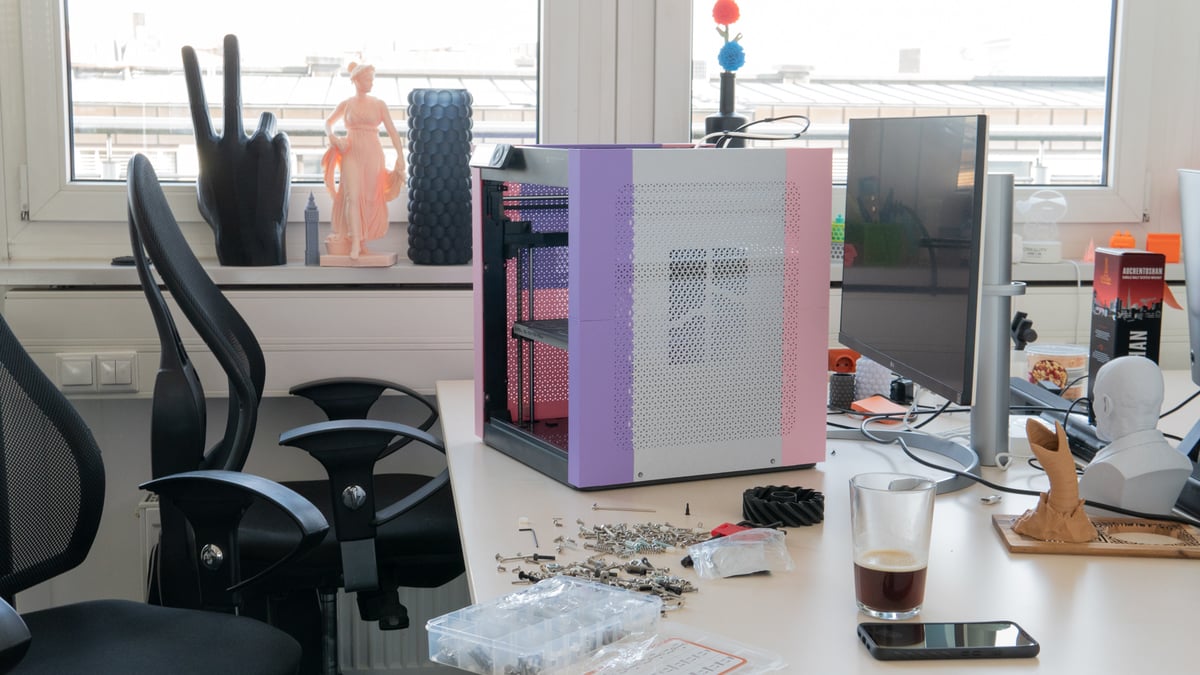
Fortunately for 3D printerers of great restlessness, Bambu Lab provides printable files for you to “fix” this. Boosting the idea of the P1P as your personal printer (emphasis on the “P”), the company gives you the tools to customize your P1P in various ways using self-printable fascia panels.
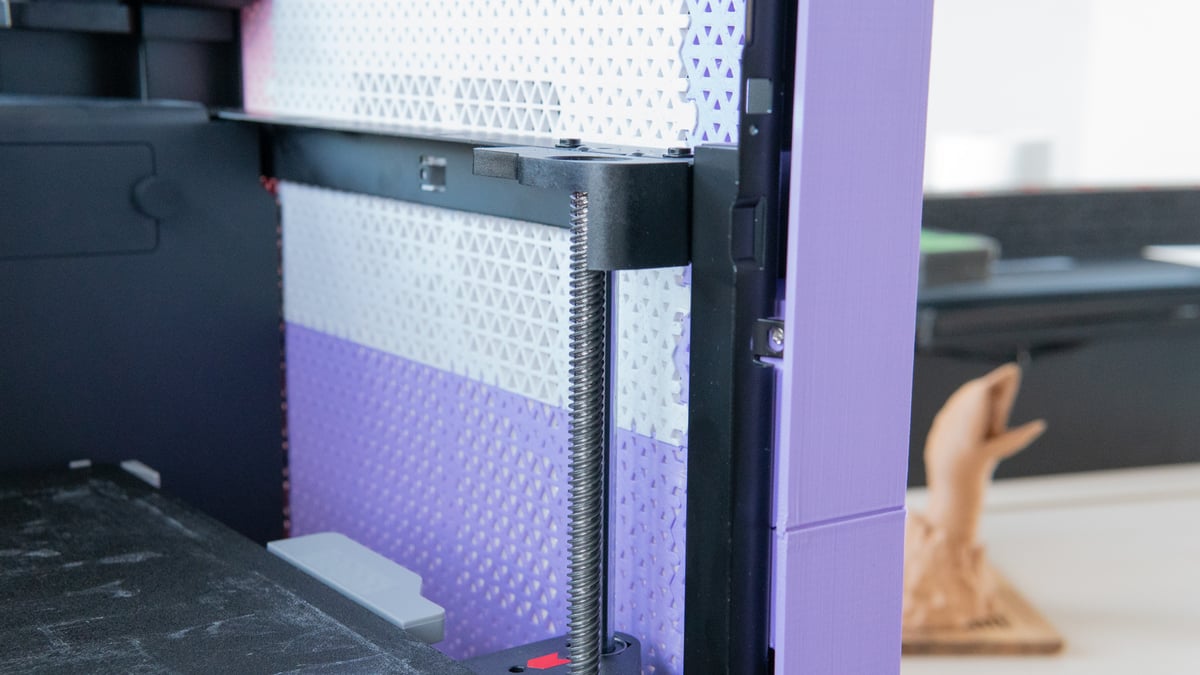
They are a tessellation-looking art triangle panel with no function other than aesthetic, a pegboard number that adds tool-hanging wall space to the sides of your machine, an “armor” style, which has a bit of a Pelican-Case-techno-lunchbox vibe to it, and finally, a pixel-style artboard that you can take as one of two premade styles or customize entirely yourself.
For brevity’s sake, we’ve gone for the art panel in a fetching Sakura Pink PolyTerra PLA, plus whatever else was lying around spare in our print lab. (Printing in your filament of choice gives limitless control over the look of your P1P.)
Being a print of many parts, Bambu Lab Studio takes full advantage of its native compatibility with the 3mf file type, with your project of multiple prints condensed into a single file containing all print plates generated for a job. You can prepare everything at once and have all parts, confined to their own print plates, available for recall from Bambu Studio’s overview’s “Prepare” tab. Alternatively, you can jump between plates in the Preview tab, meaning the other components of a print are never far away. This is a big usability boost over PrusaSlicer’s Photoshop-layers-like project tab. It is a much cleaner way to work with large batches of files.
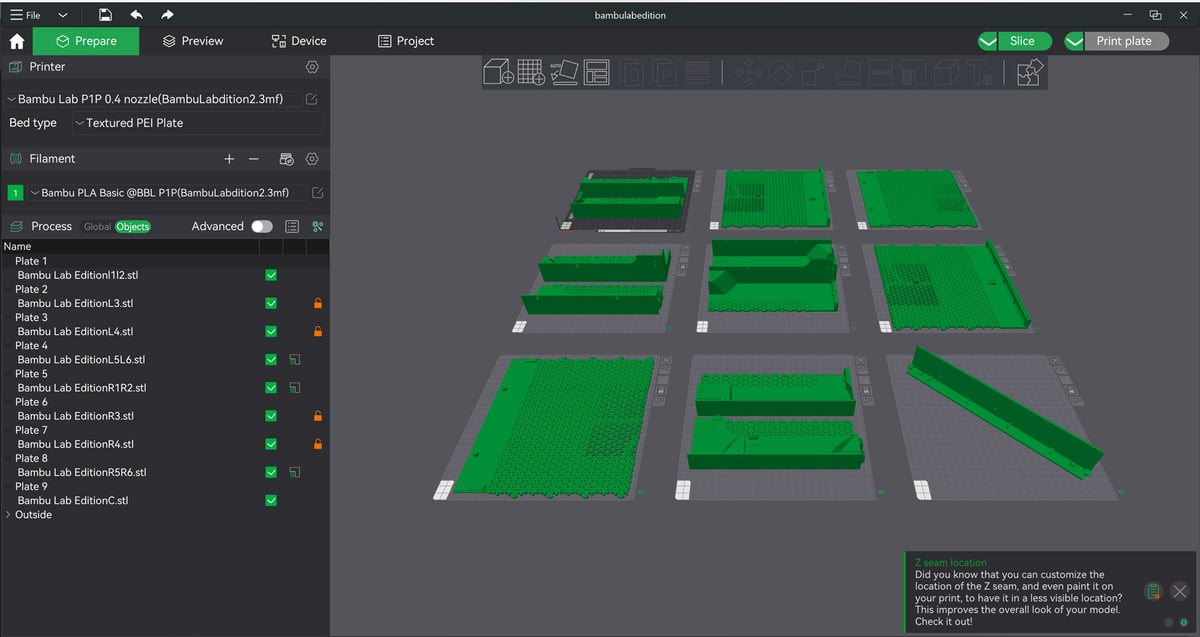
The convenience of this can’t be understated. Project work involving many, many prints with the P1P is sublimely simple. You only have one save file, but all parts with individualized print settings are neatly organized. Once you’ve filled a print bed and customized your print settings, just hit “Add New Plate,” and your existing plate with scooch out of the way for an empty bed ready to load up with other prints.
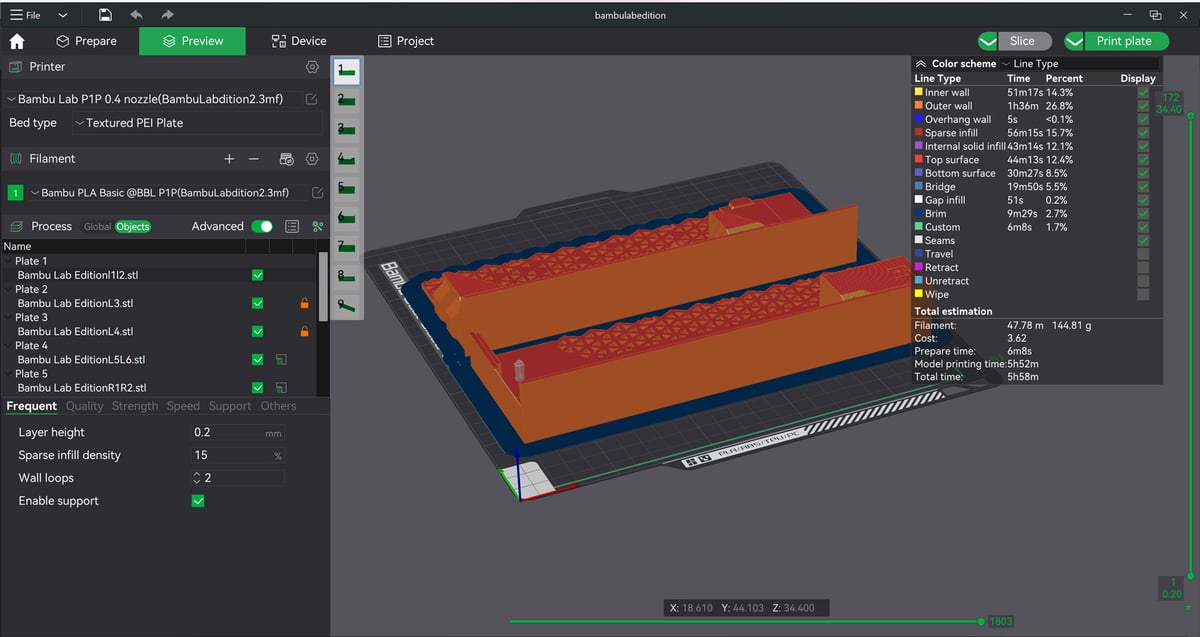
It’s not something we explored too deeply in our review, but having spent more time working with the P1P, it’s clear that a primary strength of the system is the software. Wi-Fi connectivity with simple multi-print management is one thing that emphasizes the value of Bambu Lab’s offerings, especially the relatively affordable P1P. You’d expect fancier software of $1,000+ systems, but something around the $600 mark with such conveniences is wild.

Update – Multi-Color & Multi-Material with AMS
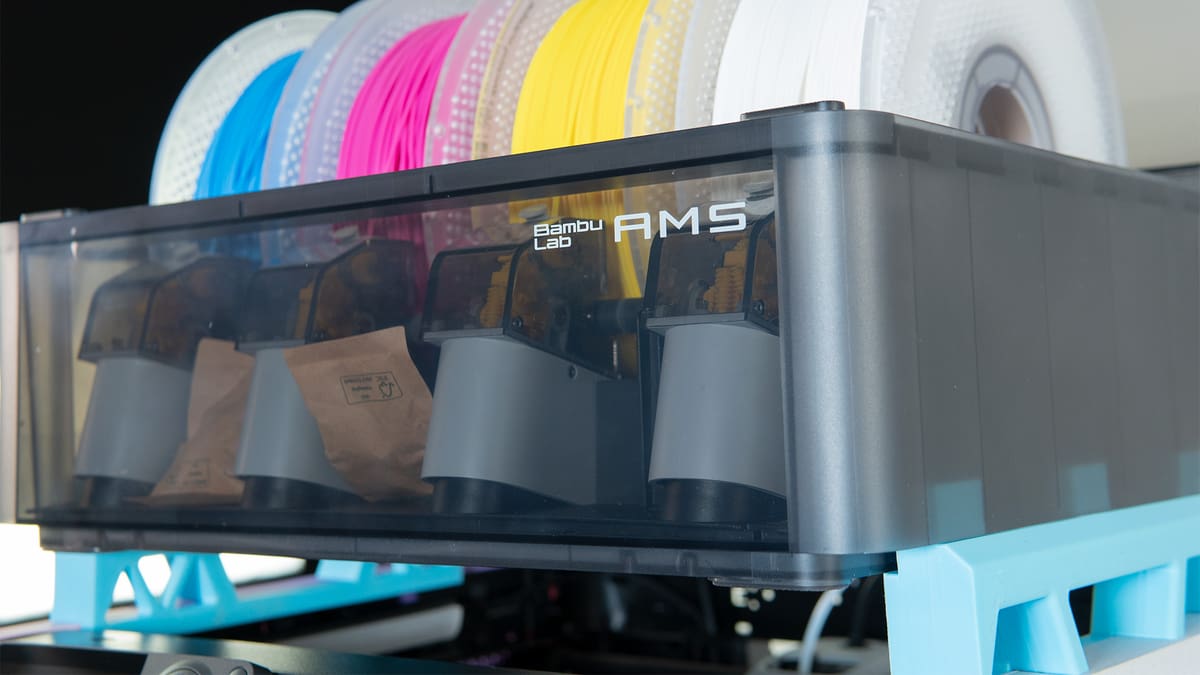
May 25, 2023 – Matt Mensley | One of the priming factors in Bambu Lab’s breakout 3D printers’ success was the Automatic Material Station (AMS). It’s a plug-and-play device that sits on or near the printer and feeds one of four spools of filament from its four material bays for multi-color or multi-material printing.
A relatively inexpensive addition to the company’s machines, this multi-material unit seamlessly boosts the possibilities of that system without a hit on print quality or print speed.
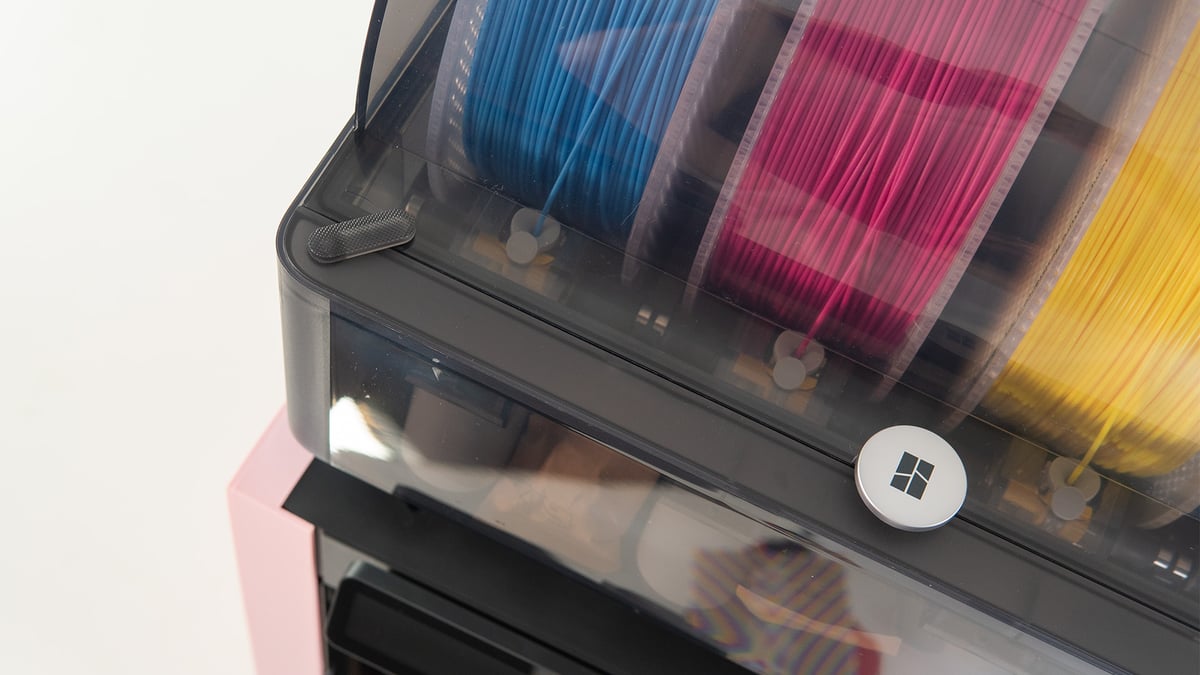
The AMS is also natively compatible across the company’s whole range of printers thus far, including the Bambu Lab P1P, making for a speedy, personalizable, multi-material printer for less than $1,000.
So, we’ve ripped the AMS off our X1 Carbon setup, printed the nifty Bambu Lab-designed brackets, and perched it all atop our pastel-hued P1P for some multi-material testing. And the results are great.
Setup
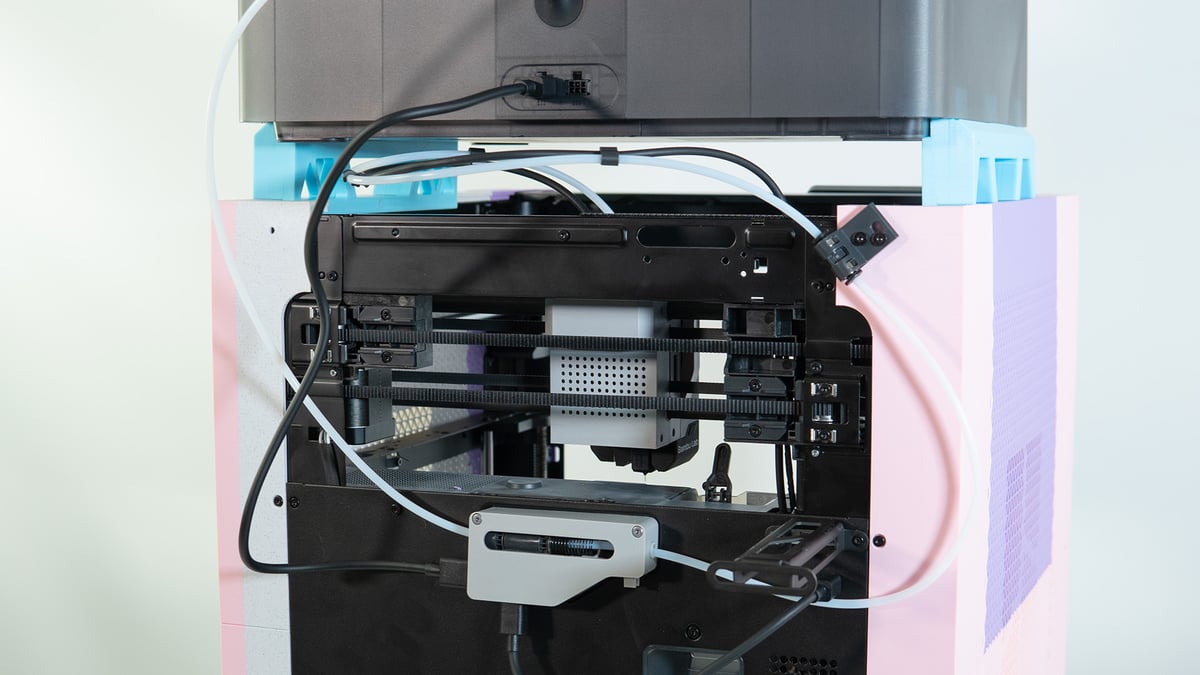
Porting the AMS to the P1P is a simple matter of finding a place to put it (Bambu Lab provides the files for a printer-top stand, but you can put it anywhere its PTFE guide tube allows), and mounting the filament buffer unit to the back of the printer. Connect the P1P’s filament guide tube to the buffer, plug its cable into the dedicated port on the back of the machine, and you’re good to go. The printer recognizes the device and, over in the Bambu Studio software, the AMS is detected. If using Bambu Lab’s chipped filament spools, it will automatically fill in the filament available to you, too.
That is, effectively, it. We’ve found the AMS to offer a seamless experience with the P1P, integrating naturally and intuitively into the general experience of using the printer.
The device is tidy, with a closed box offering some moisture protection for filaments thanks to protected recesses for moisture-wicking desiccant. A humidity sensor relays the conditions inside the AMS to Bambu Studio, indicating whether you need to refresh things or your filament is at risk.
Each of the four roller bays has an independent feeder mechanism, which can be individually replaced should it fail. It’s recommended not to run filaments with cardboard spools in the AMS in case the cardboard wears and the dust generated makes its way into the mechanisms. That’s not to say that cardboard spools don’t work – they do – but you may be shortening the lifespan and reliability of the machine doing so.
Printing
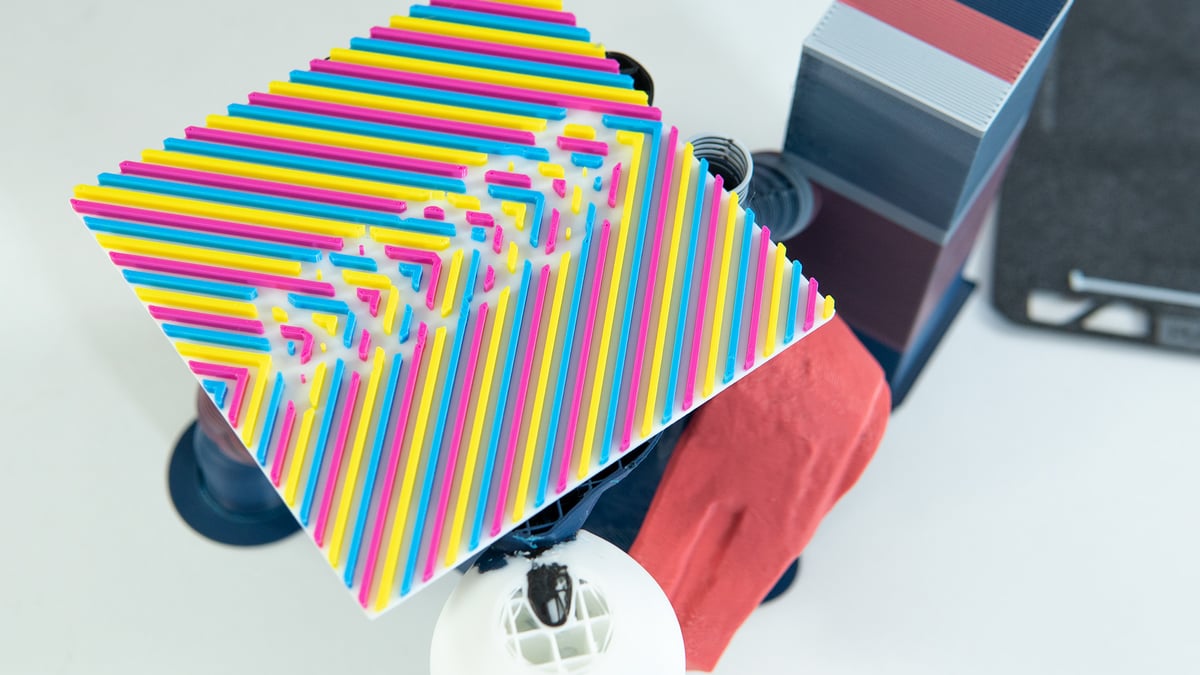
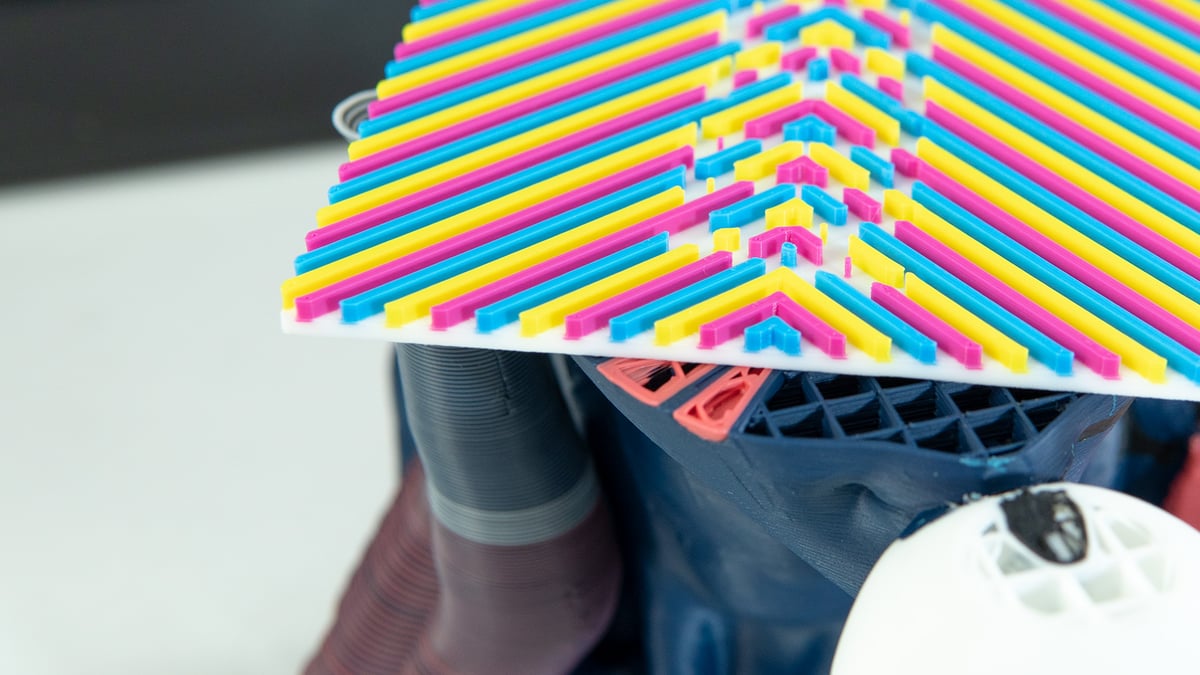
As we’ve seen with other multi-material systems, the AMS augments the existing printer rather than complicates it. The P1P quality and speed remain, albeit with the addition of a purge cycle between filament changes. Once a filament is loaded and in the hot end – something we’ve experienced at a 100% success rate so far, with zero failed loads – the P1P continues to be the high-speed workhorse we know it to be.
Software
Printing for multiple colors or materials often requires models that slot together seamlessly. Designing parts for yourself, well, that’s in your hands, but if you’re looking for a quick print that pops, Bambu Studio software introduces a color painting tool that lets you paint a 3D model with the filaments you have available to you.
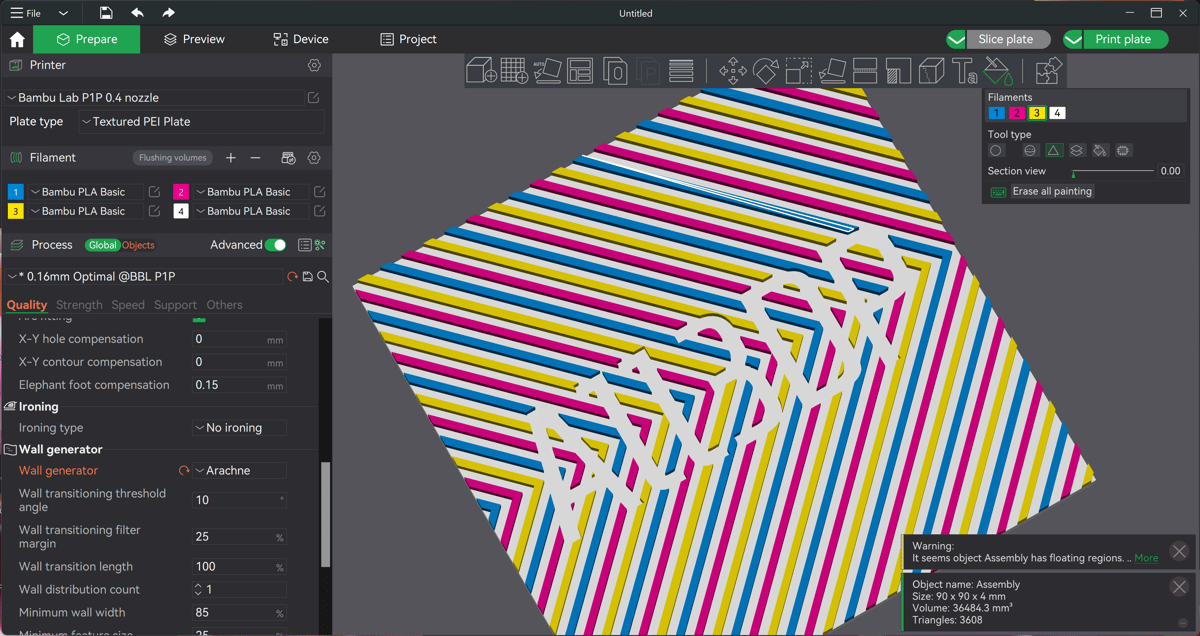
There’s a degree of precision afforded by this, with the options to fill by what the software detects as a watertight element or by the individual triangles of the mesh. Alternatively, you can go 100% creative and paint freehand using a circular brush. It’s not hugely sophisticated, and depending on the quality of the model, it can throw wasteful threads of color through a model. Still, the sheer flexibility given by the tool is terrific.
Common Complaints
For the possibilities the AMS brings to the P1P, it also brings a gigantic mess. Indeed a common complaint against the system is that it’s liberal with the waste it generates, with hot end purges and a purge block adding up to a lot of waste filament with each print.
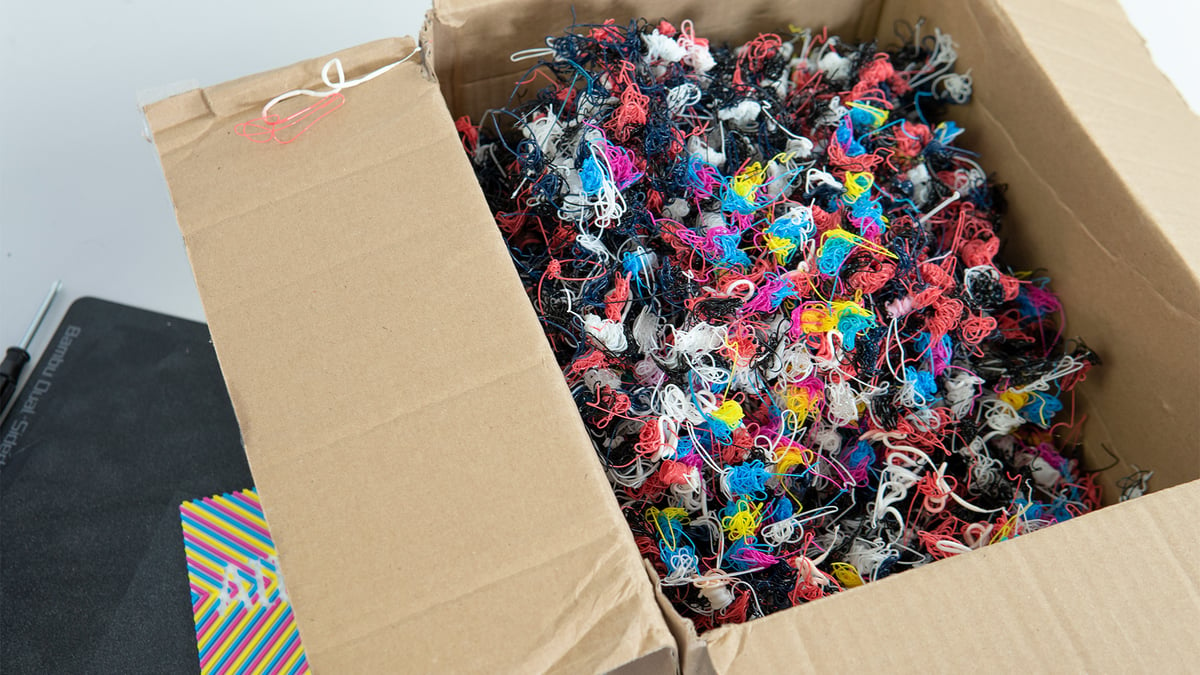
If you’re not carefully managing the purge squiggles that are ejected through the P1P’s rear chute, they can back up and interfere with the print head as it does its thing. We’ve even seen stubborn piles completely knock the front of the printhead off. Thankfully the P1P is smart enough to know this has happened and pauses the print until you fix it. But, still — inconvenient.
You have some power to reduce just how much the AMS needs to purge by changing the flushing volume and prime tower settings in Bambu Studio, but finding effective values will be down to the filament you use and some degree of experimentation.
Featured Prints
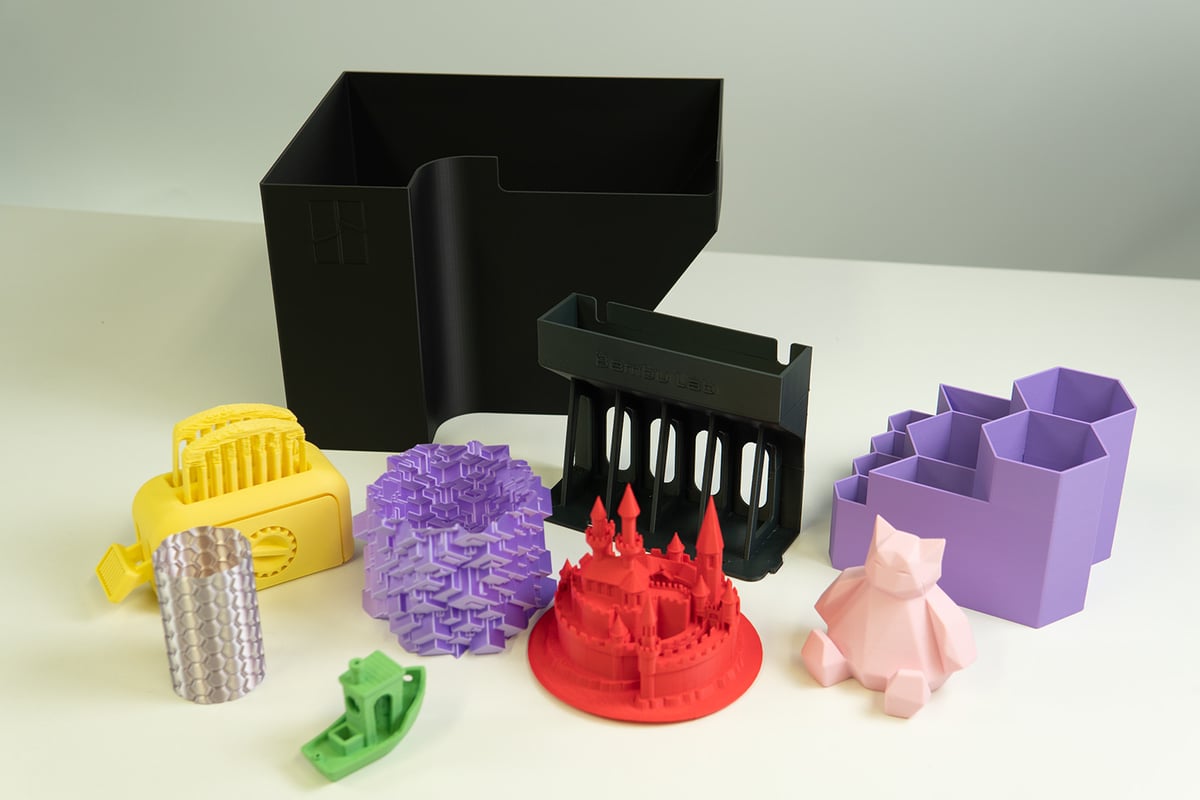
Like what you see? Here is a list of the models we 3D printed over the course of this review.
- Honeycomb Vase by GCV3D, via Printables
- Glitch Planter by vexanix, via Printables
- Castle by Prusa Research, via Printables
- Bambu Lab Purge Bucket by celeberlop, via Printables
- Fan Support by Bambu Lab, via Bambu Lab
- LED Light & Light Shell by Bambu Lab, via Bambu Lab
- Low-Poly Snorlax by Flowalistik, via Prinatbles

Features
The Basics
The Bambu Lab P1P isn’t drastically different from Bambu Lab’s first 3D printer, the X1. The P1P retains key aspects of the X1, including its kinematics, motion control system, and “state-of-the-art electronics” as well as vibration compensation and pressure advance.
The build volume also remains unchanged at 256 x 256 x 256 mm, and the extruder is the same as the X1 too. Although, the hot end is different, according to Bambu Lab.
Also similar is the design. The P1P is an open-sided cube (or not, more on that shortly) and uses a CoreXY motion system. It provides good levels of stability — particularly at the higher print speeds the P1P is capable of reaching.
Print Speeds
When Bambu Lab brought the X1 into the world, it raised some eyebrows with its claimed printing speeds. Bambu Lab was keen to make sure that the speed of the X1 could be carried forward to its new machine, and it has.
The P1P still features a print head capable of accelerating at 2000 mm/s and maintaining a print speed of 500 mm/s, though users are unlikely to ever run it so quickly. The CoreXY motion system is traditionally one of the quicker ways to get around a print bed in 3D printing, and it plays a big role here.
All-metal hot end
Another retained feature of the P1P from the X1 is the direct extruder, so handling of filaments should be no issue at all, but Bambu Lab has told us that the hot end itself is different. How exactly hasn’t yet been revealed, but it is still a 300 °C-capable all-metal unit that should allow you to work with all kinds of exotic filaments. Though, Bambu Lab’s own spec sheet for the P1P lists carbon and glass fiber polymers as “not recommended”. You will need an extra hardened steel nozzle for it.
PEI-coated spring steel print plate
Included with the P1P is a dual-sided textured PEI-coated print plate. PEI-coated surfaces have been standard issue 3D printer gear over the last 12 months or so, and for good reason, too. The surface usually holds up well to abuse, provides good adhesion, and the flexibility of the plate itself normally just lets prints pop right off when they’re done.
They aren’t everyone’s cup of tea, but most seem to like this style a lot. If not, Bambu Lab will sell you alternatives: a ‘cool plate’, an ‘engineering plate’, or a ‘high-temperature plate’.
The cool plate is only intended for use with PLA and must be used in conjunction with glue, otherwise, the surface can be damaged. The high-temperature plate’s intended use is given away by its name and is also PEI coated. The engineering plate is something that appears to be on the way, as it currently doesn’t appear in the Bambu Lab online store.
Exterior Design
This is something that’s really eye-catching. Bambu Lab is going to release 3MF files that allow users to customize the exterior of their P1Ps. A number of different options for the printer can be seen in the initial press images, and Bambu Lab has also said that 3D modelling files will be made available so users can easily create their own custom designs.
This is very cool, quite original, and, to be frank, we think it’s long past time 3D printer manufacturers started paying a little more attention to product aesthetics. So, thumbs up from us.
Wi-Fi & Bluetooth
Bambu Lab also put both Wi-Fi and Bluetooth connectivity options into the P1P. Any connectivity options outside of tiny MicroSD cards are more than welcome, of course, but Bambu Lab also does offer connection via… a tiny MicroSD card. Well, good thing the wireless network works perfectly.
AMS Compatibility and optional camera
One of the key features of the X1 is its multi-material system, known as the automatic material system, or AMS, for short. It’s an optional add-on capable of holding multiple spools of filament, with the printer able to automatically transition from one to the other — the kind of system often referred to as a multi-material unit.
The new P1P will also be compatible with the AMS, which is great news for those wanting more versatility with their printing, and will take the optional chamber camera as an add-on, too. Perhaps these aren’t accessories that will be purchased immediately, but they provide a valuable and accessible upgrade path to users as they go on their 3D printing journey.
Further Features
There’s a long old list of features on this thing, here’s a few more:
- Automatic bed leveling: Always nice to have, automatic bed leveling saves you the trouble of fine-tuning your bed with manual knobs. Or at least stop it from being needed too often. It works brilliantly on the P1P.
- 2.7-inch UI: The UI included with the P1P is controlled by a pad with buttons. No touchscreen here.
- Limited assembly: You’ll have the P1P from box to printing in under 20 minutes.

Tech Specs
General Specifications
- Technology: Fused deposition modeling (FDM)
- Year: 2022
- Assembly: Assembled
- Mechanical arrangement: CoreXY
- Manufacturer: Bambu Lab
3D Printer Properties
- Build volume: 256 x 256 x 256 mm
- Feeder system: Direct
- Print head: Single nozzle
- Nozzle size: 0.4 mm
- Max. hot end temperature: 300 °C
- Max. heated bed temperature: 100 °C
- Print bed material: PEI-coated spring steel sheet
- Frame: Steel
- Bed leveling: Automatic
- Display: 2.7-inch LCD
- Connectivity: Wi-Fi, Bluetooth, MicroSD
- Print recovery: Yes
- Filament sensor: Yes
- Camera: No (optional)
Materials
- Filament diameter: 1.75 mm
- Third-party filament: Yes
- Filament materials: PLA, ABS, PETG, Flexibles, PC, ASA, nylon
Software
- Recommended slicer: Bambu Studio
- Operating system: Windows, Mac OSX
- File types: 3MF
Dimensions & Weight
- Frame dimensions: 386 x 389 x 458 mm
- Weight: 9.65 kg

Similar Printers
3D printers – you want the best of the best, right? Well, go on then and stroll on down the street to our Best 3D Printers Guide. That’s where all the best ones are.
Bambu Lab X1
You can still place an order for a Bambu Lab X1 or its Carbon variant, but it’s currently only available as a pre-order. This machine is very similar to the P1P, but features advanced lidar technology and AI print failure detection, which is pretty snazzy if you ask us. This is the full-fat version of the P1P, or the P1P is the light version of the X1. We’re not sure which…
Creality Ender 5 S1
Creality’s new Ender 5 S1 is pretty impressive stuff. It’s a similar shape to the P1P but it is not running a CoreXY motion system. Still, it prints pretty fast. We’ve had some good results in the 120-250 mm/s print speed range. It can also print in temperatures up to 300 °C, so the saucy filaments are on the table too.
Voron 2.4
Is this the ultimate 3D printer kit? Maybe, but it’s not for the faint of heart. This is a big project, you’ll be sourcing your own components, printing them, too, actually, and then putting it all together following the Voron team’s expert instructions. Allow yourself hours, many tens of hours. By the end of it, you could have one of the best CoreXY 3D printers in the ‘hood.
License: The text of "Bambu Lab P1P Review: Shaking Things Up" by All3DP is licensed under a Creative Commons Attribution 4.0 International License.
CERTAIN CONTENT THAT APPEARS ON THIS SITE COMES FROM AMAZON. THIS CONTENT IS PROVIDED ‘AS IS’ AND IS SUBJECT TO CHANGE OR REMOVAL AT ANY TIME.


