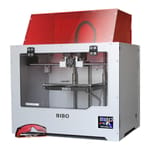
The BIBO 3D printer, also known as BIBO 2 Touch Laser, surfaced somewhere around 2016 on Amazon and has garnered apparent popularity, with hundreds of positive reviews and regular appearances on the megastore’s bestseller lists.
While we take overwhelmingly positive reviews on Amazon with a grain of salt, you can’t escape the fact that the printer’s dual-extrusion capabilities, add-on laser engraving module, and a price tag of ~$800 make a strong case for the BIBO 3D printer.
At least on paper, that is. But can it live up to the hype? We took the BIBO 3D printer for a spin to find out.
Hands On
Appearance-wise, the BIBO 2 Touch Laser (which we’ll refer to as the Bibo 2) does look like it’s from a different era. Released in 2016, by remaining largely unchanged in that time the Bibo 2 reminds you how 3D printers have evolved over the years.
But, looks can be deceiving. Despite its ancient appearance, we’ve been pleasantly surprised by the Bibo 2’s performance.
Don’t judge a book by its cover
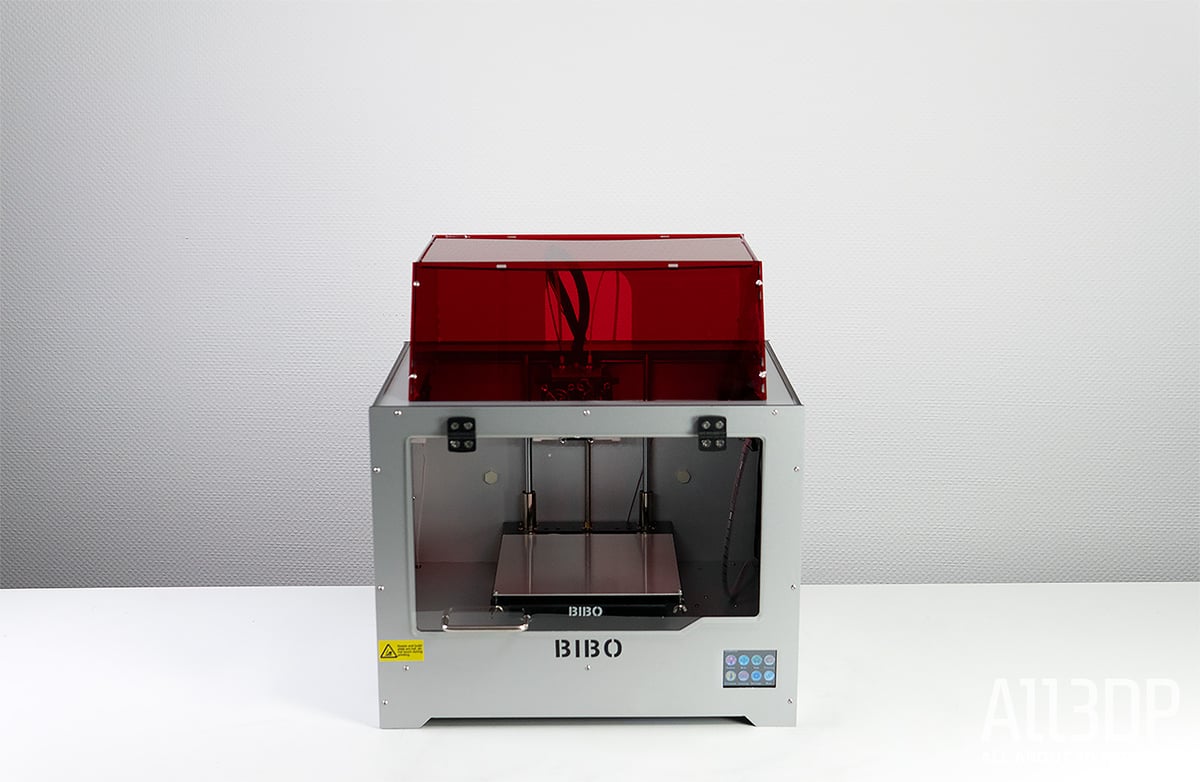
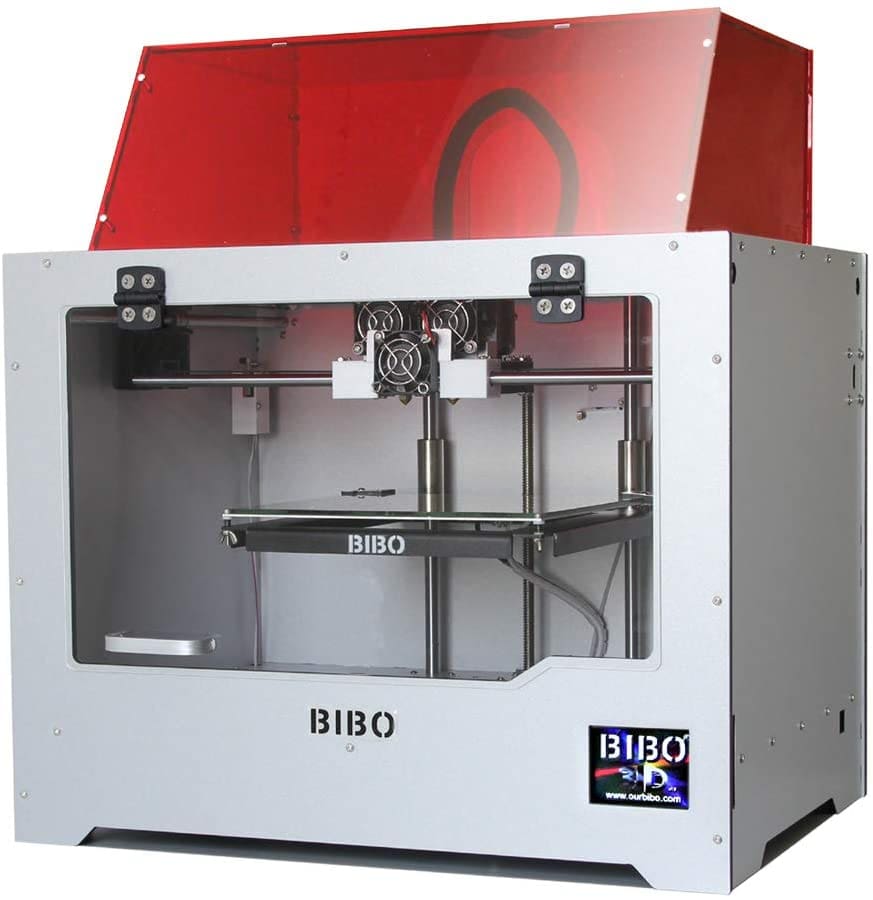
Budget dual extrusion tends to look one of two ways – either a Prusa-style frame with single-nozzle, dual-extruder setup, or like the Bibo 2, drawn from MakerBot’s 2012-released open source Replicator design. Released in 2016, the Bibo 2 – by modern standards – looks a bit frumpy. Outdated, even.
Scrutinizing the Bibo 2’s internals reveals that it actually checks most of the boxes you’d want from a modern desktop 3D printer and a dual extruder in particular.
The all-metal frame and compact enclosure give the printer rigidity, alongside a tidy look and small footprint. The 214 x 186 x 160 mm-sized bed travels through the Z-axis on a lead screw flanked by heavy-duty rods.
The heart of a dual extrusion printer is its extruder setup. In Bibo’s case, this heart beats from two direct drive extruders sitting in parallel on a print head that runs on the dual-rod reinforced X-axis. The extruders are accompanied by a part cooling fans in the front and back. These fans aren’t directed at the nozzle, and sit a little high for what you might think is effective placement, but throughout our time using the Bibo 2, we’ve found part cooling to be sufficient.
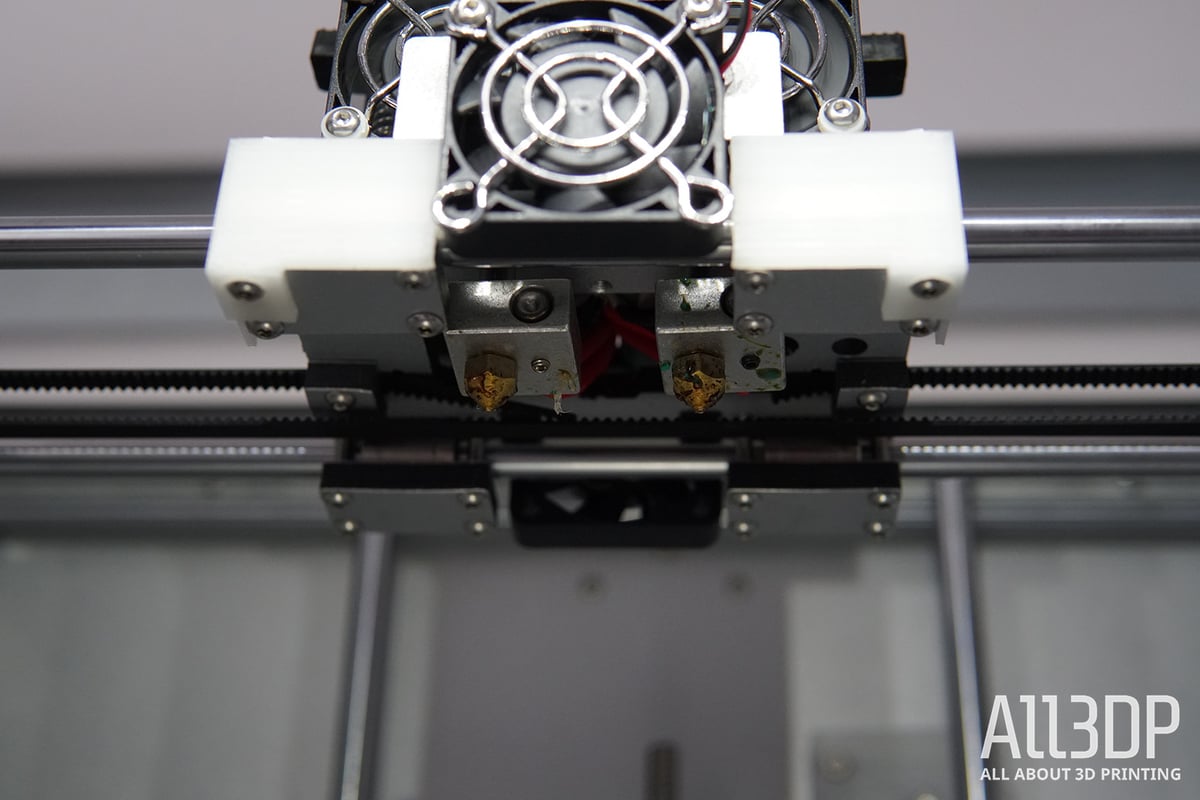
Loading the filament is a little tricky, and needs the materials to be as straight as can be. There’s a lot of open space in and around the feed mechanism that the filament will feed into instead of the hotend if you’re not careful. It’s irritating.
In general, direct drive offers many benefits for dual extrusion, namely better retraction of filament for the inactive nozzle, alongside wider filament compatibility and the reduced likelihood of slack in the feeding of filament.
Speaking of retraction, this is crucial for multi-material printing. Improper retraction leads to oozing of molten filament from the inactive hotend, transferring to the print, and resulting in unwanted flecks of material on the printed object. This is a relatively common issue on this style of 3D printer – more expensive dual extrusion machines have methods to deal with the problem.
To counteract unwanted oozing, the Bibo 2 cools the inactive hotend down to about 175°C every time the extruders switch. This helps a little, and makes it possible to get acceptably clean prints, but comes at the cost of dramatically extending print time.
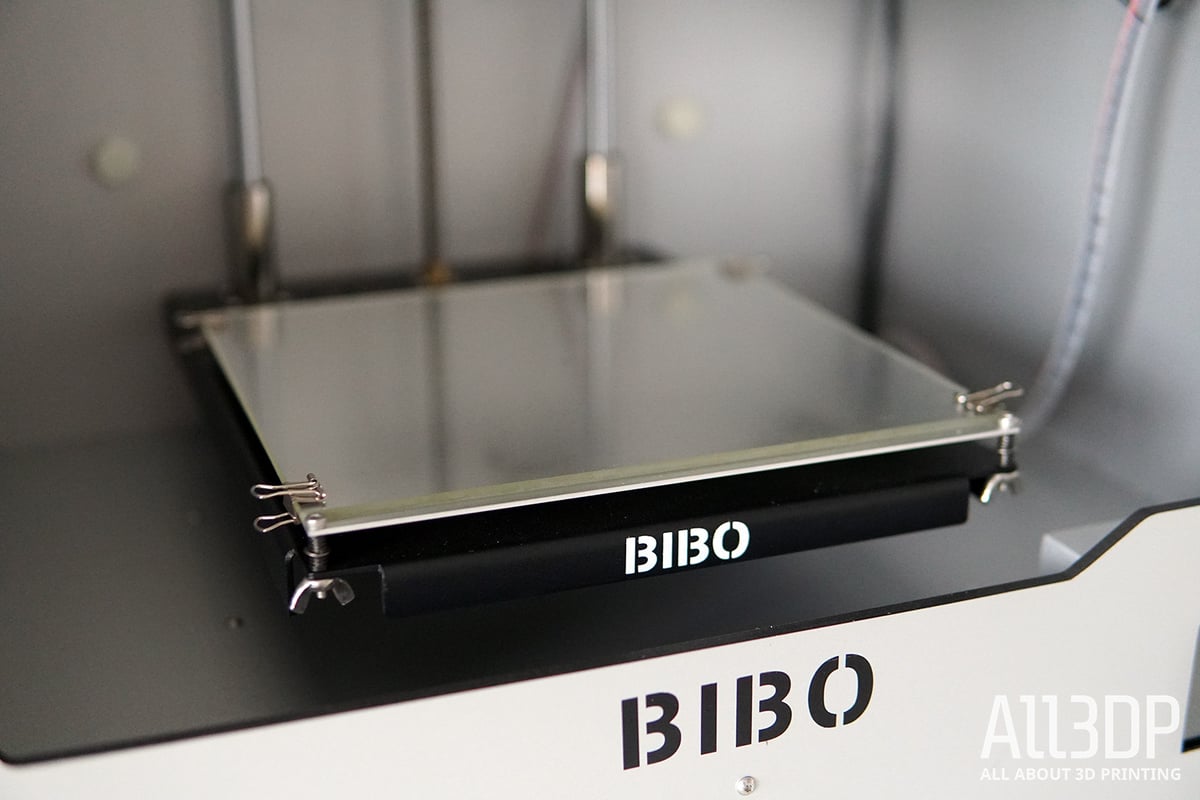
Bibo boasts in its assembly manual that the Bibo 2 ships with a level build plate, having been calibrated in the factory before shipping. We often eye such claims with skepticism, but, to Bibo’s credit, we found no need to even so much as touch one of the three bed leveling knobs.
Aligning tandem hot ends and acceptably leveling to both is challenging, so we’re grateful for not having to do it. If you were to need to level the printer manually, there’s an assisted leveling function that whips the print head to various points on the bed for you to adjust the nozzle gap.
The Bibo 2 also ships with filament run-out detection and power out recovery mode activated as standard.
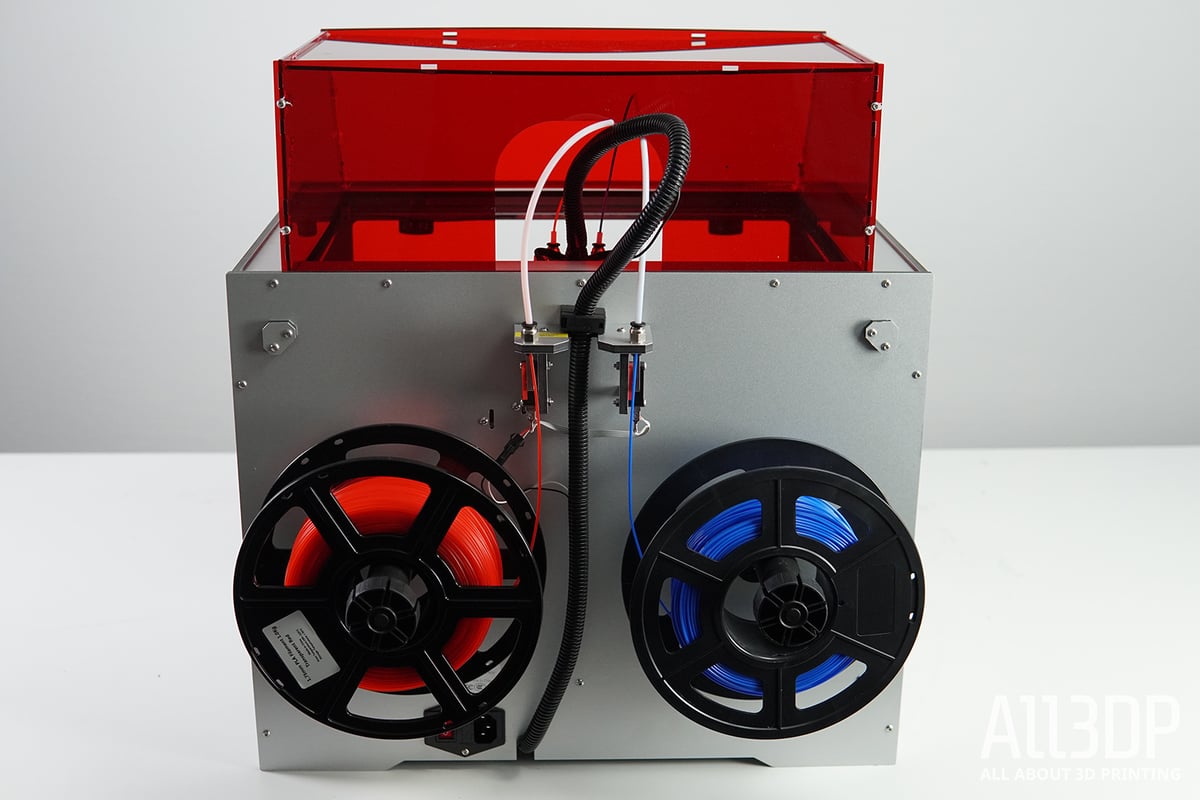
The additional laser engraving module is shipped separately and mounts to the X-axis gantry in place of the extruder. Power comes from one of the part cooling fan’s socket. Assembly is trivial, but the now unmounted extruder is still umbilically attached to the printer and has to rest awkwardly behind with its fans running. Should you use the laser module, take care not to let debris and other foreign objects enter the printhead, damaging the fans.
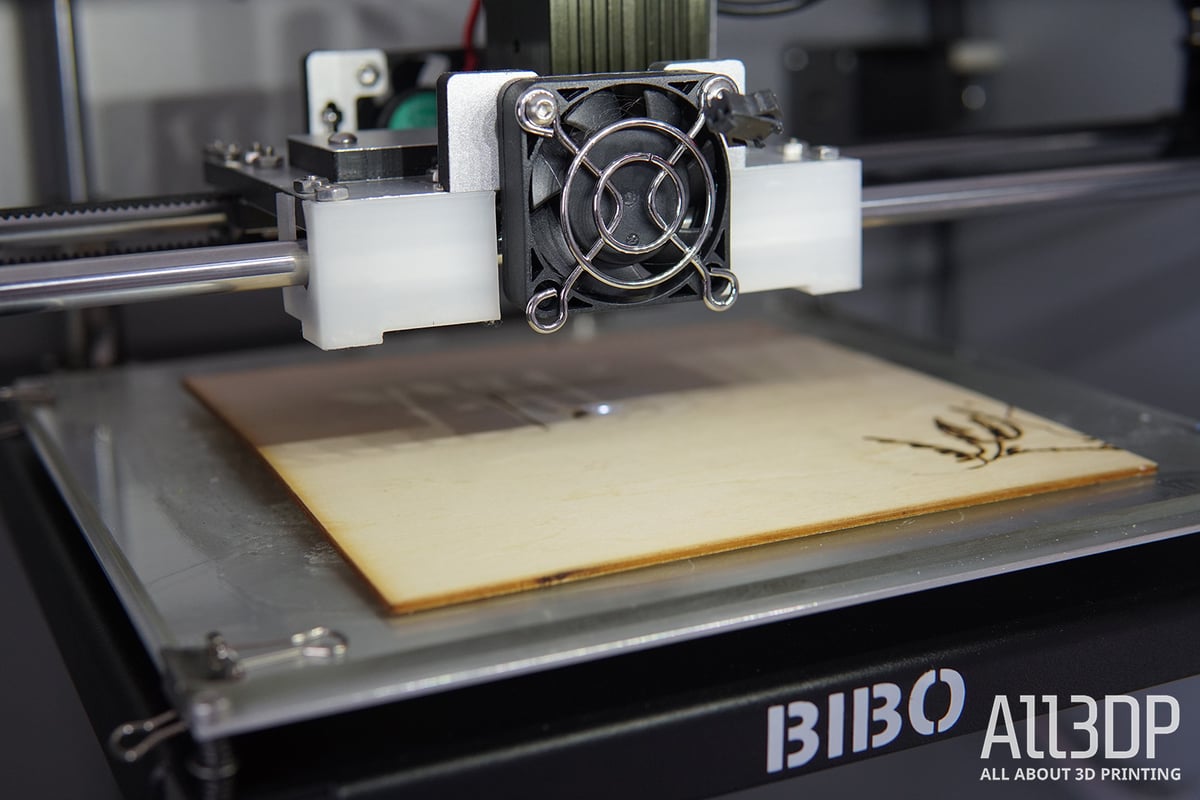
The 0.5W laser is suitable for cutting cardboard and paper as well as engraving other soft materials. The engraving area is the same as 3D printing at 214 x 186 mm, but the plate has no additional fixtures for the material to be engraved, so a little DIY-ingenuity is needed – double-sided tape is usually enough.
Printing and Usability
Pre-flight preparations for the Bibo 2 consist of mounting the extruder to the X-axis and the – more time-consuming – assembling the acrylic top cover. Mercifully, the Bibo 2 comes with atypically well-written and extensive instructions, complemented by videos, and troubleshooting guides. So hats off to Bibo.
The company provides configuration settings for Repetier, Cura, and Simplify3D slicing software, but most third-party slicer. will work for the Bibo 2.
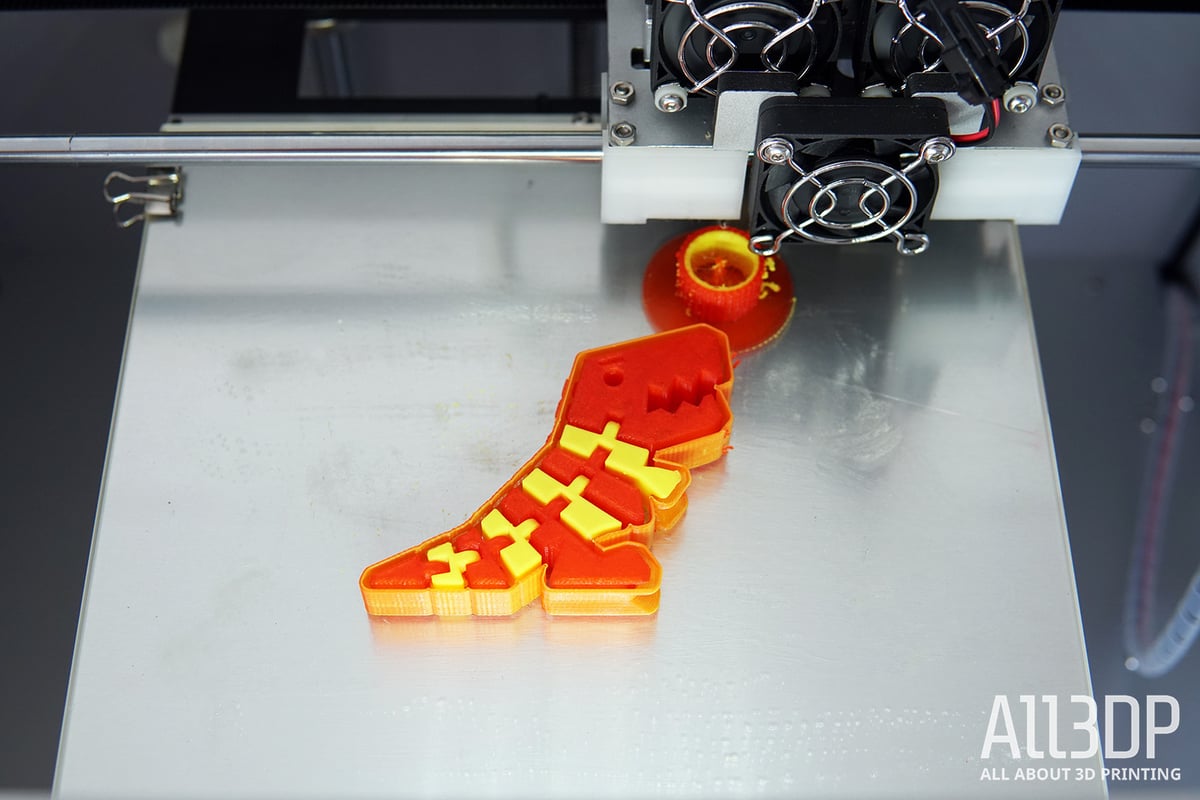
We already touched on the Bibo 2’s capacity to handle multi-material prints rather well. Printing with both a purge tower and ooze shield – two print artifacts that you can toggle in the slicer when setting up a print – improve things further, giving prints comprising separate color objects a clean finish. Where prints merge the colors into one solid object is where the limitations of the design show. While certainly decent, it’s not as solid a performance as separate color blocks comprising a print.
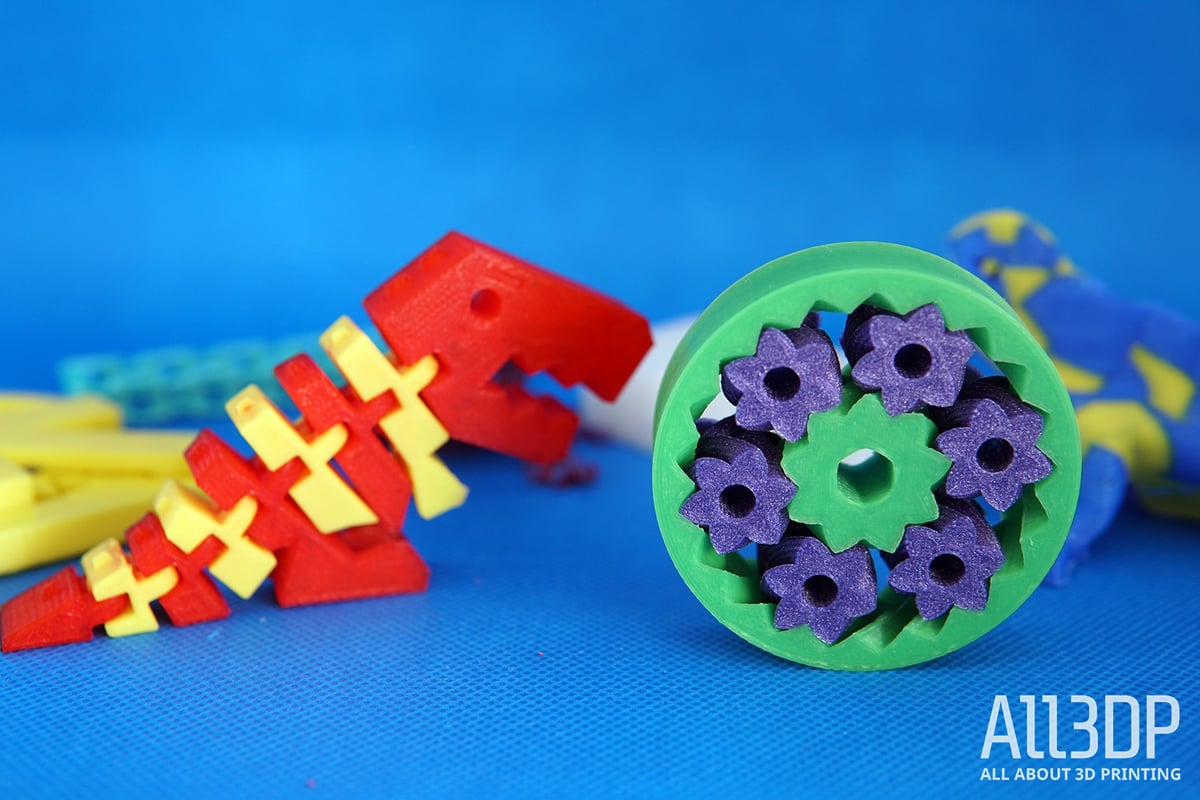
Quite frankly, we would not have guessed the Bibo to perform as it did, not least of all because of its outdated look and feel. And, while we did focus on dual-color prints (duh), it should not go unmentioned that the Bibo also handled single extrusion prints as well as printing with soluble support to our full satisfaction.
If you think the printer’s overall design looks long in the tooth, wait till you see the UI on the pokey little color touchscreen on the printer’s front.
Hands-down, it is the buggiest printer interfaces we have encountered. As you might expect, it has all the vital functions, but be prepared to get thrown continuously out of your desired sub-menu or the interface not responding at all – just two of the many bugs we ran into.
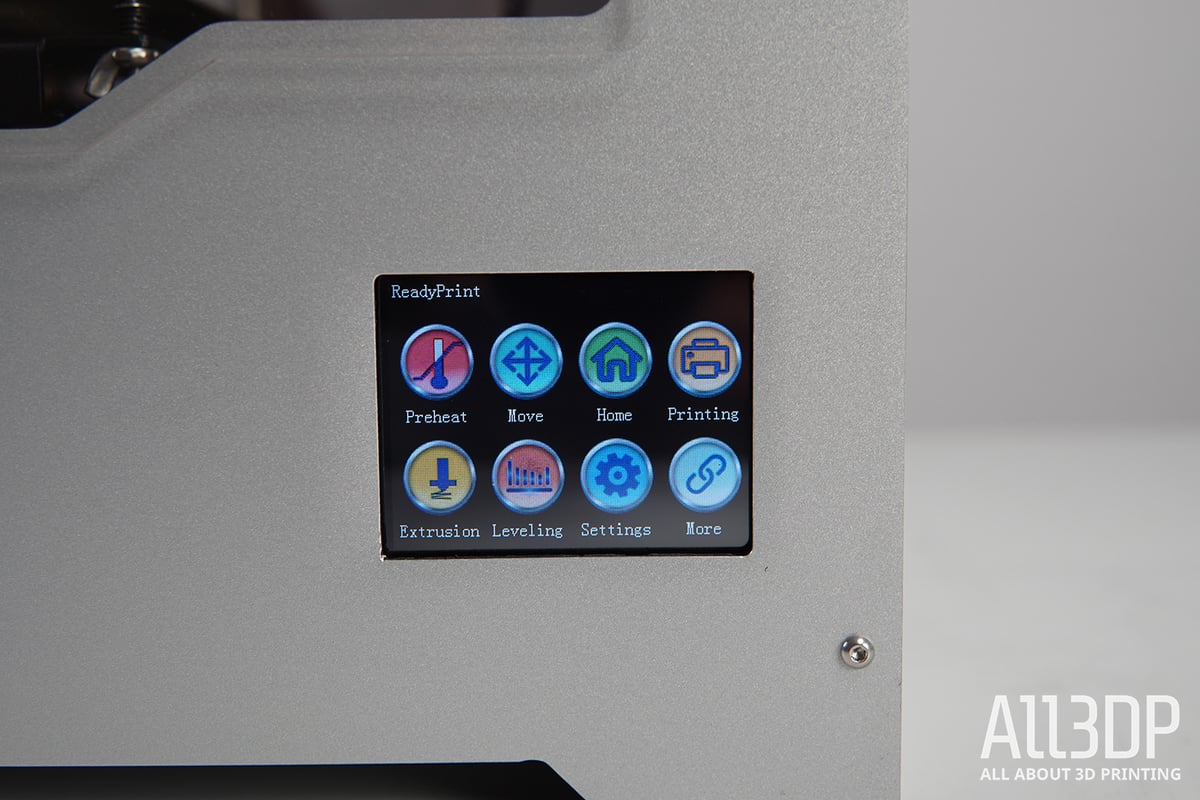
Suppose you have the woosah-like patience to cope with the Bibo 2’s UI, good on you. For those of us without saint-like patience, the limbo of non-responsiveness is downright frustrating. The printer has been out for almost half a decade, a usability firmware update in that time wouldn’t have gone amiss.
Using the laser engraving module was a moderate success. Mounting the laser module is a trivial task, but calibrating it to the correct focal length and speed – at least in our case – was a drag. Laser cutting paper was problem-free, but for wood engravings, a bit more tweaking is needed.

Verdict
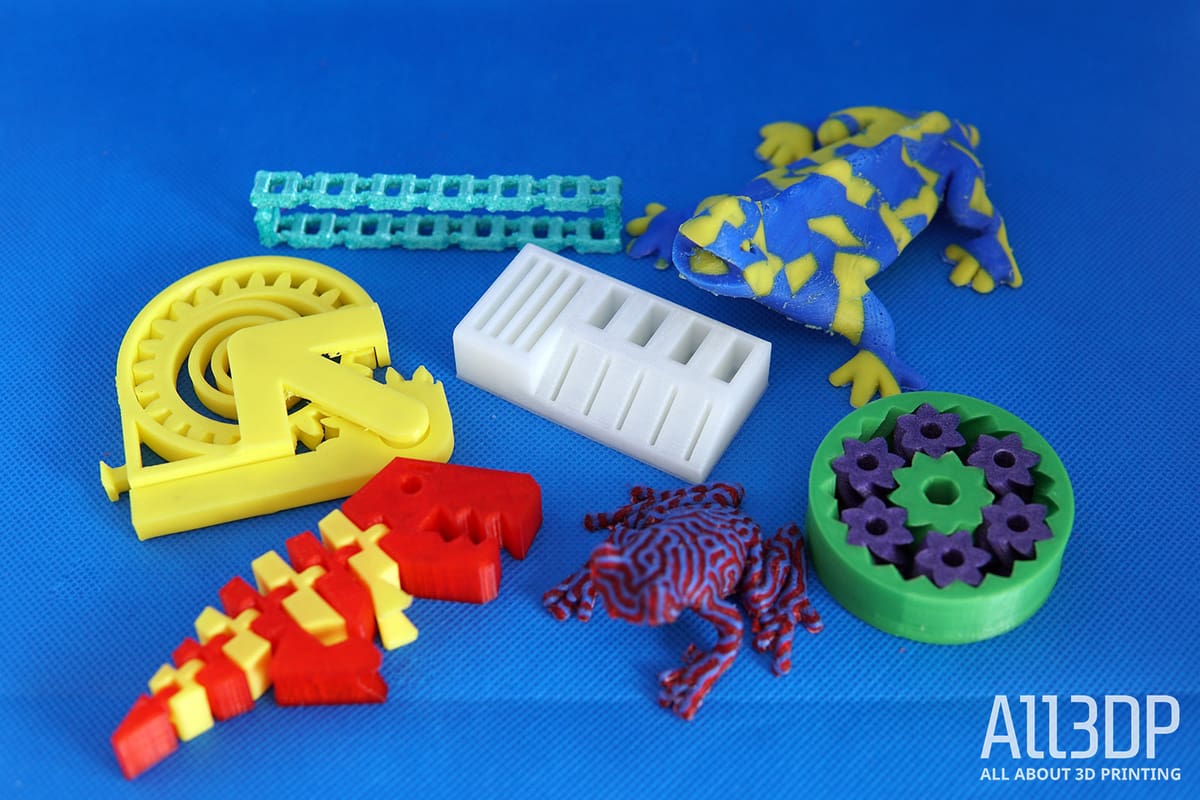
After spending a week printing with the Bibo 2, we can verify some of the positivity it’s Amazon-reviewers have for it. As a sub-$1,000 dual extruder 3D printer, and despite its flaws, it is one of the better options going.
The Bibo 2 – typically going over the counter for around $800 – delivers 3D printing results that elevate it over other similarly priced dual extrusion printers (the Flashforge Creator Max springs to mind). What’s more, the 3D printer can be further enhanced with a laser engraving module, broadening its scope of application.
This is, of course, ruined a little by that terrible user interface, though. Scrutinizing further – and this is somewhat inherent to enclosed dual extrusion printers in general – the build volume is restrictive.
However, our out-of-the-box experience was – mostly – positive, and dual extrusion just takes 3D printing to the next level. If you want to explore this world of new possibilities, the Bibo 2 is a solid starting point capable of great prints. Just remember, woosah.

Features
As previously stated, there are four versions of the BIBO 3D printer.
Available as either a kit (Maker) or fully assembled (the touchscreen-only Touch), and then further split by whether it includes the laser engraver add-on; you can tell them apart in the store listings by the name.
The full-fat BIBO that is fully assembled and includes the laser is called the BIBO 2 Touch Laser. The DIY kit without a laser is designated the BIBO Maker. And so on, so forth.
Let’s see what the BIBO 3D printer has in store.
Enclosed Printing Chamber

The BIBO 3D printer puts out a tank-like rigidity, featuring a sturdy all-metal frame made of 6 mm aluminum composite panels. To provide a fully-enclosed printing chamber, the BIBO comes with an acrylic door and a removable cover, allowing for stable printing conditions – the key to printing temperature-sensitive materials like ABS.
Plus, it contains some of the fumes from the printing process, adds an extra safety precaution, and helps to muffle the operating sound.
When printing with PLA, you can open the door or remove the top cover, since PLA results tend to do better when well ventilated.
Removable Glass Bed

The print bed on the BIBO measures 214 x 186 mm. The removable glass plate reaches temperatures up to 100°C, allowing the printer to process a broad scope of consumer printing materials. Glass surfaces provide smooth first layer finishes, but typically struggle with properly adhering to some materials so you might need additional adhesives.
The bed needs to be leveled manually by three wing nuts under the bed.
Dual Extruder

The BIBO is equipped with a dual extruder, with two hotends sitting side-by-side on a single print head. This arrangement allows you to use two different materials for the same print.
From printing complex geometries with water-soluble PVA support material to two-color or multi-material prints, the dual extrusion system and the closed chamber allow the Bibo to process a wide range of materials including PLA, ABS, PETG, HIPS, and flexibles.
Laser Module

The laser module is available as a separate add-on or bundled with the printer. The 0.5W laser engraving tool head expands the printer’s capabilities, allowing you to engrave wood and cut paper, cardboard, felt, and the like.
Since the laser engraving module is supplied separately, it must be installed where the extruders are located and connected to one of the extruder fans. The engraving software and safety glasses are also included, so you can start engraving right away.
Additional Features
Further Features on the BIBO 3D printer include:
- Full-color touchscreen – allowing for user-friendly and easy operation. In place of a touchscreen interface, the BIBO Maker features a dot-matrix LCD screen with a scroll wheel knob.
- WiFi – the included WiFi module permits you to start the print remotely from your PC or phone.
- Filament runout detection – this useful feature pauses the print if the filament runs out during printing.
- Resume Power function – a similarly useful feature that lets you recover your print in case of a power outage.

Tech Specs
General Specifications
- Technology: Fused deposition modeling (FDM)
- Year: 2019
- Assembly: Partially assembled
- Mechanical arrangement: Cartesian XY-head
- Manufacturer: Bibo
3D Printer Properties
- Build volume: 214 x 186 x 160 mm
- Feeder system: Direct drive
- Print head: Dual nozzle
- Nozzle size: 0.4 mm
- Max. hot end temperature: 270 ℃
- Max. heated bed temperature: 100 ℃
- Print bed material: Glass
- Frame: Aluminum
- Bed leveling: Manual
- Connectivity: WiFi, USB
- Print recovery: Yes
- Filament sensor: Yes
- Camera: No
Materials
- Filament diameter: 1.75 mm
- Third-party filament: Yes
- Filament materials: Consumer materials (PLA, ABS, PETG, Flexibles)
Software
- Recommended slicer: Cura, Simplify3D, Repetier-Host
- Operating system: Windows, Mac OSX, Linux
- File types: STL, OBJ, AMF
Dimensions and Weight
- Frame dimensions: 467 x 357 x 374 mm
- Weight: 16 kg

Similar Printers
You may also be interested in the following printers:
For further information, feel free to check out our Best Dual Extrusion 3D Printers Guide or, if the combination of 3D printing and engraving has sparked your interest we would recommend our Best 3-in-1 3D Printers Guide.
Qidi Tech X-Pro
With a price tag currently around $650, the Qidi Tech X-Pro is one of the most affordable dual-extrusion models going.
In testing we found the Qidi Tech X-Pro to be an excellent starting point for someone looking for an easy and affordable introduction to multi-material 3D printing.
Creality CP-01
The Creality CP-01 is a multifunctional 3D printer unifying 3D printing, laser engraving, and CNC cutting into a compact desktop unit.
For approximately $600, you get a generous 200 x 200 x 200 mm build volume, along with a 0.5W laser tool head for engraving vectors and black and white images, plus a 4,800 rpm spindle for carving.
License: The text of "BIBO 3D Printer Review: Hands On" by All3DP is licensed under a Creative Commons Attribution 4.0 International License.
CERTAIN CONTENT THAT APPEARS ON THIS SITE COMES FROM AMAZON. THIS CONTENT IS PROVIDED ‘AS IS’ AND IS SUBJECT TO CHANGE OR REMOVAL AT ANY TIME.
