Biqu Hurakan Review: Cost Klipping
Rating

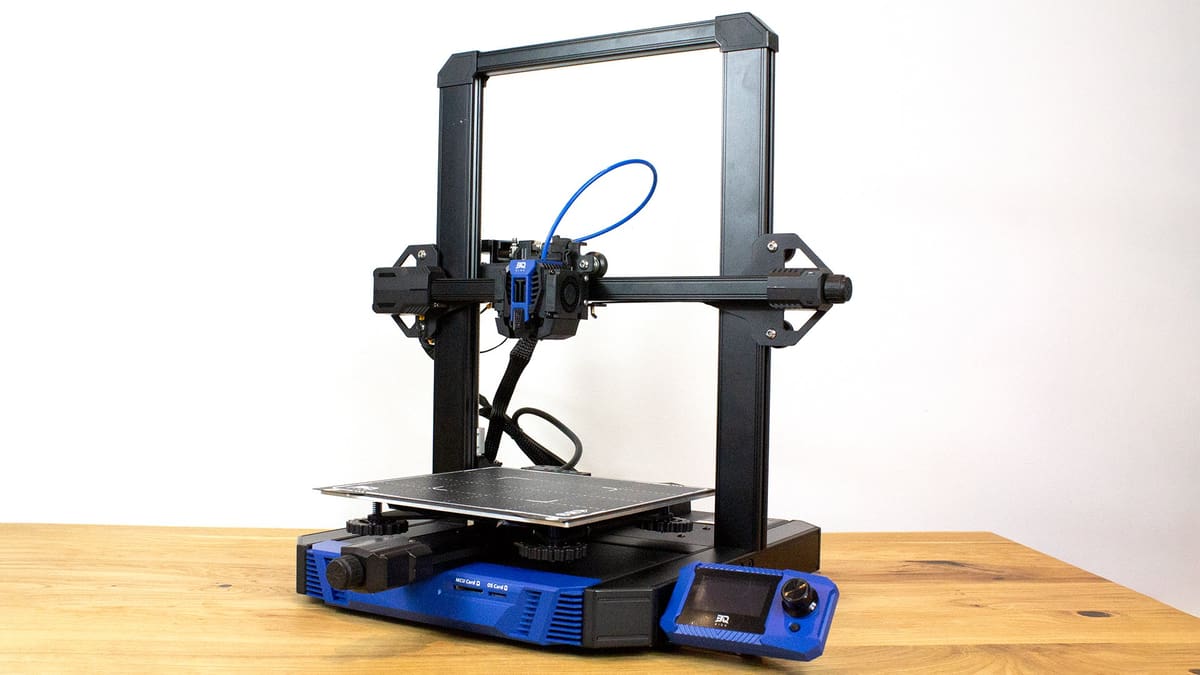
With the Hurakan, Biqu managed to bring a quality bed-slinger running Klipper fairly early to the market, packing advanced features while keeping the price low.
Biqu is joining the Klipper craze, launching the second 3D printer of this year to come with the firmware pre-installed on its printer. It’s also the first affordable bed-slinger to do so, and includes a wealth of other desirable features that really flesh out the machine.
Why is Klipper so interesting, you ask? Well, it has features like input shaping, which uses an accelerometer to help to reduce 3D printing artifacts and give you cleaner-looking prints; and pressure advance, the Klipper equivalent of Marlin’s linear advance that reduces ooze and blobbing. It’s also known to generally speed things up, having come about as a solution to limited processing capabilities stalling command execution in the 8-bit 3D printers of yesteryear. It got around the 8-bit hardware limits by adding a single-board computer (SBC), usually a Raspberry Pi, to handle all the calculations while the printer’s mainboard is relegated to simple command execution.
Given that Klipper requires some extra hardware to run compared to your average Marlin printer, and more to measure vibrations for input shaping, you’d think it’d drive the machine’s price up. But, Biqu managed to keep the machine reasonably affordable by developing its own controller hardware. This hardware, the CB1 found within the Biqu Hurakan, has the necessary capabilities to run Klipper while keeping the machine competitively priced at ~$370. Which, in an ongoing supply chain crisis, is quite an achievement.
Anyone thinking of installing Klipper on a 3D printer soon and dreading the thought of tracking down a Raspberry Pi to do so should give the Biqu Hurakan some thought. So, you can find ours in this review.
The Verdict
Pros
- Kitted out with quality-of-life features
- Practical adjustable heat bed
- Extremely light touch probe fitted well on the print head
Cons
- Klipper profile still needs some tweaking
- Cooling could be better, despite dual 4010 fans
- Some layer uniformity issues on flat surfaces
The Biqu Hurakan has managed to achieve a really impressive ~$370 price point for its feature loadout, even overcoming a severe supply chain limitation to provide an SBC within the budget build. That SBC allows the ever-increasingly popular Klipper firmware to be included in the loadout with a price point that we’d be satisfied with on a typical Marlin build considering the surrounding feature set providing enough quality-of-life that we can scarcely think of additions to pine after.
The Hurakan’s “standard” build volume of 220 x 220 x 270 mm is enough space for a hobbyist’s needs, and its unique ability to reduce heat bed power from 240 W to just 100 W — limiting the heated bed to an approximately 110 x 110-mm segment — is handy for limiting power consumption when the entire build surface isn’t needed.
Though we experienced some small hiccups in our experience with the system, the Biqu Hurakan delivered generally good results with only straightforward calibrations and was sometimes downright impressive. Though the printer profile seems to need some minor tweaks from Biqu to avoid nuisance disruptions to commands, and there were sometimes layer uniformity issues that created a less-than-ideal surface quality, profiles can easily be tweaked and any surface quality issues remained well within that of a good performance.

The Tech
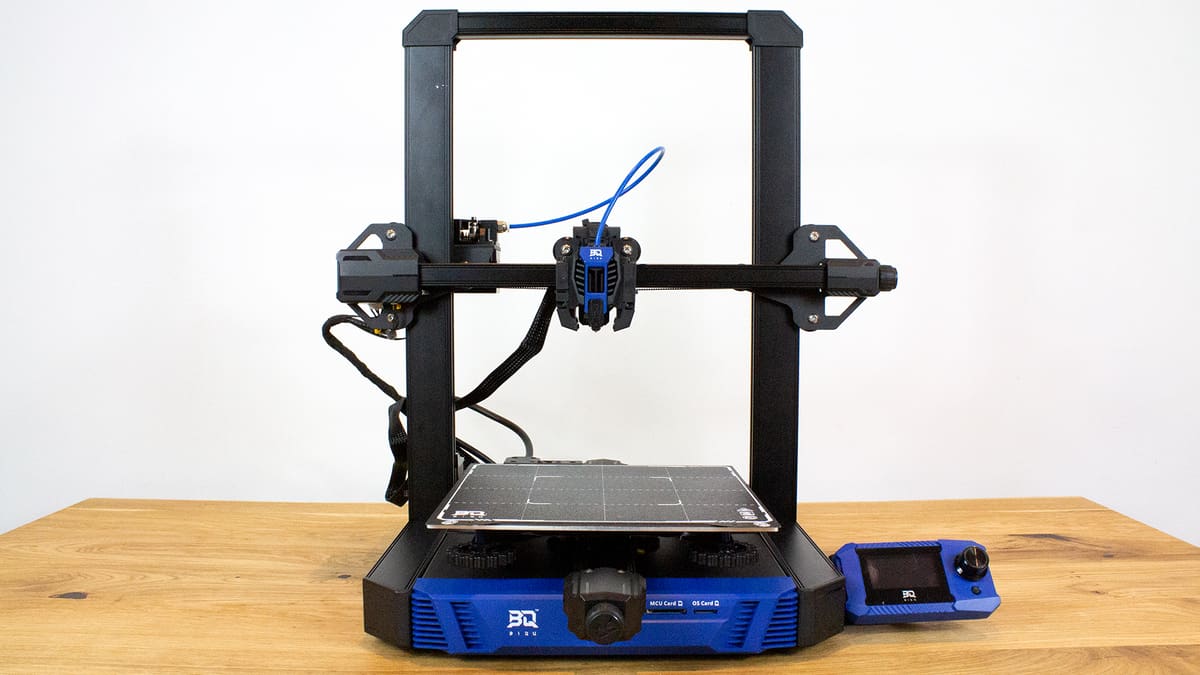
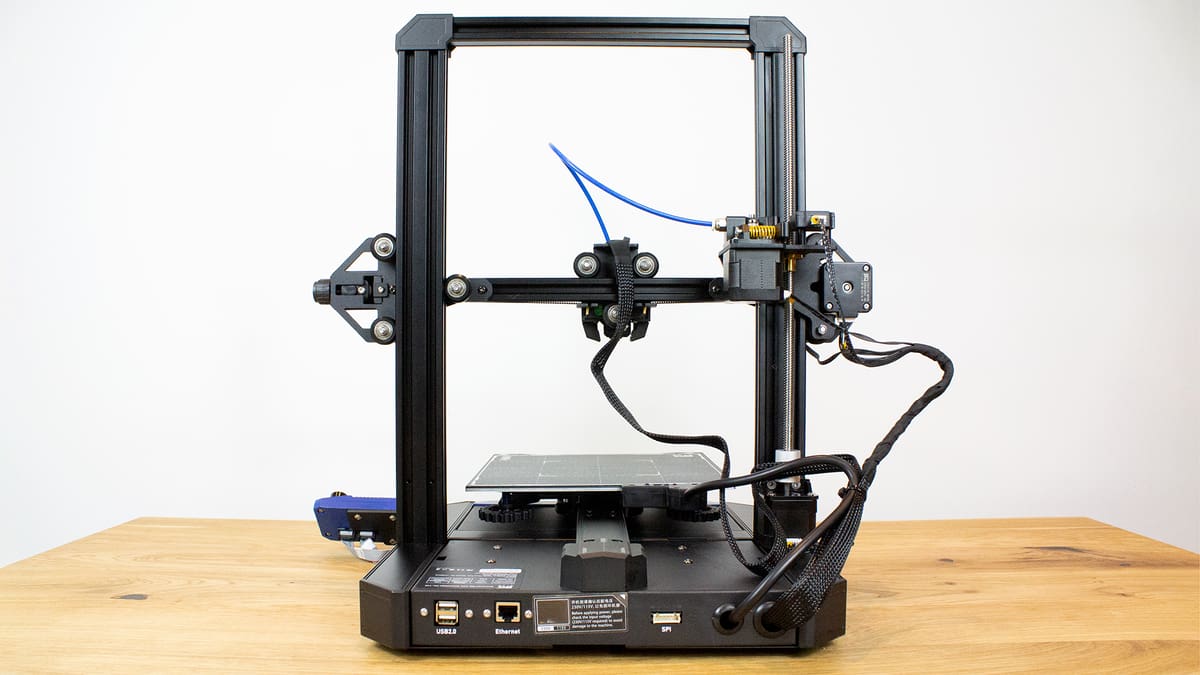
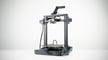
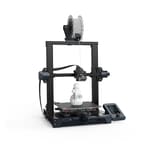
At its core, the Biqu Hurakan is a typical bed-slinger. It uses a Bowden extruder and a PTFE-lined hot end, limiting printing temperatures to a maximum of 260 °C, and has what might be considered a “standard” build volume of 220 x 220 x 270 mm.
But, this machine does have more to offer than most budget 3D printers. The system has a host of desirable quality-of-life features, with the headline feature being its Klipper firmware. Biqu has managed to hit the market with a stock Klipper 3D printer relatively early here, as the Marlin alternative has been quickly gaining popularity. Right now, the only other stock Klipper printer we’re aware of is Flsun’s V400 which, at ~$850, is a fair shake pricier than the Hurakan’s ~$370 asking price.
CB1 “Core Board” and Klipper Firmware
Running Klipper requires some additional hardware components. Specifically, a host computer running Linux. In most cases that’s an SBC, used to do all the complex calculations, operating in tandem with the printer’s regular mainboard, which runs a simpler firmware that simply carries out the SBC’s commands. Typically, Klipper printers run on a user-procured Raspberry Pi, but pre-packaged Klipper systems tend to pack something a little different.
Given the ongoing supply chain crisis – especially surrounding silicon – you can see how that sort of feature might drive prices up. So, how is the Hurakan so affordable? Biqu seems to have achieved a desirable price by developing its own low-spec board designed to run Klipper. Full SBC specs are notably absent from the printer’s marketing material, but Biqu sells its Klipper “core board”, the CB1, separately for ~$25 under its parent company’s name, BigTreeTech, with its full specs included in the product listing.
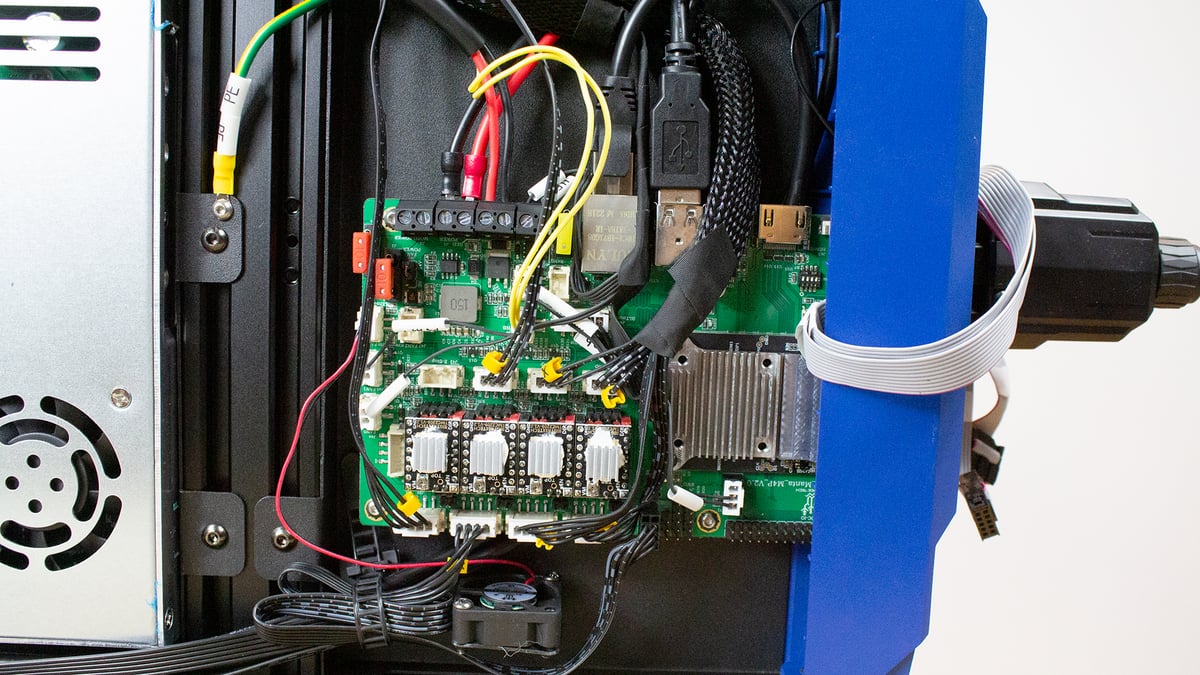
The CB1 hosts an Allwinner H616 SoC, and a Mali G31 MP2 GPU with OpenGL3.2 support. Though it has 1GB of DDR3L SDRAM when sold separately, the Hurakan’s marketing does indicate that its version has just 512 MB of DDR3 RAM. The board also has wireless connectivity, which allows users to remotely operate and monitor the printers through the pre-installed Mainsail UI, and the whole thing is capped with a decent-sized aluminum heatsink.
That board is mounted onto BigTreeTech’s Manta M4P mainboard which is cleanly hooked into all the printer’s various connections with ferrules. It’s also worth noting, the Hurakan includes an ADXL345 accelerometer in the box – a small piece of hardware required to run input shaping (one of Klipper’s more desirable features). This courtesy was noticeably absent from the more premium Flsun V400.
Adjustable Heat Bed
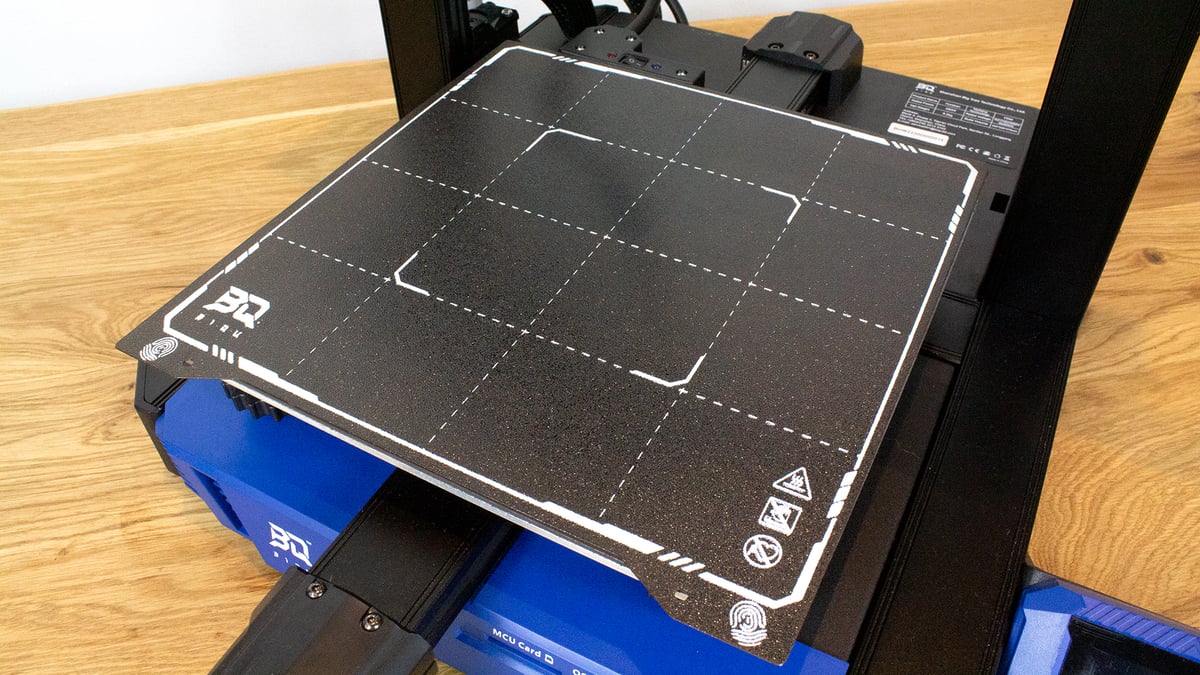
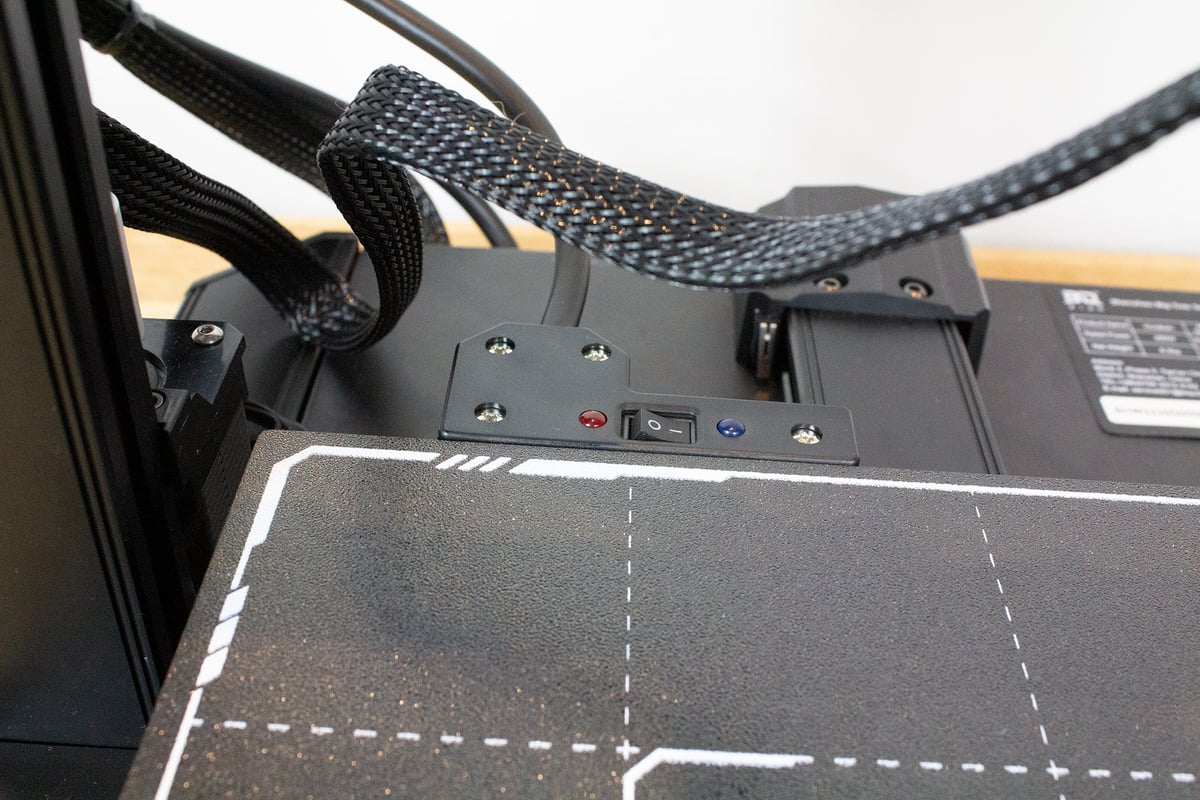
One Hurakan feature that would stand out on any affordable bed slinger is the adjustable heated build area. Biqu has included a simple switch on the printer’s heat bed to add a low-power option that heats just the center of the build platform; about 110 x 110 mm if the flexible magnetic print surface’s markings are taken as a guide, but we imagine that’s something of an approximation.
The power mode is indicated by a red and blue light – red for low power, red and blue for full power. On low-power mode, the heat bed’s outer ring heating wire is off and the bed consumes just 100 W of the full volume’s 240 W. The heat bed doesn’t appear to be physically segmented like Prusa’s upcoming XL is, so the cable toggle seems to be the only limiting factor. Being unsegmented, the bed’s outer areas do still heat on its 100 W setting — just not quite to temperature. The intended middle segment, however, reliably reached our target temperature on the 100 W setting.
Quality-of-Life Features
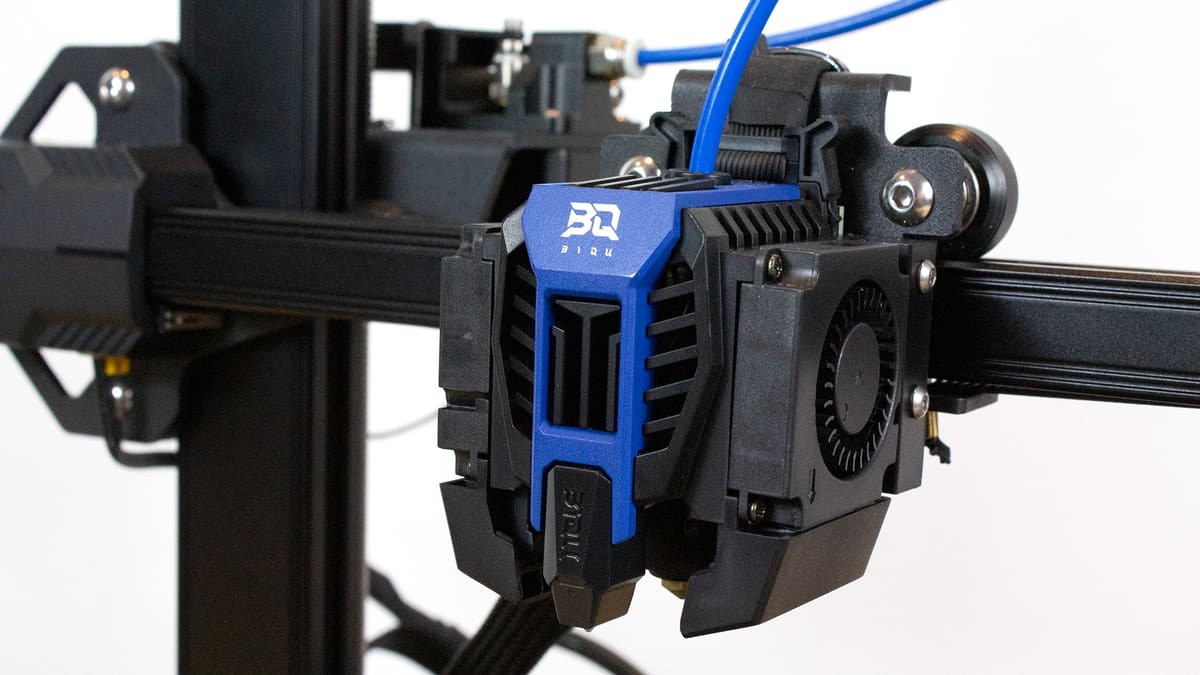
Aside from Klipper, the variable heat bed, and being rather handsome for an affordable 3D printer, the Hurakan has a host of quality-of-life features that would have merited its price tag without Klipper or the CB1 just a year ago. With ultra-quiet TMC2209 stepper drivers, a dual-geared Bowden extruder, dual 4010 part fans, filament runout detection, handy belt tensioners, an RGB part light, and a double-sided flexible magnetic print surface in addition to the SBC and mainboard listed above, there’s not much more we could want. That said, implementation is a bit lacking.
For one, the filament sensor is pure plastic and quickly sawed by the abrasion of filament passing through when using Biqu’s top-mounted spool holder. Even Creality’s Ender 3 series printers that feature filament sensors include a metal guard to prevent this sort of wear, but the damage can be seen with little use on the Hurakan.
Another example is the print head’s RGB lighting. It’s certainly there, and certainly RGB, but it’s mounted at the back of the print head — meaning the print head itself obstructs your vision of the illuminated part. Maybe putting the Hurakan on a big turntable will help?
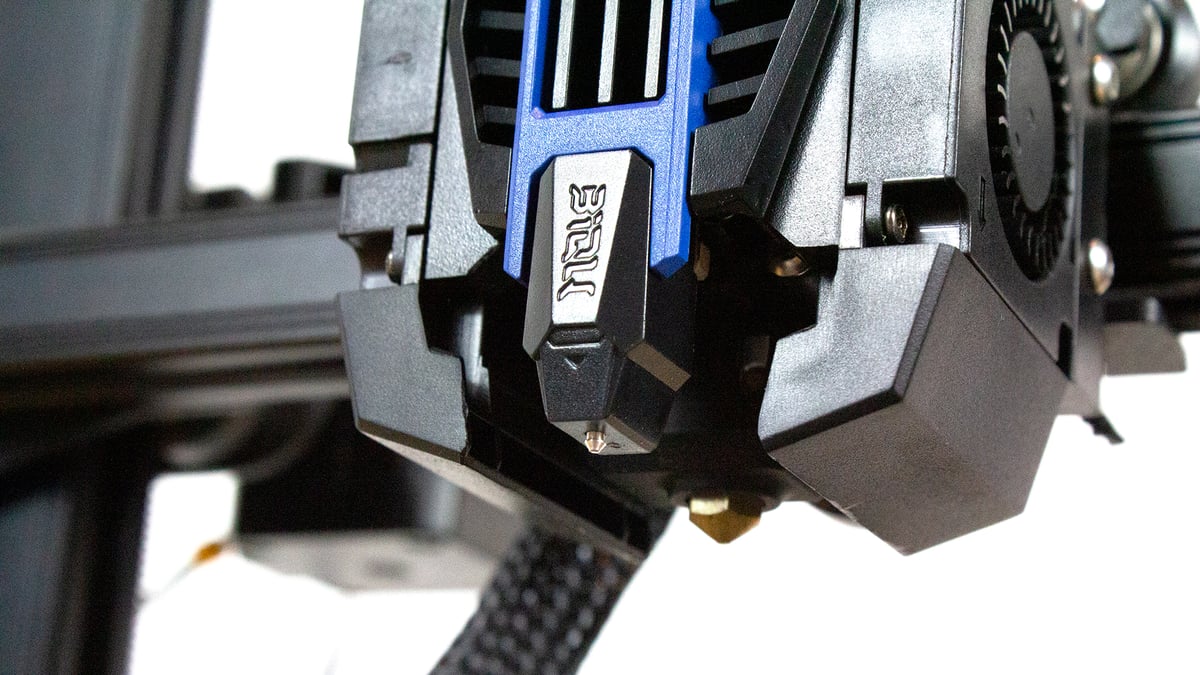
Don’t make the mistake of thinking all the Hurakan’s features are cheaply implemented though. The stock automatic bed leveling (ABL) using Biqu’s lightweight MicroProbe touch probe is of great quality. The unit is impressively small, mounted on the front of the print head, and Biqu claims that it weighs just six grams. Its prong is also metal, giving a feeling of greater quality than the purely plastic BLTouch clones often seen on budget 3D printers. Biqu claims the probe is good for “10,000,000+” … but doesn’t specify what. That stat is accompanied by just the words “longer usage”, so we assume it’s pokes. Poke away!
The Hurakan is clearly stacked, but there are a few features we miss on the set: namely dual Z-axis leadscrews, a direct extruder, a fancy touchscreen interface, and a camera. But Biqu sells all those features as Hurakan upgrades, and any USB webcam can simply slot into one of the two USB ports on its back. So, the exclusions are keeping costs low for everyone while delivering on options, at least.
Printing & Usability
Setting Up
Putting the Hurakan together is as simple as any of the semi-assembled bed slingers that have been common fare for years. Slip the X-axis onto the Z-axis extrusions, screw the Z-axis into place, plug everything in, and you’re good to go. We were a bit disappointed by the lack of mounting positions for the extruder’s cable, though. With just two spots to tie the cables down — under the filament sensor and above the print head itself — the cable sags and drags on the print bed when the print head is low and towards the X-axis’ left. It’s a minor complaint, but could eventually lead to wear.
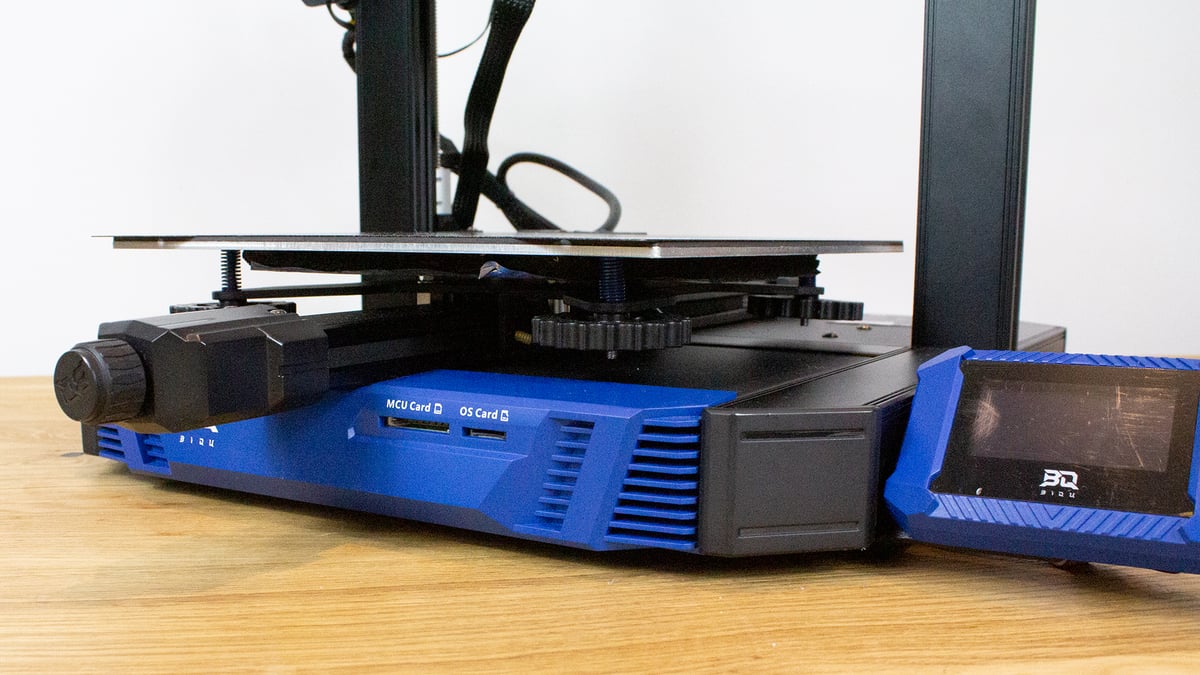
The microSD card containing Klipper hangs out the front of the printer’s base like any printer’s G-code shuttling SD cards. We scoffed at this at first, having assumed it to be one of those aforementioned G-code carriers and, upon realizing it’s the OS card, much preferring more “integrated” storage for our networked printers. But, after some troubleshooting, we realized the utility of such an accessible OS card. Just like the Pi’s mama used to make.
We did have some trouble turning the printer on because of this, though. It needs an irritatingly-slow 45 seconds to fire up, and will remain on its start-up screen telling you this well past 45 seconds if there’s no OS card to boot with. Unfortunately, for some reason, our OS card didn’t want to connect reliably. Only when we really shoved it into the slot would it work. But, we reinstalled the OS on another SD card and stopped facing this issue.
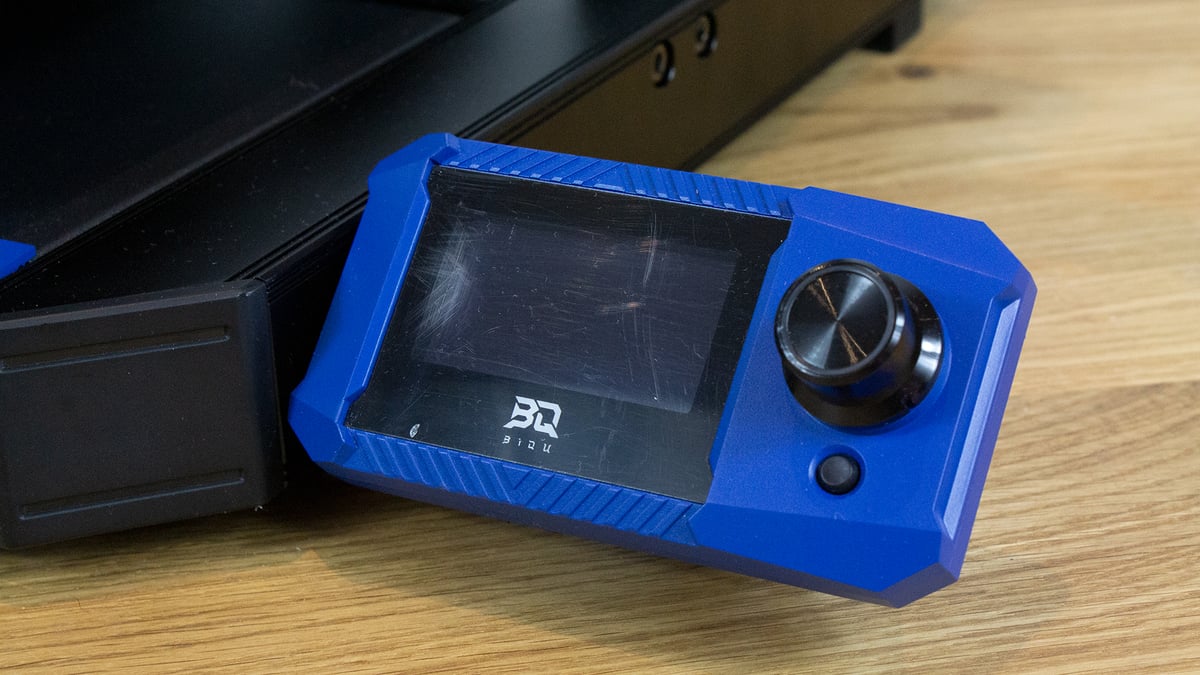
After connecting to our local network by directly editing files on the SD card to include our SSID information, booting the printer, and entering the provided local IP address in our browser, we were met with the pleasant Mainsail UI where we typically managed the Hurakan over our network — only using the simple 12864 display while checking on prints.
We were impressed with the printer’s calibration out of the box. The steppers needed no immediately noticeable adjustment, judging by our first round of calibration prints, and temperatures were very stable. We did have some regular clogging while testing retraction early on, but trimming the PTFE for a properly flush 90° end sorted that out.
The Prints
Though little tuning was needed, there were some extra calibrations we put the Hurakan through to get a full look at all its features. Specifically, input shaping and pressure advance.
These two features are some of the major draws to Klipper. Where manufacturer-compiled Marlin builds are often still lacking the firmware’s pressure advance equivalent, linear advance, adding pressure advance to Klipper simply requires adding a single line to the config files – no need to compile new firmware. So, after printing a few baseline Benchys and XYZ cubes, we jumped to these calibrations.
Pressure advance doesn’t require any special tools. It’s a simple matter of printing a pressure advance cube while running Klipper’s TUNING_TOWER command to set pressure advance factors during the print. Measure the result and you have your calibration. Easy.
Input shaping, or resonance calibration, a calculation that measures printer vibrations to reduce ringing, is similarly simple with Klipper, but does require an accelerometer to measure the vibrations. Biqu helpfully provides an accelerometer — the previously mentioned ADXL345 — to conduct the test with and the measuring process is automated. Users just need to mount the accelerometer, enter the required commands in Mainsail’s console, and wait.
Ringing was already reasonably limited on the Hurakan in our baseline ringing tower, but input shaping reduced it further. It wasn’t entirely eliminated, however, so printing at high speeds will likely still suffer from increasingly noticeable ringing, but we found it more difficult to capture the ringing on our “after” print on camera.
Though we’d given factory calibration a pass with our calibration cube printing within 0.1 mm below its target dimensions, clearance was noticeably tight on our ringing tower, leading us to make some clearance tests.
The Hurakan’s clearance was enough for some simple print-in-place models like the Graphica Fish to work well, but proper tests showed 0.3 mm of clearance and below wouldn’t budge. This was despite the extruder calibration being accurate, and not remedied after belt tensioning fixed other problems later on.
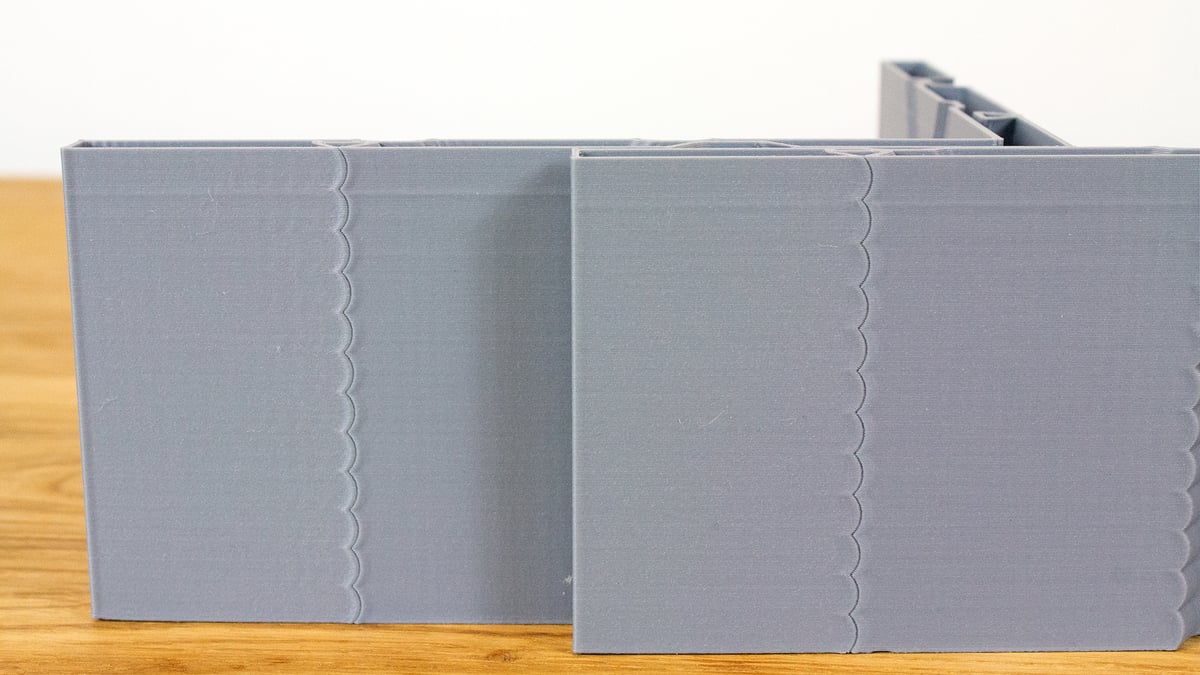
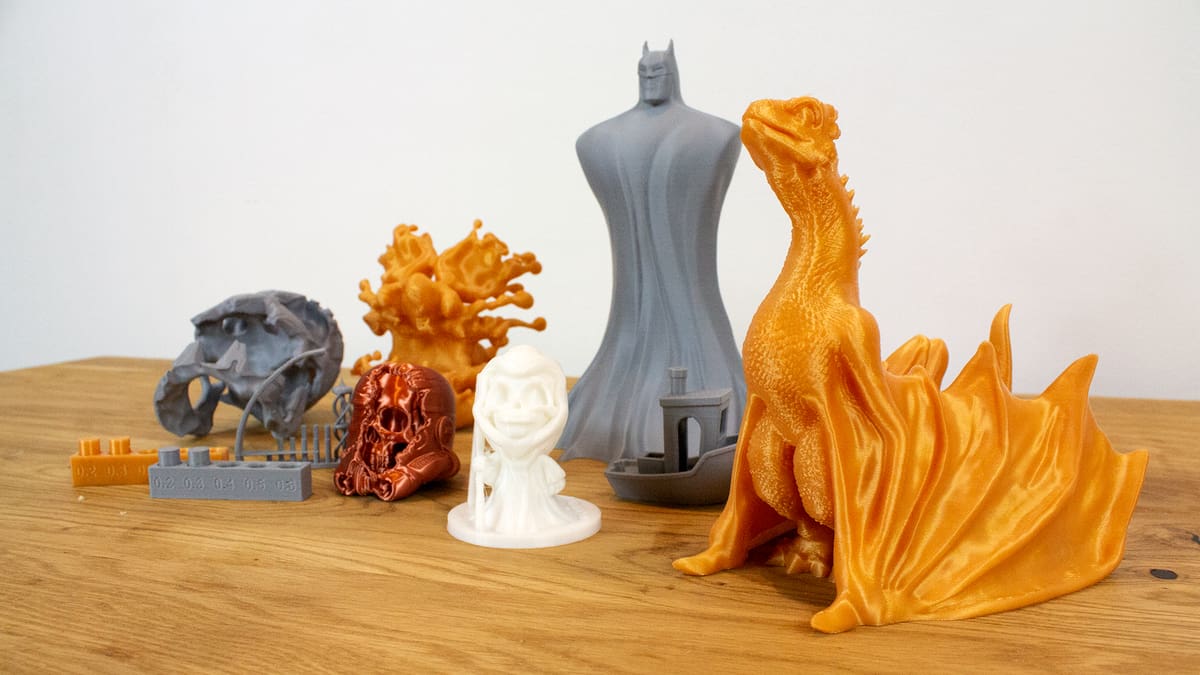
Aside from clearance, we weren’t completely happy with the surface quality on our ringing tower. It’s well within the margins of a successful print, but would benefit from some tighter tolerance. To test, we printed several surface quality test prints and a bust of Batman from Batman the Animated Series. Its tall, smooth surfaces were ideal for checking surface quality.

The print definitely highlighted the surface quality issues, but remains well within the margins of good quality – deteriorating somewhat on the model’s head where we also see some pocks suggesting our retraction settings could use some work. Overall, the surface quality issues here were workable with further tuning.
Since smaller areas of the Batman print suffered from worse surface quality, we wanted to test finer features. Though Toxic Splash is intended as a single, multi-color model, its two pieces served as a good test here. We printed the skull with the same material as Batman to see a model without such smooth surfaces, then moved on to the coral-like splash part of the model.
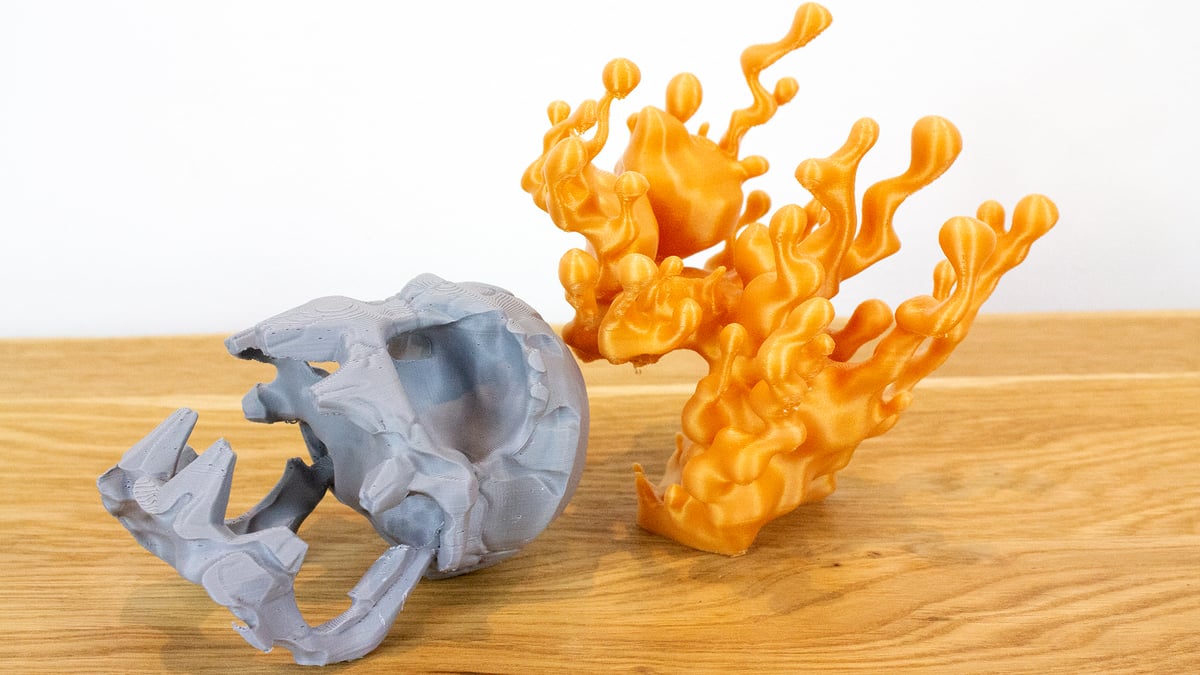
Our first print of the splash failed here, with both poor surface quality and even delamination on many of the stalks. We initially took that as an indication something was wrong but, after a bit of testing with smaller models and a reprint of the splash with new filament the results were much better (aside from some over-ambitious overhangs), with no changes other than loosened extruder gears, tensioned belts, and first-layer calibration.
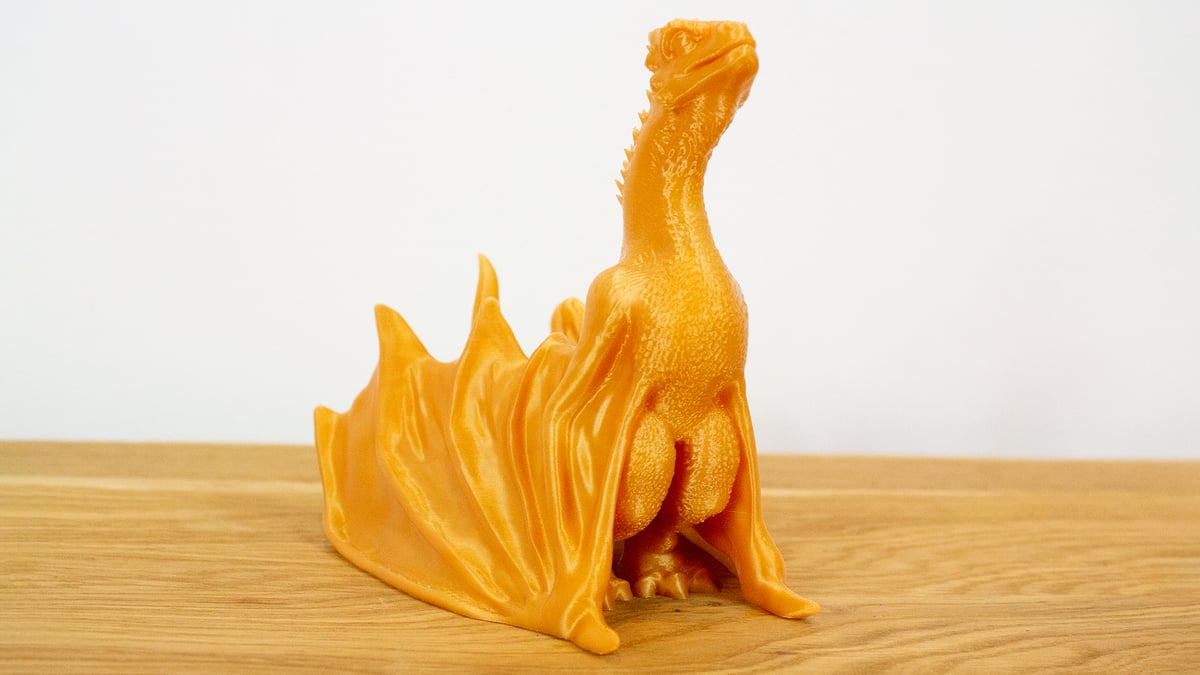
In fact, these small tweaks solved our surface issues. Our next print, Drogon, was one of the better models we’ve seen recently, with the intricate chest scales and neck spikes printing with exceptional detail at a slightly higher-than-average print speed of 80 mm/s. Thanks to the dual extruder gears, a very light touch was enough to reliably feed filament while barely biting into the material at all.
The Experience
The printer’s TMC2209s really do their job. This is the quietest printer we’ve worked with in some time. At our desk, about a meter away from the printer, we measured about 30 – 34 dB. Just in front of the printer, we measured only ~45 dB. Sometimes we even double-checked that it was still printing because of how quiet it is. Ideal for home use.
As with other implementations of Klipper, remotely managing the printer is a breeze. The attractive Mainsail web UI allows easily accessible macros, a visible module for a camera, and all the data output you could want.
Though our experience with the Biqu Hurakan was almost entirely good, a few complaints did crop up during our testing:
The CB1’s low specs show at times. If you’ve used Klipper on a Raspberry Pi or one of the Klipper screens coming out now, such as the Flsun Speeder Pad or Creality Sonic Pad, you’ll notice larger files are slow to upload. Not any slower than shuttling G-code with a microSD card, mind you, but it is noticeable.
Relying on a microSD card instead of onboard storage also created more problems than just a loose connection. At times, while using our own microSD card instead of the OS card shipped with the Hurakan, we ran into the MCU shutdown error mid-print. This error could be a number of things, but it’s likely to be a microSD problem. Easily solved with the right product, but still one more thing to think about. In our situation, the error was rare enough that it didn’t much bother much, but, for a printer that’s going to see long-term use, you’ll probably want to prevent it. Since Klipper doesn’t have a print recovery function like Marlin does, getting this error meant wasted time and filament.
We also ran into a couple of annoying roadblocks in our day-to-day use caused by an unoptimized printer profile. These problems are easy to fix by editing the printer profile directly in Mainsail’s file interface, but you can’t fix them if you don’t know how to — and the need to seems like it defeats the purpose of a stock Klipper printer. A good example here was a probe deploy distance that was too small, preventing us from running consecutive prints without first rehoming the print head. Sometimes more than once.
These are small complaints and are far from experience-ruining, but remain noteworthy nonetheless.
Is It Worth It?
The Biqu Hurakan’s ~$370 price and unique hardware combination, make it a difficult offer to pass up. It’s kitted out with quality-of-life features, but the real value is having Klipper pre-installed with a dedicated SBC – especially if you’re not confident in managing the installation process yourself.
Though you can find cheaper Marlin printers with ABL, filament runout detection, a dual-gear extruder, and belt tensioners — like the ~$210 Elegoo Neptune 3 — the Hurakan’s wireless connectivity, adjustable heat bed, and USB ports for plug-and-play webcam compatibility make a compelling case for value before even mentioning firmware. That Biqu’s machine also skirts the need to source an SBC and reinstall firmware to get Klipper further builds its case, with a quality mainboard and cabling supporting it even more. Given that, we can enthusiastically recommend the Hurakan for its price.
Still, the Hurakan isn’t a seamless experience, and making the most of some of its more desirable features requires a bit of familiarity with 3D printing. So, we wouldn’t say that the Hurakan makes for a good beginner’s machine. But, if you have a little bit of 3D printing experience under your belt and want something a little more kitted out, the Hurakan delivers good results at a tempting price. It’s a great way to convert over to Klipper, should you be looking to do so.
Features
Kinematic performance (and more) with Klipper
Cartesian 3D printers with the Hurakan’s 220 x 220 x 270-mm build volume and printing capabilities are a dime a dozen. The key differentiation is that this is one of the first Cartesian 3D printers that runs the Klipper firmware out of the box. This is pretty unique, as Klipper enables lots of interesting features such as input shaping, which compensates print head vibrations in firmware to reduce ghosting, ringing, and echoing; and pressure advance, linear advance’s Klipper equivalent that better matches print head movement with extrusion.
Most hobby-level FDM machines are Marlin-based. Due to the limitations of this firmware and the boards they run on, they won’t be capable of certain advanced firmware features without aftermarket upgrades and firmware flashing. This requires tinker time and some expertise to get right. Sure, some people like doing that stuff – but not everyone has the time or the patience. Biqu is giving consumers a machine that has everything they need without modification, making it easier for inexperienced or impatient users to hop on the Klipper hype train.
Enhanced Electronics – Manta and CB1 Boards
Your bog-standard 32-bit 3D printer mainboard simply won’t deliver the processing power Klipper requires to run. You need an external board with more processing power, such as a Raspberry Pi 3 or later. Thanks to the ongoing chip drought, these boards are hard to find though (not to mention expensive to buy when you do find them) so that’s not always practical.
Biqu has worked its way around this problem with its “CB1” single-board computer and its new “Manta” series of motherboards. Reduced costs and readily-available componentry are central design factors here.
Inside the Hurakan is a Manta M4P 32-bit board based around a 64MHz ARM STM32H0B0RE, plus a CB1 4-core Cortex-A53@1.5GHz with 512 MB of DDR3 memory. With these working together, the Hurakan can run Klipper natively without pricing itself out of the budget market.
Lots of Connectivity Options
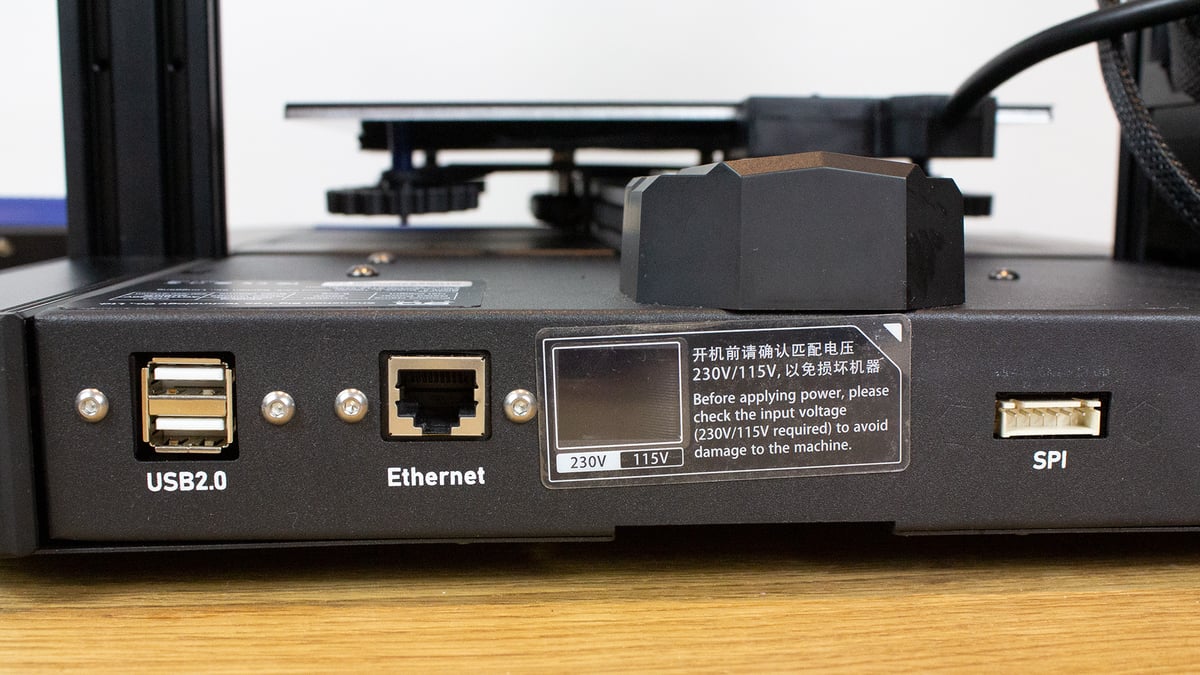
The Hurakan features Wi-Fi (with Mainsail web UI for remote operation) and 100 Mbps Ethernet connectivity, plus dual female USB-A ports to connect a USB camera, USB flash drive, or any other USB device compatible with the system.
There’s also an external SPI port to connect an accelerometer module. This is used to calibrate input shaping if the machine is installed in different locations. Biqu even points out ideal mounting points on the bed and print head to accommodate its included ADXL345 accelerometer so novices can easily take advantage of the functionality.
Automatic Bed leveling
Manual bed leveling can be a chore. Thankfully, the Hurakan includes a Biqu MicroProbe; similar to a BLTouch bed leveling probe, but super-light (6 g) and just about a third of the length of a standard ABL probe. This should help you get first layers down consistently and provide a smooth printing experience.
Adjustable Heat Bed
If you’re keen to save on power consumption, the heated bed can be changed from 240 W to 100 W via a switch. When set to 100 W, only the middle zone of the bed will fully heat — about 110 x 110 mm — which is ideal for smaller models. When set to 240 W, the entire bed will heat.
Further Features
Some additional features to consider:
- Filament runout detection: A sensor to detect if the filament has run out is a standard feature and nice to have for prints that run for many hours.
- Tensioners on X and Y belts: To get good dimensional accuracy, you can easily tweak belt tension using the included tensioners, instead of doing any mechanical rework to the machine.
Featured Prints
We use many models generously shared with the 3D printing community to conduct these reviews. If you like what you see, here’s a list of who designed them and where you can find them to 3D print yourself.
Tech Specs
General Specifications
- Technology: Fused deposition modeling (FDM)
- Year: 2022
- Assembly: Partially assembled
- Mechanical arrangement: Cartesian-XZ-head
- Manufacturer: Biqu
3D Printer Properties
- Build volume: 220 x 220 x 270 mm
- Feeder system: Bowden
- Print head: Single nozzle
- Nozzle size: 0.4 mm
- Max. hot end temperature: 260 °C
- Max. heated bed temperature: 100 °C
- Print bed material: PEI-coated spring steel
- Frame: Aluminum
- Bed leveling: Automatic
- Display: Yes
- Connectivity: Wi-Fi, Ethernet, USB
- Print recovery: No
- Filament sensor: Yes
- Camera: No (upgrade)
Materials
- Filament diameter: 1.75 mm
- Third-party filament: Yes
- Filament materials: Consumer materials (PLA, ABS, PETG, Flexibles)
Software
- Recommended slicer: Cura, Simplify3D, Repetier-Host
- Operating system: Windows, Mac OSX, Linux
- File types: STL, OBJ, AMF
Dimensions and Weight
- Frame dimensions: 480 x 470 x 482 mm
- Weight: 8.2 kg
Similar Printers
Not many 3D printers run Klipper out of the box, but plenty of Cartesian 3D printers can be obtained relatively cheaply. If you’re willing to invest time and additional hardware into them, you can rig up a 3D printer that works just as well as this one. Of course, you’re still subject to a silicon shortage right now, and you still need to educate yourself if you don’t already know how to do such an upgrade, so weigh that with an affordable option set up out of the box.
For further information, check out our Best 3D Printers Guide. But for now, have a peek at the following printers:
FLSun V400
The FLSun V400, with its delta kinematics is a very different beast from the Hurakan’s Cartesian motion system. But, they both ship with Klipper firmware, and are the first two mass-produced printers we’re aware of to do so. Delta kinematics don’t always provide the best accuracy when compared to Cartesian machines, but they sure are cool to look at. Fortunately, we also found the V400 to be a pretty stellar machine in our testing — with Klipper squeezing some high performance from its already quick motion system.
Elegoo Neptune 3
If you’re only after the Hurakan’s quality-of-life features and are keen to save a buck, you can’t do much cheaper than the Elegoo Neptune 3. For ~$210 the machine comes with a dual-gear extruder, auto-bed leveling with a resistance strain gauge, a filament sensor, and belt tensioners. But, it’s electronics aren’t quite as interesting as the Hurakan’s, even without the SBC.

Creality Ender 3 S1
Creality’s modernization of its most popular product in the Ender 3 S1 saw the printer thoroughly kitted out. It shares all the quality-of-life features of the Hurakan, but also adds Creality’s excellent Sprite direct extruder and a second Z-axis leadscrew into the offer. The comparably-priced ~$380 printer doesn’t have Klipper, but you can always grab Creality’s new Sonic Pad to change that.
Lead image source: Biqu
License: The text of "Biqu Hurakan Review: Cost Klipping" by All3DP is licensed under a Creative Commons Attribution 4.0 International License.
CERTAIN CONTENT THAT APPEARS ON THIS SITE COMES FROM AMAZON. THIS CONTENT IS PROVIDED ‘AS IS’ AND IS SUBJECT TO CHANGE OR REMOVAL AT ANY TIME.