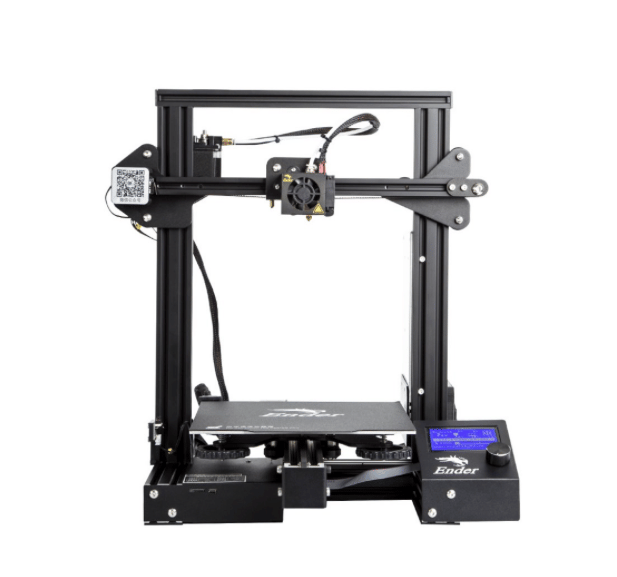
Creality Ender 3 Pro Review: Great 3D Printer Under $300
Rating

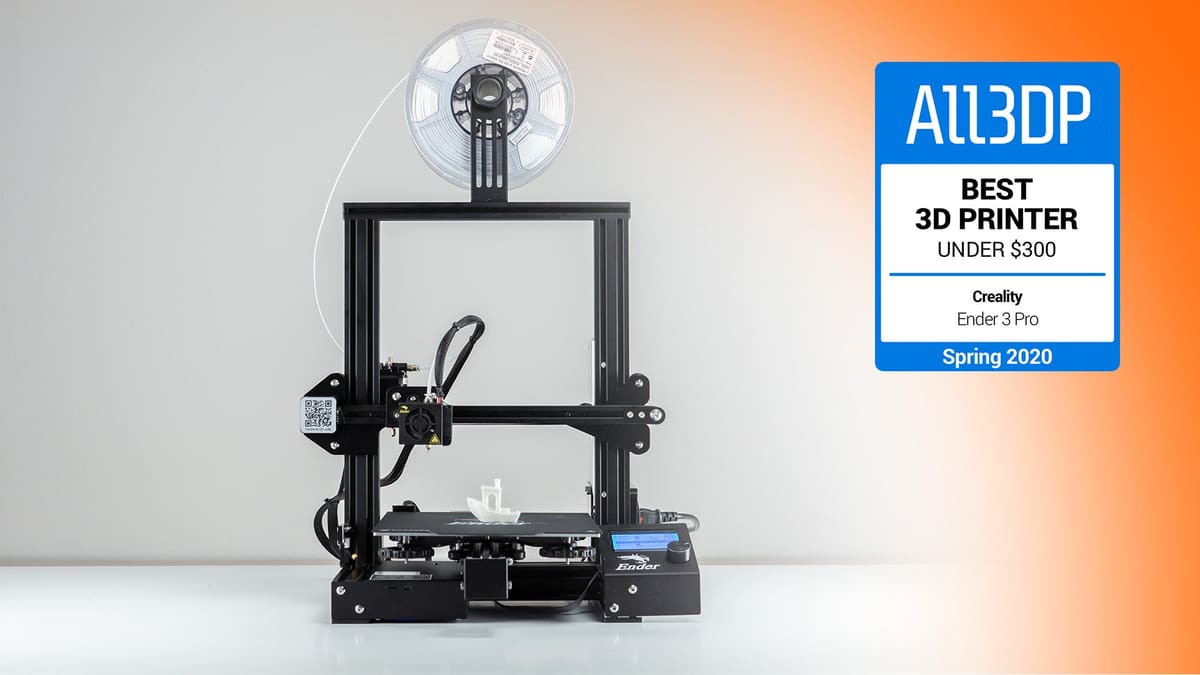
The Creality Ender 3 Pro is our pick for the "Best 3D Printer under $300" in spring 2020. Check out our review to find out why it is the better Ender 3.
Creality’s Ender 3D printer series is stronger and more popular than ever. Starting with the Ender 3, the series has found adoration from makers worldwide. Now, the Ender 3 Pro can even be found for under $300, making it our Winter 2019 pick for the “Best 3D Printer under $200”.
As you’ll find out in this review, this also applies to the successor Ender 3 Pro: We love its price, hackability, and overall print quality.
Pros & Cons
Pros
- Highly affordable
- Easy to assemble
- Compact design with decent print volume
- Prints can be high-quality
- hackable and upgradable
- Tight filament path improves compatibility with flexible filaments
- Good results on the Autodesk Kickstarter tests
Cons
- Print bed leveling is tricky
- Magnetic bed not to everyone’s liking
- We’ve encountered problems with brittle filament
- Sometimes, additional adhesion materials are needed
- Some flaws of the Ender 3 weren‘t ironed out

Verdict
The expectations for the Ender 3 Pro were high – and the good news is: Considering its price, the Ender 3 Pro is an exceptional 3D printer.
But let‘s clarify one thing first: The Pro designation of this machine merely a bold marketing statement. The Ender 3 Pro is an affordable 3D printer, but by no means could be considered to be a professional machine. It’s an excellent and affordable tool for makers, hobbyists, tinkerers, and to some degree even for educated beginners. And if you are willing to spend some time and give the printer some tender loving care, the Ender 3 Pro is capable of delivering astonishing quality prints that puts pricier printers to shame. But professional? No.
Still, there are many good reasons to drop $250 on this machine. The first reason is obvious: its extremely low price! Second, the Ender 3 Pro offers features that you don’t find in more expensive 3D printers: a decent build volume of 220 x 220 x 250mm, a magnetic bed, a power recovery mode, and a tight filament pathway that makes it easier to work with flexible materials. Thirdly, it just irons out some of the flaws of the Ender 3, which is a machine that makers love because it’s hackable as hell.
There are some drawbacks, though.
We developed a love-hate relationship with the most advertised feature of the Ender 3 Pro: the magnetic bed. On paper it’s a welcome addition to an already great machine, but after living with more premium analogs of this feature – such as the spring steel sheet found on the Prusa i3 Mk3), you don’t want to go back grabbing a spatula to hack the print off the build plate.
Compared to a firm but flexible metal build plate, the magnetic bed of the Ender 3 Pro is positively flimsy. In addition to its lackluster flop, it doesn’t snap into a predetermined position, adhering instead where it lands.
Quite often, we found ourselves in a situation where we had to manually re-adjust the sheet. The reason for that is the tight space between the inner sides of the aluminum frames on which the bed resides. If the bed isn‘t nicely aligned, it will scrape on the Z-axis, ruining your print.
But once the bed has finally cooled and you can pluck your print off it, these nuisances are forgiven: The Ender 3 Pro is capable of delivering great print quality.
Also, bed leveling is still an issue. If we could wish for a useful iteration for an Ender 3 Pro, it definitely would be auto-leveling. It is crucial for the quality – so take your time to do it properly, and your prints will turn out much better. If you don’t do so, you might even end up with the nozzle digging in the bed, which may ruin the coating and lead to ugly and inconsistent prints.
These flaws aside, we found the Creality Ender 3 Pro, for the most part, to be a highly enjoyable 3D printer that we’re sure the majority will love to spend time with. Once you get the settings and the bed calibration right, the quality this affordable 3D printer can deliver is astonishing.
Ender 3 or Ender 3 Pro?
One of the most asked questions regarding the Ender 3 printer family are the differences between the regular and the Pro version. They can be summed up in just three short bullet points:
1. Improved Mechanical Properties
The Ender 3 Pro has been redesigned with a more sturdy, 40×40 aluminum extrusion for the Y-axis base. Creality wanted to improve the overall stability of the printing surface – and they succeeded.
Also, better bearing wheels deliver more stiffness, reduce friction, and give overall better dimensional stability. This and some broad rubber feet also help to reduce the noise level.
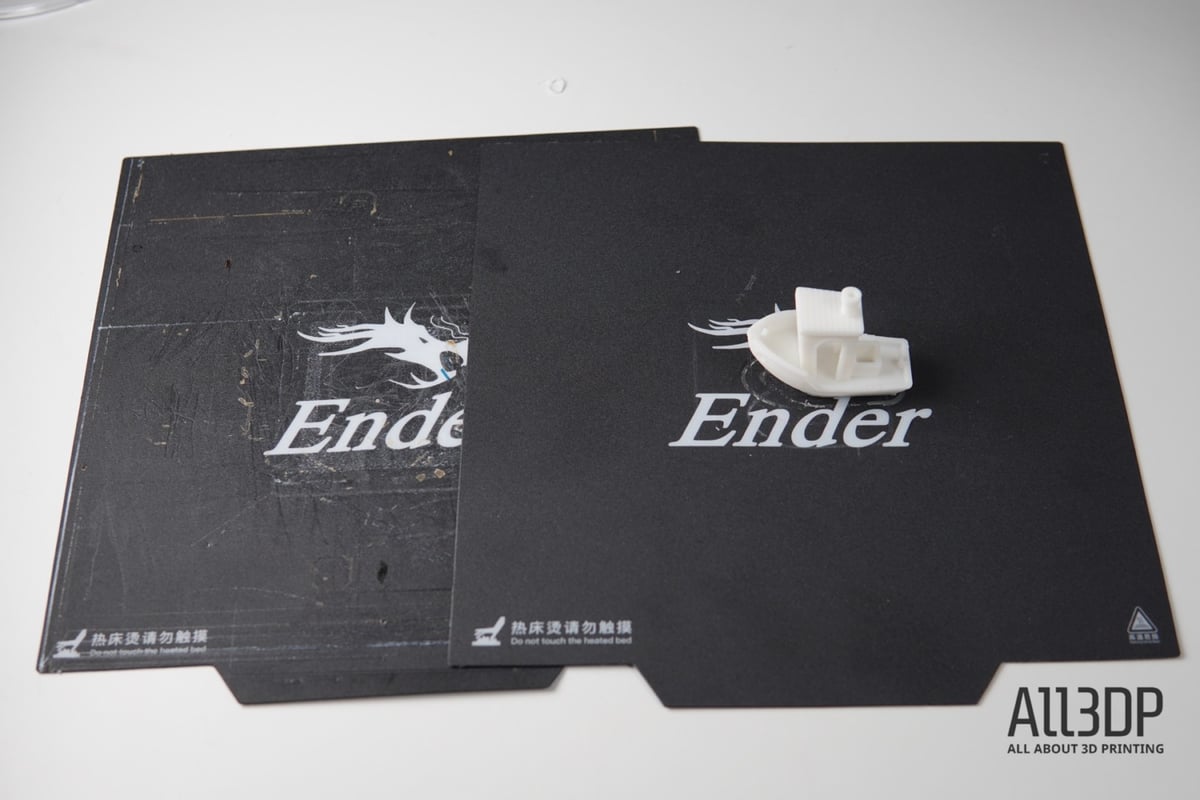
2. New Magnetic Printing Surface
Last, but not least, the Ender 3 Pro now comes equipped with a “C-MAG” magnetic printing bed. The sheet is removable and flexible, which allows you to pluck prints off the build plate easily. The textured surface helps to stick the critical first layers to the bed.
These improvements lead to a slightly higher price for the Ender 3 Pro. When the printer came out in September 2018, the retail price started at $299, whereas a Creality Ender 3 topped out at $199, often available for less. Over time, prices tumbled, and you can find the Ender 3 Pro for as little as $215.
Best check here for the current best price for the Creality Ender 3 Pro.
So, do you need an Ender 3 or an Ender 3 Pro?
So, should you buy the cheaper Ender 3 or the improved Ender 3 Pro?
Reasons for the Ender 3: In our opinion, it depends if you have experience in tinkering. If replacing fans, printing and installing modifications, even exchanging its build plate to a glass sheet doesn’t put you off, you might be better off with the original Creality Ender 3. For an additional $100 of spare parts, you can make it a monster machine capable of printing the gamut of filaments at astonishing quality with ease.
Reasons for the Ender 3 Pro: If you are on a tight budget, care for the advertised features and some overall improvements, and you don‘t want to spend much time tinkering with the machine itself, the Ender 3 Pro should be your go-to machine. We liken it in quality and user experience to the Anycubic i3 Mega, a 3D printer we also thoroughly recommend (more here).
When it came to print quality, the Ender 3 Pro delivered most of the time. Some results were even indistinguishable from printers in the $1000 range. Others were sub-par, to say the least.
Learn more:
Unboxing & Assembly
If you can build an IKEA shelf, you can build an Ender 3 Pro. As with the original Ender 3 assembly and setup are a cinch meaning even those with little experience in 3D printing will be able to build, calibrate and set up an Ender 3 Pro.
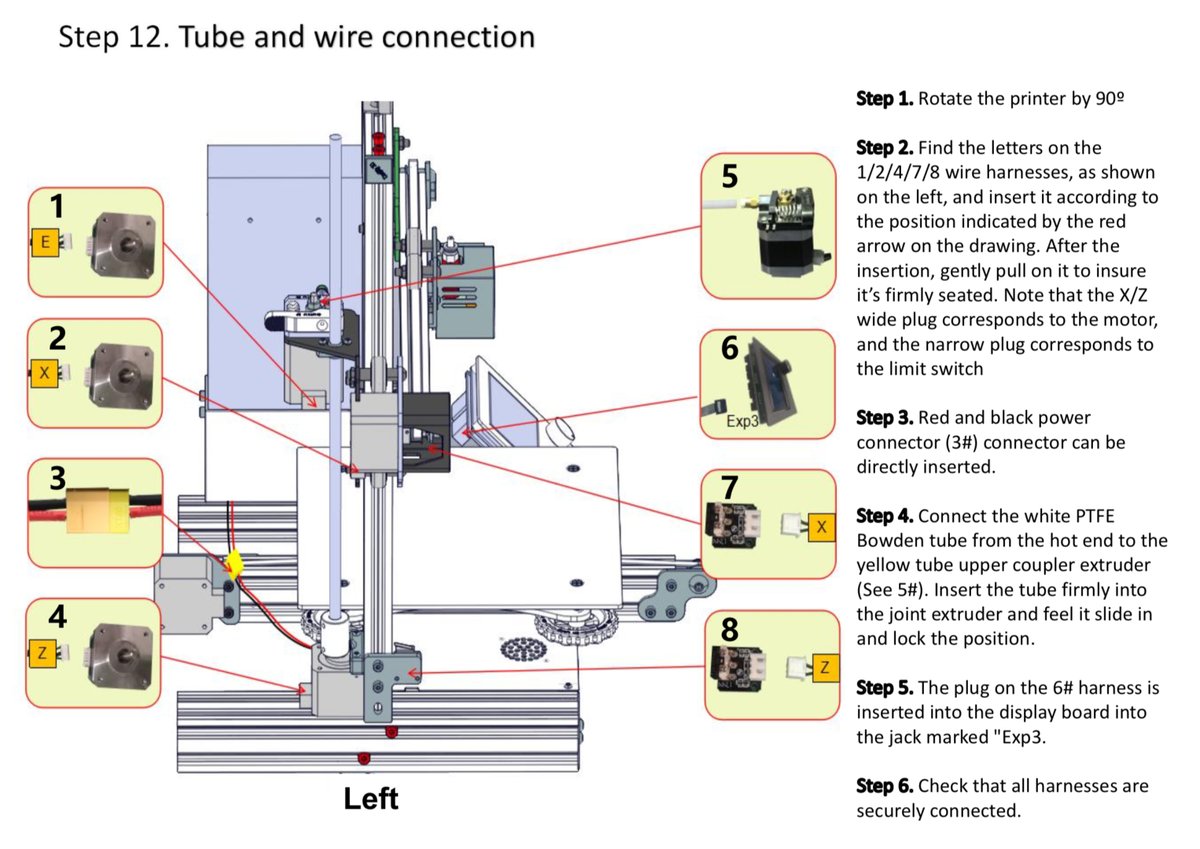
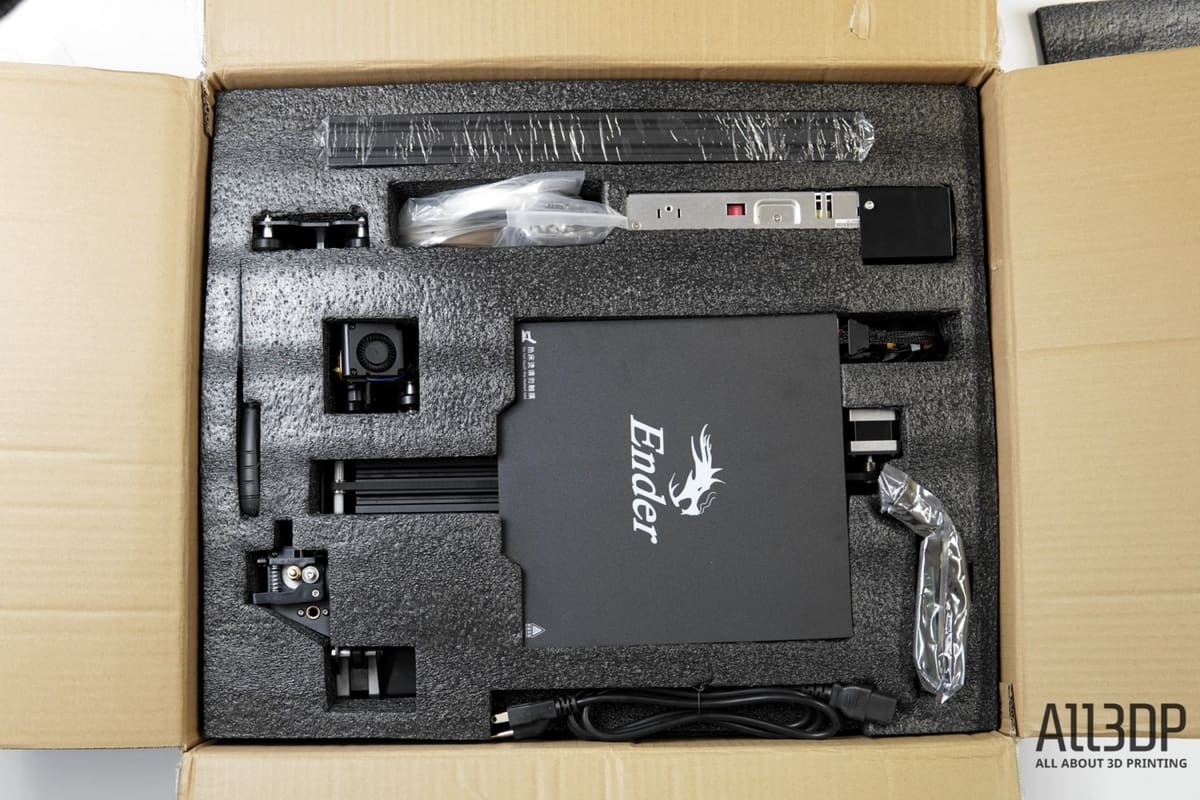
Creality tries to make the process as painless as possible. Every part is clearly labeled, so you won’t have to guess which part goes where. You’ll find an instruction sheet for assembly in the box, which is quite helpful. Additional manuals and troubleshooting guides can be found on the SD-card that comes with the Ender 3 Pro. Creality even produced a video that can be of help if you aren‘t sure about the orientation of the parts. So overall: Nicely done, Creality!
It took us roughly two hours to unpack and build the Ender 3 Pro. The X and Y axes come pre-built, so you just have to mount the Z-axis. The Ender 3 Pro comes with a set of tools, an 8GB gigabyte SD card. What we didn’t like so much was the fact that everything, even plastic parts, come wrapped in additional plastic.
We ran into three problems that took us just some minutes to resolve.
- First, the belt that moves the extruder isn’t easy to mount. It took us several attempts to get it right.
- Second, the X axis which is holding the hotend was wobbly even after we followed the instructions. If you tighten the nuts holding the wheels in the back, you’ll gain a much more stable axis.
- And third (and that’s a bit embarrassing), we mounted the spool holder the wrong way, which was resolved a minute later (ahem).
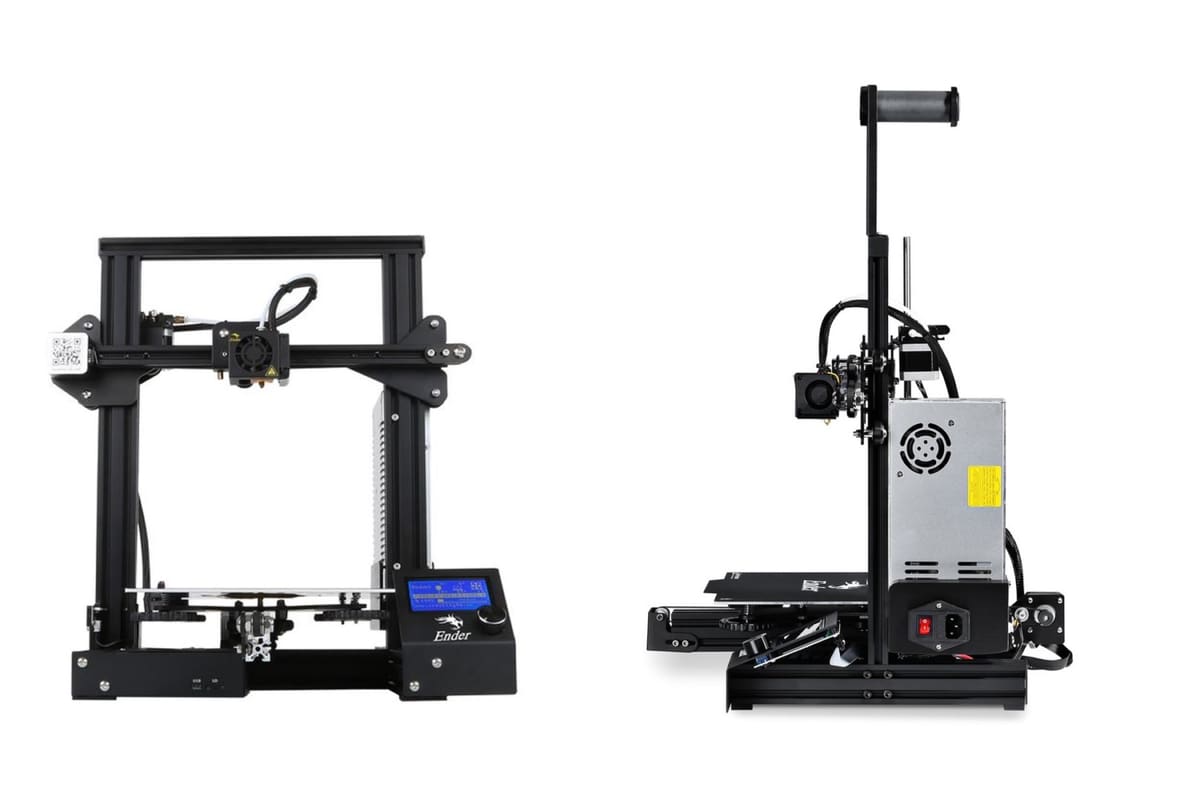
Design
Let‘s not beat around the bush here: The Ender 3 Pro and the Ender are not perfect printers by any means. Mostly, people buy them for their incredibly low price point. The price slightly varies depending on the provider you purchase it from, but as of Winter 2018, the Ender 3 Pro can be found for under $249.
Like on the Creality CR-10, the Ender 3 Pro’s frame is made from aluminum extrusions. A single leadscrew drives the Z-axis on the left-hand side of the frame. However, unlike its forebear Ender 2, which featured a cantilever style that left the X-axis rail projecting into thin air, the Creality Ender 3 Pro completes the loop and closes the frame out.
Like the Creality Ender 3, the Ender 3 Pro features a generously sized heated print bed which measures 220 x 220 x 250mm – nearly double that of the Ender 2 and comparable to a Prusa i3 Mk3 (250 x 210 x 200 mm).
Another cool feature of Creality Ender 3 series is the ability to fully recover and resume a print after losing power or getting disconnected – a feat made popular by the Prusa i3 MK3 3D printer. We’re pleased to see it implemented on a sub-$200 3D printer.
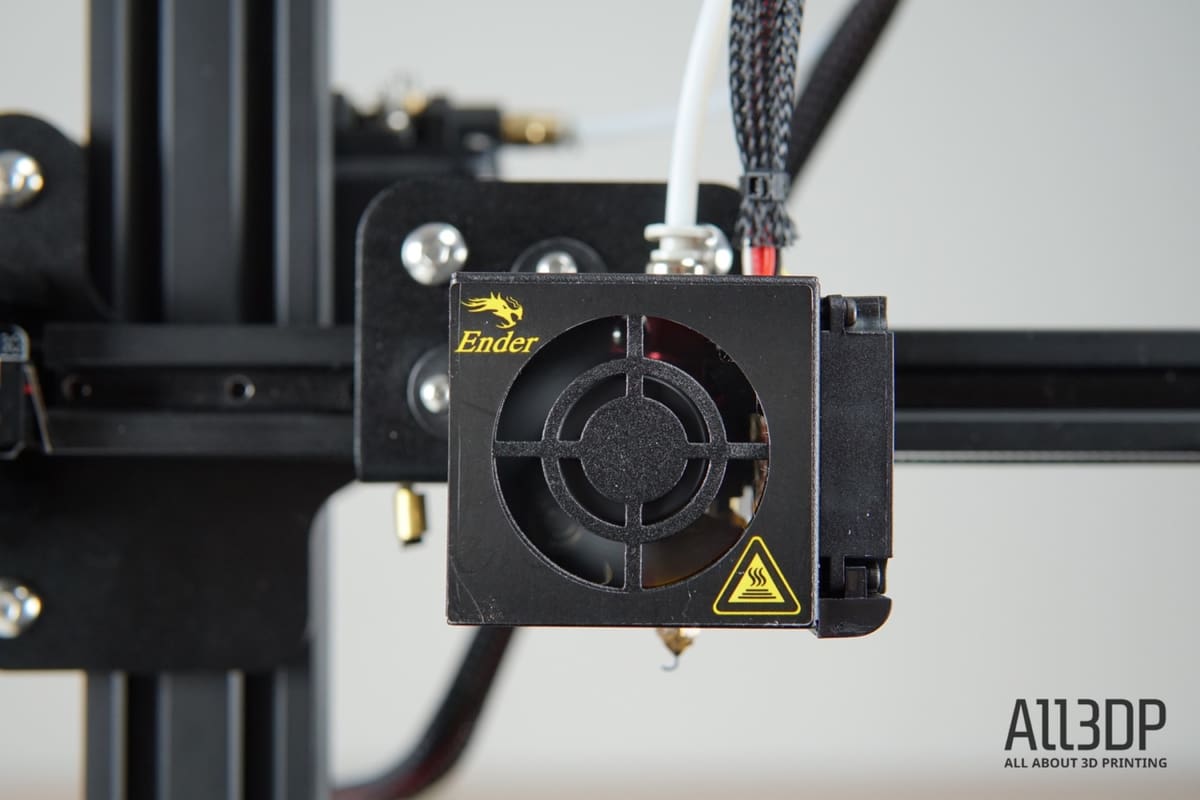
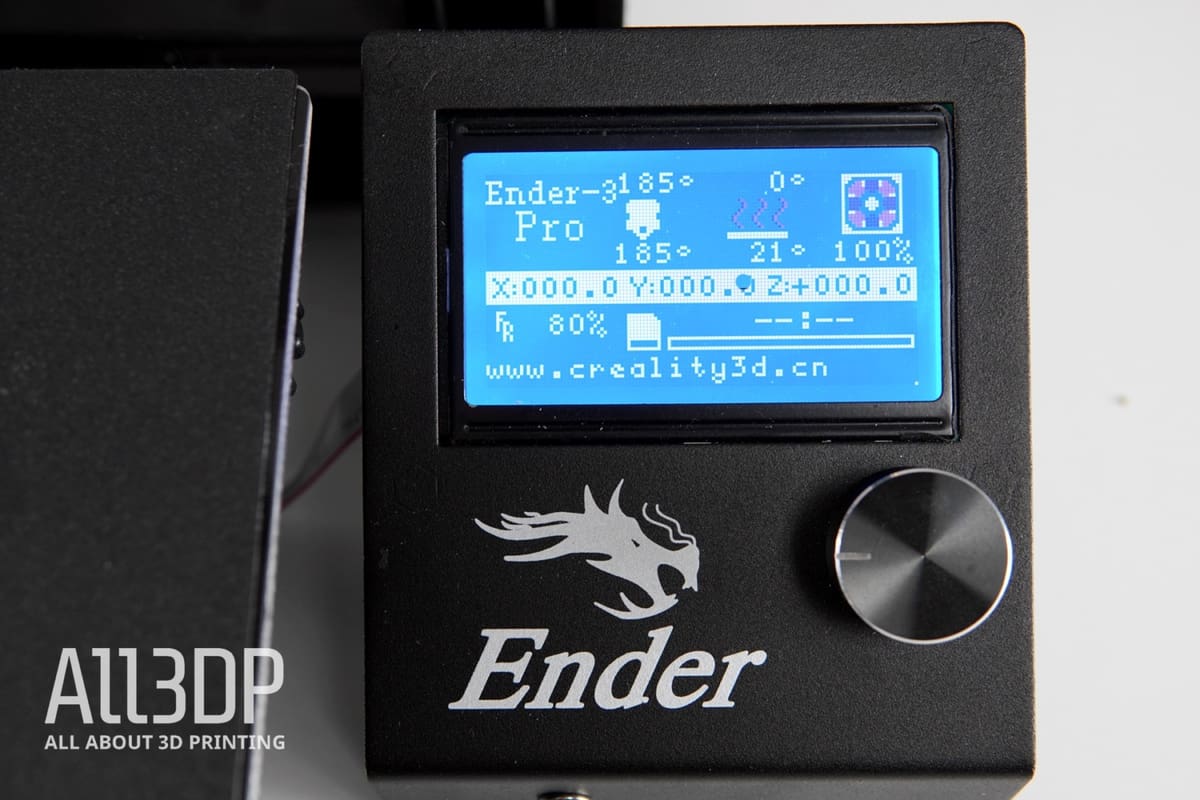
On the right-hand side of the Creality Ender 3 Pro frame is an attached LCD display with a clickable control wheel. The control board isn’t covered, so a cover might be one of the first modifications you print for your new machine. The interface is the same as for any other Creality 3D printer. It offers some of the more obscure settings, but overall, it’s relatively easy to use.
Whereas the Ender 3 is fully open source, there are no blueprints of the Ender 3 Pro available yet. We’ll keep you up to speed on this one.
All of the features make the Creality Ender 3 Pro sound pretty compelling, but printing speaks louder than words. So, we decided to put this 3D printer to the test by building it and taking it out for a test drive.
Test Prints
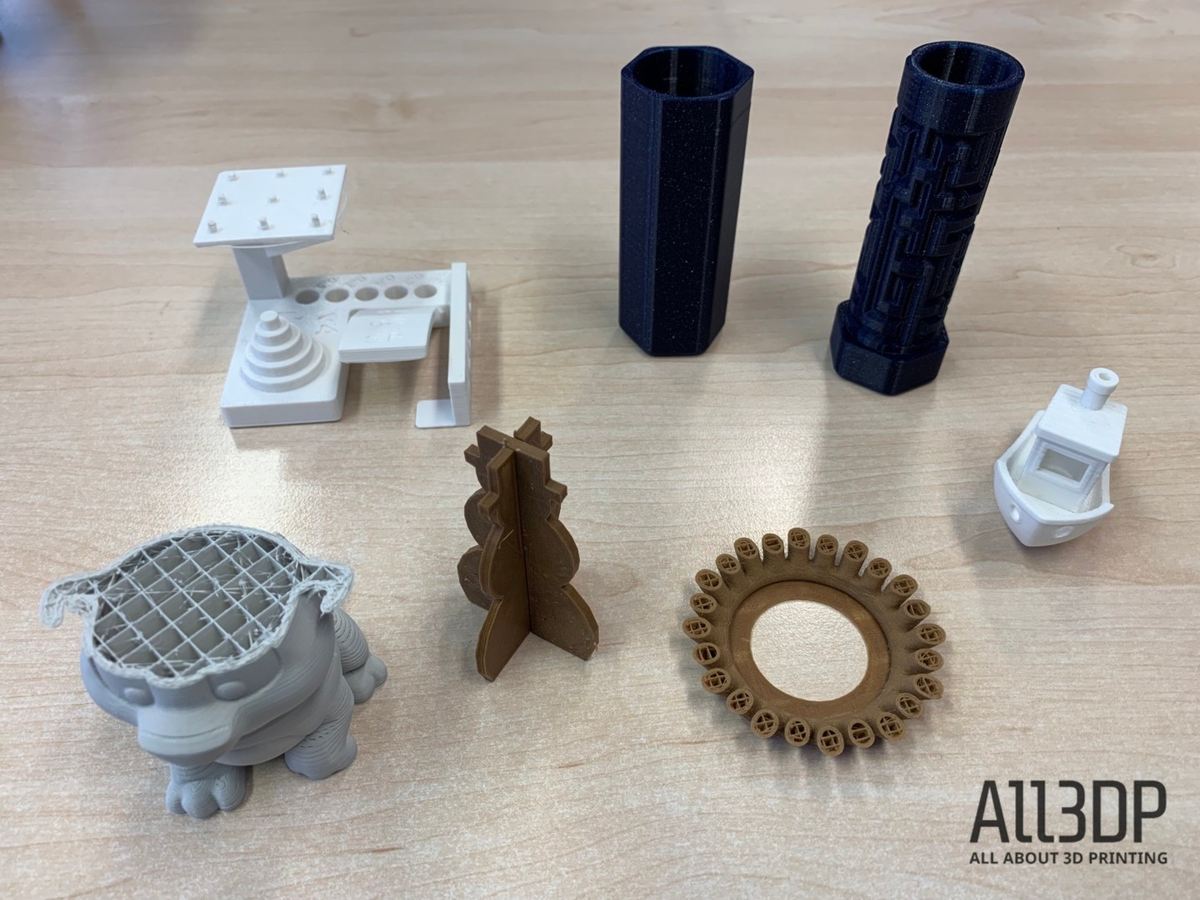
We started out with the test-dog.stl that Creality provides as a test model on their SD card. Unfortunately, the print didn’t turn out satisfactory – on the contrary.
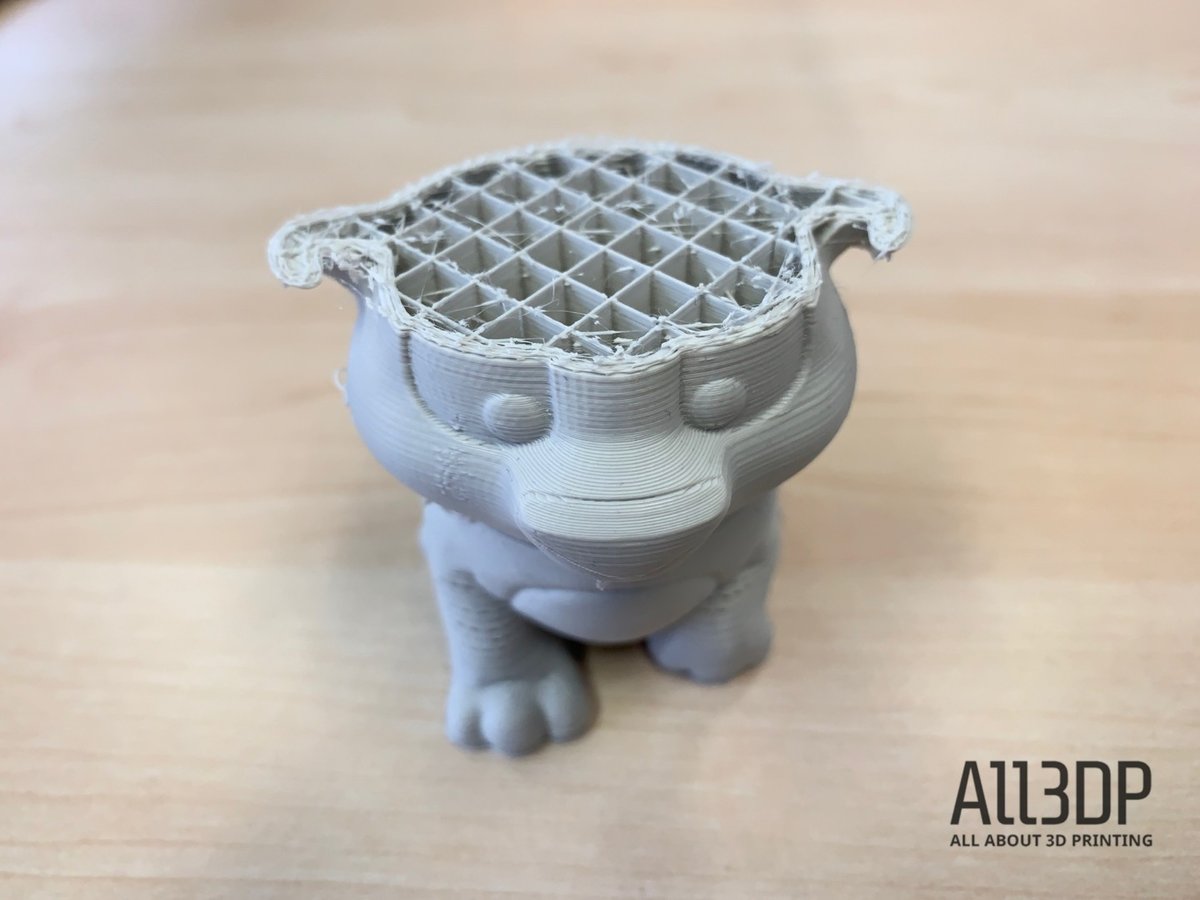
As you can see, we encountered layer dropouts and underextrusion. To make matters worse, the filament ripped off near the end of the print. So we re-leveled the bed, adjusted the speed settings in Cura – this time, it worked.
Next step was printing a Benchy with white PLA filament from Raise3D. The Benchy turned out satisfactory, with just some minimal layer lines and the occasional blob visible. Overall, this model gave a glimpse of what the Ender 3 Pro is capable of.

Then we switched to eSun’s Bamboo filament, as we wanted to 3D print a lampshade, which we bought from Cults 3D. We made several attempts for this 12-hour print, but unfortunately, every time it ended with snapped filament and the printhead printing empty circles in mid-air. The culprit for these issues, a clog, took an additional hour to clear. It even required sacrificing a short length of PTFE tubing, which had completely smeared and clogged from the molten wood filament.
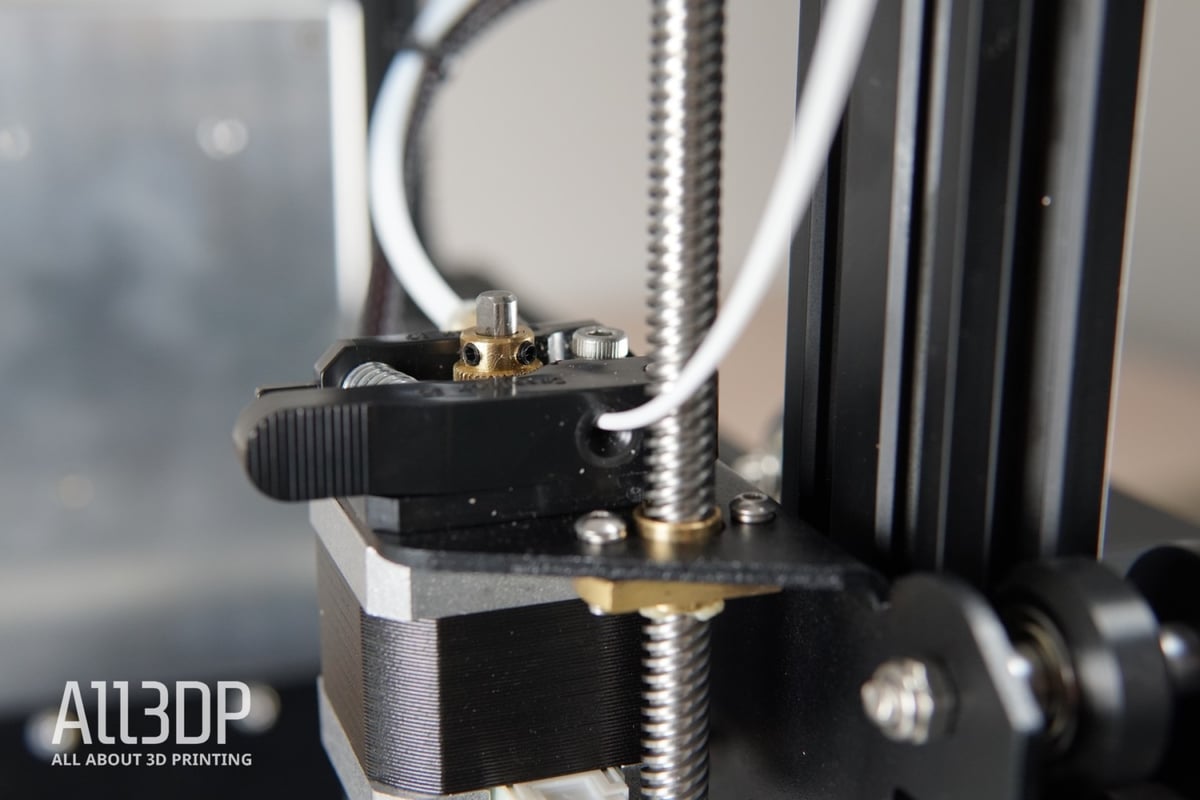
So, was this the Ender 3 Pro’s fault? We dare to say yes. The filament is fed near the lead screw through a hole, which has quite sharp edges. So if your 1.75mm filament is brittle (most wood filament is), the chance of snapping while getting pulled in by the motor is quite high. We recommend printing this little modification here to avoid the problem. After three attempts and for the sake of time, we gave up.
We had better results with the Fillamentum Vertigo Starlight, one of our favorite filaments. We printed a maze without any supports.
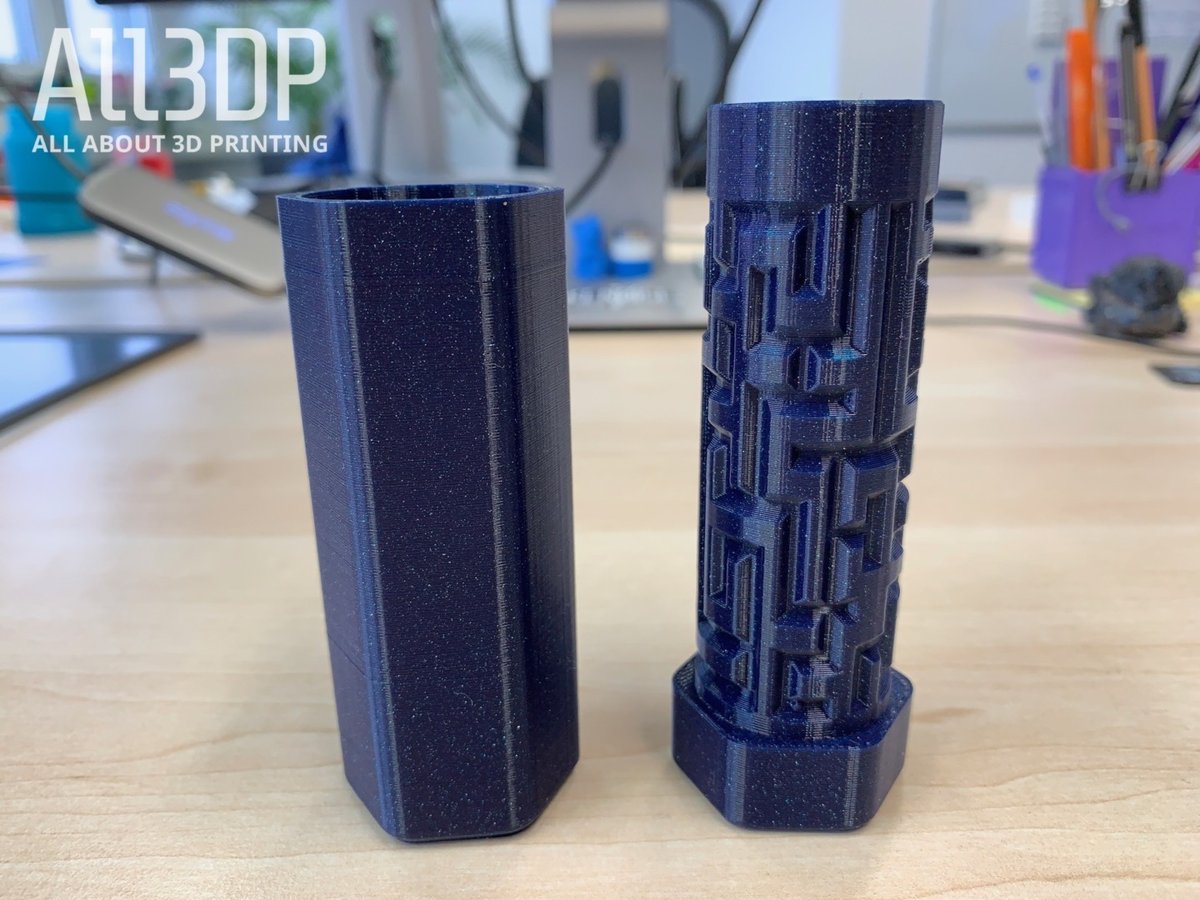
So, is there an improvement in print quality between the Ender 3 and the Ender 3 Pro? Yes, there is a bit. As the axes of the Pro model are more rigid, the Z-wobble isn’t as visible anymore as it was with the original Ender 3.
Autodesk Kickstarter Test
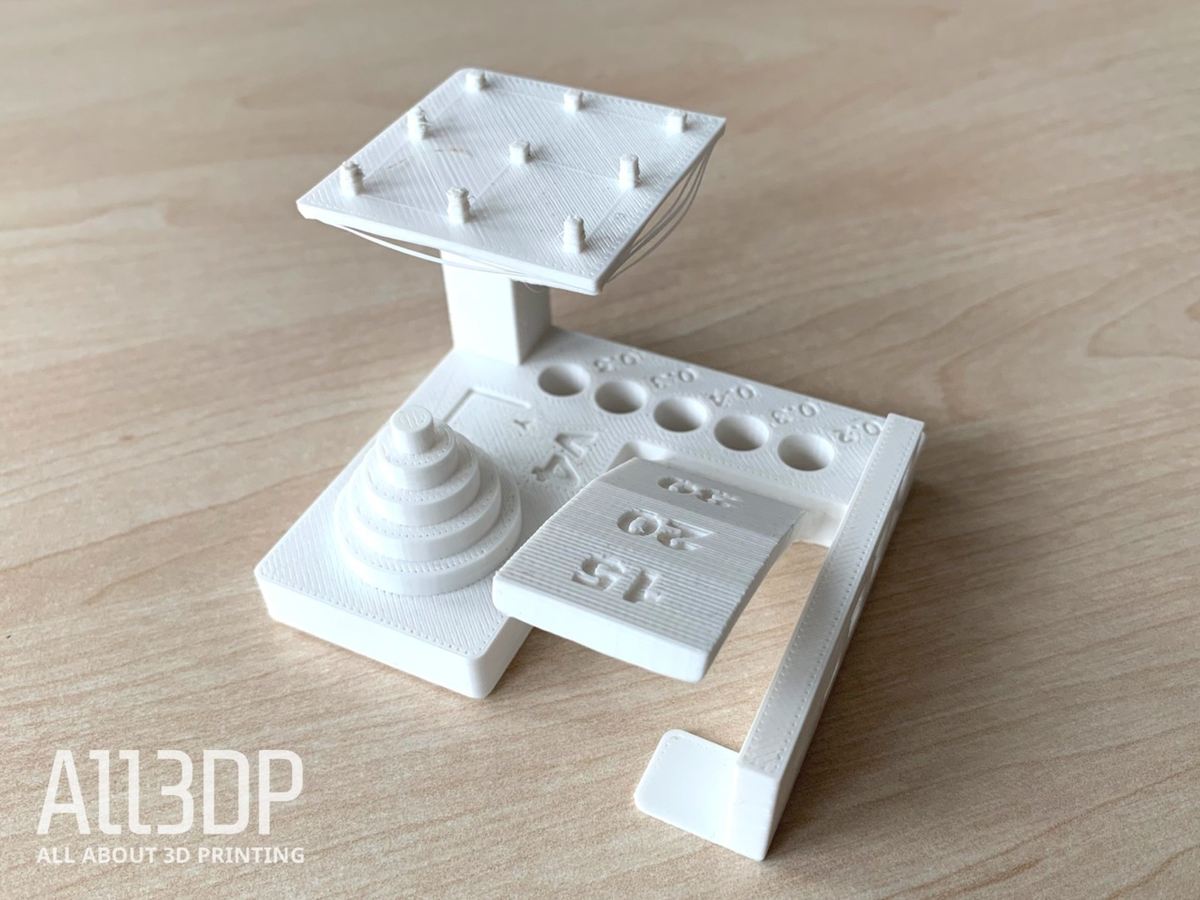
The Autodesk Kickstarter test model looks at an FDM printer’s precision – read more about it here. The Ender 3 Pro achieved the following results:
- Dimensional Accuracy: 5 of 5 points (24.90 / 19.91 /14,96 / 10.08 / 5.14)
- Fine Flow Control: 0 points (no spire was printed correctly)
- Fine Negative Features: 5 points (all 5 pins are removable)
- Overhangs: 2 points (dropped loops began at the 30-degree overhang)
- Bridging: 4 points (1 bridge contacted the surfaces beneath them)
- XY Resonance: 2.5 points (no ringing detectable)
- Z-axis alignment: 0 points (layer registration effect visible)
Overall, the Ender 3 Pro scored with 21.5 from 30 points.
Software
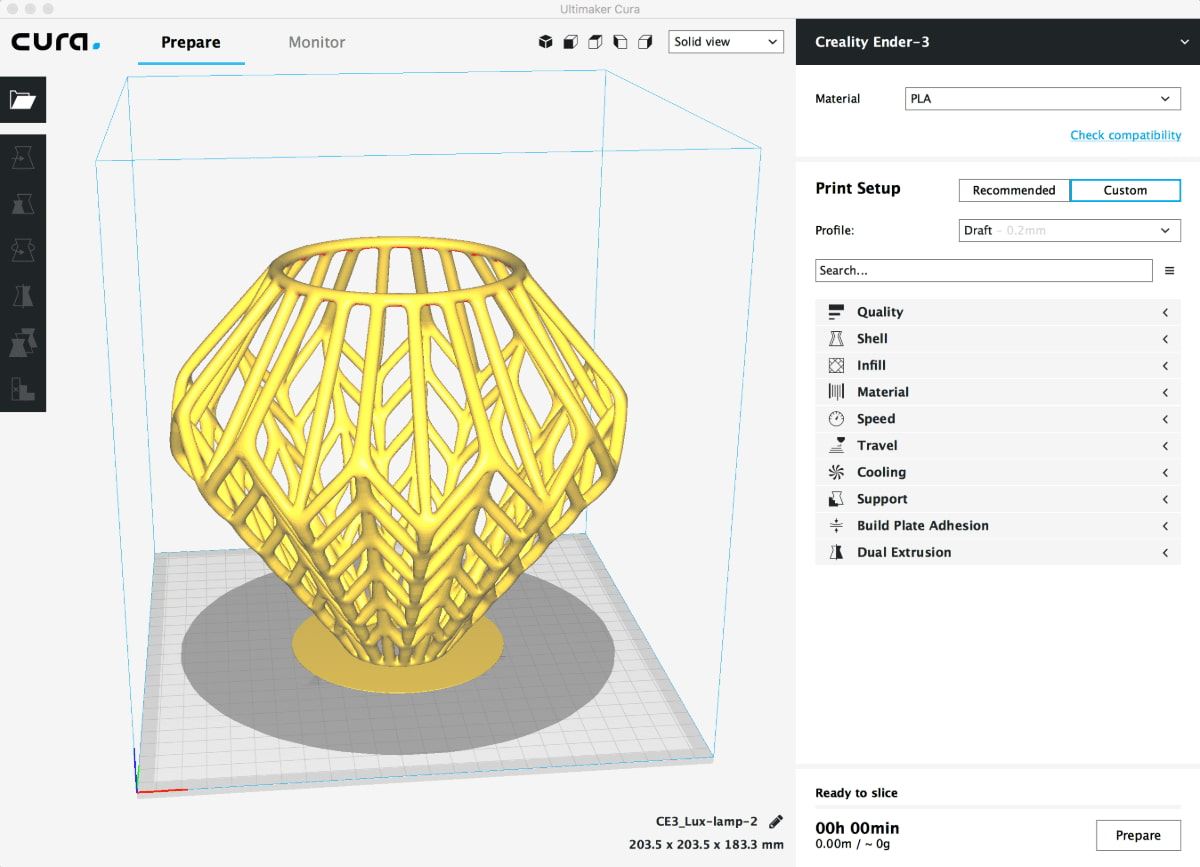
Before we wrap up our impressions of the Creality Ender 3 Pro, we wanted to touch on the topic of software, particularly the 3D slicer settings for the Ender 3 Pro.
Creality provides you with an SD card that holds a Cura version, but for Windows only. Thankfully, you can download the Mac or Linux version directly from the Ultimaker website for free.
In its newest version, Cura offers a profile for the Ender 3, as you can see below.
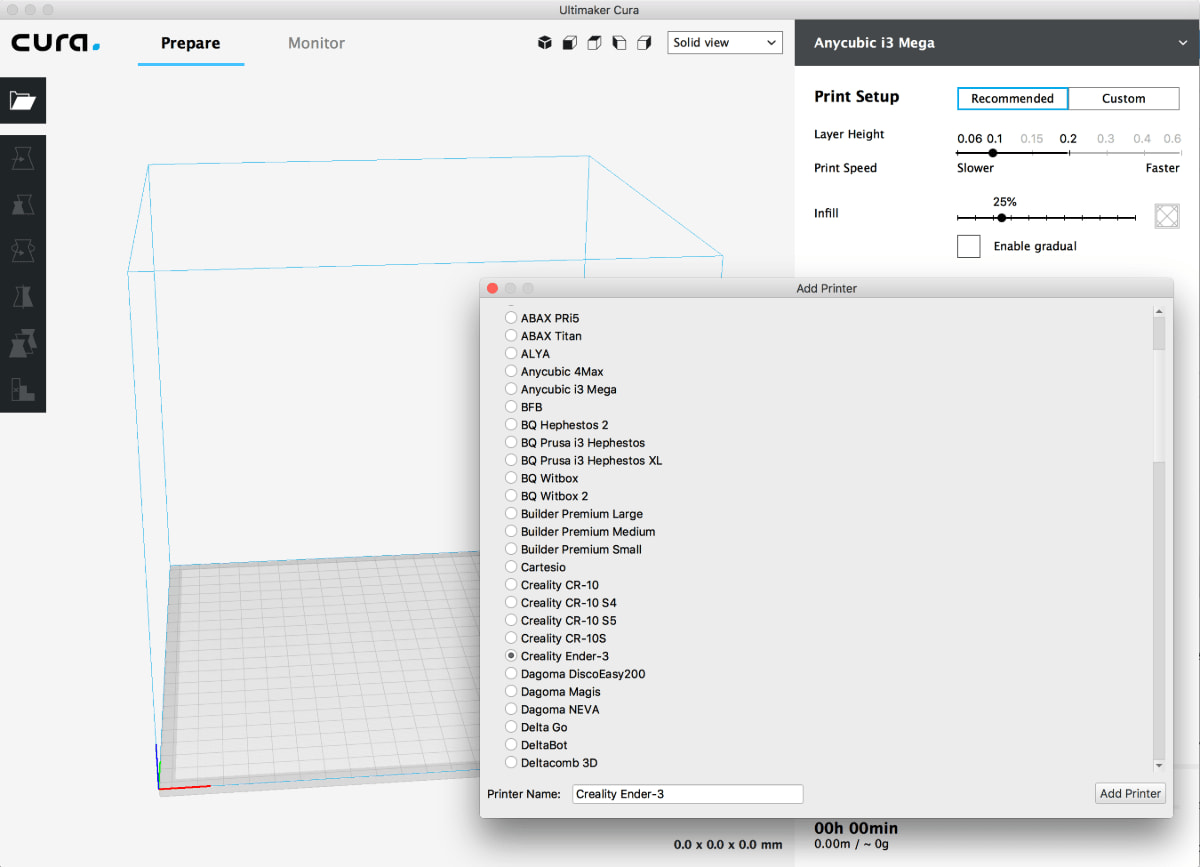
As the dimensions and stats are the same, you should load these settings and start your slicing adventures from here – even if there are some slight differences in the printers themselves, the overall settings and dimensions are exactly the same.
Some important notes to keep in mind when adding the Creality Ender 3 as a custom FDM 3D printer to Cura. First and foremost, make sure you change the filament diameter in the main menu from 2.85mm (the default number) to 1.75mm. This small step is easy to skip over, and doing so will result in an under-extruded and overall disappointing print.
We found that, for the most part, the Cura settings worked exceptionally well.
If you want to get deeper into Cura’s settings, please continue here: Cura Settings Decoded – An Ultimaker Cura Tutorial
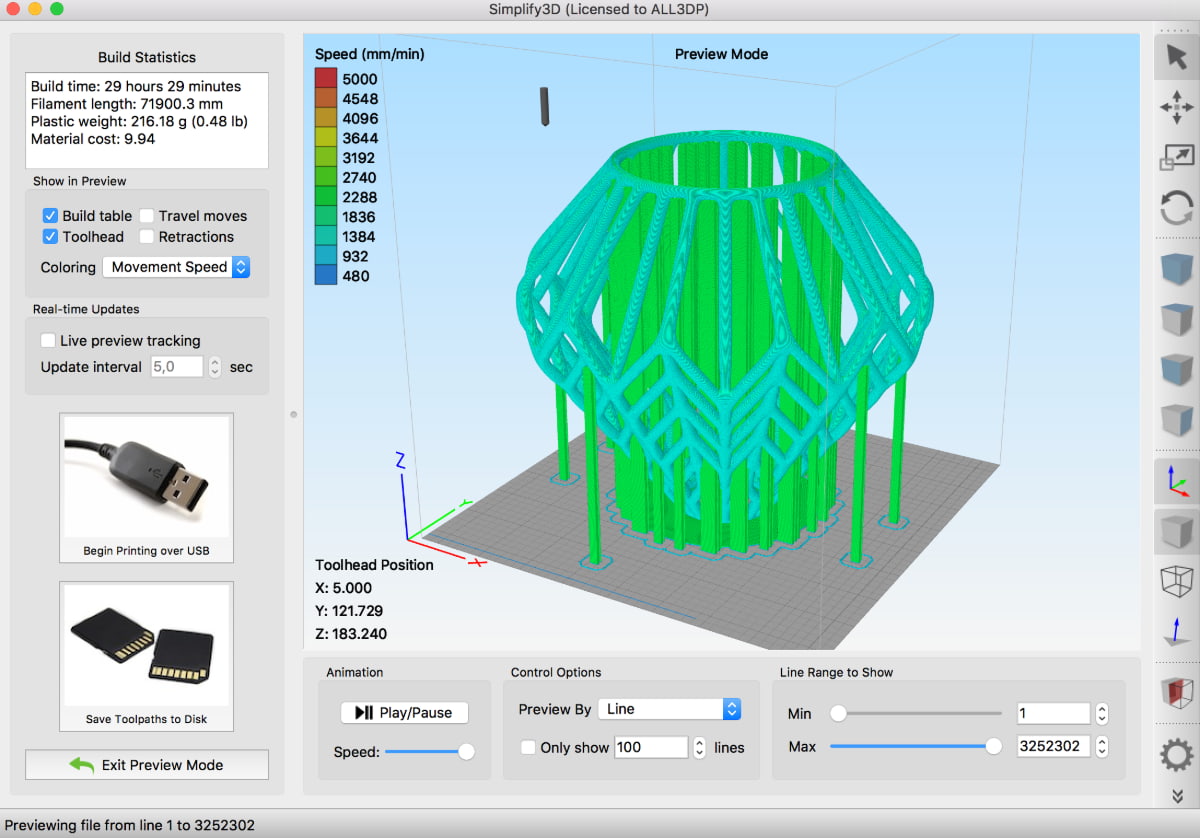
We also worked with the popular Simplify3D slicing software, which offers a dedicated profile for the Ender 3 Pro. The results were excellent, especially when it came to the support structures, which were much easier to remove.
Tech Specs
All the other technical specifications for the Ender 3 Pro are the same as in the regular Ender 3.
- Print volume: 220 x 220 x 250mm
- Nozzle: Single 0.4mm
- Filament: 1.75mm
- Heated bed temperature: 110℃
- Max. print speed: 180 mm/s
- Layer resolution: 0.1 – 0.4mm (100-400 microns)
- Connectivity: SD card reader
- LCD screen: Yes
- Print precision: +/- 0.1mm
- Packing type: Unassembled kit
Where to Buy
At its launch date, the Ender 3 Pro 3D printer had a price tag of $299 – $100 more than the Ender 3. Since then, the Ender 3 Pro’s price came down consistently. You can now pick up a Creality Ender 3 Pro for under $200.
Please check the retailers listed to the right to get the best price available.
License: The text of "Creality Ender 3 Pro Review: Great 3D Printer Under $300" by All3DP is licensed under a Creative Commons Attribution 4.0 International License.
CERTAIN CONTENT THAT APPEARS ON THIS SITE COMES FROM AMAZON. THIS CONTENT IS PROVIDED ‘AS IS’ AND IS SUBJECT TO CHANGE OR REMOVAL AT ANY TIME.