Creality Ender 3 S1 Review: Best 3D Printer Under $500
Rating

The Creality Ender 3 S1 is the latest Ender 3, but is it the greatest? Read our review if you want to find out.
For a company that sees fit to have a total of 21 – count that, yes 21 – filament extruding 3D printers on offer, all sharing largely the same components and generally failing to excite 8 times out of 10, Creality still has the ability to surprise.
Take the new Ender 3 S1, for example. It joins a series of 3D printers that’s four-strong (not including the stealth Ender 3 variant, the CR-6 SE); a series that is comfortably the most sold consumer 3D printer in the world. And yet, the S1 still manages to feel fresh. It makes gainful improvements over our budget fave, the Ender 3 V2, and justifies the ~$180 jump in price with the Creality-made Sprite extruder, amongst other nifty features, giving users a strong reason to consider the upgrade.
If the CR-6 SE dropped as a concept of what an improved, ‘deluxe’ Ender 3 could be, then Ender 3 S1 is the production model of that idea. Same general style and feature set, but with practical changes and even some superseding improvements.
We’ve been hands-on with the Ender 3 S1 for a few weeks now. Here’s what we found.
Update – May 17, 2022
Well, that didn’t take long. Creality has already pushed out a “Pro” version of the S1 featured in this review.
The new S1 Pro takes things a little further, offering the following features on top of the S1 package we know and rate highly.
- Upgraded “Sprite” extruder that can now heat up to 300 °C.
- Spring steel PEI build plate.
- The UI has been switched to a 4.3-inch touchscreen.
- Little tweaks and touches like a slightly wider tool drawer, an LED light bar, and an all-plastic one piece base.
Of course, the S1 Pro is priced higher than the S1, coming in around $480, making it a considerable step up from the standard S1, but if you’re looking to print more exotic filaments, the upgrades might be worth it.
Verdict
Pros
- New direct extruder is superb
- Effortless & consistent high-quality printing results
- PC coated spring steel bed works exactly as you’d expect
Cons
- No guide rails for magnetic bed
- Poorly illustrated instructions
- Not so budgety anymore
The Ender 3 S1 is an easy-to-use, well-spec’d, and reliable machine that achieves fine print quality consistently with very little user effort.
You get a dual-geared direct extruder with an auto-bed leveling probe in tow, making filament feeding and first layers a cinch, and the addition of a second motor to drive the Z-axis brings stability to counter the newly added weight on the X-axis. The print bed is grippy and sturdy, popping prints free when flexed but not buckling or accepting damage during the course of printing.
The little things help, too. A full-size SD slot for offline printing is immeasurably nicer than microSD, and external module ports mean you can add to the printer without ripping it open to tinker.
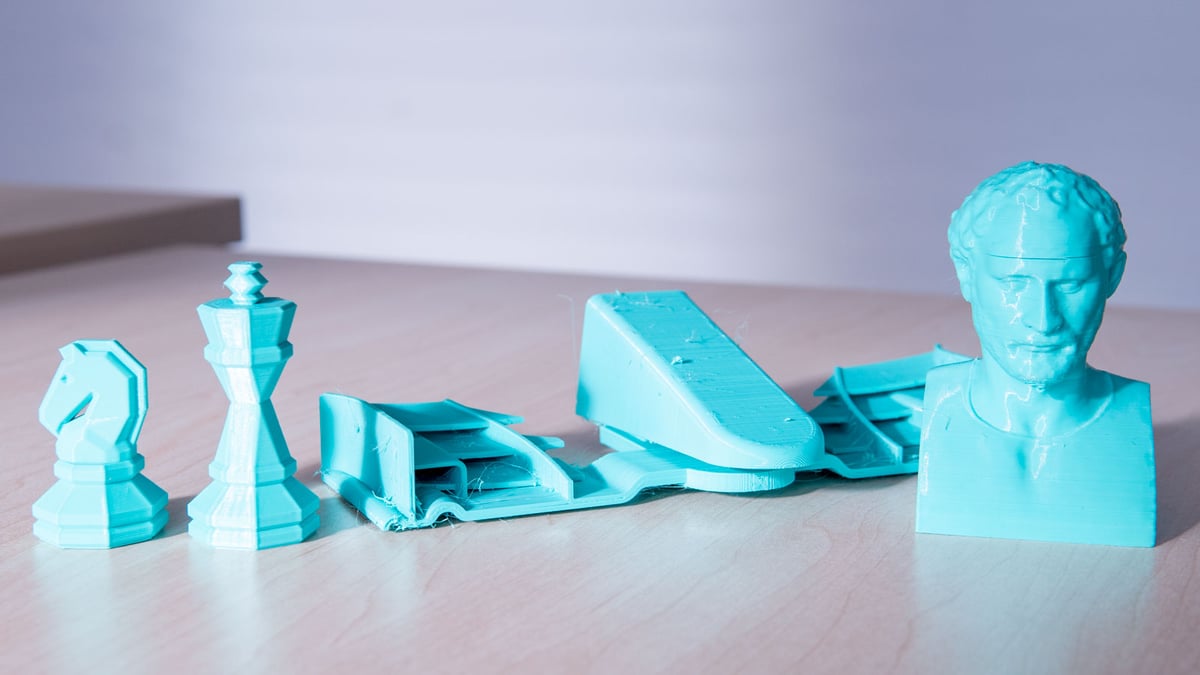
Print quality is, as we’ve found with past Ender 3 machines, characteristically great.
The Ender 3 S1 is a no-fuss printer to simply get on with printing. The build instructions are pants, though. Hope you get a revised version with better visuals.

The Tech
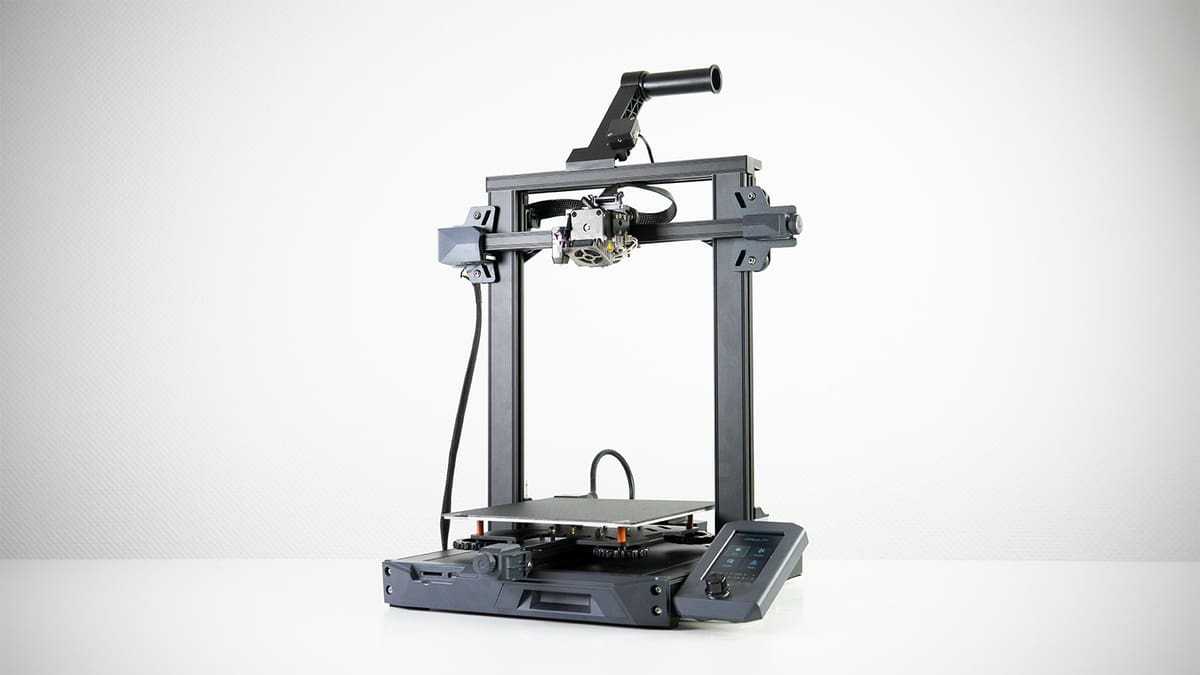
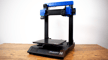
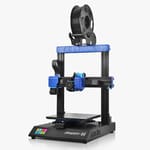
There’s a lot about the Ender 3 S1 that we haven’t seen in previous Ender 3 models. Despite having the same shape, build volume (almost – you get 2 cm more in the Z), and printing capabilities (260 ℃ hot end, 100 ℃ bed), it’s now a direct extruder arrangement, with the extruder mounted directly on top of the print head. Here you’re getting a dual, geared extruder for strong filament feed. Not to mention a flexible, removable metal print bed, auto-bed leveling, and a dual-motor driven Z-axis for greater stability and level in your printing.
It is, by most measures, a marked step up on the likes of the Ender 3 V2. We draw some comparison to the CR-6 SE, Creality’s odd Kickstarter-launched printer that bucked the trend for lean budget machines in favor of a decked-out spin on the Ender 3 with load-cell based bed leveling, a custom extruder, and other fanciness. As said in the intro, the CR-6 SE set the tone, but the Ender 3 S1 is the printer you really should want.
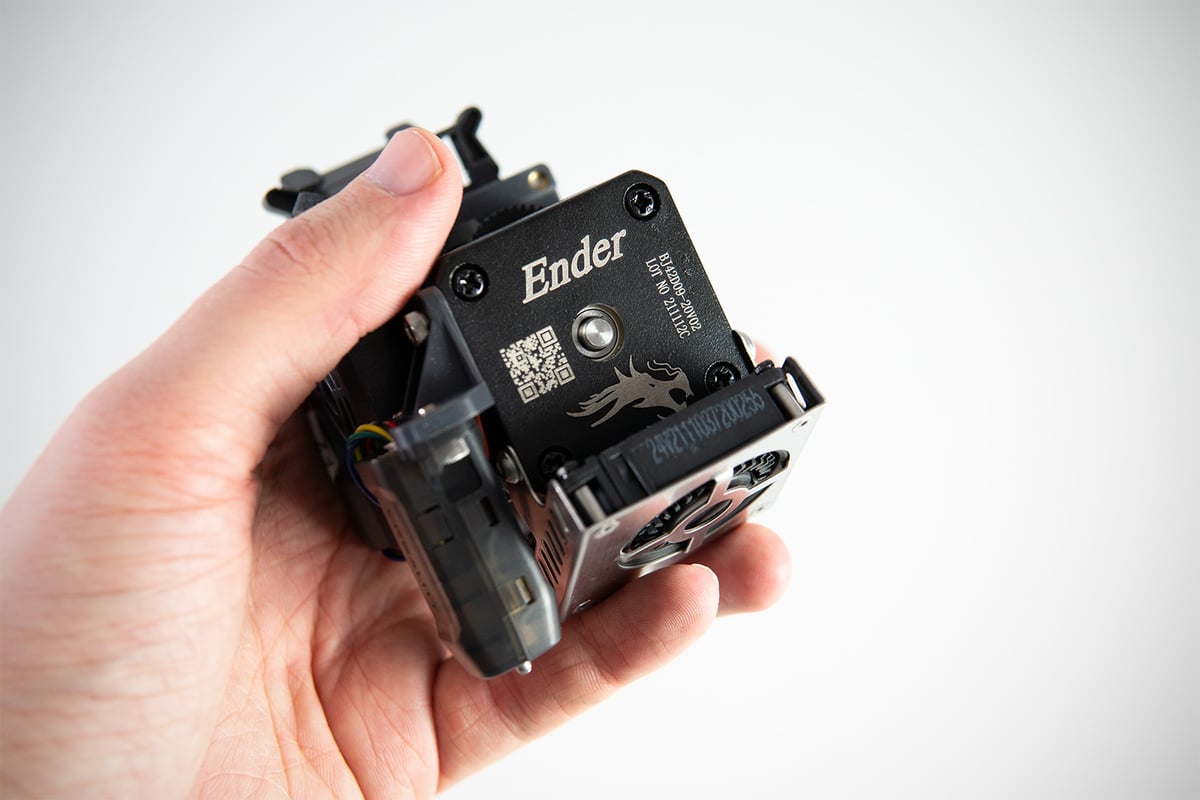
It’d be negligent of us to map out the S1 without taking a long stroll down “new extruder” lane. The Sprite, as Creality calls it, is the company’s new extruder that will feature on a least three of its new machines – the S1, plus the upcoming Ender 3 S1 Pro and CR-10 Smart Pro, both of which will run slightly hotter for more engineeringy materials. The Sprite comes as a complete unit and, sold separately, is available as a standalone upgrade for older Ender 3 machines.

Heating to 260 ℃, the Sprite is cut out for PLA, ABS, PETG, TPU, and similar easily-handled consumer-level filaments. The hot end seems to consist of Creality’s standard heater block, heartbreak, and nozzles, with the key difference being the heatsink, which extends up integrates as part of the extruder’s mounting plate. A cooling fan blows completely through the heatsink–the printer’s lack of clogging issues during our time printing signals hints that things are working as they should be.
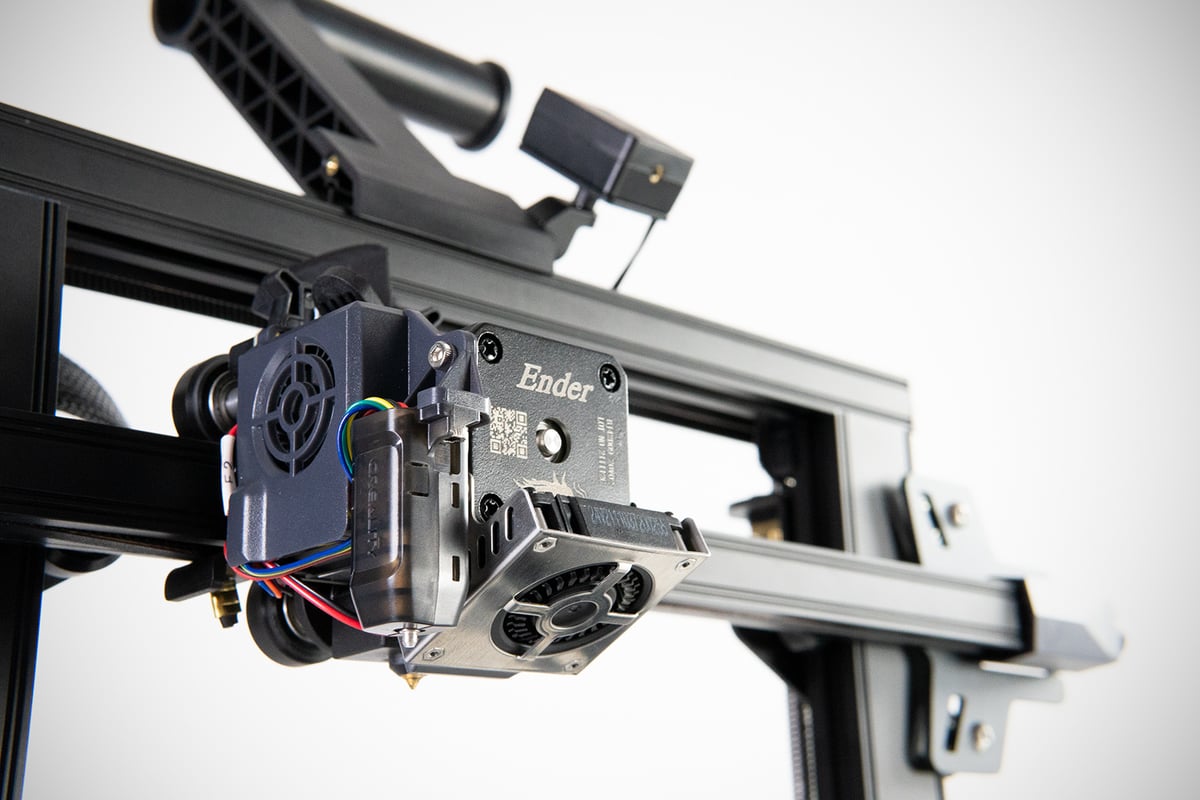
As we mentioned before, the S1 is the first Ender 3 to feature a direct extruder–the extruder ‘cold end’ is mounted directly on top of the hot end on the print head. This has the benefit of reducing the distance the filament has to travel between the point control is exerted on it and where it melts. Sounds convoluted – it basically means less room for the filament to buckle, bend, and differ in how much filament is being melted and extruded versus how much the printer has been instructed to send in for melting. It also has the advantage of being much, much easier to load filament.
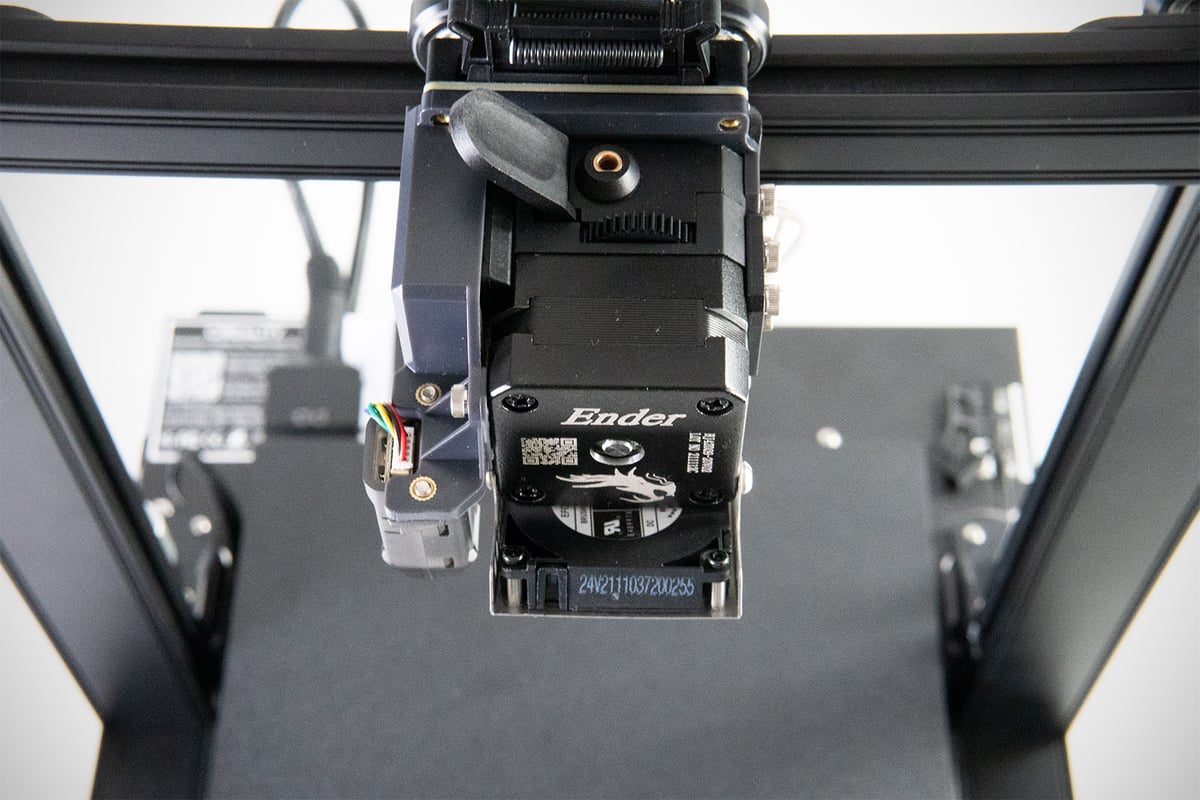
This extra capability loaded onto the print head comes at the cost of weight, though, with a pancake stepper motor and gearing all now traveling along the X-axis. Creality puts great emphasis on the Sprite being lightweight and claims it weighs only 268 g. This, in contrast to the Ender 3 V2’s print head, which we unscientifically weighed out at approximately 150 g, shows the Sprite to be something of a feat for Creality. Still, the inclusion of a second stepper motor to drive the X-axis gantry up and down through the Z-axis is a smart move to take full advantage of the S1’s printing gear.
The S1’s mainboard carries a Muskian offspring-like name – CR-FDM-v2.4.S1_v301. Creality hasn’t been upfront with what exactly this new board is rocking. Working from its title, we’ll assume it’s a variant of the company’s 32-bit 2.4.x boards (the Ender 3 V2 uses the 4.2.2), and like all other current Creality mainboards, it carries stepper-motor-silencing drivers. Again, it’s not explicitly stated which drivers they are (we asked for specifics from Creality but got none), and they’re buried under heatsinks and thermal paste we didn’t care to remove. Historically Creality’s ‘silent’ machines have used TMC2208, TMC2209, or TMC2225 drivers, so we’ll assume one or some combination of these are present on the S1. The drivers are typically not set up for more advanced firmware-based control such as linear advance (without cautious tinkering with a soldering iron), and we’d be surprised if that is different for the S1, too.
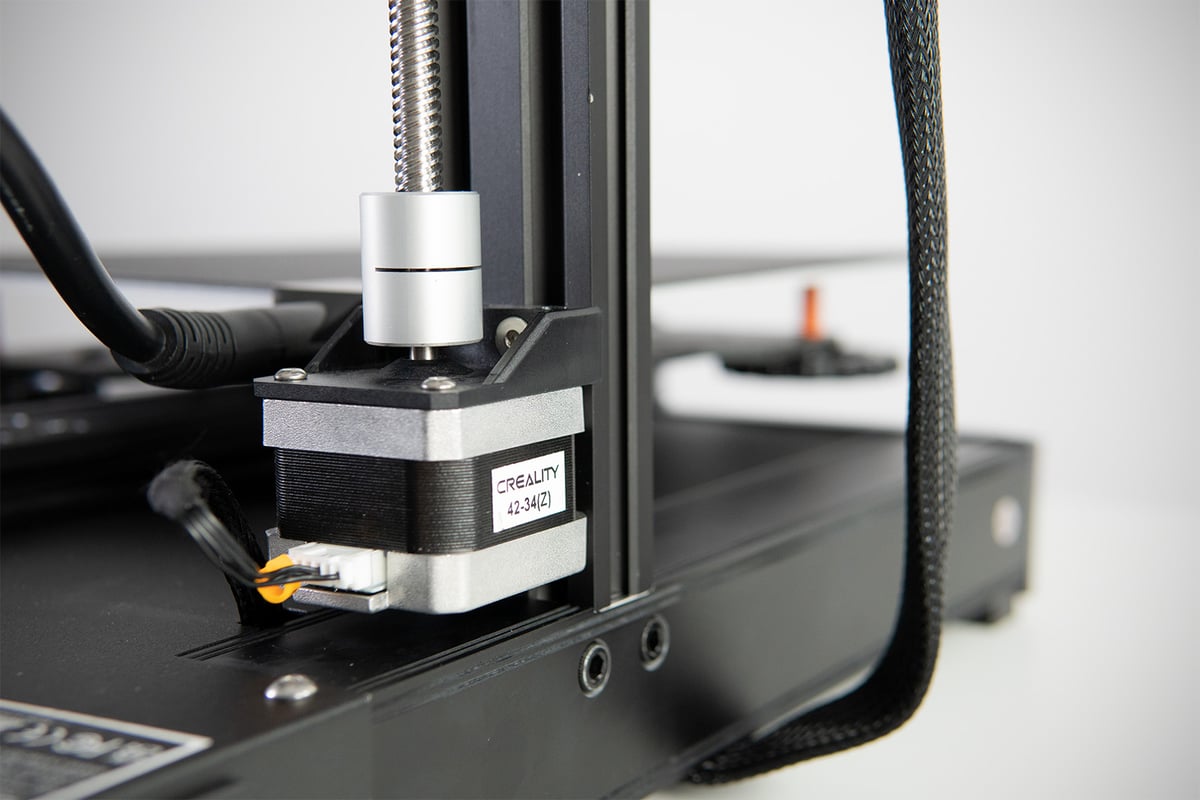
A popular mod to do on past Ender 3 models is to make it ‘dual-Z’, adding a second lead screw and driving it either by belting off the first or driving it directly with a dedicated stepper motor. The S1 challenges that tradition by adding a second Z-axis lead screw and motor and a timing belt on top to keep the movement aligned and synchronized. A feature not only long-awaited but also highly needed as the S1 comes with an even higher Z-axis as well as its direct extruder.

Automatic bed leveling ought to be something appearing on most new 3D printers by now, and it does on the Ender 3 S1. The provided CR-Touch probe takes a poke at 16 points on the bed as part of its auto-bed leveling routine, helping the S1 compensate for irregularities in the surface to give you a truly lovely first layer.
The auto-bed leveling routine is something you have to manually trigger via the printer’s menu, and for truly drastic alterations of the bed level, the S1 does also include bed leveling knobs on the print carriage’s four corners. In practice, we simply let the automatic leveling do its thing and slightly adjusted the Z-axis compensation via the UI. No further tweaks were needed; it was a pleasantly simple experience, as it should be. All printers should at least have an automatic bed leveling option in this author’s book. Manual leveling is practically medieval at this stage.
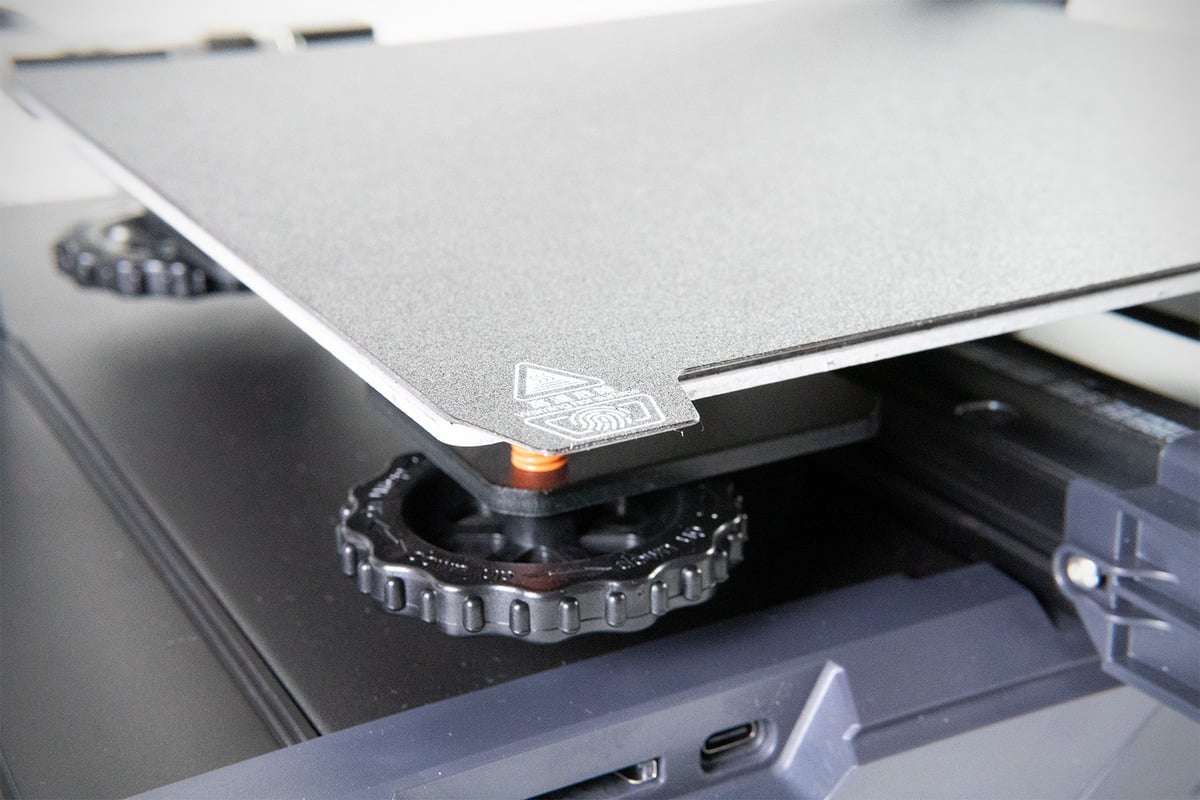
Beneath all the bed-leveling wizardry, you have a new print surface to play with here too. Where the Ender 3 V2 made use of the Carborundum glass bed, the new S1 uses a sturdy, PC-coated spring steel bed that magnetically attaches itself to the platform. It can be pulled off when prints are finished and flexed to help print pop off its surface.
The bed is much tougher than the C-Mag style sheet that comes on the Ender 3 Pro. This new sheet is more in league with the popular Anycubic Vyper or Original Prusa i3 MK3S+‘s rather than the wimpy fridge magnets some printers use. It can be quite tricky to line it up perfectly when attaching it back for the next print, mind.
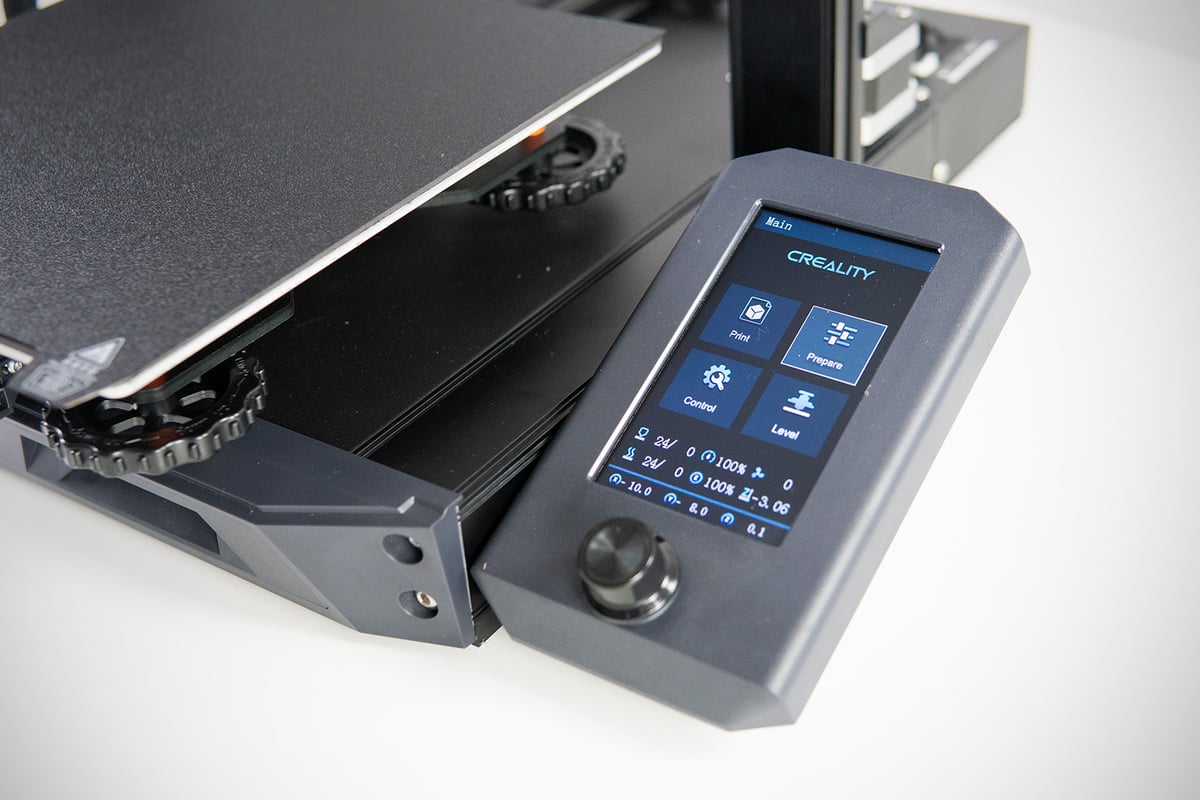
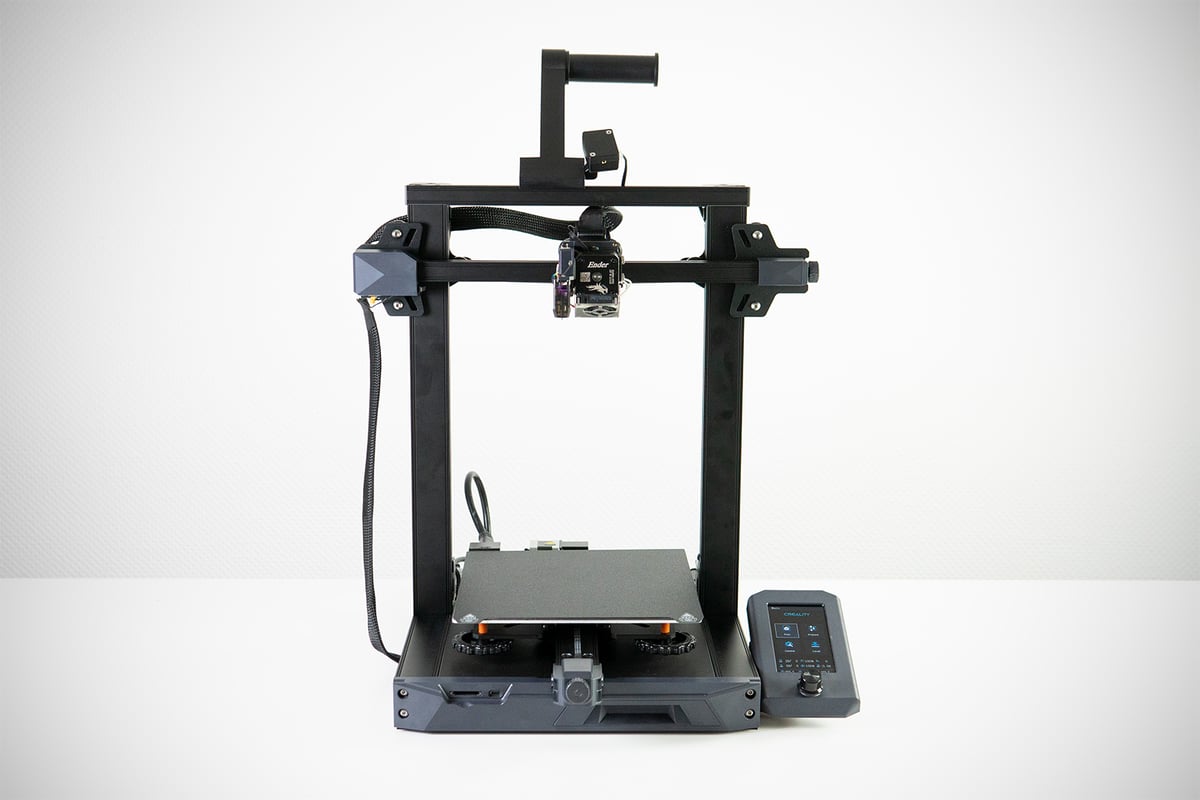
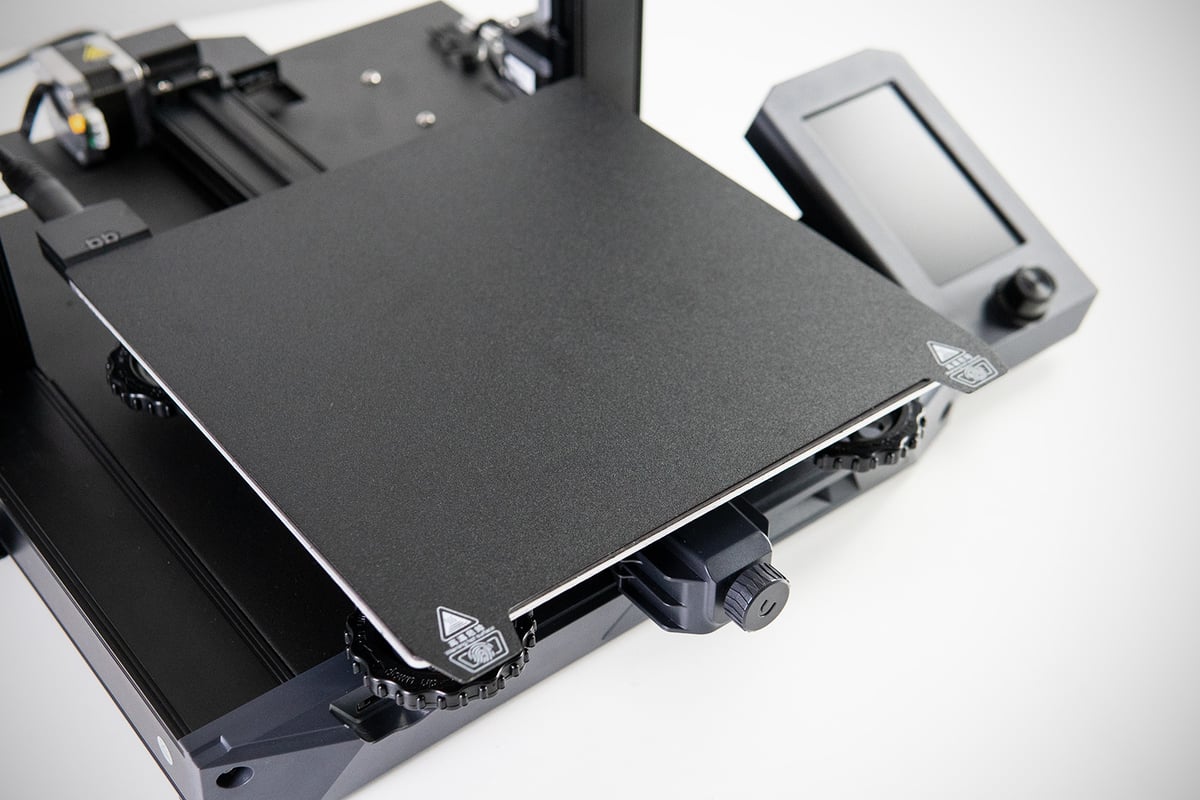
There’s a degree of organization to the front of this printer that’ll be much appreciated by busy people. First off, we’ve got a very simple, 4.3-inch UI that’s controlled via a rotary knob and is about as easy to navigate and control as UIs get. It’s not all that different from the one found on the Ender 3 V2, though, so we’re surprised to see it being pushed as “brand new.”
The UI dims after 5 minutes of inactivity in an effort to “protect the environment,” according to Creality. It’s not the first thing we’d think of tackling if addressing wasteful practices in 3D printing, but every little bit helps, we guess.
Mercifully, you’ll also find a full-size SD card slot on the front of the S1. And thank goodness for that, because microSD cards are some of the most annoying items in all of 3D printing, thanks to their passion for going AWOL. Same goes for the USB-C type connection if you want to hook it up to your computer, a small but contemporary touch when you think of the dying breed that is Micro-A and Micro-B USB data cables.
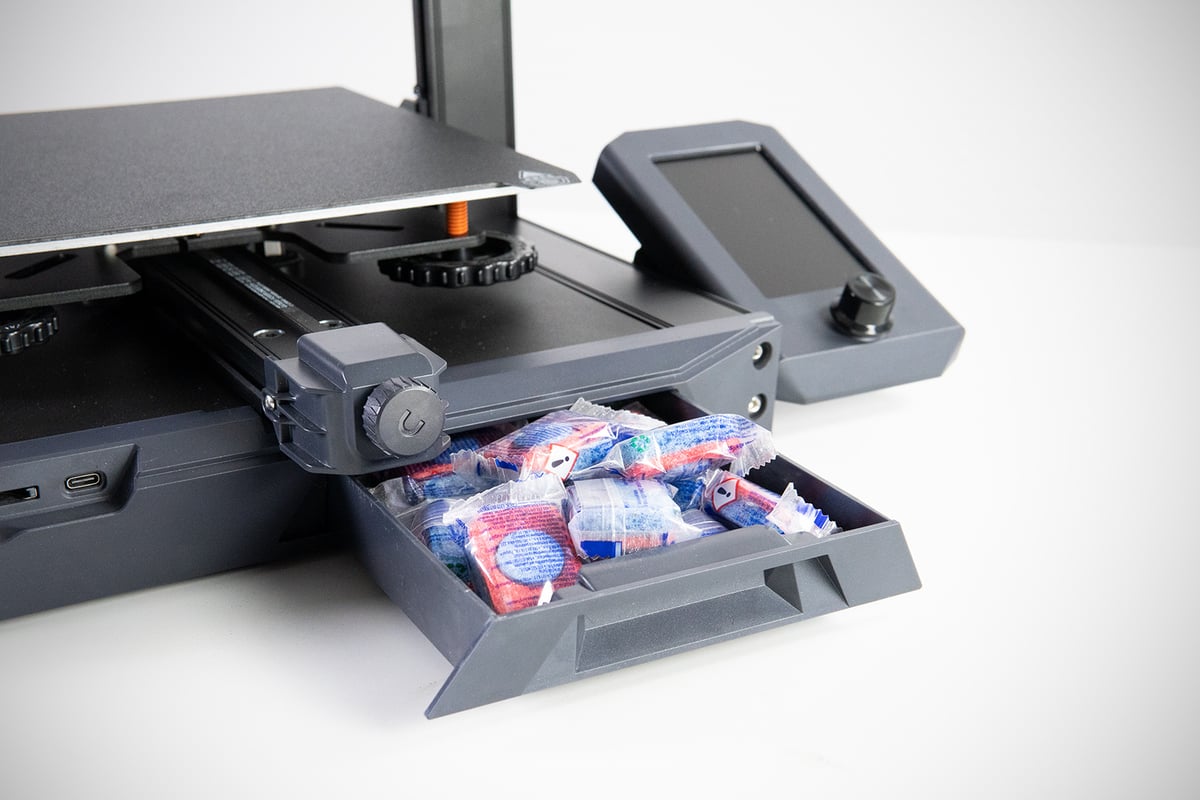
To the right of the data input ports, you’ll find the good old tool drawer, the only place you’ll ever need to store things entirely unrelated to 3D printing. This time we’ve gone for dishwasher tablets because, for some reason, we’ve run out of snacks at the All3DP office. Already. In the first month of 2022. Send help.
Printing & Usability
A good 3D printer should begin with some good instructions. Creality claims the Ender 3 S1 is 96% assembled, and the greater part of its assemblies are, indeed, assembled. But there’s some building to do with, connecting the gantry to the printer’s base unit, plus a few other bits and pieces.
If you’ve owned or assembled similar semi-assembled printers before, you’ll have it together in a jiffy. But if the S1 is your first machine, as we suspect it will be for many, following the instructions to the letter is frustrating. As provided with our review loaner, the instructions were wrong in places, difficult to read if your eyesight is anything but perfect, and hindered by unhelpful diagrams. You can muddle through, but you may have to scrutinize them extra closely.
For what we’d consider a flagship machine in one of the most popular series of consumer-level printers, it’s frustrating that Creality still lags behind on this. Every printer comes with instructions of varying quality. The printers reach ever greater heights of usability and user experience, but the documentation to intro new users is half-baked.
Lucky, being the haggard old editors that we are here at All3DP, we’re pretty used to this sort of thing, and the Ender 3 S1 was assembled and ready to rumble in pretty quick time. Give yourself half an hour to 45 minutes, and you’ll already be printing.
In operation, the Ender 3 S1 is about as simple to use as a 3D printer can be. Automatic bed leveling is taken care of very quickly, and you may not even need to use the manual knobs provided under the platform for tramming the bed.
All Systems Go
To get going, you simply tell the printer to preheat to PLA or ABS (the latter should also be used for TPU and PETG) and feed the filament into the Sprite extruder by holding down the lever with your thumb and, well, pushing it in until you see it flowing out from the nozzle below – a hands-on approach that’s one of the perks of a direct extruder. It’s quicker than recent Bowden systems we’ve tested by a comfortable margin, allowing for rapid filament changes. Alternatively, you can poke through the settings to tell the extruder to pull in or out a certain amount of filament.
For print file preparation, the Ender 3 S1 comes with Creality Slicer, a re-skin of Ultimaker’s popular open-source Cura slicing software. The functionality is mostly the same as Cura, albeit some versions behind. Those familiar with Cura might notice the difference in minor slicing settings and operations. Porting a profile for the Ender 3 S1 over to Cura, or creating a new one in other popular slicing software such as PrusaSlicer, will be relatively straightforward.

For everyday 3D printing–the uncomplicated, non-experimental stuff–Creality Slicer is a perfectly suitable slicer. It comes ready to run with a printer profile (the machine-specific settings configured) for the S1, meaning you don’t need to create one yourself or futz around loading separate files before you can begin printing.
We used Creality Slicer for all of our basic test prints, encountering zero issues. Time estimations for TPU prints were way off the mark, but that’s more a quirk Creality Slicer inherits
Getting to Work
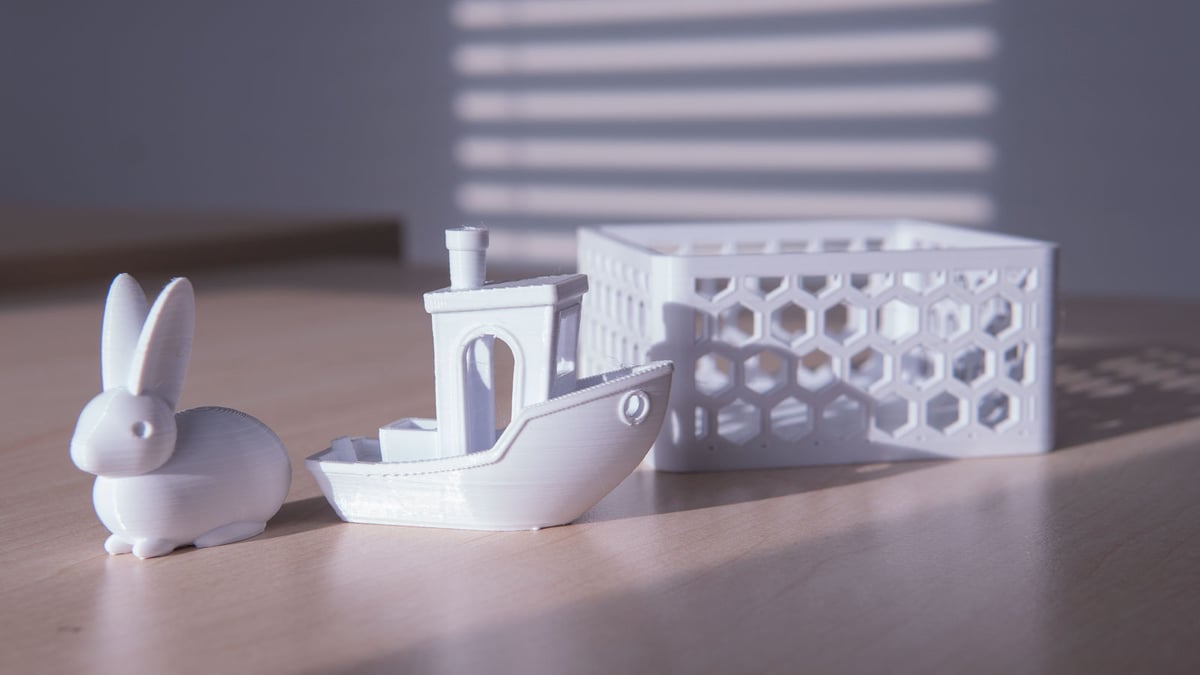
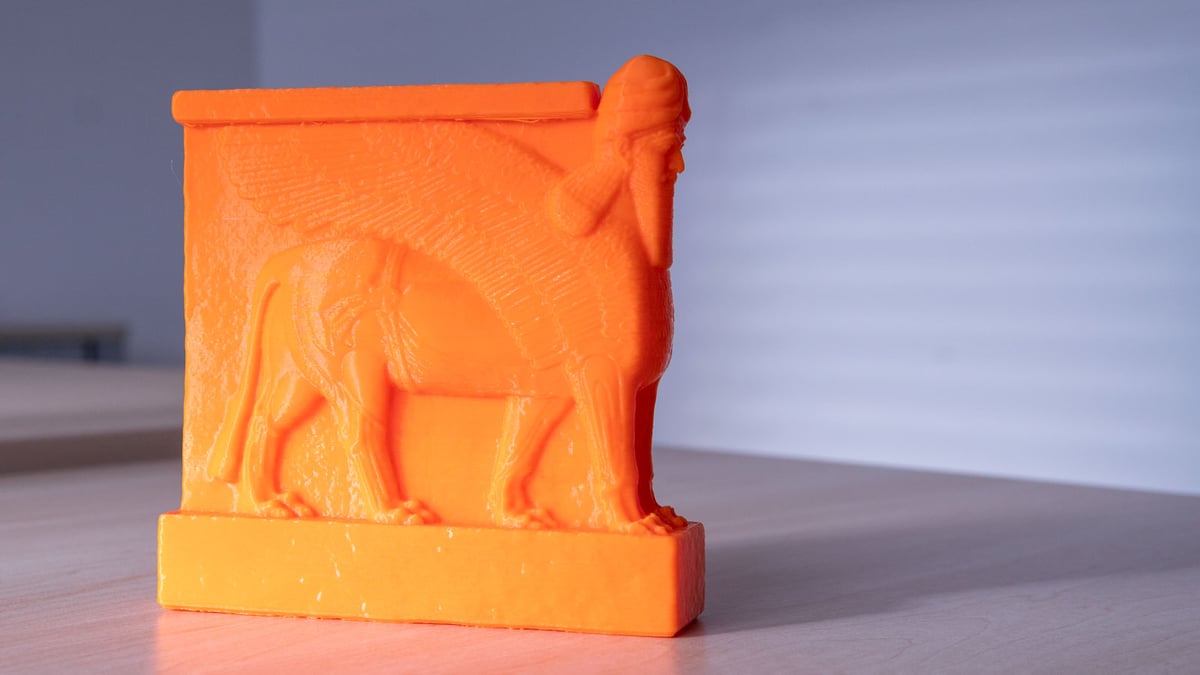
If PLA is the bread and butter filament in 3D printing, then the S1 is a sandwich shop. PLA printed on the S1 at default settings is neat and tidy, with little cause for complaint and few flaws. Cooling, while unidirectional, is strong, allowing for decent bridging and overhangs. We wonder if the airflow passing through the heatsink could be ducted to the nozzle to give omnidirectional cooling, something that would result in more consistent printing in all directions.
Airflow musing aside, we’ve struggled to identify any glaring issues with the S1 and its printing abilities; the accuracy and detail of the prints is what we’d expect to see from a printer like this, and with that hot end temperature limit of 260 ℃ in mind, we only pushed it as far as PETG, TPU, and PLA.
Needless to say, we’re sure there’s more that could be done with the S1 and other materials with some tender loving care in the slicer settings.

The new metal print bed has a satisfying weight to it, with prints popping off the new PC coating with no fuss, too. Handling prints is a simple case of removing the plate, flexing it a little, and the prints release without any drama. The texture is relatively fine, too. Not as coarse as we found with the Anycubic Vyper and its PEI-coated flex bed. Like the Vyper, though, we’d be hesitant to hack at it with a scraper, so be sure to nail your Z-offset with printing and avoid baked-in first layers.
TPU handling is clearly going to be a subject of interest for most S1 users, as a direct extruder can offer some advantages when printing with flexibles. This rings true for the S1, which handles noodly filament as well as the other, harder plastics. The inner workings of the Sprute extruder deserve some words here, not least because it’s the first dual-geared–meaning two hobbed gears bite into the filament from two sides, giving a much stronger transferral of motion from the extruder to the filament. This is doubly great in the Sprite since Creality employs a 3.5:1 reduction gearing ratio, increasing the torque the extruder has in pushing the material. These, in combination, should make filament skips and potential light blockages a thing of the past. Only in extreme circumstances can we foresee the Sprite bunging up in your printing.
Is It Worth It?
We started this review by saying that Creality can occasionally surprise with printers that go above being capable, if a little unexciting, workhorses. The Ender 3 S1 is one such surprise. It’s a genuine step up on past Ender 3 machines, introducing a swathe of new features that all other Ender machines lack.
The star of the show is undoubtedly the new Sprite extruder; it’s absolutely tremendous. Strong and assuring thanks to its dual-gearing and reduction ratio, not to mention quick to swap filaments with. Owners of older printers can benefit from it, too, with it available as a separate purchase for past Ender 3 machines.
There are two other key features that make the Ender 3 S1 worthwhile: The CR Touch automatic bed leveling is the first, eliminating inconsistent first-layers and negating any errors in the level of the bed. Secondly, the PC coated spring steel build platform is a convenient alternative to the textured glass Creality has defaulted to on its recent printers.
If you’ve already got an Ender 3/Pro/V2 and you’re willing to tinker, we see no real need to buy the S1, though. There is a clear upgrade path for you to follow in the Sprite extruder, dual-Z stepper motor, and a flexible bed.
And as for upgrading the S1 itself, we don’t see much potential or need for upgrading it with other printing hardware–your money would surely be better spent on the cheaper Ender 3s, which have the same bones. There’s no denying the cost to convenience factor with the S1 is strong. An Ender 3 V2 upgraded to match the S1 using Creality-made parts costs roughly the same as a factory-fresh S1. For a second printer you need to simply run, or your first fuss-free machine, the S1 is an attractive option.
After getting to know the Ender 3 S1, we can confidently say there’s no reason to consider the CR-6 SE anymore–$20 is all that separates them. And on the subject of other printers, we’ll also draw your attention to the Artillery Genius Pro, which offers a similar experience–geared, direct extruder, and auto-bed leveling–for approximately $100 less.
The Ender 3 S1 is a fabulous printer, but it is not quite the budget-friendly value past Ender 3 printers offered.
Features
“Sprite” Direct Extruder
It’s nothing to do with a delicious tasting citrus soda, unfortunately. The new extruder, developed by Creality, offers considerable pushing force while only weighing 268 grams. It’s a geared extruder with a reduction ratio of 3.5:1, with dual gears doing that actual gripping and pushing of the filament. That’s relatively sophisticated compared to past Mk8 style extruders we’ve seen from Creality.
We had no issues at all with the Sprite, finding it provided quality extrusion across variety of filaments. Creality is pushing it as a flexible filament-friendly option, and in our experience, it is. It’s also very easy to load and unload, and overall, just very simple to work with.
A filament sensor and resume print function are also present on the S1, which are becoming pretty much standard on any FDM 3D printer worth getting excited about.
CR Touch Auto-Bed Leveling
Automatic bed leveling, you love to see it. Creality’s CR Touch setup uses a metal touch probe that makes a cheeky little poke in 16 areas across the print bed in much the same style as BL Touch. It does a good job for accounting for any inconsistency in the flatness of the print bed, and once set we barely needed to adjust it. You can still use giant hand-leveling knobs to dial in the general perpendicularity of the bed, but this new sensor should get you across the line to even first layers.
Build Volume
You’ve got 220 x 220 x 270 mm to play with, which makes the Ender 3 S1 ever so slightly larger than the Ender 3 V2 on the Z-axis – by 20 mm, actually. It’s a bang average build volume, and there’s nothing wrong with that. If you need a teeny tiny bit more space, the Biqu B1’s 235 x 235 x 270 mm will give you just a bit more sideways space.
If you’re the type of person who likes the zone of printing to be copiously illuminated in low light conditions, there’s further good news, Creality will sell you an LED add-on for the S1. However, if you have something called a light switch at home, you can turn that on, and not only will your print bed be illuminated, your entire room should be too. That’s a top tip right there.
Possible Future Modularity
Creality is keen to point out that the direct extruder can be removed easily and replaced with a laser engraving tool head that’s sold separately. We’re still not sure how powerful this laser will be or if there will be more tool heads to follow. If there are, things could get a little Snapmakery. Though, judging by Creality’s seemingly abandoned CR-01 3-in-1 machine, we don’t hold out hope for the company cracking this particular nut anytime soon. It’ll be interesting to see how far Creality takes it, if anywhere at all.
Quick Six-Step Assembly
For a semi-assembled 3D printer, the Creality Ender 3 S1 is pretty assembled. Creality says when you open the box, the printer is 96% assembled. Try running late to work and telling your boss you were 96% on time to work in the morning. It’s odd. Anyway, the S1 can be assembled in just six steps, which isn’t a lot of work and is much quicker than having to build the whole thing from scratch.
PC Spring Steel Printing Sheet
Glass print beds can be hit and miss, but the Ender 3 S1 comes instead with a spring steel printing sheet that magnetically attaches itself to the print bed. Once your print is complete, you can remove the bed and flex it to release the prints with very little effort. It works excellently, and it showed no real signs of wear after a good couple of weeks of consistent use, suggesting it’ll hold up well over time.
New User Interface
There’s a new UI in town: a 4.3-inch LCD with a rotary knob you can twiddle around and select options on the screen with. It calls back to the Ender 3 V2, the last printer the company put out with such a UI. Considering the touchscreen-heavy list of recent releases from Creality, this seems like a backward step. However, some people prefer this method and it works well enough. No complaints here.
Further features
Besides the above, here’s what the Ender 3 S1 is packing:
- Dual Z-axis: Sturdier, more consistent travel through the Z is the goal. A synchronized dual-driven Z-axis can help.
- Full-size SD: An underrated feature in offline printers, if you ask us. No more losing microSD cards in the shag carpet. Full-size SDs all the way with the Ender 3 S1.
- Tool drawer: The tool drawer returns. It’s a thoughtful touch that we like to disregard the original purpose of and stash snacks within.
Tech Specs
General Specifications
- Technology: Fused deposition modeling (FDM)
- Year: 2022
- Assembly: Semi-assembled
- Mechanical arrangement: Cartesian XZ-head
- Manufacturer: Creality
3D Printer Properties
- Build volume: 220 x 220 x 270 mm
- Feeder system: Direct
- Print head: Single nozzle
- Nozzle size: 0.4 mm
- Max. hot end temperature: 260 ℃
- Max. heated bed temperature: 100 ℃
- Print bed material: PC-coated spring steel sheet
- Frame: Aluminum
- Bed leveling: Automatic
- Display: 4.3-inch LCD
- Connectivity: SD card, USB
- Print recovery: Yes
- Filament sensor: Yes
- Camera: No
Materials
- Filament diameter: 1.75 mm
- Third-party filament: Yes
- Filament materials: Consumer materials (PLA, ABS, PETG, Flexibles)
Software
- Recommended slicer: Creality Slicer, Cura, Simplify3D, Repetier-Host
- Operating system: Windows, Mac OSX, Linux
- File types: STL, OBJ, AMF
Dimensions and Weight
- Frame dimensions: 487 x 453 x 622 mm
- Weight: 9.1 kg
Similar Printers
We’ve put together a little list of other 3D printers you might want to take a look at. Keep in mind there’s more in the 3D printing world to check out too, have a flick through our Best 3D Printers Guide.
Creality Ender 3 V2
A hugely popular machine that prints great and is easy to use and live with, there’s a lot to like about the Ender 3 V2. It’s a fair bit cheaper than the incoming S1, so if you don’t want to spend extra on the S1, this might well do the trick.

Anycubic Vyper
The Anycubic Vyper disappointed us, but plenty of people seem to have bought one and had a more positive experience than we did, so perhaps you’ll want to consider it too. The automatic bed leveling works a treat, and the print bed is easy to remove, but the print quality and a few other issues left us with a sad face.

Artillery Genius Pro
What’s smarter than Smart? Maybe a Genius? Maybe a PRO Genius? Artillery’s latest version of the Genius has a direct extruder, automatic bed leveling, a 32-bit mainboard developed by Artillery, and a big blue plaque with its name on. You should be able to get one for a little less than the Ender 3 S1, if you shop around.
Correction — February 15, 2023: A previous version of this article repeated Creality’s claim that the Sprite extruder weighs 210 g. Creality has now clarified that weight is without a nozzle, heater block, or cooling fan, and that a fully assembled plastic Sprite extruder weighs 268 g.
License: The text of "Creality Ender 3 S1 Review: Best 3D Printer Under $500" by All3DP is licensed under a Creative Commons Attribution 4.0 International License.
CERTAIN CONTENT THAT APPEARS ON THIS SITE COMES FROM AMAZON. THIS CONTENT IS PROVIDED ‘AS IS’ AND IS SUBJECT TO CHANGE OR REMOVAL AT ANY TIME.