CreateLitho Review: The New Way to Print Photos
Rating

Print yourself a surprising little piece of magic with Create Cafe's new CreateLitho app.
Nothing is more intriguing than when something is not what it seems. Especially if it’s better than you expected.
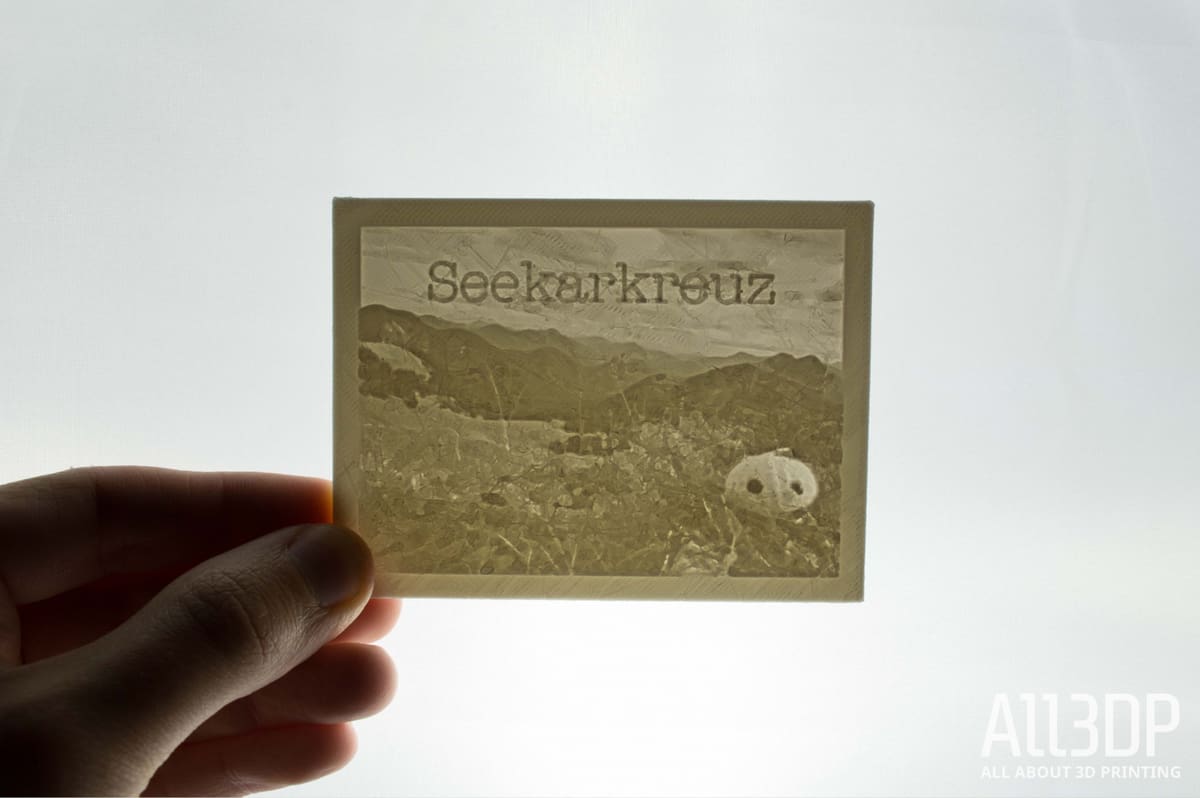
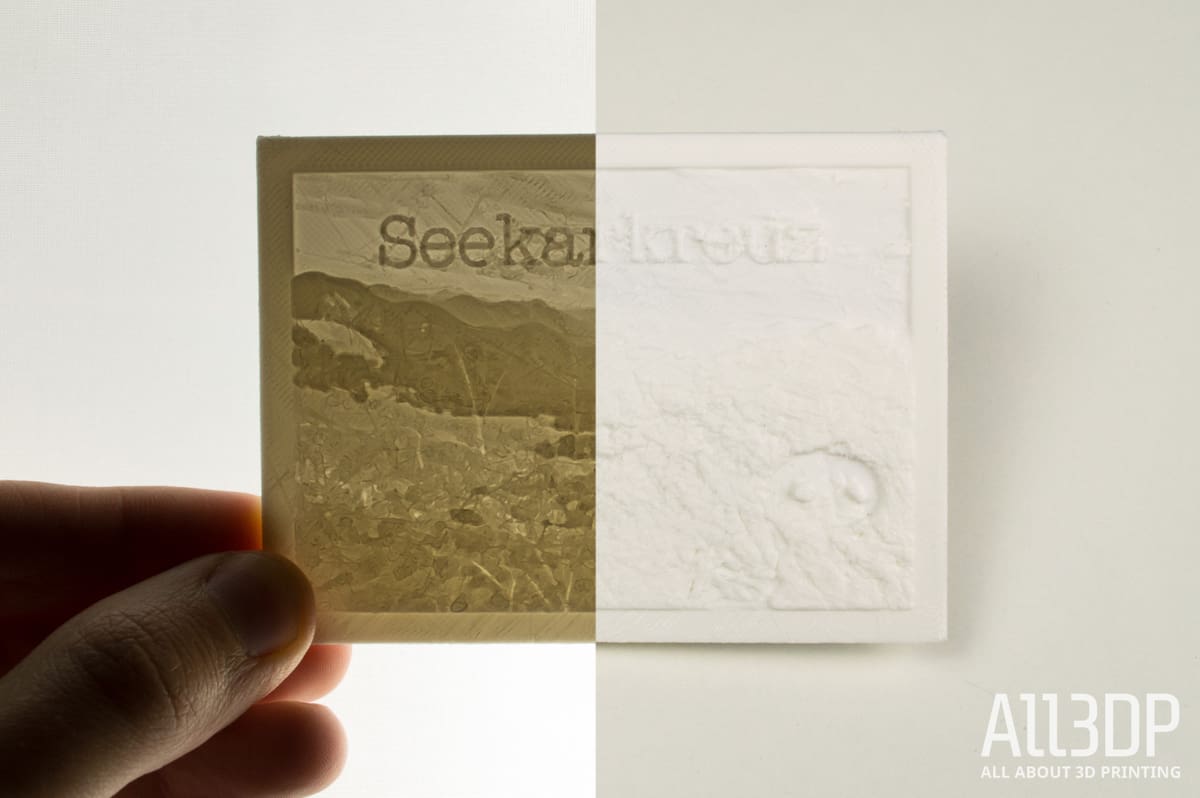
Lithophanes create a 3D art piece that looks, frankly, pretty unappealing in ambient light.
However, when held up to a light source, it is impressively depictive and beautiful.

Originally, this type of art was only for the elite. It first came around in the 1820s and was hand carved out of porcelain, a painstakingly laborious process.
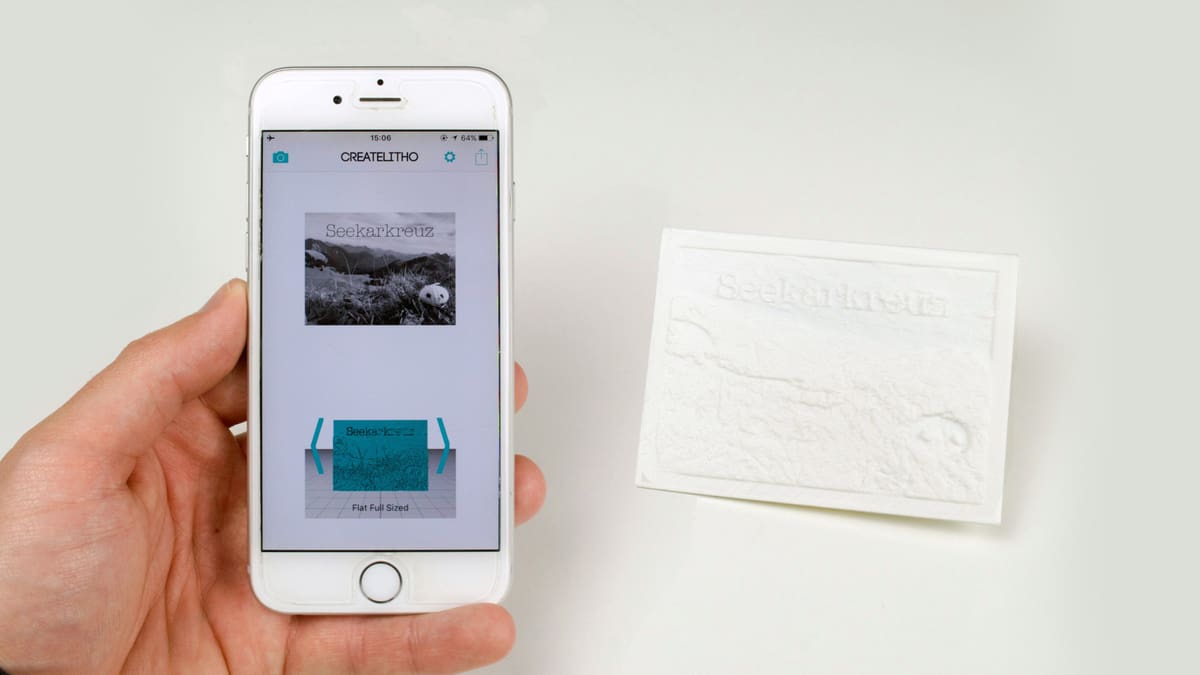
Today, you can access a piece of this magic with a little help from CreateLitho. This app allows you to upload a picture (or take one right from the app), and create the necessary format to 3D print it.
You can then send the files to yourself and print it or get it printed from a third party site, such as our best price comparison service.

Pros
- Extremely easy to use
- Simple, straightforward interface
- Image editing in the app
- Option to add emoticons, stickers and/or text
- Low price of $4
Cons
- Cannot save uploads to the app, always have to re-upload
- Cannot return to editing features after having left
- No user manual guiding on print specifications
- Minimum thickness is 4.00 mm
Verdict
CreateLitho is a fun little app that’s very straightforward and easy to use.
Without a manual to tell you which specifications are optimal, there’s an initial trial and error phase to figure out what works. However, you can do this with flat keychain prints that take less than 20 min, and once you get the optimal specifications worked out, it’s as simple as ‘upload and go.’
In the end, we’re quite happy with CreateLitho. You don’t need any 3D printing experience to create one of these lithophanes. And lucky for you, you can cheat and learn from our own trial and error process which resulted in these optimal settings:
- Make the minimal thickness as thin as possible (0.4 mm)
- Keep the maximum thickness low too (we found 2.4 mm was better than 3.2 mm)
- A stark white (i.e. arctic white) filament yields better results than a slightly opaque one (i.e. natural white)
- Set the printer layer height low (~1.0 mm)
But don’t just take our word for it. CreateLitho is currently only available for iOS, so head over to the App Store and try it out for yourself.
The Looong Read
Create Cafe is a new start-up out of Canada that combines 3D printing and coffee – does it get better than that? With mostly in-person offerings, such as classes and 3D printing by the hour, it’s not overly relevant for anyone who does not live in Saskatoon, Canada. Or, this used to be the case. Now Create Cafe is spreading their domain with the launch of their new app: CreateLitho.
CreateLitho is a rather pioneering app that allows you to take a photo and instantly convert it to a lithophane ready to 3D print. When we were first introduced to this app, we were blown away with how easy it is to use: the whole process takes only a few seconds!
Design
The 3D design of CreateLitho is broken down into three easy steps:
- Take/upload a photo.
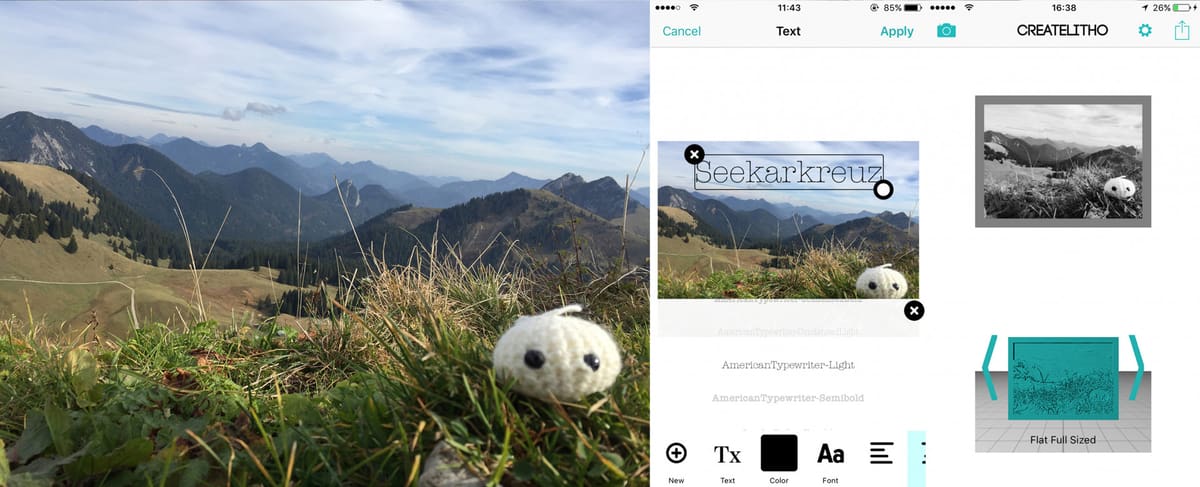
- Edit the photo, if desired, including adding text and emoticons.
- Choose whether you want a Flat Keychain, Flat Full-Sized, Curved Keychain, or Curved Full-Sized.
And you’re done! From there, you can send yourself the files and either upload them to a 3D printing service or send them to your own 3D printer. Easy as pie. We really liked how painless it is!
Features
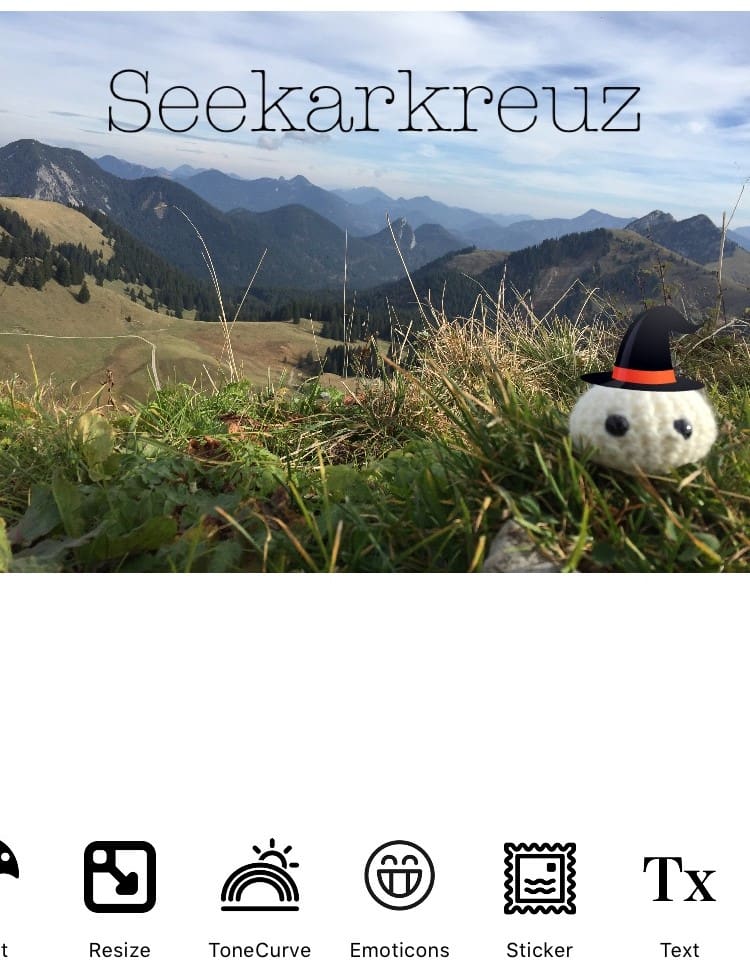
Even with a simple design, CreateLitho does offer several editing features: Crop, Blur & Focus, Adjustment, Rotate, Filter, Draw, Splash, Effect, Resize, ToneCurve, Emoticons, Sticker, and Text.
Each feature was easy to select and implement. Be careful though – once you hit “Apply,” there’s no turning back. Unfortunately, you can’t return to a particular version to edit or delete it.
The first drawback is that you have the inability to return to the editing page once you’ve left.
The second drawback is you can only work with one photo at a time. There’s no option to store images in the app, which means scrapping any changes you’ve made if you choose to work with a different image.
In addition to editing the image itself, you’re offered a few settings options. Within the App Settings, you can choose whether or not you want a border on your print and also the angle of curvature for the curved prints.
Within the Lithophane Settings, you can choose the minimum and maximum thickness, and the numbers of pixels per mm. These are more-or-less an extension of your printer’s settings and will differ for each, but we found keeping the minimal and overall thicknesses low yielded the best results.
CreateLitho does handcuff you a bit here though as the minimum thickness allowed is only 4.00 mm. With reports of printing as thin as 1.00 mm, it’s likely these prints replicate the authentic lithophane more effectively. Nevertheless, as you can see, the image comes through quite nicely and the lithophane is a resulting success.
The design could be expanded a bit to include these possibilities. But regardless, we are quite pleased with the interface and offerings CreateLitho allows.
3D Printing
To test out the capabilities and push the limits of CreateLitho, we decided to print a picture of a landscape with lots of detail to see how well it came through. First off though, we had to get the settings right.
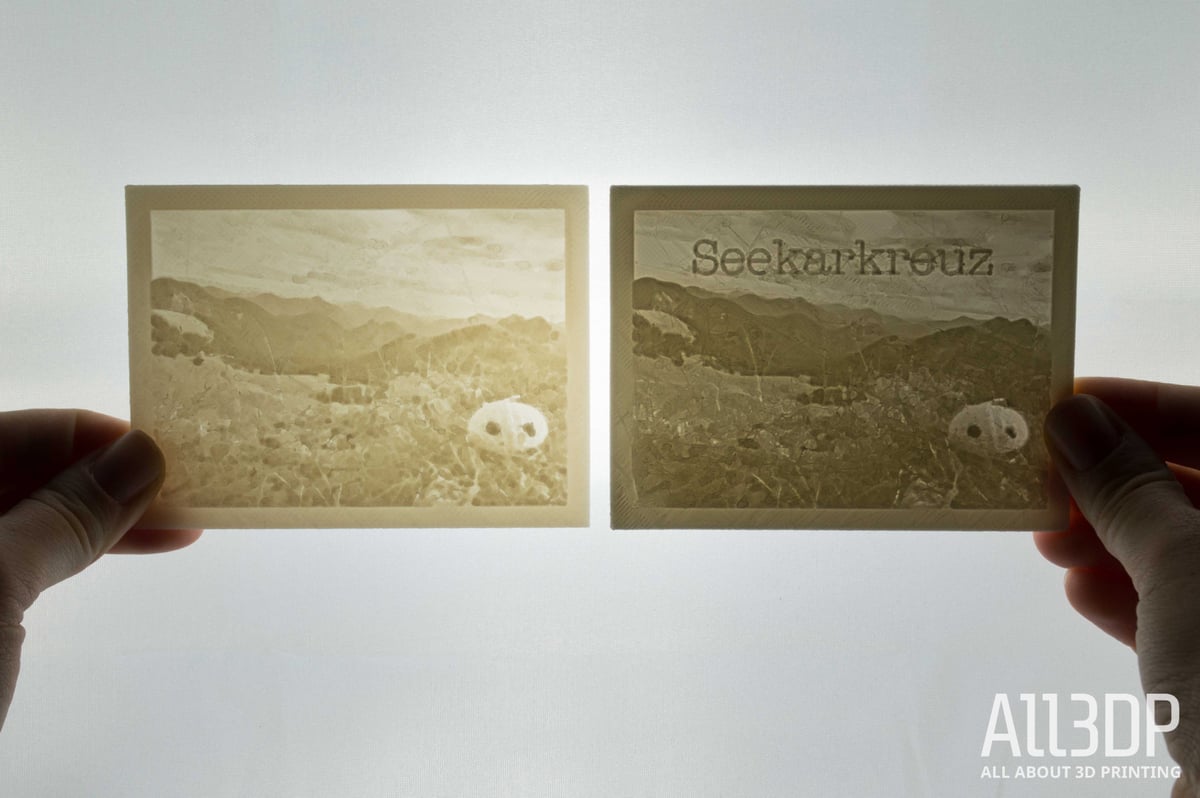
The first few times we tried to print lithophanes from CreateLitho, we struggled to get a clear image to shine through. After fiddling with the settings, it turned out the material played a big part in the clarity of the image. The initial filament we used was Innofil3D’s Natural White, which is slightly iridescent on its own and took away from the dispensation of light that the lithophane creates. It slightly negated the lithophane effect, which allowed more light through than the slicing of the lithophane formulated for. When we switched to ColorFila’s Arctic White filament, the light was much more balanced and the image more clear, as can be seen in the figure below.
Once this was settled, it was just a matter of determining the optimal print settings, as with any print.
For printer settings, we found that keeping the print speed low, as well as the print layer thickness, yielded the best results. Just remember to print with 100% infill! Otherwise, the light dissipation becomes rather moot.
Additionally, counter-intuitive to what you might expect, having a broader range of thickness does not always mean more detail and a better print. It’s actually better to keep the overall thickness down – too much detail can take away and mar the image.
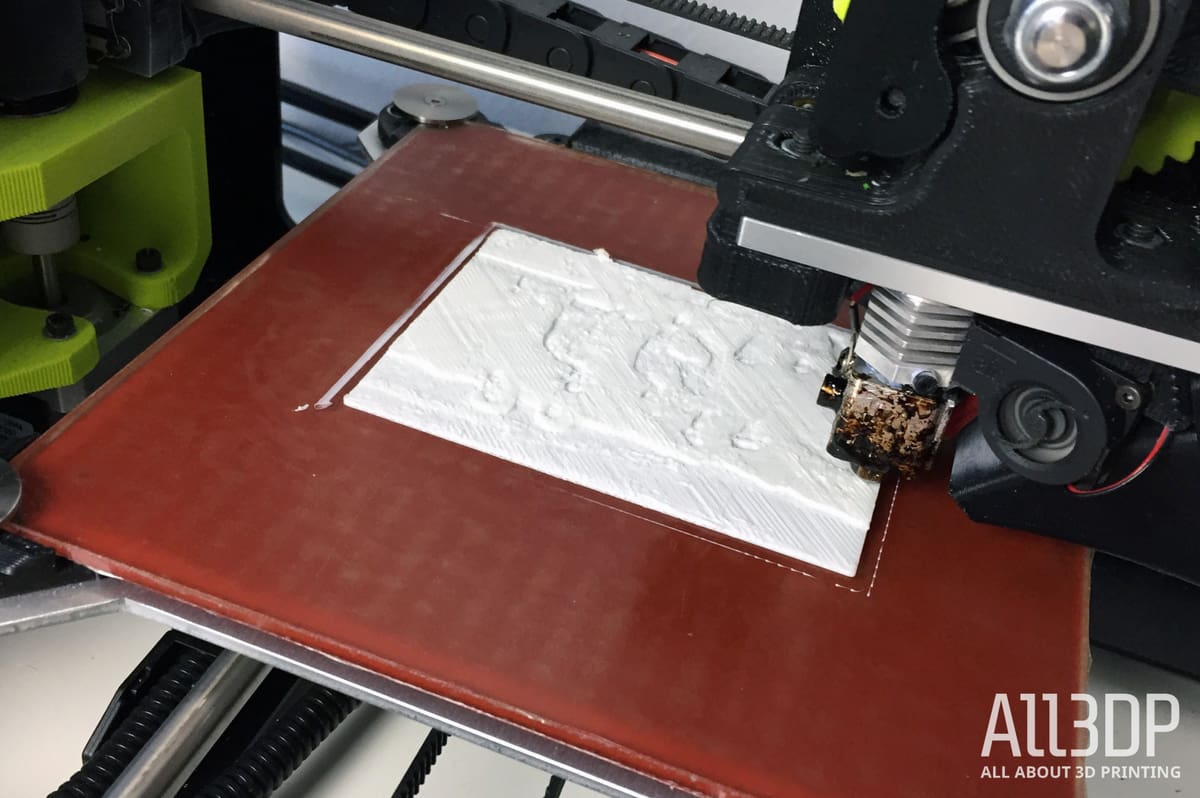
Once the print is complete, due to the nature of lithophanes and disjointed layers, there will inevitably be strings of unattached filament strewn across the lithophane, even with the lowest possible printing speed. This was especially true for this image as the grass proved to have lots of crevices for the filament to be strung between. To tackle this, we found it’s handy to have a pair of wire cutters on hand. They allow you to perfectly get in and pull out these strands from all the crevices with precision and clip them at the base.
This took a little time with the more detailed prints, like this one. Remember to take this into consideration when making your own 3D printed lithophane.
Once all of this was settled, CreateLitho proved it was capable of handling the details of this intricate photo, which really demonstrated its capacity. In knowing that it can handle these intricacies, it’ll no doubt print a portrait of your loved ones crisp and clear.
Wrapping Up
In the end, we were impressed with CreateLitho. We like how easy-peasy and effortless it is; it’s a fun little app that needs little tinkering. Plus, being able to create a lithophane with only a few taps/clicks is where this app really shines. These images will forever have a wow factor, and with CreateLitho, that wow is now at your fingertips.
Simply head over to the App Store now to download CreateLitho straight to your pocket.
License: The text of "CreateLitho Review: The New Way to Print Photos" by All3DP is licensed under a Creative Commons Attribution 4.0 International License.