Electroplating 3D Prints – All You Need to Know

Want to coat your 3D prints in metal to boost their look and strength, it's possible with electroplating. Learn how!
Electroplating is a finishing process to coat objects with a thin metal layer. You’ve likely heard of gold-plated jewelry, which is far less expensive than solid gold jewelry, but has a nearly identical appearance.
You can coat metal with another metal and coat polymers with metals; in fact, anything that is electronically conductive can be electroplated. This includes your plastic 3D prints, enabling you to improve not only your part’s appearance but also its strength and durability without having to go down the much more expensive metal 3D printing path.
Contrary to popular belief, electroplating is nothing like spray painting or dipping parts in a metal slurry; it’s a chemical process with electricity, which can be done at home or in a lab but is most often carried out at a manufacturing facility.
In this article, you will learn everything there is to know about the process, its pros and cons, how it works, and who uses it for 3D printed parts. At the end of the article, you will have enough information to get plating yourself, but if you don’t want to dish out the money for a plating kit just yet, you can always test the waters with 3D printing and electroplating services providers.
Understanding Electroplating
Electroplating uses controlled electrolysis to achieve the electrodeposition of metal cations from the positively charged stock material (anode) to the negatively charged substrate (cathode). In other words and overly simplified: When you put your 3D printed object in an electrolyte solution with the metal you want to use as a coating and apply electricity, bits of the metal will flow through the solution and stick to your 3D printed part. Let’s look at this a little closer.
When an electronic charge is introduced, positively charged ions (cations) dissolute via oxidation and follow the electrical current to deposit a metal layer onto the part. The most common metals used for electroplating are copper, nickel, gold, silver, palladium, tin, zinc, and chromium.
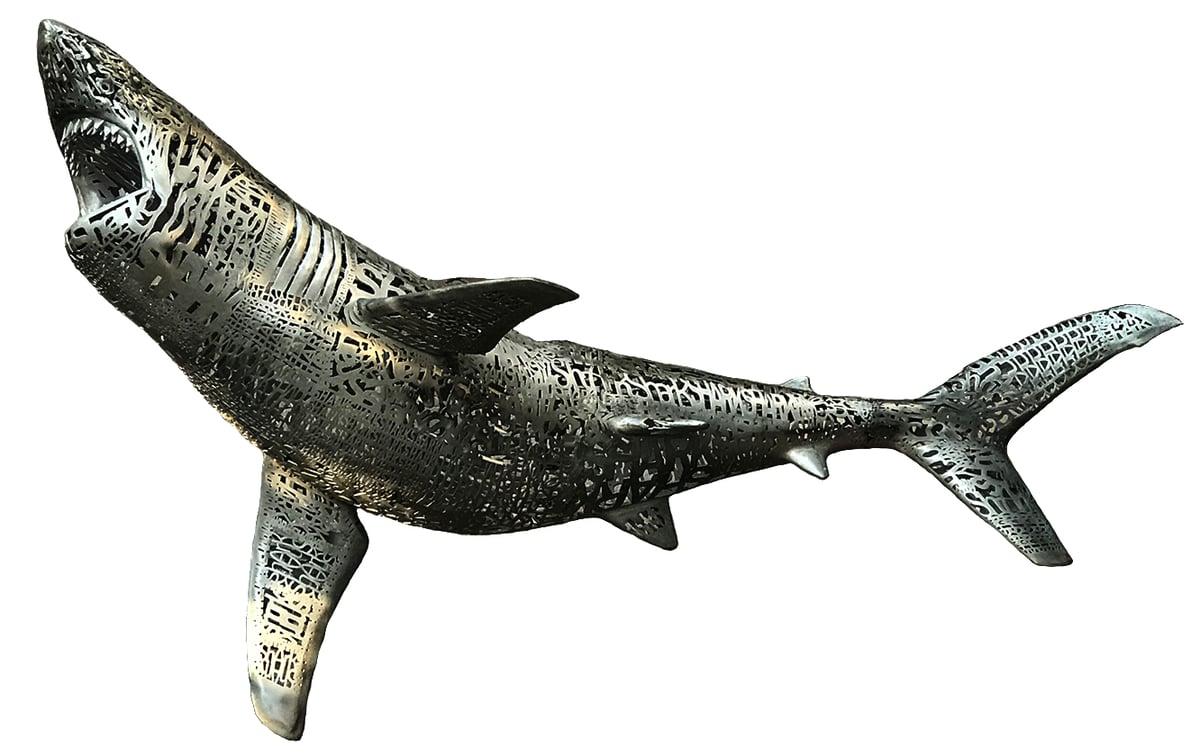
If applied to weaker plastic materials, these metals can give the final part improved mechanical properties like tensile modulus and ultimate tensile strength, albeit not nearly as good as fully metal 3D printed parts. Electroplated objects can therefore be regarded as a midpoint between plastic and metal 3D prints, where electroplating can as much as double the ultimate strength of a resin 3D printed part.
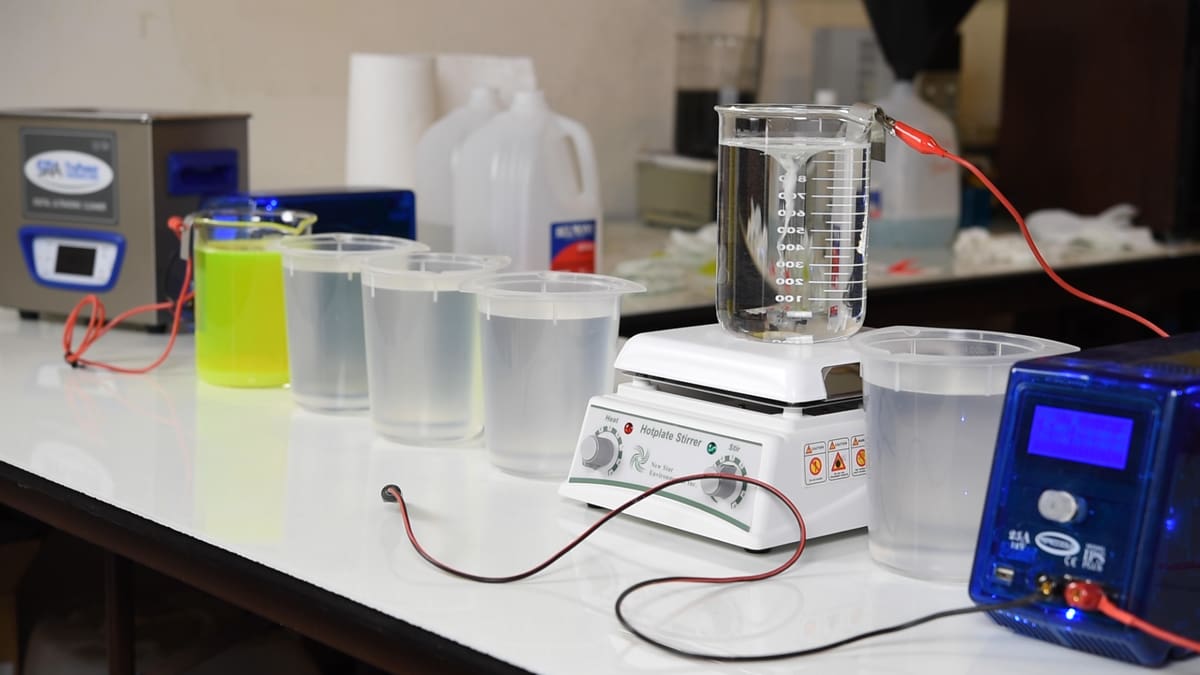
Each process happens while submerged in a conductive electrolyte solution that usually contains salts of the metal you want to plate, sulfuric acid, and solvents alongside other additives like acids, bases, or brighteners. Handle the solution with great care, as it is highly corrosive. Always wear the appropriate personal protective equipment like gloves and safety goggles, and never pour your spent electrolyte down the drain but dispose of it at the appropriate collection site!
Remember that electroplating is a balancing act of depositing metal to your part, with the current and the electrolyte eating away the coating you just applied. It takes patience and experimentation. Plating success depends on various factors, the most important being exposure length, part geometry, and electrical current strength.
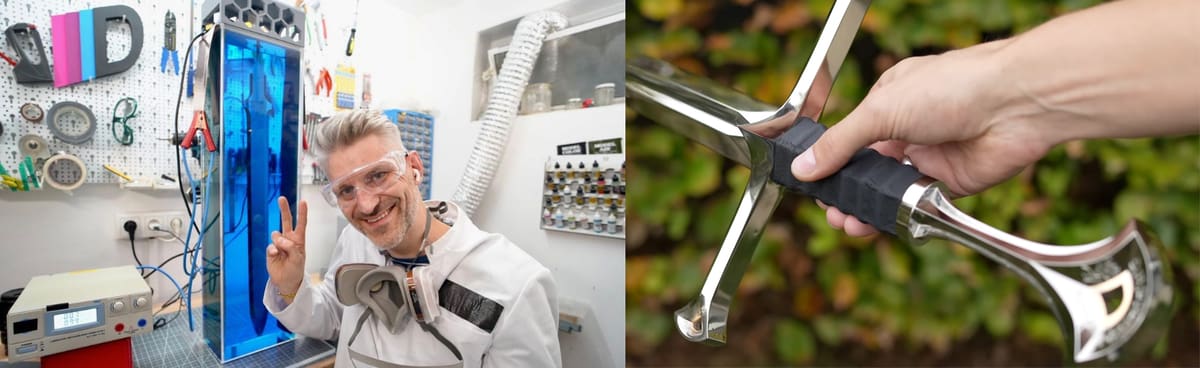
Although the popular YouTuber Hendrik Vogelpohl makes electroplating 3D prints look easy in his video series, it may be more art than science.
Folks at Prusa Research tried their hand at electroplating for a piece in their blog and weren’t afraid to document all that can go wrong. “Keep in mind that you might need some patience and frustration tolerance because the results are probably not going to be perfect right away,” writes Jakub Kočí at Prusa.
Note that the 3D printed part needs to be conductive to ensure the flow of the metal cations from the positive to the negative pole. Non-conductive plastic prints must therefore be appropriately set up to ensure plating success. How exactly this can be done will be explained next.
Preparation and Safety Measures
Besides the electrolyte solution that should be handled and disposed of carefully, preparing 3D printed parts and electroplating them should always be executed with the appropriate protective equipment—proper clothes, gloves, goggles, and a respiratory mask are necessary. Spraying and electroplating should also be done in a well-ventilated area to avoid breathing in harmful substances. As always, follow the handling and storage instructions for the used materials. But for now, let’s look at the necessary steps before plating.
3D Printing the Part
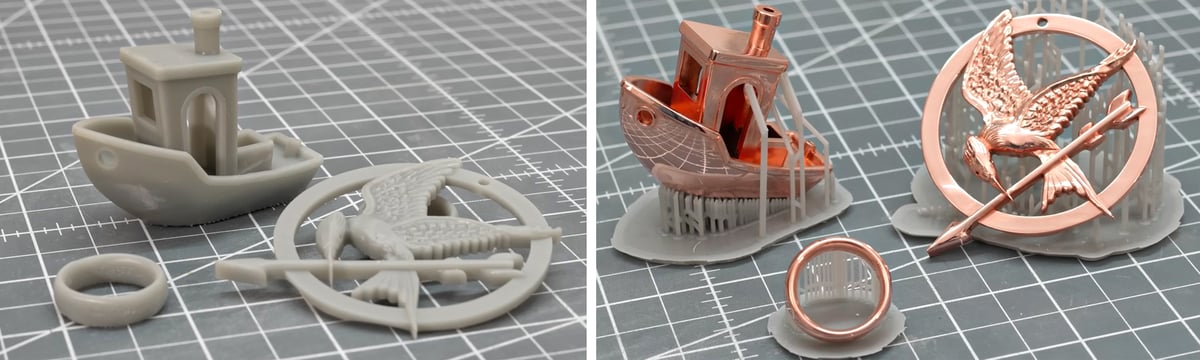
When plastic 3D printing for electroplating, the most used technologies are SLA and FDM, but SLS and material jetting are also possible, yet more expensive.SLA printing has a competitive edge due to the achievable detail resolution. In both cases, the better the printer resolution and the lower the layer thickness, the less post-processing the part requires. In terms of material, anything that the conductive paint sticks to can be 3D printed. Some specialty service providers can even print and plate industrial materials like Nylon and PEEK.
Sanding the Part
One of the most elementary requirements for electroplating is a smooth surface to yield good results from the fragile film that’s only a few hundred microns thick. The smoother the surface, the shinier the final metal coating. Especially for FDM printed parts, this means several rounds of vigorous sanding and filler spraying. Polyurethane varnish also helps fill any gap in the print.
Cleaning the Part
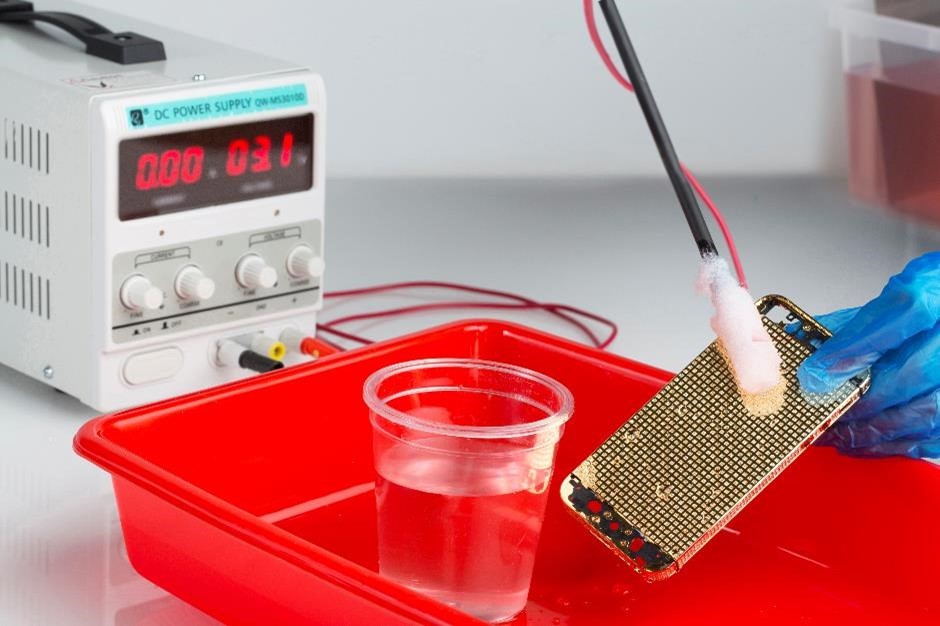
Just as important as a smooth surface is a clean surface, not just before starting the electroplating process but between every step. Dust and grease are the mortal enemies of electroplating, as they prevent the filler, conductive paint, and subsequent metal coatings from binding uniformly to the part. Clean and degrease your part thoroughly before placing it into the bath and clean it with distilled water between the electroplating steps.
Making the Part Conductive
To make the part conductive, apply a layer of conductive paint. Copper or Nickel paint is most commonly used, but much cheaper graphite paint will also do the trick if sanded once more before dipping it into the electrolyte. Not every filler is compatible with graphite paint, however. Youtube creator HEN3DRIK has a formidable tutorial on graphite electroplating along with a wealth of other electroplating resources. There have also been attempts at printing with conductive filament to avoid having to apply a conductive paint layer, but results have been mixed, so going the way of the spray is recommended, especially for novices.
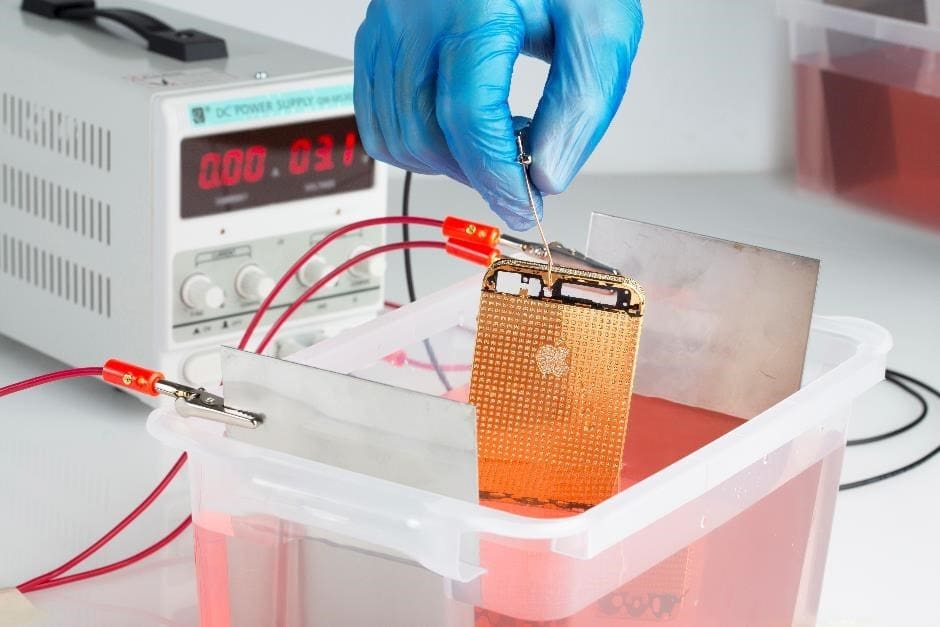
Immersing the part
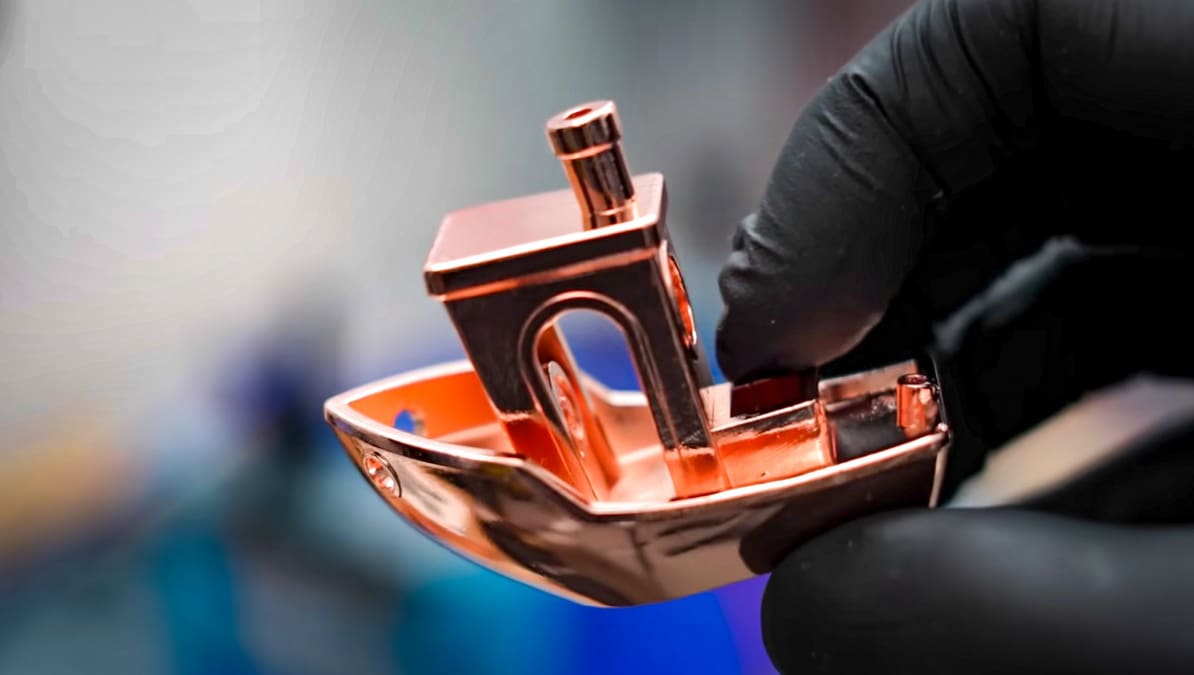
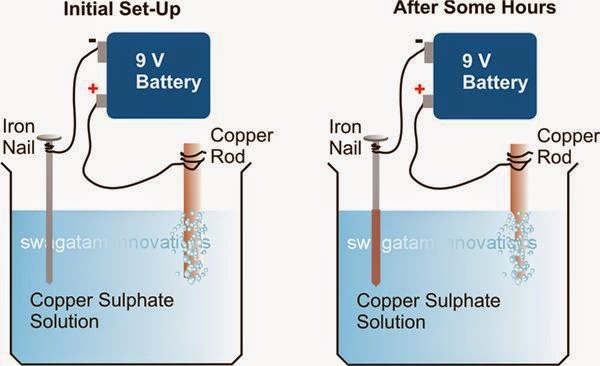
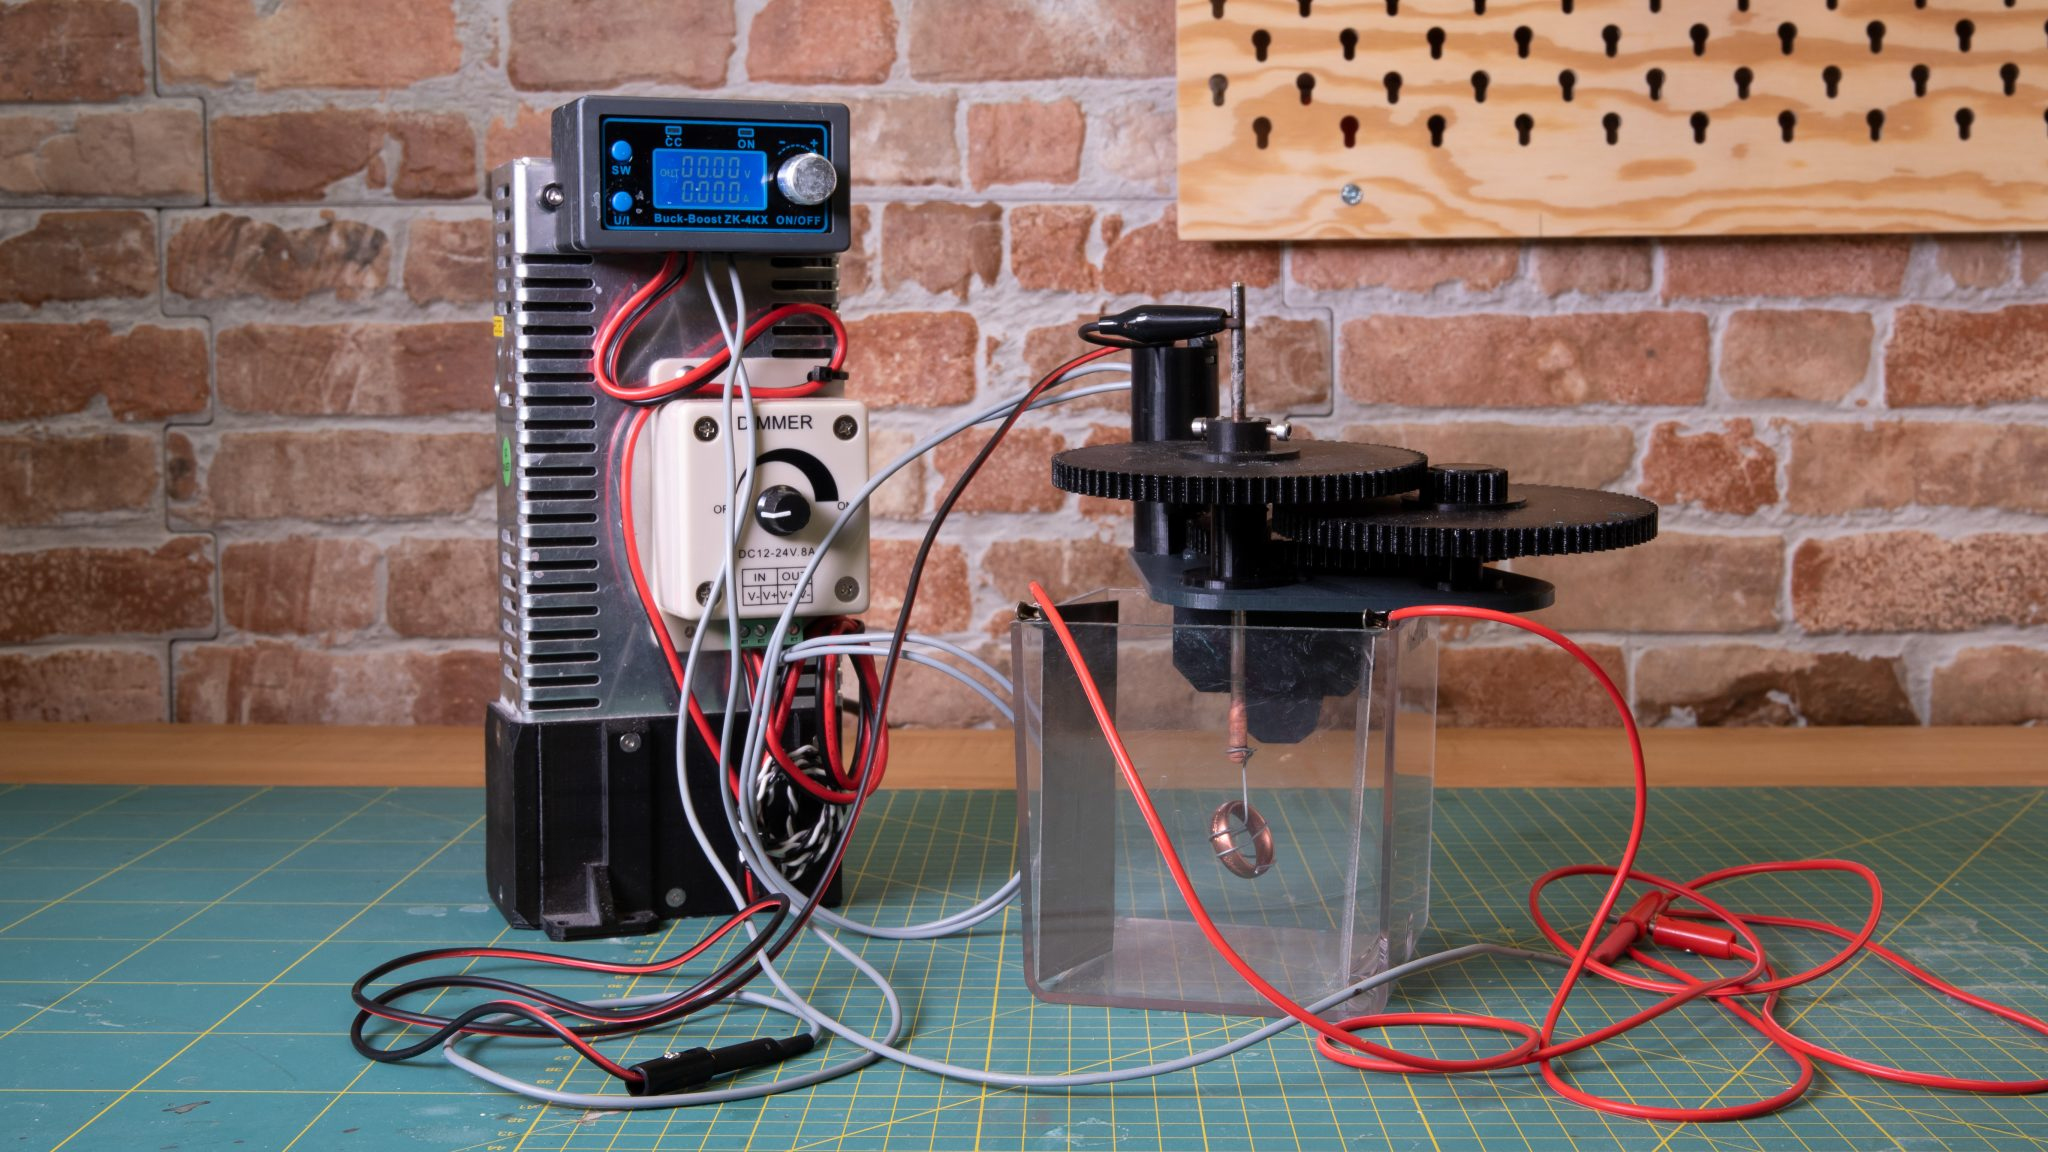
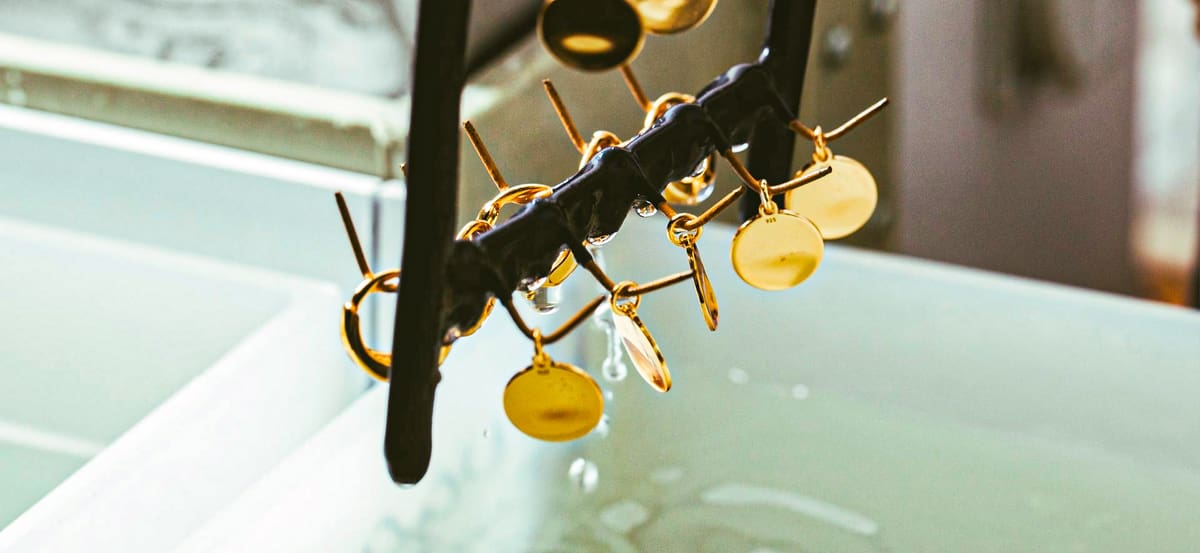
Set up the electrical circuit by attaching the electrodes to your power supply. The anode needs to be attached to the metal forming the plating. The cathode will be connected to your part. Cut a metal wire to length and shape it so your 3D printed, primed, and cleaned part can sit in it. Some 3D prints want to float, so hold them down with the wire if necessary. Remember to reposition the piece while plating periodically, or it will weld to the wire. Fill a glass or plastic container with the appropriate electrolyte and ensure the part to be plated is completely submerged.
Electroplating the Part
Everything is set up, and you can turn on the power supply. The needed current depends on your model’s thickness, surface area, and tank volume. There are online calculators that help you figure out the required voltage. For best results, it makes sense to increase power as the deposited layer gets thicker gradually. Too much current will lead to uneven coating with rough and grainy deposits and faster electrolyte degradation. A weak current will result in insufficient metal deposition leading to thin or patchy plating.
Further Processing the Part
The electroplated part can then be further plated with other metals like nickel, gold, or palladium. This can be done either through further electrolysis or other methods like brush plating. The part can also be chemically cleaned to increase the film’s reflectivity further.
Troubleshooting Electroplating
Electroplating is a complex process requiring a high level of diligence and experience to satisfy results. This section summarizes some of the most common defects, how they happen, and what can be done to avoid them.
Part Geometry Defects and Issues
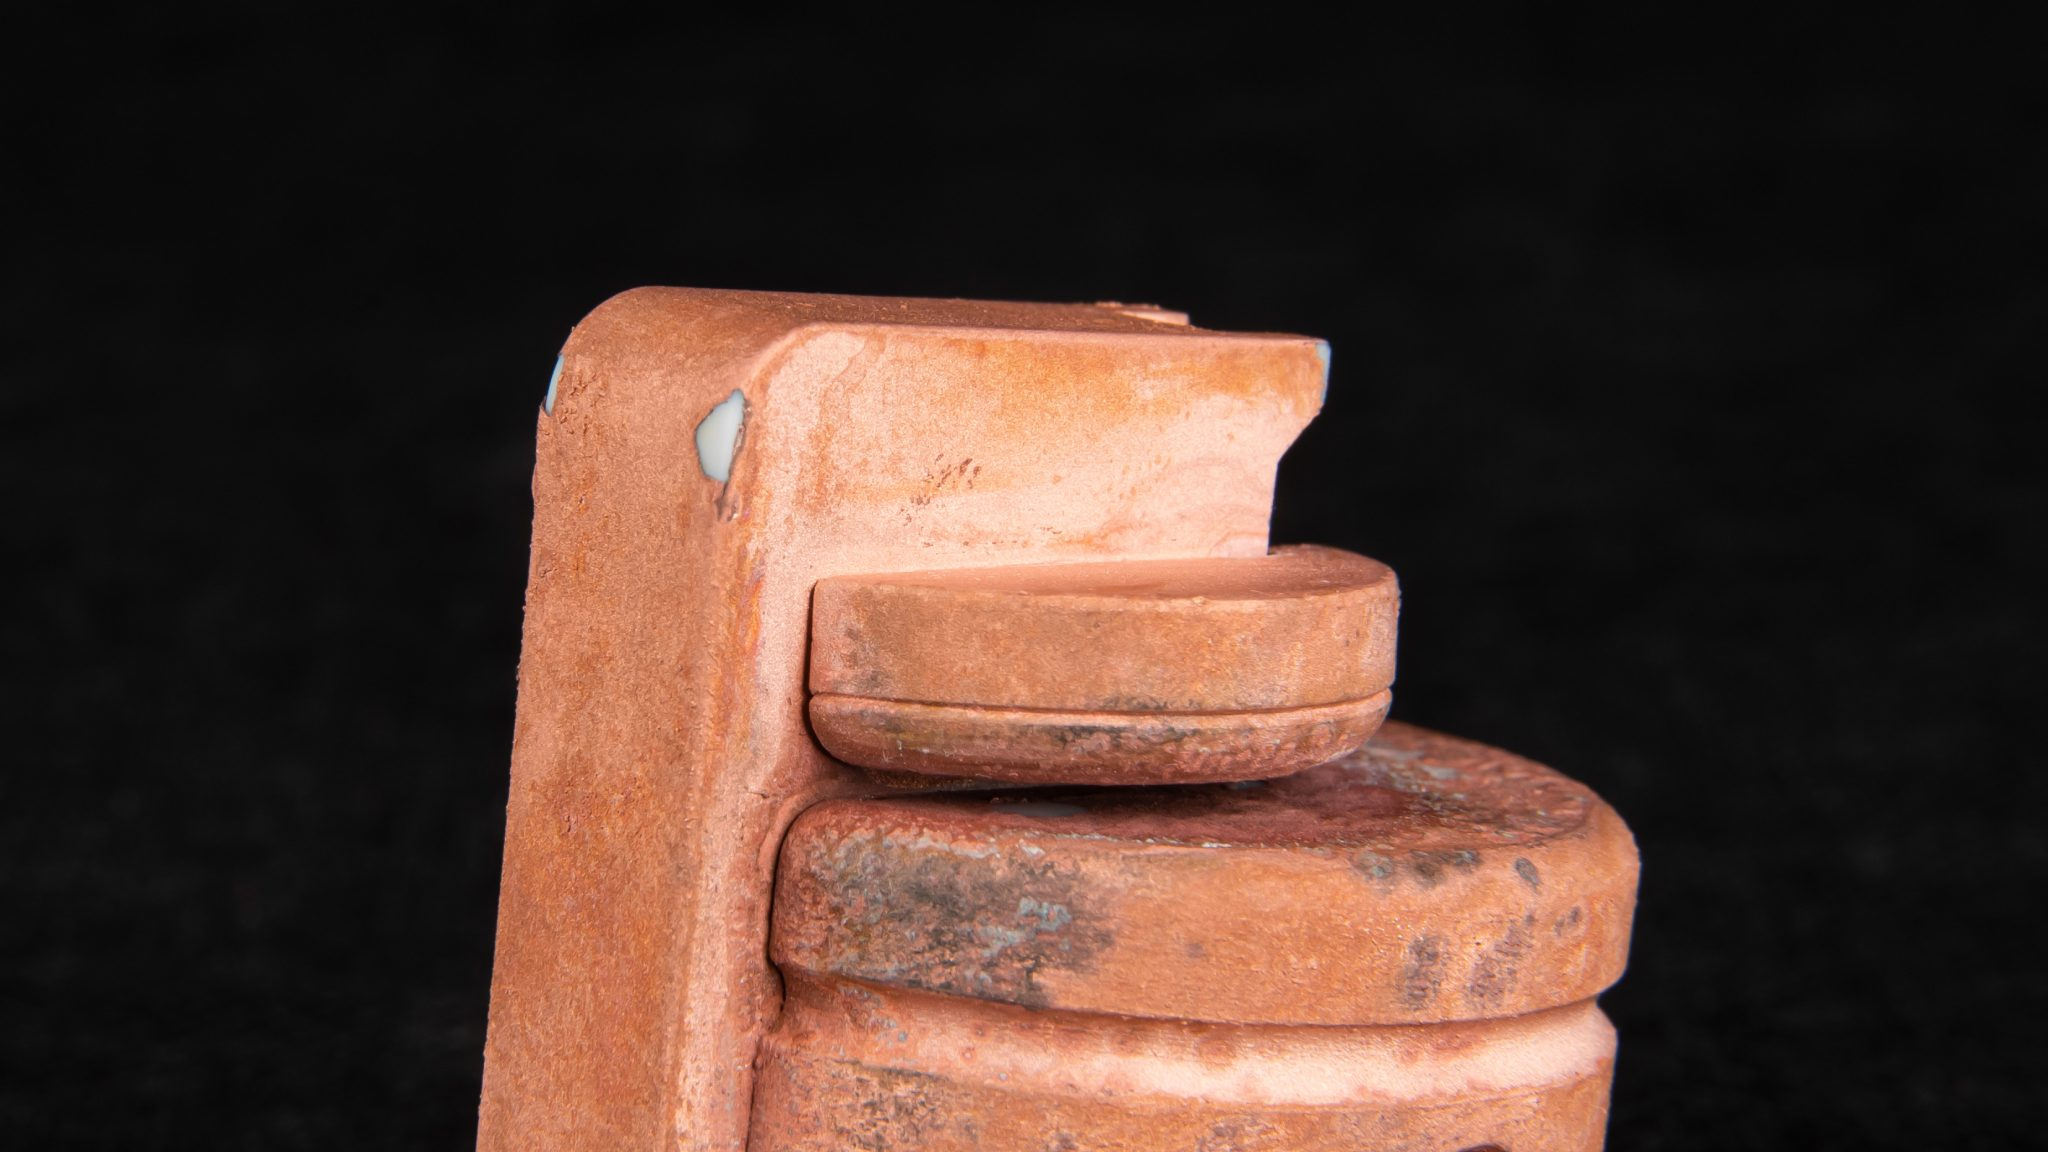
The geometry of a part plays a crucial role in guaranteeing electroplating success. Conventionally manufactured substrates made with plastic injection molding or metal casting often exhibit surface irregularities that make even metal deposition challenging. Cold shuts, for example, occur when materials harden at different stages of the injection process, leaving behind visible flow marks or lines. Pitting, another common issue, refers to small holes on the substrate’s surface.
Their equivalents in the 3D printing realm are layer lines and material under- or overextrusion issues. These process-specific phenomena cause deviation from the final part dimensions. They must be handled via sanding and priming before electroplating because such significant irregularities can not be fixed once the metal film has been deposited.
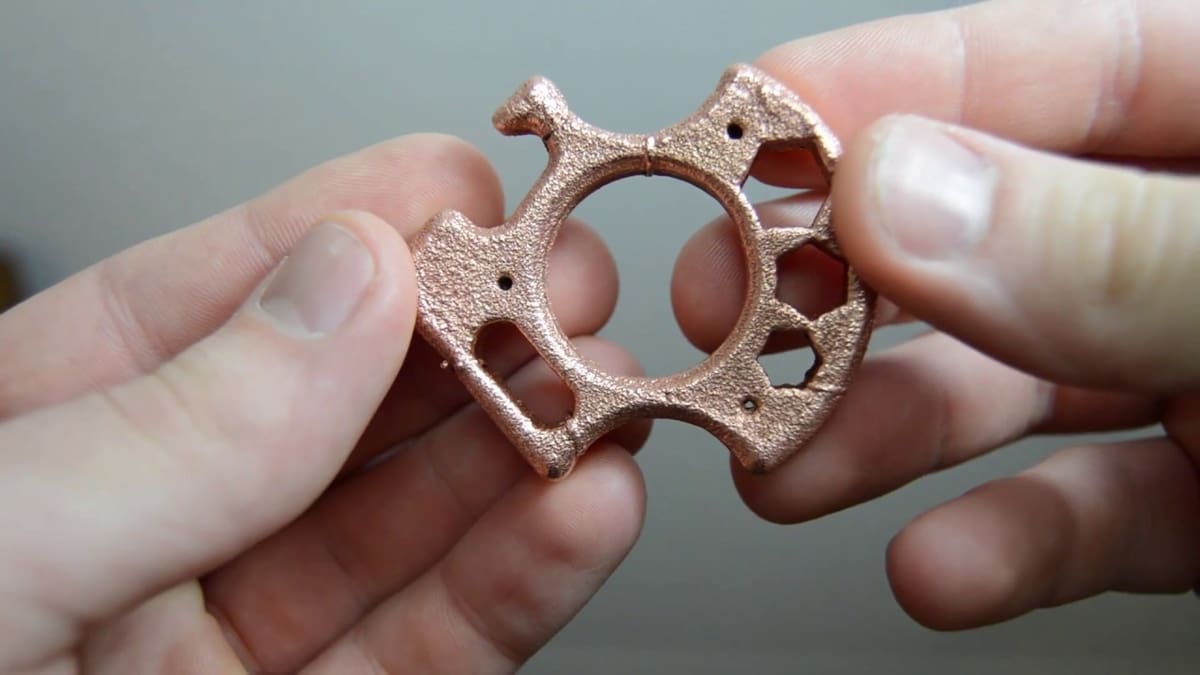
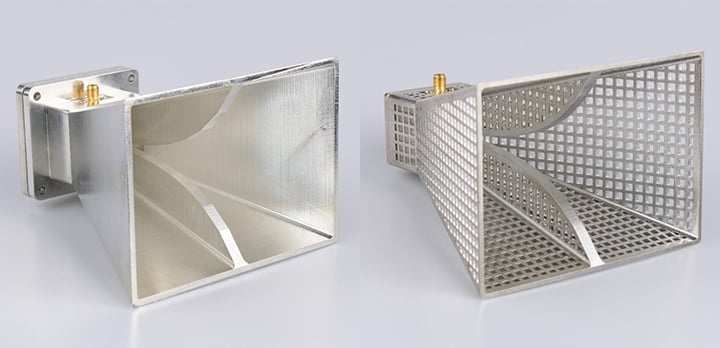
Even intentional part geometries like sharp edges or intricate designs like lattices can cause issues during plating because of current distribution issues. Current density is higher at sharp edges, meaning excessive coating will occur in these areas, leading to a brittle layer that easily breaks. The opposite of that is shadowing, which can be understood similarly to the sun casting a shadow. Parts of the substrate that are covered from the anodes will receive less deposition. This can be solved by rearranging the anodes or continuously turning the substrate within the electrolyte for distributed part exposure.
Poor Adhesion
Uneven Plating
Suppose the finished plating is not just dull but also rough. In that case, the electrolyte may be degraded and contaminated by particulates that will deposit on the substrate, leaving behind an uneven coating. Filtering or replacing the electrolyte will help.
Excessive current also leads to uneven coating; thus, decreasing the current will often alleviate the issue. Bubbles forming on the substrate are usually a telltale sign. However, if the current is too low, the coating may be too thin or even patchy and incomplete. Finding the right balance is one of the most critical aspects of electroplating success.
Dull and Hazy Plating
It can be frustrating when the plating is successful but does not exhibit the desired shine and reflectivity. There are many reasons why this may have happened. A chemical imbalance like too much sulfate, chromic acid, or contaminants dissolved in the electrolyte may be the cause, so changing the electrolyte could improve results. Incorrect temperatures may be another reason. Temperatures between 130 and 140°F are ideal for both the bath and the substrate.
Incorrect current density or a broken power supply leading to interrupted currents may also be the root cause. The part itself may also be placed too high in the container. Make sure that it’s at least four inches below the surface. Lastly, inadequate rinsing between electroplating steps may lead to chemical or dirt residue and subsequent dullness. If none of these fixes deliver the desired results, using a brightener can also help improve the final result as it stops large crystals from forming on the part, making it shinier.
Electroplating Pros and Cons
Like any technology, electroplating has pros and cons, some of which have already been mentioned in the article and will be summarized here. In addition to common electroplating-specific considerations, a few more must be considered when combining it with 3D printing. The following list summarizes these benefits and drawbacks.
Pros of Electroplating
- Improved surface appearance
- Protects the substrate material from mechanical wear, corrosion, or tarnishing
- Improves part properties like tensile strength, stiffness, and weight
- Creates new properties like magnetism or electrical conductivity
- Enables the coating of different metals, including copper, tin, nickel, gold, palladium, chrome, and more
- Low-cost alternative to metal 3D printing that enhances plastic parts with metal characteristics
Cons of Electroplating
- While cheaper than 3D printing with metal, the required materials are expensive and add to the cost of the final part
- Tedious and manual process with process-specific defects like cold shuts, pitting, sharp edges, cleavage points, and loss of adhesion that make the process challenging to master, especially in a hobbyist setup
- The differing thermal expansion properties of plastic and metal can lead to cracks and separation of the coating from the substrate over time
- Mechanical properties do not come close to metal parts
- Lengthy process that takes several hours to days, depending on the required finish
- Toxic materials that create hazardous waste and can damage the environment if incorrectly handled and disposed of
Who's Using Electroplating?
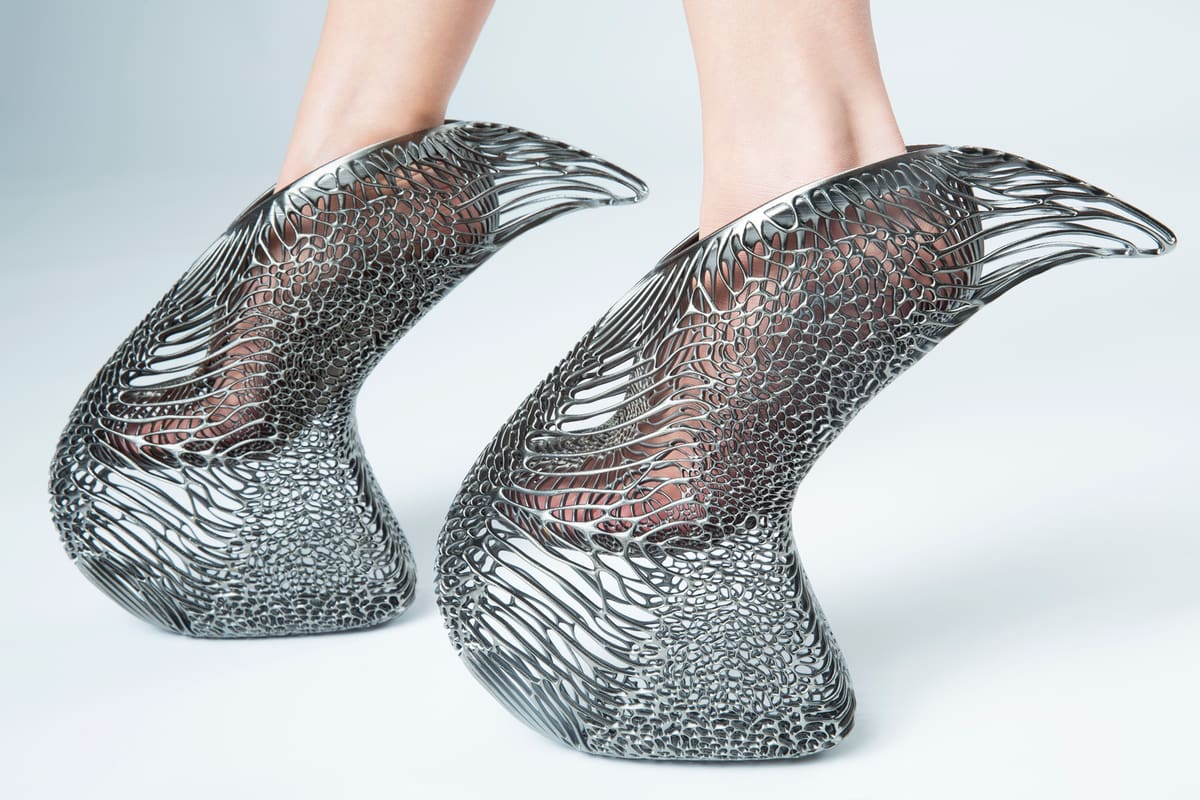
Since electroplating is a well-established finishing technique, most manufacturing sectors, including additive manufacturing, use it in selected applications to improve part characteristics like conductivity, durability, visual enhancement, or strength. Such industries include the automotive, aerospace, electronics, medical, and fashion industry. In the latter, it has been used by shoe designers and jewelry makers to give their products a more luxurious look and feel. Electroplating a plastic or metal ring with a microscopic layer of gold will be much more affordable but provide the same elegant look. It also allows makers without access to goldsmithing equipment to upgrade their 3D printed plastic parts at relatively low costs.
Where to Get Your Parts Electroplated?
Several on-demand 3D printing services offer electroplating, also called just plating, as a type of finishing to your 3D print. Conveniently, you can just upload your digital file and these companies will take care of printing, prepping, and plating your part.

License: The text of "Electroplating 3D Prints – All You Need to Know" by All3DP Pro is licensed under a Creative Commons Attribution 4.0 International License.