LulzBot Mini 2 Review: Editor’s Choice
Rating

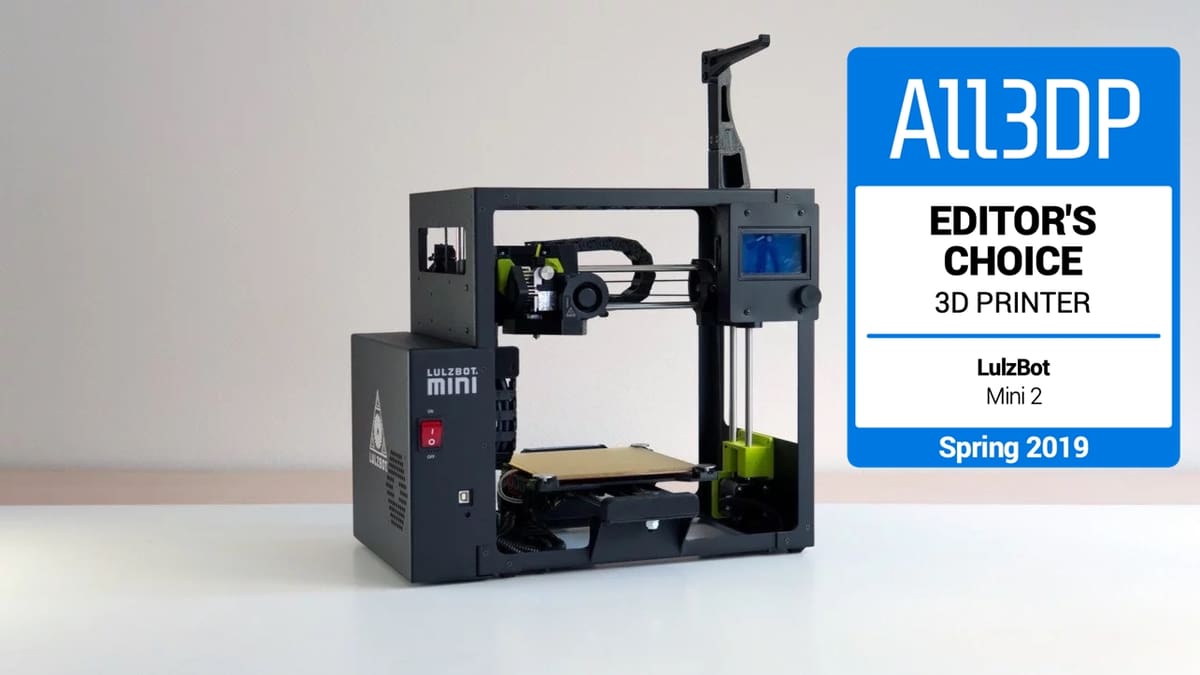
The LulzBot Mini 2 is one of our Spring 2019 picks for "Editor's Choice". Check out our review to find out why we love this 3D printer so much.
Many of the desktop 3D printers currently on the market are built with affordability in the driver’s seat, but more professionally-minded manufacturers still prioritize reliability over having the lowest price tag possible. Since its earliest days on the 3D printing scene, the Colorado-based manufacturer Aleph Objects has always identified with the latter, developing workhorse 3D printers that are easy to use and incredibly dependable.
The company has recently released the LulzBot Mini 2, a new and improved version of its flagship desktop 3D printer. The latest LulzBot 3D printer features a wide range of updates and improvements, ranging from enhanced components to a larger build volume.
The LulzBot Mini 2 highlights Aleph Objects’ ongoing attempt to conquer professional applications like product and process engineering, design, manufacturing and education. At first glance, the LulzBot Mini 2 doesn’t seem to diverge much from its predecessor, but a deeper look shows that this 3D printer is equipped with some seriously sweet upgrades.
Priced at $1,500, this new desktop 3D printer is primed for professionals and small businesses that want a reliable and professional-grade 3D printer without breaking the bank.
We were certainly excited to see how the LulzBot Mini 2 matched up with the first iteration, which we recently awarded as the Editor’s Choice in our Best 3D Printer list. So, without further ado, here’s our in-depth review of the LulzBot Mini 2 3D printer.

Pros & Cons
Pros
- Extremely reliable workhorse 3D printer
- Compact and sturdy design
- Larger build volume compared to predecessor
- Fast printing capabilities
- Ready-to-print right out of the box
- Able to handle advanced materials (TPU, Exotic PLA, ABS, etc)
- Intuitive user interface
- Automatic bed leveling
Cons
- Extruder/filament change issues
- Print quality varies depending on material
- Relatively expensive
- Limited build volume
Verdict
After spending a few weeks getting familiar with the LulzBot Mini 2, we found that this 3D printer was even better than the beloved original LulzBot Mini.
The newest addition to the Aleph Objects family continues to maintain a similar compactness and reliability, but it’s the new features and enhancements that really push the LulzBot Mini 2 above its predecessor.
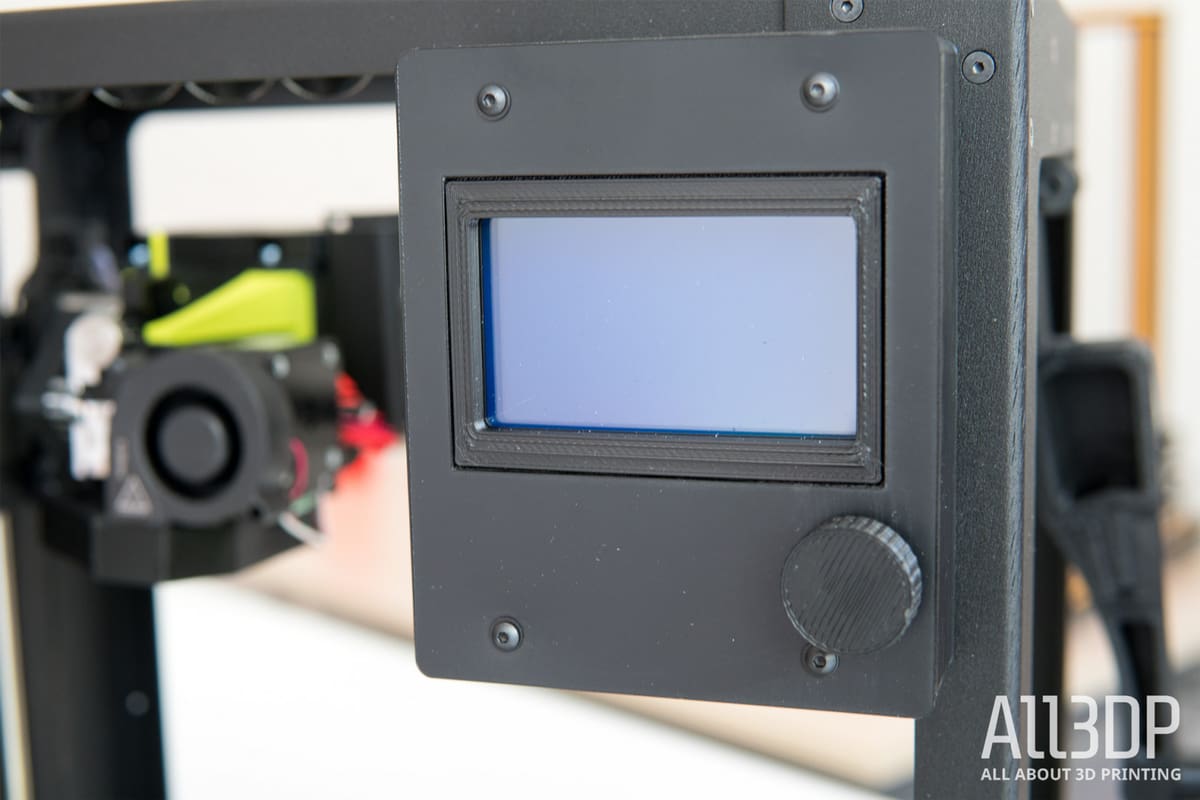
The addition of the GLCD Controller and LCD display provides a certain type of freedom that just couldn’t be achieved with the first Mini, as it always had to be tethered to a computer.
The LulzBot Mini 2 allows you to insert a SD card and start printing, controlling the settings all from the simple user interface. Previously, all of the adjustments and tasks were controlled from Cura LulzBot Edition, but the addition of tetherless printing eliminates this dependency.
This is clearly a major improvement over the original Mini, but it wasn’t the only factor that made us enjoy our experience with LulzBot Mini 2. The redesigned PEI print bed worked like a charm. Out of the many materials and models we attempted to print, there was absolutely zero issues with adhesion or warping.
One of the few issues we had with the LulzBot Mini 2 was with changing filament. Although the process of swapping materials is designed to be quite easy, there were a couple of occasions where we encountered a frustrating problem. You can read more about this in the following “Features & Design” section.
Other than that, there were also some slight layering issues with a few of our prints (as you’ll see later on in the “First Prints” section of our review) that were set to print in High Detail mode. Outside of the difficulty with filament changing and sporadic print quality issues with certain materials, we had no other qualms with the LulzBot Mini 2.
This machine is a true workhorse in every sense of the word. It’s reliable, easy to use and will continue printing from sunrise to sundown without any issue. We were especially impressed by its ability to handle difficult-to-print materials like NinjaFlex, wood filament and ABS.
We highly recommend the LulzBot Mini 2 for prosumers, designers, engineers and small businesses that require a printer that is dependable, consistent and able to pump out high quality objects quickly.
At $1,500, there are certainly more affordable options on the desktop 3D printer market, but few manage to offer the reliability and user-friendly experience of the LulzBot Mini 2.
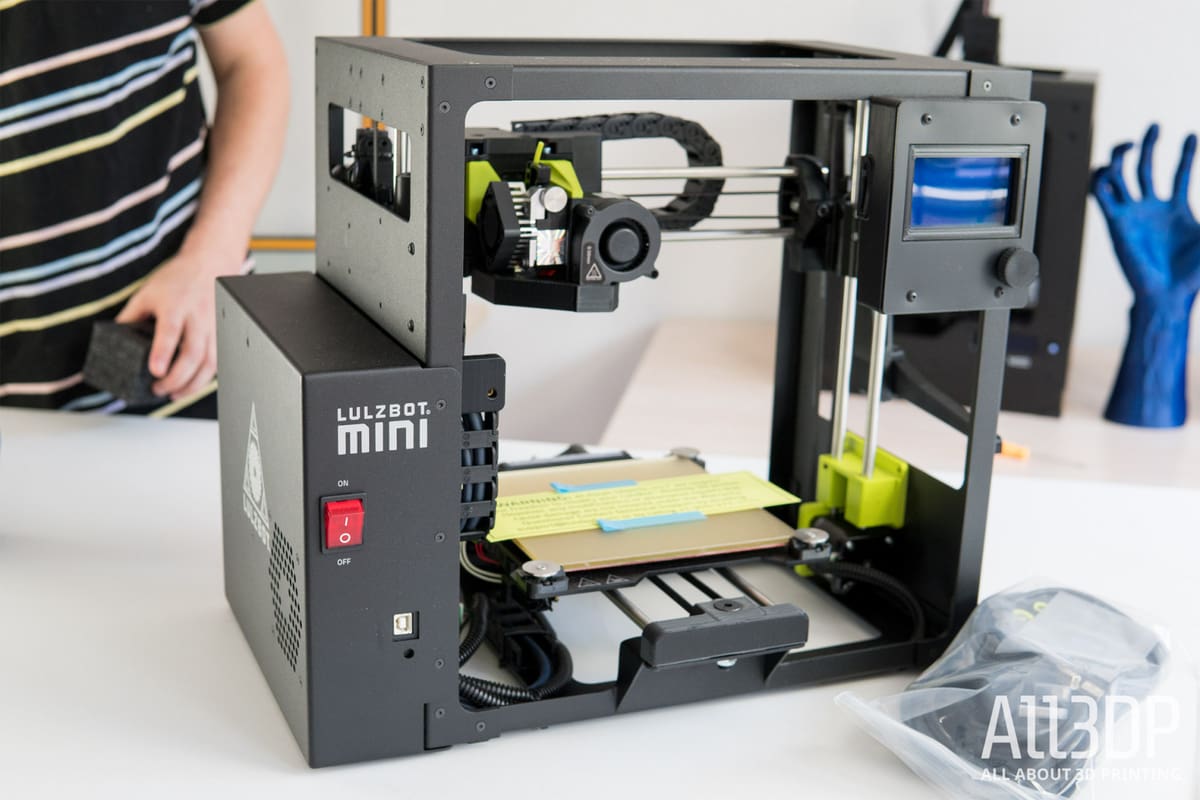
Features & Design
The LulzBot Mini 2 has a number of hardware improvements under its hood, including Einsy RAMBo electronics with Trinamic 2130 stepper motor drivers, which effectively silences the printer during operation.
While there’s no increase in footprint between the two machines, the LulzBot Mini 2 manages to provide a 20 percent larger build volume. The original Mini offered a 152mm x 152mm x 158mm build volume; the latest model is slightly bigger at 160mm x 160mm x 180mm.
Perhaps the most significant feature integrated into this 3D printer is the newfound ability for standalone 3D printing. The first Mini had to be tethered to a PC in order to print, which proved to be a slight restraint at times. But the LulzBot Mini 2 is fully independent, featuring an onboard LCD screen and SD card reader.
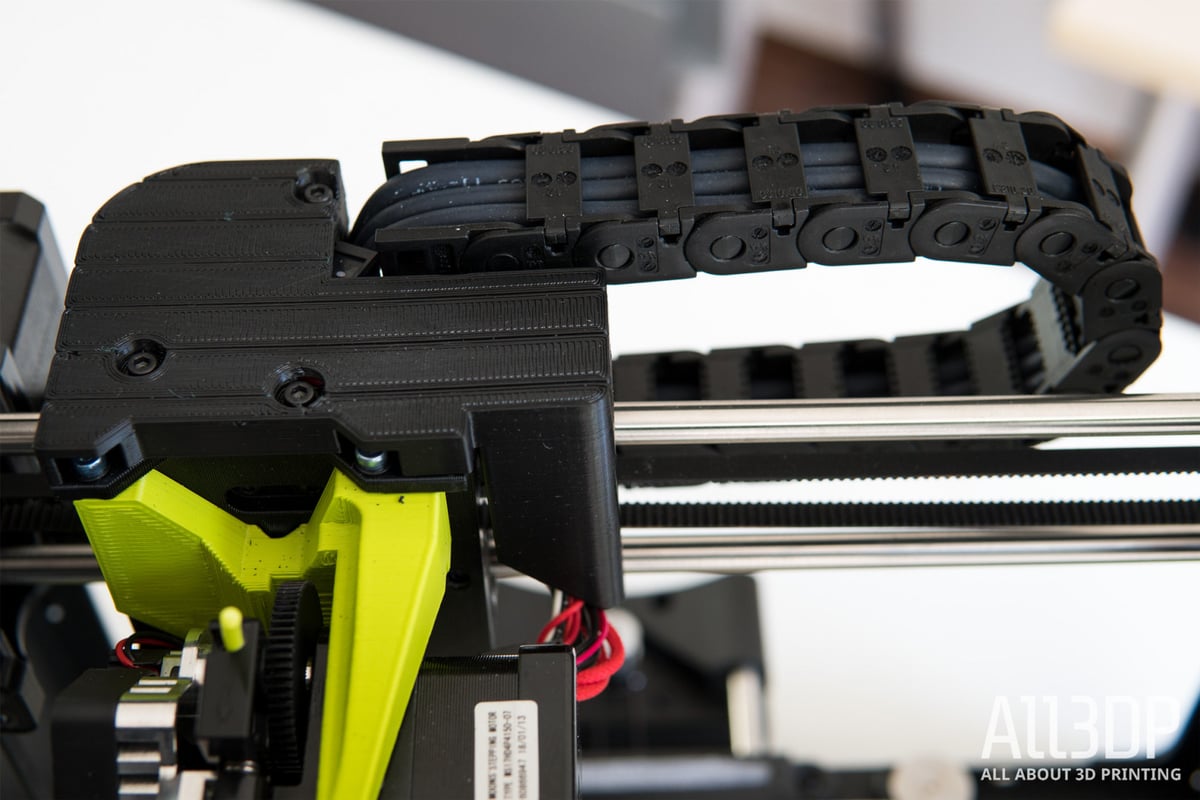
The new LulzBot Mini 2 is also designed with a belt-driven Z-axis that increases travel speed and accurate layer alignment without sacrificing print resolution.
Additionally, Aleph Objects has decided to equip the new Mini with a whole range of top-grade accessories that were previously available as separate add-ons.
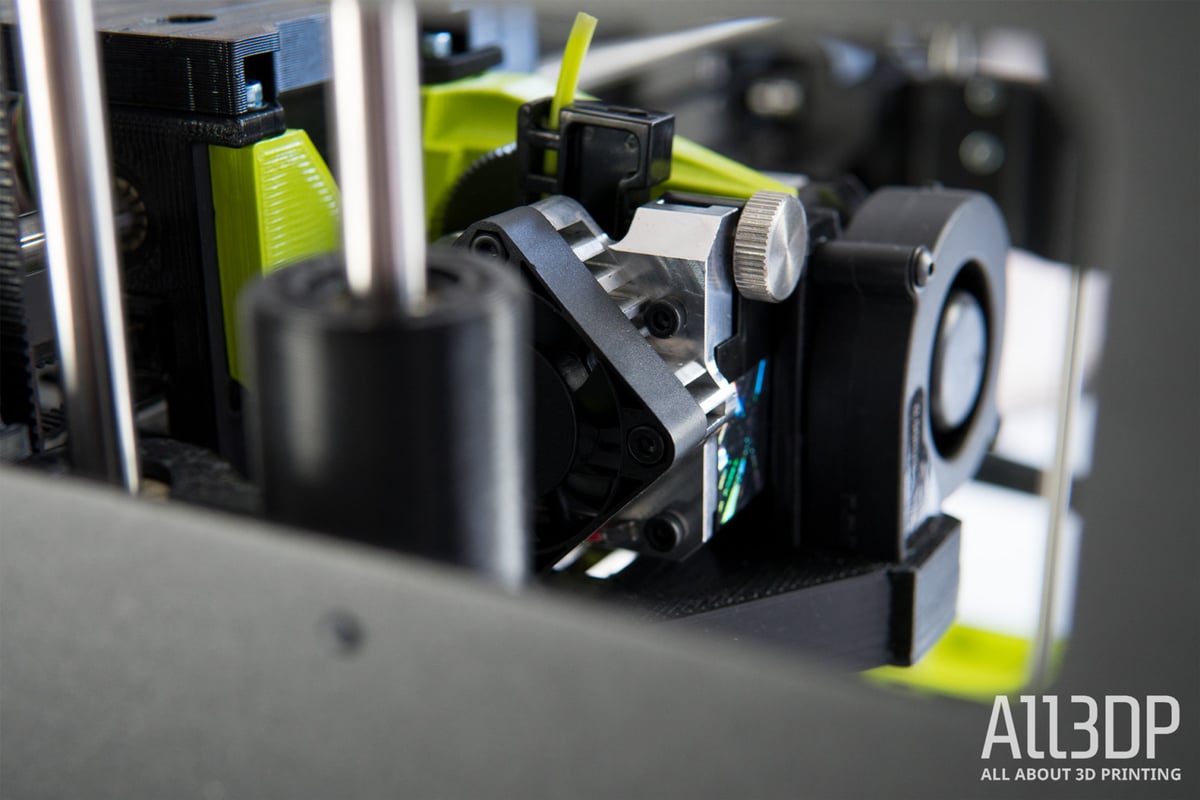
This includes a lightweight Aerostruder Tool Head that is designed around the E3D Titan Aero hot end extruder, offering a more constrained filament path to improve compatibility with flexible filaments.
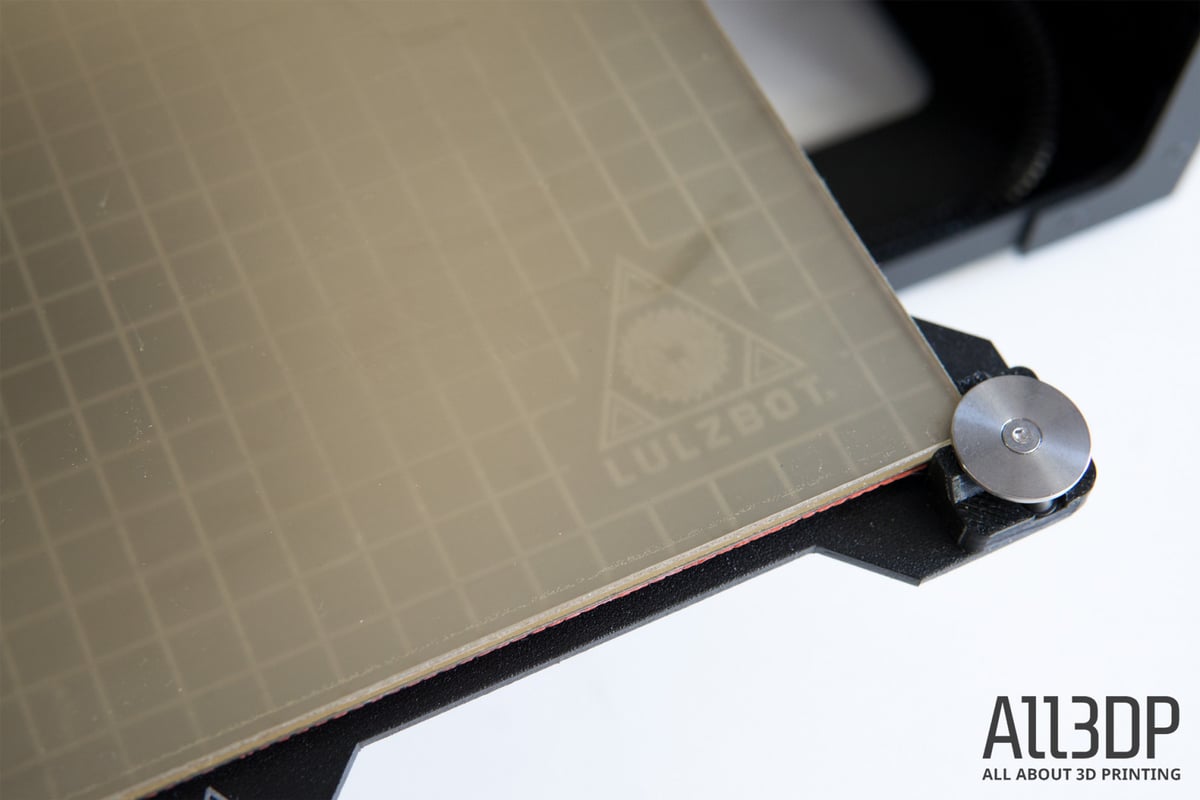
Another notable feature of the LulzBot Mini 2 is the Modular Print Bed System, which is a two piece replacement for the standard LulzBot heated build plates.
This modular system splits up the heater from the print surface, making the build plate easily removable. This means you can switch from the standard PEI bed to raw glass surface at a whim, essentially opening the door to more 3D printing materials.
The LulzBot Mini 2 is also equipped with a new belt-driven Z-axis that promotes exceptional layer stacking. A custom circuit board that acts as a brake has been integrated to prevent the Z-axis from failing when disconnected from power.
As a whole, the LulzBot Mini 2 manages to maintain the compact design of its predecessor while also offering more features and improved functionality. There were a couple of issues we ran into, one of which involved the new tool head.
While the redesign tool head looks great, we did experience some trouble when attempting to change materials.
When attempting to retract filament we had been previously using, the melted tip of the material would sometimes get stuck below the extruder hobb (as you can see in the photo below), which is engineered to rotate to either insert or extract a material from the tool head.
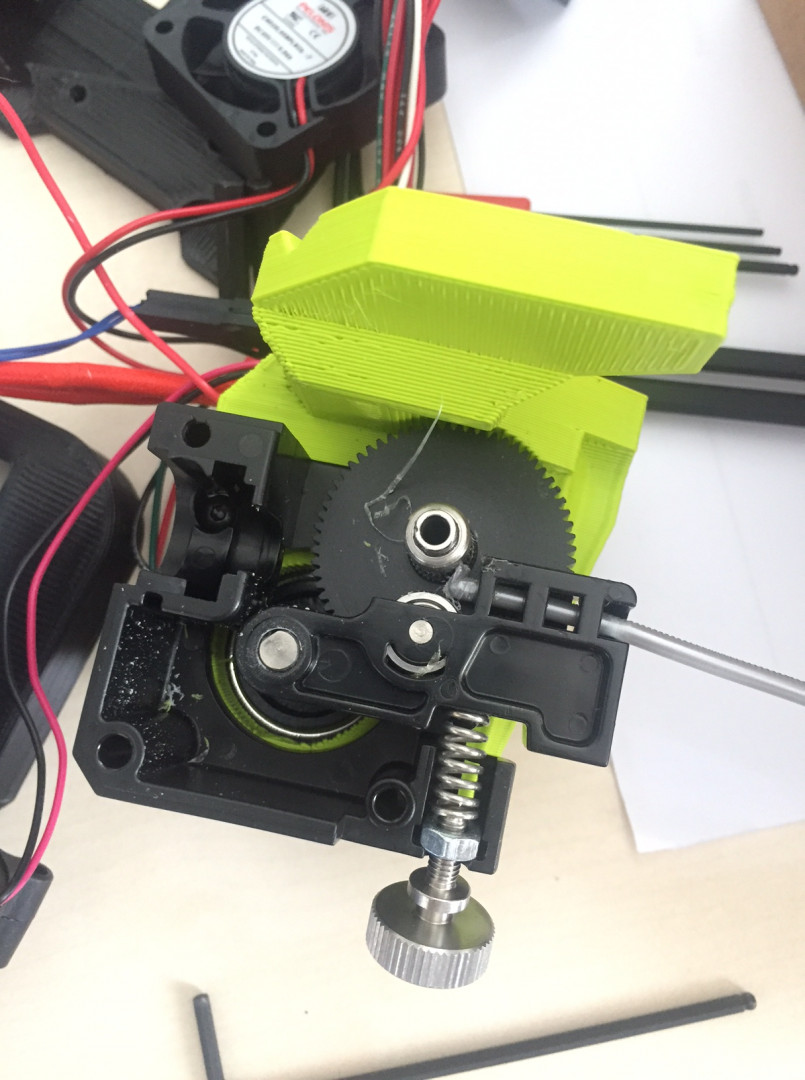
The first time this happened, we were eventually able to maneuver the tip of the filament to get it out without too much effort. But the second time didn’t go as smoothly. We had to disassemble the tool head to get to the source of the problem, snip the filament tip away and then reassemble it to get printing again.
Thankfully, after toying around wit the idler adjustment knob a bit, this clogging dilemma was eventually solved.
Unboxing & Assembly
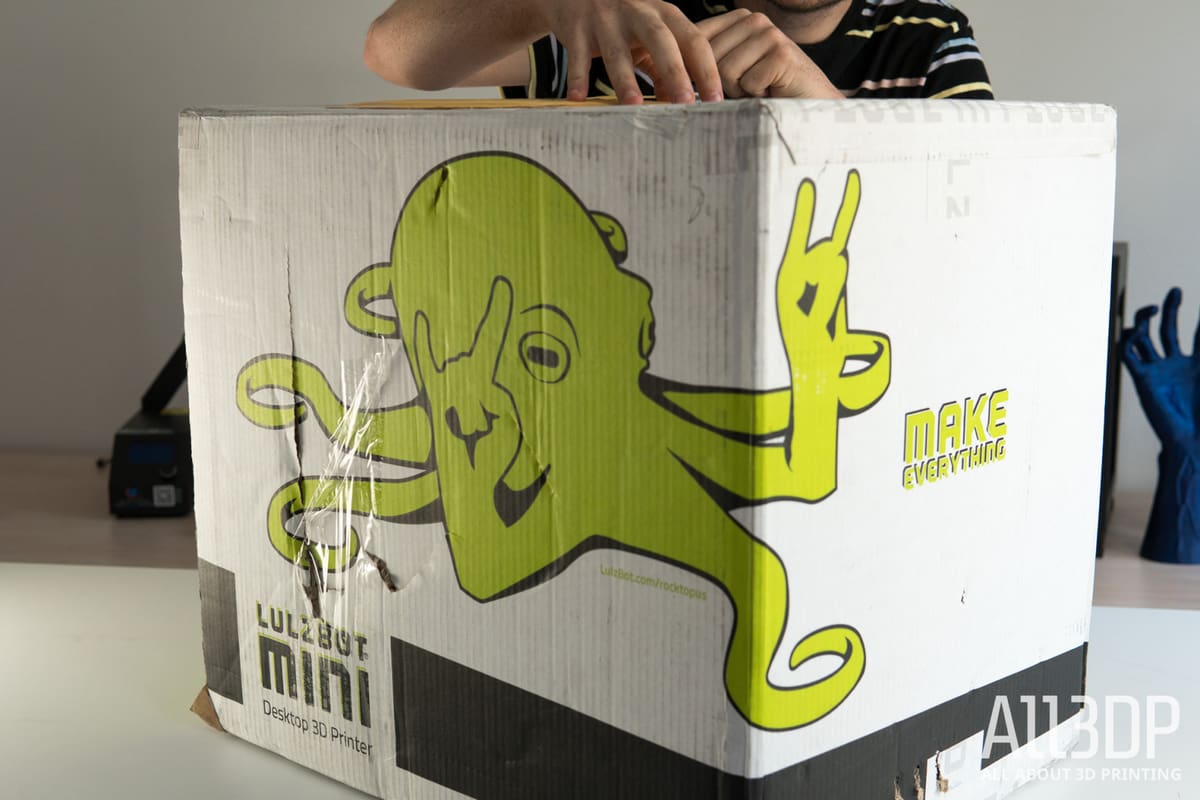
When the LulzBot Mini 2 arrived at the All3DP office, it came packaged in an enormous and decorative box wrapped by an image of the company’s Rocktopus mascot.
For a 3D printer that has the word “Mini” as the focal point of its name, the packaging was surprisingly substantial. It comes in a 26.5lb box; most of the weight comes from the stout, pre-assembled LulzBot Mini 2.
Upon opening the box, we soon learned why this compact machine came through our doors in such a boisterous and big box. The LulzBot Mini 2 is about as “plug-and-play” as a 3D printer can get.
It comes fully assembled and ready to print, and all of the necessary components, tools and instructions are neatly packaged alongside the sleek hardware.
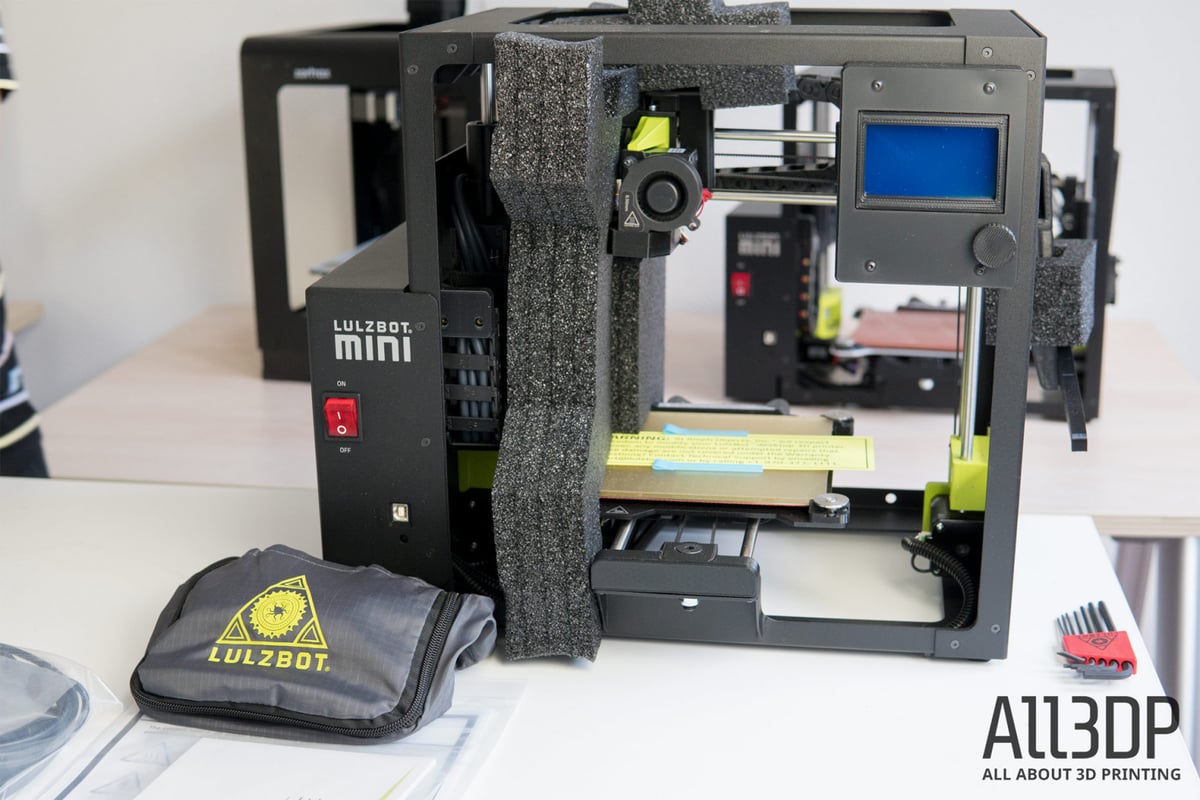
After excavating the LulzBot Mini 2 from the clutches of the protective styrofoam, we we’re pleased to discover neatly packaged instructions and a tool kit.
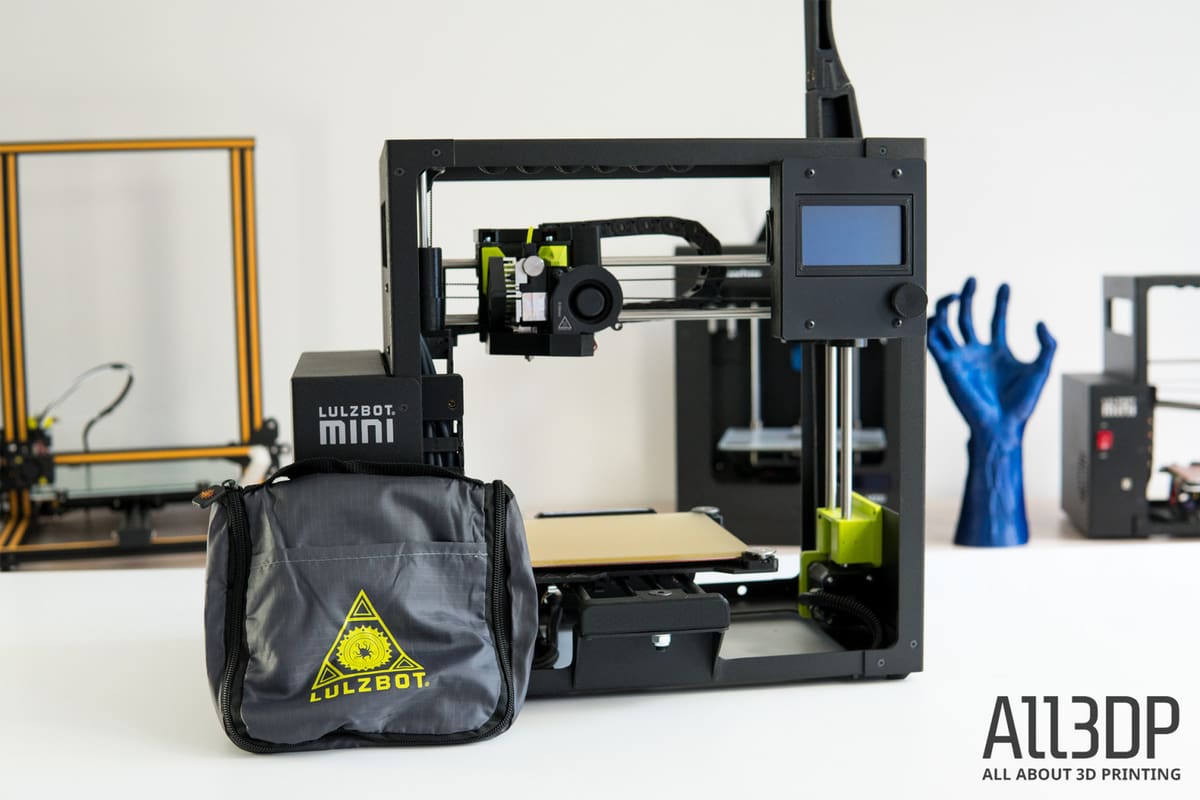
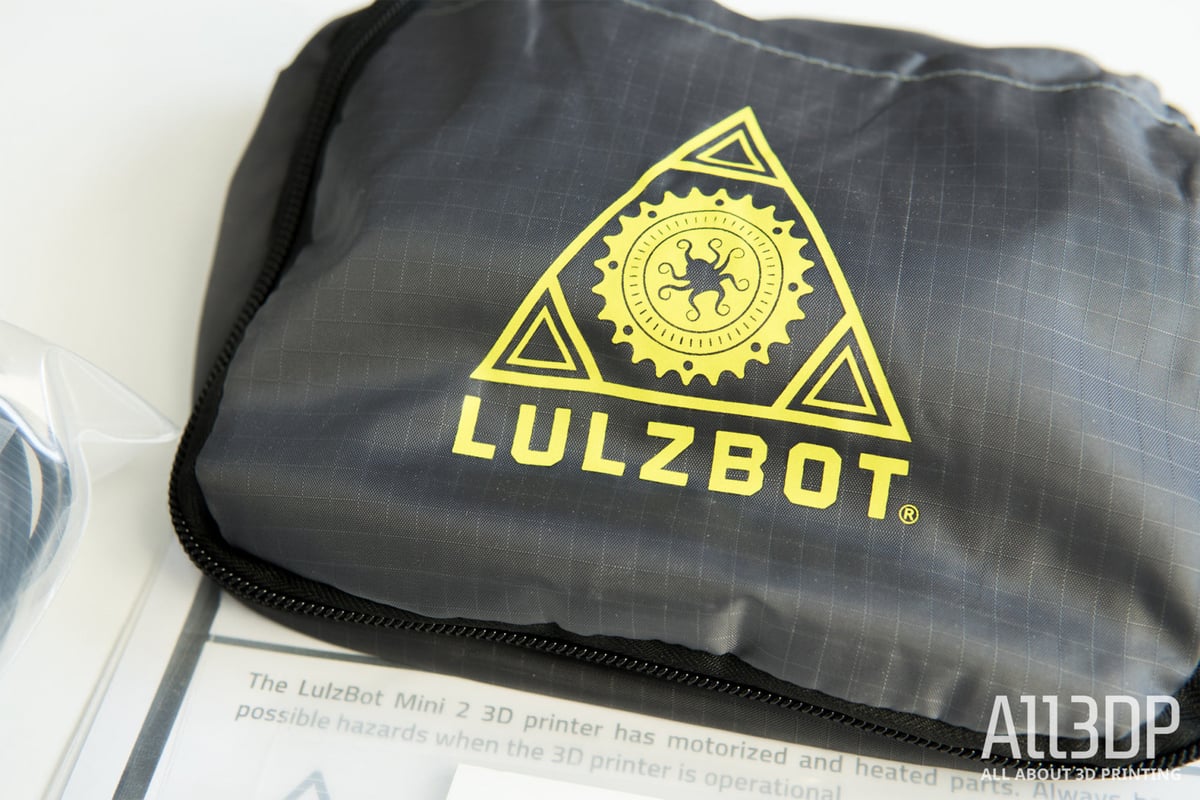
One of the more unique things the Aleph Objects does with its pakcaging is the addition of a LulzBot-branded, fanny pack-like tool kit that has everything you need to keep the printer in tip-top shape.
The useful little tool pouch includes:
- SD Card
- Wire cutters
- Pliers
- X-acto knife
- Hex keys
- Tweezers
- Small ruler
- Nozzle cleaner
- Knife (for print removal)
- Glue stick
- Replacement wiping pads
- Nozzle cleaning pads
Our LulzBot Mini 2 also came packaged with two filament samples–one from Verbatim and the distinguished LulzBot Green from Polymaker.
There’s also a few ziplock bags with power cables, various pieces of documentation (which includes the quick start guide) and a LulzBot sticker.
Aleph Objects also includes a 3D printed model of its Octopus mascot. Each customer receives this sample with their LulzBot Mini 2, and the print is produced on the very same printer that comes in the box.

The Quick Start Guide is an informative booklet with lots of imagery and easy to understand instructions.
The first few pages show an in-depth look at the parts and components that make up the LulzBot Mini 2, including the redesigned extruder.
Next comes instructions on how to unbox the 3D printer, install the Cura LulzBot Edition slicer and set it up for the Mini 2, get the printer powered up and prepare the model for printing.
The manufacturer also provides information on how to navigate Cura, retract filament, change filament and adjust the tool head.
Towards the end of the Quick Start Guide, Aleph Objects shares useful details on filament settings and how to keep the LulzBot Mini 2 properly maintained and clean. Needless to say, this colorful little guide has everything you need to know to start the printing journey.
First Prints
Now let’s get to the fun part…our very first prints!
As per usual, we kicked off our LulzBot Mini 2 adventure with the one-and-only 3D printer torture test: the 3DBenchy. Instead of just printing one Benchy to see how the printer performed out of the box, we decided to do two. Why? Well, we wanted to see the difference between the High Quality and High Speed slicer profiles.
So, we loaded up the iconic LulzBot Green filament from Polymaker and set sail. Although there were some minor differences between the two Benchy models, there were less discrepancies between the two that we initially expected.
The High Quality Benchy managed to overcome most of the challenges posed by this famous model, but there were some layering issues that appeared on the hull of the ship. Strangely enough, for the High Speed Benchy, the surface quality was nearly identical, even down to the same crease in the front of the hull.
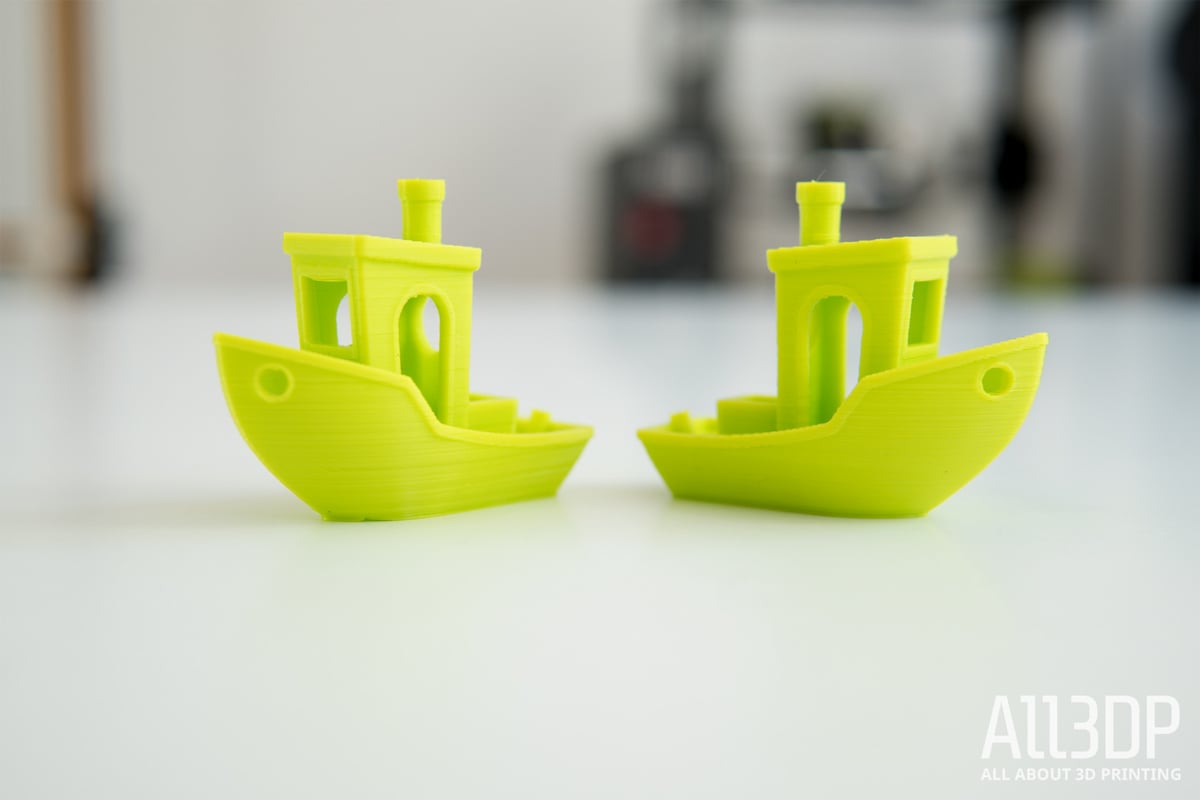
Aside from that slight layer shifting, the LulzBot Mini 2 was able to produce two boats with impeccable overhangs, uniform bridging and an overall decent quality.
Although we’re personally fond of the staple LulzBot Green filament, we wanted to experiment with as many unique materials as possible. And so, after sifting through our eclectic collection of filament, we explored Thingiverse to find some fun, useful, or just flat out cool models to print.
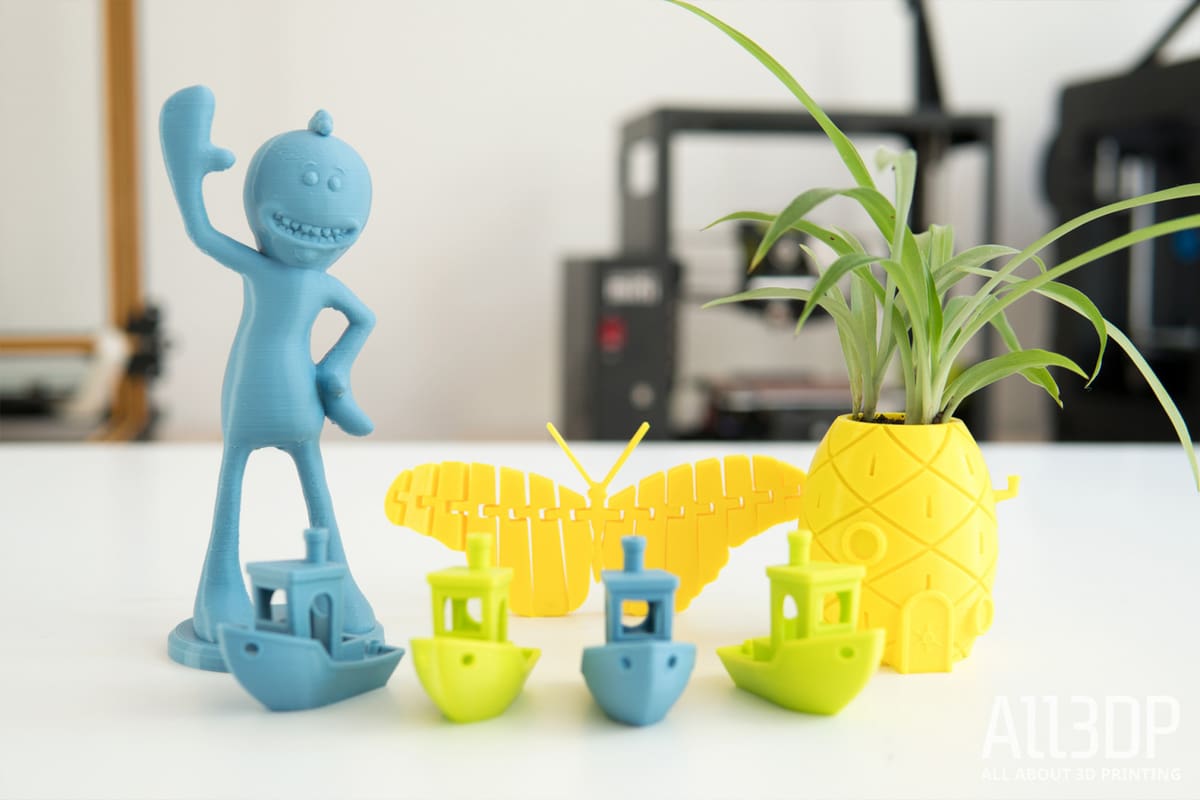
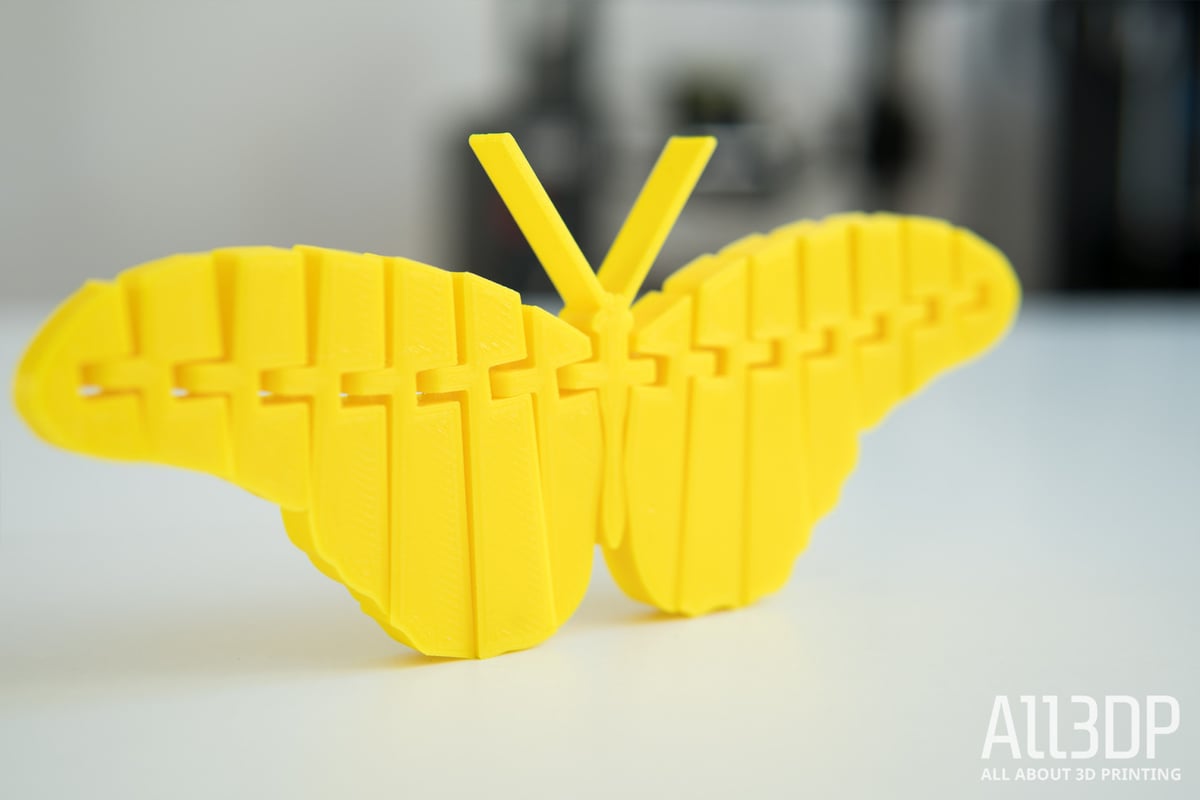
The next filament to extrude from the LulzBot Mini 2’s nozzle was MakeShaper’s Yellow PLA/PHA. This material is a magnificent yellow color that we found incredibly easy to print.
Aiming to print something a bit more challenging and functional than the Benchy, we settled on the popular Articulated Butterfly model, an articulated animal designed by Thingiverse user 8ran. This delicate print came out flawlessly, and every joint was moving right when it came off of the print bed. It’s a simple and quick model to print, and has intricate joints that need to be printed accurately to properly work.
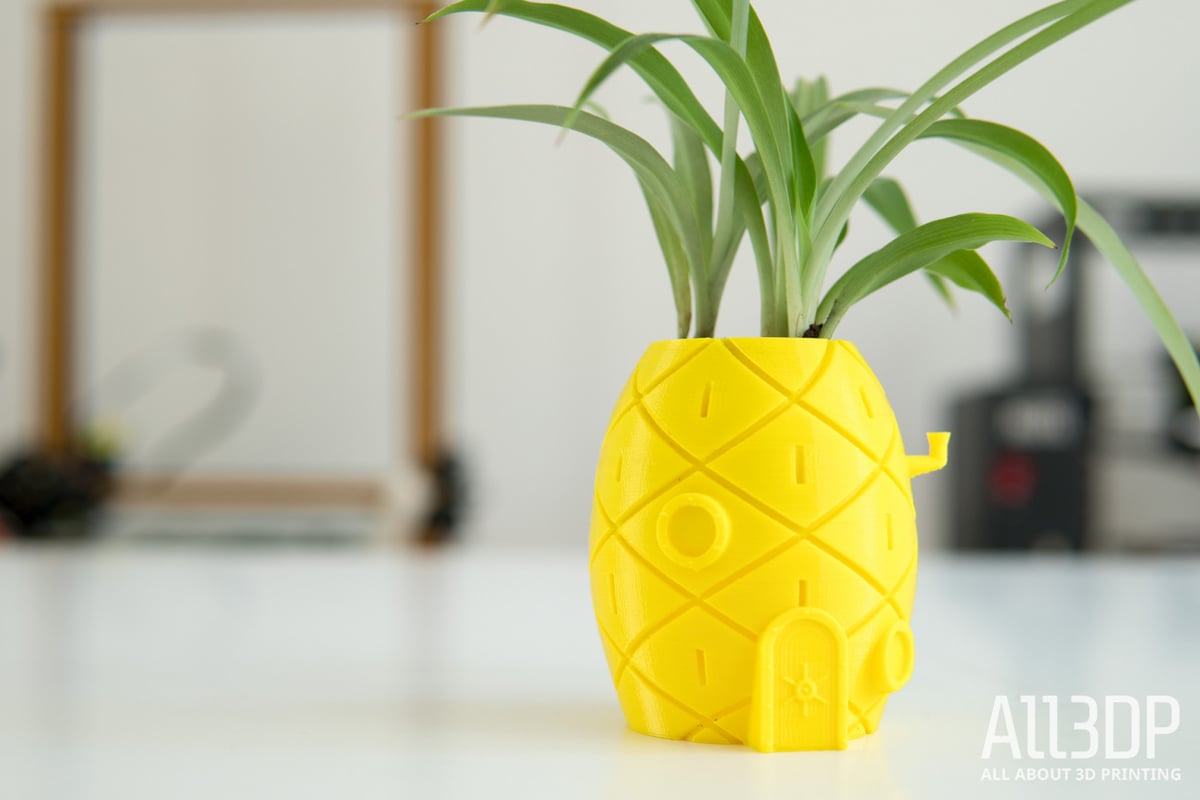
Moving onto a more functional and decorative model, we decided to use our vibrant yellow material to print a pineapple-shaped planter. This wasn’t just any ordinary pineapple, it’s a planter modeled after the underwater home of the animated character Spongebob Squarepants, designed by Thingiverse user reno77.
This print came out just as impressive as the fluttering insect we created prior to the pineapple house. Without any support structures, the LulzBot Mini 2 managed to handle the extruding door, windows and chimney without any difficulties. After filling the base up with soil and planting a Spider Plant, we had ourselves a nice Spongebob-themed desk decoration.
Continuing on with PLA, the next filament we tested on the LulzBot Mini 2 was the Pastel Blue PLA by the Polish manufacturer Pri-mat3D.
We started off with a couple of Benchy models, and were surprised to find that the same minor layering issues took place in the same exact place (on the hull) as the two we printed in LulzBot Green. The slight layer separation aside, the two boats came out quite well.
We were enthused by the sky-like color of this blue filament, which reminded us of a character from the animated comedy Rick and Morty. And so, the next model we settled on was a waving Mr. Meeseeks, a friendly and helpful creature that is summoned from a Meeseeks Box to solve personal problems.
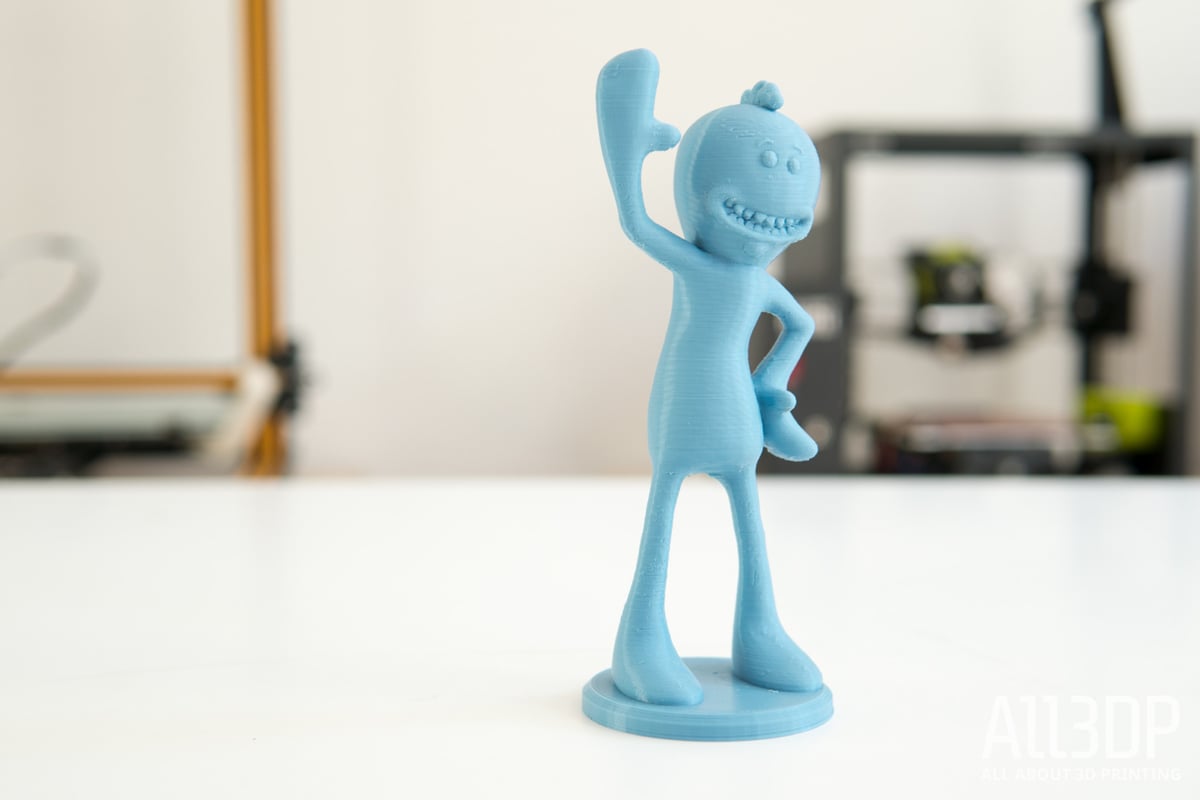
This model, which was designed by Thingiverse user dricketts, was more complex than anything else we had printed up to this point, and required support material in multiple places.
However, using a support density of 15 percent, the LulzBot Mini 2 did a masterful job creating this smiling blue character. The support structures snapped off quite easily, leaving very little clean up to do on the surface of the model. There were a few minor flaws in the head area, but not to the extent that it could be considered a bad print.
More Printing
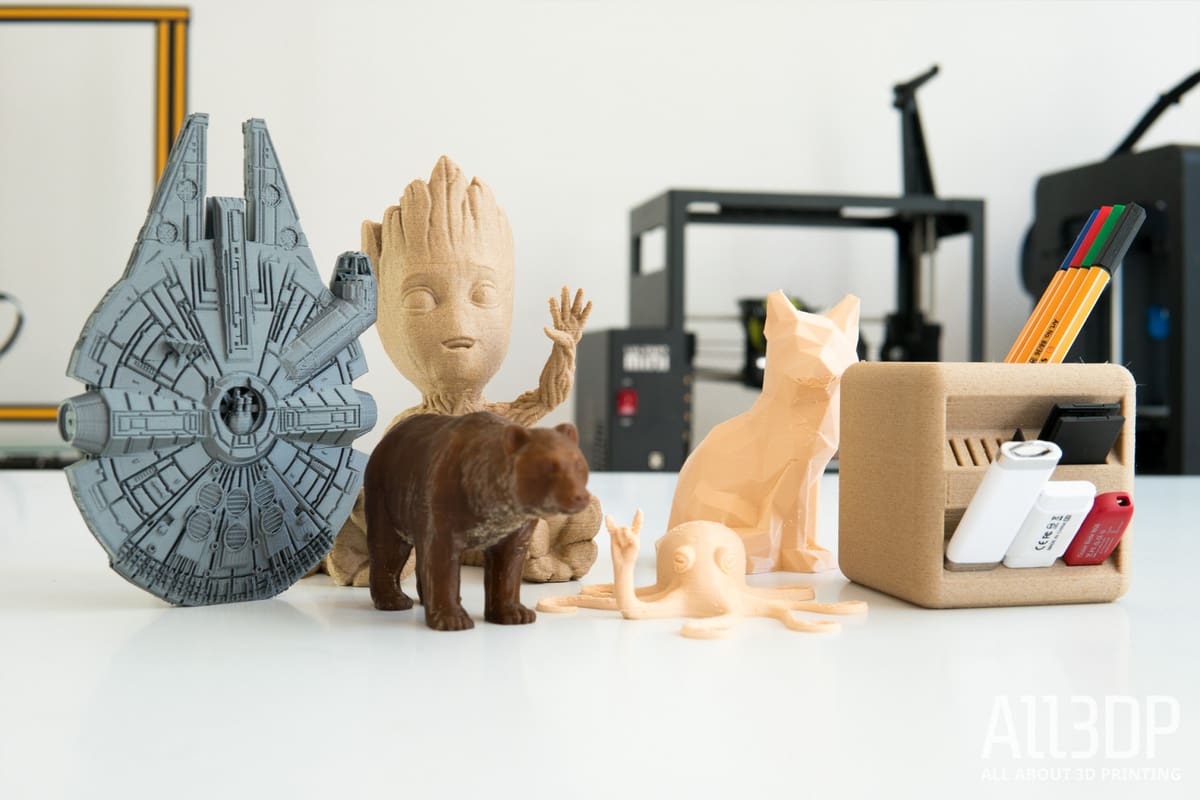
After a successful first round of 3D printing with the LulzBot Mini 2, we decided to turn things up a notch with some more advanced and exotic materials. We started this round of filament testing off with Bamboo filament from Pri-Mat 3D, and with it we achieved our finest results yet.
Since the reviewer needed a place to store pens and USBs, we settled on the Little Box Pen Holder by Monkey3D for our first print. This model is a sleek design that holds two SD cards, six MicroSDcards, and three USB sticks, along with a number of pens or other office supplies in the center console. It has difficult angles to 3D print, and the holes for the card/USB holders must be printed with a high-degree of accuracy.
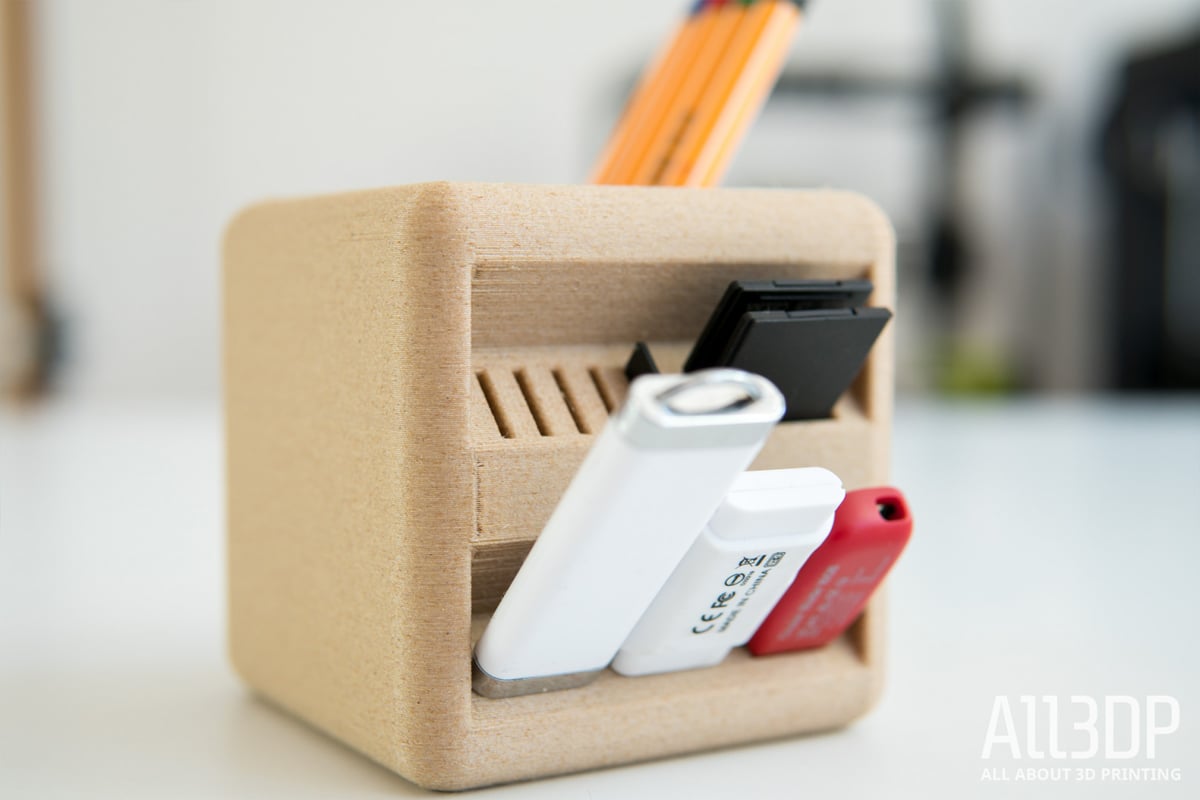
Having attempted to print with various wood filaments in the past, we were a little skeptical of how well this model would come out in a more difficult-to-print material.
To our surprise, the LulzBot Mini 2 did a masterful job with this pen holder, creating the most impressive print we have seen from this machine this far. This model is nearly perfect. There are no layering issues, or even the stringiness that oftentimes occurs with wood filament.
On top of that, the grainy aesthetic of the Bamboo filament made it look like there was no layering at all. Needless to say, the Little Box Pen Holder is now in full use and proudly displayed on the desk of the reviewer.
With the wood filament still loaded into the LulzBot Mini 2, we decided to be a bit cliche and print a Waving Groot, the beloved character from Guardians of the Galaxy.
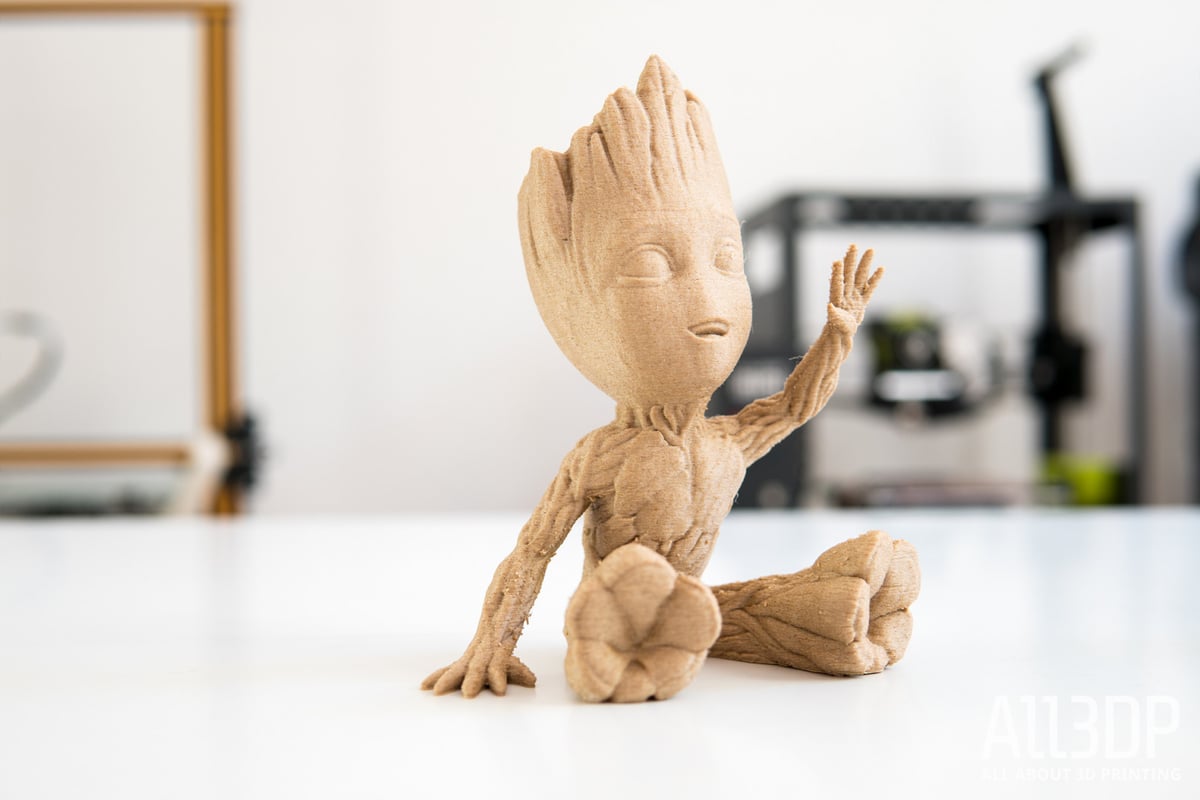
This model has a slew of intricate details, making it a challenging print for many printer’s to tackle, especially with wood filament. But the LulzBot Mini 2 prevailed, creating a high quality Groot without the need for any support structures.
There was a minuscule amount of tiny blobs sticking out the surface, but these were easily scraped away. The finished product was an exceptional Groot, one of the best we’ve printed (and trust us, we’ve printed quite a few). Once again, the grainy wood quality of the filament added to over look of the print.
Pleased with our wood filament results, we decided to take things up a notch with almond colored NinjaFlex, a TPU material that is notoriously difficult to print with certain 3D printers.
With the LulzBot Mini 2, however, this flexible material was printing successfully right away. We started off with the LulzBot Rockctopus. It came out with some stringiness on the tentacles (as to be expected with TPU), but the overall quality of the print was quite decent.
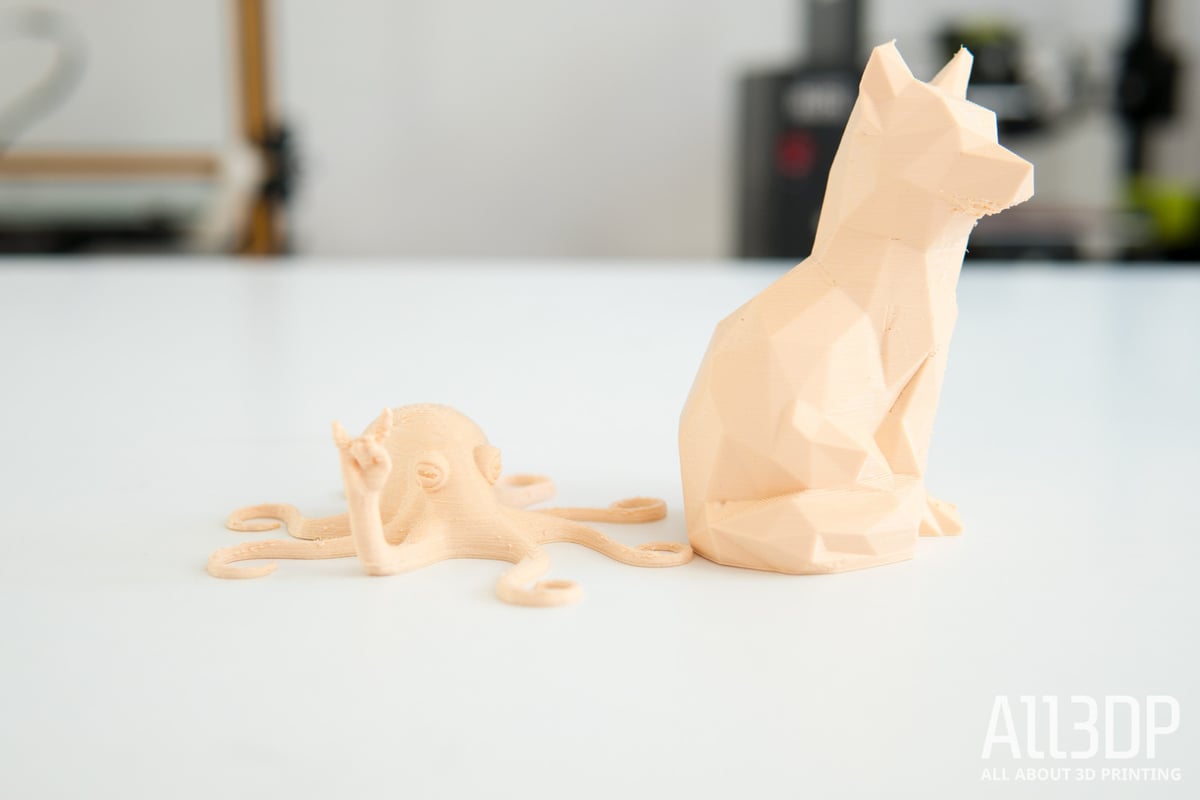
Looking to test out a model with a more geometric focus, the next model we printed in NinjaFlex was the Low Poly Fox by Thingiverse user slavikk.
The surface quality of the print was exceptional for TPU material, but we did face some challenges with the overhang created by the animal’s protruding nose. We tried to place some supports here, which halfway worked, but still left a rough surface that was inconsistant with the rest of the print.
Last but not least, we wanted to see how the LulzBot Mini 2 could deal with ABS material, so we loaded up some Metallic Grey ABS Extrafill from Fillamentum. The color of this filament resembled that of a spacecraft, so what better model to try and print then the “Fillenium Malcon” by Thingiverse user aaskedall.
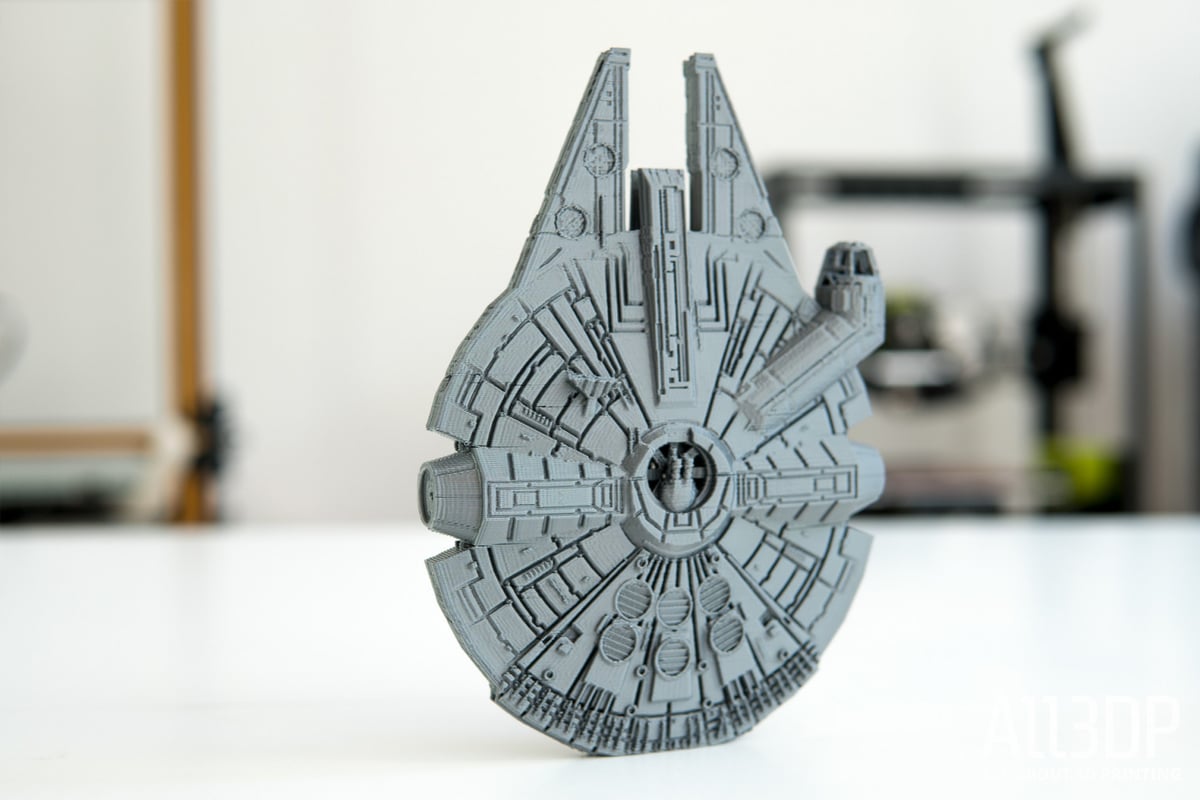
Once again, we were extremely impressed with this 3D printer’s ability to deal with more complex materials. Without any supports, we printed the intricate Star Wars ship with ease. There was no warping or cracking hindering the quality of the print. The LulzBot Mini 2 managed to nail down every aspect of the ship, giving us one of our favorite prints from the entire review process.
Software
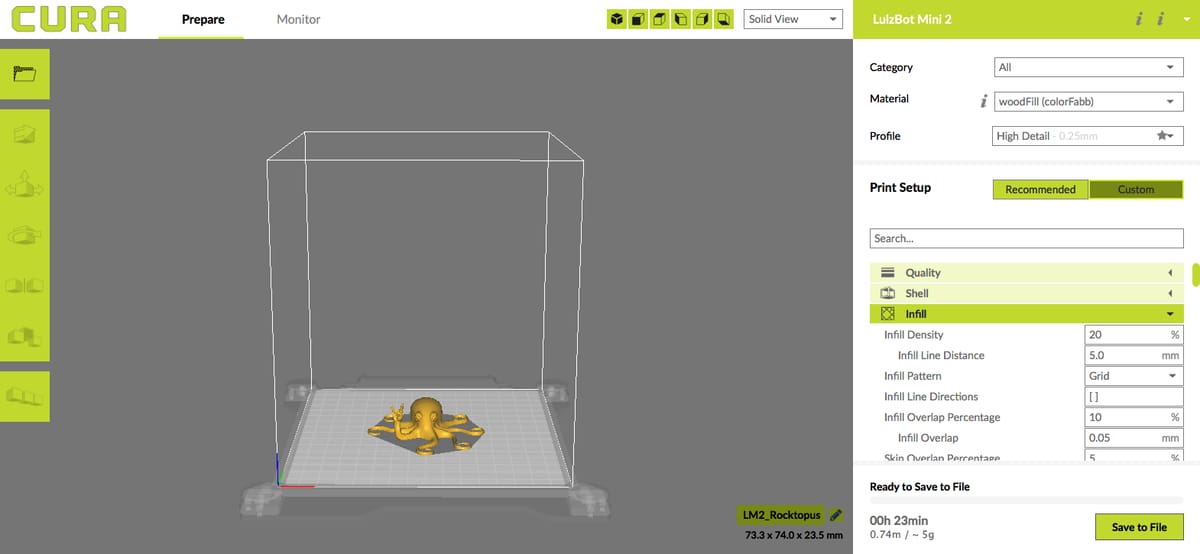
Aleph Objects has also developed a new version of Cura LulzBot Edition to enhance the user experience for the LulzBot Mini 2. The updated slicing software provides faster load times, an updated interface, and a plethora of new slicing options.
Using the foundation of Ultimaker’s industry-leading slicer Cura, the LulzBot ecosystem has its own lime green interface to navigate and monitor print settings.
With Cura LulzBot Edition, models can be quickly set up to be printed High Detail, Standard, or High Speed, giving users an instant ability to manage between print quality and speed.
All of the printer settings are preloaded into the software, so all you have to do is scroll to LulzBot Mini 2 and you’re good to go. There’s also a variety of pre-uploaded materials and profile types, allowing users to prepare a model in a matter of seconds.
The software includes a custom option that makes it possible to tweak every setting imaginable, including basic settings like temperature, infill and support structures, as well as unique features like special modes and experimental settings.
Compared to the previous versions of Cura LulzBot Edition, the time it takes to slice a model has been heavily reduced. The “Monitor” page, which enables users to control the printer when tethered, has also been given a makeover.
Aside from normal settings involving pre-heating and extrusion, there are also predefined commands that provide instance access to certain actions, such as wiping or cooling the nozzle, leveling the X-axis, turning the motors off and so on.
You can download Cura LulzBot Edition 3.2.23 for free from the LulzBot website.
Specs
For those who are more data-driven and want to check out the cold hard facts about this 3D printer, here are the full specs for the new LulzBot Mini 2:
- Print Technology: Fused Filament Fabrication
- Print Area: 160mm x 160mm x 180mm (6.30in x 6.30in x 7.09in)
- Maximum Travel Speed: 300mm/s
- Leveling: Automatic Compensation
- Connectivity USB Serial and Included 8gb SD Card
- Stock Tool Head: LulzBot Mini 2 Standard Tool Head
- Extruder/Hot End: E3D Titan Aero
- Nozzle Diameter: 0.5mm
- Nozzle Material: Nickel-Plated Copper Alloy
- Nozzle Temperature: Up to 290°C
- Print Surface: Heated Borosilicate Glass/PEI
- Maximum Print Bed Temperature: Up to 120°C
- Layer Resolution: 0.05mm-0.4mm
- Minimum Positive Feature Size: 0.5mm
- Filament Diameter: 2.85mm
- Supported Materials: PLA, Natural and Metal PLA Blends, TPU, ABS, PETG, nGen, HIPS, Polyamide, Nylon, Polycarbonate, PC
- Operating System Compatibility: GNU/Linux, Mac, Windows
- Recommended Software: Cura LulzBot Edition
- Firmware: Marlin
- Supported File Types: .stl, .obj, .x3d, .3mf, .png, .jpg
Where to Buy?
The LulzBot Mini 2 is available to purchase from Matterhackers or through Aleph Objects via Amazon. This desktop 3D printer is ideal for prosumers, designers, engineers, small businesses or even hobbyists that value quality and reliability.
License: The text of "LulzBot Mini 2 Review: Editor’s Choice" by All3DP is licensed under a Creative Commons Attribution 4.0 International License.
CERTAIN CONTENT THAT APPEARS ON THIS SITE COMES FROM AMAZON. THIS CONTENT IS PROVIDED ‘AS IS’ AND IS SUBJECT TO CHANGE OR REMOVAL AT ANY TIME.