Lulzbot TAZ 6 Review: Great Workhorse 3D Printer
Rating

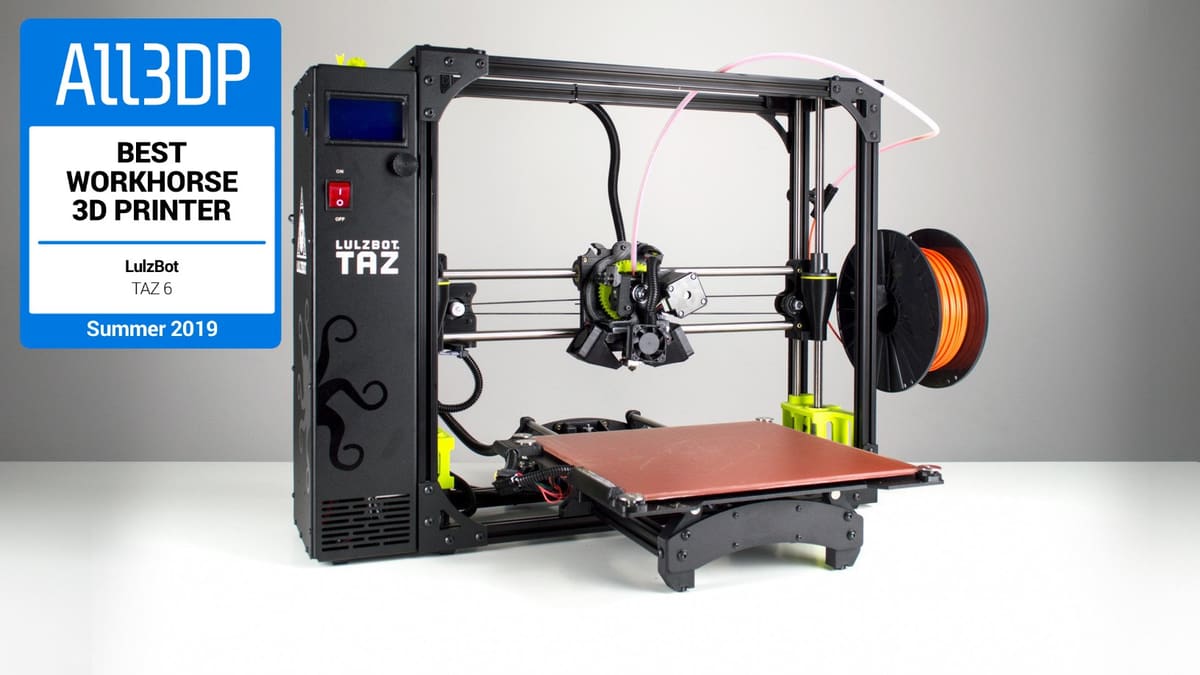
The Lulzbot TAZ 6 is our summer 2019 pick for the "Best Workhorse 3D Printer". Check out our review to find out why it is the ideal machine for frequent use.
Ease of use, reliability, a large build size, these are some of the primary factors to take into account when shopping for a new 3D printer. The Lulzbot TAZ 6 offers all of this and more, making it one of the more popular desktop machines on the professional and consumer market.
Created by the Colorado-based 3D printer manufacturer Aleph Objects, the Lulzbot TAZ 6 is a testament to the company’s focus on open source hardware and faultless reliability. Unlike the more petite Lulzbot Mini, the Lulzbot TAZ 6 is a leviathan of a 3D printer, equipped with almost double the print area.
Priced at $2,500, the Lulzbot TAZ 6 is on the expensive end of the desktop 3D printer market. But for people who want a dependable workhorse with a large build volume, it’s hard to take your eyes off of this sleek, minimalistic machine.
Aleph Objects’ ongoing “Libre Innovation” campaign places the open source community at the forefront, stating its commitment that “hardware and software we create is free to be copied modified and converted by all users”. Therefore, the manufacturer is among the ranks of Prusa Research and Ultimaker as favorites in the 3D printing community.
And without further adieu, here’s our Lulzbot TAZ 6 review.
Pros
- Huge build size (280 x 280 x 250 mm)
- Reliable and consistent printing performance
- Solid and sturdy design
- Easy to use and setup
- Auto-calibration and self-cleaning nozzle
- Open source and hackable
- Untethered printing
- PEI print surface
Cons
- High price tag
- Slightly noisy
- Limited user control when untethered
- Slow initial setup before print
- Slicer issues (Cura Lulzbot Edition)
Verdict
Let’s cut straight to the chase, shall we? The Lulzbot TAZ 6 is a magnificent option for those in need of a printer that offers a tremendous build size and undoubted reliability. In fact, the Lulzbot TAZ 6 3D printer has quickly risen in our own eyes, earning the All3DP badge for the “Best Workhorse 3D Printer”.
As the big brother to the Lulzbot Mini, the Lulzbot TAZ 6 produces a similar level of consistency at a grander scale, and also provides more perks. Unlike its smaller sibling, the Lulzbot TAZ 6 offers untethered 3D printing via SD card. This is extremely beneficial for those that don’t have space or the means for a stationary computer dedicated to 3D printing.
The 280 x 280 x 250 mm build area is almost double that of the Lulzbot Mini, which of course expands what is possible to create. However, with that increase in print area comes a doubling in price. But it’s worth it.
Although it’s difficult to find much to criticize about the Lulzbot TAZ 6 3D printer, there are a few hiccups that keep it from being a perfect 10.
One glaring issue with the Lulzbot TAZ 6 was with the slight lack of user control with standalone printing. For instance, there’s no option to feed filament on the UI, which makes changing materials a bit more difficult than it needs to be. This problem is easily solved by tethering the Lulzbot TAZ 6 to the Cura Lulzbot Edition slicer, but that isn’t always the most convenient solution.
The Lulzbot TAZ 6 also takes a little longer to calibrate and heat up than other printer brands we’ve tested, but it’s hard to complain about this in light of the consistent and high-quality results that the printer produces.
If the Lulzbot TAZ 6 isn’t the right 3D printer for you, check out our best alternative options here.
Features and Specs
Lulzbot TAZ 6: Features
- Large build volume (280 x 280 x 250 mm)
- Heated PEI bed surface
- Automatic bed leveling
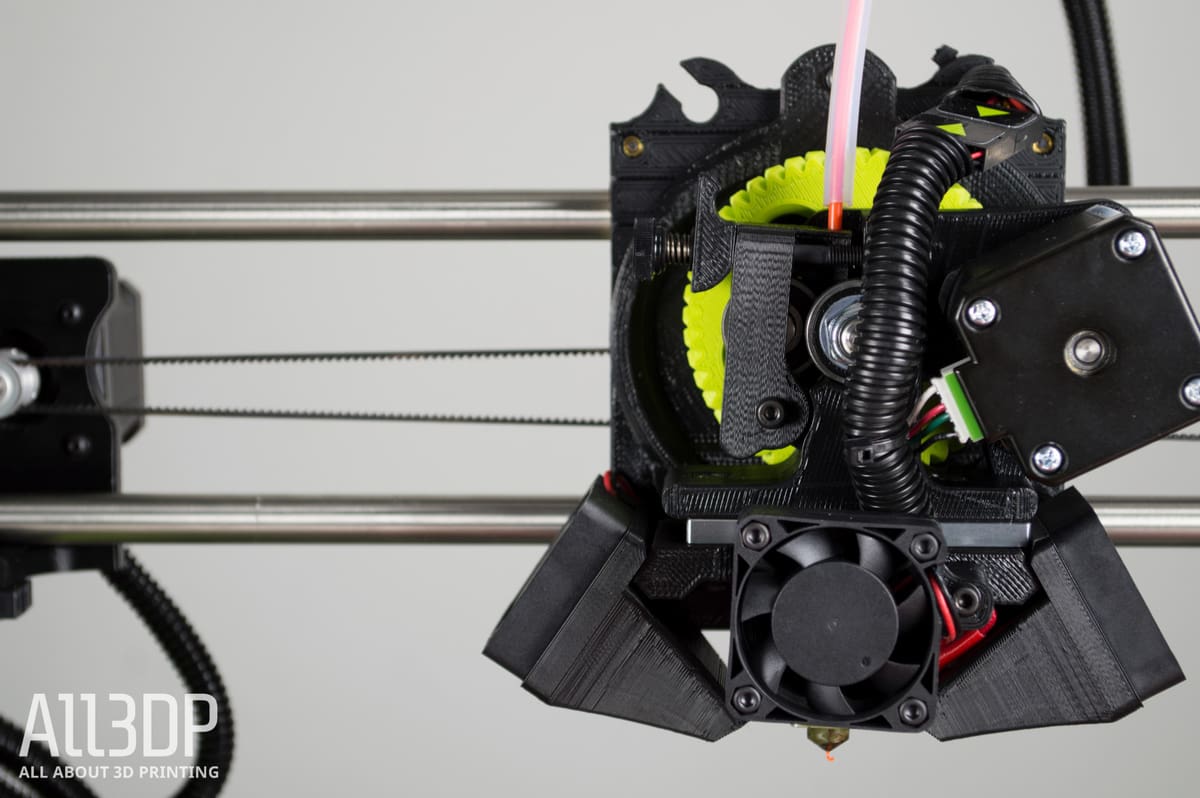
- All-metal LulzBot v2 Hot End
- Optional tool head upgrades
- Untethered 3D printing
- Cura Lulzbot Edition
Lulzbot TAZ 6: Specifications
- Print Surface: Heated glass bed with PEI film
- Build Area: 280 x 280 x 250 mm
- Max. Print Speed: 200mm/sec
- Print Tolerance: 0.1mm (0.0039in) in X and Y axes. Z axis is dependent on layer thickness
- Layer Thickness: 0.050mm – 0.50mm (Dependent on nozzle size)
- Compatible Materials: ABS, PLA, HIPS, PVA, specialty filaments, Polycarbonate, Nylon, PETG, conductive, UV luminescent filaments, PCTPE, PC-ABS, etc.
- Filament Diameter: 3.00mm
- OS Compatibility: Mac OS, Microsoft Windows, Linux
- Connectivity: USB, SD Card
- One-year warranty
Unboxing and Setup
The Lulzbot TAZ 6 comes assembled in a sizable box that features its name in big, bold letters alongside the company’s iconic logo. This triumphant choice in packaging fits the printer’s large build volume and open source bravado that Aleph Objects prides itself on.
Right away, unpacking this printer reveals a number of useful tools and components. Aleph Objects includes the following with the Lulzbot TAZ 6 3D printer:
- LulzBot Hexagon Hot End Tool Head with 0.50mm Nozzle
- Quick Setup Guide
- 4GB SD Card
- Filament Feed tube
- Toolkit bag
- 15 Piece Metric Hex Key Set
- Pliers, Needle Nose
- Tweezers
- Standard Precision Knife
- Dental Pick
- Part Removal Knife (clam knife)
- Metric Ruler
- Complete documentation for Lulzbot TAZ 6
Now, with all of these spare parts, you might assume that some assembly is required for this printer. But the Lulzbot TAZ 6 demands the minimum amount of effort from the user. Simply snap everything into place and you’re ready to start calibrating just 20 minutes after tearing the packaging tape away from the printer’s vibrant box.
This task is made even easier by the exceptional and eye-catching documentation that accompanies the Lulzbot TAZ 6. There are three different booklets included with the 3D printer, including a comprehensive user manual, as well as a “Start Here” and “Operation” guide.
The introductory “Start Here” guide offers a step-by-step on how to properly unpack and setup your Lulzbot TAZ 6. Upon cracking open this booklet, you’ll find a plethora of high-resolution images and corresponding information. First, the user must remove the packaging foam and tape used to protect the printer during its shipping journey.
After these preliminary steps, it’s time to assemble the remaining parts of the Lulzbot TAZ 6. Following the guide, this entire process should only take about 20-30 minutes to complete. To start, you must mount the Y-axis assembly to the printer frame, using four thumbscrews to secure the print surface in place.
There are a few additional cables to connect (all of which are visually displayed in the documentation), followed by mounting the tool head. Again, this is another step that the Lulzbot team has managed to make as intuitive and convenient as possible. Last but not least, you snap the filament guide tube onto the side bracket and voilà, it’s time to start printing.
Although the setup was mostly trouble-free, I did have a gripe with the way this filament guide tube was assembled. But more on that in the following section. From the “Start Here” guide, we move directly into the “Operation” booklet, which details how to get printing after assembly is complete.
The guide helps you get acquainted with the special Lulzbot edition of Cura, the popular 3D printing slicer developed by Ultimaker. It also shows how to properly load filament and ensure that you’re first print goes off without a hitch. Lastly is the Lulzbot TAZ 6 user manual, which isn’t needed to start printing, but offers a comprehensive overview of everything you need to know about the hardware and software.
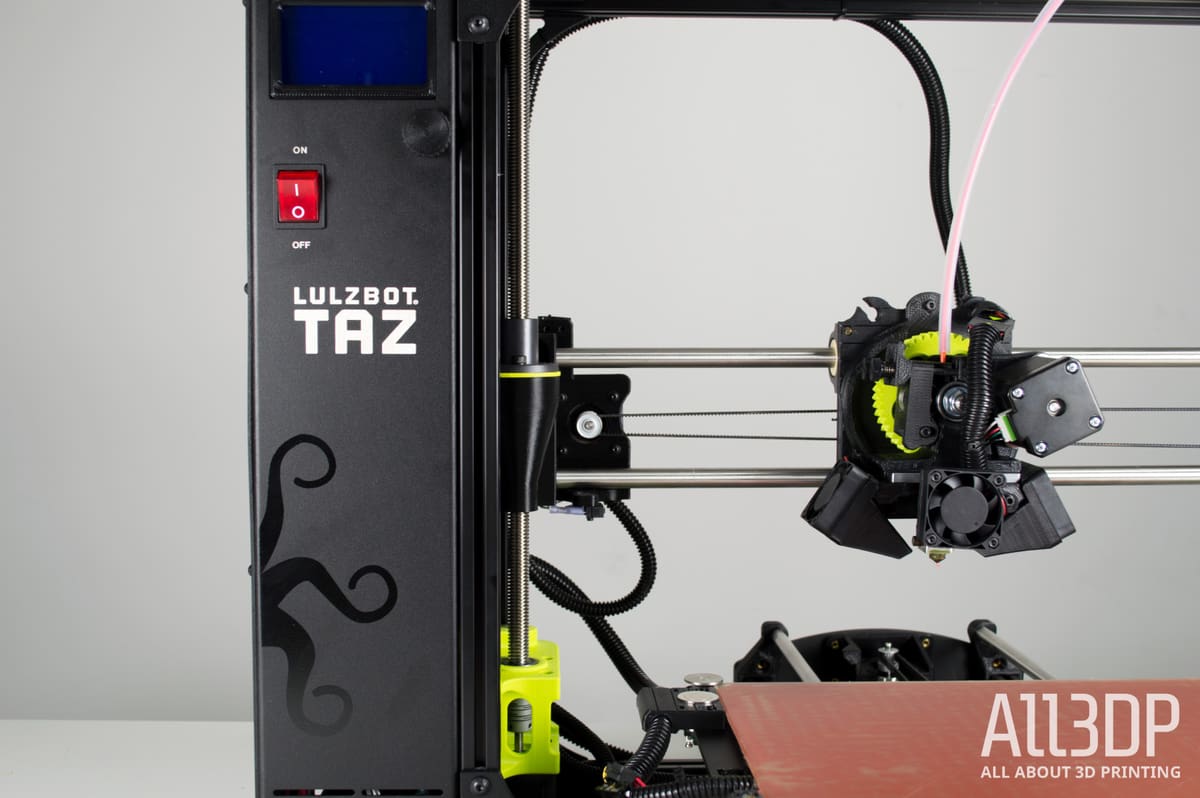
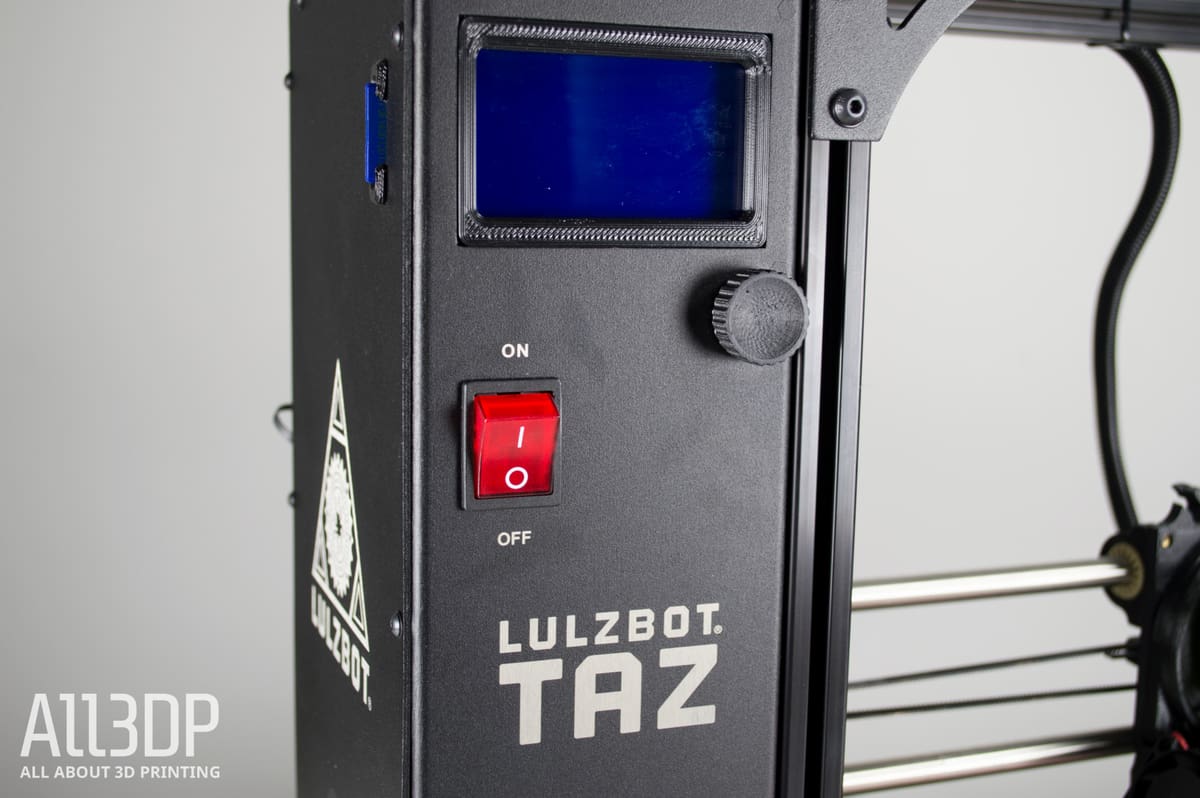
Design
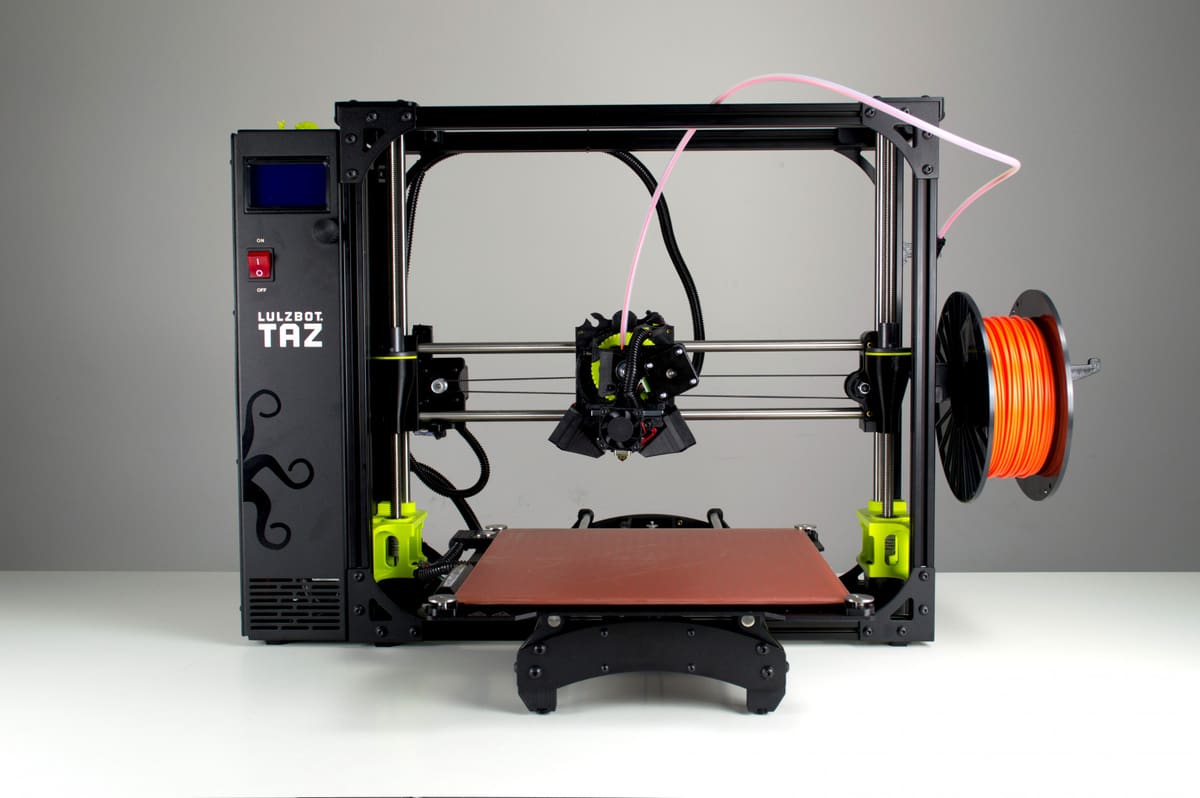
Generally speaking, Aleph Objects’ 3D printer range arguably has one of the best minimalistic designs on the market. The Lulzbot TAZ 6 is certainly no exception to this. The printer’s frame is comprised of a sturdy black powder-coated metal, with smooth steel rods that use self-lubricating linear bushings. Sprinkled amongst the sleek black frame are components printed in Lulzbot’s lime green material, adding a little vibrance to the otherwise stark design.
As we’ve mentioned, the Lulzbot TAZ 6 is pretty gigantic, and the minimalist frame allows you to observe the 3D printing action from almost any angle.
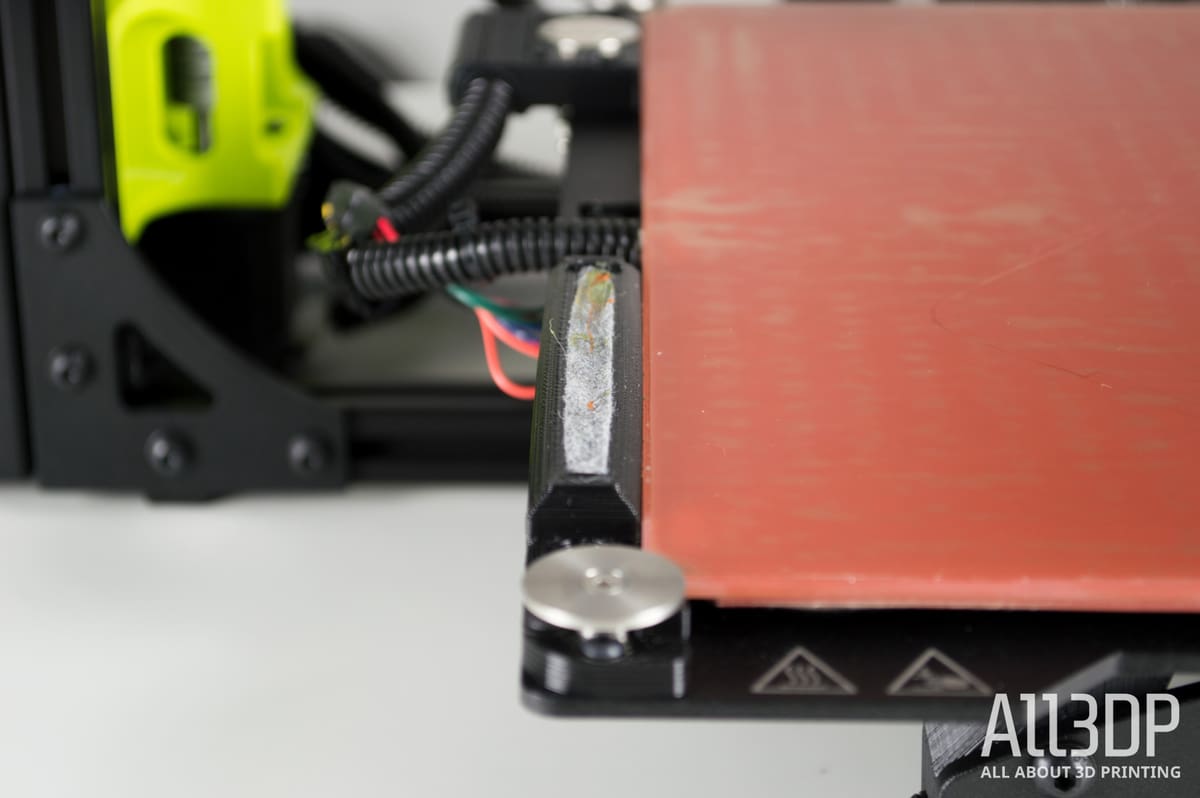
While most of the setup process was pretty intuitive, one glaring issue was the erratic filament feed guide tube. The starting point of this tube contraption connects right behind the printer’s spool holder. But from there, the user is left with a wonky tube that has no real endpoint, and ends up sort of just hovering above the extruder.
During one print, the tube was being whipped around by the extruder so much that my PETG filament snapped mid-print. After situating the tube in a better position, this problem didn’t occur again. We were even able to resume the print after reinserting the filament, which showcased the printer’s ability to pickup where it left off. Still, it was one of the few flaws we found amongst the otherwise impeccable design.
The user interface is tastefully placed in the upper lefthand corner of the printer, easy to access without being overly intrusive. Sleek, sturdy, and simple are the three perfect words to describe the design of the Lulzbot TAZ 6.
First Print Impressions
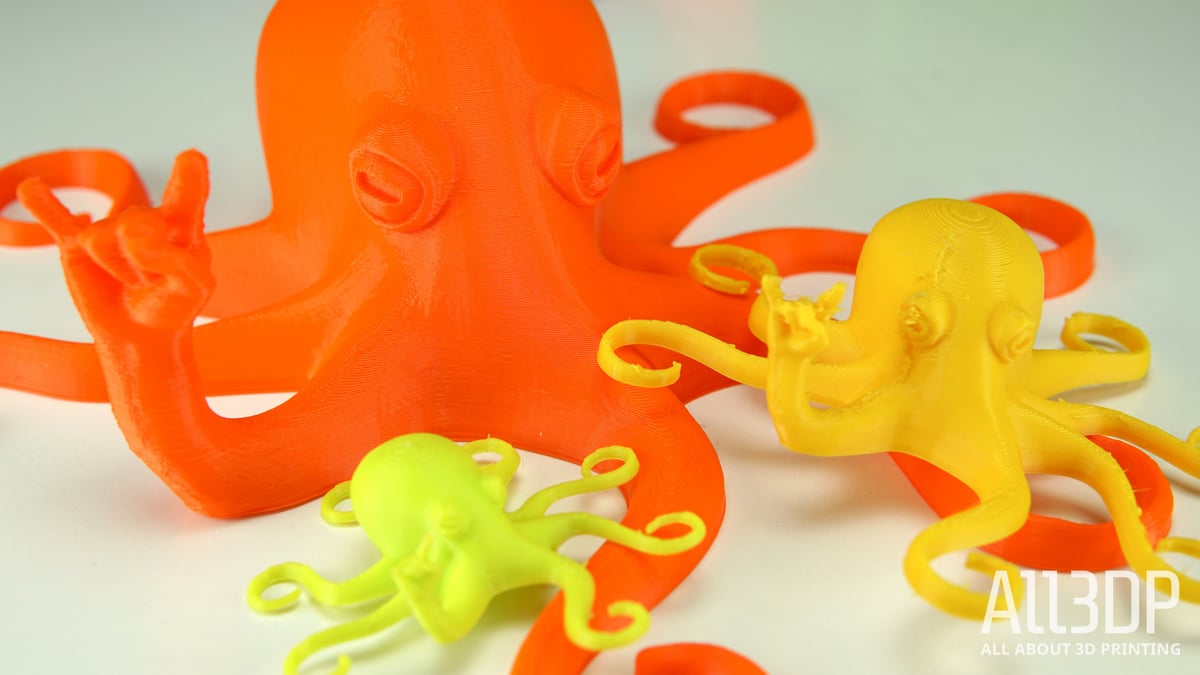
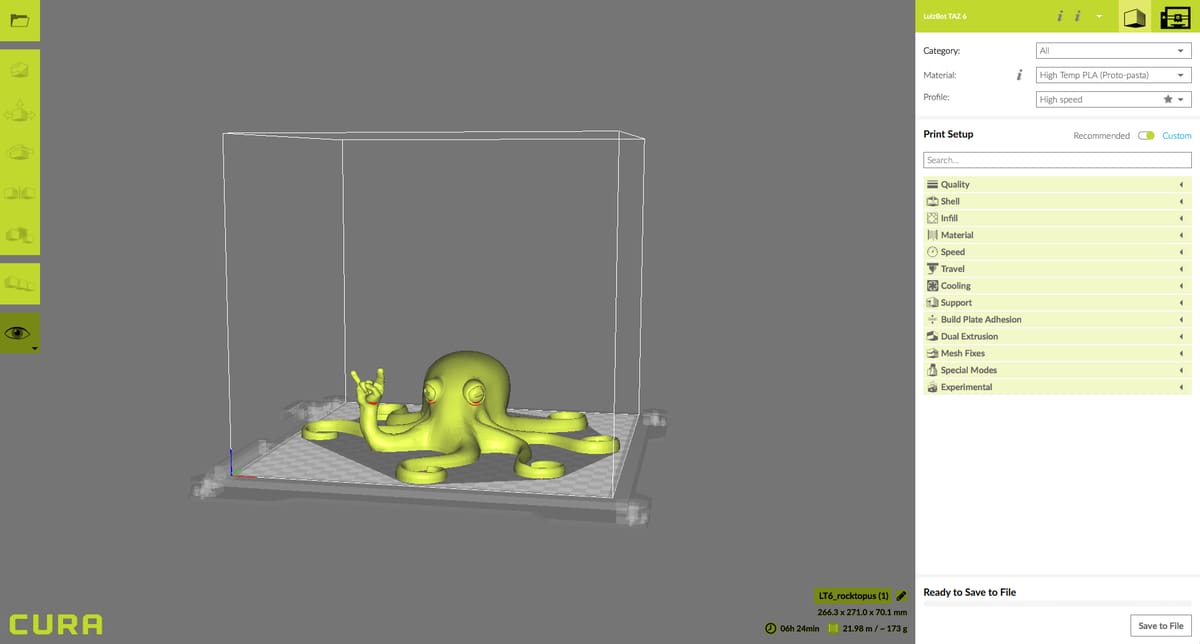
After setting up the Lulzbot TAZ 6, it was time to start with our first print. And what better way to christen a Lulzbot 3D printer than with the beloved Rocktopus model. This suave octopus is an easy and quick print, holding up its one human-like hand making the sign that is synonymous with rock-and-roll.
However, the standard Rocktopus model is underwhelmingly small compared to the build size of the Lulzbot TAZ 6. Thus, we used Lulzbot Cura to scale up the design fill the print bed.
The resulting print is a massive sea creature diligently telling us all to keep on rocking. Even at this massively increased size, the large-scale Rocktopus came out with superb detail.
Once we completed the two Rocktopus prints, we moved onto the one-and-only 3DBenchy model, the acclaimed 3D printer torture test that comes in the form of a tiny boat.
Upon opening the latest version of Cura Lulzbot Edition, the slicer offers three different preset printing profiles mode: high quality, high speed, and standard. Interested in what each of the three profiles offered, we decided to print a Benchy model for each.
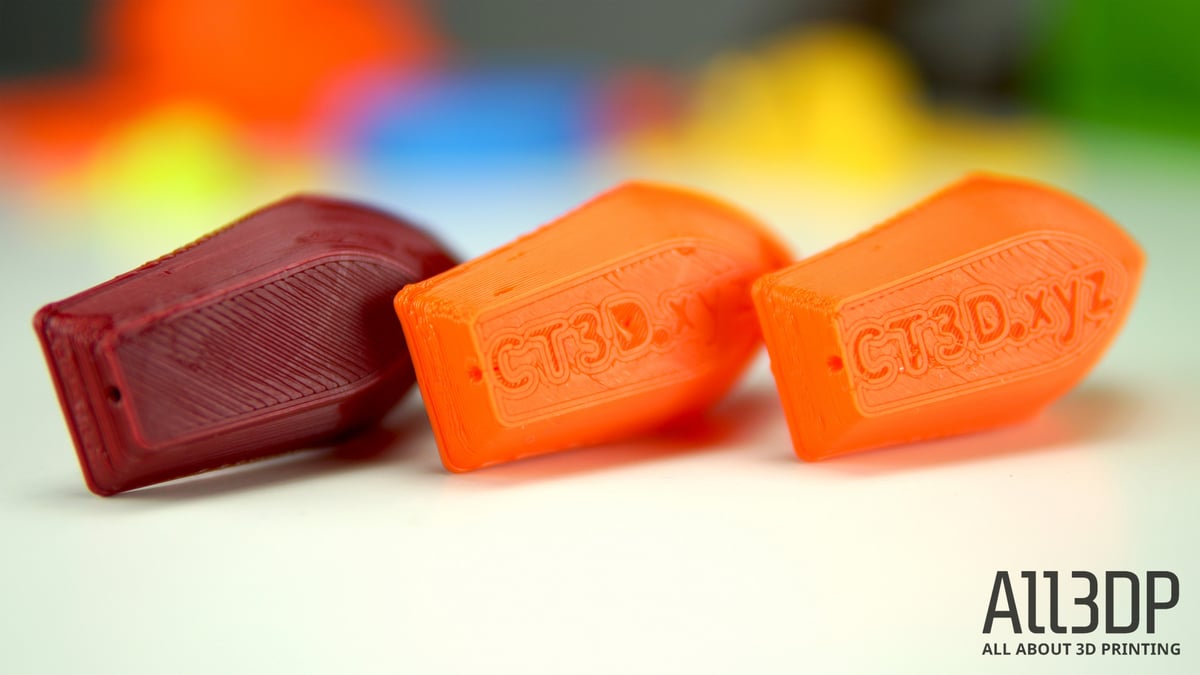
In the Standard profile (0.25mm), the Benchy model was nearly flawless, handling overhangs and geometric shapes with ease. The only noticeable issue was the small text on the back of the boat, which was likely muddled due to the printer’s 0.50mm nozzle. Despite this, the Lulzbot TAZ 6 produced a fine little ship on the Standard setting. It took about one hour and 05 minutes to print.
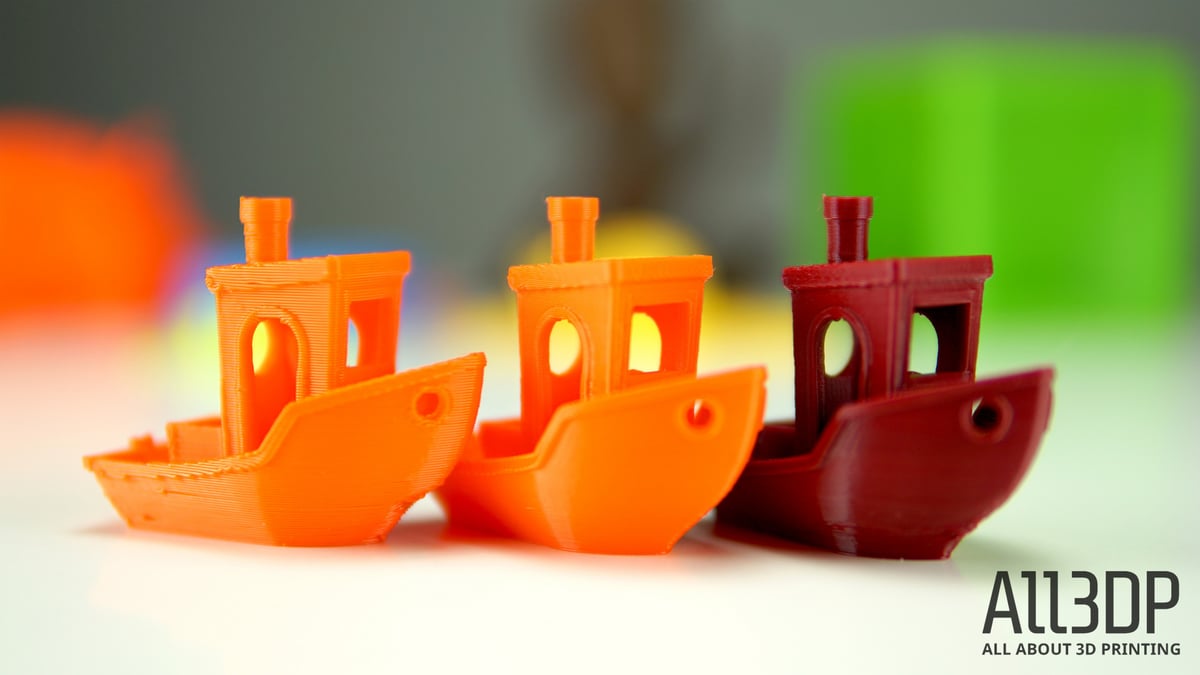
On the “High Speed” profile (0.38mm), the print speed was increased greatly, spitting out a formidable Benchy in just 43 minutes. However, the difference in quality was definitely apparent, particularly in the ship’s hull. The base of the Benchy model was far from perfect, but the overhangs and geometrical shapes on top came out almost identically to the “Standard” Benchy.
Finally, it was time to try out the “High Quality” profile (0.15mm). This particular Benchy model came out incredibly smooth, by far the best resolution of the three. However, we noticed that the first layer (which shows the “CT3D.xyz” text) was completely missing.
A bit flabbergasted by this issue, we dug a bit deeper to figure out what the problem was. After some investigation, it seems that there was a bug within the slicer software, not the hardware. Aside from the mysteriously missing first layer, the high-resolution Benchy passed most of the benchmarks. It took about one hour and 20 minutes to print.
Despite the apparent bugs in the Cura Lulzbot Edition slicer, the printer itself had proven itself to be worth the hype thus far.
More Printing
After the initial journey printing the 3DBenchy and Rocktopus models, it was time to kick things into gear and find out what the Lulzbot TAZ 6 was really capable of. We printed an array of models in different filaments types, including ABS, PETG, Flexbile, Woodfill, and other exotic materials.
Looking to print something functional that would also test the ability of the Lulzbot TAZ 6, and so we selected the popular Measuring Cube by iomaa. We figured this to be the perfect model to test considering the food-safe nature of PETG filament. The design is both practical and has geometric properties that will challenge the printer.
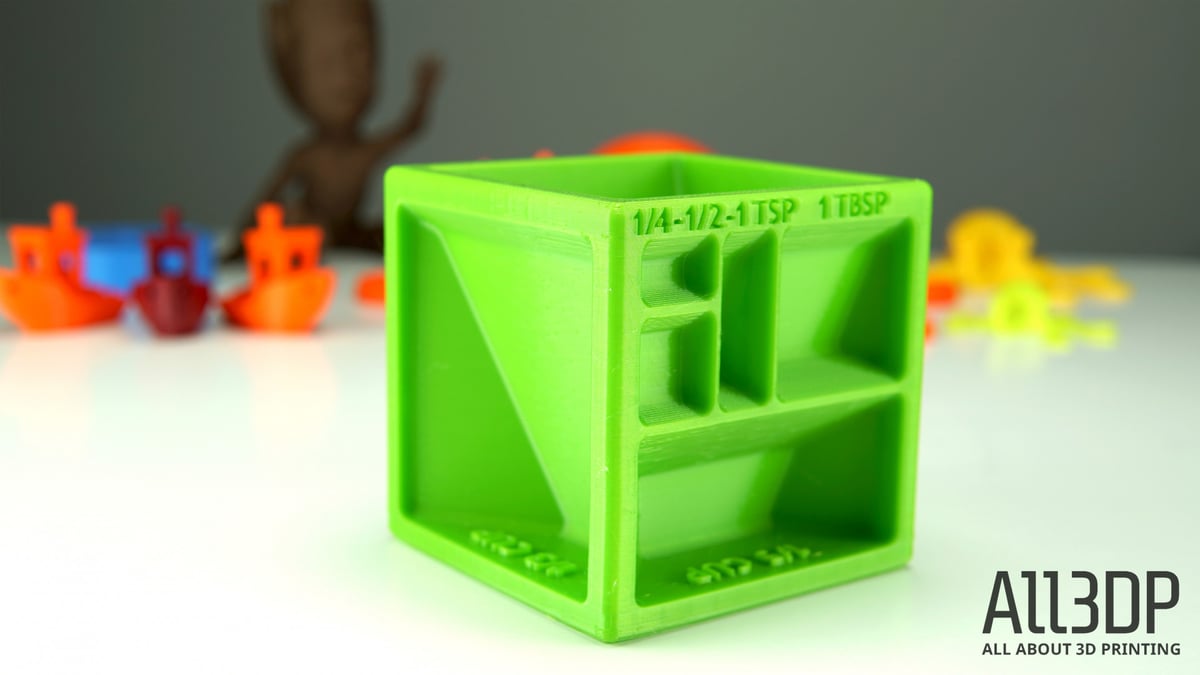
The Lulzbot TAZ 6 handled the Innofil EPR InnoPET with ease, producing smooth layers and stunning details. The most impressive parts of the print are the difficult angles printed without supports, as well as the different measurements that are cleanly inscribed on the model.
Next up, we loaded in some ABS to print the Gear Bearing design by emmett. The model is a planetary gear set that is meant to be pre-assembled, meaning you get a rotating gear system right off the print bed. After scaling up the model to make it bigger, we printed it with Blue ABS from Rigid.ink.
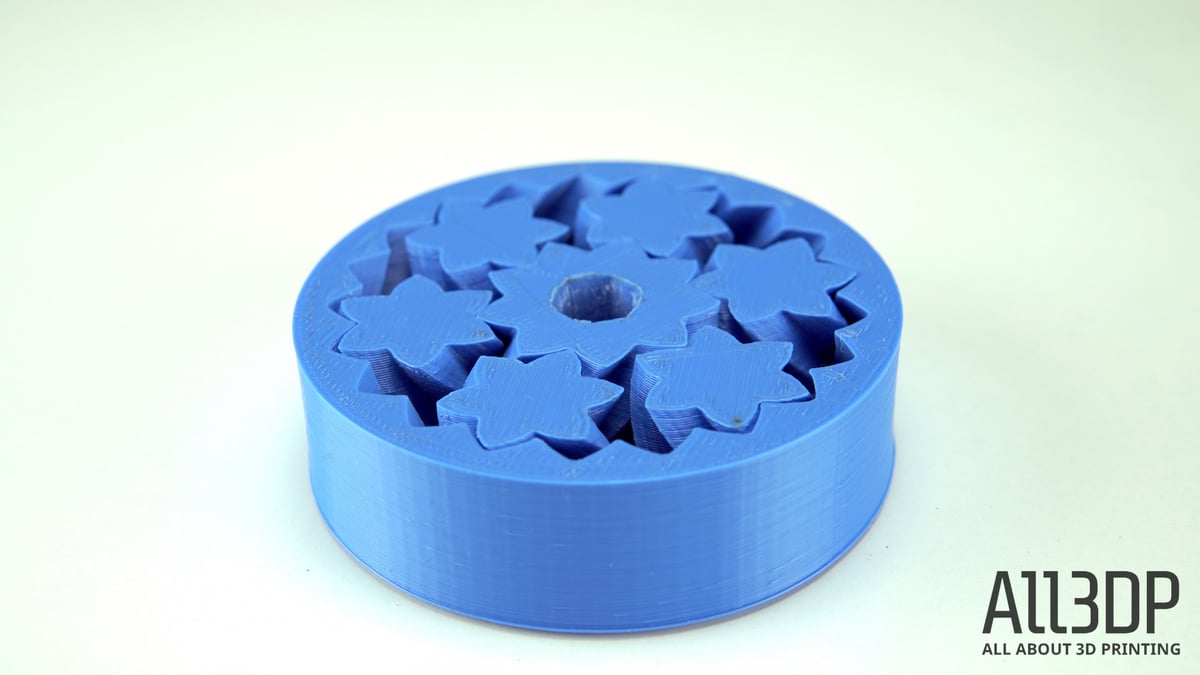
The Lulzbot TAZ 6 also managed to print this material with phenomenal results. It took a bit of twisting and turning to loosen the model up, but soon after the print was complete we had a working gear that was printed as a single piece.
We also wanted to experiment with exotic filaments like wood and metal filled PLA. We used 3D Cork from the Polish filament producer Pri Mat3D to print everyone’s favorite model: Baby Groot. The Lulzbot TAZ 6 was able to print this cute little waving character with no supports, and the Cork filament provided a woodsy charm that suits the model perfectly.

There were a few issues with retraction, leaving some stringy or rough surfaces on the print. However, with a bit of tweaking to the slicer settings, the wood fill can surely be optimized to turn out even better.
Last but not least, we decided to give flexible filament a go, using Yellow Flexfill material produced by the Czech company Fillamentum. Unfortunately, we didn’t have the LulzBot TAZ Flexystruder Tool Head v2 at our disposal. The optional tool head is engineered to print with flexible filaments, and without it, we were unsure of how the Lulzbot TAZ 6 would react.
Refusing to be deterred, we loaded up the flexible filament and circled back to the beloved Rocktopus model. It took some tweaking and one failed print, but we were ultimately able to print a decent model with the printer’s stock tool head.
There was a bit of stringiness left on the model, but this is a common theme when 3D printing flexible filaments. All in all, we were impressed to see the Lulzbot TAZ 6 handle this difficult material without the specially developed Flexystruder.
Software
We’ve briefly mentioned some of the trouble we had with the latest Cura Lulzbot Edition slicer, but overall the software was both accessible and expansive. While slicing a 3D model, you can either use the recommended settings for a specific filament and printing profile, or you can customize and tweak each part of the printing process.
When using the custom print setup, the Cura Lulzbot Edition slicer allows you to control every aspect of the shell, infill, print speed, cooling, experimental settings, and much more. Advanced users can take complete control over the Lulzbot TAZ 6, while the user interface on the printer offers further possibilities to modify setting mid-print.
With the recommended print setup, there’s a long list of materials to choose from. Although many filament types are not included on this preset list, you can easily import settings or create your own filament profiles.
Aside from our aforementioned bug issue with the “High Detail” profile, the slicer itself seems a little bit slower than other options, including the basic version of Cura.
All in all, the specialized slicer is easy to use and provides full control over the Lulzbot TAZ 6. Still, the slicing speed and issue with printing profile keeps Cura Lulzbot Edition from earning a perfect 10.
Wrapping Up
After testing the Lulzbot TAZ 6 with a multitude of filaments and models, we found this monstrous machine to be exceptionally reliable and easy to use.
The generous build size, unmatched dependability, and sturdy design makes the Lulzbot TAZ 6 well worth its high-end price.
The Lulzbot TAZ 6 printer is certainly not for makers on a strict budget. But those who are willing to pay the price for a steadfast and enormous printer will be hard-pressed to find a better option. While we faced a few issues with the slicer, the hardware itself worked incredibly well.
We ultimately found the Lulzbot TAZ 6 to be a beastly and highly reliable machine. We fed multiple types of filament through the extruder, including PLA, ABS, PETG, Exotics, and even flexible. All of these materials printed successfully, and most with impeccable quality. Needless to say, as frequent users of the Lulzbot Mini, we were very pleased with our Lulzbot TAZ 6 experience.
All in all, the Lulzbot TAZ 6 is a workhorse designed for pro-sumers and hobbyists that want to keep their maker spirit going from sunrise to sundown.
However, it the Lulzbot TAZ 6 is a bit outside of your price range, take a look at some worthy alternatives below.
Good Alternatives
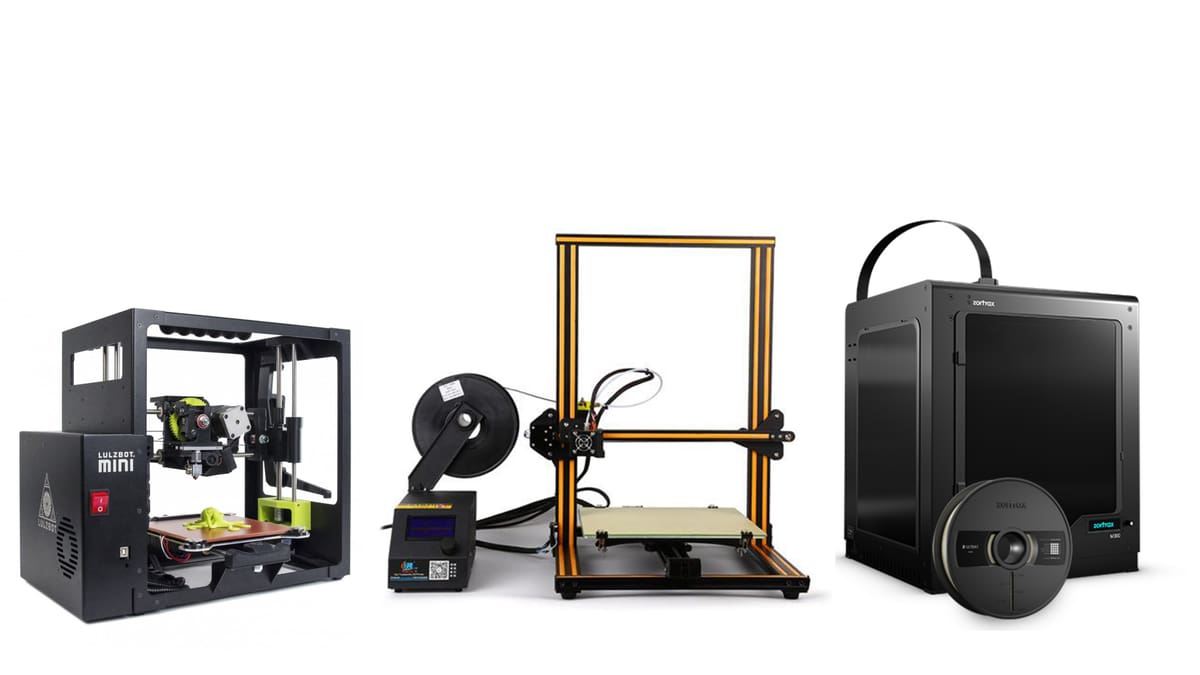
If the Lulzbot TAZ 6 is a bit outside of your price range, or the sheer size of this printer just frightens you, there are a number of good alternatives you can turn to.
First and foremost, you can downsize to the Lulzbot Mini, a smaller and more inexpensive member of the Aleph Objects family. For half the price, you’ll get a 152 x 152 x 158 mm build volume and equal 3D printing capabilities. However, unlike the Lulzbot TAZ 6, the Mini has no standalone 3D printing feature, which means you’ll have to stay tethered to a PC.
If size is an important factor, but the Lulzbot TAZ 6 is outside of your price range, the Creality CR-10 may be a suitable alternative. Although you lose a bit of that reliability that Aleph Objects offers with its 3D printers, the CR-10 has quickly become the go-to option for makers on a budget. For under $500, you’ll get a print area of 300 x 300 x 400mm. However, keep in mind that you’ll be missing out on the consistency and performance that comes with owning a Lulzbot 3D printer.
Is the Lulzbot TAZ 6 just not big enough for you? Perhaps the Zortrax M300 will tickle your fancy with its 300 x 300 x 300 mm build area. This Polish 3D printer is a bit bigger, but it also cost more money. On top of that, you miss out on the advantages of having open source hardware, as the M300 will encounter more restrictions than the Lulzbot TAZ 6.
License: The text of "Lulzbot TAZ 6 Review: Great Workhorse 3D Printer" by All3DP Pro is licensed under a Creative Commons Attribution 4.0 International License.
CERTAIN CONTENT THAT APPEARS ON THIS SITE COMES FROM AMAZON. THIS CONTENT IS PROVIDED ‘AS IS’ AND IS SUBJECT TO CHANGE OR REMOVAL AT ANY TIME.