Mycusini Chocolate 3D Printer Review: A Real Treat
Rating

We tested out the Mycusini chocolate 3D printer. Does it deserve a chef’s kiss or is it half-baked? Check out this review for our take.
Whether you’re an experienced home cook, a confessed chocoholic or a 3D printing junkie, the Mycusini chocolate 3D printer is a tempting gadget to buy.

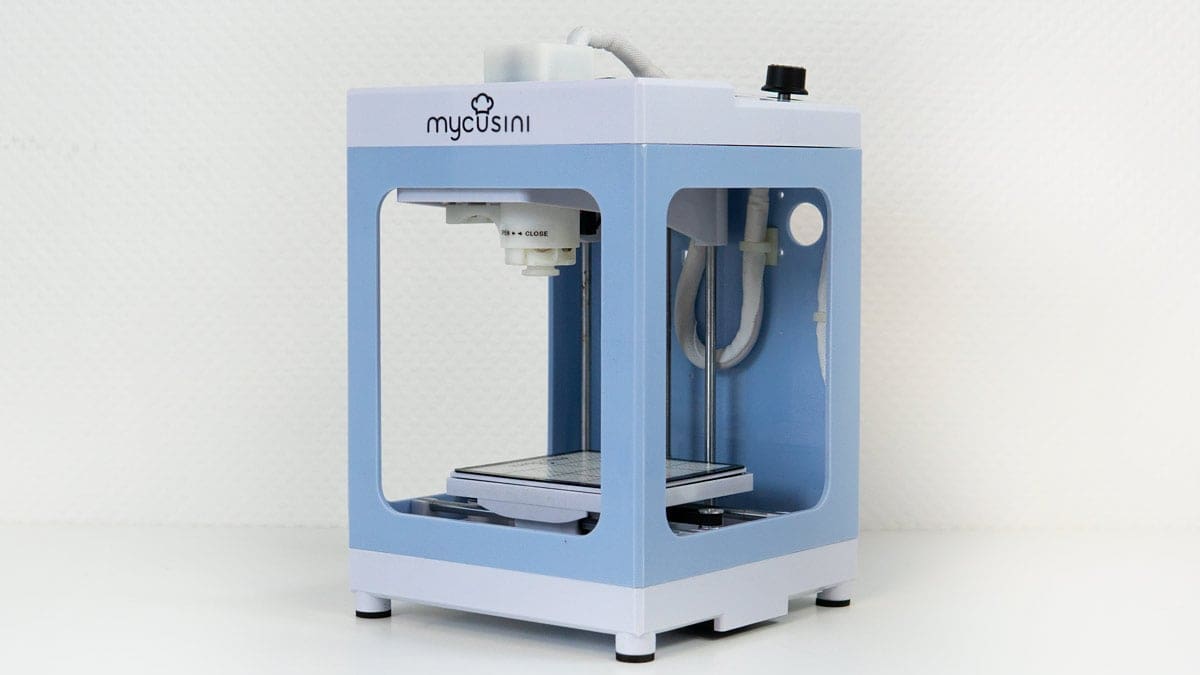
Built by Print2Taste, a German startup that also makes the Procusini food 3D printer, the Mycusini is possibly the cheapest food printer on the market right now. It was launched on Kickstarter for just shy of 200€ (~$220) and at 190 x 195 x 270 mm, it’s compact enough to fit on a kitchen countertop or be stored in a cupboard.
Print2Taste surpassed its Kickstarter goal and the machines have been sent out, but you can still buy a Mycusini from the website for 398€ (~$440.)
It looks a treat, but are its chocolate confections too? Read on for our review of this affordable food printer.
Be the host with the most with the Mycusini chocolate 3D printer.

Verdict
This small machine is surprisingly adept at churning out chocolate confections. It’s pretty fast and the chocolate it produces tastes like, well, chocolate. Is it perfect? Not quite, but it’s off to a strong start. At almost 400€ (~$440), it costs only a little less than a Kitchenaid stand mixer, the ultimate home-cook gadget, but offers impressive versatility and the possibility to create freely in chocolate.
Pros
- Easy to use – no 3D printing knowledge required
- Prints accurately
- Large library of prints
- Mycusini Club gives you the freedom to print (almost) anything
Cons
- Messy
- Refills are expensive and a little wasteful
- Cannot swap refills mid-print
First Glance
The Mycusini comes snugly packed in its box and is simple to assemble. It has a clean, sleek look – the wires are neatly wrapped up so they don’t get in the way – and is made mainly of plastic, which makes it easy to clean. This small gadget would fit easily in a cupboard or on a kitchen countertop and is about the size of a coffee machine.
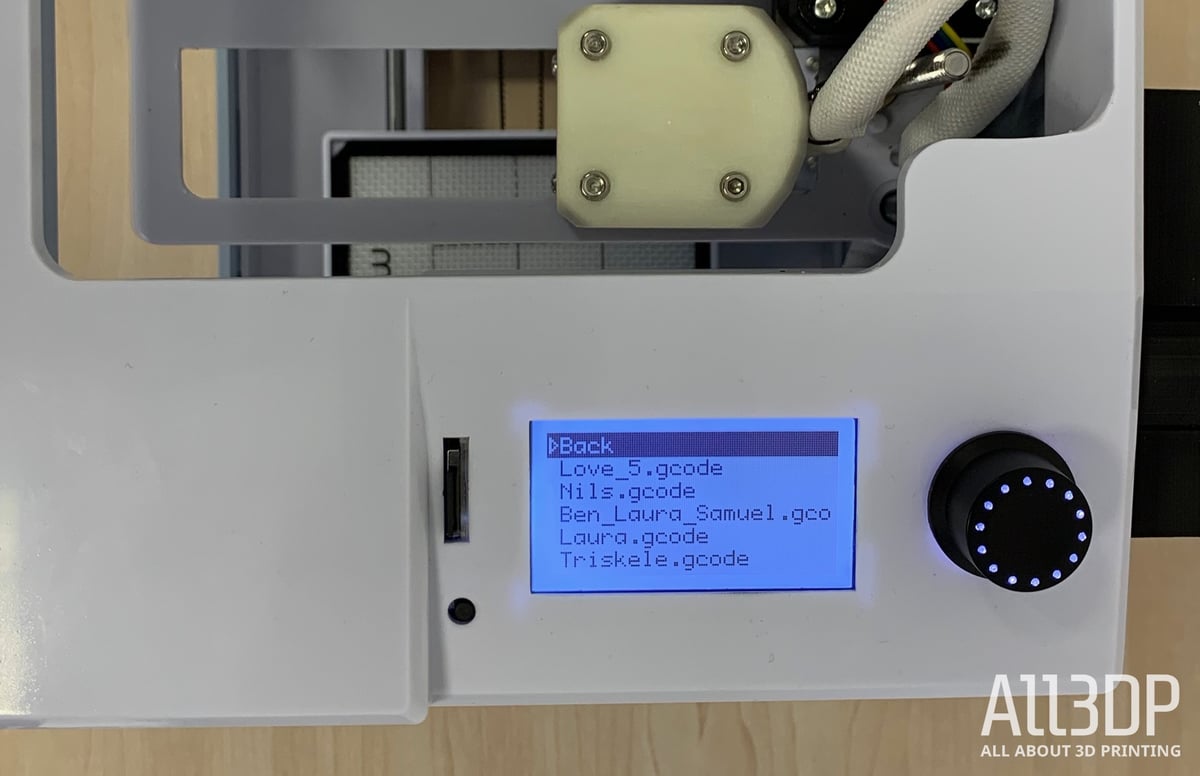
You can control the machine using a knob on the side of the LCD screen, which displays the percentage of chocolate remaining and how far along the print is. Though the Mycusini comes with an impressive menu of objects it can print out, it also offers the versatility to produce your own models with its Mycusini Club platform.
Setup is extremely straightforward and simple. The only issue we ran into was leveling the build platform, which was initially too high. We ended up tightening the screws on it so the removable build plate sat lower in it. This way, there was enough room between the build plate, removable mat that sits on top of it, and the nozzle. Once this was fixed, it was smooth sailing.
Printing
As far as printing goes, we were very impressed. With all the settings correct on the Mycusini, we had a fail rate of zero and the machine extruded the chocolate evenly and accurately.
But, let’s back it up a bit and break down how the printing actually works.
The Mycusini prints using melted chocolate. The chocolate you use in it, which comes plastic-wrapped and looks like sausage-shaped logs secured at either end with metal twists, is called refills. Each machine comes with 10 refills and you can buy more as you need them.
You have to cut the refills in half before you can begin printing with them, and the company stresses that you must get it exactly in the middle. They even provide a laminated printout of the refill with a line in the middle to show you where to cut. Unfortunately, our refills were ever so slightly longer than the one in the photo, so we still had to eyeball it a little. The chocolate is pretty solid so be sure you have a sharp knife and keep your fingers out of the way.
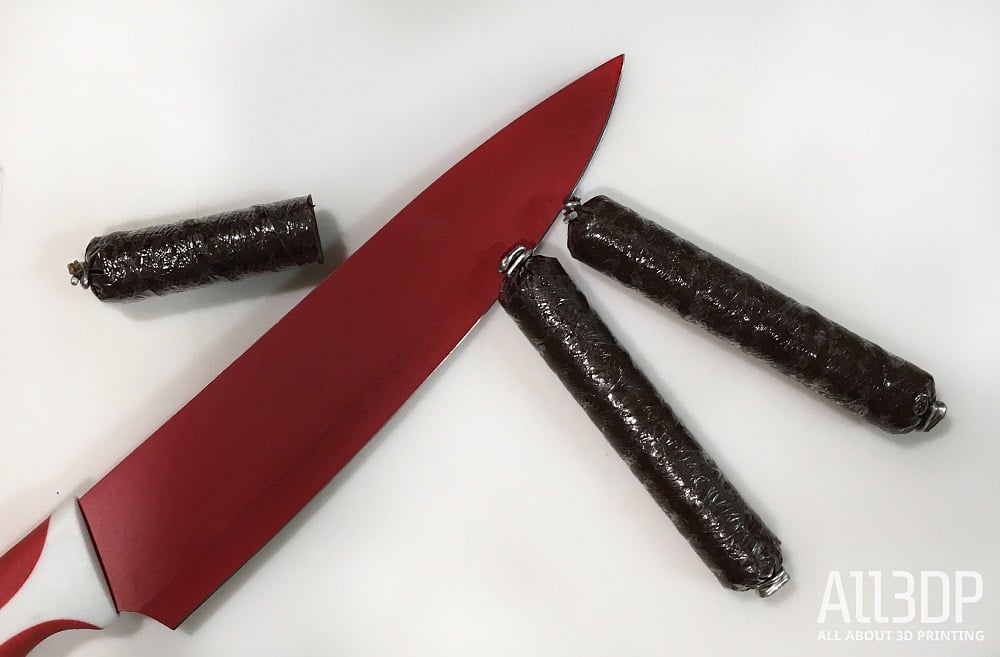
Once you’ve chopped them in half, you put one half into the silver cartridge, open side down. The refill (chocolate log) shouldn’t be longer than the cartridge. As mentioned though, ours were, so we had to chop some of the chocolate out of each side — essentially wasting it — until the refill half was short enough to fit in the cartridge with a couple of millimeters of room at the top.
Next, you put the cartridge into the white cartridge holder and twist it to the right to secure it. It requires a little more push than you may think the plastic machine can handle, but just go for it. Once it’s in, settle down for a 10-minute wait while the machine heats up.
Mycusini says the reason the machine takes so long to heat up is that it has to very gradually melt the entire refill from the outside in without overheating it and damaging the texture of the chocolate.
Once heated, the machine extrudes chocolate by pushing down on the closed part of the refill and forcing the melted chocolate at the bottom out of the narrow nozzle.
You get the printer to start extruding chocolate by turning the control knob to the right until you’ve got a steady flow of chocolate. Once you’re satisfied with the flow (a slightly wasteful process), you hit the knob and the printer will get to work. If it’s under-extruding, abort the print and turn the knob further to the right the next time. However, once you’ve got the flow right, you can continue printing objects back to back without having to reset the flow.
If you’re planning on keeping the machine in a place where other people are working or need any type of calm, think again. The Mycusini, when printing, sounds vaguely like dial-up Internet, for those old enough to remember.
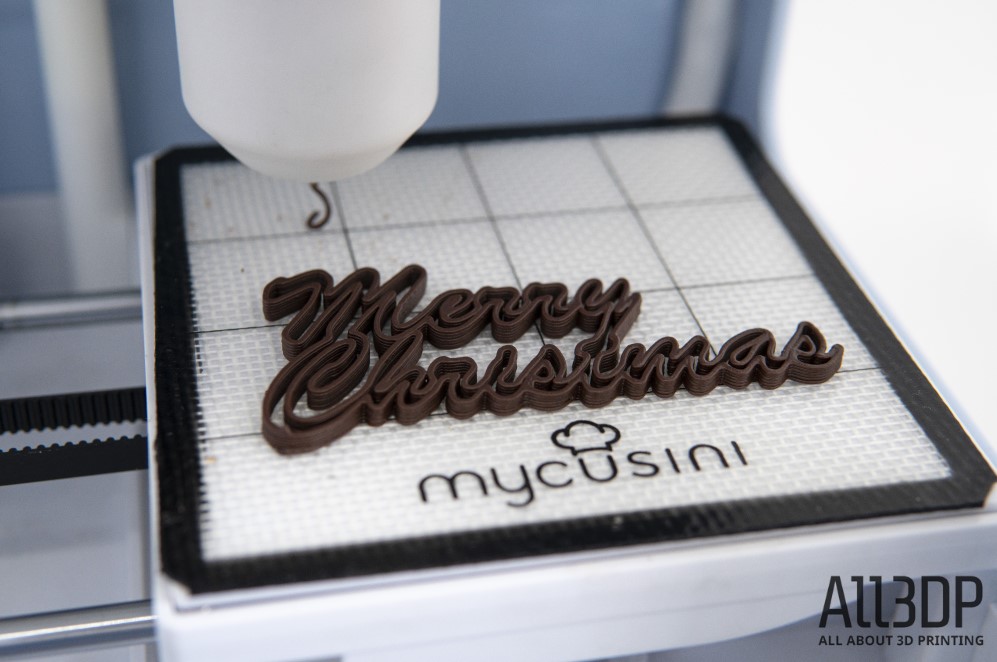
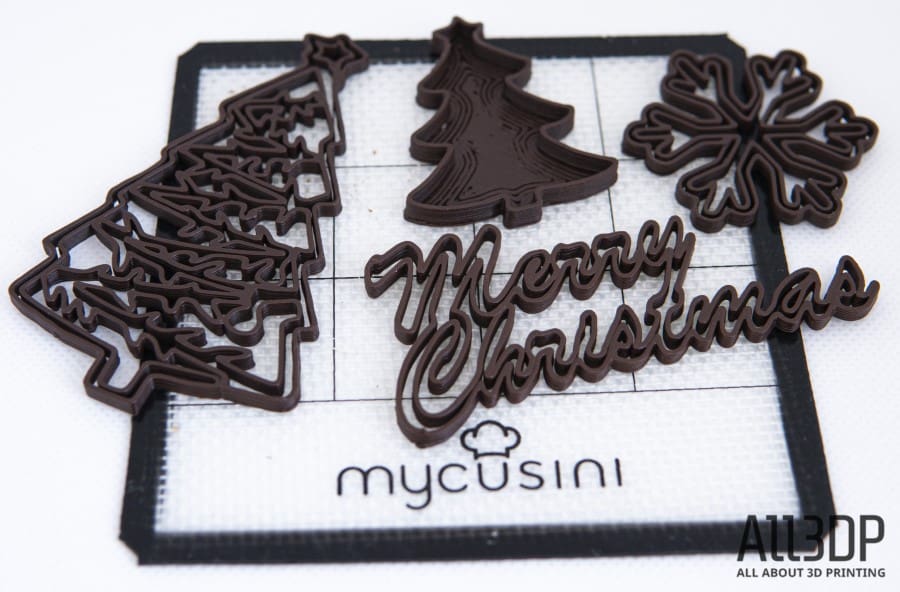
Once we got our Mycusini up and running – again, a zippy, straightforward process – we were impressed with the level of detail and smoothness of the prints, though they are fairly delicate. They’re also a cinch to remove from the floppy mat that goes on top of the build plate.
And, though the process is easy, it does comes with a caveat. You have to have enough chocolate left in the refill to complete your prints. There isn’t a way to pause a print mid-way and refill a cartridge should you start to run low, unfortunately.
In terms of taste, the chocolate isn’t anything special – it’s made with sugar, fully hydrogenated vegetable fats (coconut and palm kernel), cocoa powder, vanilla extract, a stabilizer, and an emulsifier – but it does taste and look like chocolate once melted.
However, at 10€ (~$11) per 150 g, or 10 refills, it’s not cheap. We’re curious to see whether an at-home chef looking to save some money could mix up their own consistency of chocolate and try and insert it into the machine.
That being said, we were able to get between five to eight objects printed per refill, depending on their size.
And, if you’re wondering about mess, there is a little bit. Melted chocolate isn’t the neatest food, but it’s not too bad if you’ve got a sink and paper towels nearby.
Mycusini Club
The “Club” is by far the coolest part of the Mycusini and it’s what really takes your creativity to the next level. The free tool offers in-depth YouTube videos to help acquaint you with the machine, but more importantly, it gives you the power to create all kinds of designs and models with your printer.
One of the offers on the platform lets you draw what you want the machine to print directly on your screen and then have your Mycusini print it in chocolate. It works really well and – in the hands of better artists than we are – could likely yield some pretty impressive treats.
If you’re more of a drawing within the lines type of person the trace outlines feature is a cool option for assisted-choco-artistry. Simply upload a photo of what you want to print and then use it as a guide to literally trace out what you want. If only we had better fine motor control…
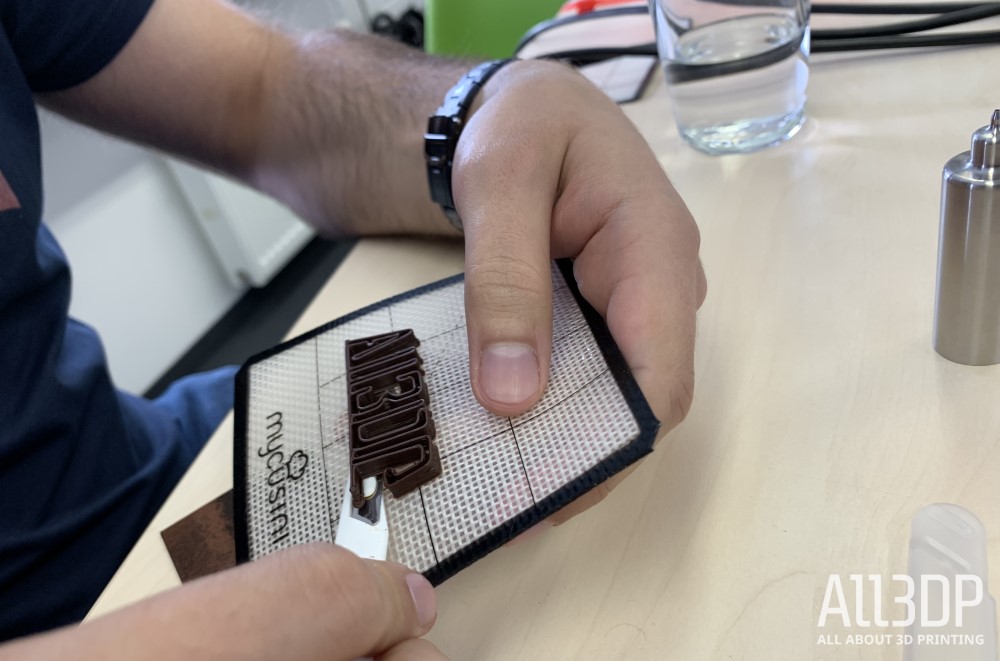
Then there are two options to produce text, either in joined-up writing or not. This is great for printing people’s names, sayings, best wishes and more. You can print multiple blocks of text at the same time which makes it a pretty efficient feature.
Lastly, the Mycusini also has a beta mode which lets you put in any STL file and (try to) print it. Since this is chocolate though, it’s unlikely all your prints will work.
Final Thoughts
Make no bones about it: This is a really cool machine. It’s versatile, easy to use and though it’s not perfect, it’s extremely promising. We love the control the Mycusini club offers and had a lot of fun creating edible art.
Where to Buy
You can get a Mycusini from the following online retailer:
Be the host with the most with the Mycusini chocolate 3D printer.
License: The text of "Mycusini Chocolate 3D Printer Review: A Real Treat" by All3DP is licensed under a Creative Commons Attribution 4.0 International License.
CERTAIN CONTENT THAT APPEARS ON THIS SITE COMES FROM AMAZON. THIS CONTENT IS PROVIDED ‘AS IS’ AND IS SUBJECT TO CHANGE OR REMOVAL AT ANY TIME.