![Featured image of [Project] Bicycle Bubble Machine](https://i.stageall3dp.com/workers/images/fit=scale-down,w=1200,h=675,quality=79,gravity=0.5x0.5,format=auto/wp-content/uploads/2019/06/07172709/feat1.jpg)
[Project] Bicycle Bubble Machine

Bicycles might be a disappointingly mundane part of your life, but you know what would spice it up? Bubbles.
For many people, bike rides are all too common in daily life, but if you’re looking to spice things up, why not attach this wind-driven bubble machine to your ride? The brainchild of heinzdrei on Thingiverse, this contraption is a relatively easy print, and it goes together fairly simply – perfect to occupy a lazy weekend afternoon.
Without further ado, let’s see how you can trick out your set of wheels and spread soapy water all over the neighborhood.
Materials List
Parts Needed
- 2mm welding wire (axles for the wheels); alternatively, toothpicks (don’t last long)
- wooden board (about 5cm x 80cm) to mount the printed parts onto, attaches to the luggage rack of the bicycle
- small self-tapping screws (so your plastic doesn’t break)
- small wood screws
- elastic ribbon (“the stuff that makes your knickers hold,” according to the creator)
- sewing stuff: needle and thread, fixing pins
- a small drill (like 2.5mm) to drill open the holes for the axles (many 3D printers will not make the holes dimensionally correct)
- screwdriver and small hand tools
- 3D parted parts
3D Printed Parts
Print one of every part and two of each clip, and you can make either two 3mm spacers or one 6mm one. As for the slicer settings, you’ll need a raft to print at least the wind wheel, and any infill will do.
The creator advises printing all parts in the orientation he set in the original downloads due to support optimization and layer adhesion.
The tank, on the other hand, requires special consideration: it should be as solid as possible so it doesn’t leak bubble fluid. Three perimeters and four top/bottom layers was found by the creator to produce a relatively watertight tank. He also found that slowing the perimeter speed helped keep things dry.
Let's Build It
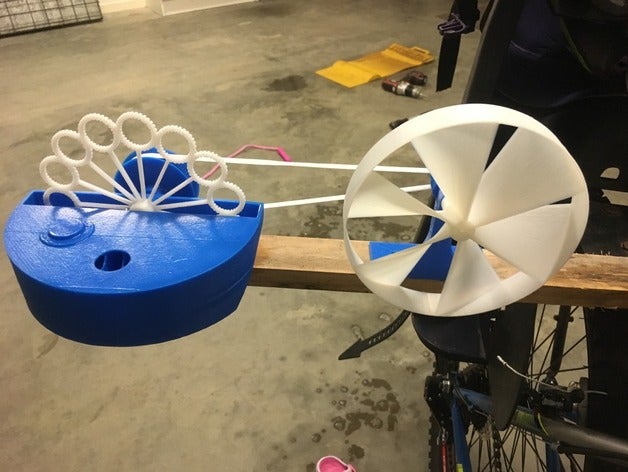
Start with mounting the wind wheel to its mount, then mount the other parts in the following order: small pulley, optional washer, wind wheel mount, optional washer, wind wheel (see photo).
Next, cut your axles to length then press the pulley onto the axle, then the mount so that the foot is on the pulley side. If things won’t fit, use the drill to make up for poor clearance. The pulley and the wheel are supposed to be fixed onto the axle so that the wind wheel transfers torque to the pulley, which spins the bubble wand.
Then, mount the wind wheel to the board with small screws, making sure not to fix them in place completely – you might need to make an adjustment later to correct belt tensioning.

Finishing Assembly
Next, mount the tank to the outer edge of the board, where there’s more wind. Afterwards, attach the clips (to mount the board to the luggage rack). Position them so that you can slot in one side first, then press the other to snap it in place. You’ll want to attach this as far back on you luggage rack as possible.
Afterwards, you’ll get to the fun part: attaching the bubble wheel. Fix the bubble wheel onto the axle with self-tapping screws. Make sure to use the printed spacers to separate the bubble wheel from the walls of the tank, then attach the large pulley on the outside of the tank, on the same side as the wind wheel’s pulley (obviously).
Belt Attachment
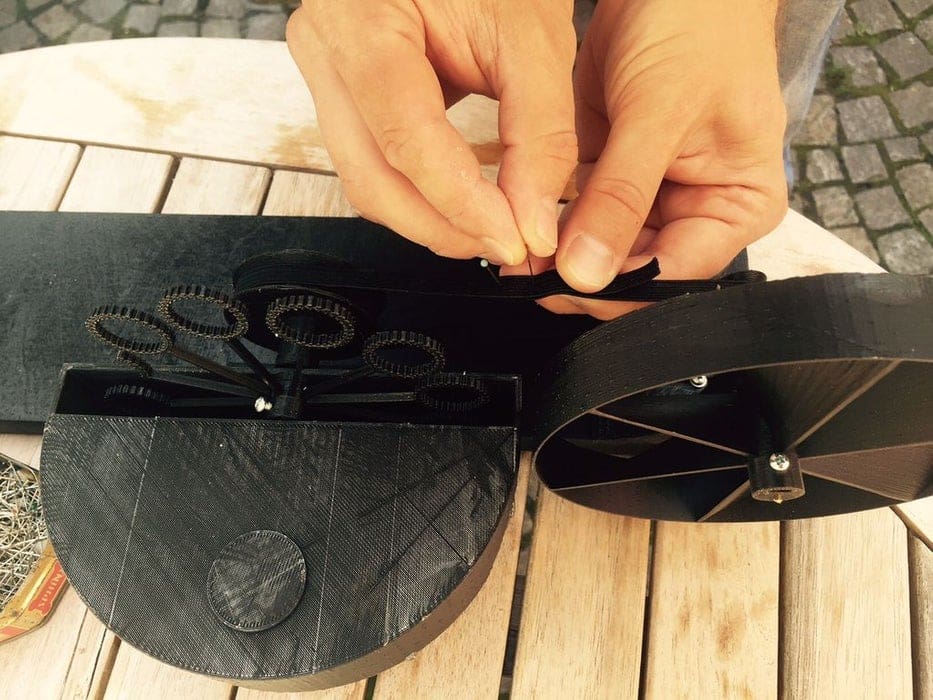
You can either use GT2 machine belts or a regular elastic band, the ones found in elastic-waisted pants. First, loop the belt around both pulleys to estimate how much you’ll need, then cut it to length leaving a few centimeters to spare. Fix the two ends in place with pins until you find the right tension, then sew the two ends together with the thread and needle.
Now, fill the tank with liquid and replace the tank cap, and ride into the sunset, sowing happiness in your wake.
License: The text of " Bicycle Bubble Machine" by All3DP is licensed under a Creative Commons Attribution 4.0 International License.