TEVO Tornado Review – A Worthy CR-10 Challenger?
Rating

The TEVO Tornado is a large volume 3D printer that shares much with the popular Creality CR-10. Cheaper than the CR-10 and almost as popular, check out our TEVO Tornado review to see how it stacks up.
If you’re in the market for an affordable, larger than average 3D printer, there are a growing number of options available to you.
One such option is the TEVO Tornado. Perhaps the most colorful of the lot, the Tornado differentiates itself from the rest with an AC-powered heated bed and TEVO-made Titan extruder. In most other ways it closely resembles the Creality CR-10 upon which it so clearly draws inspiration.
But how well does it stack up against the beloved CR-10? At a slightly lower price point than the aforementioned, do you really get more of a printer for less? Read on to find out.
See Also: 19 Must-Have Tevo Tornado Upgrades and Mods
Pros
- Large print volume
- Quick to set up and begin printing
- TEVO Titan extruder above average
- Stock setup “okay enough” for part-assembled printer
Cons
- Heated bed wiring needs work
- Noticeable “salmon skin” pattern takes shine off large prints
- Print bed adhesive sticker is garbage
- Firmware boot up bug becomes tiresome
Verdict
After using the TEVO Tornado on and off for several weeks now, we will admit that it’s easy to see why so many people love this machine.
Going from boxed to built and printing was unusually effortless (boot up bug and the subsequent troubleshooting notwithstanding), which at the very least puts the TEVO Tornado on even footing with the CR-10.
And in terms of day to day printing, the Tornado just works. TEVO’s take on the Titan extruder handled everything we threw at it with no sign of giving up the ghost; no stripped filaments or tangles of TPU. That is very much a welcome thing in a printer that comes flat packed.
It’s some small shame then that a small pile of foibles mar what could otherwise have been a very good printer. The fast heating bed is a nice, but ultimately unnecessary feature especially in light of the concerns its implementation could possibly cause (as we detail further on in this review). Not ideal, especially so for 3D printing novices attracted by the TEVO Tornado’s low price.
Add to that a poor print bed and “salmon skin” affecting print quality, and it makes for a slightly disappointing picture. Yes, these are fixable, but in a market of affordable 3D printer kits that appears to be improving with each release, is it enough?
Bottom line, the TEVO Tornado is a solid starting point if you want a decent frame and extruder. It looks great, is a cinch to set up and will reliably churn out prints from the get go, but is not without its share of small (and one big) flaws.
Features
Generally speaking, the most appealing feature of the TEVO Tornado 3D printer is the 300 X 300 X 400 mm build size, which for around $350 seems like a bargain in-and-of-itself. Pair that with a 50 micron minimum layer thickness and a 150 mm/s print speed, and this 3D printer is a appealing proposition.
At first glance, the TEVO Tornado 3D printer clearly takes heavy inspiration from the extremely popular Creality CR-10. However, there are a few features that separate these two desktop FDM 3D printers.
One of the biggest differences is that the TEVO Tornado comes equipped with a Titan extruder (derived from E3D’s open-source original). This high-end accessory is commonly used to upgrade budget 3D printers, but TEVO opted instead to attempt to bring that level of quality to the stock kit. We’ll reserve judgement on how well it holds up until we’ve had a long run with different filaments printed on the TEVO Tornado.
With that said, borrowing from E3D’s original design the TEVO Titan extruder also features the tightly constrained filament path of the original, meaning printing with the likes of TPU and other flexibles should be a-go.
Another defining feature of this 3D printer is the AC heated bed. Utilizing mains electricity, it allows the print area to heat up to high temperatures in under a minute. Definitely a step in the right direction for quality of life upgrades, however, there is a large caveat with the heated bed that we address further on in this review.
Last but not least, the TEVO Tornado tends to be a bit cheaper than the Creality CR-10, but not by much. The prices for both of these 3D printers seem to vary from time to time, but the TEVO Tornado appears to sit around $30 – $40 less.
Unboxing
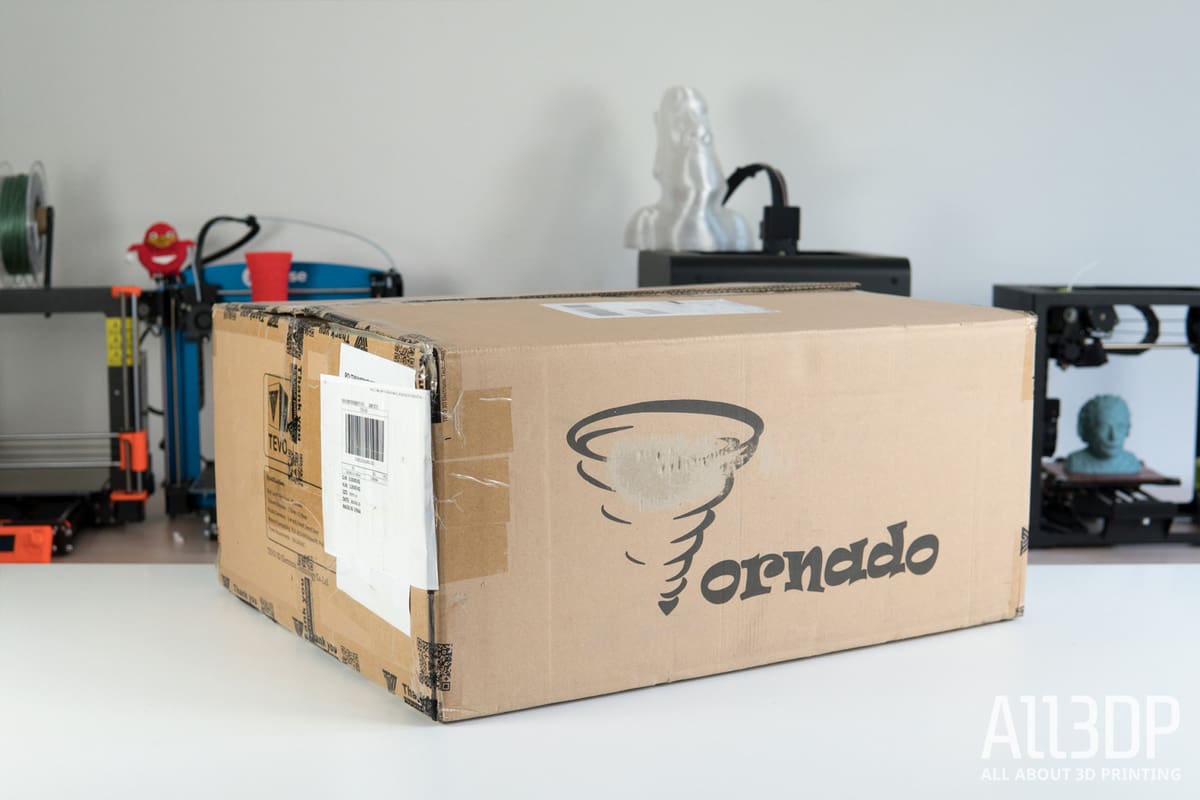
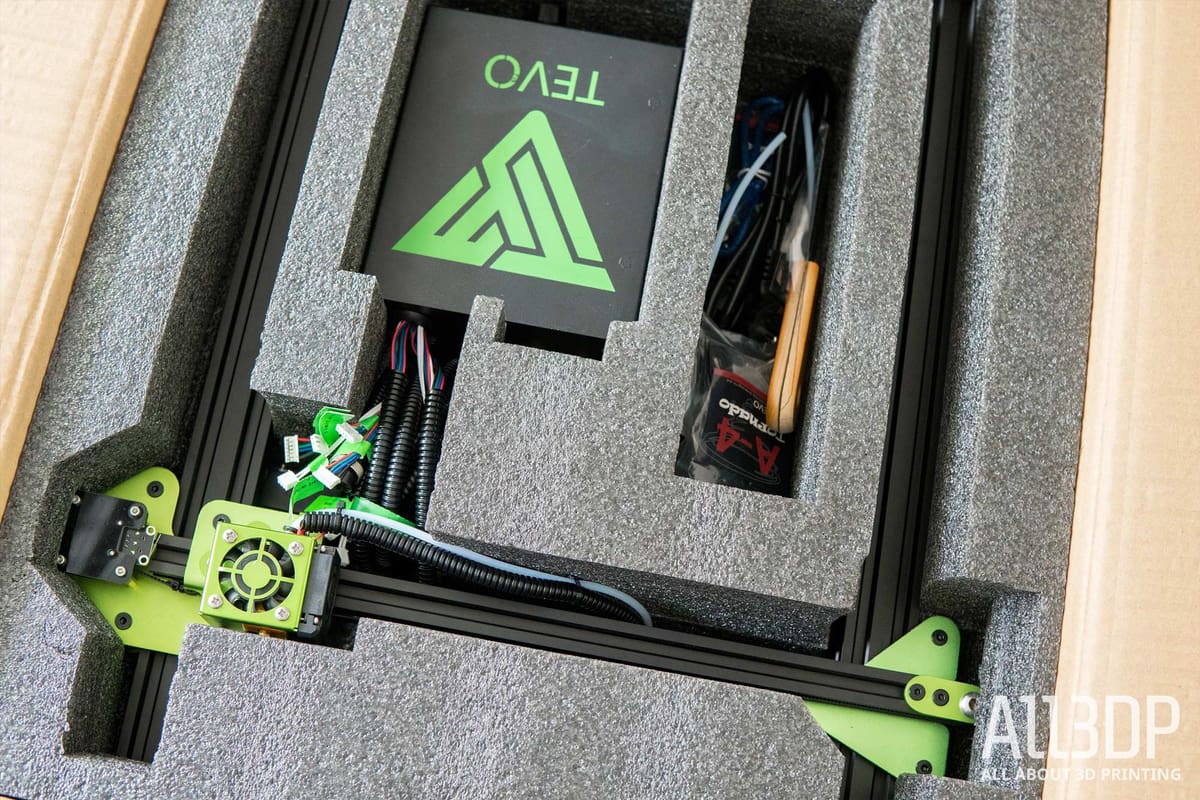
As you might expect from an import 3D printer kit such as this, the TEVO Tornado comes packaged in a big cardboard box stuffed to the nines with foam. On the outside you have the usual import/export labeling, plus the TEVO Tornado emblem.
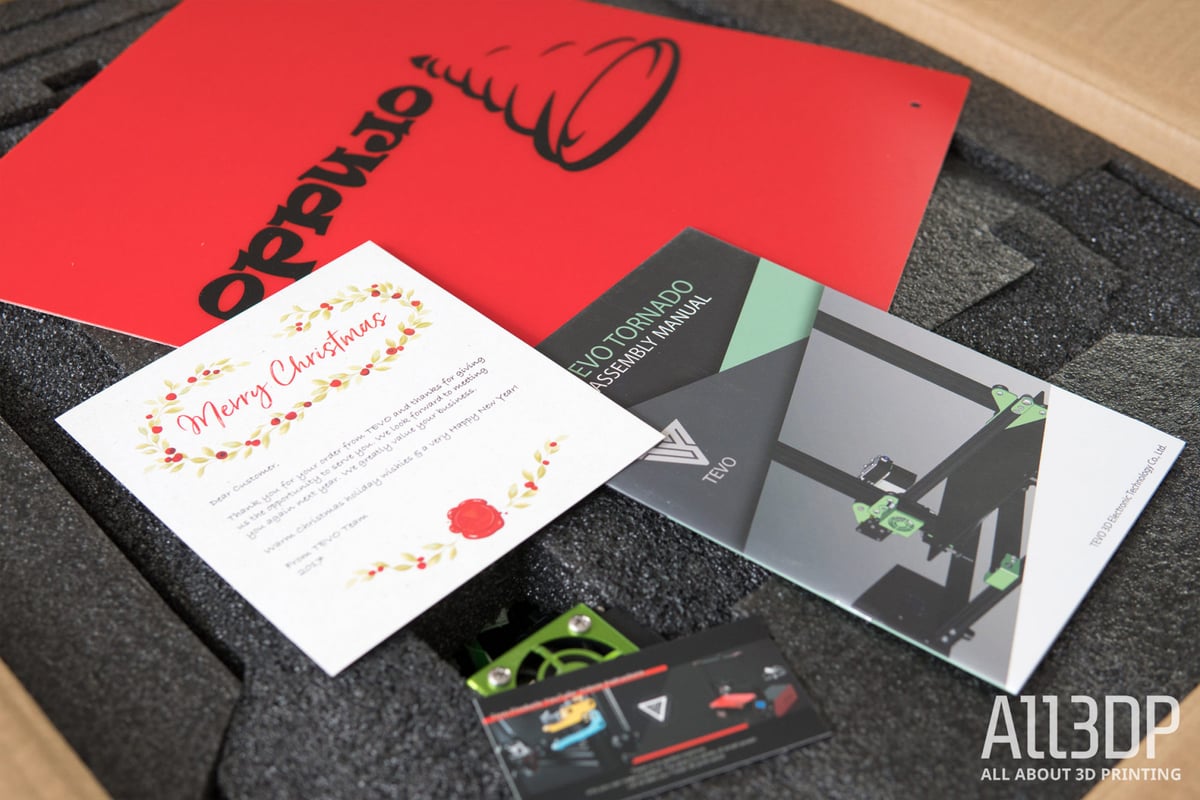
Paring back the cardboard flaps, we were faced with a Christmas greeting from TEVO — a thoughtful inclusion, and one that indicates to us that this is a late 2017 model TEVO Tornado.
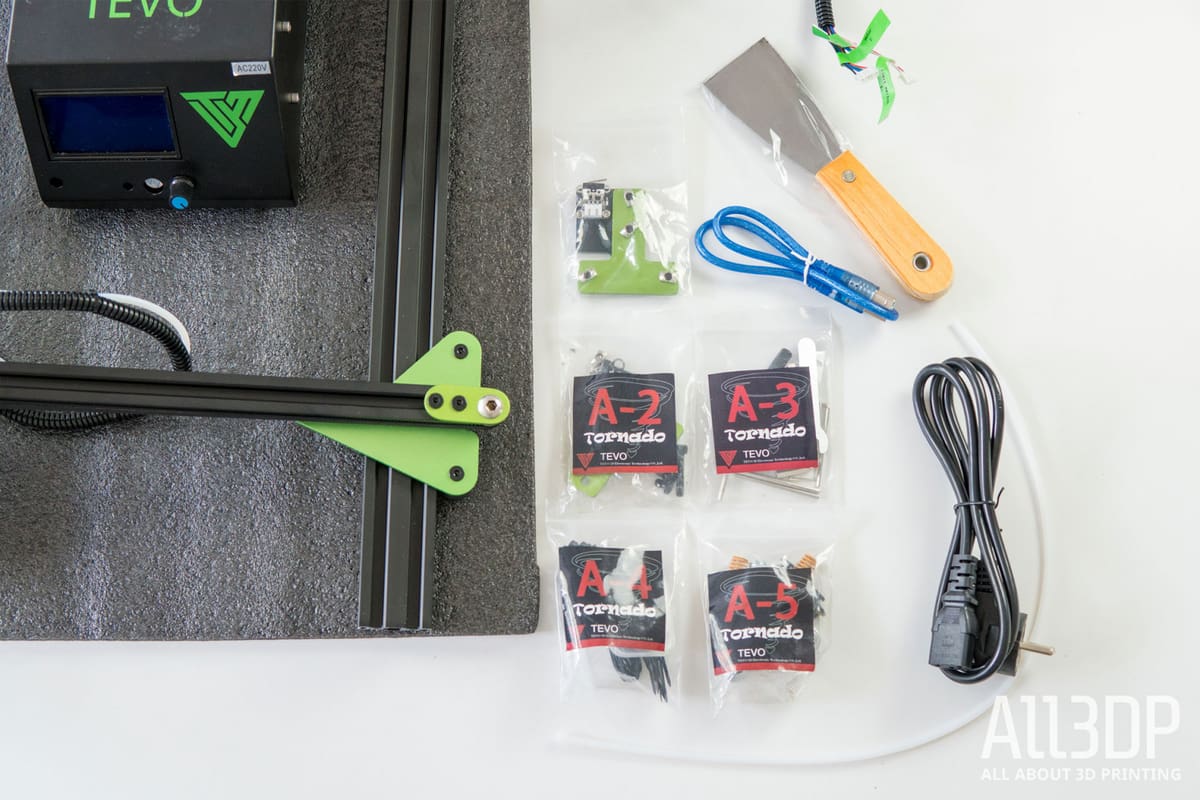
The TEVO Tornado retails as a kit, but really it is for the most part assembled. Snugly nestled in the foam packaging lies two assemblies — the Z- and X-axes as one, and the base with print bed as the other — plus the control box.
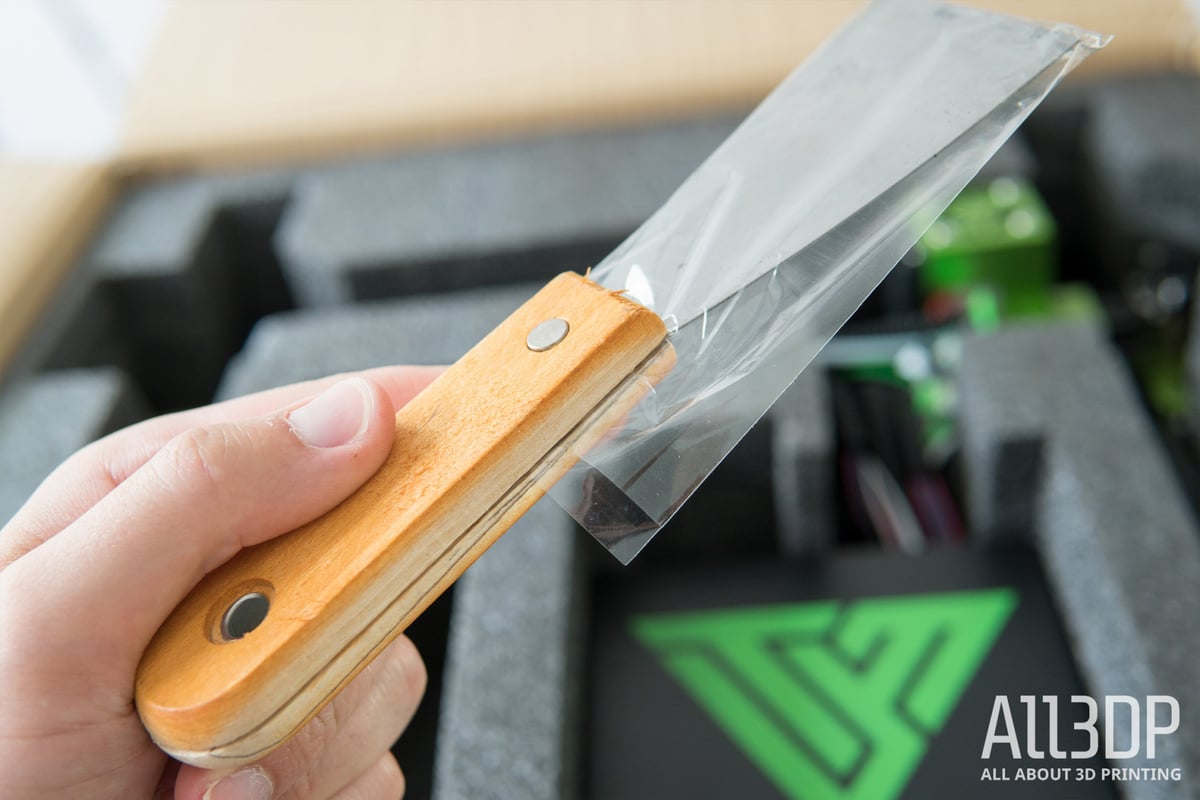
Additionally you’ll find a handful of labelled packages containing screws, t-nuts and other vitamins for the printer. Likewise, a print removal scraper (inexplicably constructed around its own packaging – see the pic below), SD-card with test prints, USB cable and power cord all complete the picture.
While the vast majority of components and frame pieces all appear in fine condition, there were some troubling scuffs, dinks and paint scratches that have us wondering about the strictness of QC on TEVO’s end. It’s possible we received an aesthetically duff TEVO Tornado, or a refurbished return.
Assembly
In all, our assembly of the TEVO Tornado took approximately 40 minutes, including time to read through the instructions to be sure of what was required.
And in the instructions for the TEVO Tornado is where we see one of the improvements TEVO has made over it’s short time manufacturing 3D printers. While we can’t speak for older models of Tornado, the instructions for our late 2017 version were clear, concise, and left us in no doubt about any of the steps it described. Two steps forward, we’d say, compared to the nightmare we had with the company’s build guide for the Tarantula printer last year.
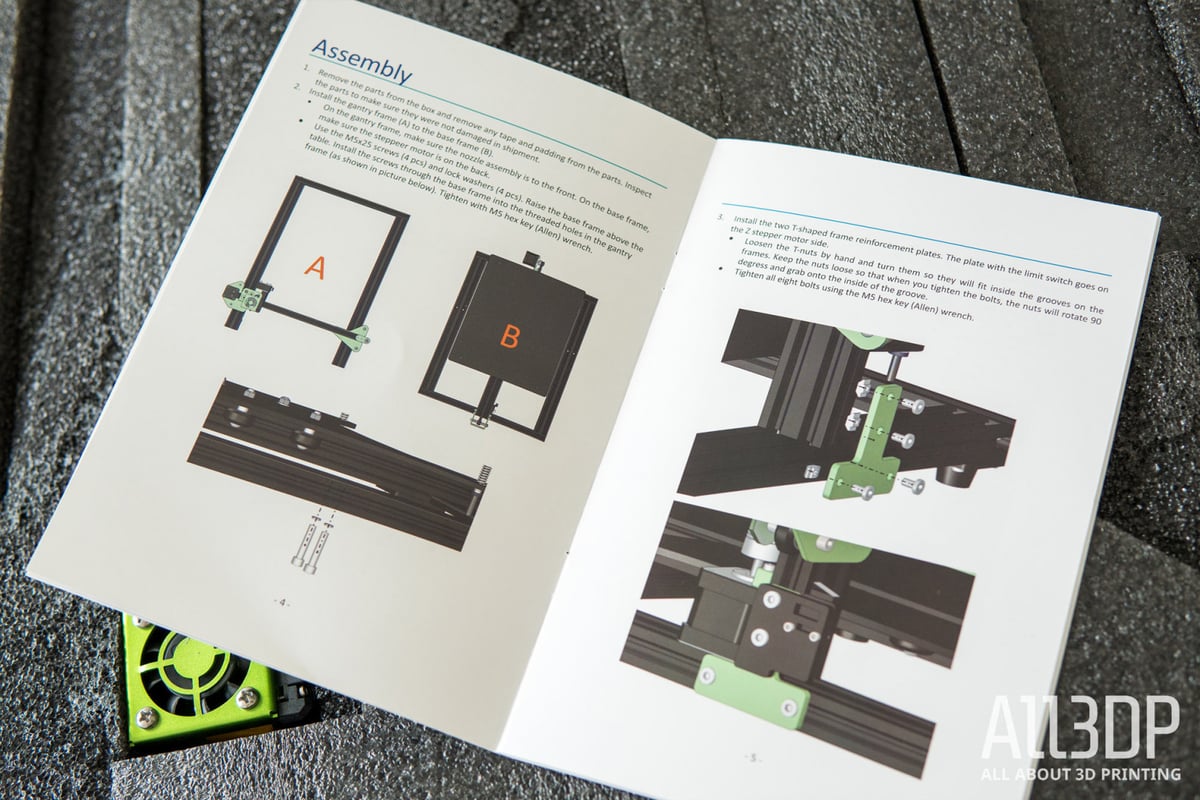
With that said, the instructions are missing any reference to the act of attaching the heated bed to the Y-axis carriage. No biggie for those familiar with the workings of desktop 3D printers such as the Tornado, but to a complete novice we imagine enough to delay the build from uncertainty. A little step back.
Progress indeed, but not an assured step forwards — the Tornado is, for the most part, assembled already, meaning there are way fewer and much simpler steps to follow in any case.
In fact such is the ease of assembling the TEVO Tornado, don’t expect to come out of the other side of assembling the machine with a deeper understanding of how a 3D printer works and the mechanisms within, because really, you won’t touch them. Its more a case of attach parts A and B to part C, plug A-B-C in to part D and then power up and calibrate.
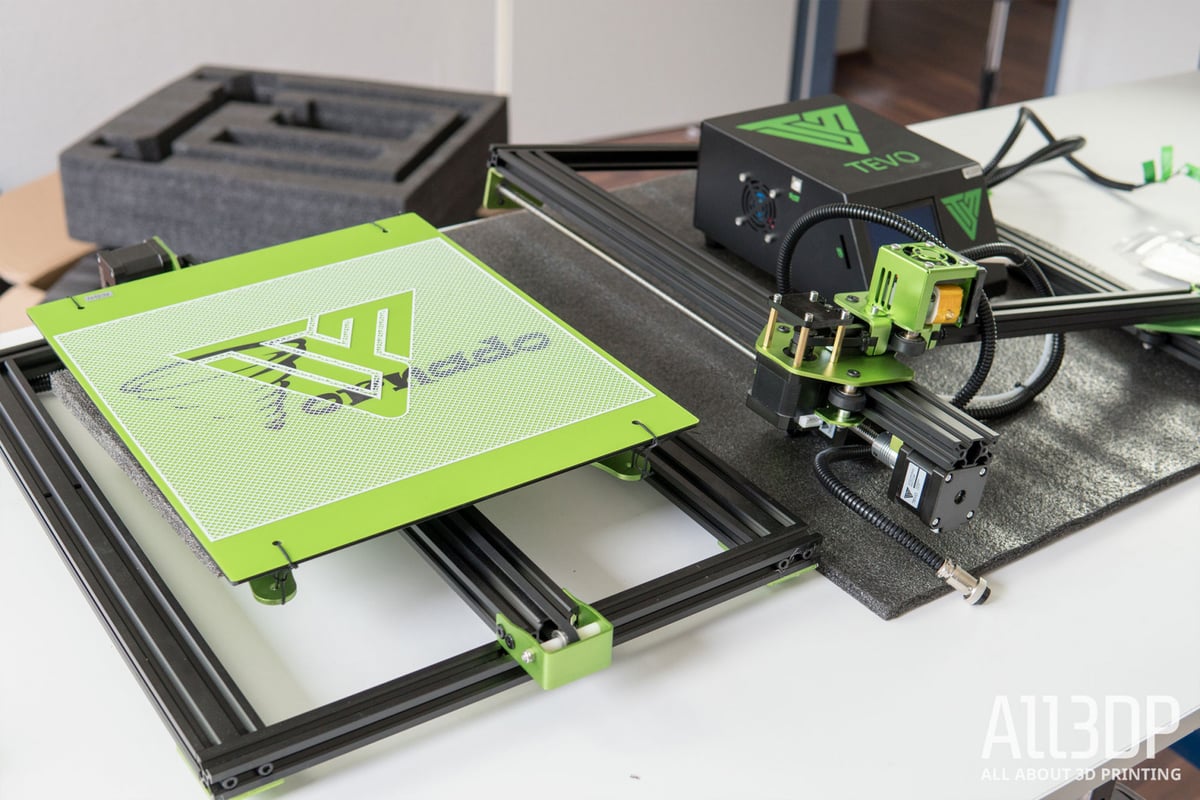
In this algebraic dance, part A is the tall standing part of the frame, already assembled with lead screw and motor, plus X-axis rail, carriage, hot end and belt, plus a TEVO Titan extruder. Part B is the AC heated bed with cabling. Part C, the TEVO Tornado’s base unit, complete with Y-axis stepper motor, belt and Y-axis carriage. And lastly, part D is the printer’s control and power unit.
Overall we found the experience of putting the TEVO Tornado together better than that of the CR-10 (circa summer 2017 — we can’t speak to newer CR-10s). The instructions were helpful and left very little to imagination or apprehension.
With that said, along the way of assembling the Tornado, one small irritant cropped up in the parts’ packages being labelled with specific codes (something we know from previous printers to correspond to specific build instructions and the parts required therein). Except that, in the Tornado’s case, no mention is given to the parts labels at all.
To us, this hints at an iterative approach to assembling the kits, with stations at varying levels that don’t necessarily dovetail with the rest. Overall the feeling is one of sloppiness, which pains us when there a signs of things heading in the right direction when compared to previous printers.
One final note about the assembly, is that we found a couple of the cables (shrouded in irritatingly curly cable wrap) were too short to comfortably plug into their respective connections.

To avoid putting undue tension on them and risk them stealthily coming loose should the printer take a knock, we partially extracted the offending wires from the wrap, giving them the extra slack to reach their destinations. A minor irritant, but one we foresee causing issues in the future if not taken care of now.
Design
Before we dig in to the usual design stuff we like to look at when reviewing a 3D printer, there’s one very important thing we want to address with the Tevo Tornado: the AC powered heated bed.
The Tevo Tornado features a mains-powered heated bed, which is great for one thing: heating the bed quickly. The wiring from the Tornado’s power supply is soldered directly to the bed, which ordinarily would be fine, but when we’re dealing with mains electricity one would hope certain safeguards would be in place. There is the highly unlikely (but still possible) chance of these live cables working free or snagging and falling onto the metal frame of the printer, and with no apparent grounding of the printer’s frame that we could find, that electricity would have nowhere to go but through you should you touch the frame.
Additional these two cables are shrouded in only a single layer of insulation, meaning a mere nick will expose mains carrying electricity to wandering fingers.
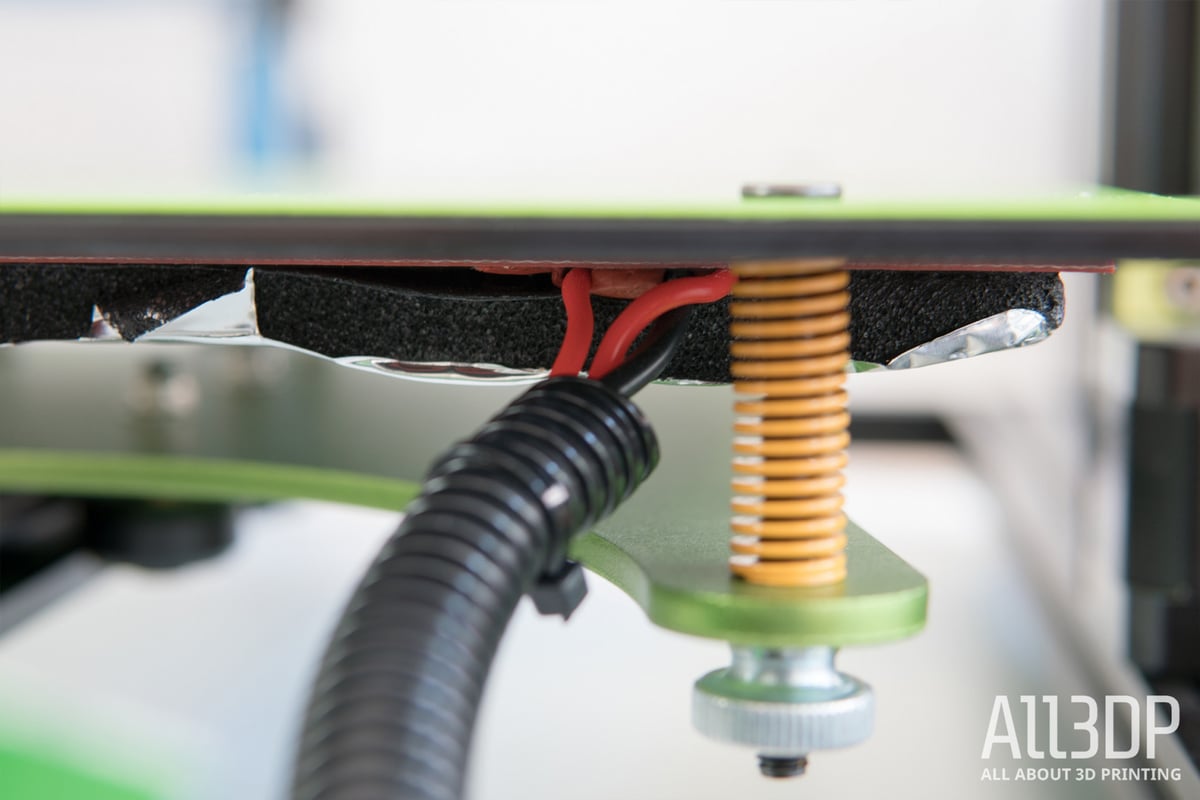
Unsupported mains-carrying cables into the heated bedInspecting the bed cables on the TEVO Tornado we have in the All3DP office, yes they are soldered in place, and there’s some kind of rubber putty material smothering that connection with the bed. But moving them around about the connection, it’s not a wild stretch to imagine countless hours of back and forth motion with the occasional snagging of cables on the printer’s frame could loosen them.
It would be somewhat mitigated with the inclusion of strain relief for these mains electricity carrying cables, but there isn’t. That would be another modification for you to print yourself for extra peace of mind.
There has been much chatter online about the potential risks such an implementation of an AC powered bed could have. If you find yourself in possession of a TEVO Tornado, there are steps you can take to mitigate the potential risk — check out this pretty clear video by RuiRaptor on the matter.
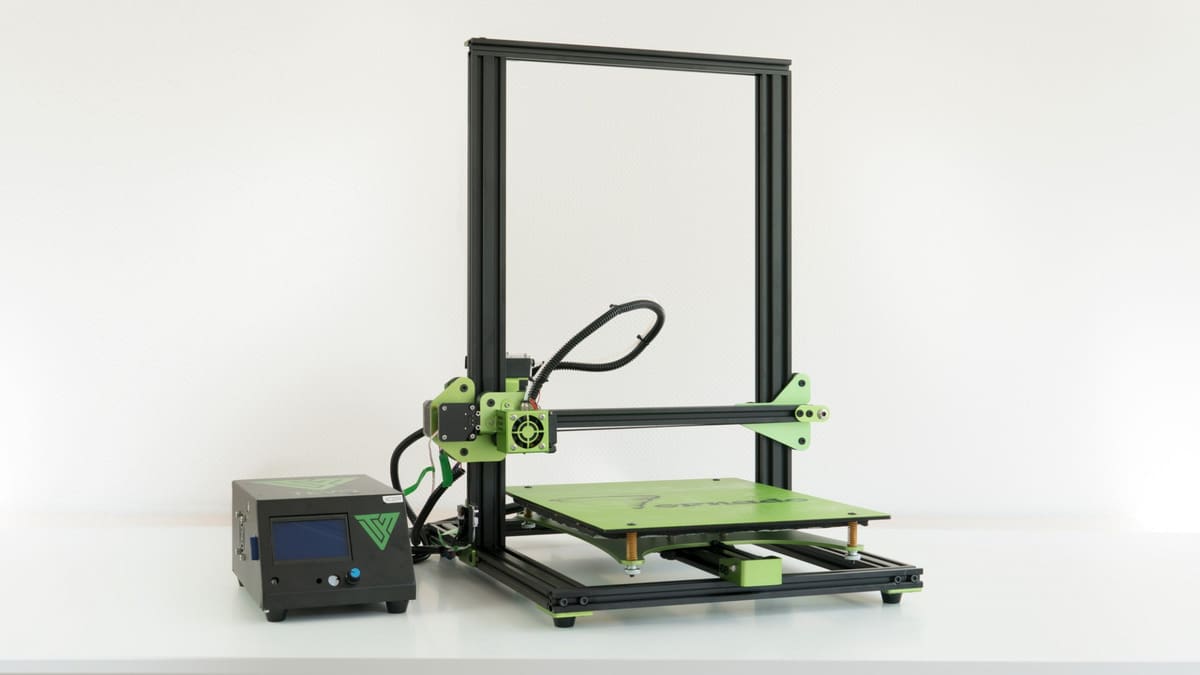
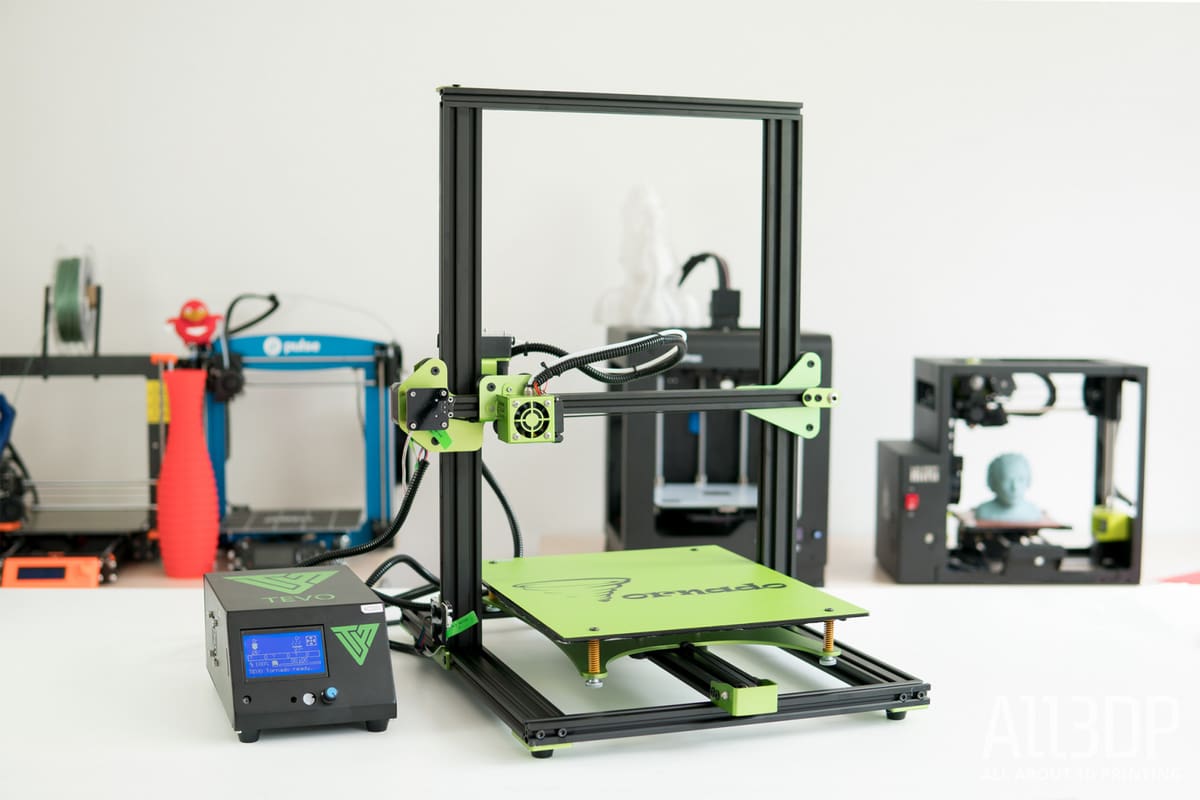
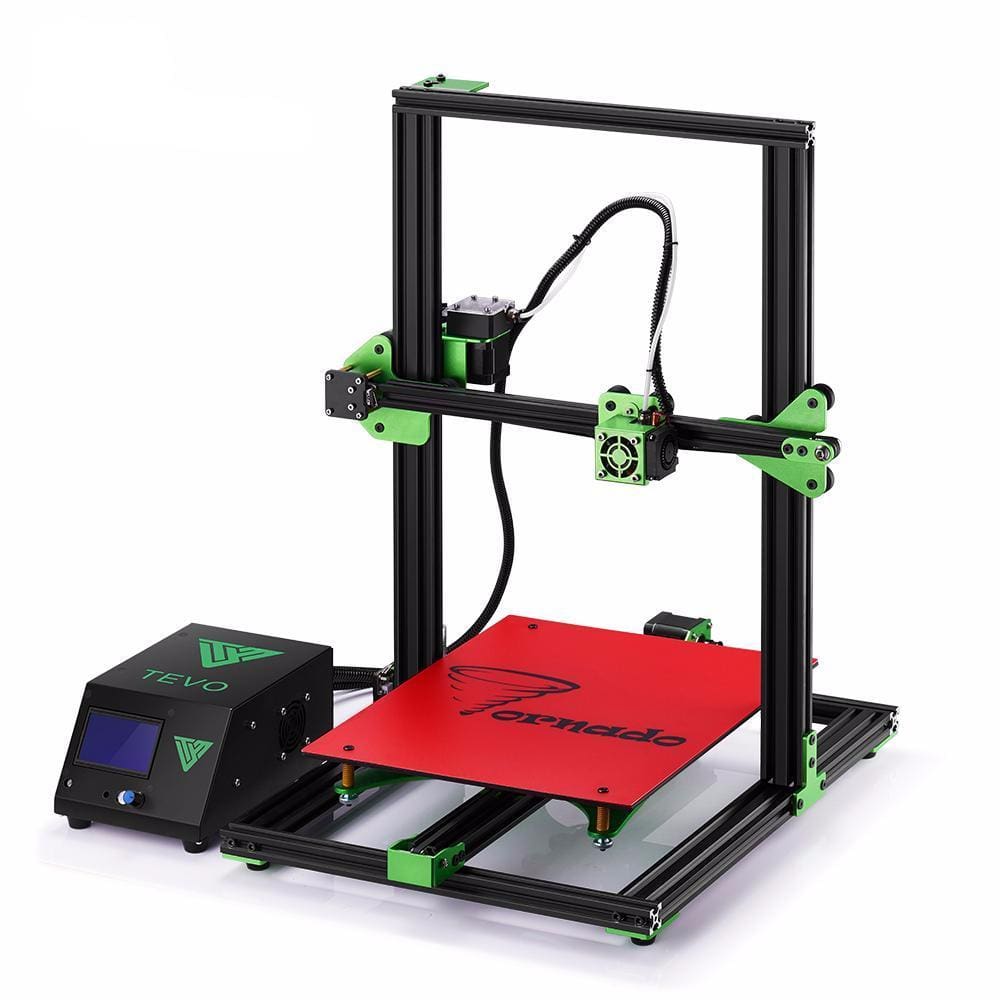
Shocking revelations aside, the TEVO Tornado prominently features that most useful of machinery building blocks — aluminum extrusions. The frame style borrows from that popularized by the Creality CR-10, throwing in its own splash of vibrant color (as TEVO so often does — look at the Black Widow’s sultry reds and Little Monster’s blue and neon green accents).
We’ve likened it to a watermelon in the past, with the vibrant red print bed sticker (a spare included in the box) contrasting to the punkish green frame elements. It’s certainly distinctive and makes for a striking looking 3D printer.

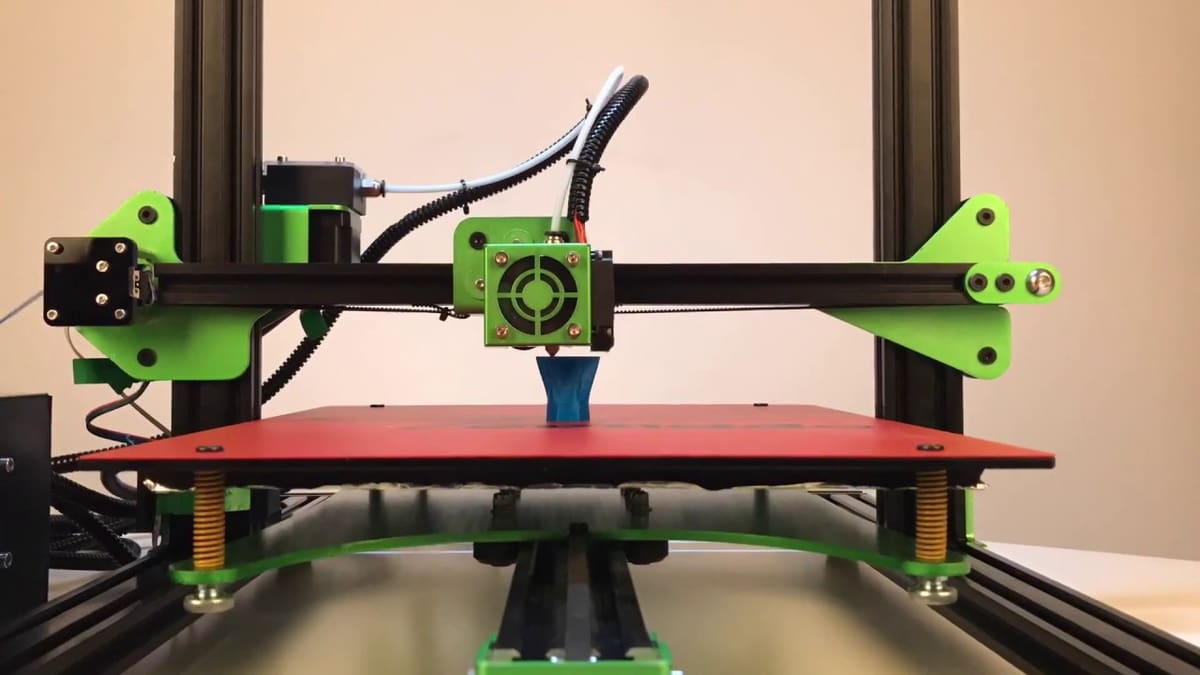
Filament is pushed around on the TEVO Tornado by TEVO’s own Titan extruder — a remake of E3D’s popular open-source design — which is mounted to the left of X-axis rail as you look at it head on. In a Bowen style system, it pushes filament through a PTFE tube into the hot end, an E3D V6 according the TEVO’s description of the printer on BangGood, though like the extruder it’s more a TEVO made piece following E3D’s design.
The print area for the TEVO Tornado reads at 300 x 300 x 400mm, but the bed itself is actually slightly larger, cutting a portrait aspect ratio with extra room in the Y-axis.
That’s not to say this is printable space — this overflow area accommodates the exposed bed fastening screws, which sit protruding on top of the print surface. Were the printable area to extend beyond 300mm in the Y-axis, some modification would be required to avoid the nozzle crashing into these screws.
In our experience using the Tornado, the provided print bed stickers will begin to bubble after a modest amount of use, so plan ahead to replace these with your own print bed solution.
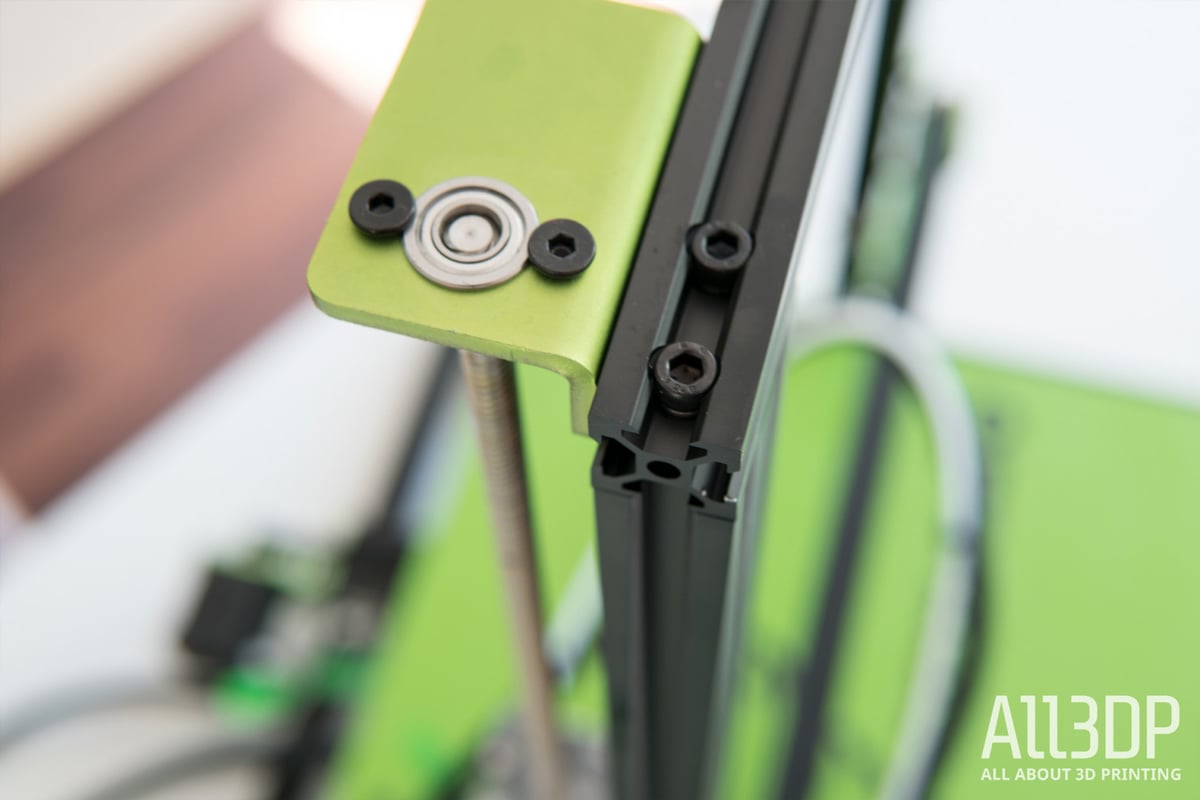
Looking to what we like about the design — first up, the lead screw is fixed at both ends, which is a nice stability assurance, especially going into prints that take up that tall 400mm reach in the Z-axis.
Similarly good to have is an easily adjustable X- and Y-axis belts — a simple case of loosening some nuts and pulling it taut before tightening again. Though it could be better with inbuilt adjustment knobs.
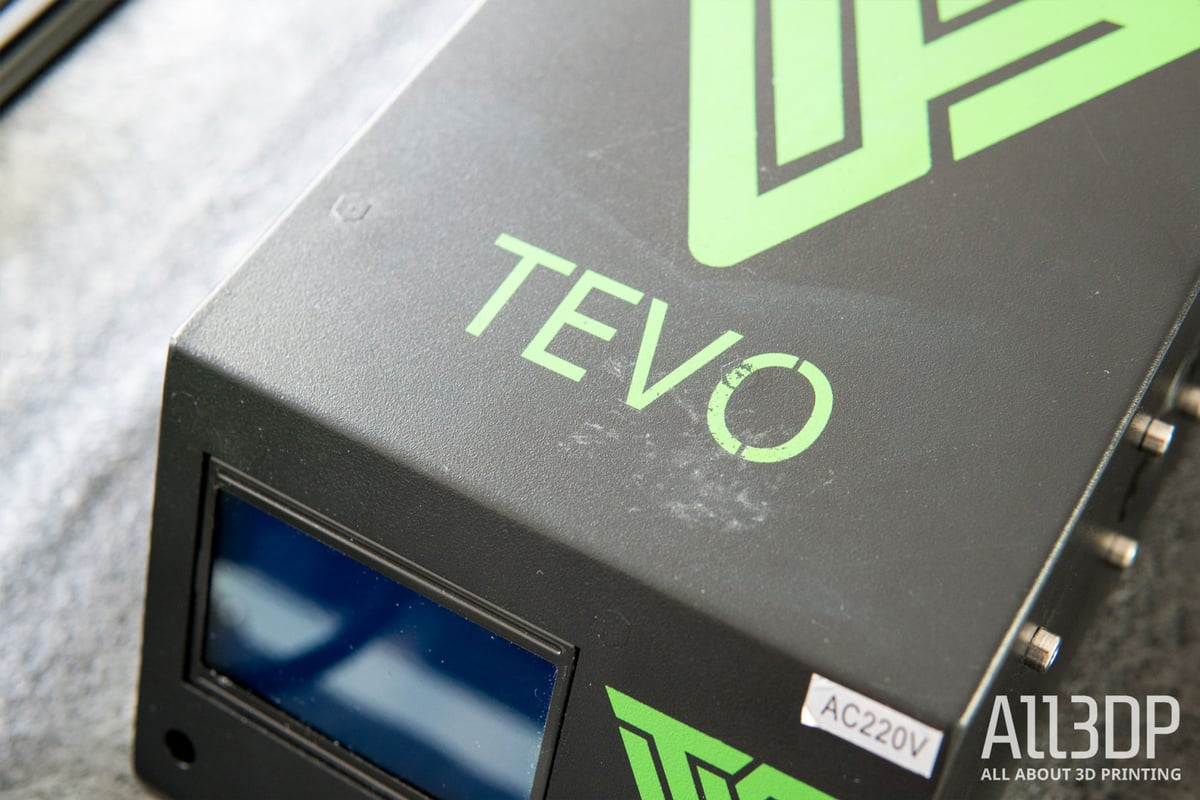
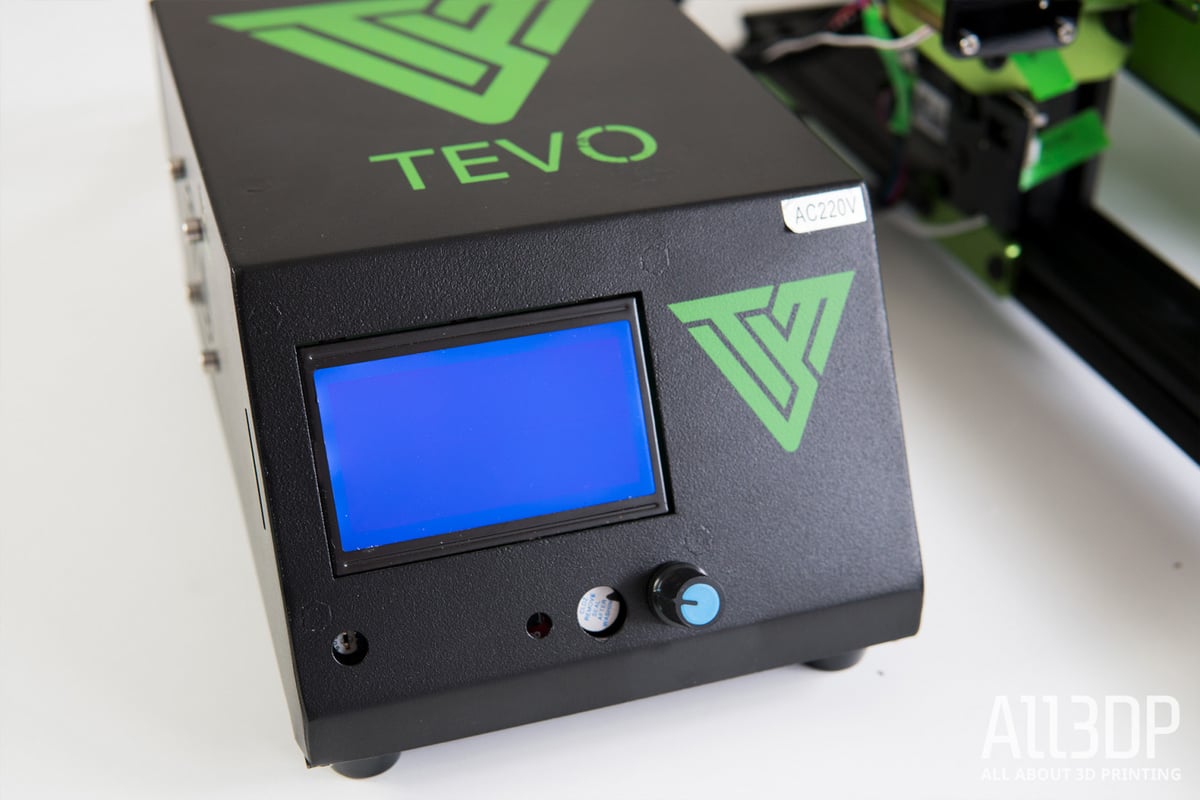
In honesty, the control box is something we think needs to go away. Having a block of metal umbilically attached to the printer increasing the overall footprint and allowing for a mess of cabling (potentially catching on the bed as it moves about during a print) is completely unnecessary. Especially so when the entirety of the TEVO Tornado’s frame is open for you to affix extras wherever you want.
Software
The TEVO Tornado does not come bundled with any specific print preparation software, opting instead to point users to the plethora of free and paid programs out there. The printer’s instructions give some detail on setting up Repetier-Host.
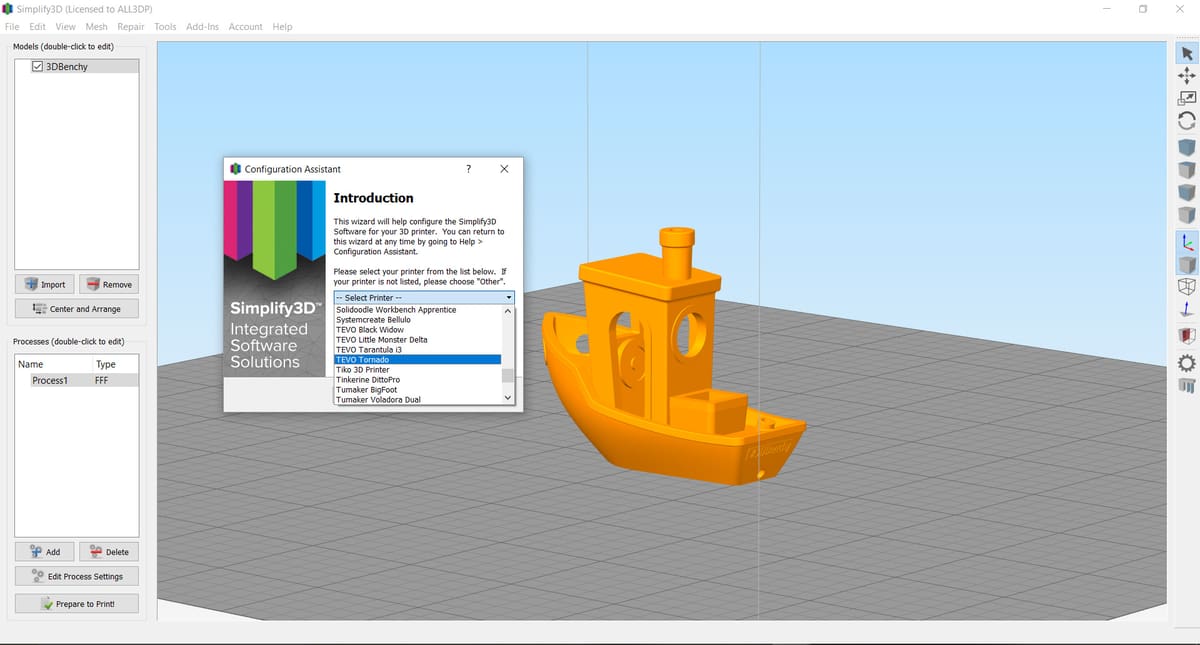
For the purposes of our review we’ll stick with two popular options from both sides of the paywall — Ultimaker’s free slicer Cura, and the premium Simplify3D.
You’ll find a settings profile for the TEVO Tornado built in to Simplify3D. A profile for using the Tornado in Cura can be found on this Youtube vid by SAN TUBE (we’ve skipped to the relevant part).
First Prints
With the TEVO Tornado all set up, all that was left to do is fire it up, level the bed and set it printing. The machine booted up successfully, allowing us to level the bed per the standard manual routine: home all axes, preheat for PLA, disable stepper motors and then manually position the print head at various points on the bed, including corners, lowering or raising the bed via it’s thumbscrews to get the distance between bed and nozzle the depth of a sheet of paper.
All without a hitch. We powered the TEVO Tornado down for a quick break before continuing to print. Upon return, flipping the power switch resulted in the LCD display lighting, but displaying nothing. Lights were on, but no one home, so to speak.
Turns out, there is a bug with the particular firmware loaded onto this TEVO Tornado. There is a workaround, in that connecting the printer to your PC via USB cable will bring the printer to life (you don’t need to keep it tethered — the act alone is enough to have the printer operate as expected).
And we’re not alone with this particular issue — other users of the printer have reported the issue clears after some time.
Uncooperative firmware aside, with the Tornado booted up on PC life-support we set about printing.
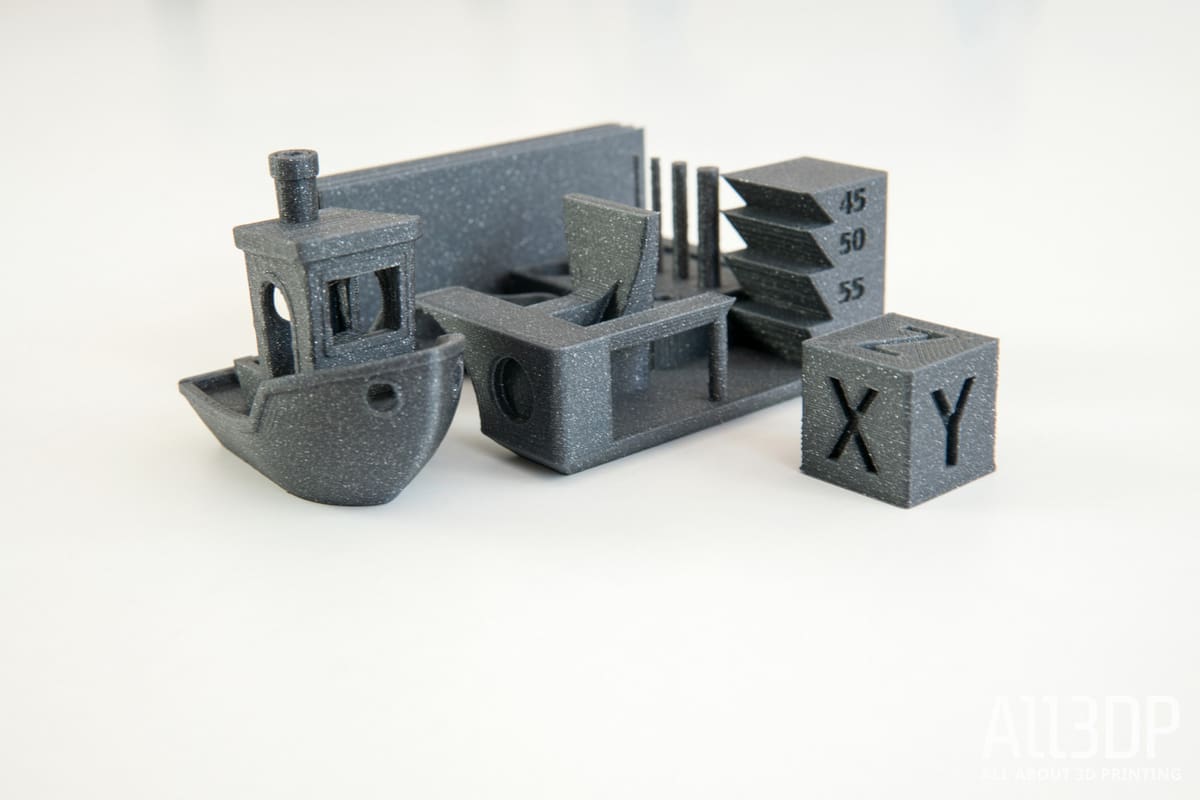
Using Simplify3D’s inbuilt profile for the TEVO Tornado and a roll of Filamentum’s Vertigo Grey PLA in hand, we inserted the TEVO-provided SD card loaded with BrickWizard’s 3D printer torture test into the control box.
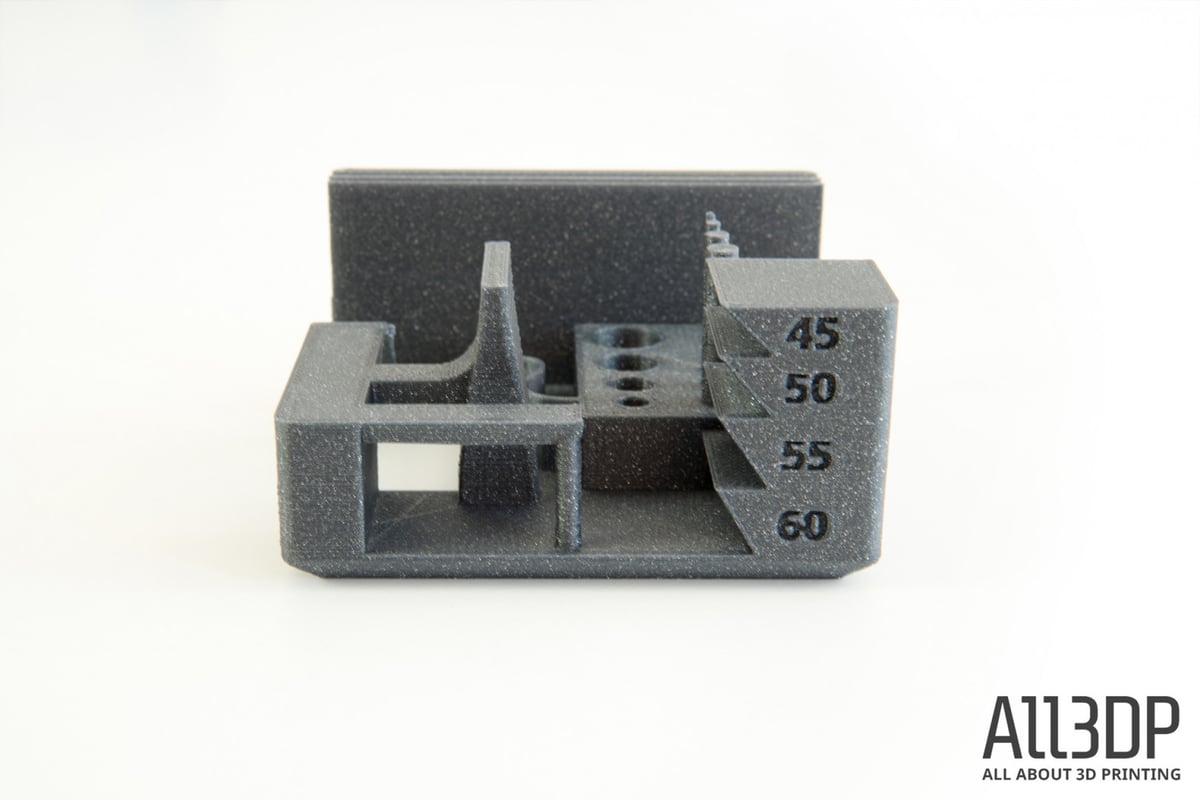
Three hours later, and the initial impression is pretty positive. With no alterations or tweaks to the printer, the resulting print for the most part ticks the boxes. The bridging sections suffer from a couple of loose strands, but nothing that couldn’t be tidied up with clippers, and there’s slight separation between the infill and shell. Also easily fixable with some tweaks the print preparation settings.
We followed this up with a quick calibration cube test to dial in the steps, but encountered an inexplicable issue in the print stopping mid-way through. No error messaging, no mechanical failure of any kind. It just stops.
Running the print again replicated the issue so it was clear something was amiss, rather than a one-off hiccup. Our initial thought ran to the possibility of loose connections inside the sealed control box, so after cracking that open and giving everything the once over, we moved on to other possible culprits.
Our next stop was to check how the machine reads over USB. Using Simplify3D we can see error reports and run G-code commands to probe various aspects of the machine — but before we got to that, tried piping the same print to the TEVO Tornado via USB. And whaddaya know — all print, no problems.
It turns out that the provided SD card was the culprit. Switching it out for a well known branded card cleared up these errant prints. So there’s a troubleshooting tip for free.
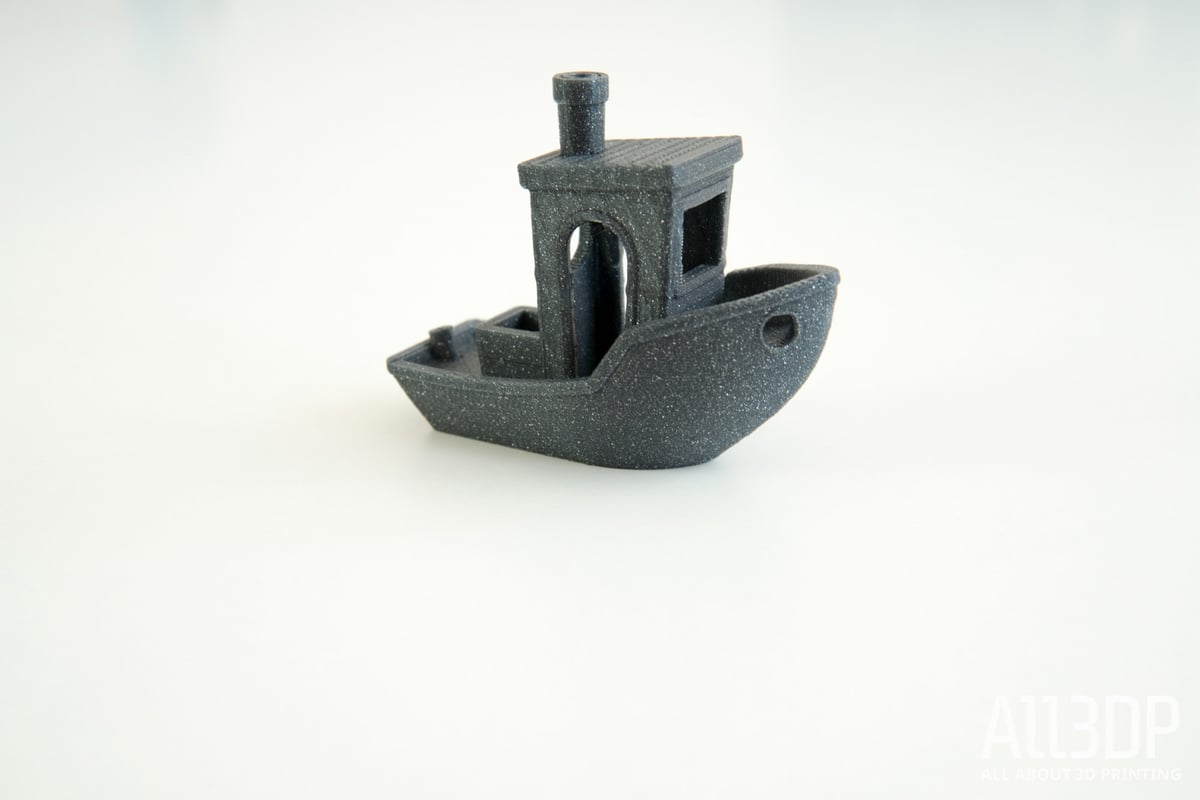
Next up, the obligatory 3DBenchy. Again, standard print settings, nothing altered or modified on the stock machine, and the result is promising. On first glance it seems an acceptable print, but looking closely there are telltale signs of things in need of a tweak or investigation.
There’s an odd bulging effect happening part way up the cabin, almost like gradual over extrusion over a dozen or so layers before correcting itself.
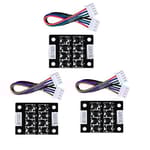
Likewise, we also see the telltale signs of the TEVO Tornado’s notorious “salmon skin” issue — a print artifact caused by the stepper motors handling the print head moves. There is a simple fix, but one that means you’ll need to either purchase new drivers to replace the ones shipped with the TEVO Tornado, or add smoothers between the board and stepper motors.
With this so visible on a small Benchy already, expect to see this effect more pronounced on larger prints.
At this point in time would we say the TEVO Tornado is as good as the much lauded CR-10? Sort of. In some areas it improves upon Creality’s machine. We like the fixed lead screw, and the styling is certainly eye-catching. The print quality out of the box is okay, with easy room for improvement on known issues that plague the machine. Similarly the safety aspect is a big mark against it.
More Prints
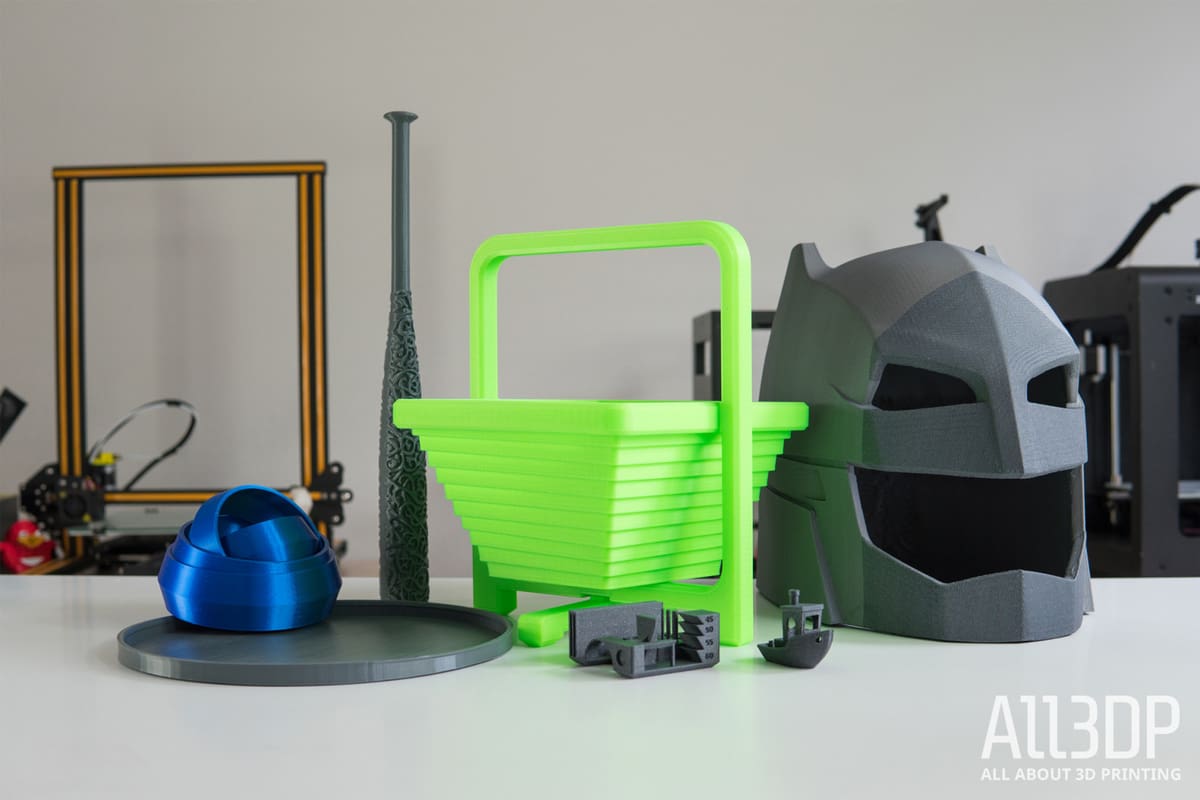
To continue testing the TEVO Tornado, we decided to focus on a couple of aspects of the machine that would potentially draw someone to it: the large print volume and the Titan extruder.
First up, printing big.
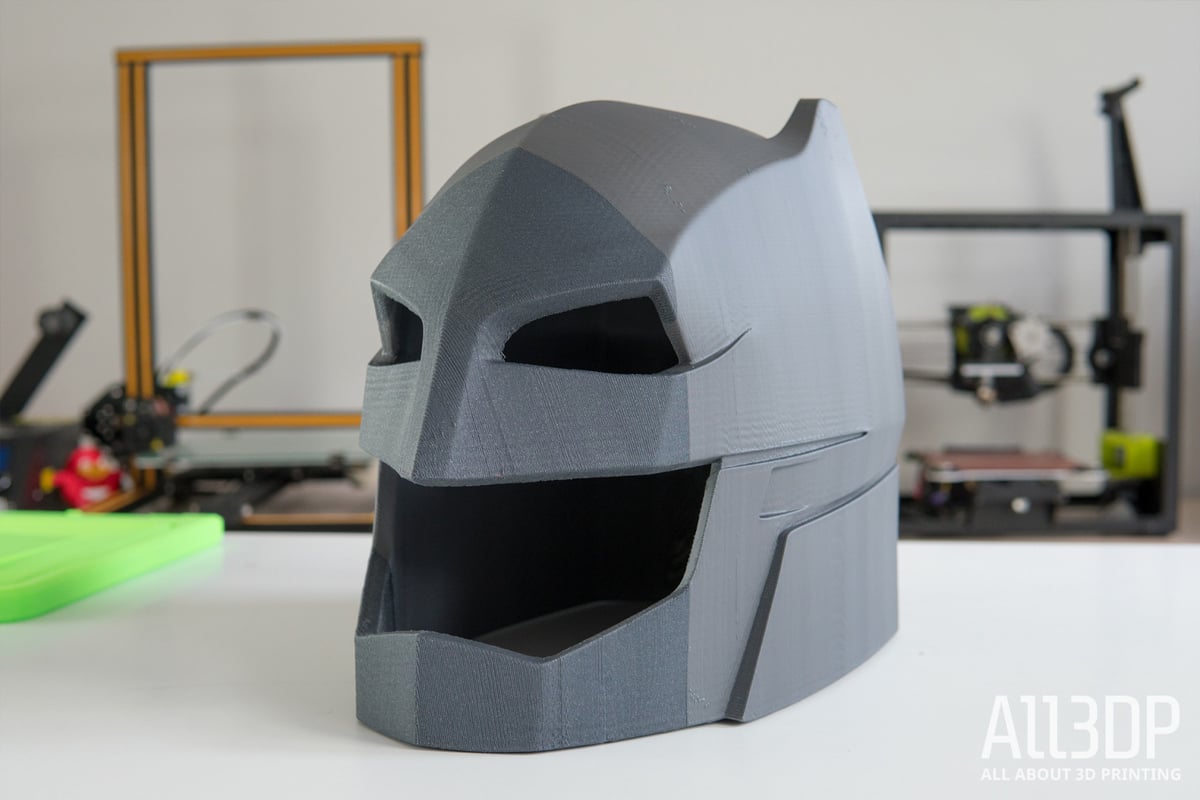
In one of our more ambitious prints to leave running for some days, we printed out this larger-than-life sized Batman cowl armor (Davidd26, via Thingiverse). Besides printing with perhaps one shell too few and enacting a hasty filament change after realizing we loaded a 750g spool instead of 1kg, the resulting print is impressive on first glance. Look closely though and the “salmon skin” effect is evident.
Presumably a print like this would be post-processed so the effect is less of an issue, but for “display” parts printed in expensive filament chosen for the finish, this would be somewhat disappointing.

Next, we took to printing a large, single print collapsible basket (an awesome design you should check out on Thingiverse – kudos, 3DPRINTINGWORLD). Printed in lurid neon green PLA, this weekend-long print fared considerably better than the Batman cowl. With the best surface finish and consistency across the whole print, it’s a great indication of how great the TEVO Tornado can be.
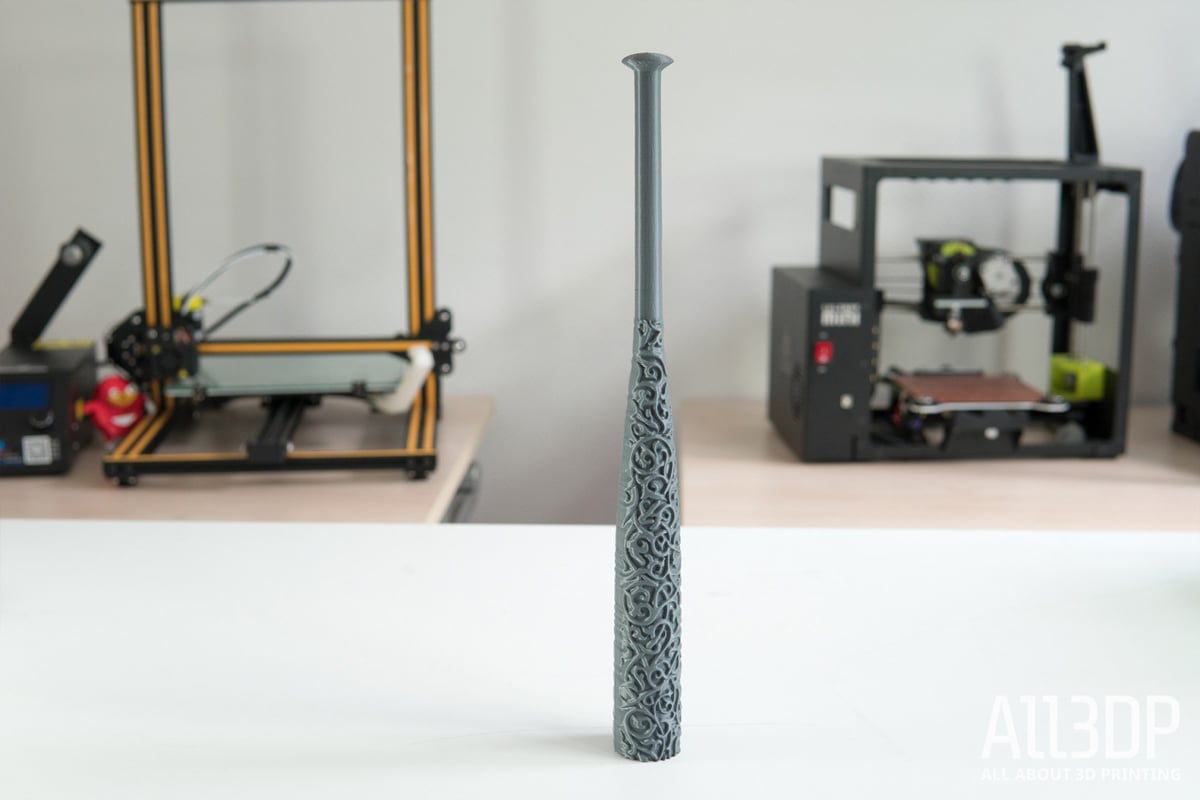
Subsequent prints took a turn for the flexible, with colorFabb nGEN-flex loaded in and a decorative baseball bat (find it here on Thingiverse) printed successfully, albeit with some over extrusion issues at various layers across the height. Such artifacts do not show up on our other prints with the TEVO Tornado, which leads us to believe this is down to the flexible nature of the nGEN-flex and the TEVO Titan’s extruding of it. Your mileage may vary.

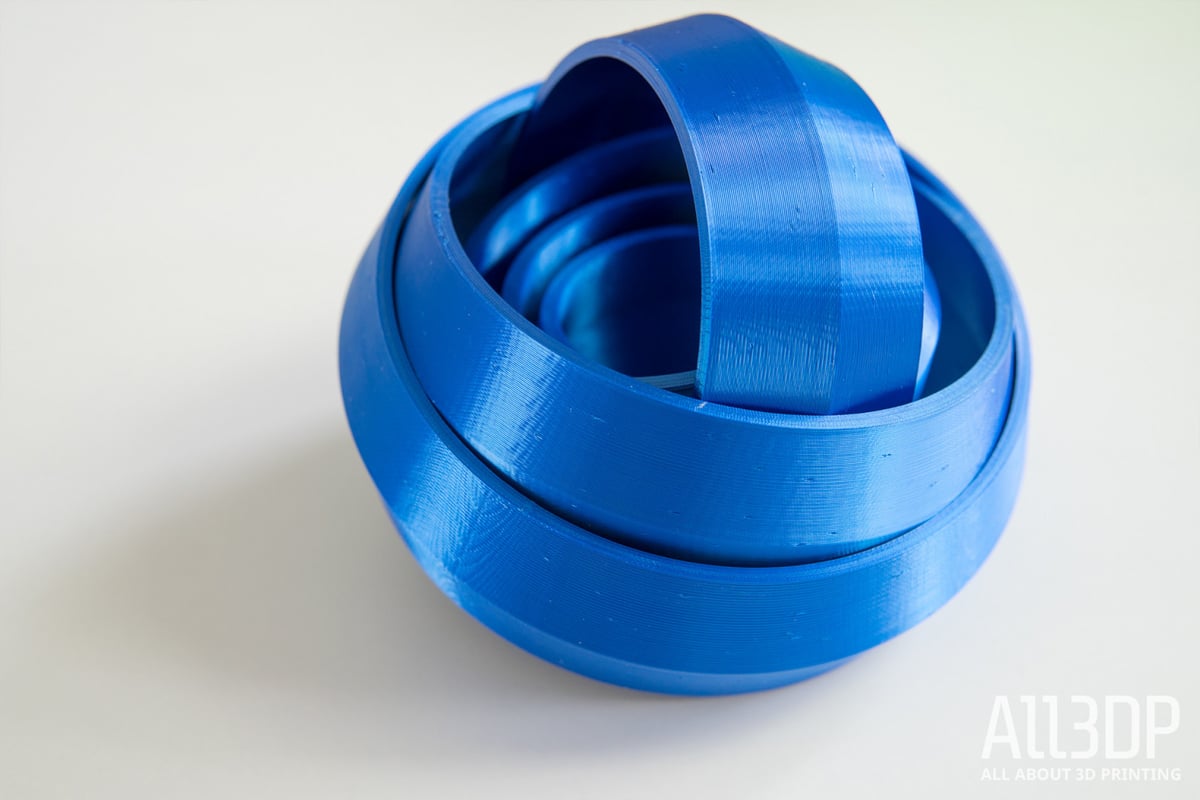
Further printing, using Amolen’s fabulous silk-like PLA in a shiny blue color is this concentric ring fidget…thing (you can find the file on Thingiverse here). Second only the to the green basket for off-the-print-plate finish, this turned out very well.
Overall, the feeling is that the TEVO Tornado gives mixed results. If you plan to chop and change materials and models with frequency, do not expect excellent results every time.
Specifications
Here’s a brief overview of TEVO’s specifications for the Tornado 3D printer.
- Min. Layer resolution: 50 microns
- Max. Printing Speed: 150 mm/s
- Build size: 300 X 300 X 400 mm
- Extruder: Full Metal E3D Titan (Bowden)
- Material type: PLA, ABS, PETG, Wood, PVA and Flexible Filaments
- Nozzle size: 1.75mm
- Positioning accuracy: Z 0.004mm, XY 0.012mm
- Printing Color: Single color
- Nozzle diameter: 0.4mm (customized 0.3mm/0.2mm)
- Max. extruder temperature: 260°C
- Heating plate temperature: 60-110°C
- Best ambient temperature: ≥25°C
- Power requirements: 220V, 250W, 50Hz, 0.89A
- Connection: TF card or USB
- File print format: STL, G-Code
- Compatibility: Windows, Linux, Mac
- CE, FCC specifications: CE, FC, ROHS
- Device weight: 14kg
- Equipment size: 560X 600X620mm
- Package size: 660X 560X 310mm
Where to Buy?
You can purchase the TEVO Tornado 3D printer from a number of online retailers, including Banggood, GearBest, and Amazon.
License: The text of "TEVO Tornado Review – A Worthy CR-10 Challenger?" by All3DP is licensed under a Creative Commons Attribution 4.0 International License.
CERTAIN CONTENT THAT APPEARS ON THIS SITE COMES FROM AMAZON. THIS CONTENT IS PROVIDED ‘AS IS’ AND IS SUBJECT TO CHANGE OR REMOVAL AT ANY TIME.