
20 Must-Have Tronxy X5S Upgrades and Mods

Want to improve your Tronxy X5S? Thanks to the growing Tronxy X5S 3D printing community, here are the 20 best Tronxy X5S upgrades and mods to improve your 3D printing experience.
With a sturdy aluminum frame and a big build volume for around $300, the Tronxy X5S is a 3D printer with all the makings of a bestseller. But despite slowly overtaking its bigger brother, the Tronxy X3S, in popularity, it also has a few flaws.
But no need to fear. There’s a good reason why many users consider this DIY 3D printer to be an adequate project 3D printer. There are a number of Tronxy X5S upgrades and mods that will slowly transform your budget DIY 3D printer into an impressive machine. Some of theTronxy X5S upgrades and mods can be 3D printed right on the spot. Others can be purchased and mounted onto the 3D printer to improve certain aspects of the 3D printing experience.
In the following list, we’ve got the ultimate collection of Tronxy X5S upgrades and mods on both sides of the spectrum. From an entirely new metal frame to a simple 3D printable extruder button, your 3D printer will look like an entirely new machine by the time you’re through.
There the first section is about the best Tronxy X5S upgrades can buy, the second section is about the upgrades you can 3D print or do yourself.
Read the Review: Tronxy X5S: Review the Specs
Tronxy X5S Upgrades and Mods to Buy
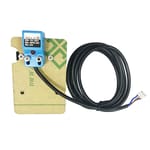
Auto-Level Sensor

What is this Tronxy X5S Upgrade? Any 3D printer user that has had to manually calibrate their machine knows how convenient an auto-level sensor is. Manual calibration can take a long time, and even after you’re finished, the slightest imbalance can cause immense frustration among other assorted 3D printing issues.
So why not make life easier with an auto-level sensor for your Tronxy X5S kit. You can find this Tronxy X5S upgrade for around or less than $10, and once installed, you’ll save enough time that makes the small investment undoubtedly worth it.
There are a few factors to consider when shopping for an auto-level sensor. Some, like the BL Touch, are more expensive than other options, but are superior to inductive sensors when utilizing a glass bed. If you still have the stock Tronxy X5S print bed, than a cheaper sensor might actually work better.
Needless to say, this is one of the Tronxy X5S upgrades that demands research and other considerations, such as your bed setup, your budget, and your experience with modifying 3D printers.
Where can I buy this Tronxy X5S upgrade?
Auto-leveling sensor that is compatible with a range of 3D printers, including the Anet A8, Prusa i3, and others.
Power Supply Unit
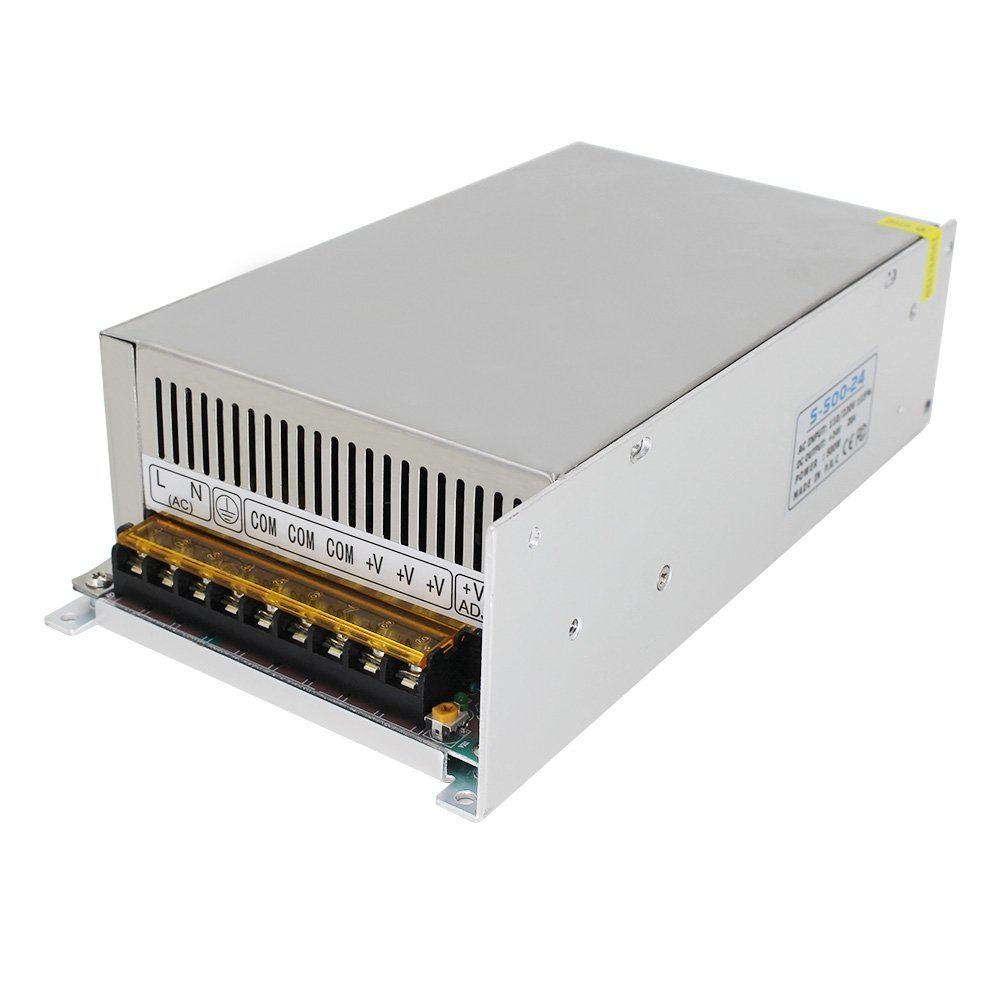
What is this Tronxy X5S Upgrade? The biggest flaw reviewers have complained about is that the Tronxy X5S is shipped with an insufficient power supply unit (PSU). Since the supplied 12V power supply unit won’t allow your print bed hotter than 60°C-70°C, you cannot print more demanding filaments like ABS. An easy fix that has been suggested is to insulate the heated bed on the bottom side. But even with this simple Tronxy X5S upgrade, you won’t get more than 80°C out of this heated bed – and only with tremendous patience!
If you want to print materials like ABS, the smartest Tronxy X5S upgrade is to replace the original power supply unit with a 24V power supply unit. This takes a lot of weight of your shoulders, since you don’t need to mess with glueing insulation to your heated bed. Using a 24V power supply unit, you can heat your print bed to a toasty 90°C in 7 to 10 minutes. What is more, by using this Tronxy X5S upgrade, 100°C are now within reach.
Please note, that you should buy a power supply unit with a current rating of at least 20A / 480W, or even better 25A / 600W. Some configurations like 24V / 15A may get fried, because the heated bed alone pulls a whopping 12A. The power supply unit selected below is a carefree choice that requires no complicated tinkering and will get you printing in no time.
Where can I buy this Tronxy X5S upgrade?
A great power transformer for 3D printers, electronic equipment, home appliance, and more.

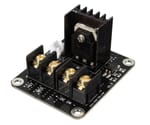
MOSFET

What is this Tronxy X5S upgrade? The addition of a MOSFET is one of the most important Tronxy X5S upgrades you can buy. The most common use of the MOSFET with the Tronxy X5S 3D printer is to regulate the high workload that the heated bed places upon the mainboard. The high current of the hot bed can lead to stress for the mainboard connectors, and increases the possibility of a fire hazard or hardware malfunction.
Adding a MOSFET is especially important if you 3D print with ABS, as this filament generally requires high bed and extrusion temperatures. But even if you’re sticking to low-temperature 3D printing materials like PLA, it’s wise to ensure that your heated bed isn’t overpowering your motherboard. Aside from the safety benefits, the MOSFET also allows users to apply a second power supply unit (PSU), which will drastically reduce the time it takes your heated bed to reach its set temperature.
Where can I buy this Tronxy X5S upgrade?
The MOSFET will will help prevent the motherboard from potentially overheating and taking on too much pressure. This component reduces potential fire risks with your 3D printer, and also provide better voltage to the motors.
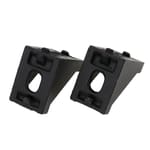
Aluminum Corner Brackets
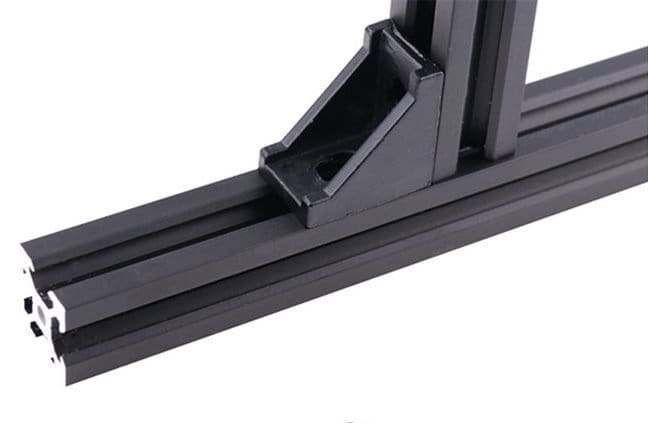
What is this Tronxy X5S Upgrade? Although the CoreXY frame design used in the Tronxy X5S is famously firm and sturdy, some users have complained that they experienced ringing and ghosting artifacts in their prints. It is an easy and cheap fix to increase the stability of the Tronxy X5S with brackets are fastened in the corners the left and right side. Adding this simple Tronxy X5S upgrade will prevent the frame from flexing and increase the quality of your prints.
When you go shopping for brackets, keep in mind that the beam extrusions are 20 mm wide. We have found these brackets that will be a perfect fit for your 3D printer. To complete this essential Tronxy X5S upgrade you will also need to M5 screws and M5 nuts.
Alternatively, you can print brackets yourself to upgrade your Tronxy X5S.
Where can I buy this Tronxy X5S upgrade?
Suitable for most 2020 Beam Extrusions.
XY-Gantry Belts
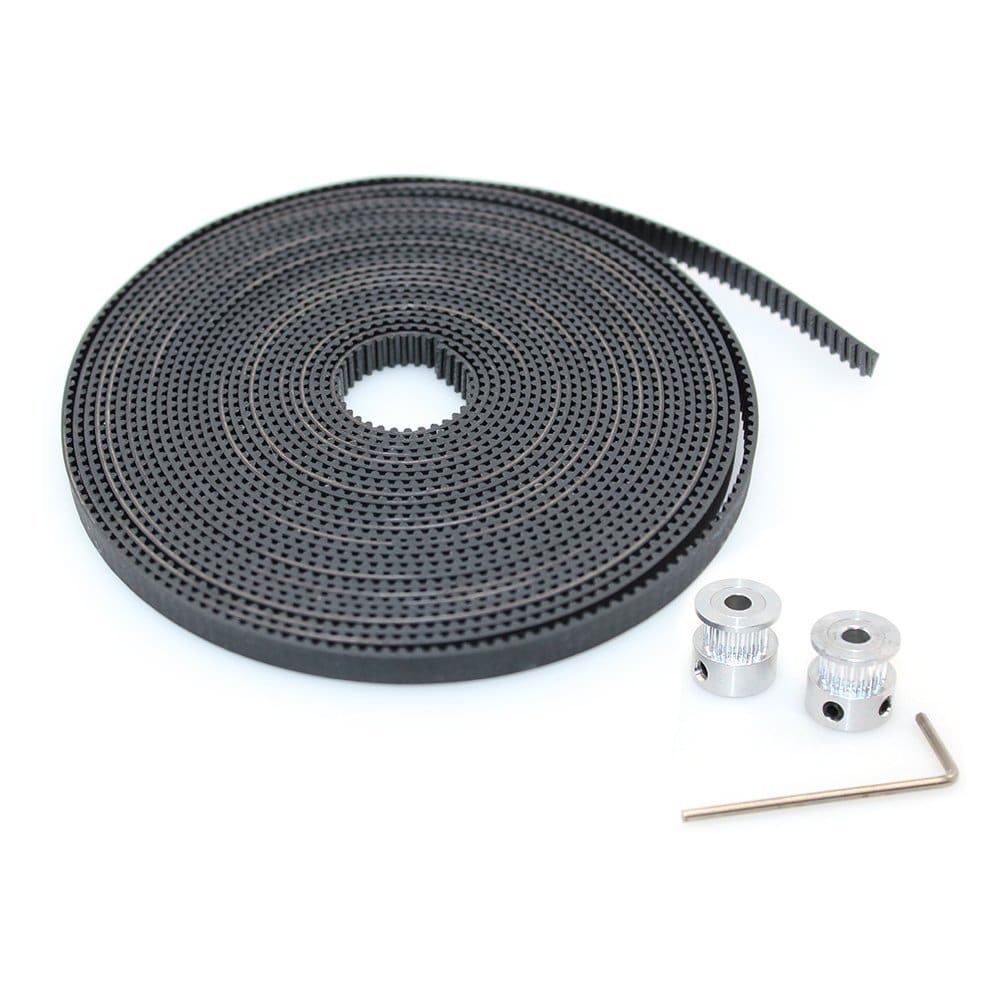
What is this Tronxy X5S Upgrade? Another Tronxy X5S upgrade that is highly regarded by the 3D printing community is higher-performance belts, particularly the fiber-glass reinforced belts. Many Tronxy X5S users feel that the stock belts are cheap and easily stretchable, which of course has a direct impact on your 3D print quality. For this reason, many of them feel that replacing the original is almost a mandatory upgrade. We say that the relatively cheap price of about $10, this is not the place to be stingy.
There are a couple of reasons why fiber-glass reinforced belts are a good alternative. First and foremost, when the gantry runs back and forth along the X and Y axis the tensions in the belts have to stay at a steady level to ensure that the belts run parallel. Otherwise, the standard belts may not be sufficient for high-quality prints and you may end up with deformed parts, askew walls.
In addition, these enhanced belts are quieter and easier on your 3D printer motors. This Tronxy X5S upgrade will also provide better smoothness and accuracy of positioning.
Another factor is that, once you cut the stock belts to install on the X-axis and Y-axis, they are usually too short to use with a tensioner. As you’ll find further down our list of Tronxy X5S upgrades and mods, 3D printable X and Y-axis tensioners will improve the state of your 3D printer. But to really optimize the way your Tronxy X5S operates, fiber-glass reinforced belts are a must-have upgrade.
Where can I buy this Tronxy X5S upgrade?
Fiber-glass reinforced belts are quieter and easier on your 3D printer motors than cheaper stock belts. They will also provide better smoothness and accuracy of positioning.
E3D Volcano Hotend
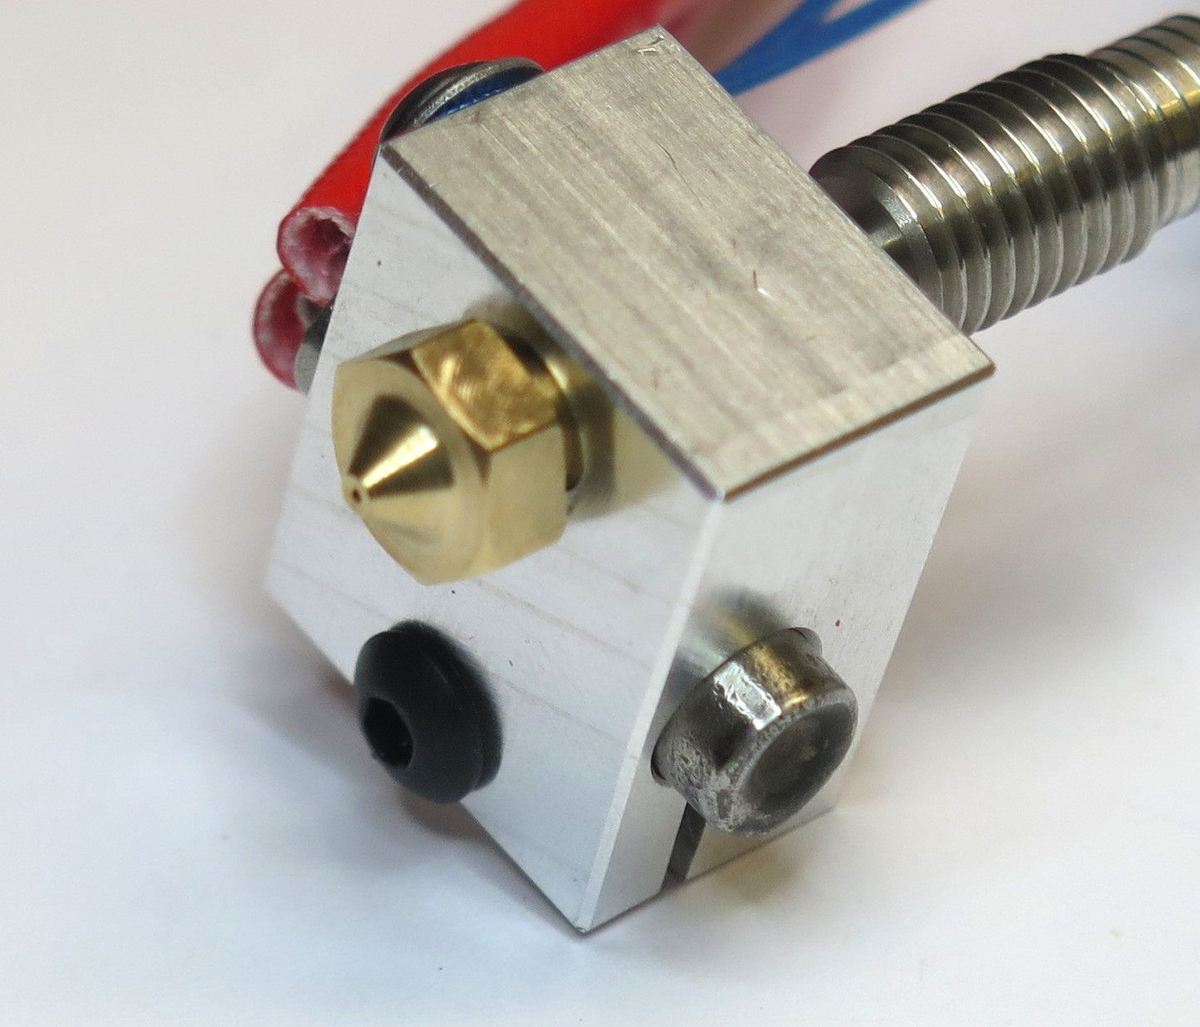
What is this Tronxy X5S Upgrade? In addition to upgrading your Tronxy X5S with the Titan Extruder, the E3D Volcano hotend is another worthwhile way to improve this DIY kit. An update to the popular V6, this all-metal hotend will grant more reliable high-temperature 3D printing, and will also reduce stringiness and clogging.
Another great thing about the Volcano is that it’s plus-sized nozzle is a great fit for plus-sized 3D printers. Because it reduces the time needed for printing. This Tronxy X5S upgrade also makes a perfect pair with the Titan Extruder.
Those Tronxy who have added this hotend to their setup praise the more consistent prints and applaud the fact that now they have to deal with less jams. Hence, the Volcano hotend is a must-have Tronxy X5S upgrade that will take your 3D printer kit to the next level.
Where can I buy this Tronxy X5S upgrade?
Achieve larger prints in only half the time with the E3D Volcano hot end.
E3D Extruder
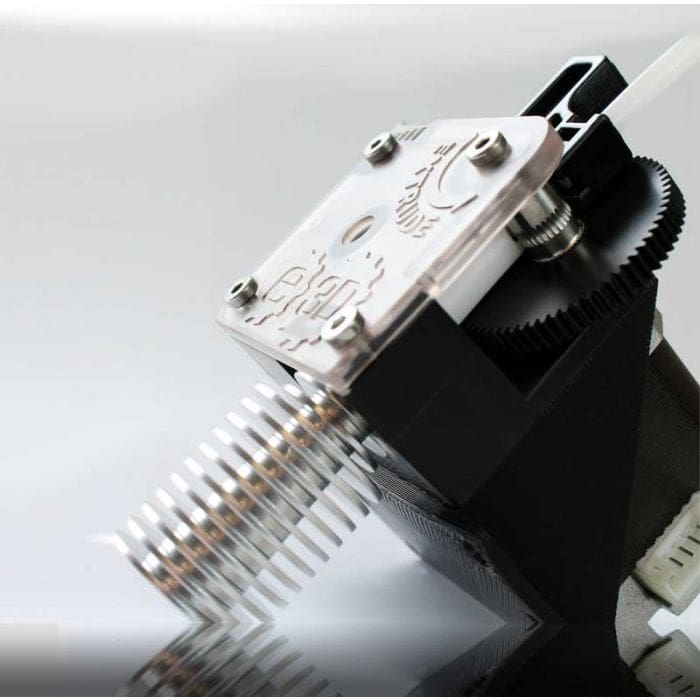
What is this Tronxy X5S upgrade? If you’re willing to invest some extra money into making your Tronxy X5S 3D printer is good as possible, one of the first Tronxy X5S upgrades you should look into is the Titan extruder. Originally made by the UK 3D printing accessories producer E3D, this popular extruder setup is perfect for those who want to go beyond 3D printing with basic materials like PLA.
The E3D Titan extruder reduces the risk of material clogging, but that’s not all that this lightweight setup can offer. According to E3D, the Titan extruder includes custom machined teeth on the hobbed gearing, which improves filament group. The lightweight nature of this kit also provides more torque and higher resolution to the print quality.
Many users report that this Tronxy upgrade affords higher printing speeds and a higher degree of consistency in their parts. So, this extruder is worth every cent!
All in all, Tronxy X5S users who wish to print with materials that require high-temperatures will have to tinker a bit. But the Titan extruder is the perfect place to start. If you’re on a budget, you can even opt for a clone extruder rather than E3D’s original.
Where can I buy this Tronxy X5S upgrade?
The E3D Titan is an amazing lightweight extruder made with injection molded parts for maximum performance. Best of all, it's universal! The Titan is compatible with both 1.75mm and 3.00mm filament, and easily swaps between the two if needed.

Webcam

What is this Tronxy X5S Upgrade? Keep an eye on your 3D printer with a webcam while you are away from home – or create stunning time-lapse videos of your printings. Adding a webcam like the Logitech C270 to your Tronxy X5S could even be the first step of integrating it into a remote control interface like OctoPrint.
The best thing about the Logitech C270 is that you can mount it onto the frame of your printer with a 3D printable design available on Thingiverse. So, you get two Tronxy X5S upgrades for the price of one.
Where can I buy this Tronxy X5S Upgrade?
The C270 Webcam boasts high-quality recording and is perfect for documenting your 3D printing successes.

Encasing
What is this Tronxy X5S Upgrade? Since the 3D printer lacks any sort of encasing, the 3D prints are susceptible to breezes of wind that can impair their overall quality. The beam extrusions of this 3D printer do not only lend it highly advantageous stability. But they also open up the possibility of custom Tronxy X5S upgrades. It is an easy feat to take advantage of the beam extrusions and set plexiglas sheets into the groove in the middle. With this simple Tronxy X5S upgrade you can block air currents and increase your print quality.
As always, there is a trade-off. The downside is that you become limited in your possibilities to intervene in the printer. in case you need to replace parts, you can only put your hands through the sides that are not closed off. Our suggestion is that you implement this Tronxy X5S upgrade only once all other changes function smoothly to save you from arduous re-assemblies. The second disadvantage is that the glasses will not be perfectly fixed in the beam extrusions. That means when you print, they may start vibrating and generate some noise.
There is a way to prevent the noise. Use something with more mass than plexiglas. This way you cannot look into the printer, but you improve your print quality without increasing the the overall noise of your 3D printer.
Where can I buy this Tronxy X5S upgrade?
These plexiglas sheets are ideal for cutting, drilling, engraving, printing, and many other DIY projects!

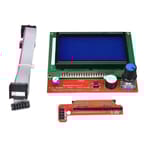
Smart Display
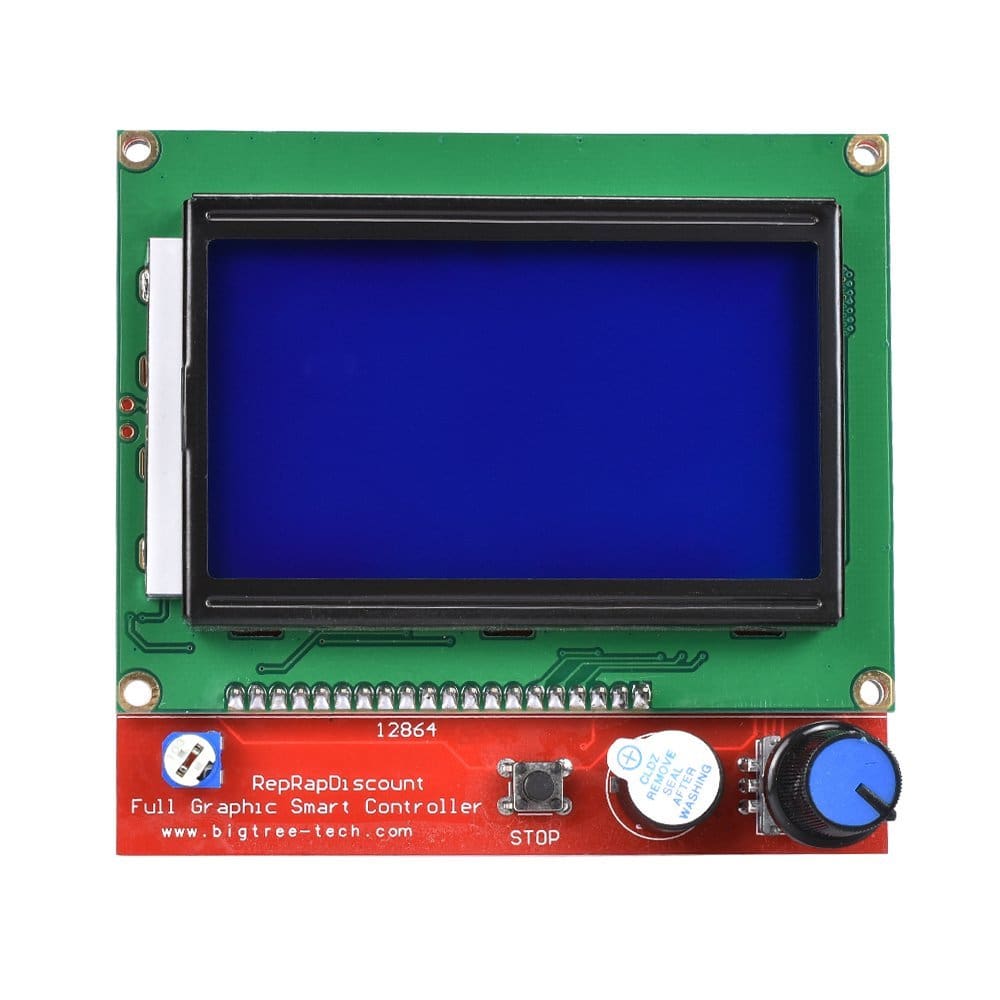
What is this Tronxy X5S Upgrade? One of the weakness that is even apparent to users with no technical background is the low-quality stock display of the Tronxy X5S. The stock controller works fine, but nowadays 8bit graphics should be in a museum or in a retro game.
Truth be told, the display is not a necessary Tronxy X5S upgrade and not required. However, those who want to invest the extra money will not only enjoy the better graphics, but also the included SD reader. To protect the display and mount it on the 3D printer, 3D print a case for this controller. So, with this Tronxy X5S upgrade you get actually for the price of one – or something like that.
Where can I buy this Tronxy X5S upgrade?
This LCD display will greatly improve the usability of your 3D printer.
Tronxy X5S Upgrades and Mods to 3D Print or DIY
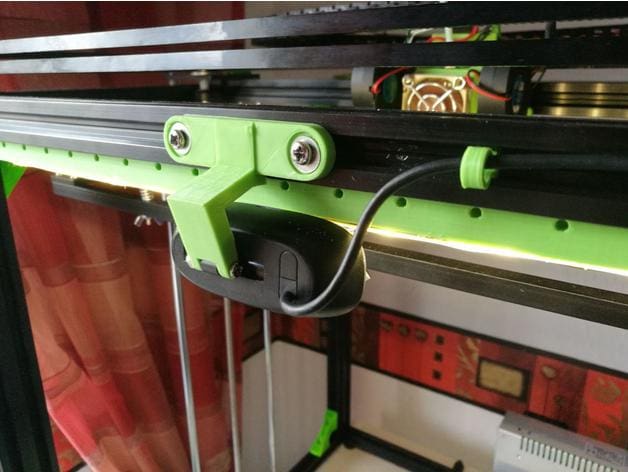
Power Switch Mount
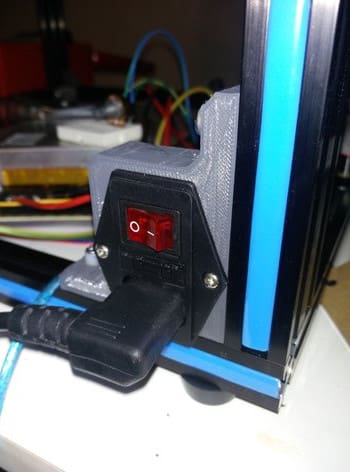
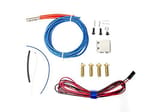
What is this Tronxy X5S Upgrade? This might seem like a simple addition to the Tronxy X5S, but a power switch should be welcomed by 3D printer users with open arms. Believe it or not, the stock Tronxy X5S kit doesn’t have an actual power switch. You have to plug and unplug the 3D printer to control the power, which is not only an annoyance but also slightly dangerous.
This Tronxy X5S upgrade might not affect the way your 3D printer works, but convenience and usability can go a long way for 3D printer users, especially those with cheap DIY kits.
Once you have purchased the switch, 3D print this bracket to mount it to one corner of your printer. You will also need two T-nuts and two M4x8 to complete this Tronxy X5S upgrade.
Who made this? XalbiX
Download the files: Thingiverse
Power Supply Cover
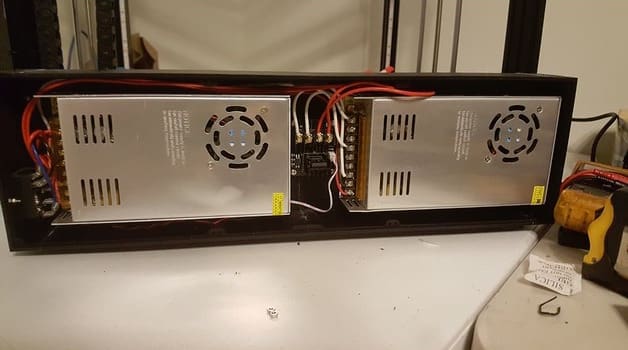
What is this Tronxy X5S Upgrade? Let’s face it: The default PSU setup on this DIY kit is not exactly known for its safety. If you want to be on the safe side, you can protect yourself and turn your 3D printer on and off with a power supply cover. This enclosure designed by lutinplunder can hold the stock 12V power supply the Gearbest MOSFETT, and a 24V power PSU.
Use six M4x8 with T-nuts to fasten the cover to the frame and twelve M3x10 for the grilles. The PSUs can be mounted with M4x12, and the MOSFETT with four M3x8.
Who made this? lutinplunder
Download the files: Thingiverse
Corner Brackets

What is this Tronxy X5S Upgrade? Although the CoreXY frame design used in the Tronxy X5S is famously firm and sturdy, some users have complained that they experienced ringing and ghosting artifacts in their prints. It is an easy and cheap fix to increase the stability of the Tronxy X5S with brackets are fastened in the corners the left and right side.
Adding this simple Tronxy X5S upgrade will prevent the frame from flexing and increase the quality of your prints. To complete this essential Tronxy X5S upgrade you will also need to M5 screws and M5 nuts.
Alternatively, if you prefer brackets made off metal, we have found some you can buy.
Who made this? mojode
Download the files: Thingiverse
Mega Gantry Plates
What is this Tronxy X5S Upgrade? Although the CoreXY frame design used in the Tronxy X5S is designed to be extra firm and sturdy, low-cost kits like this one often don’t live up to their full potential. An especially inventive Thingiverse user called graham01 noticed that a big chunk of X-rail was hidden away by the X-end stop.
That’s why he redesigned the X-endstop bracket to extend the wheel base by twice the original length (from 45mm to 90mm). As a result of the Tronxy X5S upgrade, the printer becomes extra rigid. For the most part, you can reuse the stock bolts. In addition you will need the following parts:
- 8: 5mm Washers
- 2: M5 x 50 Bolts
- 4: M3 x 30 Bolts
- 4: V-nuts
Who made this? graham01
Download the files: Thingiverse
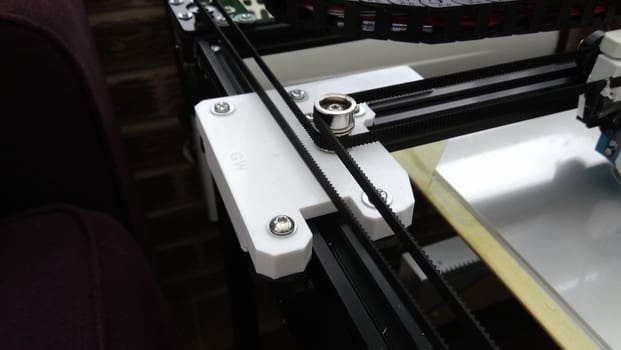
X-Axis Belt Straightener
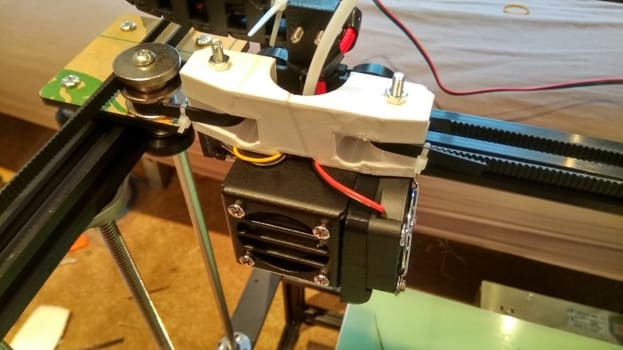
What is this Tronxy X5S Upgrade? Due to the CoreXY setup of the 3D printer, it is absolutely necessary that the belts connected to the extruder are aligned perpendicular to the direction of travel. Because this is not the case in the Tronxy X5S, the belts stretch over 3mm when moving from the center of the gantry to the edges. As a result too much strain is put on parts like pulleys and steppers. Over time this will lead to a quicker wear of these parts that will have to replaced.
graham01, the designer of this Tronxy X5S upgrade, has provided this x-axis belt straightener to repair this flaw. He recommends printing it in strong materials like PETG or ABS. In addition you will need: 2: M4x30 bolts and 2: M4 nuts.
Who made this? graham01
Download the files: Thingiverse
Z-Axis Modification
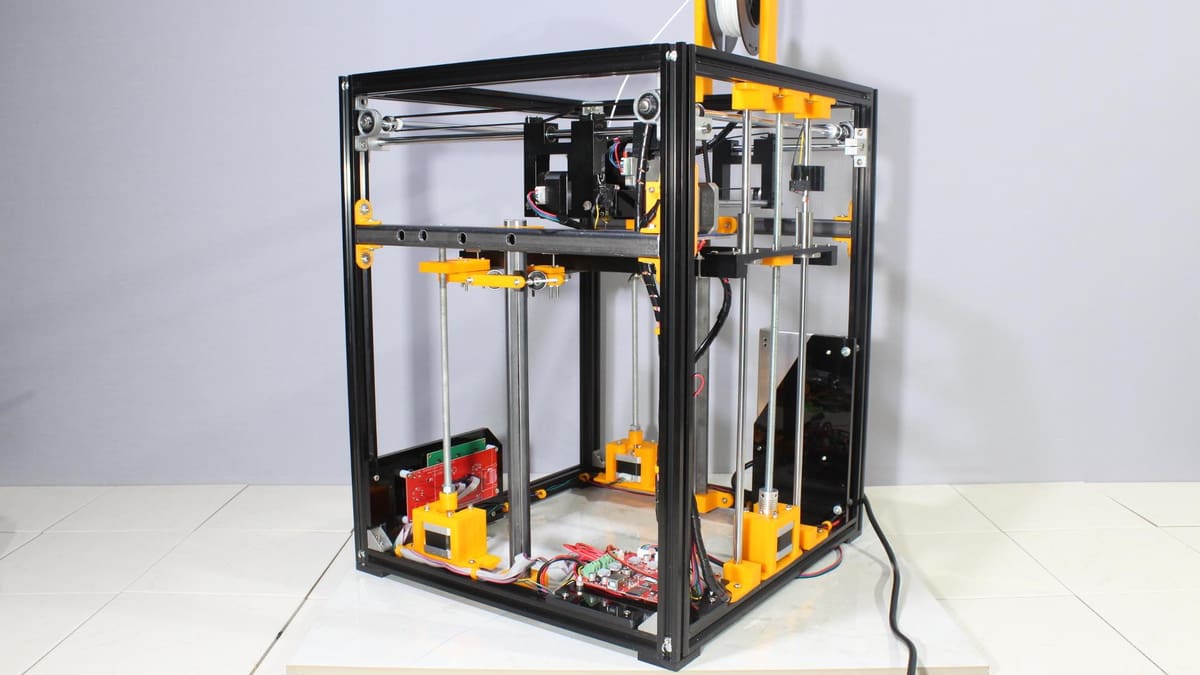
What is this Tronxy X5S Upgrade? One complaint that comes often up in discussions abot this 3D printer is its pronounced Z-wobble. The reason for this flaw that its print bed is mounted only at the rear end of the frame. Because the weight of the print bed is unevenly distributed, it undulates gently while printing leading to Z-wobble. Various solutions to this problems have been suggested on forums. The consensus seems to be that the print bed should be mounted on at least two sides of the frame.
This Tronxy X5S upgrade by homofaciens presents a comprehensive solution to remove Z-wobble by suspending the build-plate from three guiding rods. However, the conversion should only be attempted by those seasoned in building their own 3D printers. This upgrade serves to show how far you can push the print quality of a humble DIY kit like the Tronxy X5S, if you are willing to go the extra mile!
In addition to the 3D printed parts, the Tronxy X5S upgrade requires the following metal parts:
– 20x20mm square tube 2m
– 20x4mm flat iron 1m
– 8mm threaded rod 1m + 7 nuts
– 3mm threaded rod 1m + a couple of nuts
– 8 ball bearings 6x19x6mm
Who made this? homofaciens
Download the files: homofaciens
Fan Cooler
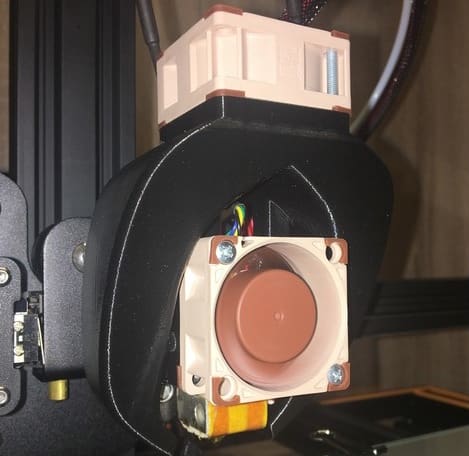
What is this Tronxy X5S Upgrade? When 3D printing with certain materials, a nozzle fan helps to cool freshly extruded plastic and keep the 3D print in tip-top quality. In its stock format, the Tronxy X5S does include one of these fans, but the original cooling fan blows only from one direction. A more efficient cooling fan can easily be 3D printed. To cool printed filament from two directions, you can print this Tronxy X5S upgrade.
Although this fan cooler was originally designed for the Creality CR-10, it is compatible with the Tronxy X5S. This unique design snaps right into the extruder fan and blows air from two sides towards the nozzle, greatly improving the overall quality of your 3D prints.
Who made this? SanderPuh
Download the files: Thingiverse
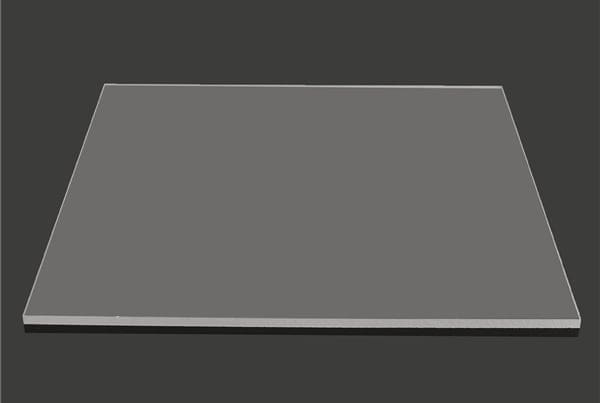
Glass Bed Holders
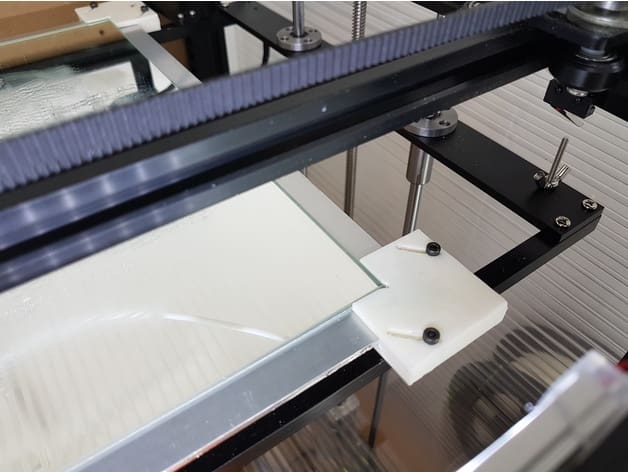
What is this Tronxy X5S Upgrade? The standard printing bed of the Tronxy X5S may be OK for the first steps in 3D printing. But you will quickly realize that the filament does not stick well to it and changing the blue-tape constantly is also not an option. For this reason, you should get a glass bed. Borosilicate glass is your weapon of choice, because it is shows high chemical resistance and allows for high temperatures. This comes in handy when printing fickle filaments like ABS.
Not only will your 3D printing results improve, but the glass bed is also easy to clean. To fasten this Tronxy X5S upgrade print these simple glass bed holders. Although it is primarily designed with 300mm glass sheeets in mind, the designer is clearly a genius, because he added rails that allow you to adjust the holders for glass sheets between 300mm and 330mm.
Who made this? Jeffthegeek
Download the files: Thingiverse
Webcam Mount
What is this Tronxy X5S Upgrade? Keep an eye on your 3D printer with a webcam while you are away from home – or create stunning time-lapse videos of your printings. Adding a webcam to your Tronxy X5S could even be the first step of integrating it into a remote control interface like OctoPrint. This particular design is bespoke to connect the Logitech C270 to the 3D printer’s frame.
It’s true that there are other designs for mounting webcams onto the Tronxy X5S, but none has enamoured as quite like this one. This nifty design leverages the rails of the CoreXY frame to fasten the webcam. For this reason we think it is both a well engineered and elegant Tronxy X5S upgrade.
Who made this? FoinB
Download the files: Thingiverse
LCD Case

What is this Tronxy X5S Upgrade? Truth be told, it is not a necessary to switch the Tronxy X5S’s display, since the stock controller works fine. However, those who want to invest the extra money will not only enjoy the better graphics, but also the included SD reader of this Tronxy X5S upgrade.
Once you have bought the brand new LCD display, you may want to protect the display and mount it onto the 3D printer. The logical choice is a 3D printed case for this controller. So, with this Tronxy X5S upgrade you get actually two for the price of one!
Who made this? RickyW
Download the files: Thingiverse
License: The text of "20 Must-Have Tronxy X5S Upgrades and Mods" by All3DP is licensed under a Creative Commons Attribution 4.0 International License.
CERTAIN CONTENT THAT APPEARS ON THIS SITE COMES FROM AMAZON. THIS CONTENT IS PROVIDED ‘AS IS’ AND IS SUBJECT TO CHANGE OR REMOVAL AT ANY TIME.