![Featured image of [Project] 3D Print a Human-Scale LEGO Space Blaster With Sounds & Lights](https://i.stageall3dp.com/workers/images/fit=scale-down,w=1200,h=675,quality=79,gravity=0.5x0.5,format=auto/wp-content/uploads/2019/03/30190338/LEGO-blaster-e1553969052993.jpg)
[Project] 3D Print a Human-Scale LEGO Space Blaster With Sounds & Lights

This 3D printed human-scale LEGO Space Blaster, created by Norwegian designer Stian Ervik Wahlvaag, is equipped with sounds and lights. Learn how to make your own and have a blast!
No matter what generation you come from, there’s a decent chance that you spent a portion of your childhood bringing imaginative worlds to life with LEGO bricks. These world-class Danish-made building blocks have become a mainstay on the toy scene, found even on the big screen and in video games.
But have you ever wonder what it’d be it’d be like to live in a life-sized LEGO world? How about starting off with a 3D printed human-scale LEGO Space Blaster!
This 3D printing project, created by Norwegian 3D designer and multimedia developer Stian Ervik Wahlvaag, is more than just a block-styled gun prop. It’s equipped with LED lights and makes space gun sounds, making it perfect for your kids or your own childish enjoyment.
The designer, who goes by agepbiz on Thingiverse, believes his project is perfect for educational or recreational purposes. Let’s take a closer look at how to make a 3D printed LEGO Space Blaster on your own.
What You Need & How to Build it
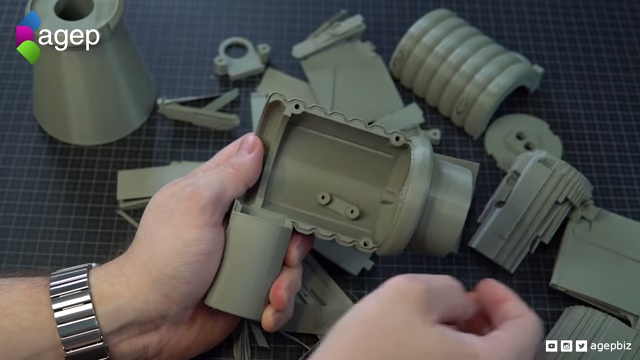
The STL files for this 3D printed Space Blaster are free to download from Thingiverse. There are eight different pieces to 3D print, some of which will require support structures (you can see which on the Thingiverse page). The designer states that he used 15-25 percent infill for the components.
In his example, Wahlvaag uses gray-colored PLA for the bulk of the gun, but also a cool transparent blue filament for the tip, providing a true LEGO-like appearance. Keep in mind that this project will require a bit of soldering, but nothing that someone with basic soldering experience shouldn’t be able to tackle.
Aside from the 3D printed components, here’s what else you’ll need to bring light and sound to this fun project:
- Elenco K-10 Space War Gun Kit
- 9V Battery
- Extra Wires
- 2x 5mm LED Holders
- 2x 5mm Clear LEDs
- Assorted M3 Hex Socket Cap
- Assorted M2 Hex Socket Cap
Once you have all of your parts gathered, it’s time to move onto the assembly process. As you’ll see in the instructional video below, Wahlvaag starts by removing the supports from the 3D printed parts.
Next, taking the Elenco K-10 Space War Gun Kit, you’ll want to carefully solder the circuit board together. You can follow along with the soldering process presented in the video. The following step is to solder the LED lights onto the extra wire and then onto the Elenco kit.
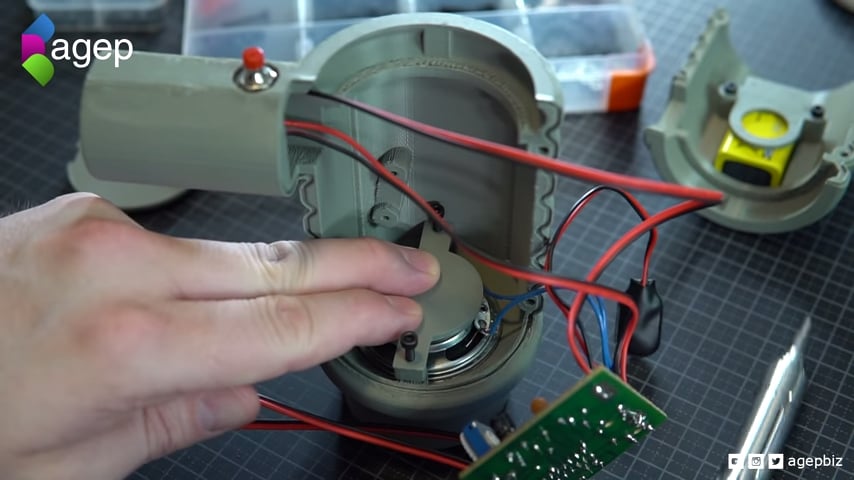
Now that everything is soldered, it’s time to put everything together. You can see in the video how the designer situates the components and utilizes the M3 and M2 screws. After you complete those steps, you’ll be left with the LEGO-esque Space Blaster that makes otherworldy battle sounds, lighting up your mood instantly!
Check out the video below to learn more about this project, and drop by the Thingiverse page to ask the designer any questions you may have.
License: The text of " 3D Print a Human-Scale LEGO Space Blaster With Sounds & Lights" by All3DP is licensed under a Creative Commons Attribution 4.0 International License.