![Featured image of [Project] 3D Print This Mesmerizing LED Geode City](https://i.stageall3dp.com/workers/images/fit=scale-down,w=1200,h=675,quality=79,gravity=0.5x0.5,format=auto/wp-content/uploads/2019/04/07212520/Geode-city-e1554665164894.jpg)
[Project] 3D Print This Mesmerizing LED Geode City

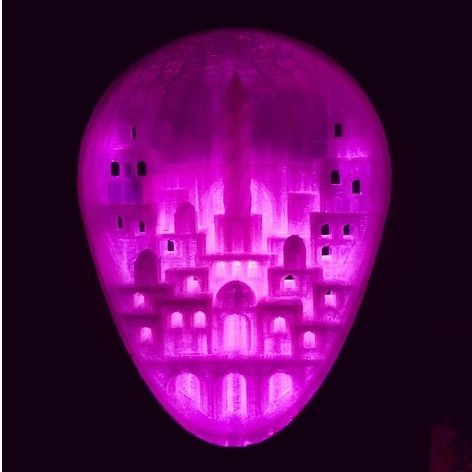
Want to bring the bright lights of a city landscape into your home? This 3D printed Geode City, created by designer Jacob Surovsky, uses an LED puck to bring mesmerizing colors to a complex city structure.
3D printing projects take many different forms, but unique lamps and light structures are one type of project that always seems to garner the favor of the maker community. One of the most recent objects featured on Thingiverse, the popular 3D model repository, is the Geode City.
Created by 3D designer and maker Jacob Surovsky, who goes by sirofsky on Thingiverse, this 3D printed structure features an intricate city that appears as if it were carved into some sort of stone. While the word “geode” is usually used to describe a small cavity in a rock that is lined with crystals or minerals, in this case, it refers to a magical little cityscape that resides within a rock-shaped base.
This 3D printable landscape model holds an LED puck inside of the base of the structure, generating a user-controlled color-changing effect that shines out of each little window. The city is comprised of stacked buildings that stretch from the bottom to the top of the base, as well as a candle-like structure in the middle of it all.
It’s an easy project that requires very little manual effort or non-printed components, making it an ideal project for those looking to add a little light to their home or workshop. Interested in making your own? Let’s take a brief look at what you need and how to build this fun little project.
What You Need & How to Build it
The STL files for the Geode City are available to download from Thingiverse. There are three separate parts that make up this structure, but the designer has also uploaded it as a single piece. However, to get the most out of this project, you should use different filaments to distinguish the base from the inner cavity.
In order to showcase the LED light within the confines of the landscape, the inner cavity should be printed in clear or transparent filament, while using black or dark filament for the outer base provides a nice contrast. In his example, Surovsky uses 10 to 15 percent infill and a layer resolution of 0.2mm.
The 3D printed Geode City is designed to be 3D printable without any support structures, but there are some things to keep in mind when preparing the model. The designer suggests orientating the pieces the way they will be positioned during final assembly and also checking to make sure your slicer has the unit set to inches.

Aside from the 3D printed components, all you need is a color-changing LED puck and a hot glue gun. There’s also a small slot in the model that enables you to turn the Geode City into a lamp. As you can tell by the brief parts checklist, the post-printing assembly is quite easy!
Once you have the 3D printed parts gathered, use the hot glue to attach the Inner Geode to the Outer Shell. With the LED puck inserted into the base, mount the two newly attached pieces on top of it.
And that’s it! Pretty simple, huh? If you want to learn more about this project or drop a question for the creator, head over to the Thingiverse page.
License: The text of " 3D Print This Mesmerizing LED Geode City" by All3DP is licensed under a Creative Commons Attribution 4.0 International License.