![Featured image of [Project] Hit the Big Screen with a 3D Printed Projector](https://i.stageall3dp.com/workers/images/fit=scale-down,w=1200,h=675,quality=79,gravity=0.5x0.5,format=auto/wp-content/uploads/2019/03/31215654/Geneva-hero-e1554062552873.jpg)
[Project] Hit the Big Screen with a 3D Printed Projector

With this 3D printed 12-frame automatic projector, created by maker 3DSage, you can make any image larger than life. Learn how to make your own!
After watching a video on the Geneva Drive mechanism by Makers Muse, the popular 3D printing YouTube channel, designer 3DSage became inspired to expand upon that idea.
The Geneva Drive is a gear mechanism that transforms continuous rotation into an intermittent rotary motion. In other words, it’s a device that holds a position before quickly turning to the next, making it ideal for something like a photo projector!
Using a 3D printer and some other components, that’s exactly what 3D Sage created and shared with the maker community via Instructables!
This 3D printed 12-frame projector is a remix of the 6-position Geneva Drive featured in the video. The resulting roatating contraption can be used to project personalized images onto the wall, making it a terrific project for evoking fond and joyful memories.
Best of all, this 3D printed projector is relatively cheap and easy to build. Let’s take a look at what you need and how to build one on your own.
What You Need & How to Build it
The STL files for the 3D printed components can be downloaded directly from Instructables.
All contained within a zip file, there are five different parts to 3D print with 0.2mm layer resolution and no support structures. 3DSage also packages these files with a template to help construct the rotating wheel.
Aside from the 3D printed parts, here’s what else you need to build this projector:
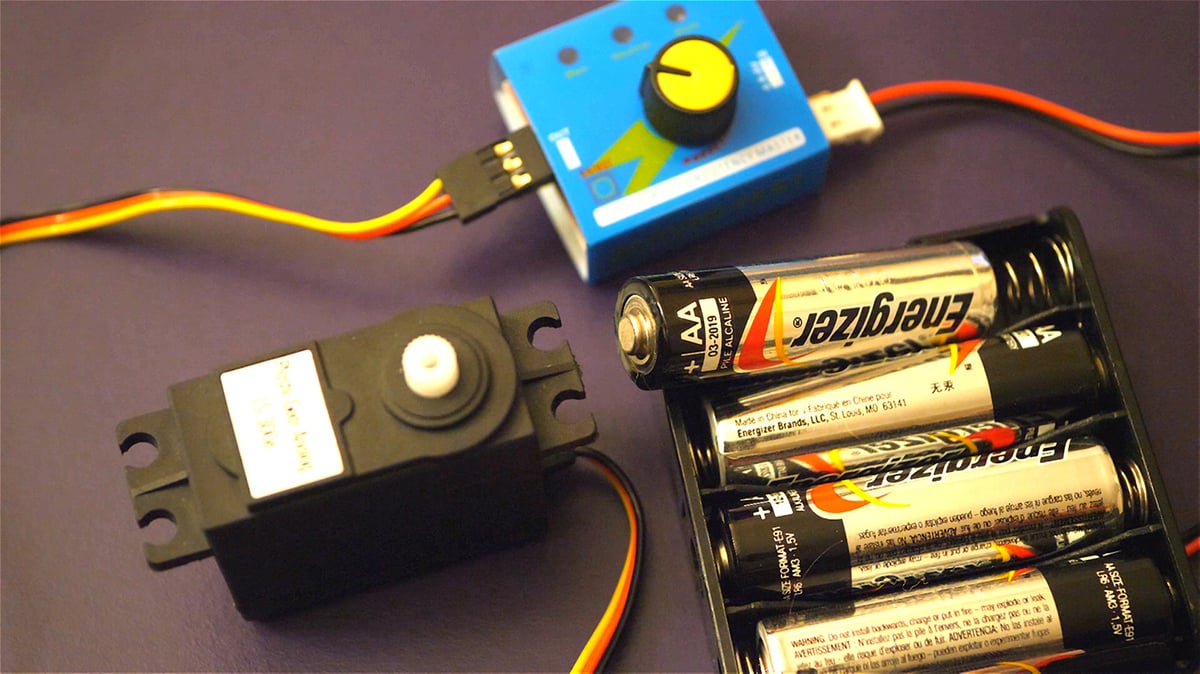
- LS-3006 Servo Motor 360 degrees
- 3CH Digital Multi Servo Tester
- 4x AA Battery Holder with 6 Inch Wired 2P Connector
- Nebo 6272-A Micro Redline OC LED Flashlight – 360 LUX
- Pendant Magnifier 5x 1 3/4″
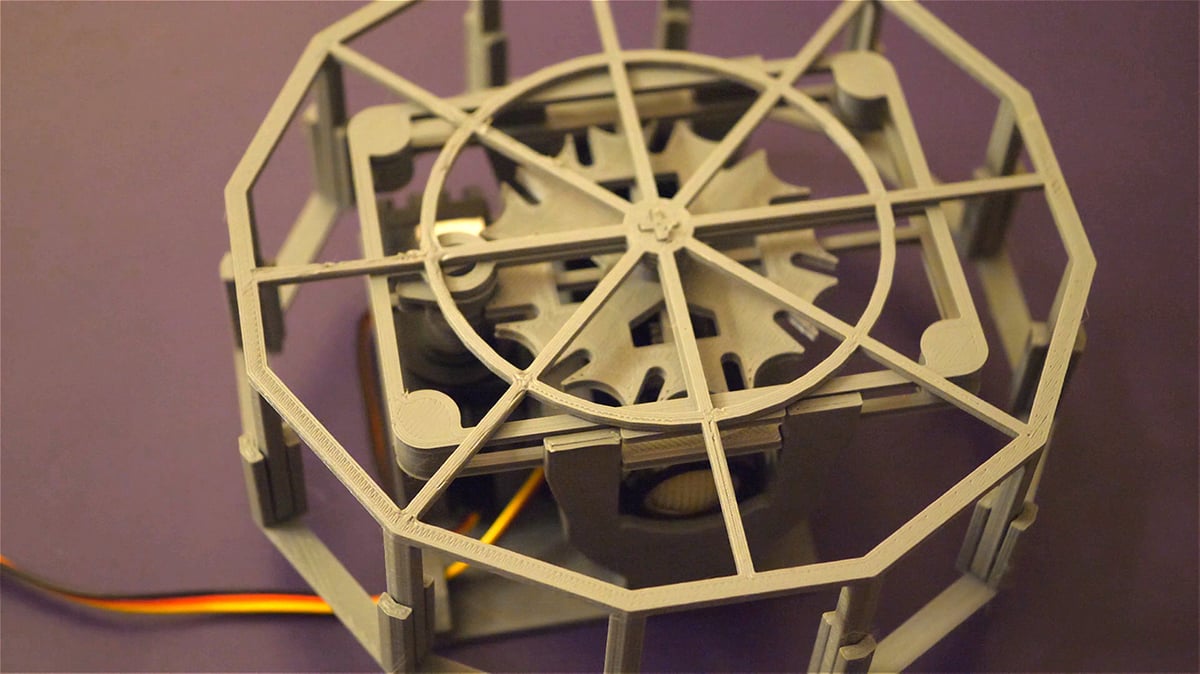
The wheel itself is split into two parts, which was done to make the base easier to print. One side of the wheel is designed to friction fit into the other half. The designer recommends printing the wheel parts slower to ensure the thin vertical section comes out right.
Once you have all of the 3D printed parts and components collected, it’s time to move onto the assembly process. Connect the servo and batteries to the servo controller, connecting black to negative and red to positive. Using the template provided with the 3D printed parts, build the Geneva Drive.
You can give the mechanism a test run by plugging in the batteries and turning the nob on the servo controller, which should set the Geneva Drive into a spinning rotation.
Now that you have the mechanism built, you’ll need to take some PNG images (preferable pictures with high contrast) and have them printed on transparent paper by a print center. When the slides are inserted into the slots, it will help hold the wheel parts together.
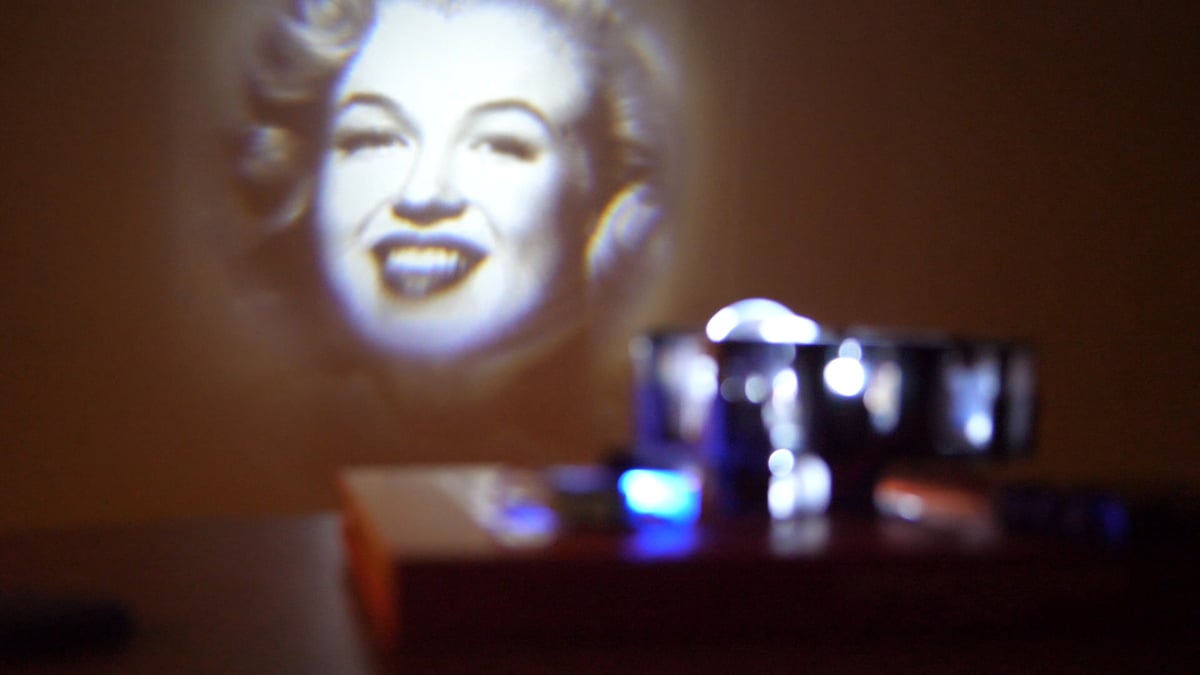
When the flashlight is turned on, a blurry projection of the image will show up on the wall. Taking the 5X magnifying glass, which should fit into the 3D printed holder, you can adjust it until the projected image is in focus. You may also need to flip the slide vertically so that the image is projected right side up.
Finally, with your slides inserted and the lens focused, turn on the Geneva Drive and watch as the flashligh projects your images on the wall! The darker the room, the better.
If you want to learn more about how this project was developed and built, check out the video from 3DSage below!
License: The text of " Hit the Big Screen with a 3D Printed Projector" by All3DP is licensed under a Creative Commons Attribution 4.0 International License.