
Yes, You Can Over Dry Filament. Here’s How Not To

Drying filament is important but drying filament properly is even more important. Learn the science behind what moisture and drying does to polymer filament.
3D printing hobbyists and pros have gotten the message about wet filament and the stringing and print failures it causes. So much so, that a new issue is popping up: over-dried filament.
Too much drying — whether it’s at the wrong temperature, for too long, or too often — can damage the molecular structure of some polymers. This negatively affects strength, layer adhesion, and results in brittleness. It’s also very difficult to print with over-dried filament because the filament itself can break, extrude unevenly, and any resulting prints can show surface cracking.
Whether you have hundreds or tens of thousands of dollars invested in filament, it pays to have a plan to keep it dry and dry it correctly. Here, we’ll explore how to tell if your filament is too wet or too dry, the best practices for drying properly, and how to keep it dry (both budget and pro solutions).
Too Wet or Too Dry?
You may already be familiar with the problems that wet filament produces, such as popping or cracking sounds when extruding; severe stringing, blobbing, or oozing; uncharacteristically textured or “fuzzy” surfaces on prints; and uneven extrusion lines. Less noticeable is the reduced part strength and layer adhesion.
Wet filament may feel pliable to the touch, it could even have a moldy smell, or faded color.
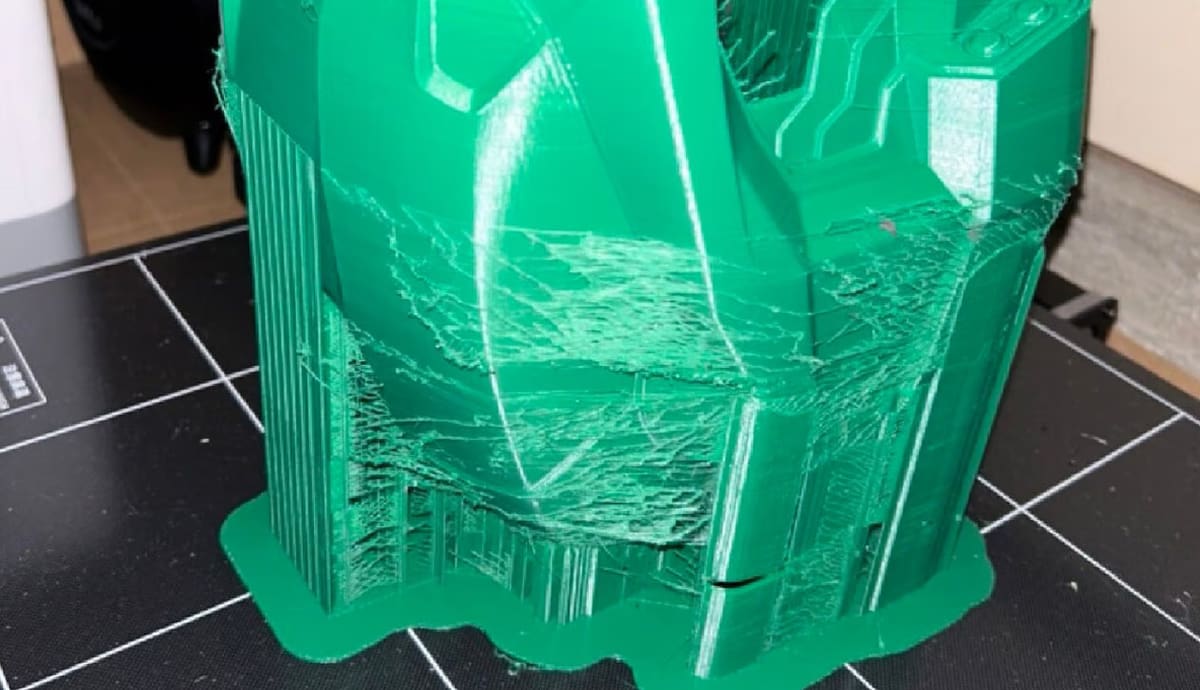
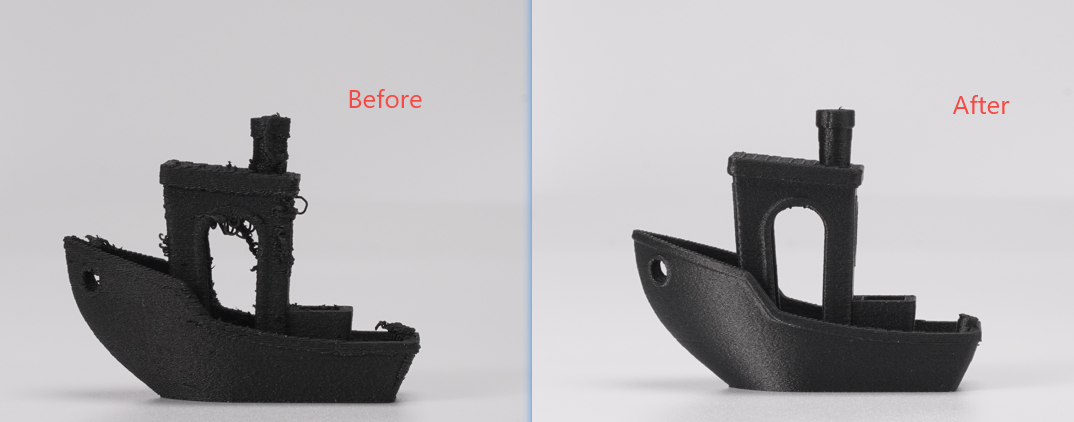
On the other end of the spectrum, when filament is too dry, there are equally negative results and similar characteristics. You may notice poor layer adhesion or rough surfaces. Brittle filament can snap or break easily during handling, and there could also be stringing, blobbing, or other extrusion issues due to changes in the flow characteristics of the filament.
Dry filament may feel brittle, be easily cracked or broken, and may stick to itself on the spool.
Because too-wet and too-dry filament share some characteristics, how can you tell them apart?
One way to tell is the weight of the filament. When the material has soaked up water, it will weigh more. Measuring this, however, isn’t quite as easy as it sounds. That 1kg spool doesn’t weigh exactly 1,000 grams; there’s the weight of the spool and there’s also slight variations in the precise amount of material wound onto each spool. Plus the amount of moisture that could affect printing can be in the tiny milligram range.
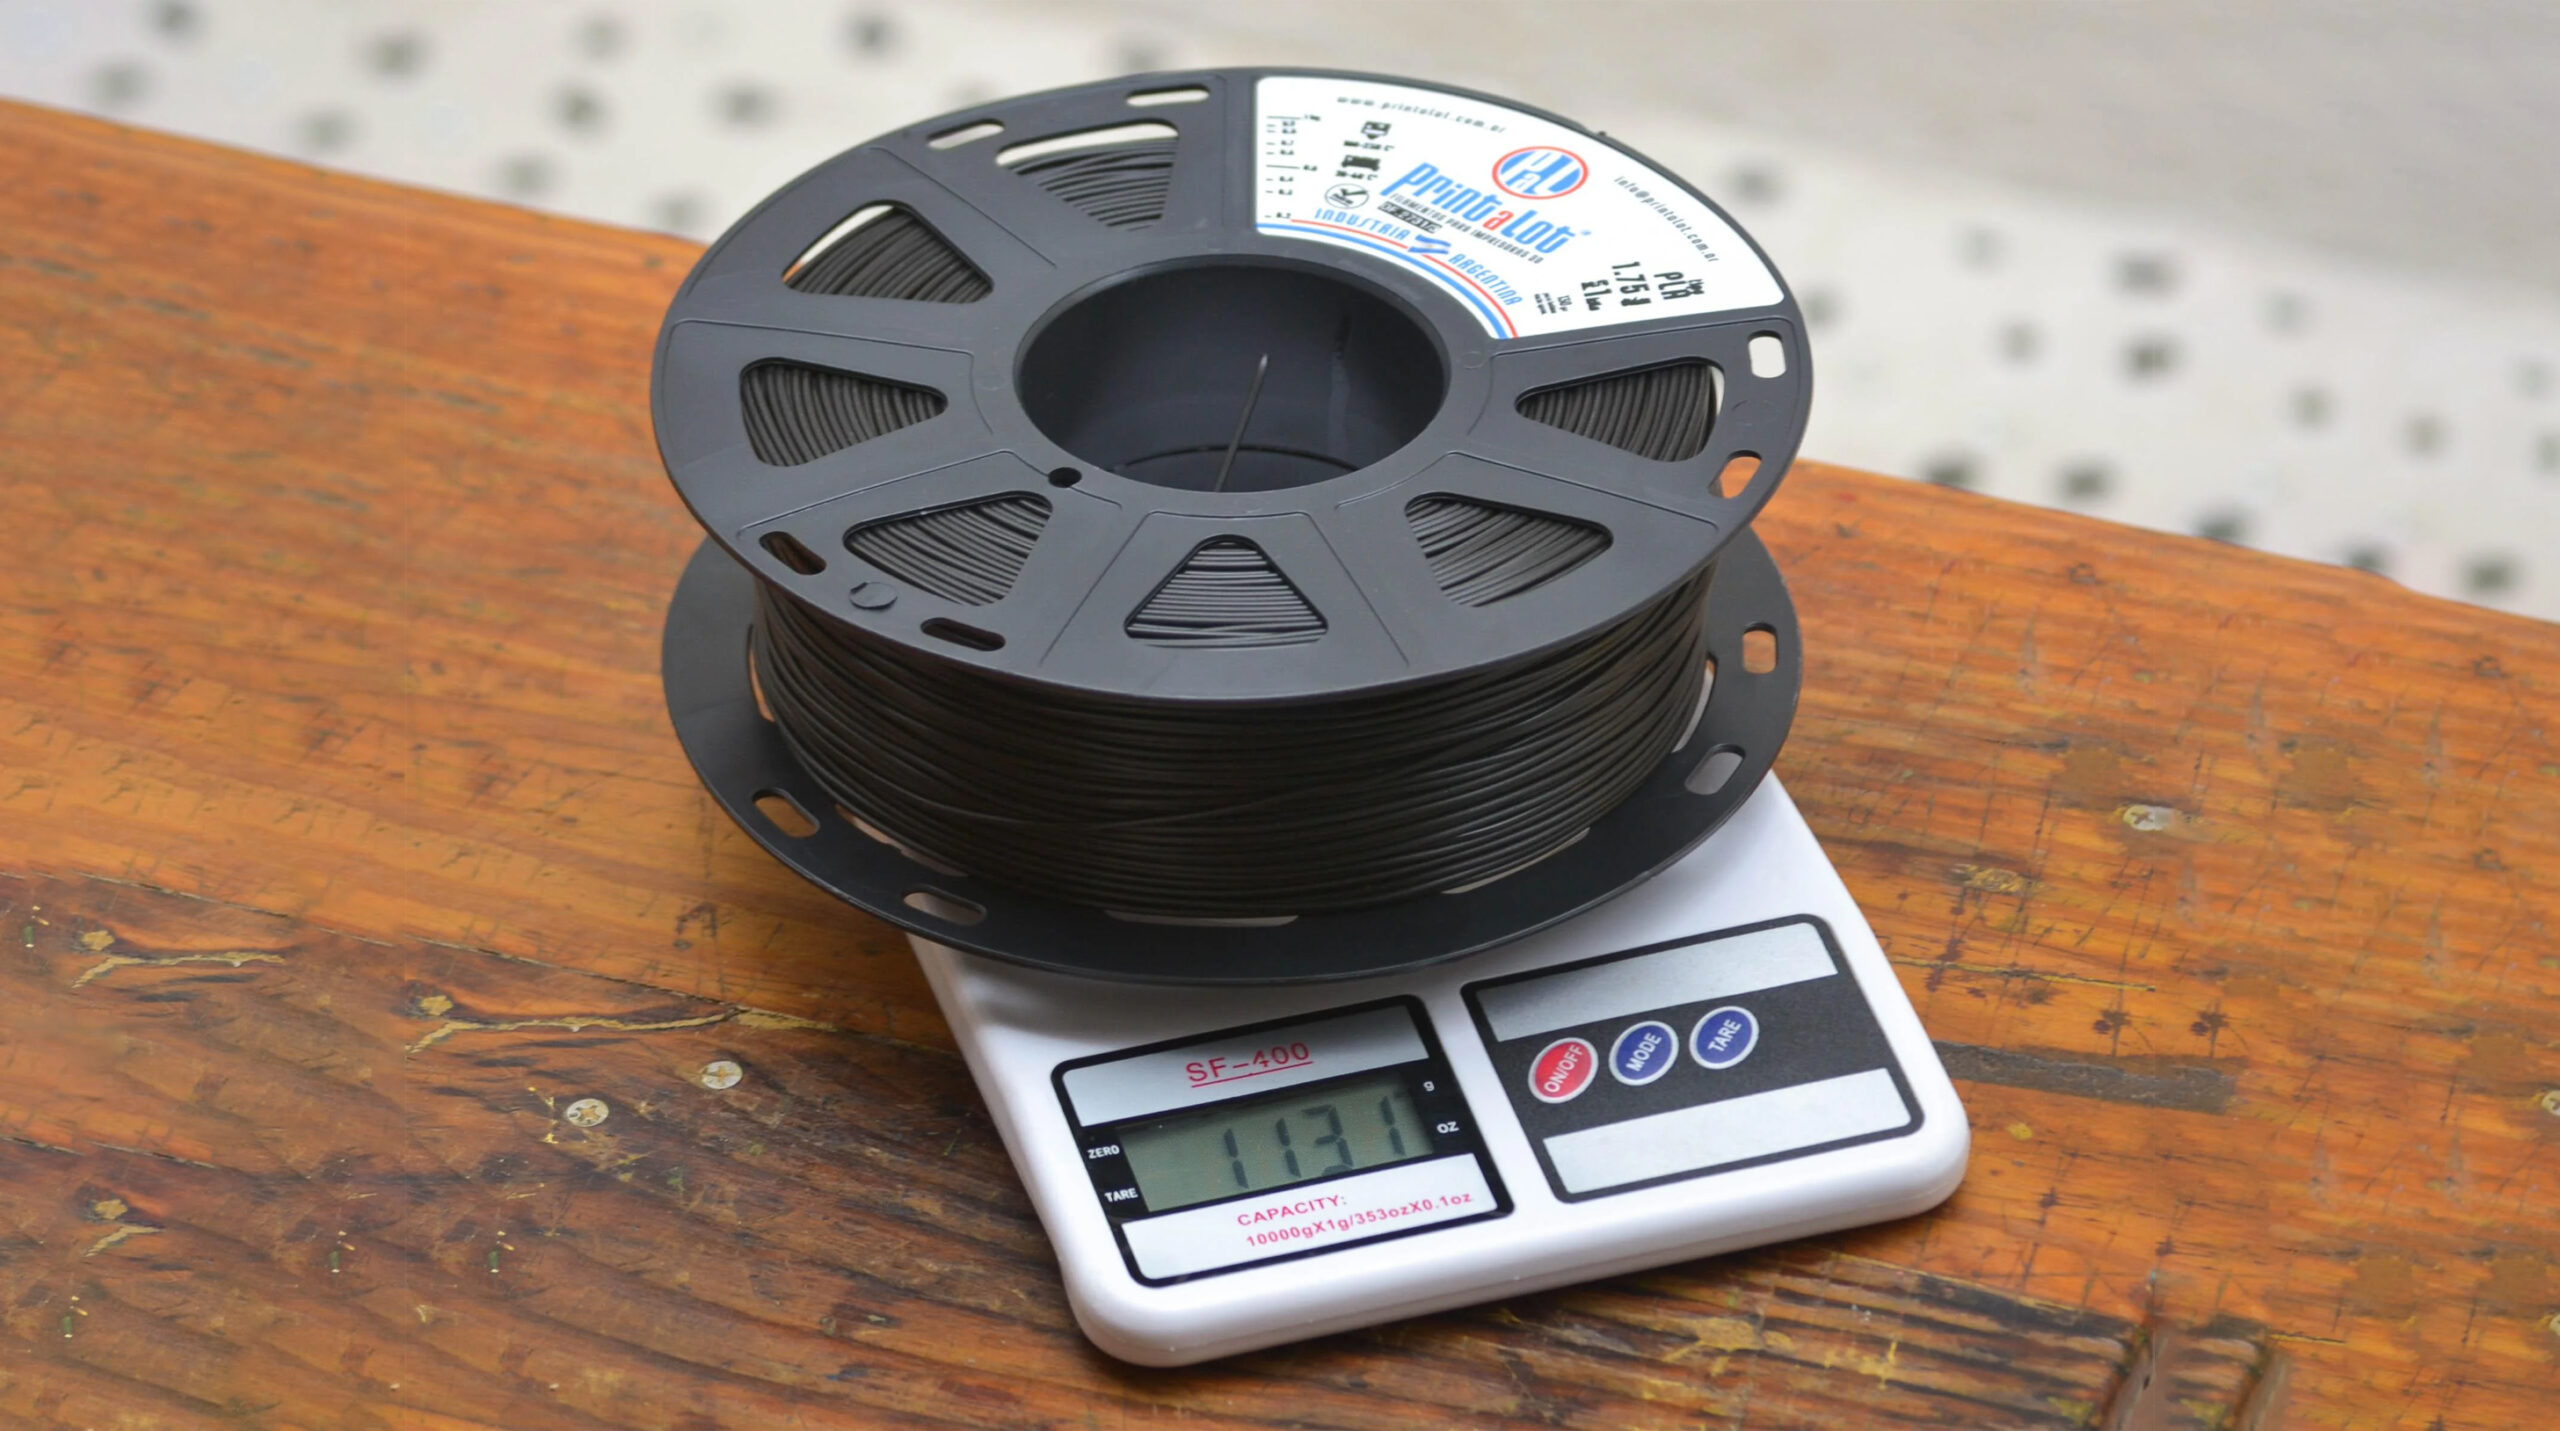
Readers have told All3DP that they often weigh a new spool right out of the pouch on a precise scale and record that number for reference. Then dry the spool and weigh it again. Although this is a way to prove or disprove that your material was moist and now isn’t, it doesn’t provide information before drying. Plus, cardboard spools can hold more moisture than plastic ones, so you can lose milligrams of water just from the spool.
Another method is to cut two lengths of filament, maybe 200 mm each. Dry one of them then compare their weight. You could also put the filament in a sealed pouch with a moisture indicator (widely available for under $30) for a few hours. If the moisture indicator says the relative humidity in the pouch in above 40%, you likely have moist filament.
Because it’s not easy or quick to determine how much moisture your filament already contains, it may seem like the best route is to just dry it before use. In fact, this is recommended by many material producers regarding many types of polymer filament, such as nylon.
However, drying already dry filament can have consequences depending on the material and your drying process. But to be clear, most polymer types can be dried repeatedly with no damage as long as you follow the manufacturer’s recommendations for drying closely. Where drying typically goes wrong is using the wrong temperature (too high) and repeatedly allowing your filament to soak up water then drying it.
Let’s take a closer look.
Do Dry or Not to Dry?
If you’re someone who reads 3D printing forums or watches 3D printing YouTube videos, then you’ve come across two types of people: those who have never dried their filament and haven’t had any problem and don’t understand what all the drying fuss is about, and those who religiously dry their filament before each use. Everyone else is somewhere in the middle.
The point is, if your printed parts turn out with a layer adhesion, strength, and surface quality that’s acceptable to you, keep doing what you’re doing. But if you are not getting the quality you expect, the problem (very often) is the condition of your filament.
If you 3D print for or as your business, you need company-wide processes to follow to ensure your materials are always at the optimal condition.
When Should You Dry?
In a perfect world, the best way to keep filament in top condition to avoid ever drying it, especially with heat. There “should” be no reason to dry brand new filament that comes in an air-tight pouch. Presumably, this material was manufactured and packaged in a suitable environment. But this isn’t always be the case. In fact, some manufacturers, like Bambu Lab and Prusa, recommend that you dry specific materials, such as TPU and PA (nylon), before each use. (All3DP has been to the Prusa filament factory and it is state of the art, so the dry recommendation is likely just a precaution.)
This brings up the fact that all polymers are not the same when it comes to their reaction to moisture. Some polymer filaments, like PLA, may never need to be dried, while others, like nylon, quickly absorb moisture from the environment.
It’s Hygroscopic, Not Hydroscopic
You may have heard the term “hygroscopic” when it comes to filaments, which relates to how the polymer’s molecular structure absorbs moisture, e.g. highly hygroscopic. Fortunately, the characteristic is measurable and it’s a useful data point to know about your filament.
There are various methods for measuring this feature of a polymer, but when it comes to 3D printing filament you may see a mention of “moisture absorption rate” (MAR) by the manufacturer — although it’s not a standard measure on a material data sheet.
MAR is typically expressed as the percentage increase in the material’s weight after exposure to a humid environment for a specific period, often 24 to 48 hours, under controlled conditions of temperature and relative humidity, usually 50%. For example, a MAR of 0.1% isn’t the amount of moisture absorbed, but rather how much more the filament will weigh when exposed to typical moisture for a day or two.
Don’t put too much importance on the 24 to 48-hour measurement used in official MAR testing. This doesn’t mean that leaving your filament out for six hours or even one hour is fine. The rate of moisture absorption is directly influenced by the relative humidity of your environment. Higher humidity levels and temperatures increase the amount of water vapor available, leading to greater absorption by hygroscopic materials faster.
Likewise, a filament with a low MAR of 0.1% doesn’t mean that this is the maximum amount of moisture the material can absorb. The longer a material is exposed to moisture, the more it can absorb up to its saturation point, which also called moisture equilibrium or equilibrium moisture content (EMC).
Every material has a unique moisture equilibrium, which is the point where no more moisture can be absorbed into the filament and its fully ‘wet’. For materials like PLA, this equilibrium is under 1% (by weight) and “generally anything under 1% is negligible,” says Luke Taylor at filament maker PolyMaker. “This is why PLA is so friendly and you can leave a spool on top of your printer for months and it will still be fine.”
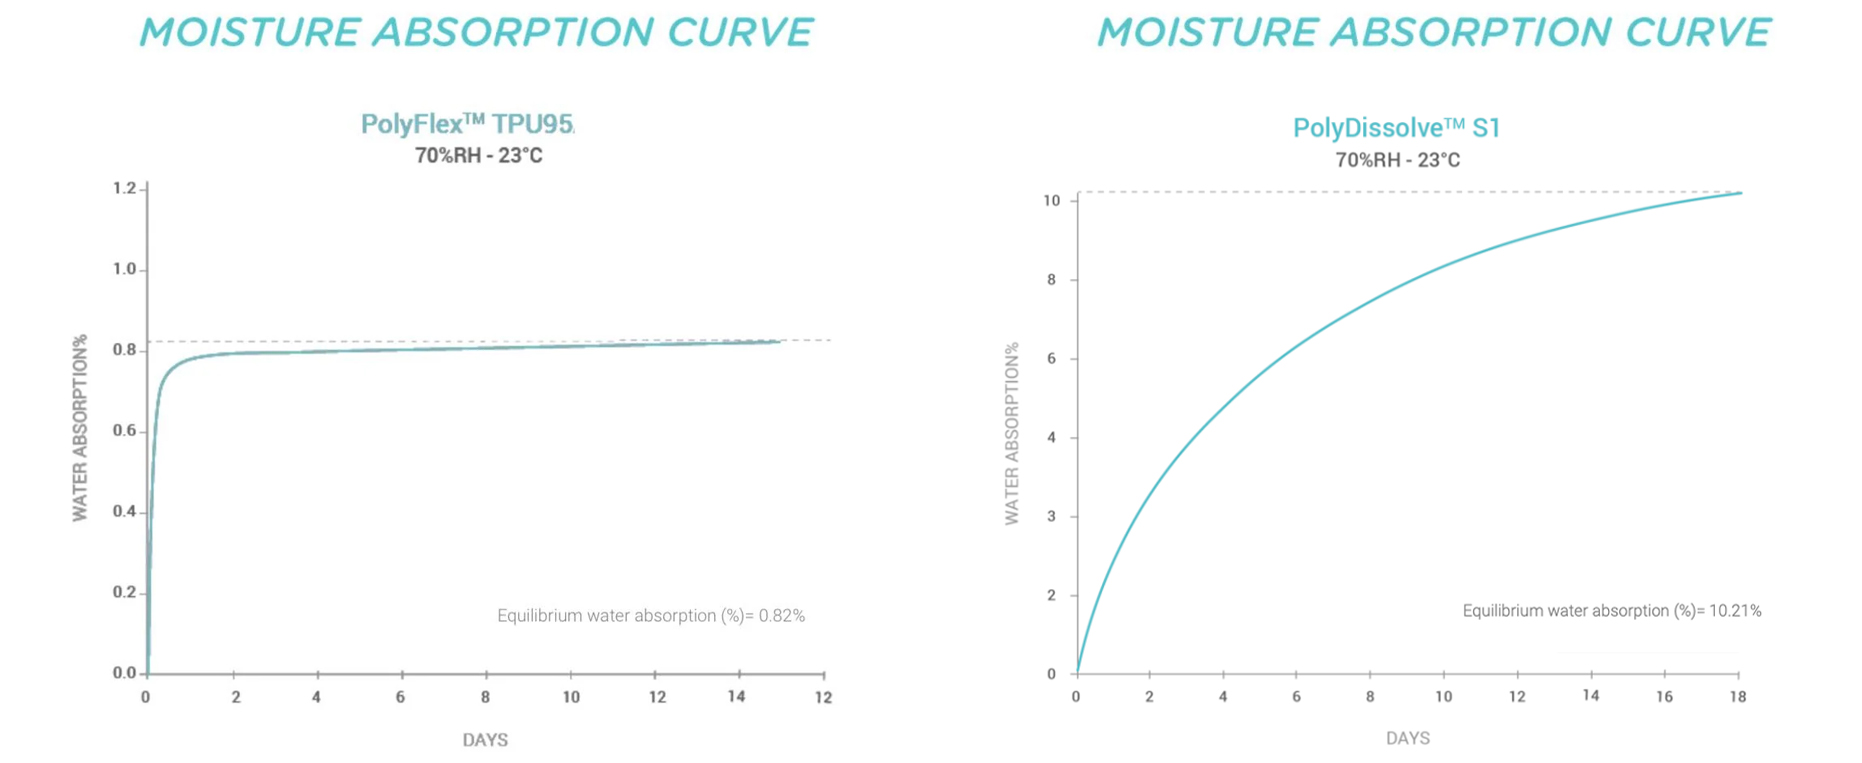
Materials like nylon however have a much higher equilibrium. For nylon PA6, it’s around 3.3%, which, at this point, there is so much moisture in the filament that when it is melted in the hotend (printing temperature around 270°C) the moisture boils and ruptures outward. “This ruins the surface quality, layer adhesion, and makes prints stringy,” says Taylor. “PVA is even worse, reaching equilibrium over 10% and is famous for becoming unprintable in humid environments.”
Why should you care about the MAR and equilibrium of your filament? Although we list the typical range of for 12 polymers below, it’s best to look for these measurements on your brand of filament, if it’s provided, to know exactly how moisture absorbent your filament is.
There are so many different formulation of filament with various additives like plasticizers, stabilizers, fillers, or pigments, that it may not fit into the “typical” behavior and may need unique drying methods.
Another reason to look for this data is to compare among like filaments before you buy. Today, some material makers are striving to make formulations of nylon, for example, with very low MAR numbers, which is a strong selling point for high-volume printing operations that always need to have dry material at hand.
PolyMaker provides a “Moisture Absorption Curve” chart with every filament (see above) which indicates how long you can leave it out before it gets too wet to print with, which is MAR around .8 to 1%, says Taylor.
* These rates can vary based on specific formulations and environmental conditions, so it’s always good to refer to manufacturer data sheets for precise information.
Always Dry Nylon, Rarely Dry PLA
As you can see from the chart above, nylon is very hygroscopic and PLA is not. If stored properly, you may never need to dry your PLA, but may often need to dry your nylon and even print with it while it’s in a dry box.
Here at the All3DP Lab, we generally aim to store PLA in its original pouch, but we have been guilty of leaving it out in our lab and, honestly, we haven’t had issues with most PLA. It’s when we print with nylon or TPU where we can begin to see moisture issues.
Also, depending on the climate where you live and the type of house or building you 3D print in, moisture levels may be naturally low and your PLA may never need drying.
Yet, before you default to drying all new filament, test it with a short calibration model. If you see no stringing or extrusion issues, you can save yourself the time and the potential degrading of the materials by not drying it.
How to Over-Dry Filament (Don't Do this)
“Once filament has been over-dried to the point of brittleness, there is unfortunately no effective method to restore its original properties,” says Remy Marac at filament maker FormFutura. “This makes it crucial for users to monitor their filament closely during the drying process.”
As we’ve already discussed, polymers react differently to moisture. They also react differently to drying, especially the heating part of drying. Some polymers are very difficult to over-dry, while others can damage relatively easily.
When we asked polymer scientist Brian Alexander at Syensqo Specialty Polymers about over drying filament, he explained that, some materials, such nylons, are formed through “reversible condensation reactions”. So for these materials you only need to add water to get the water content to where you need it. Alexander, who specializes in PEEK and PPSU materials said he doesn’t come across customers over-drying filament.
So, some polymers may be salvageable when over dried, while others are not. Which is which? Some polymers made with condensation reactions include PLA, PETG, PA (nylon), PC, PEI, and TPU. But again, the addition of additives in filament can affect these polymers’ ability to be rehydrated.

Don’t Dry Too Hot
The biggest culprit in over-drying is heat. There are two temperature measurements to be aware of when it comes to drying your filament: its glass transition temperature (Tg) and its melting temperature (Tm).
Tg is the point when the polymer just starts to get pliable and soft. Filament drying should always take place 10 to 20°C below the polymer’s Tg, which maintains the filament’s structural integrity while allowing moisture to evaporate.
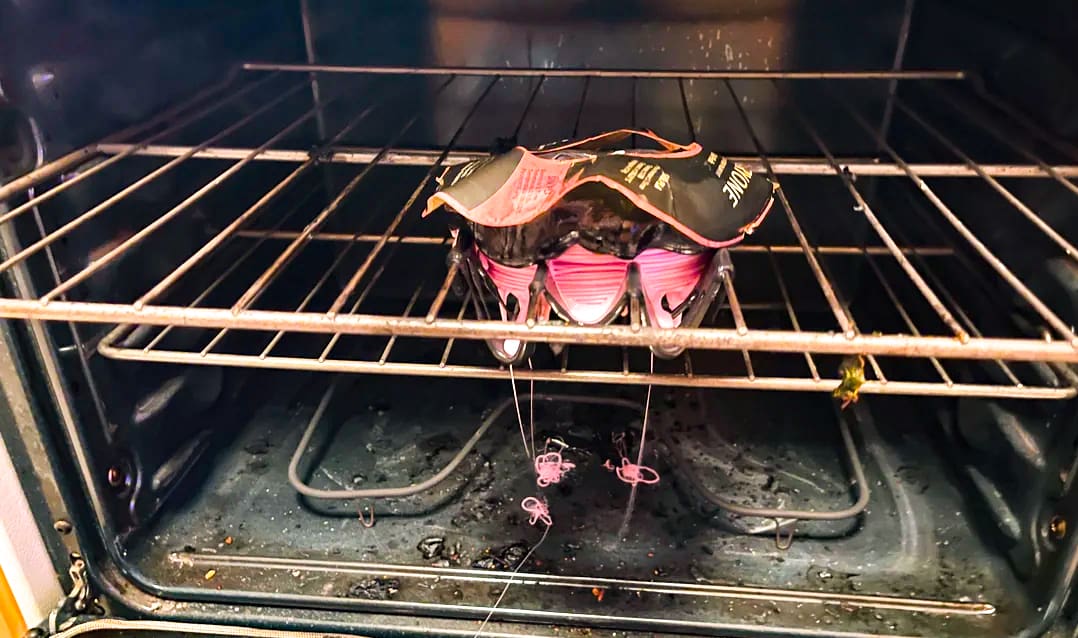
So the first way to over-dry your filament is to heat it in a dryer or oven at the Tg temperature or higher. This temperature may cause the filament to deform, warp, or lose its round shape, which can lead to feeding issues in the printer. The filament could stick to itself, leading to tangles or even sections where the filament becomes brittle upon cooling and breaks.
If the filament deforms or partially melts, it could have areas of varying thickness or roundness, which can also result in inconsistent extrusion during printing, leading to printing issues like under-extrusion or inconsistent layer adhesion.
As you may know, 3D printing with filament is carried out at a sweet spot between the Tg and the Tm. Heating to the melting point can degrade the material, resulting in discoloration, off-gassing, or complete loss of mechanical properties, especially for polymers sensitive to thermal degradation, like PLA or ABS. Naturally, you never want to dry at the melting temperature of a polymer.
Important Temperatures of Filament Polymers*
* We can’t stress enough that these are averages or typical figures across filament polymers and you should always look at the technical data sheet (TDS) of your specific filament for accurate numbers.
As you can see from the chart above the ideal drying temperature for you PP would be much to hot for your TPU since the drying temperature for PP is near the Tg of TPU. You wouldn’t want to put these two types of filament in the same oven for drying.
Don’t Dry Too Long
We couldn’t find data on the effects of drying polymers for too long but it stands to reason that if a manufacturer recommends 6 hours of drying, you should stick to that time. Will 12 hours instead of 6 damage the filament? Again we only have anecdotal evidence from users who noticed brittleness forming in their filament from “forgetting” it in the oven or drying for more than the recommended time.
A good practice would be to err on the side of less time drying rather than more, but always follow the specific brand’s recommendations.
To illustrate just how much a material, for example nylon, varies by brand and formula when it comes to drying, below we list the drying instructions or five types of nylon filament.
5 Different Ways to Dry Nylon
Don’t Dry Too Often
If you’ve invested in a material dryer, you may think you can forgo proper air-tight storing of your filament because you can just dry it before each use. Yet, repeatedly absorbing moisture, drying out, and then reabsorbing moisture can damage 3D printing filaments over time.
Some polymers, particularly hygroscopic materials like nylon and PVA, can undergo hydrolysis when exposed to moisture. This chemical reaction can break down the polymer chains, leading to a reduction in mechanical properties such as strength and flexibility.
The repeated cycles or moisture absorption and drying can affect the surface properties of the filament, potentially leading to increased roughness or irregularities. This can result in inconsistent layer adhesion during printing.
Studies have shown that the tensile strength and elongation at break can significantly decrease after repeated drying and moisture absorption cycles. This makes the filament less suitable for applications requiring high mechanical performance.
As we mentioned above, many filaments contain additives like plasticizers, stabilizers, or pigments that improve their printability or performance, but repeated drying/heating can cause these additives to evaporate or degrade overtime, leading to changes in material properties, such as reduced impact resistance.
How to Dry Filament Properly
“When the moisture is absorbed into filament, it’s not like water in a sponge where it can be squeezed out easily,” notes Taylor at PolyMaker. “The water molecule forms a polar bond onto the polymer chain and acts as a plasticizer, reducing tensile strength and stiffness, whilst simultaneously increasing toughness and elongation. For this reason, it takes quite some hours to dry the filament as the heat needs time to break the polar bond and evaporate the moisture out of the filament.”
This is the goal of all filament drying, but how to do it takes many forms.
There are several methods for drying filament — filament dryers, ovens, dehydrators — each with its own set of perimeters that can get confusing. In fact, there is a lack of clear guidelines on drying filament in general, which can be blamed for the prevalence of over drying.
For example, Bambu Lab suggest drying its PC filament in a forced air oven for eight hours at 75 – 85 ºC but recommends drying the same PC in a heated build chamber of a Bambu Lab printer at 90 – 100 ºC for 12 hours. Sounds straightforward enough.
But what if you’re using a filament dryer, like the PolyDry from PolyMaker? That machine doesn’t let you set temperatures and instead has “power levels”. PolyMaker recommends drying any PC filament at power level three, which it says is less than 70°C, for six hours. But this is a lower temperature and less time than Bambu Lab recommends.
How can you be sure of drying when your filament maker says one thing and your filament dryer says another? Let’s take a closer look filament dryers.
Filament Dryers
You don’t have to buy a filament dryer to dry your filament but it is the best option in our opinion because most come with failsafes that help prevent over drying, such as automatic shut-offs. Many industrial FDMs, such as the Stratasys F3300, the Apium P400, and the 3ntr Spectral 30, have embedded material dryers. Yet these are typically only for four or six spools at a time.
We cover the consumer level filament dryers and professional level filament dryers in other articles so we won’t go into each machine here, but when you’re shopping for one, consider its maximum temperature (some don’t get hot enough for materials like PAHT), adjustable material-specific dry settings (although don’t rely on these alone, always read the specific brand’s drying guide), and appropriate capacity.
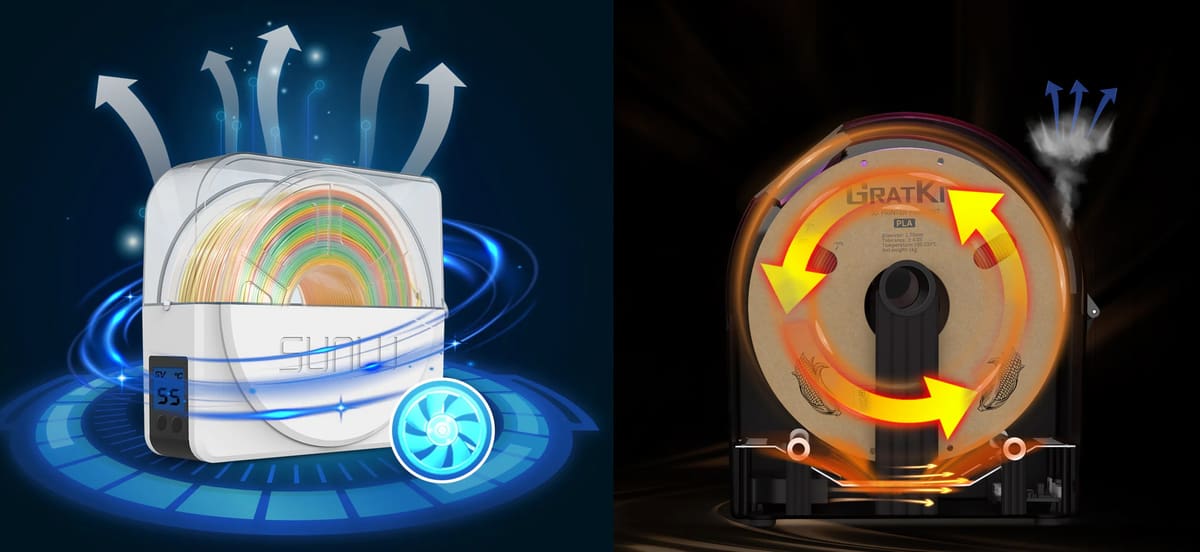
Many drying solutions, from the consumer-focused Sunlu Filadryer S4 to the BigRep Drycon, have pre-configured temperature and duration settings of commonly used filaments, such as PLA, ABS, PETG, as well as TPU, PA and PC. Yet, as we’ve already covered, polymers can vary widely by brand. Ensure that your filament dryer enables you to manually override the settings to what each filament maker recommends.
Most filament dryers use heat and forced air, yet some only provide heat and you’re required to open them every so often to let the moisture escape. Heat alone is not an effective dehydrator.
To ensure that your filament doesn’t soak up moisture during printing, some dryer models feature an automatic filament feeding system via teflon tube.
* For dedicated filament dryers or convection ovens with accurate temperature controls, designed for even, consistent drying. These are general guidelines that may not apply to your brand of filament. Always check the manufacturer’s drying instructions.
Conventional Ovens
When using an oven to dry your filaments, use the forced air or circulating air setting so that the moisture can be removed from the oven chamber. An oven that’s too small, like a toaster oven, might heat the filament but not effectively remove the moisture (you may need to periodically open the door).
Ensure that you have enough room around your filament so that air can circulate, don’t pile spools on top of eachother, and don’t mix polymers that have different drying requirements. A typical home convection oven can dry two spools at a time. Be sure to keep the spools away from the heating elements. After drying, let the material cool in the oven, which should be relatively moisture free.
Printer Chamber or Internal Dryer
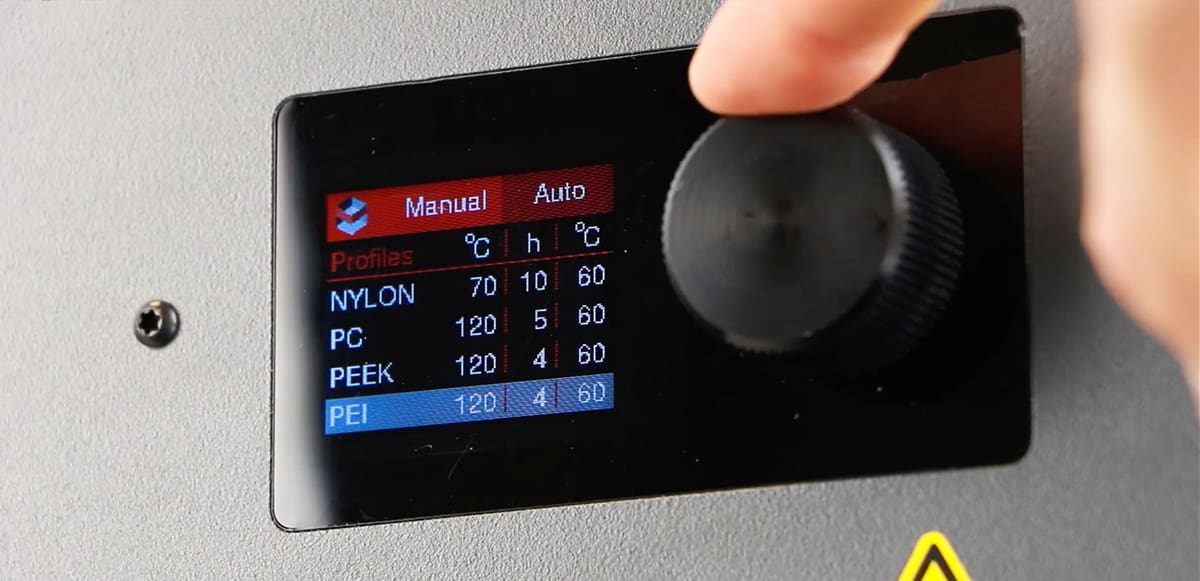
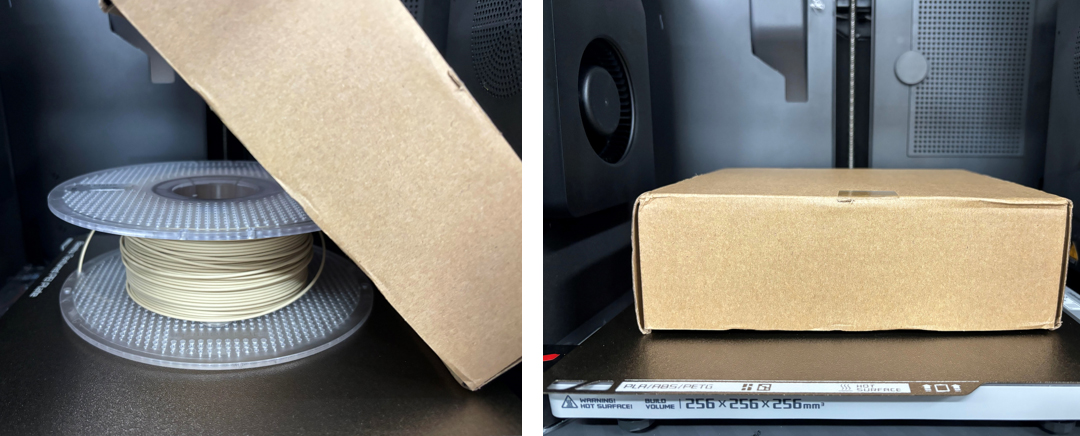
Several consumer-level FDMs with heated chambers can also be used as effective dryers. Bambu Lab, for example, has a dry setting on its X1 and P1 Series 3D printers. It recommends putting the filament in the original paper box and following the on-screen instructions. It provides a list of polymers and recommended heatbed temperatures all with a 12 hour duration. It’s essential to flip the spool over every six hours.
Food Dehydrator
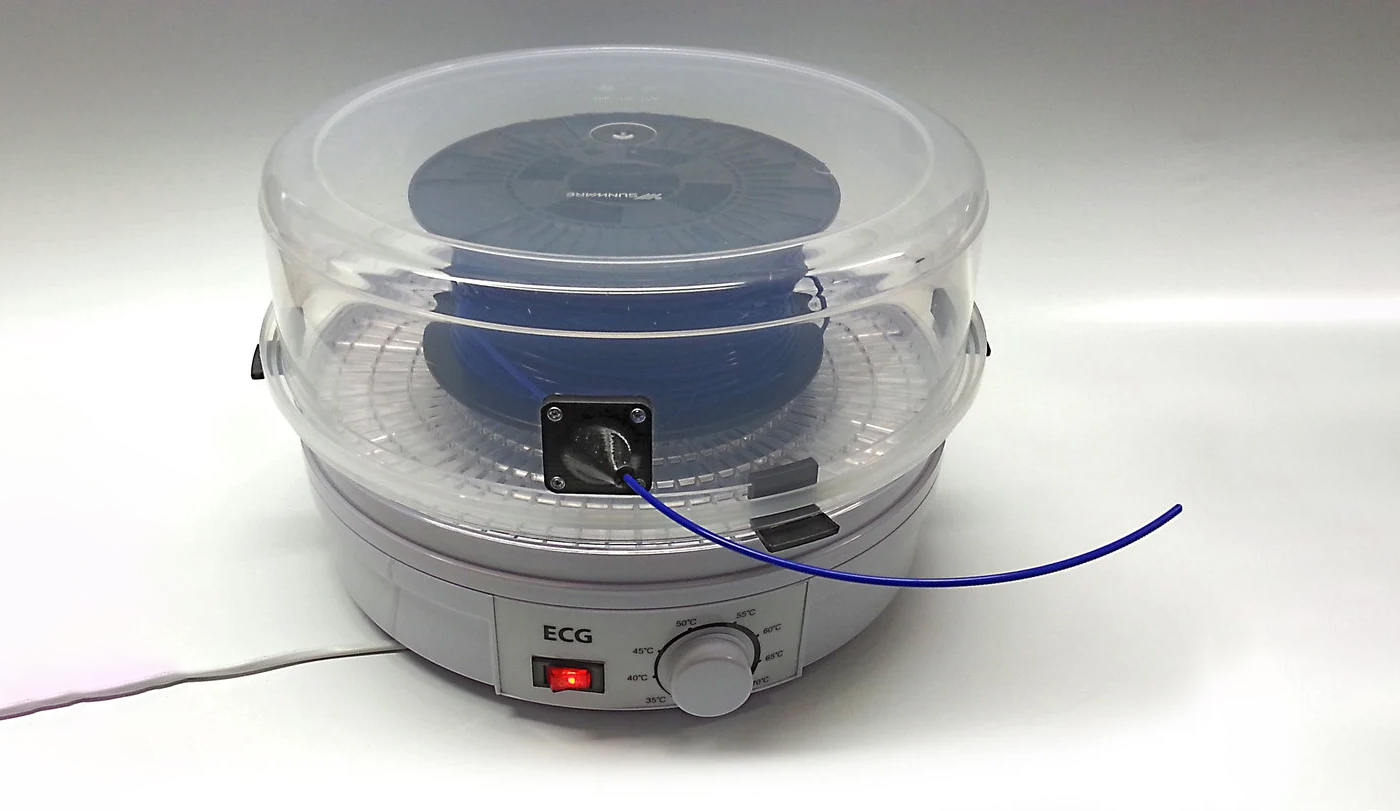
On the budget side, food dehydrators have long been used to remove moisture from filament just like they do for apples and strawberries. The drawback is that material makers have not embraced this method and rarely provide instruction for dehydrator temperature and time.
Food dehydrators, in general, have less precise temperatures than ovens and the temperature can vary as much as 10 degrees from the area closest to the heat source to the area farthest away (for the units that only have heating at the bottom). Anecdotal evidence shows that dehydrators take longer to dry filament. So if you really want to know how long you need to dry your specific materials with your specific food dehydrator (or oven for that matter) use the method we mentioned above, where you measure the weight of a section of undried filament to a like section of filament from the dehydrator.
Desiccant Pouches in Sealed Box
You cannot effectively dry out filament by just putting a spool into a box with desiccant, even if you continuously pump out air.
The plastics industry has a number of industrial solutions involving desiccant used for drying pellets for injection molding and other plastic manufacturing processes. Some of these solutions involve air forced through a desiccant bed to make it extremely dry. This air is then heated to a specified temperature and fed into a drying hopper containing the material to be dried. These industrial desiccant solutions have not made their way to the 3D printing industry for filament, likely because the volume of filament typically dried is low compared the hundreds of kilos of plastic pellet material.
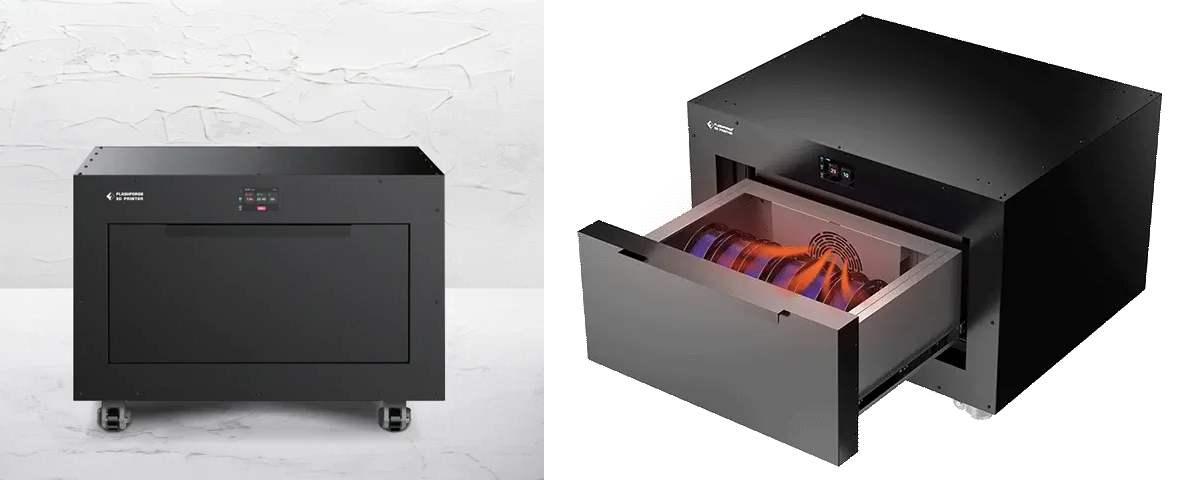
3D printer maker BigRep makes a dry cabinet called the BigRep Shield that prevents filament moisture absorption without heat by operating in a sealed environment with air circulation. By looping air through a controlled desiccant chamber, Shield eliminates 99.99% of airborne moisture, the company says. However, BigRep is replacing the Shield with it’s new cabinet, the Drycon, which does include a heating unit for drying.
Dry Storage Without Over Drying
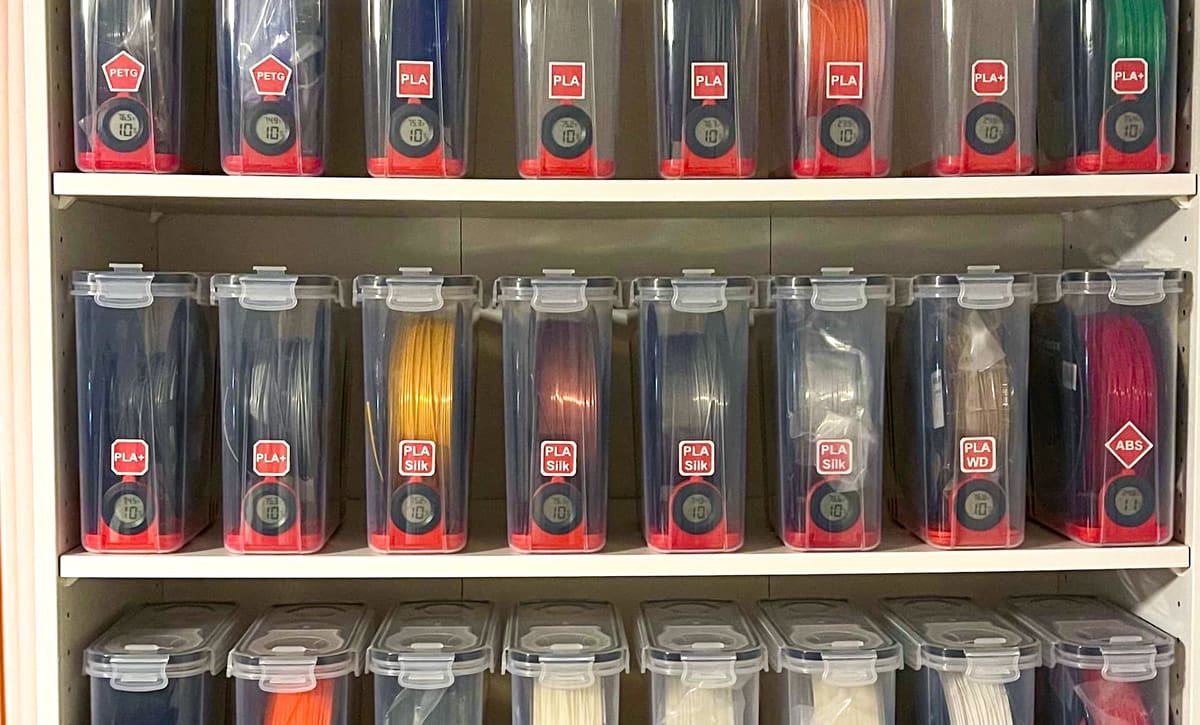
Dry storage boxes or cabinets are the best way to keep your filament away from the harmful effects of moisture, but don’t make the mistake of thinking that these can’t ever lead to over drying. Even desiccant pouches (if you use enough of them) can lower the moisture content in a box to the point of damaging filament left there for extended periods, although we admit, this would be rare.
This is why moisture level indicators are critical in any filament storage solution. Only by monitoring humidity levels can you know if your storage is too moist or too dry, or perhaps you didn’t reseal the box properly last time your opened it. Hygrometers, at less than $20 each, or color indicating desiccants packets, are easy ways to ensure the right moisture level in your storage.
In the 3D printing industry, there are several solutions for single-spool storage, but these can get pricy if you have hundreds of rolls.
Other industries have a need to keep products and materials dry, so dry cabinets have been around for a long time. Professional photographers have long stored their cameras in dry cabinets while units in a wide range of sizes are used for printed circuit boards, laboratory samples, and electronics. It turns out that many of these are also ideal for 3D printing filament.

Of course, they lack the bells and whistles of dedicated filament storage units and there’s no way to feed filament directly from these cabinets to your printer, but for general or longer-term storage, these can be a good choice as long as they can maintain a relative humidity (>30%) that your filament needs. Note that typical camera dry cabinets have a minimum RH of only 35% so be sure to find one that can achieve a lower RH.
You May Also Like:


License: The text of "Yes, You Can Over Dry Filament. Here’s How Not To" by All3DP Pro is licensed under a Creative Commons Attribution 4.0 International License.