3D Print Orientation: What to Consider for Optimal Results

Deciding how to orient a part on the build plate requires some consideration. Read on to find out the best 3D print orientation!
Which Way Down?
So you’ve found or designed your dream 3D model to print. But once you’ve imported it into your slicer of choice, you’re not sure how to best orient it on the build plate. Don’t worry, we’ve got you covered!
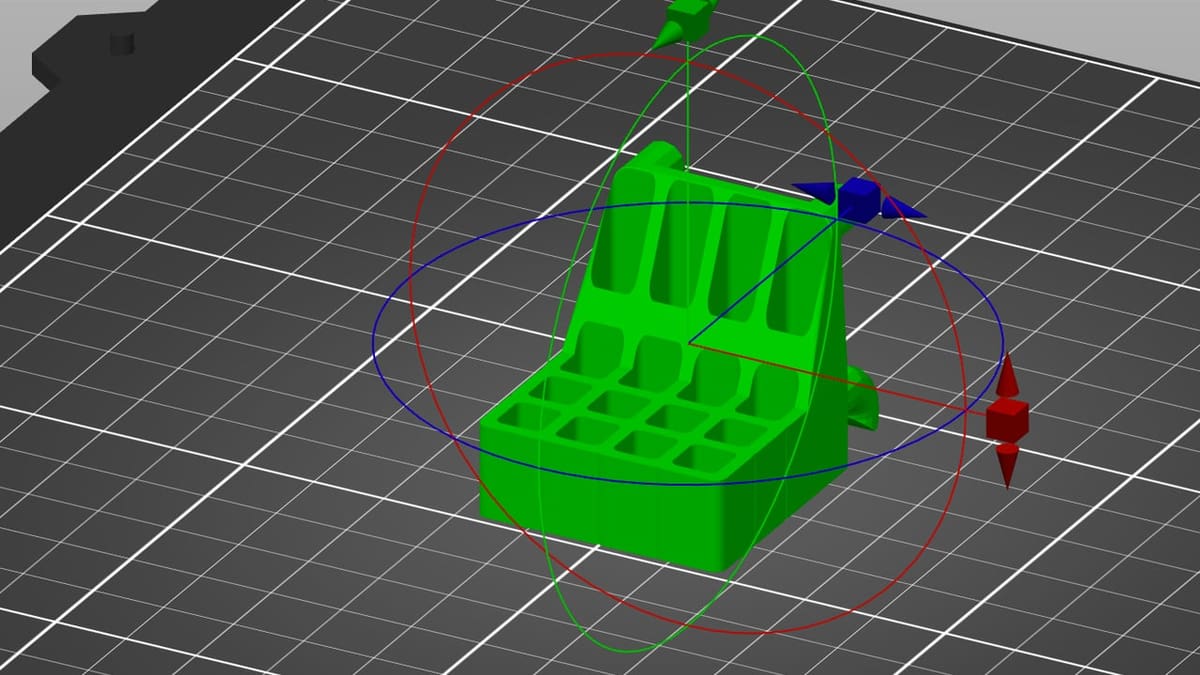
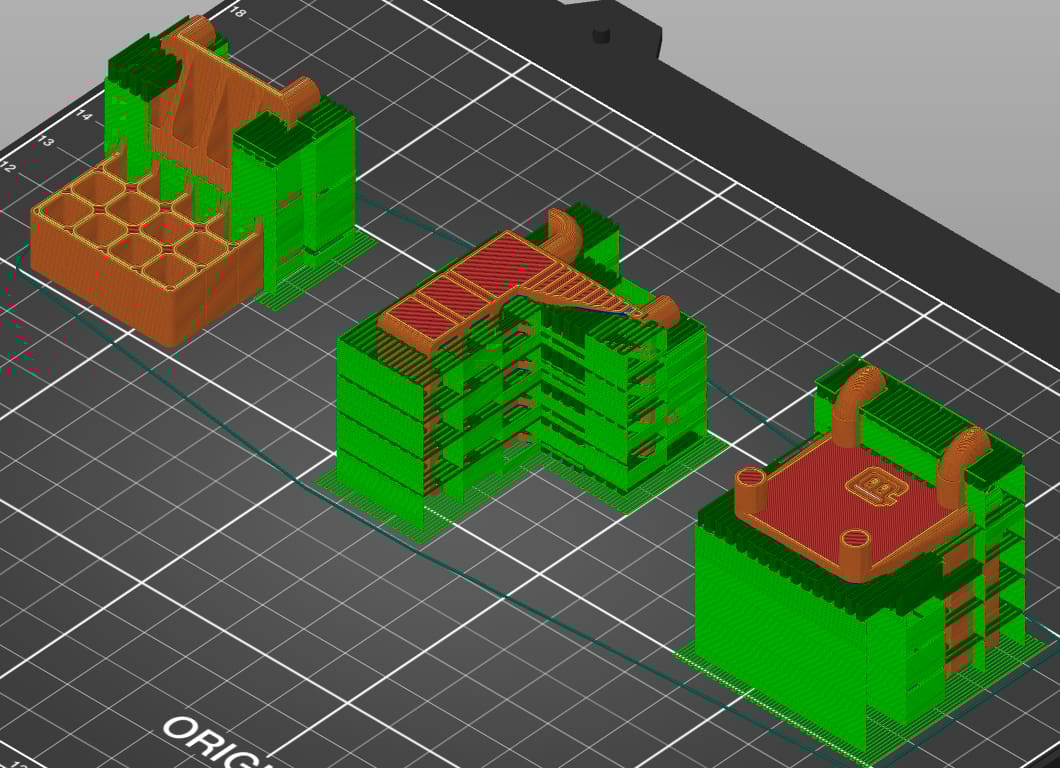
Simply put, build orientation is the rotational orientation of the part, or the way in which the part is in contact with the build plate. Some examples of different build orientations are shown in the image above.
In this article, we’ll use PrusaSlicer to go through three different orientations of a part from the Pegboard Wizard collection on Thingiverse to illustrate how orientation can affect print time, success, post-processing. But first, we’ll be going over some of the key considerations to determine the optimal part orientation. Let’s get started!

Considerations
Let’s go over some of the factors to consider in determining build orientation:
- Find the best face(s) for stability and bed adhesion. A good place to start is to identify the faces of the part that will provide good adhesion to the build plate. They have to be large enough to provide stability through the whole printing process. While it is possible to add rafts and brims in your slicer, you should only take that option if there’s a reason to select a small face as your base, since these will have to be removed.
- Consider mechanical stress(es). If your part will experience stress, it should be oriented so that the direction of minimum applied stress is along the 3D printing build direction (usually vertical). The reason for this is that vertical build direction is generally the weakest since it relies on the bond strength between layers, rather than the inherent strength of the material.
- Make sure you know the build volume of your printer. Is the build orientation limited by the build volume of the machine? For example, a tall part that would fit vertically in the machine might not fit on the build plate if it’s laid on its side. If you’re printing multiple parts, orient them so that the greatest number of parts will fit on the build plate.
- Minimize print times. Print times should be minimized in order to maximize productivity and printer utilization.
- Minimize supports. Which build direction minimizes or eliminates the requirement for support material? Support material, while it can be necessary, has to be removed, which adds time (and potentially cost) to the printing process. Orient the part so that overhangs of less than 45° are minimized. Generally, orienting the part so the center of mass is closest to the build plate results in the least amount of support material, but this depends on the shape of the part.
- How much post-processing do you want to do? Is support material added to areas that must be smooth in order for the part to function well? Support material tends to create a “rash” on the part that requires post-processing work to improve surface finish.
- Maximize dimensional accuracy. Features of the part that must meet close dimensional tolerances may print better in some orientations than others. For example, cylindrical features print more accurately in the vertical direction than horizontally. (Close tolerance features can be machined after the build process, but this adds time and often additional costs.)
Now that we know some of the important considerations for determining build orientation, let’s look at some real models!
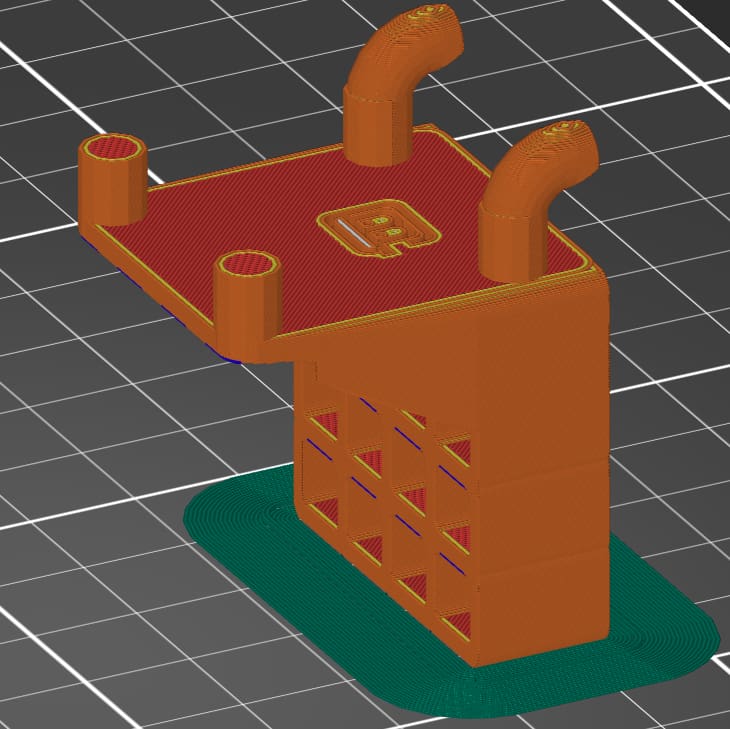
Example #1
This first option is orientated to maximize contact with the build plate.
- Build plate adhesion: This part orientation provides plenty of surface area in contact with the build plate.
- Mechanical stress: The applied stress is perpendicular to the build direction.
- Size of the printer: The part fits comfortably on the build plate.
- Print time: 268 minutes (19 minutes for supports)
- Support material location: Support material is on pegs that go into the board. It’ll require removal and surface finish improvement.
- Features with close dimensional tolerances: Holes in the part that holds the tools are printed vertically and should be dimensionally accurate.
Example #2
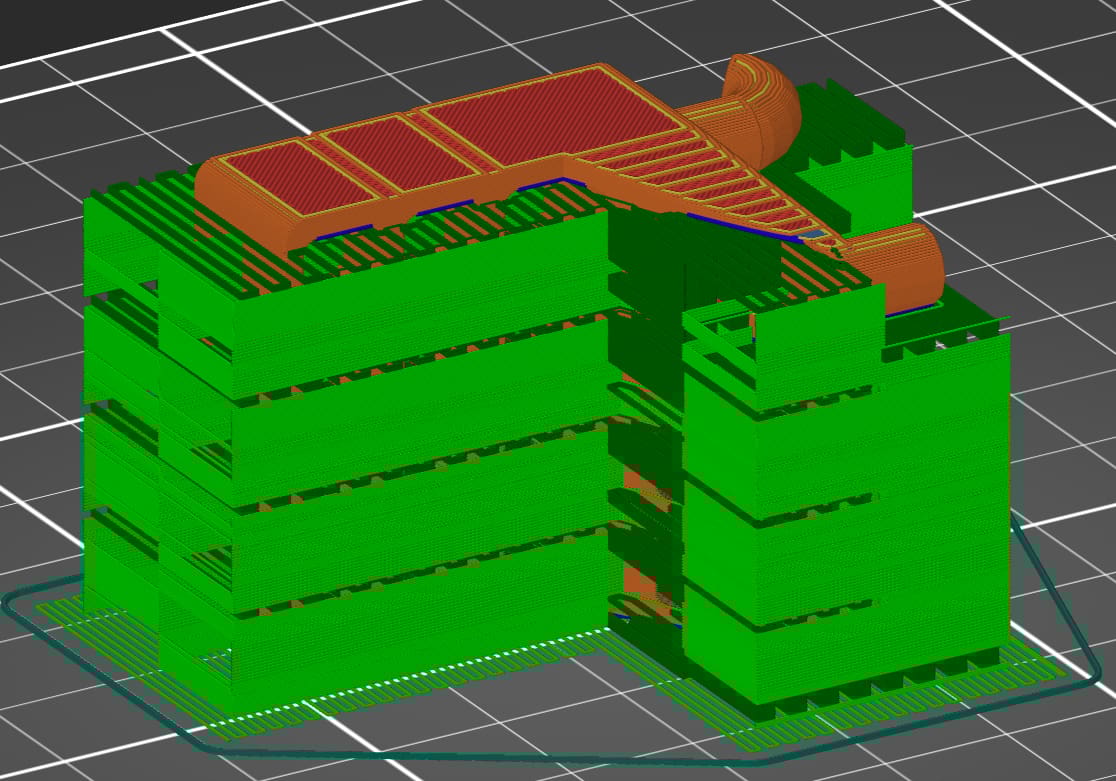
In this case, the part is rotated 90° about the Y-axis.
- Build plate adhesion: This part orientation provides plenty of surface area in contact with the build plate.
- Mechanical stress: The applied stress is perpendicular to the build direction.
- Size of the printer: The part fits comfortably on the build plate.
- Print time: 226 minutes (57 minutes for supports)
- Support material location: Support material is on pegs that go into the board and in the holes that hold the tools. It’ll require post-printing removal and surface-finish improvements.
- Features with close dimensional tolerances: Holes in the part that hold the tools are printed horizontally and will be less accurate than in the first example where they’re printed vertically. The support material will aid in maintaining dimensional tolerances, but the rash left behind by the support material could impair the part’s usability.
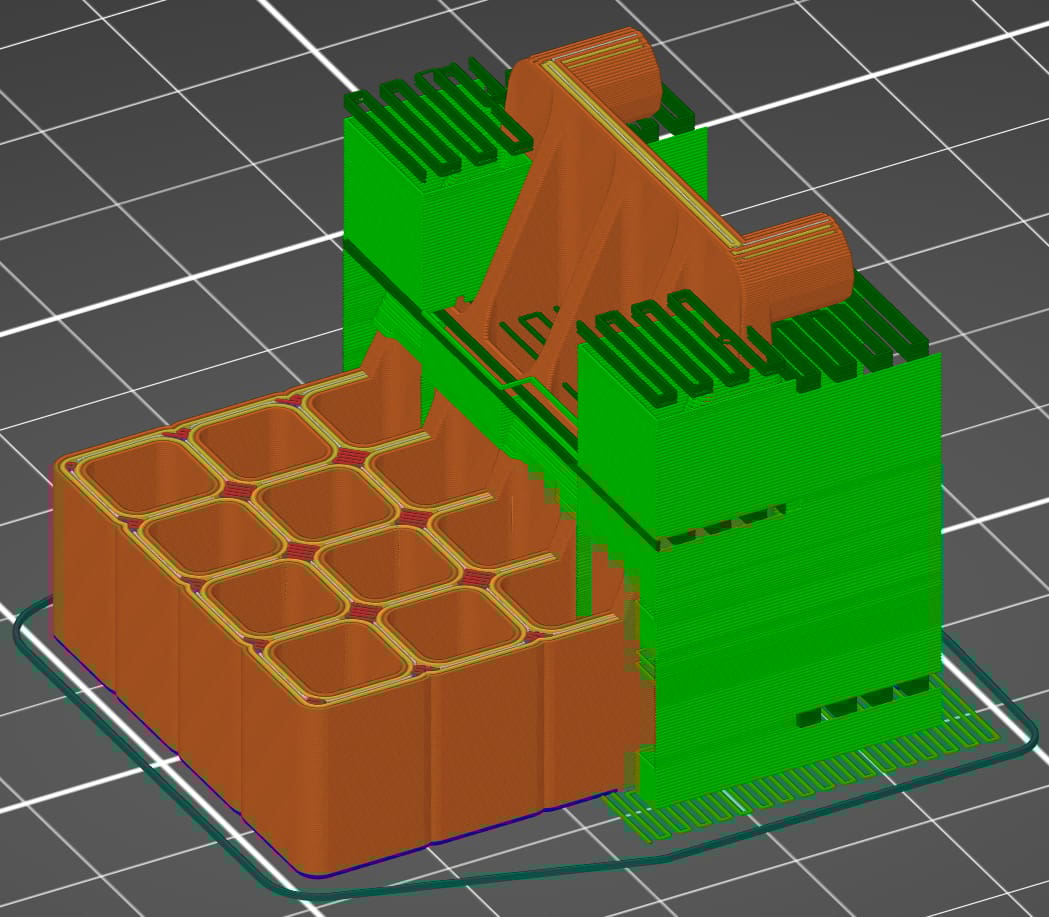
Example #3
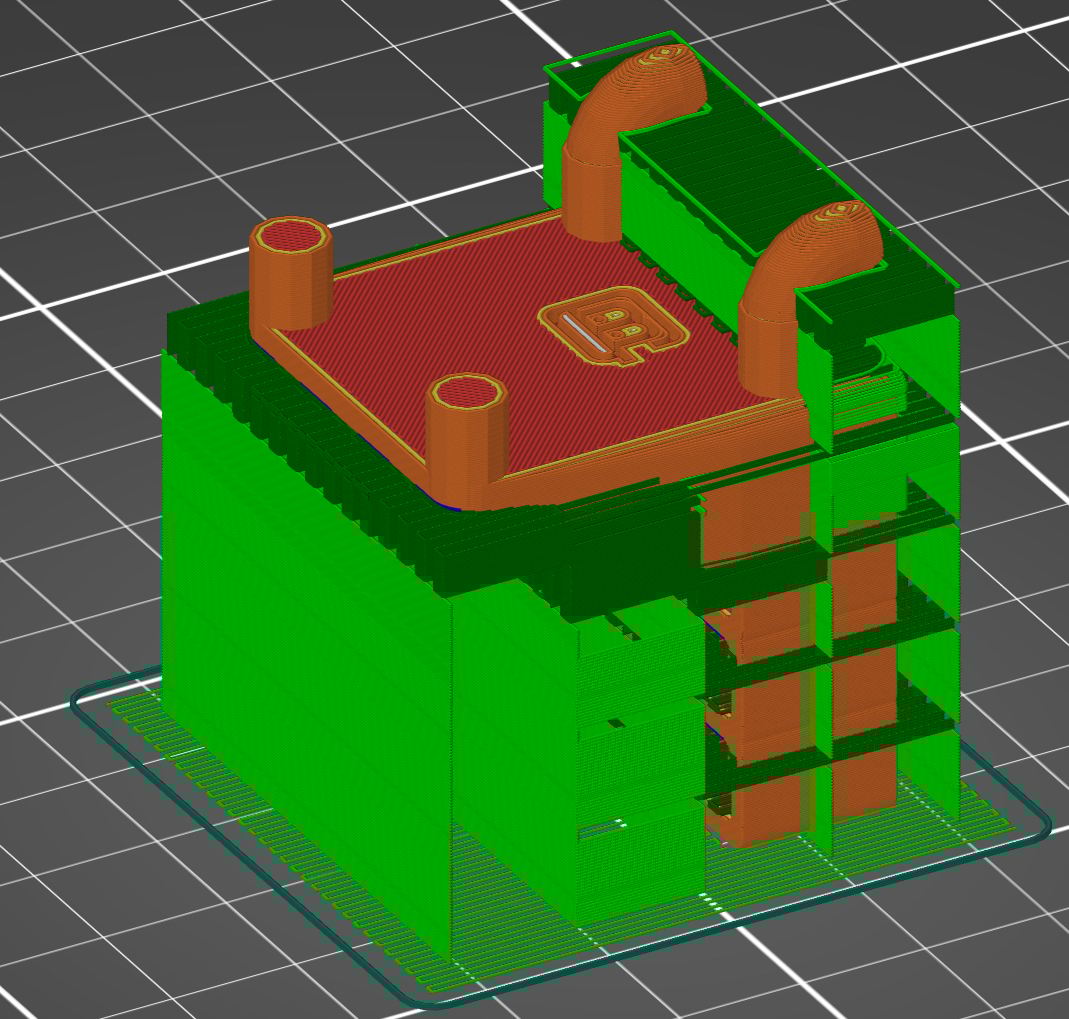
In this case, the part is rotated 90° about the X-axis.
- Build plate adhesion: The small surface area of the part in contact with the build plate makes this orientation of the part less than optimal for build plate adhesion, but the support material will provide enough stability for the part to print.
- Mechanical stress: The applied stress is parallel with the build direction which will make the part weaker and subject to mechanical failure.
- Size of the printer: The part fits comfortably on the build plate.
- Print time: 250 minutes (62 minutes for supports)
- Support material location: Part is largely encased in support material. Will require post-print removal and significant work to improve surface finish.
- Features with close dimensional tolerances: Pegs that go into the board are vertical which will make them dimensionally accurate. Holes in the part that hold tools won’t be as accurate.
Final Thoughts
The first option is probably the best orientation for this part. It provides good build plate adhesion, maximizes part strength, and has a minimal amount of support material. The second orientation places a lot of support material in the functional areas of the part that will impair its performance. Finally, the third option risks mechanical failure of the part.
As you can see, build orientation selection involves consideration of a number of factors. Sometimes the solution isn’t obvious, and you must distinguish between “must-have” and “good enough” characteristics. At the end of the day, to achieve the desired printing result, it’s best to eliminate the build orientations that fail to satisfy the necessary characteristics, then optimize the other factors.
License: The text of "3D Print Orientation: What to Consider for Optimal Results" by All3DP is licensed under a Creative Commons Attribution 4.0 International License.