3D Printer Stringing: 5 Simple Solutions

3D printer stringing is a common problem, especially with flexible materials. Overcome this issue with these five simple solutions!
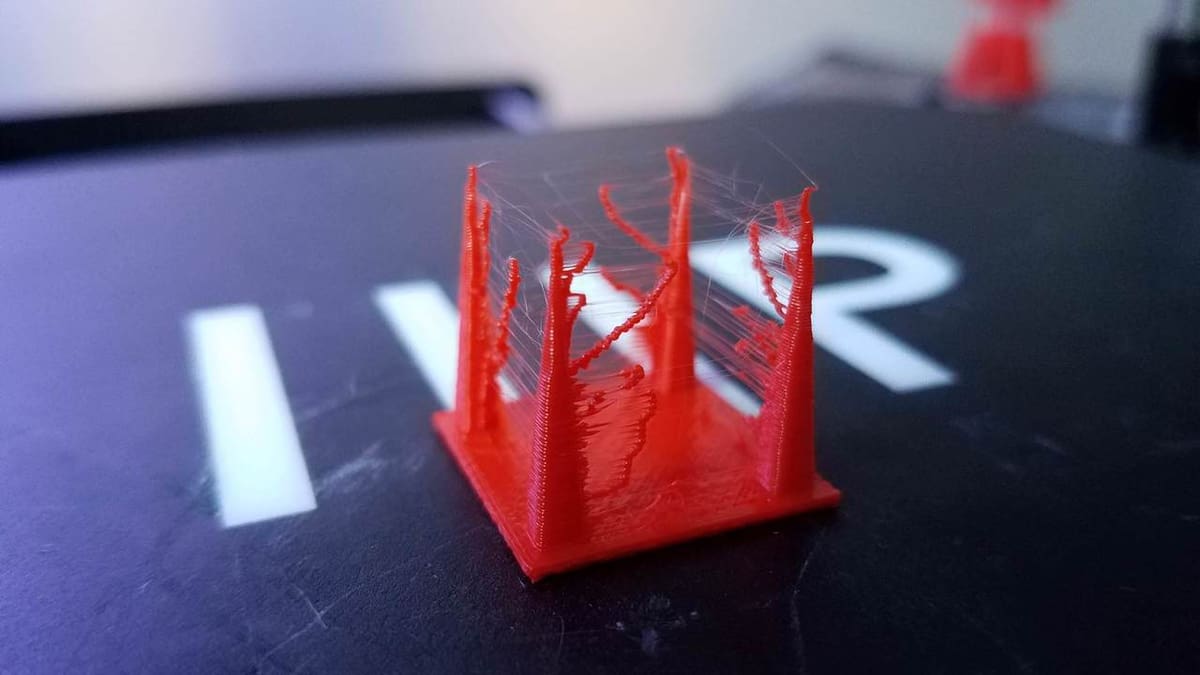
As an FDM printer’s nozzle travels across an open space to get to the next point, it may sometimes ooze melted plastic, which then solidifies and sticks to the printed parts. This is 3D printer stringing, and it leaves your 3D printed parts with thin strands of plastic that resemble cobwebs or strands of hair.
In theory, your nozzle shouldn’t deposit plastic as it travels through open air (otherwise known as a travel move). However, molten plastic will often leak onto parts where it shouldn’t, leaving your prints with what looks like “whiskers”.
The leading causes of stringing in FDM printers are using incorrect retraction settings and setting the hot end temperature too high. PETG, for example, requires relatively high temperatures for melting and is notorious for stringing. PLA and ABS, however, are also known to have this issue.
Luckily, there are some ways of preventing 3D printer stringing. In this article, we’ll take a look at five simple solutions. Let’s get started!
Enable Retraction

Enabling retraction is the most common method used to combat 3D printer stringing. Enabling retraction means that, where the printhead has to cross a space, the filament will be pulled back – just a little bit – by the feeder. This prevents the molten plastic from trailing behind during the travel move because the “pulling back” action serves as a countermeasure against oozing. Once the printhead has arrived at the next location, the filament is pushed back out, and printing resumes from the nozzle again.
In most slicing applications, like Cura, retraction is usually enabled by default. However, it’s always a good idea to confirm that this is true, especially when you start experiencing stringing. If the retraction setting is turned on and there’s still stringing on your prints, you may then need to go into the nitty-gritty of the retraction settings.
Retraction Distance
Retraction distance is probably the most critical retraction setting, as it determines the length of filament that pulled back by the extruder. Generally, the more filament that can be retracted, the less likely you’ll encounter stringing. But if you retract too much, the filament may be unavailable in the hot end when you need to resume printing.
The retraction distance may vary depending on the type of extruder you’re using. For example, a Bowden extruder will typically require a higher retraction distance, owing to the longer distance between the nozzle and the drive gear.
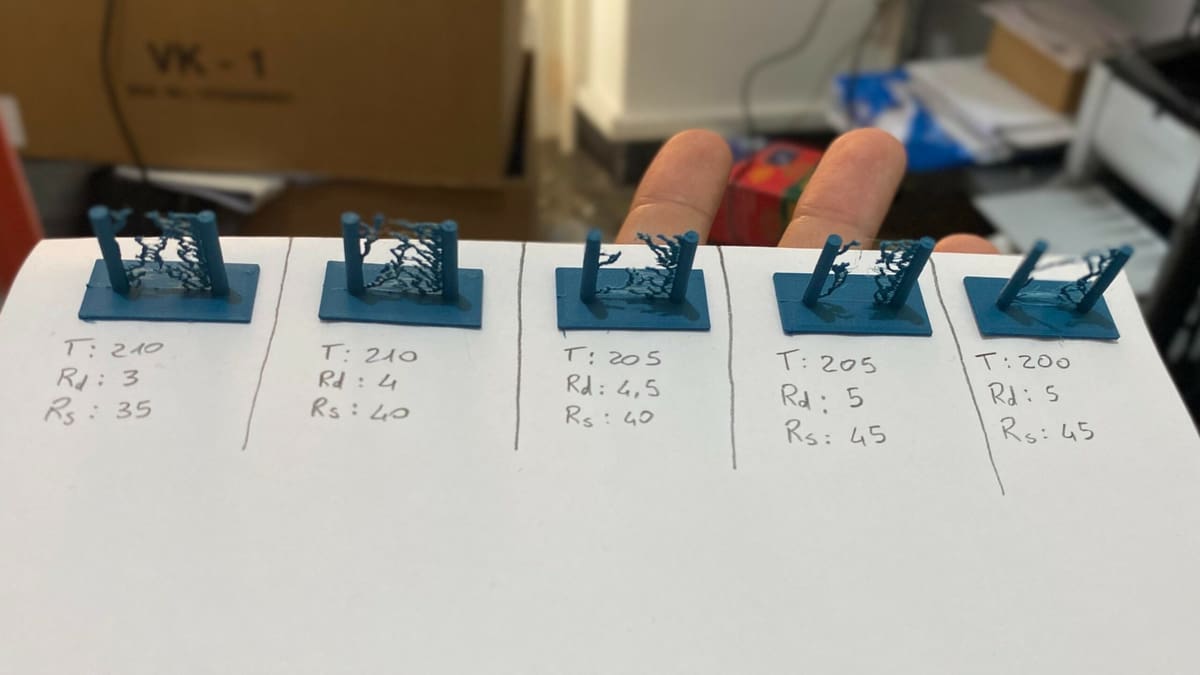
To determine the correct retraction distance, you may have to perform test prints. Try this retraction test print: It prints quickly and doesn’t require too much filament.
Retraction Speed
The retraction speed determines how quickly the filament is retracted. A faster retraction speed suggests that 3D printer stringing is less likely to occur because the filament is pulled back fast enough before it starts oozing. However, when the retraction speed is too fast, it may cause the filament to disconnect from the other portion inside the nozzle. Worse, a quick movement of the drive gear may grind the molten plastic and jam the nozzle or create areas where the filament is not deposited.
Therefore, you should aim to find a sweet spot (between slow and fast), where retraction is optimal. This sweet spot may vary depending on the printing material. Perform a few test prints to determine the ideal retraction speed.
Also, specific slicers may be helpful in dialing in the right settings. For example, Simplify3D comes with pre-configured profiles that are a great place to start if you’re looking for a retraction speed that works best.
What Settings Should You Use?
To determine the optimal retraction values, you must first know the extruder you’ll be using and the material you’ll be printing with.
Materials like ABS and PLA typically do well with a speed of 40 to 60 mm/s and a retraction distance of 0.5 to 1.0 mm on direct extruders. On the other hand, Bowden extruders will generally require a speed of 30 to 50 mm/s, with a retraction distance of around 2.0 mm. These figures aren’t constant and can change based on many variables.
Some slicer programs, like Simplify3D, come with “coast” and “wipe” parameters that are powerful tools for further dialing in your retraction values. As the name suggests, wiping moves the nozzle against the outer wall to wipe off leftover plastic, while coasting shuts off the extruder for the last few millimeters of the print line to decrease pressure buildup and prevent blobs or zits.
In Cura, the “Retraction Minimum Travel” setting prevents retraction from occurring unless the printhead is traveling a certain distance. This acts as a precaution against filament grinding. Another setting to consider is “Combing Mode“, which controls the printer’s travel moves to avoid unnecessary retractions. All retraction settings can be found in the “Travel” dropdown in Cura.
At the end of the day, when retraction is done correctly, it’ll put a stop to stringing and give you more control over your prints.
Set the Right Temperature
As the temperature increases, the printing material becomes more liquefied and is more likely to drip from the nozzle, even after adjusting the retraction settings. A lower nozzle temperature reduces this likelihood. However, you must be careful to not set the temperature too low. Very low temperatures could prevent the filament from melting and create issues with extrusion.
An ideal temperature depends on the printing material and other print settings. However, it’s generally recommended to lower the temperature once you notice stringing. You can try reducing the nozzle temperature by 5 to 10 °C increments, but never reduce the temperature below the manufacturer’s minimum specifications. These are the commonly recommended nozzle temperatures for some of the most popular filaments:
- PLA: 180-220 °C
- ABS: 210-250 °C (90-110 °C print bed)
- PETG: 220-250 °C
- TPE: 210-260 °C (20-110 °C print bed)
- PVA: 160-215 °C (60 °C print bed)
- TPU: 210-230 °C (30-60 °C print bed)
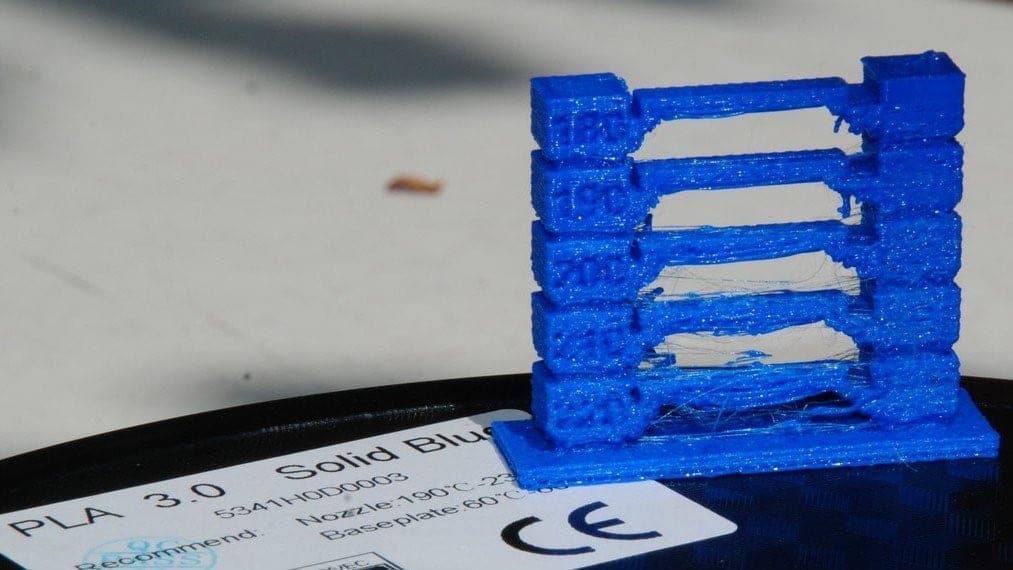
Using a temperature calibration tower test print is a great way to identify the ideal temperature for each printing material.

Adjust the Print Speed
Some speed settings can also affect 3D printer stringing. If, for example, your nozzle takes too long to move between two points, stringing is likely to occur because molten plastic has more time to ooze out of the nozzle. But if the printhead can travel faster, it may be quick enough that the filament won’t have enough time to ooze.
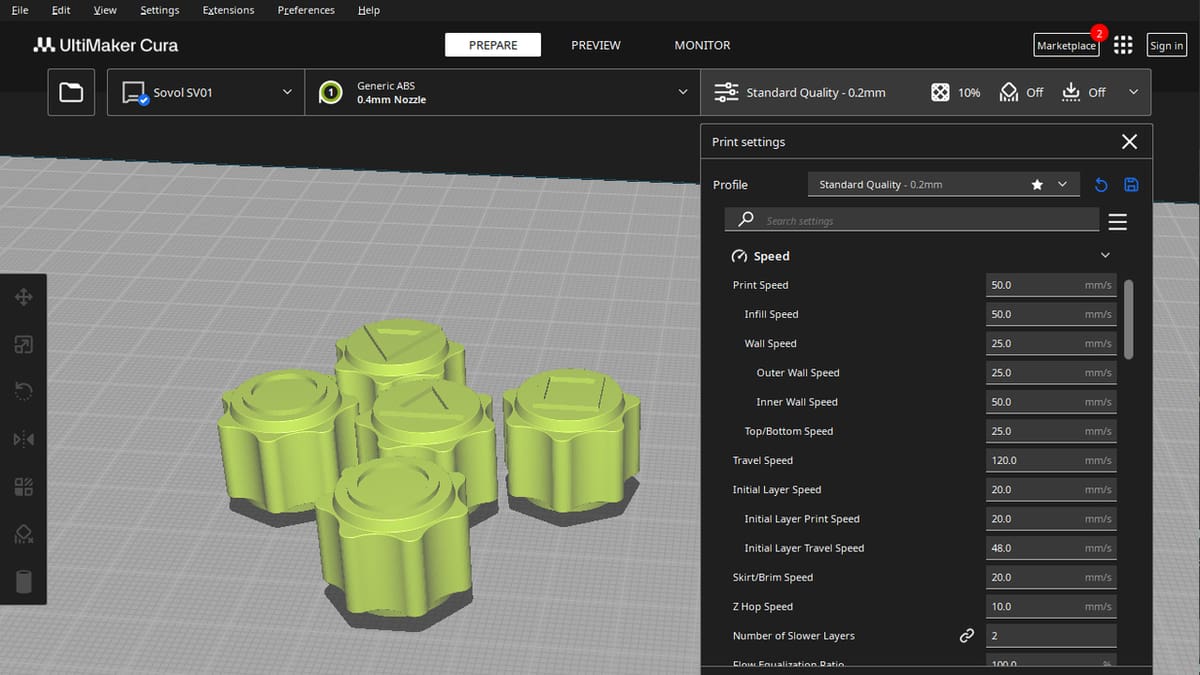
This setting is called “Travel Speed” in Cura, and increasing it can reduce 3D printer stringing. However, if the temperature is low and the print speed is too high, you may end up with under-extrusion because the plastic won’t have enough time to be deposited.
Generally, a speed of 190 to 200 mm/s will work fine with most printing materials. MatterHackers, however, has found 150 mm/s to be the ideal Travel Speed setting for most printers.
A similar setting in other slicers, including Simplify3D, is “X/Y Axis Movement Speed”. Basically, it allows you to change the printhead’s speed while it’s moving side to side to places where filament needs to be deposited. Increasing the speed means less time for oozing during travel moves.
Though not a speed setting per se, the actual length of printhead movements can also be conducive to stringing. The further the travel move, the more likely plastic can ooze out of the nozzle. Some slicers adjust the travel path to favor shorter moves. For example, Simplify3D’s “Avoid crossing outline for travel movement” setting keeps travel paths tight to reduce the chance of oozing.

Clean the Nozzle Before Printing
When you use a printer for a long time, especially with a single type of material like PETG, the filament can leave a thin layer of residue inside and outside of the nozzle. This layer can cause stringing, as filament strands will try to stick to the surface of your printed part.
To avoid this issue, ensure your nozzle is thoroughly cleaned before printing. Start with the nozzle exterior, wiping it with a damp cloth while it’s still hot. This should remove debris on the outside of your nozzle, but you may need to use a wire brush or a small blade to remove leftover material.
Next, you’ll want to tackle the inside of your nozzle and clean away debris blocking the output hole. The easiest way to do this is to insert a small needle or drill into the nozzle. This should break up dirt and clear the nozzle. However, if it doesn’t work, you can also try the cold pull method to remove any remaining dirt from the previous filaments.
If you’re still experiencing issues after cleaning with the above methods, you may need to replace your nozzle. Just make sure to heat the hot end to melt any material stuck inside and remove filament fed into the extruder. Once all residual material is gone, you can remove the nozzle. Then, clean the hot end with a small metal pick before attaching your new nozzle.
For more detailed guidance, check out our nozzle cleaning guide.
Keep Your Filaments Moisture-Free
Moisture in the air can damage filament and lead to stringing. Once moisture is present, it tends to turn into steam as the plastic gets heated up. This steam can mix with the plastic, increasing the probability of oozing during non-print movements. PLA is the main culprit here because it tends to absorb more moisture compared to ABS and other materials. However, all FDM 3D printing filaments are hygroscopic to some degree.
Severe stringing is a sign that you’ve got a case of wet filament. The good news is that you can safely dry your filament and make it print-ready with a few different methods. The first one is to purchase a filament dryer. These machines heat the filament and evaporate moisture in a controlled environment. The Sovol SH01 and the Sunlu FilaDryer S2 are both good options for drying filament.
Another option is to dry your filament in the oven. You’ll need to check the glass transition temperature for your filament and wait until the oven heats up before setting the spool inside. A good rule of thumb is to leave the filament in the oven for four to six hours. If your oven isn’t suitable, you can also use a food dehydrator for drying.
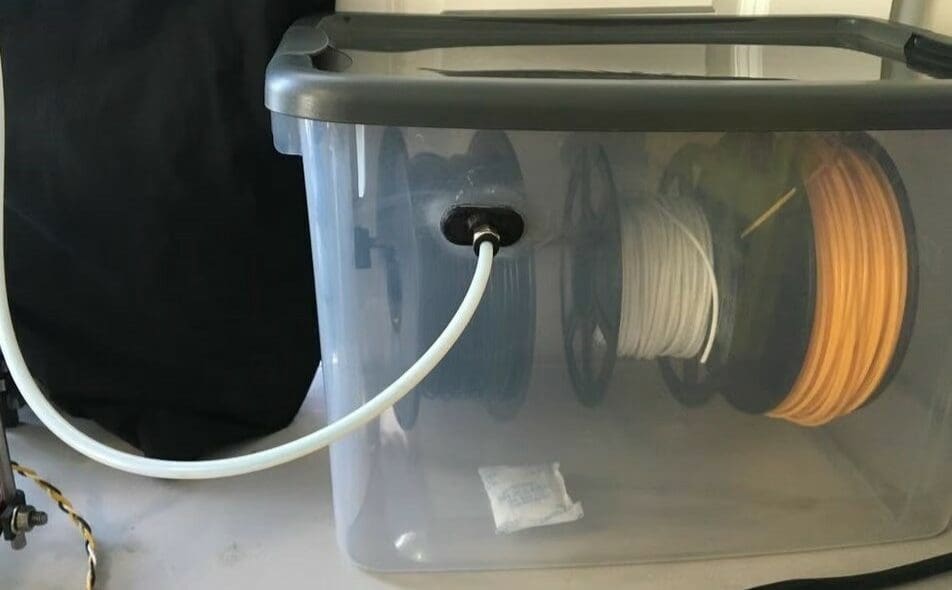
Once you have properly dried filament, you’ll want to store it in a moisture-free environment. Some good storage solutions to consider are airtight boxes, desiccant packs, and vacuum storage bags. You can either purchase a dedicated dry box like the Polymaker PolyBox or opt for a DIY option, such as a Rubbermaid storage container.
How to Remove Stringing
Now if you’ve followed all of these steps, you should be getting great results with minimal stringing! But what do you do with all of your previous prints that still have strings attached?
Mechanical Removal
Let’s go through some of the best methods to physically remove those stubborn strands from your models, with a variety of tools.
Fingers
The first and most simple method to remove stringing is by simply rubbing the wisps away. And the easiest and most accessible tool to do this with are your fingers. This does the job in most cases, and is often all you need to do to get your model looking tip top. Just be careful around delicate parts of the print and make sure to do this with clean hands, as dirt from your fingers can easily get caught in the layer lines and make them much more visible. That said, do not use this method for fiber-filled filaments (e.g. glass or carbon fiber), as they can be highly irritating to your skin!
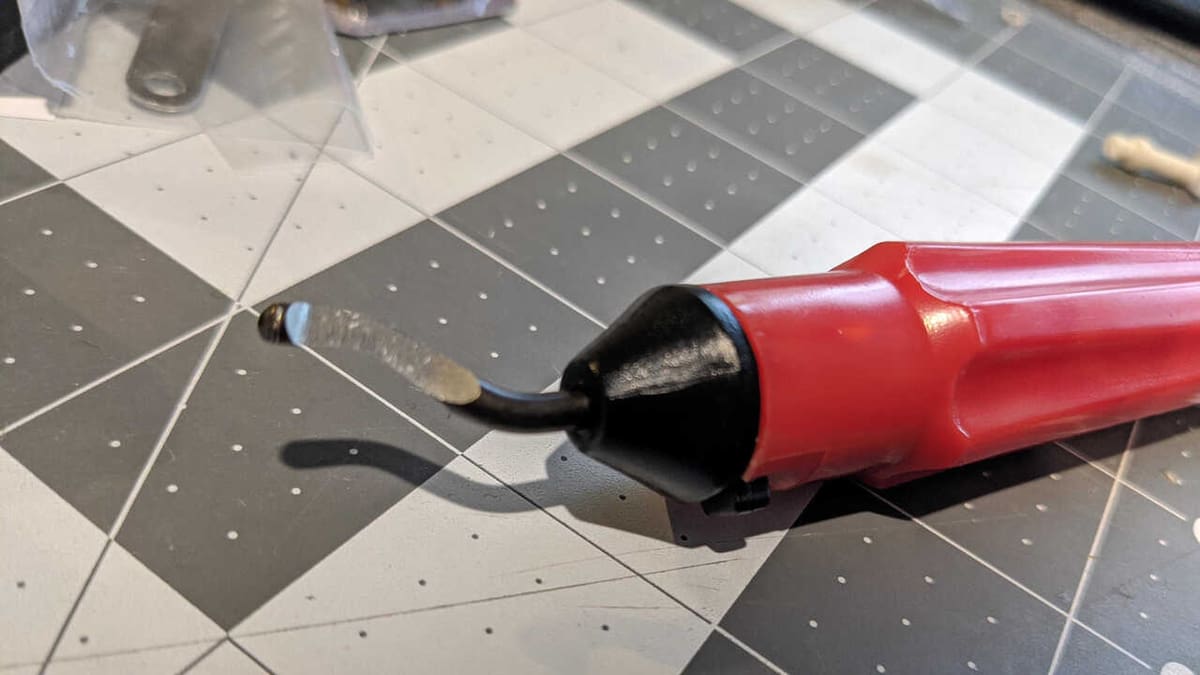
Deburring Tool
Another handy way to remove stringing is with a deburring tool. These are normally used to clean up the edges of machined metal parts, but 3D printing enthusiasts have found other uses for them, namely cleaning up the remnants of brims and supports. They are also good for cleaning up stringing! However, they’re only good for cleaning up stringing along sharp-ish edges, such as when the nozzle travels over a gap between two vertical features, leaving stringing in its wake. It can be a very quick and clean way to remove stringing in that circumstance.
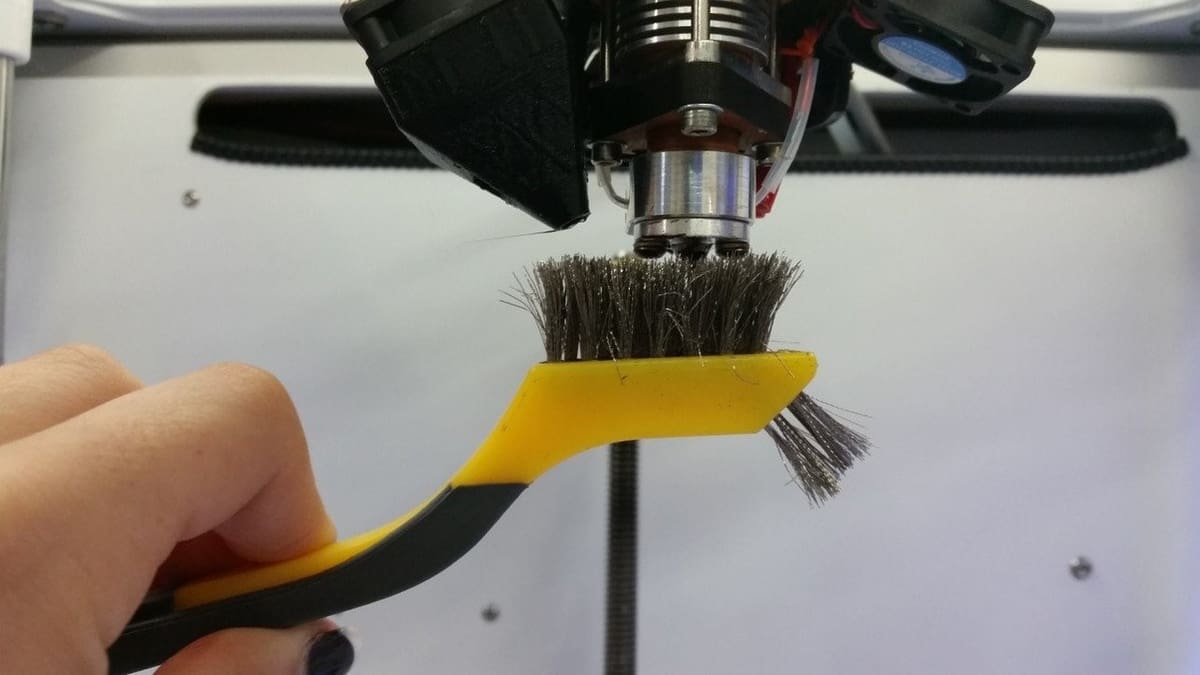
Stiff Bristle Brush
You probably have a brass bristled brush for cleaning your nozzle laying around, but it shouldn’t be used for cleaning up stringing because it’ll probably leave some scratches behind. Instead, use an old stiff bristled toothbrush or other cleaning brush. This is good for very light stringing in delicate areas, namely places where you can’t reach with your fingers. However, it’s not so good for stubborn, thick stringing. You’ll find the brush only gets the wispy ends of the strings and not the thicker base of them in those cases.
Sanding Paper
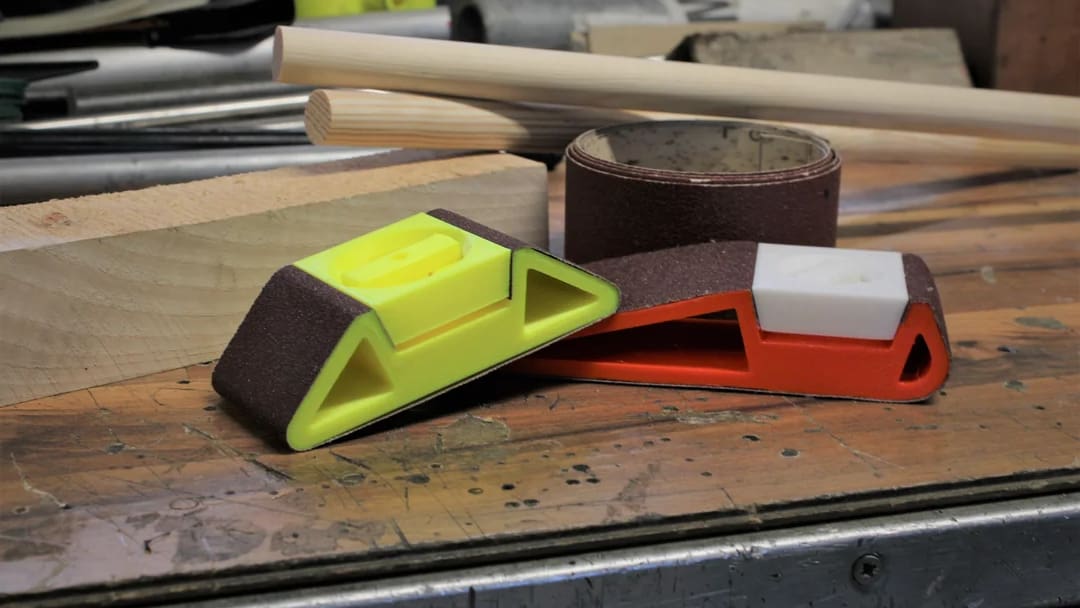
Similar to the brass brush, we don’t recommend this method unless you don’t mind the scratches it will leave, or if you’re planning on sanding and painting the model anyways. This effective method makes it is easy to get into tight places by folding the sandpaper and slotting it into the crevices. It’s especially handy for TPU, which is often too stubborn to get with your fingers, and the material doesn’t scratch as easily as others, like PLA.
Plastic Card, Spudger, or Guitar Pick
This one’s for all the musicians out there! Or anyone who owns an iFixit Kit or similar. These often come with a triangular shaped prying tool, similar to a guitar pick, or plectrum. These are excellent for removing stringing from sharp corners, inside or out. One neat trick to get into hard to reach places is to take an old credit card and cut it to the right size and angle, that way you can reach into places in the model that your fingers couldn’t normally go.
Heat-Aided Removal
Next, these methods for removing stringing involve the use of heat. And in many cases this can be the fastest and most effective method! But it’s not without it’s risks…
Open Flame
The simplest tool to use would be a simple butane lighter. “Zippo” style lighters aren’t recommended because they leave a lot of nasty black soot behind. The best option for the job is the long-nosed barbecue lighter, as it is safer to use and prevents you from burning your fingers.
This is, however obviously, the most dangerous method, and the utmost care should be taken to prevent hurting yourself or damaging your model. Go easy over the area and only wave the flame near it – don’t hold it in one place and don’t get it too close. After that, you’ll still need to follow up with some mechanical removal though, as this often leaves tiny beads of melted filament. These beads are very loosely attached at this point though, and should be really easy to remove.
Heat Gun
This next method requires a specialist tool in the form of a hot air gun or hot air soldering station, but a hair dryer could also be used, albeit not quite as effectively. Some people swear by this procedure! For lower temperature filaments like PLA, a hair dryer is often sufficient. But for stuff like ABS and PETG, an actual heat gun is recommended.
This is definitely safer than the open flame method, but it is still quite easy to melt a print and burn yourself. Again, go slow and wave the heat around. Avoid staying in any one place for too long. Just as in the open flame method, this needs to be followed up with mechanical removal, but most of the work is done at that point.
License: The text of "3D Printer Stringing: 5 Simple Solutions" by All3DP is licensed under a Creative Commons Attribution 4.0 International License.