3D Printed Shirt: The Coolest Ways to Make Your Own

Custom printing on fabrics is nothing new, but is a 3D printed shirt possible? Read on for a few 3D printed shirt tutorial options.
If you keep tabs on what is going on in the world of 3D printing, you probably remember Adidas launching their sneakers with 3D printed midsoles back in 2015. Around that same time, you may have also heard of the 3D printed dress designed by Karl Lagerfield that made its debut on the runway for Paris Fashion Week.
Since then, 3D printing has found its way into the world of fashion and costume design, primarily to make accent pieces with intricate detail. The adaptability of 3D printing that we all know and love gives designers the ability to create small batches of custom pieces with a level of detail only limited by their creativity. Take for example the elaborate headress and shawl worn by the iconic Angela Bassett in Black Panther.
But what about everyday wear for 3D printing hobbyist? Is it possible to create custom designs that you can add to fabric using the same 3D printer you already have at home? While we can’t guarantee the final product will be ready for Paris Fashion Week, let’s get into the possibilities of customizing your clothing and how (if possible) 3D printing can be used!
Printed Shirts
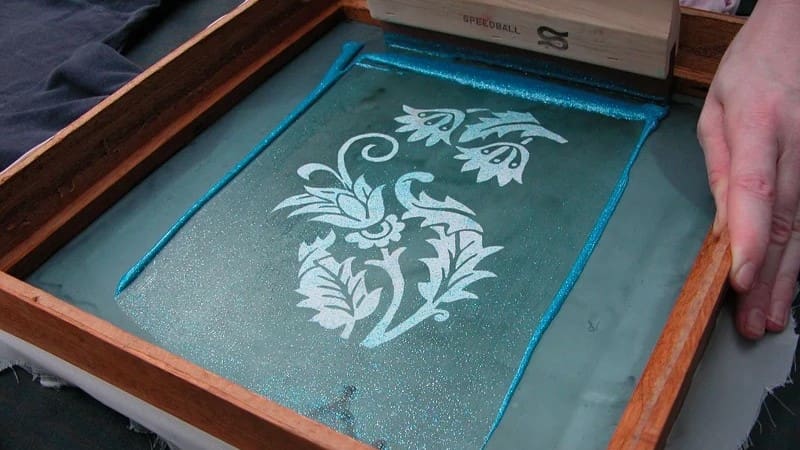
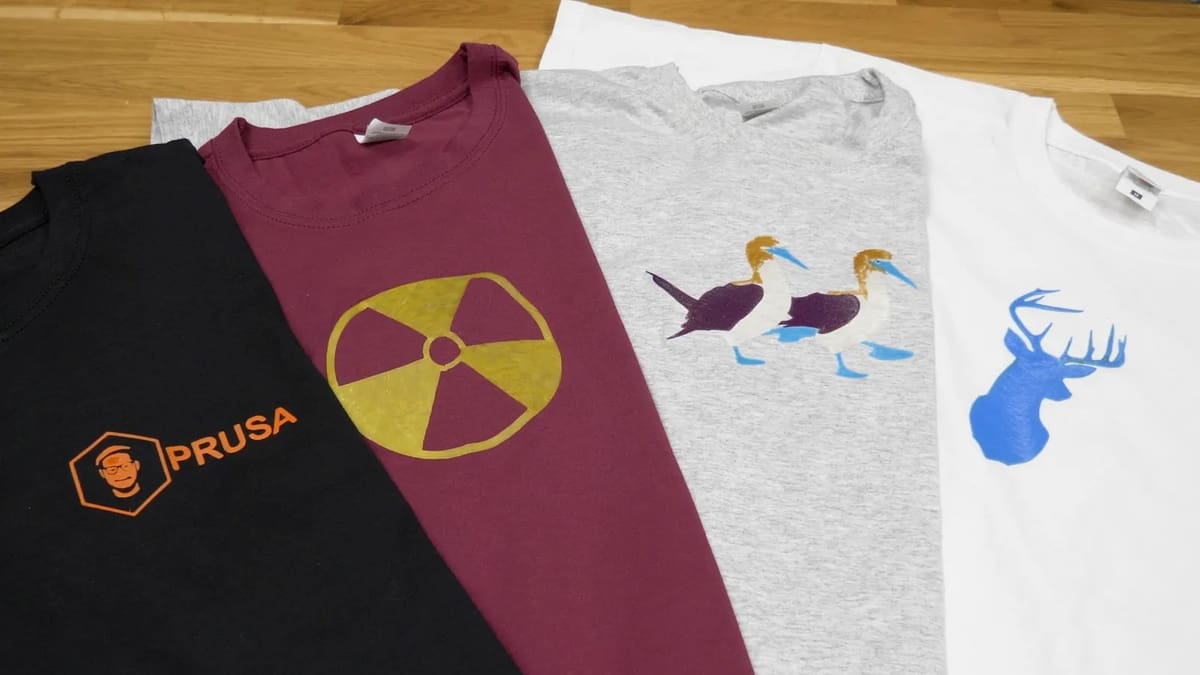
While there are a variety of methods that one can use to create a custom shirt design, screen printing is the most popular and one of the oldest methods. With the use of mesh screens, ink, and stencils, designs are applied to the surface of fabrics. It’s a simple enough process that it’s widely used among DIYers as well as large-scale operations.
But hey, why bother with all that when you have a 3D printer? You read that right – with the same machine that you have been using to create your cool Pokémon figures, inexpensive kitchen gadgets, and last-minute gifts for loved ones, you can also create your own custom shirt designs!
While, for some reason, science has not advanced enough to create a shirt fabric filament that you can use to create an entire shirt from scratch with your printer, you can certainly use it to add motifs, patches, or even 3D patterns to a fabric that makes it entirely your own.
So before diving into the different methods you can consider to achieve your desired look, let’s get into the fine print.
Design Considerations
The easiest type of image to 3D print onto a shirt would be one that doesn’t have too much intricate or fine detail. Therefore, photographic images or detailed drawings wouldn’t really work. It would also be difficult to achieve most shading or fading effects, as you can only make layers so thin until you run into issues during printing or with durability. Limiting the design to one color will make for the most straightforward process, but if you’re up for filament exchanges, the sky’s the limit.
If you’re looking for a program to create or edit a 2D design in, Inkscape is a free vector manipulation program that is user-friendly and has lots of online resources available. If you go this route, Inkscape will export your design as an SVG, which will have to be converted to an STL for printing.
The easiest way to do this is probably using Tinkercad, an online 3D modeling program: Import your design, extrude it to your desired height, then export as STL. You could also consider creating your design in Tinkercad directly, then upload the design to your slicer and let the fun begin! Other software options include Fusion 360 or Blender.
Hold on, we’re not ready for the fun part just yet. Diving into a project like this unprepared could result in disaster, or more likely, burn holes in your shirt. It’s important to consider which materials will yield the best results.
Material Considerations
While many factors will depend on what method you ultimately end up attempting, there are a few general things that you should keep in mind while assembling your supplies.
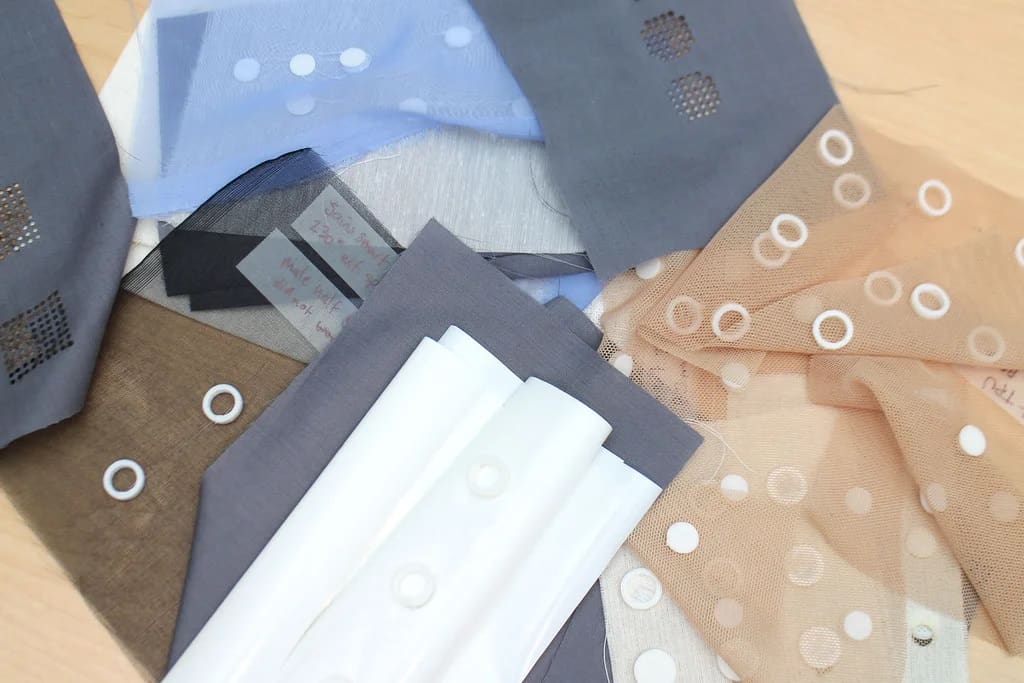
- Fabric: The main thing to take into account here would be the heat resistance of the fabric. Will it be in contact with freshly melted filament? Try doing a test patch first to make sure your fabric can handle the temperature you plan to use. Relatively safe fabric choices to print on would be cotton and polyester/cotton blends. If your fabric already has special care needs, you probably should avoid 3D printing onto it.
- Filament: Depending on the method you use, you’ll have more or less flexibility in what filament you use. But in any case, make sure to have the settings ironed out before you start printing on a shirt. It’s a lot more difficult to address blobs or stringing when the print is already attached to some fabric. PLA will be a safe choice in any method because it’s easy to print, and its lower melting temperature may be beneficial for both printing and troubleshooting adhesion issues. Though trickier to print, you’ll also find TPU often used with projects that involve 3D printing onto fabrics because of its flexibility.
Iron-On

This technique of shirt customization involves using 3D printing to create an iron-on “transfer” of your design. The project was reported on by Jakub Kočí via Printables, and it’s only suitable for flat designs (If you’re craving a shirt decal with a third dimension, check out the other two methods).
The method of application is similar to the one used when adding names to the back of sports shirts or iron-on patches, for instance. The basic technique involves using the following materials:
- Baking paper
- PLA filament
- Glue stick
- Clips
- T-shirt!
You’ll need to cover the print bed with a sheet of baking paper, then secure it in place with the clips. It’s recommended to coat the baking paper with glue to allow good adhesion of the printed design. You can then print your design directly onto the paper to produce a transferable 2D print. Due to its relatively low melting temperature, PLA works best, as the design will essentially be melted onto the shirt later in order for it to adhere.
This method can only be used for flat designs, and the print itself would only need to be one or two layers high, but this will ultimately be a trial-and-error process. Due to the need to iron on the design after printing, try not to have the final print be more than 0.5 mm thick, but even thinner is ideal. The finished print won’t be permanently stuck to the paper, so you can always rearrange and adjust it before applying it to the shirt if your design is made of multiple pieces.
The printed design, while protected by the baking paper, can then be applied to the shirt using a hot iron. This needs to be done carefully, and the use of steam isn’t necessary. Try to avoid leaving the hot iron on one spot for too long to prevent burning and potential damage to the design. The aim here is to melt the design just slightly so that it soaks into the fabric threads.

This method allows you to quickly customize a shirt using a minimal amount of materials that are likely already available to you, but at the end of the day, the design will not be long-lasting. Maybe that’s a benefit if you need something temporary for an event, for example, but it’s also possible that removing the design will leave some residue on the shirt.
It’s probably best to do some trials on a shirt that you wouldn’t mind trashing before you go for the final print – just make sure the test shirt is the same type of fabric that you plan to put the final design onto!
For some design inspiration, you can take a peak at the designs used in the Printables tutorial or scour online repositories like Thingiverse for cool designs. Another source of inspiration could come from SVG files intended for projects with cutting machines like Circut. If you don’t know how to convert SVG into a printable STL file, we’ve got you covered.
Material & Design Considerations
- Material: Cotton or cotton blend shirt; PLA filament
- Printer settings: Appropriate temperature for filament type; slower speed than printing directly onto the print bed
- Care: Depending on the design, it may withstand gentle machine washing at low temperatures, but hand washing would be better. The design can be fully removed if needed or will remove itself after a few washes.
Direct Print
This method, as you might guess, is for printing your design directly onto the shirt. It’s probably the most popular method of the three, although definitely more challenging to nail the details compared to the iron-on method. The materials and tools needed would be:
- Filament (PLA or TPU)
- Clips
- T-shirt
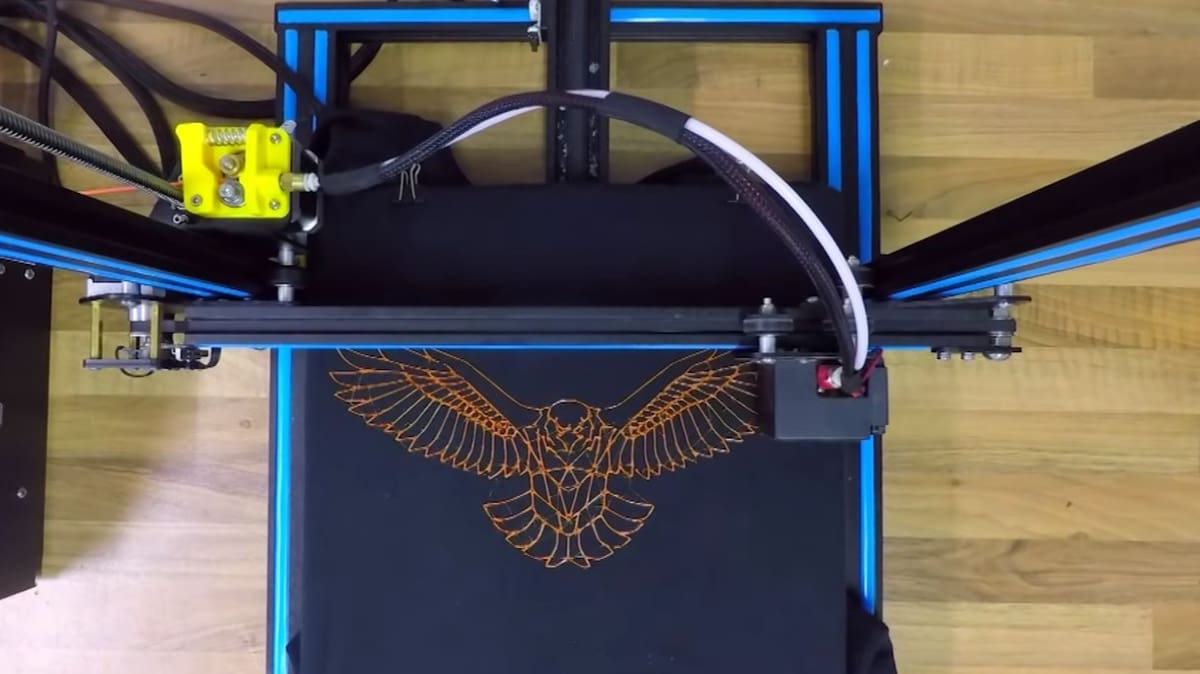
The most important thing for getting a good print with this method is to make sure your shirt is held taut against the build plate. The easiest way to do this is to use binder clips, as in the last method. This is important because if the shirt is loose enough to allow for the nozzle to snag on it, you may end up with some burn marks on your finished product – not to mention a poor quality print. It’s recommended to perform a fresh bed leveling procedure once the fabric is secured.
According to one talented maker, PLA will work fine, but you’ll quickly run into adhesion issues, especially if you plan to wash the shirt. The same guy demonstrated that using a flexible filament like TPU will produce longer-lasting results that may even hold up in the washing machine (but it still needs to be handled with care). The downside to this is the elevated heat settings needed to print TPU, which can cause damage to the shirt if one is not careful.
The initial file conversion process would be the same as the iron-on method but may require some more tweaking of slicer settings, especially for the first layer. You could also consider a slight bump in your usual temperature (as long as it’s still within the recommended temperature range) to ensure the filament is melting into the fabric enough, and for the same reason, turn off the fan. Another setting that may be helpful to activate or increase is what is known as “Z Hop” in Cura or “Retraction vertical lift” in Simplify3D; this will prevent the nozzle from getting too close to the shirt during travel.
If you plan on using a more permanent filament such as TPU, be aware that it’ll stick to any part of the shirt it comes into contact with. Therefore, it’s important to make sure to remove the filament purge line in the slicer settings or, as this maker recommends, apply tape to the area of the shirt where the purge line will be applied so that it can easily be removed without leaving residue.
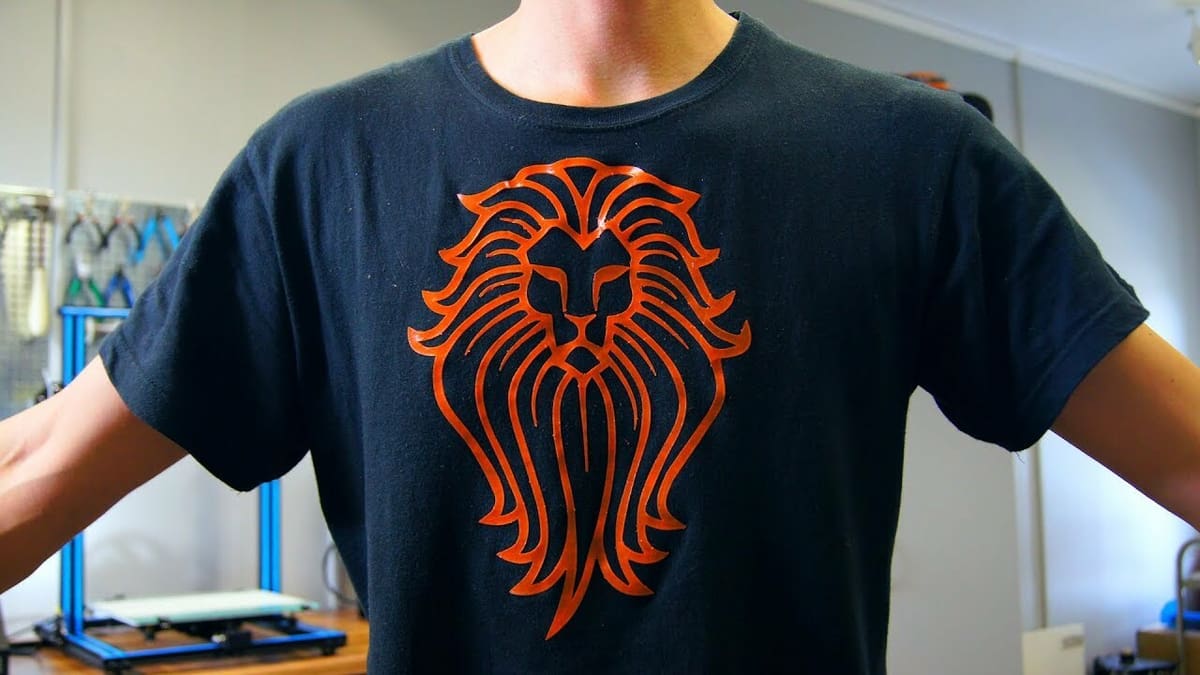
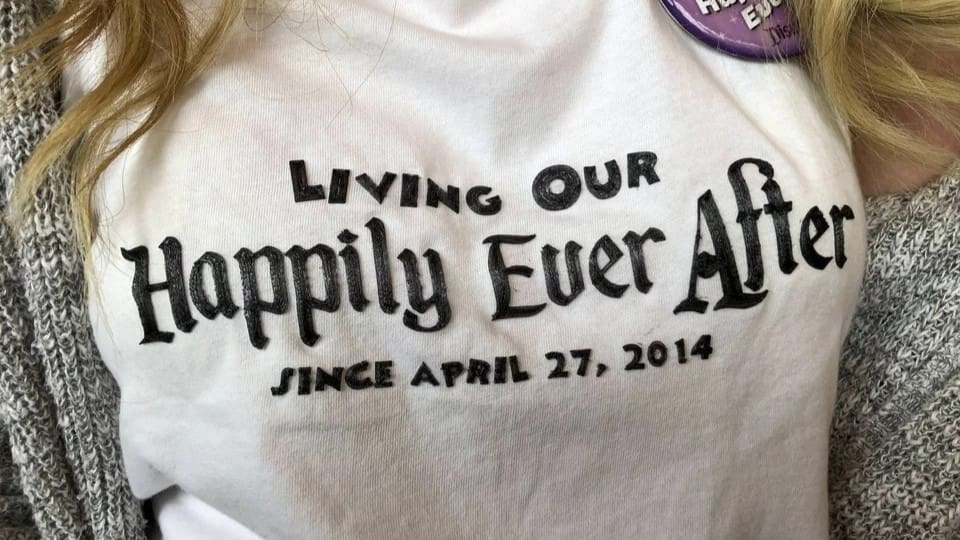
The key to this method is in the preparation. Once you’ve got your shirt secured to the bed and the slicer settings tweaked, all that’s left to do is print! The fun possibilities here include printing a decal with a bit of texture or depth to give it a really unique and elevated look, like these Harry Potter badges. However, one or two-layer designs tend to adhere better to the fabric. If you have a larger design, a bit of fabric glue may be your friend.
Developing a process that works for your fabric, printer, filament, and design of choice will take some effort, but ultimately, you can end up with an awesome customized piece that will hold up for at least a few wears, or more if you’re gentle.
Material & Design Considerations
- Material: Cotton or cotton blend shirt; PLA or TPU filament
- Printer settings: Appropriate temperature for filament type; slower speed than printing directly onto the print bed
- Care: Depending on the design and filament used, it may withstand gentle machine washing at low temperatures, but hand washing would be better.

Print & Sew
This last method takes on a new strategy of adding a 3D printed embellishments to spice up your shirt. Be warned, this will use more material, require some sewing skills, and take more time, but the result will speak for itself. The key difference here is the addition of a piece of fabric during the print, then sewing the printed design onto the final shirt. Here’s what you’ll need:
- Filament
- Clips or tape
- Piece of tulle, mesh, or a porous lace (large enough for your design)
- Sewing materials (thread and needles)
- Shirt
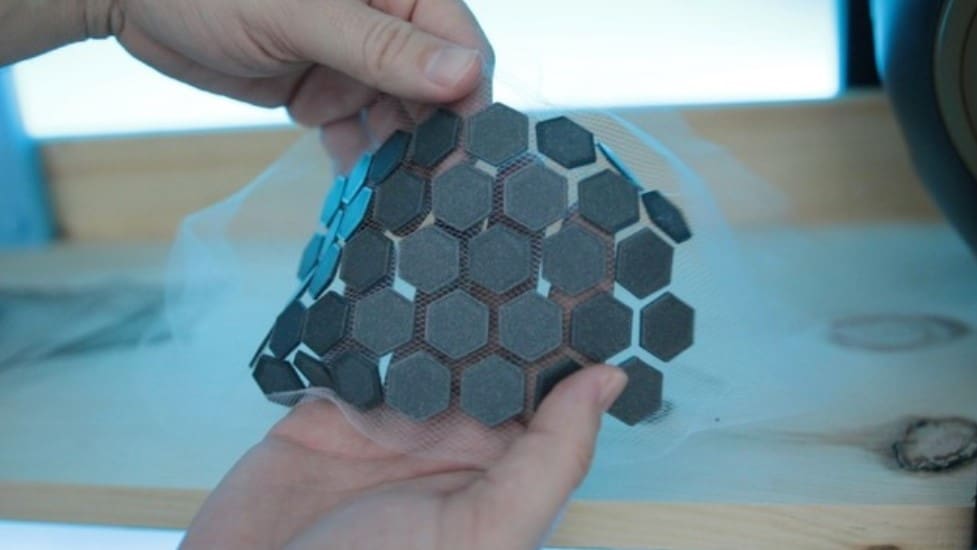
To get started, you’re only going to need to make one major adjustment to the slicer settings, namely to Pause at Layer Height. You can either do this manually, or you can pre-program it into your slicer when preparing your design. During this pause, you’ll place the mesh fabric directly onto your print and secure it down with clips or tape. Again, make sure the fabric is nice and taut to get the best adhesion. Then, you can resume your print as normal. This will fuse the mesh fabric within the layers of the printed design, making it practically inseparable.
Of course, the key is to have a porous fabric that the melted filament can penetrate. Also, be wary of the type of fabric you plan to use as some of the more delicate varieties may not be able to withstand the temperatures of freshly melted filament. This may be the method of choice if your desired end fabric is too temperature sensitive to be directly printed on, as there’s no heat needed for the final application. However, the fabric must still be suitable for sewing.
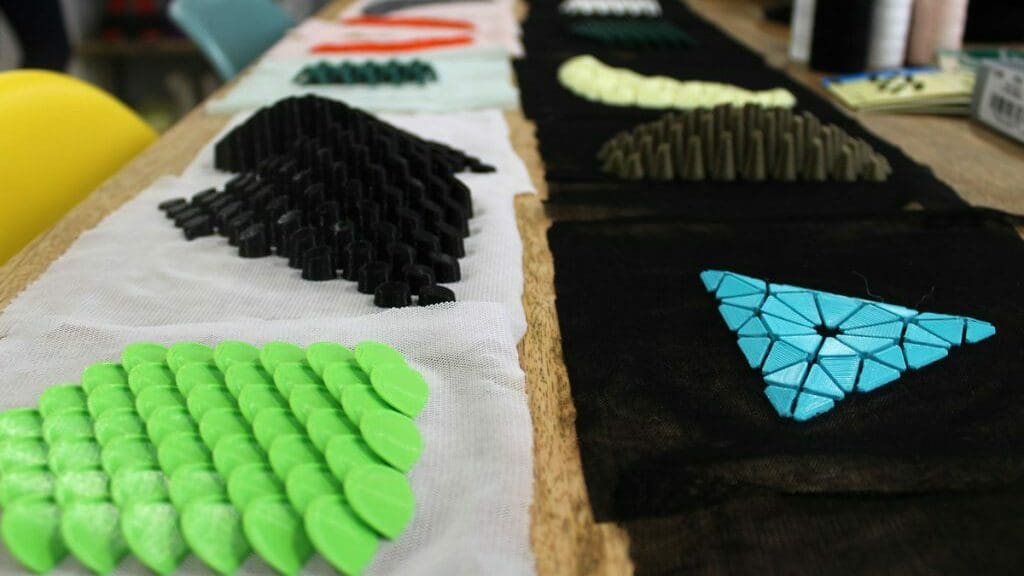
The final product will be a relatively durable 3D design that you can then add to anything you would like. Keep it as a mesh to add scaly patches to your cosplay, or sew a badge design directly onto a t-shirt to get a much more durable customization than is possible with the previous two methods. Alternatively, you could even turn the printed-on mesh into jewelry instead! The possibilities for designs with this method are really endless.
Just keep in mind that if your design is large and doesn’t use a tile-like pattern with spacing between printed-on regions, it could get quite stiff. The YouTuber Uncle Jessy created a simple test pattern for you to start experimenting with the possibilities.
You can use just about any filament for this, but PETG or TPU will probably give the best long-term results. They will, however, need higher printing temperatures compared to PLA. The ability to withstand a wash cycle will depend on what direction you take with your design. If you opt for a popping 3D decal, it may be better to hand wash. If you opt for a small and flat patch, it’ll probably be safe to throw it in the machine on a gentle cycle.
Ultimately, if you’re willing to put in the time to get the most durable (and 3D) customization, this method is the way to go. And if you’re not already familiar with sewing, this is a great opportunity to learn the basics of this very useful skill!
Material & Design Considerations
- Material: A shirt of any fabric as well as a porous and temperature resistant mesh; any filament
- Printer settings: Appropriate temperature for filament type; appropriate speed for the filament type
- Care: Heavily dependent on your design and material choices
License: The text of "3D Printed Shirt: The Coolest Ways to Make Your Own" by All3DP is licensed under a Creative Commons Attribution 4.0 International License.