3D Printed Watch: 10 Great Projects & Models to 3D Print

A DIY watch is a great way to flex your tech prowess. Check out these 3D printed watch projects and put your DIY skills to the test!
Shoot, what time is it? You might ask yourself this question on a daily basis. Some of us rely on nearby clocks, while others pull out their cell phones, but checking a watch? That’s rare these days.
No watch? No problem! We’ve got you covered.
Here’s a list of the 10 best DIY watch projects that can be 3D printed. These unique watches will ensure you’re always running on time and might also draw a few envious glances. For each project, we’ll share some basic information about the watch, its creator, and where to get it.
In addition to the 3D printed parts, all of these designs require a range of other non-printable parts. Retailers like Esslinger and Amazon are great sources for everything you might need for watchmaking.
If you’re interested in any of the designs but don’t have a 3D printer, consider using a 3D printing service. Through Craftcloud, you’ll have access to professional expertise, high-quality prints, a wide range of materials, and round-the-clock support.
Now, it’s time to get to our list!

MakerBot
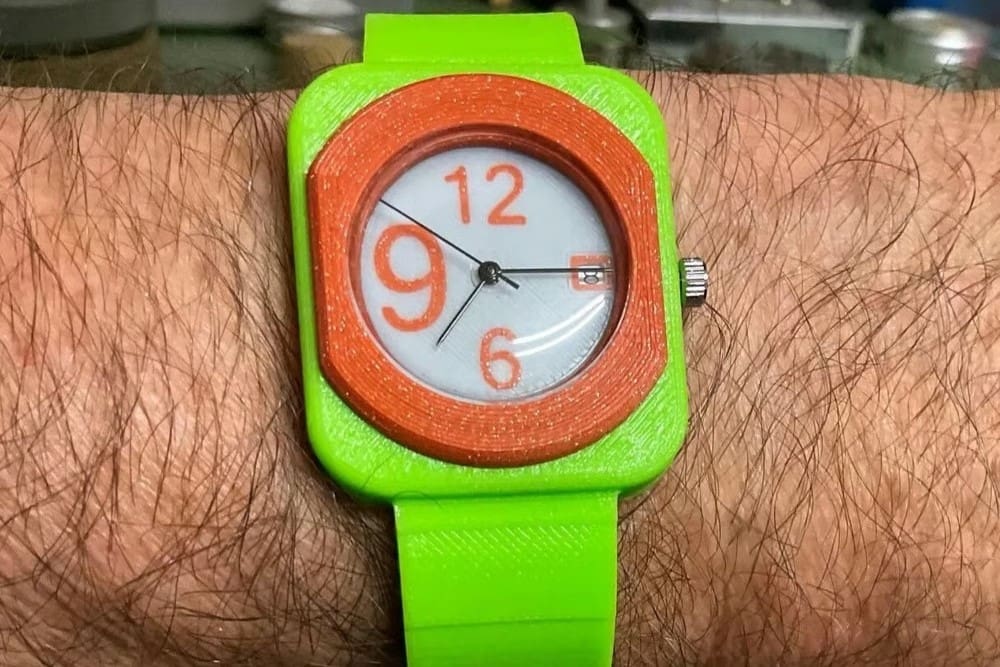
Since this watch includes numbers, you only need to introduce the watch mechanism to the casing.
The model has a simple printing process, but the result is interesting. It’s a great way to try out print-in-place for a useful print that is more than just a toy. The watch should be ready to go as soon as you take it off the printer, but be careful not to yank it, as both the printer and the print can get damaged easily.
If you have a dual printer, you can get creative and use multiple colors in the wristband. Additionally, the creator recommends using 10% infill and only one shell, as well as a layer height of 0.25 mm for a good fit in the print-in-place parts.
- Who designed it? MakerBot
- How printable/popular is it? While 6 people have shared their makes of this model, 12 have posted their remixes, and the files have over 9,000 downloads.
- Where to find it? Thingiverse
Micro Bit Binary
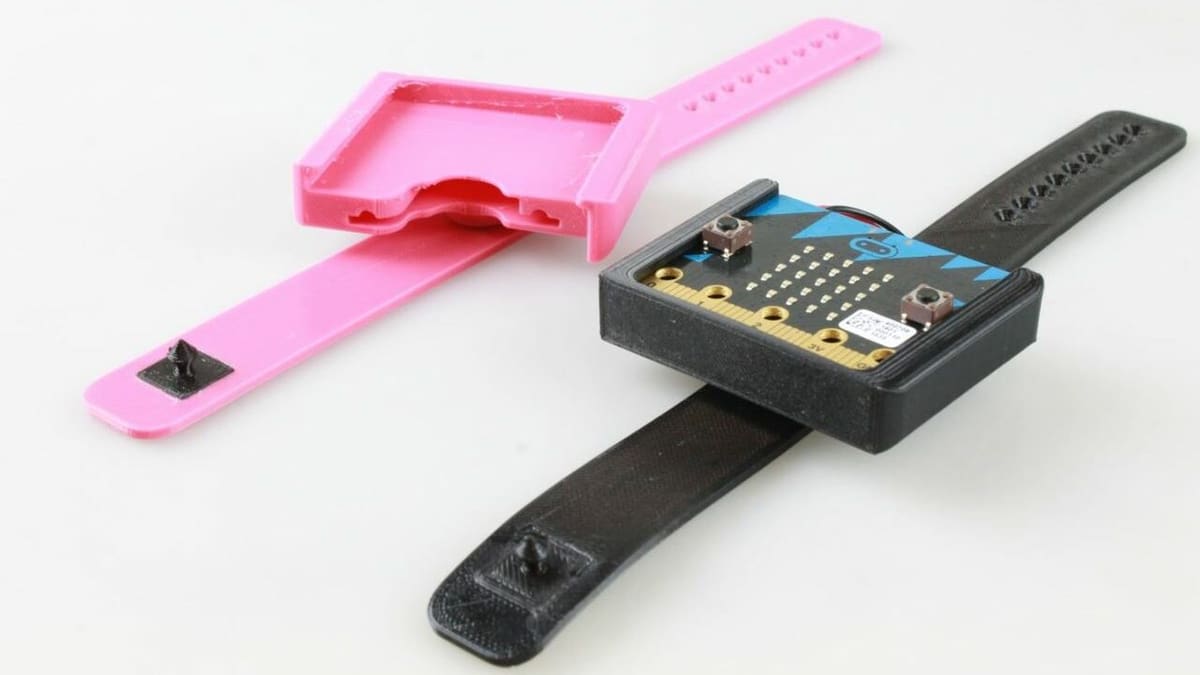
Next, we have a unique wristwatch that tells time in binary using small lights on an electronics board. If you want to know the time, you’ll have to know how to read the numeral system.
Among the necessary non-printable parts for the project is a BBC Micro Bit. A bit of coding will be required, but don’t worry, the full code is included in the 3D print design’s instructions. Flashing the Micro Bit makes the assembly for this watch a little complicated, but if you follow the maker’s precise instructions, all should go well.
Because this design doesn’t use chain links for the wrist band, you’ll need to use a flexible filament, such as TPU, to print the band. This will allow you to wrap the band around your wrist and wear the watch without the print snapping.
The designer recommends printing at 230 °C with an infill above 35%. When printing with flexible materials, make sure you print slow and with no retraction!
- Who designed it? 3DMate
- How printable/popular it? This watch design has almost 22,000 views with over 1,170 downloads. Wow!
- Where to find it? MyMiniFactory
Compliant
This one’s for the flat-watch lovers out there! More than that, the band of this watch uses an interesting concept called “compliance“.
By making some sections of the band thicker than others, it tricks the material into becoming bendy at the cross-section, increasing its flexibility. This way, the wristband can bend without needing hinges. Flexibility also depends on the material, so although you can use any materials you want, PLA or PETG may be more preferable to others like ABS, for example.
In their blog, the author explains how the project was conceived and explains that, if your watch mechanism can stand it, you can heat it up when inserting it into the print to secure a snug fit. They printed the wristband in TPU and the other elements in PLA.
- Who designed it? mecapat
- How printable/popular is it? This model has five downloads so far, and the print shared by the author shows a good-quality finish and flexibility, so having your own shouldn’t be a hassle.
- Where to find it? Printables
Round Case
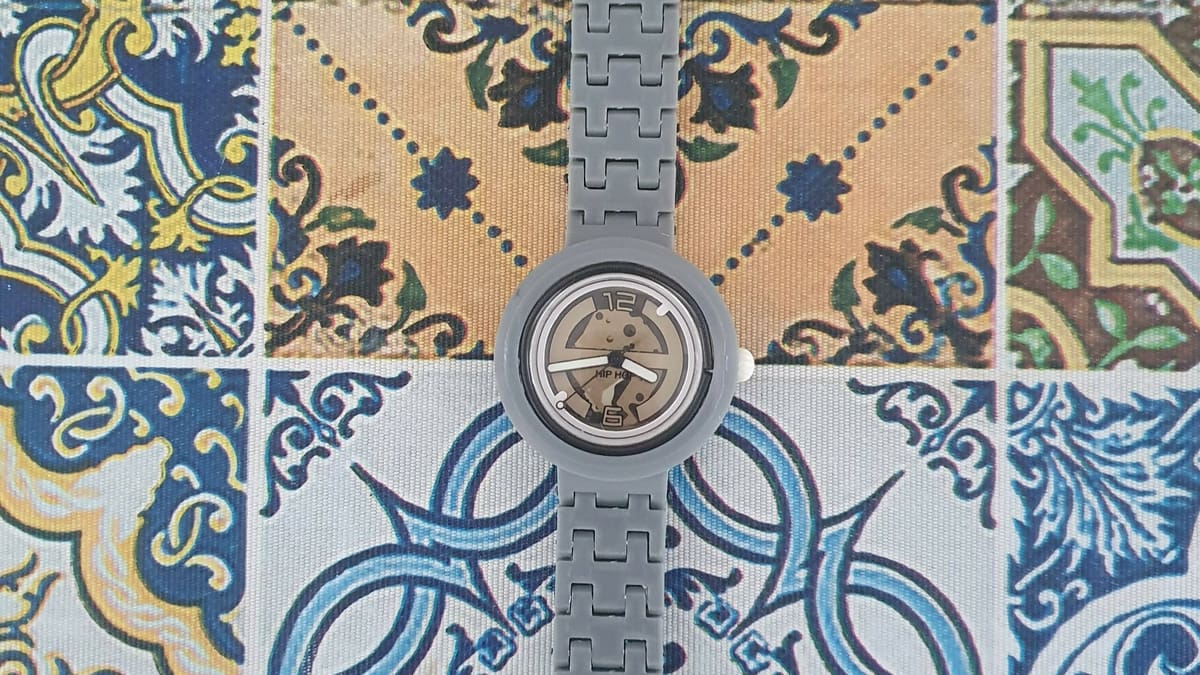
Talk about sleek and stylish! This design is also print-in-place and can be printed with PLA or PETG. Moreover, the author provides good printing instructions to help you achieve a successful print, such as using 100% infill and a layer height of 0.08 mm.
A short layer height results in high-quality prints and great detail, but a longer printing time. However, it will aid in the lifespan of the print. You don’t have to follow the author’s instructions exactly, but you may end up with different results if you experiment.
This watch is the result of three iterations of designs from which the author has learned and done improvements, so it should garner you the best results.
- Who designed it? An3a_Design
- How printable/popular it? This model has 10 downloads, and although no community makes have been shared yet, we’re sure it’s just a matter of time given how straightforward the print settings and recommendations are.
- Where to find it? Cults
LED Binary
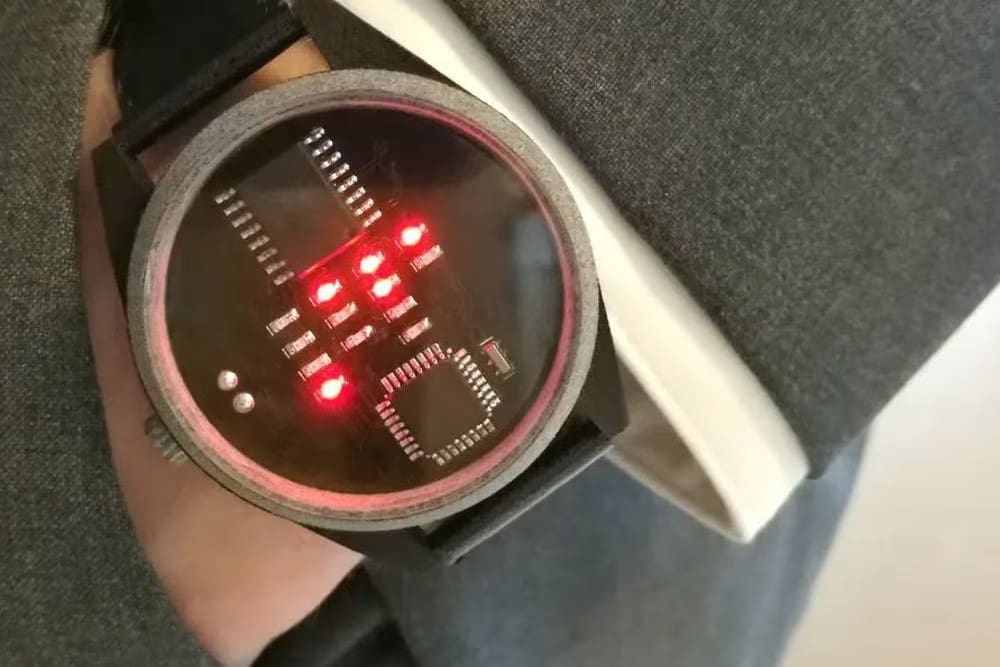
With a relatively clean and professional look, this DIY watch is definitely one of the more stylish ones we’ve seen. It uses binary to display the time with LED lights.
With the project posted on three different platforms, the maker engages a lot with the community, answering most questions and comments across the three sites.
The project uses a lot of non-printable parts like an ATmega328P-AU and LED 0603 lights. The project’s page includes a complete list of parts as well as detailed instructions.
For assembly, you’ll need to use a solder a good bit, so make sure you’ve got some experience before diving in. We don’t recommend doing this project if you don’t have at least intermediate soldering skills. Failure to solder correctly could lead to broken parts or a less-than-attractive finish.
For the 3D printed parts, you should print them slowly and with a good retraction speed since one part includes multiple small, close-together columns. You should also use a high infill of 30% or above, as these parts will be the outer shell, encasing the electronics. Also, print with supports because there are overhangs.
- Who designed it? sverd-industries
- How printable/popular is it? This project has over 1,400 downloads on Thingiverse and almost 13,000 views on Hackster.
- Where to find it? Thingiverse, Instructables, Hackster
OLED Display
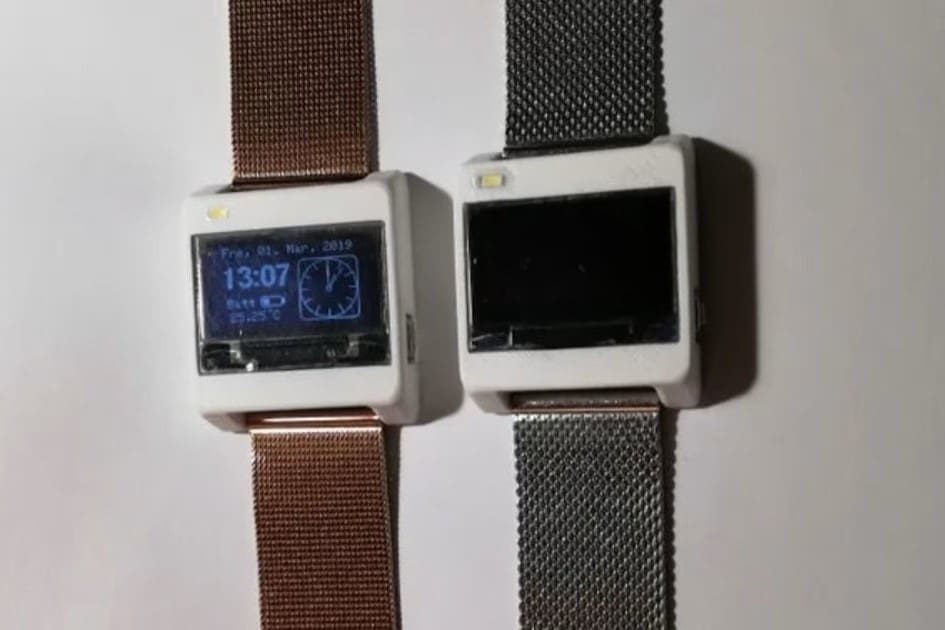
With its cool OLED screen, this multifunctional watch can display digital time, analog time, wrist temperature, battery life, and even a calendar.
Assembly, electronic configuration, and programming shouldn’t be hard, as the creator provides detailed instructions on how to make it. In addition to the OLED display, the other required parts and tools are included on the project page. Keep in mind that you’ll also need a solder.
The watch case should be printed with a layer height of 0.1 mm, 50% infill, and a shell thickness of 1.3 mm. The designer also suggests printing the part in PLA and with the “wall-overlap” setting activated.
- Who designed it? nlohr
- How printable/popular is it? This project has over 2,200 views and 9 likes.
- Where to find it? Instructables
Retro
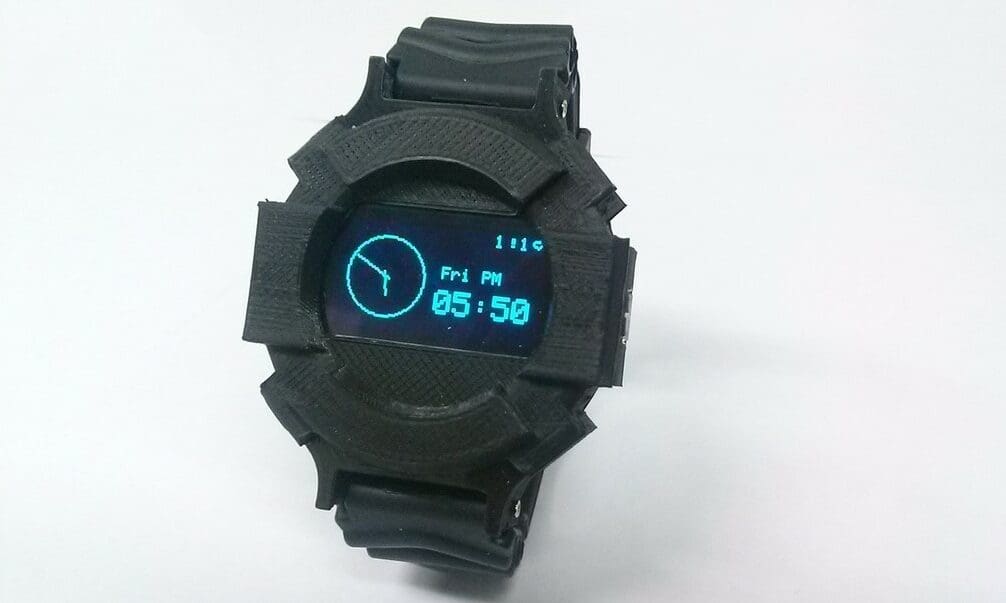
Retro Watch is one of the first DIY and partially 3D printed smartwatches, inspiring countless other projects. With a detailed and visually appealing design, it looks just like smartwatches sold in retail stores.
This project is very complex. Even following the instructions is challenging, so make sure you’re an experienced DIYer and know how to solder well. The non-printable parts include an Arduino Pro Mini microcontroller, an OLED display, and a Bluetooth module.
The 3D printable parts are available on Thingiverse. Based on the rendering, we suggest that you print the models with a small nozzle if you have one. If not, that’s okay. Simply use a small layer height. Also, we recommend printing the models with a high infill for strength. To make matters easier, no supports are needed.
- Who designed it? GodsTale
- How printable/popular is it? With over 708,000 views and 11 makers who shared their own versions of the project on Instructables, this design is clearly popular!
- Where to find it? Instructables, Thingiverse
Modular

Who said DIY projects can’t be stylish and professional-looking? This watch proves all the naysayers wrong.
The project calls for five 3D printed components and nine other parts. Our project article includes the full list of parts and step-by-step assembly instructions.
According to the designer, you should print the 3D printable parts at a 50% infill with a resolution of 0.06 mm for enhanced precision and detail. If your slicer prevents you from doing this due to your nozzle diameter, you should just lower the layer height as much as you can.
- Who designed it? adylinn
- How printable/popular is it? This modular wristwatch project has over 2,500 downloads!
- Where to find it? Thingiverse
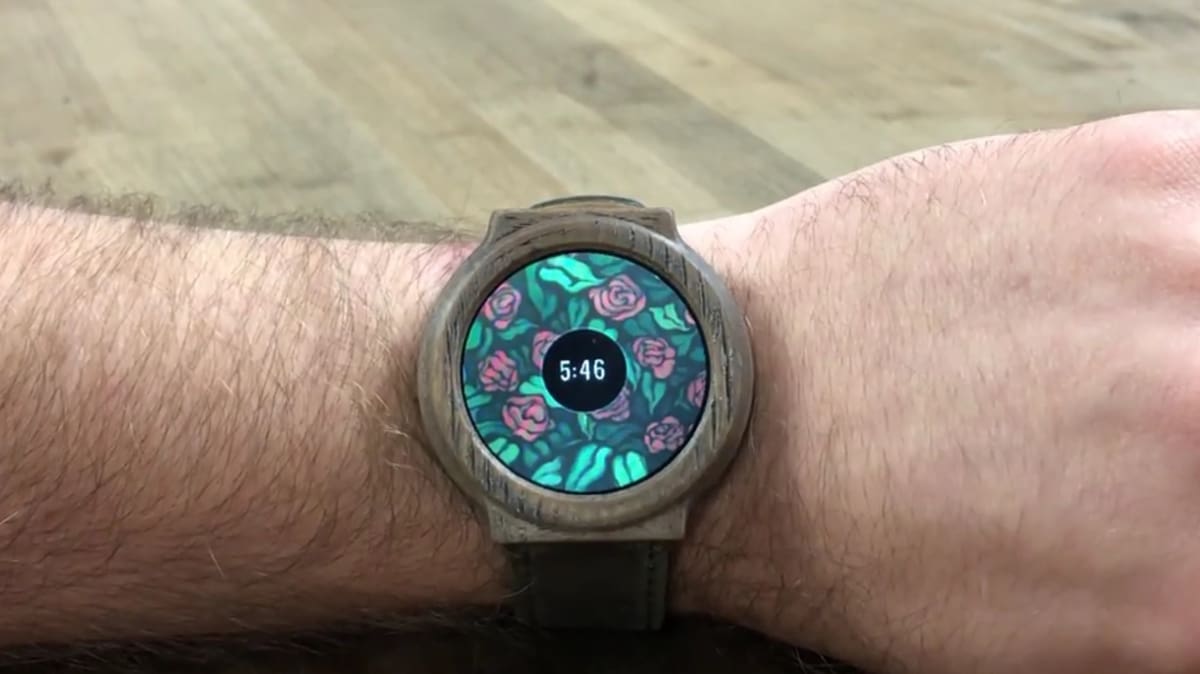
Smart

This smartwatch came to be because the designer just didn’t think the other smartwatches were good enough, so he built his own. Using some 3D printed parts as well as other electrical components, the designer created a very attractive and aesthetically pleasing smartwatch, cheaper than many others on the market.
This smartwatch project uses 26 different parts that can’t be 3D printed, and while that can seem like quite a number, you can find a full bill of materials to avoid any issues.
The 3D printed parts are responsible for the aesthetics of the watch. The designer used wood PLA, but you can customize your watch with the material and color of your choice. You can also consider a variety of post-processing techniques for enhanced visual appeal.
The models for the 3D printed parts are available in the housing section of the GitHub page. You should print the parts with a high infill percentage, around 60%, to ensure durability and protection for fragile electronic components. The Imgur page shows the 3D printing struggles, one of the main ones being stringing, so keep your retraction a little bit higher than usual.
- Who designed it? samsonmarch
- How printable/popular is it? This design is very popular: The project page on Imgur has over 185,000 views, almost 3,000 likes, and 128 comments.
- Where to find it? GitHub, Imgur
3-Part
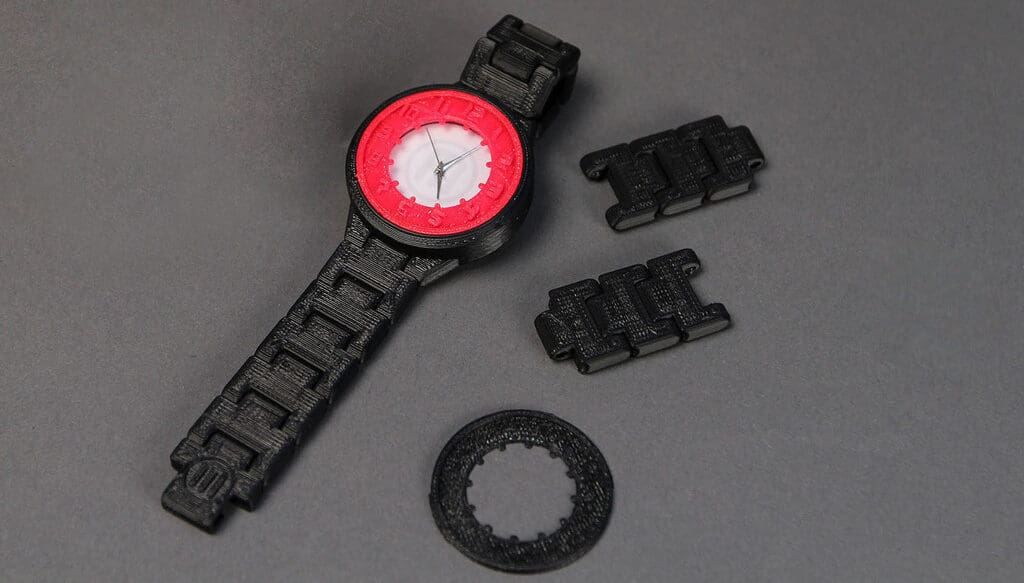
If you’re looking for an easy print that’s not too complex in concept or execution, we’ve got you covered. These print files include two components: one for the band and one for the case.
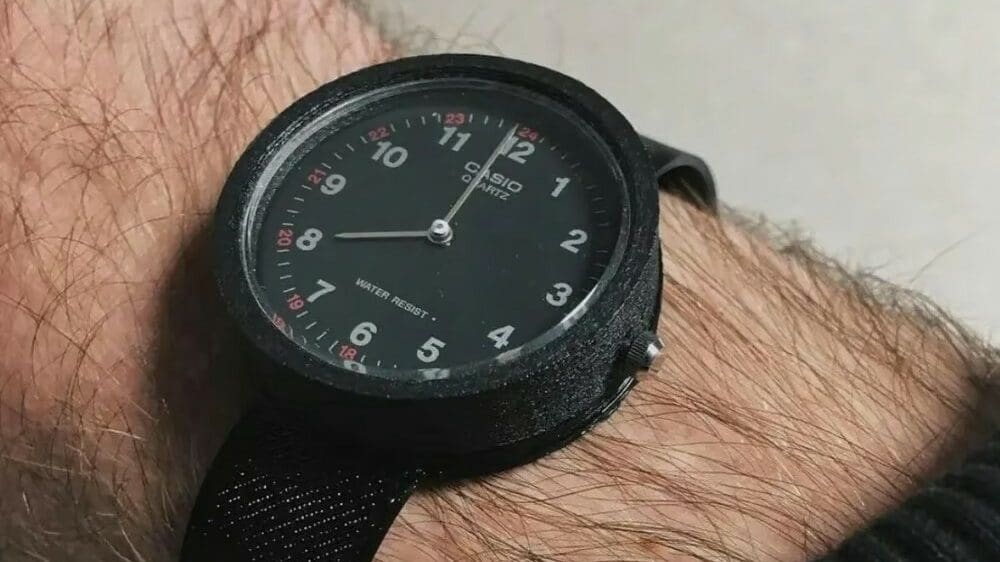
The band has a ring at each end to fit the case without requiring any gluing, which ensures the watch won’t unexpectedly break. Additionally, the bands have a textured design that makes for a very nice finish.
You can put the watch on by placing one ring on the watch, passing the band around your wrist, and putting the other ring on. It will be hard to tell how the watch works to an unobservant eye. The printed model can fit a Casio MQ24-1B analog watch, and to make 3D printing life easier, none of the components need supports or rafts. The author recommends using TPU for the straps, which makes sense.
- Who designed it? 3DBrooklyn
- How printable/popular is it? This model has three downloads and no makes have been shared so far, but that’ll change soon.
- Where to find it? Printables
License: The text of "3D Printed Watch: 10 Great Projects & Models to 3D Print" by All3DP is licensed under a Creative Commons Attribution 4.0 International License.
CERTAIN CONTENT THAT APPEARS ON THIS SITE COMES FROM AMAZON. THIS CONTENT IS PROVIDED ‘AS IS’ AND IS SUBJECT TO CHANGE OR REMOVAL AT ANY TIME.