3D Printer Repair: How to Fix Your Machine

3D printer repair involves several different considerations. Read about the most common issues and how to go about repairing them.
With any machine, there could come a time when it breaks down or stops working altogether. If this were a TV or microwave oven, you could pick up your phone and book a repair. 3D printing can almost be considered unique in the realm of repairs, as it tends to be something that users themselves can carry out.
This is because the majority of hobbyist or home-use 3D printers on the market today are designed to be easily maintained and repaired. It’s part of the reason why prices are accessible, not just for the machines but also for replacement parts.
When we talk about repairing a 3D printer, we’re referring in this case to fused deposition modeling (FDM) printers. We won’t be looking at resin printers as FDM machines feature more serviceable parts. Also, trying to repair a resin printer is a far more complex affair, and any attempt to do so would no doubt invalidate any warranty or after-sales guarantee. On that note, it may be worth checking the warranty on your FDM printer if you have any concerns that your DIY repairs may invalidate it.
In this article, we’ll be looking at some of the most commonly occurring faults and guide you to identifying and fixing them. For examples, we’ll be focusing on Creality’s Ender 3, as it’s one of the printers that most users may either own or be aware of. It also shares many characteristics similar to most FDM machines on the market.
Please note that the advice given in this article is meant as a general guide and not as a detailed tutorial on how to fix your 3D printer. Each brand and model will have different specifications and designs for the integral parts. Therefore, refer to the manufacturer’s manual or official online guides for specific printer details.
Maintenance vs. Repair
When assessing what could be causing a fault in your printer, it’s good to follow the troubleshooting route. This would involve looking at every possible cause of the fault and either repairing that part or changing the appropriate setting so your printer works again. If a repair is required, this article will hopefully give you a good idea as to how to solve the most common problems. Now, not all faults require repair, and this is where the lines could blur between repair and maintenance.
There’s an old saying that prevention is better than the cure, and this is where maintenance comes in. Regularly carrying out general maintenance tasks can prevent repairs down the line and also uphold the quality of your printed items.
Let’s take a closer look at what each may involve.
Maintenance
General maintenance includes, but isn’t limited to the following:
- Cleaning: One shouldn’t underestimate the impact of regular cleaning for the print bed surface, the extruder gears, the nozzle, the axis belt tracks, and more.
- Tightening: There’s plenty connected to how loose or tight the axis belts, nozzle and Bowden tube, print bed, frame, among others, are.
- Bed leveling: It may sound basic, but this can prevent unnecessary damage to the bed and to the nozzle.
Some of the most common issues could be blockages, poor adhesion to the bed, and low print quality. An additional factor to bear in mind here would be the cost of wasted filament. If your print bed isn’t leveled or your nozzle becomes blocked, you may well lose a print that has been going on for hours.
Repair
In contrast to maintenance, which attempts to avoid problems, repair comes into play when a problem has already occurred. Naturally, it’s not always immediately evident what the cause is, and that’s where troubleshooting is useful.
Troubleshooting is, as we’ve mentioned, the first step to identifying the potential fault. Doing this successfully is the key to effectively and efficiently solving a problem. To illustrate this process, especially how troubleshooting is involved, let’s take a look at a particular example: a faulty thermistor, which is a fairly innocuous wire that’s there to stop the hot end from overheating. Therefore it’s a pretty important safety element.

Identifying the Problem
A “thermal runaway” alert comes up on the screen, preventing the printer from being used. The temperature has gone above that which was set and continues to rise. The safety element comes into play and shuts down the heating element to the hot end. The cause of this is most likely to be a faulty thermistor and would be the first and easiest thing to check. You may also find that there has been some burning of filament which may then in turn have adhered to the heating block. This could have also been an earlier alert to the problem if you’d already smelled burning!
Burning filament of course may also be caused by a blockage to the nozzle, over-extrusion, or too high temperature, so it’s worth checking these out first before replacing the thermistor. But if it’s followed by the “thermal runaway” alert…
Taking Safety Precautions
The printer should be turned off, disconnected from the main power, and allowed to cool to a safe level.
Obtaining Materials & Tools
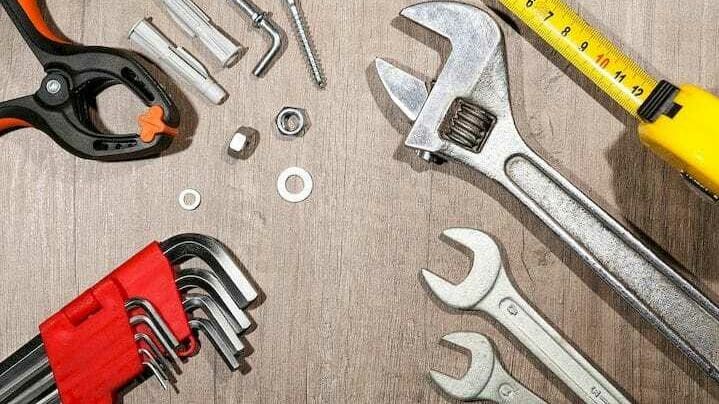
A replacement thermistor is required and can be purchased easily enough online. Other tools include the appropriate hex keys or screwdrivers, clippers, cutter, and cable ties.
Executing the Repair
Remove the cover and silicone sock from the heating block. If there’s any melted filament then carefully remove this. You may need to change the nozzle at this point (which we’ll look at later on). Loosen the holding screw for the thermistor. Remove the mainboard cover and unplug the thermistor connector. Cut the cable ties around the hot end wiring cluster and then carefully pull through the thermistor cable to remove it completely. Insert and feed the new thermistor back through the wiring cluster and then reverse the process of connecting at both ends. Replace the cable ties with new ones and then reassemble everything back to its original state.
Testing
Restart the printer and set the hot end temperature to the desired heat. This should then be working and the temperature should stop rising once it’s reached the target.
That’s just one example of a fairly common problem that might occur, and it should help visualize the difference between maintenance and troubleshooting and the different steps involved in each. Next, let’s have a more detailed look at some issues.
Non-Printing Components
As we’ve seen with the previous example, it’s good to follow a standard process to completely identify the problem, fix it, and test it. So now let’s go through some of the most common repairs that you’re likely to perform.
As mentioned previously, this will be on the standard Ender 3 printer, and we’ll assume that you’ll have a basic knowledge of how the printer works and its component parts.
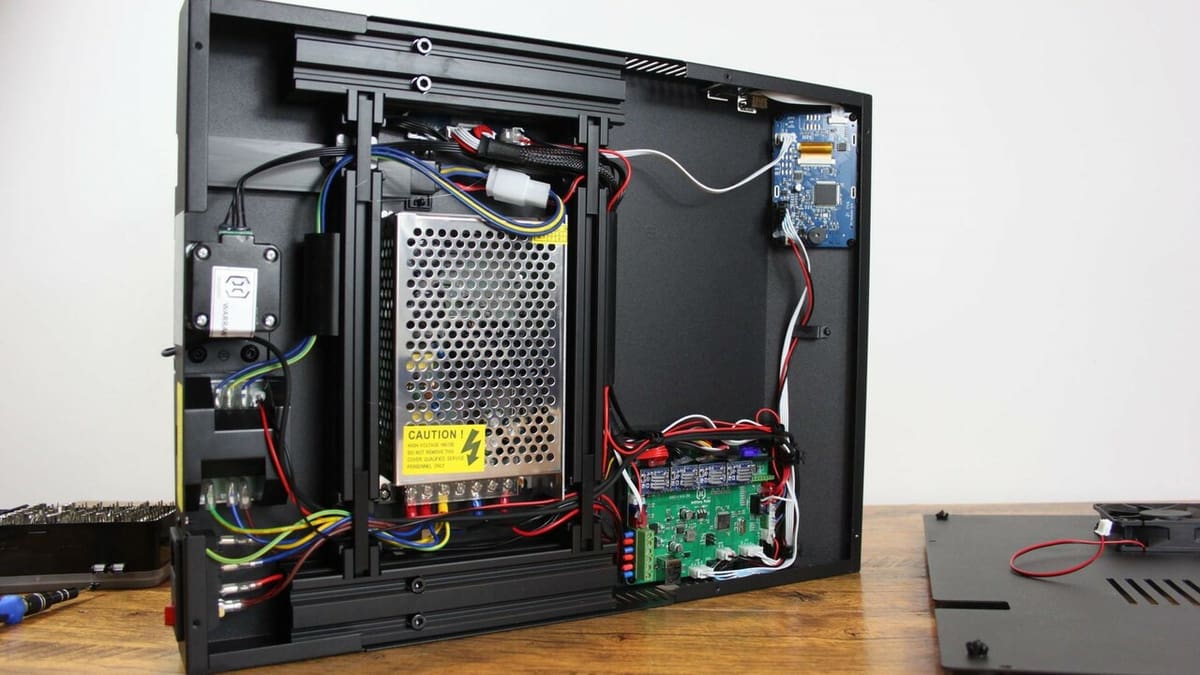
Mainboard
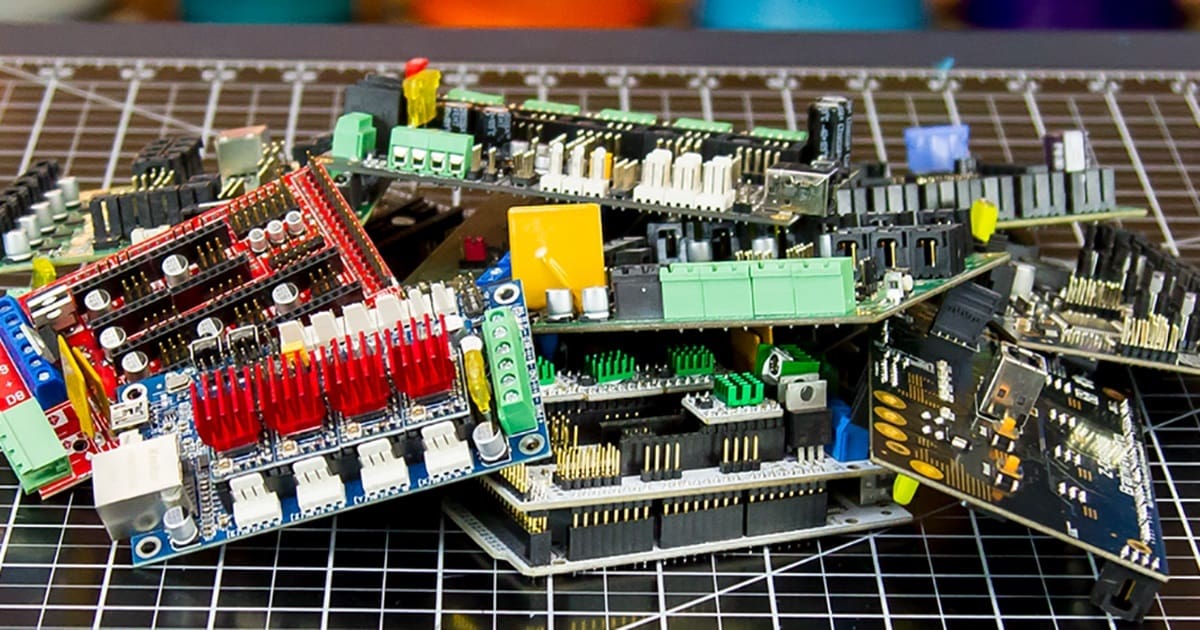
The mainboard, or motherboard, is understood as the brains of the machine and what makes the whole thing work properly.
The most common fault is simply that the mainboard stops working, and you’ll get a blank screen when you start your printer. The first thing to try in this case is to “re-flash” the firmware and see if this breathes life back into the board. If the issue remains, then it may be time to replace the board, which we’ll look at shortly.
If your printer is working and powering on but not functioning as expected, then there may be a connection error or fault with the mainboard. When we say “not functioning as expected”, this could be that a stepper motor isn’t running properly, auto-home is working incorrectly, or it’s not heating up correctly, to name a few. A lot of these problems can be traced back to the mainboard.
Most problems you encounter that are repairable will be down to poor or incorrect wiring. Due to the mass production and installation of these boards, errors sometimes occur. These won’t become apparent until the printer is used. For instance, the + and – terminals are reversed in some connections, such as fans and even the power supply. This kind of problem can even cause a stepper motor to work in reverse.
This is fairly easily solved since it’s visible when looking at the mainboard connections. Once you’ve identified this is the issue, you may need to replace the part connected to the mainboard if the wiring is damaged. This would also be the safer option unless you’re particularly skilled with wiring repair or soldering.
Also, as the user can make some connections (for example, changing the thermistor as mentioned previously), it’s possible to damage a connection on the mainboard.
However, there aren’t many user-serviceable parts, and the most likely solution to a fault is to replace the board with a new one.
There are a few different configurations of mainboards for the Ender 3 series. These have been updated as newer versions have been released. For example, the standard Ender 3 will have an older version than the Ender 3 Pro, and the Ender 3 V2 will again have a newer board. However, they all have the same basic layout and connections and will fit into the machine the same way.
Replacement of the board is fairly straightforward. First, ensure that the power is off and the printer’s unplugged, and then undo the three retaining screws to the housing cover. Carefully note where each wire is connected, and maybe even take a picture with your phone for reference. It’s then just a case of carefully removing each connected cable one by one until everything is disconnected. Remove the three or four retaining screws that hold the board in place, and then it’s out.
Replacing the board is simply a reversal of the removal process but ensures everything is connected properly and tightly. At this point, you may need to run a firmware update, but that depends on what replacement board you’re using. For instance, if it’s a like-for-like replacement of the same version, reconnecting should be the same, and a firmware update shouldn’t be necessary.
If you’re replacing the mainboard, it may be worth upgrading to either the latest version or even a different third-party option. In the case of the Ender 3, Creality’s latest version of their mainboard is the 4.2.7 or V2, which may be an upgrade to what you already have. It’s easy enough to check either on the display screen or by checking on the board itself. A third-party option might be considerable – BigTreeTech’s SKR Mini E3 could be the way to go. In either case, you’re going to need to update the firmware.
Reassemble and restart the printer, and hopefully, it will work perfectly!
- Difficulty: Intermediate
- Materials and tools: Hex keys, replacement mainboard
- Safety precautions: The printer should be turned off and unplugged.
Stepper Motors & Drivers
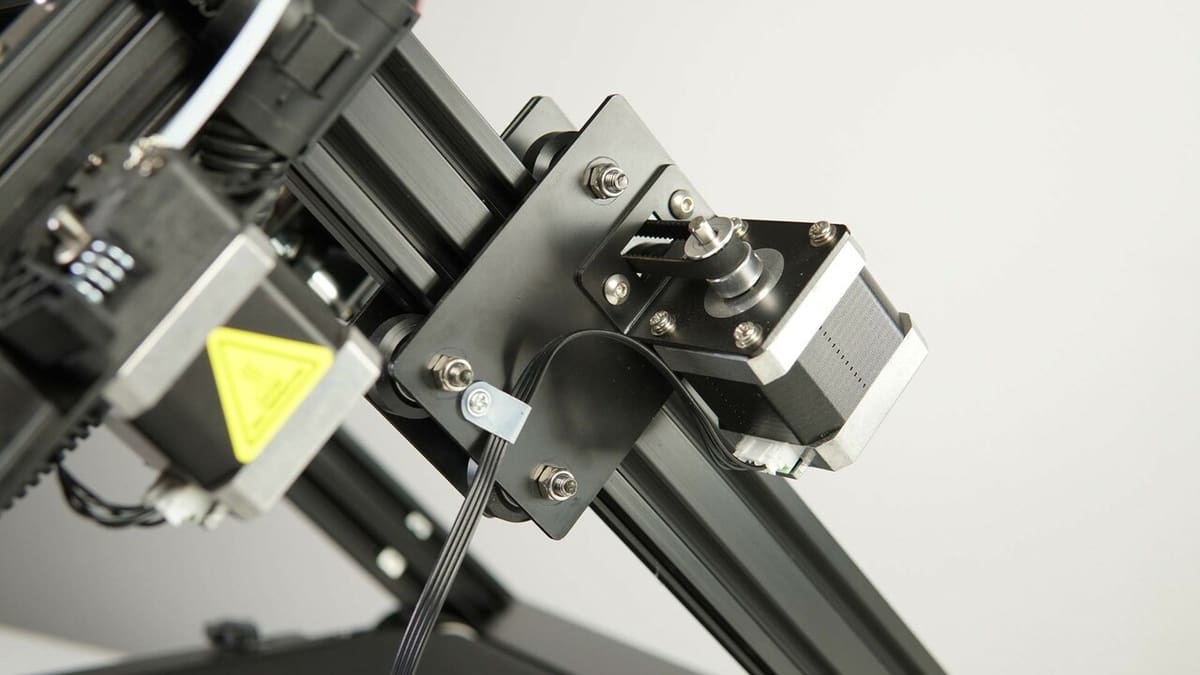
The stepper motors move each of the three axes of the printer and the extruder. Probably the most common one to wear or become faulty is the extruder stepper motor, as it’s the one working the hardest. The signs of this being faulty or not working properly include excessive noise, overheating, and the gear drive shaft not turning correctly. Other issues with extrusion can be attributed elsewhere (blockages, retraction issues), but once those have been eliminated, then the motor is probably at fault.
Again, as with the mainboard, there aren’t really any serviceable parts to a motor, so it would need replacing if faulty. The axis motor are fairly easy to replace (and won’t cost an arm and a leg), but the extruder motor does involve a bit more work.
First, you’ll need to dismantle the extruder driver attached to the motor (we’ll look at the extruder driver assembly later on). This can be a bit fiddly, and you should take care to ensure that you don’t lose any of the small parts or bolts. You’ll find that the motor is held in place by four bolts and attached to the Z-axis carriage. Once you’ve taken everything apart, it’s a case of reassembling everything back to where it was with the new motor and checking that it’s connected to the correct power socket.
Testing ensures that the motor turns and operates correctly when in use. This is slightly easier with the axes motors, as it just involves controlling the appropriate axis to look for correct movement.
- Difficulty: Easy
- Materials and tools: Hex keys, replacement motors or drivers
- Safety precautions: The machine should ideally be off but if left on, take care when reconnecting wires.
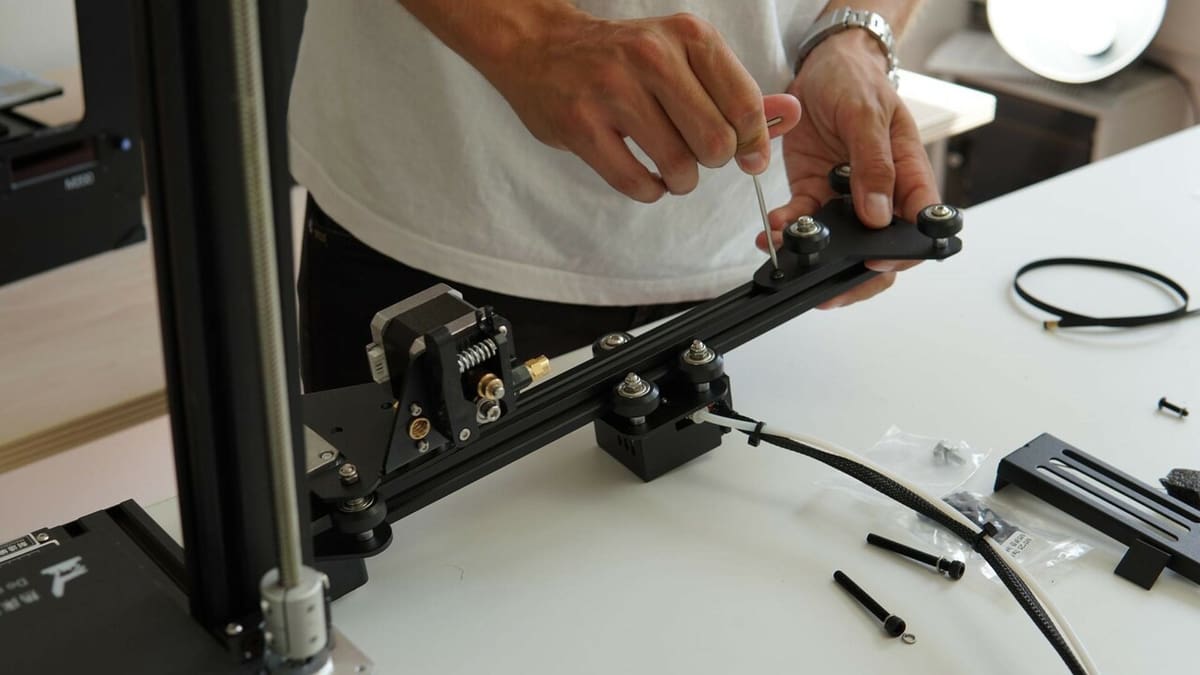
Carriage Wheels & Belts
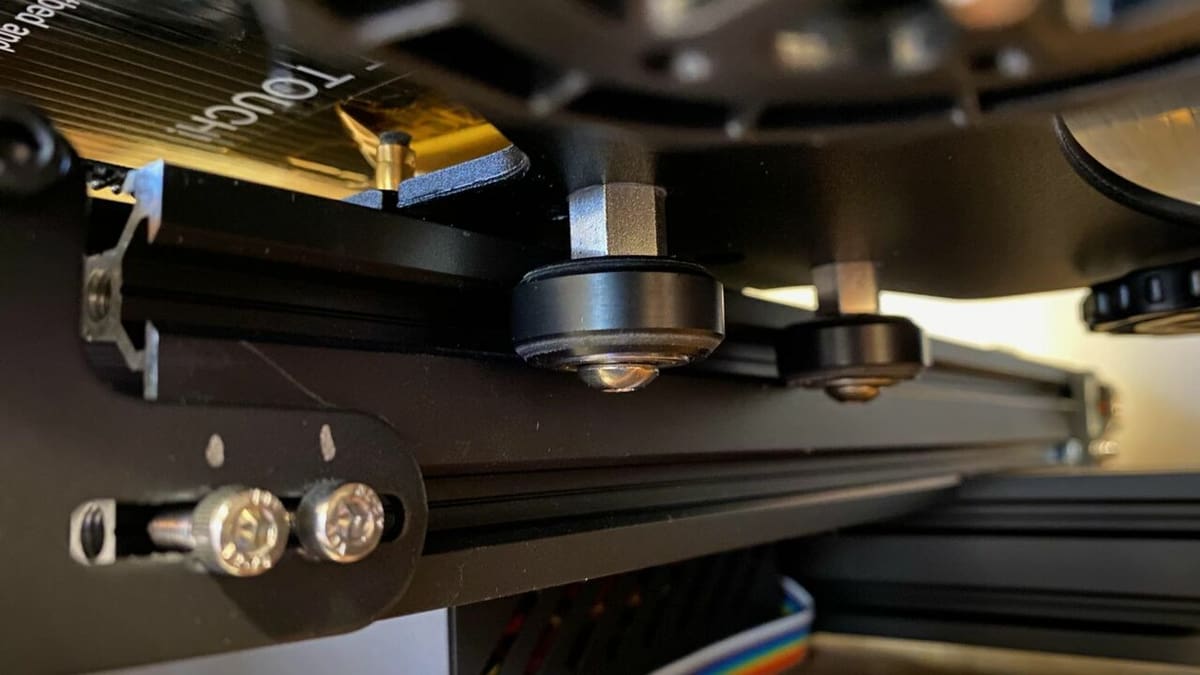
The carriage wheels literally do what their name implies: They move the carriage along the relevant axis. Obviously, these need to have something to drive them, so they’re connected to the stepper motors via timing belts.
The carriage wheels and belts can wear after continued use. Identifying the issue would be fairly self-apparent if the carriages aren’t moving smoothly. That said, if we refer back to our section about motors, this may also result from poor carriage operation. However, in such an instance, the carriages are unlikely to move at all.
Regarding the carriage wheels, these are in sets of three for each of the axes and run along the V-slot of the gantry frame. Common problems would be wear to the actual wheel or seizure of the bearing at the center. Replacement here again is the best option, and it would mean loosening the eccentric nuts on the carriage, detaching the belts, and removing the carriage itself. You could replace the whole carriage setup, but it’s probably better to remove the offending wheel(s) and replace them.
Again, reverse the process to reassemble.
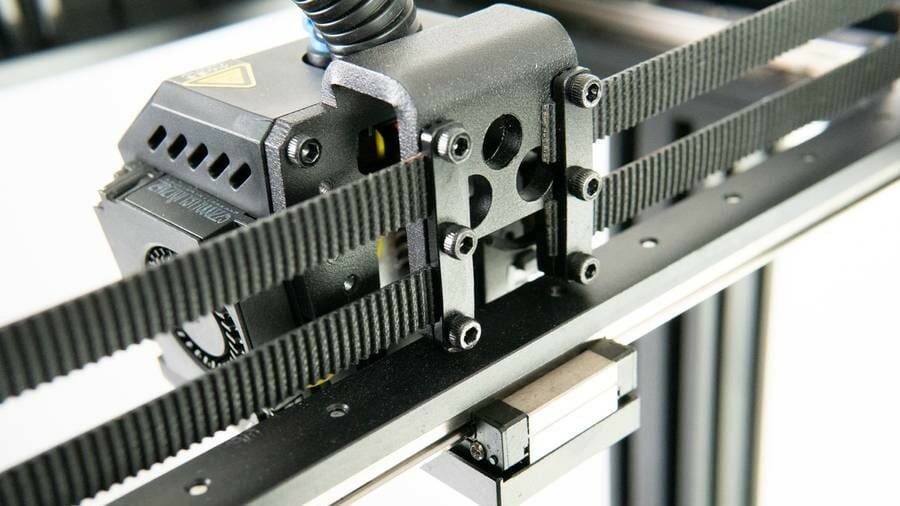
The timing belt can also wear so you can replace it at this point. However, if you can detect or see wear on the belt as the main problem, then it may not be necessary to completely remove the carriage. Unclip each end of the belt, and you should be able to feed it through to remove and replace it.
Carriage wheels themselves are a generic printer part made to the same specifications. It’s not essential that you buy the “official” version of the wheels but given the small differences in price between, for example, Creality and a third-party option, you may as well get the best you can afford.
When it comes to replacing a belt on the Ender 3, there isn’t really any option other than to buy the Creality version, so it’s always best to go with that. With other printer brands and models, you’ll need to check the appropriate wheel size before ordering replacements. Again, it may be worth checking the manufacturers’ official sites first, but third-party options are usually available. The same is true of timing belts, as they may vary in length between printer models. Also, make sure that, if you’re buying an X-axis timing belt, you don’t buy a Y-axis or print bed belt instead, or vice-versa.
- Difficulty: Easy
- Materials and tools: Hex keys, multi-tool/spanner
- Safety precautions: The printer will ideally be powered off, but this isn’t essential.
Fans
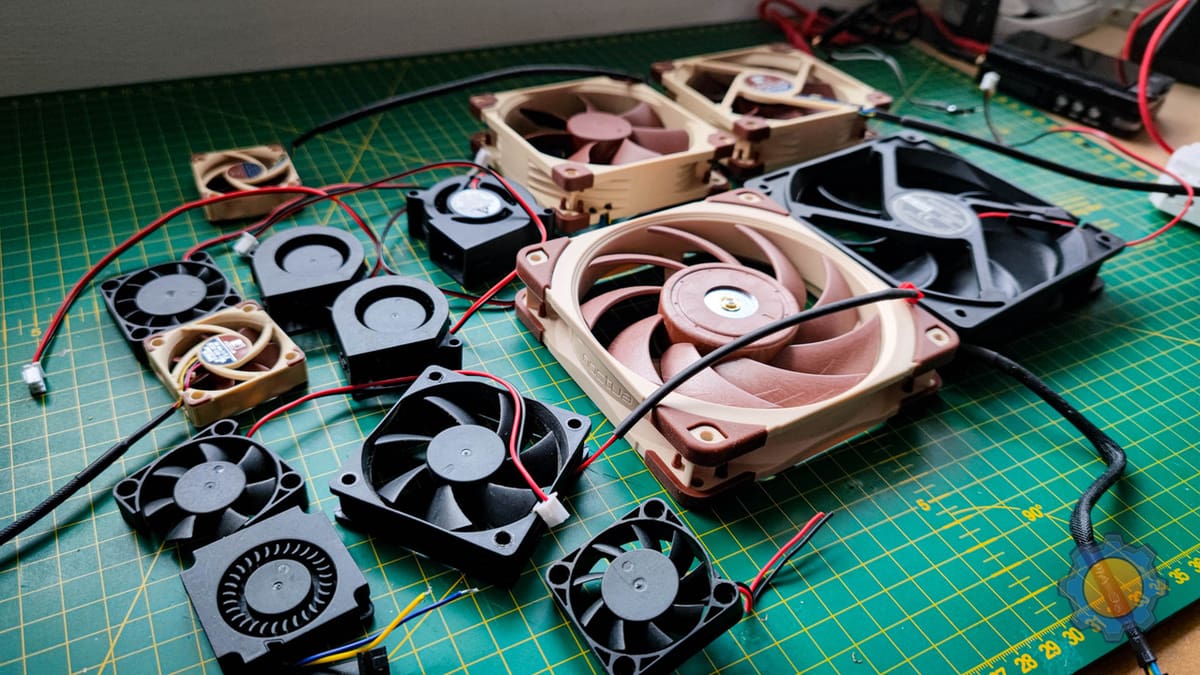
Fans are an integral part of the smooth operation of the 3D printer. Obviously, they’re in place to cool parts of the machine that may be prone to overheating.
The Ender 3 features three fans: one to cool the mainboard, one for the hot end, and one for the printed part. These are made of plastic, and the vanes break easily. If there are problems with your fans, your first alert will be an unpleasant noise. However, you may also notice that the fan isn’t functioning as expected. This may in turn cause poor results from your prints in terms of cooling and build plate adhesion, for instance. Fluctuating hot end temperatures may also be a precursor to fan failure.
If you suspect or can see that a fan isn’t working properly, the first thing to try is removing and dust or dirt that might be present. This is fairly straightforward to do with a vacuum cleaner. If that doesn’t work, you may need to replace the fan.
With the mainboard fan, this is really easy, as it’s just a case of removing the mainboard housing cover, unscrewing the fan, and disconnecting the wire. The replacement process involves reversing the steps taken to remove the faulty fan and ensure that the mainboard housing cover is properly secured.
When it comes to the two fans on the hot end assembly (i.e. the hot end fan and the one for part cooling), you’ll need to remove the whole setup from the X-axis carriage and remove the fan(s). As you’ll see, the cable for each fan runs through the wiring cluster and connects to the mainboard. To remove this, you’ll need to feed the wires through the cable cover for the wiring cluster after disconnecting from the mainboard. This will require cutting the cable ties and a fairly fiddly process of feeding through and then reversing to feed the new wire through.
Replace everything to its original state, turn the printer on, and test if the replaced fan is working properly.
For the Ender 3 series, there are a few options to consider.
- Difficulty: Intermediate
- Materials and tools: Hex keys, screwdriver, replacement fan, cable ties, clippers/cutter
- Safety precautions: The printer should be powered off and unplugged; the hot end should be cool.
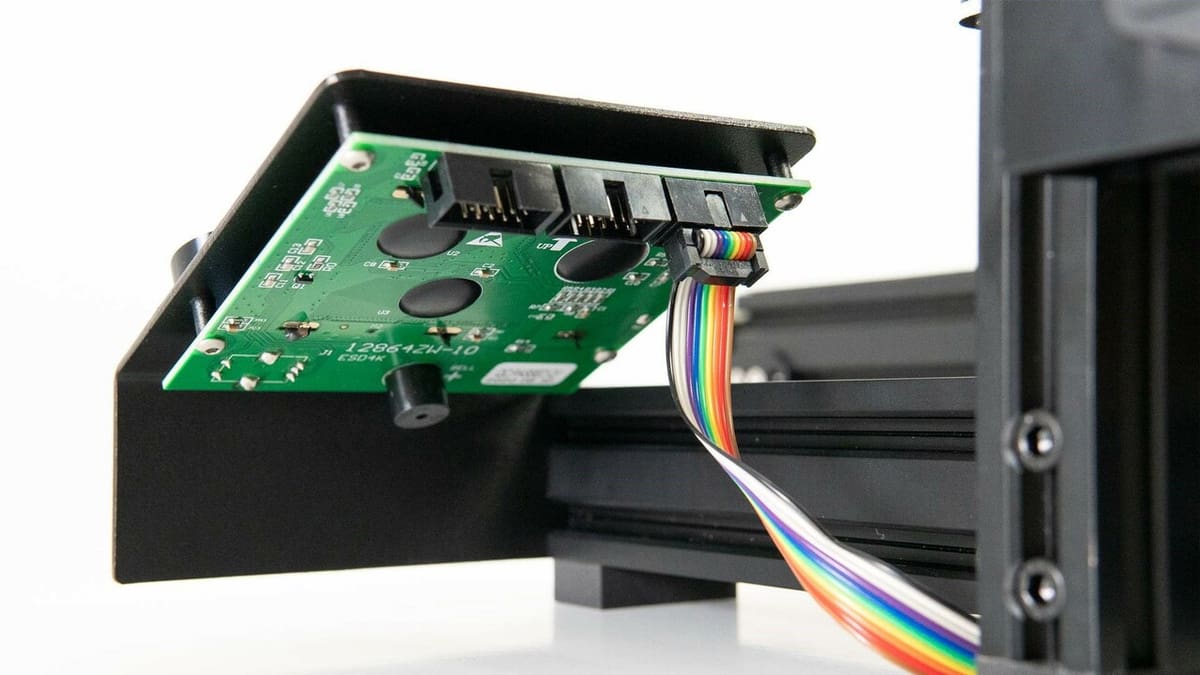
Screen

The screen is the control panel and user interface (UI) for your printer. In the case of the Ender 3, this is a simple-looking UI you can control by turning a dial to cycle through the menu.
The main fault you might find, which will become apparent when you turn on the printer, is that the screen just shows a single blank color. Flickering or indecipherable text could be another issue, as well as an unresponsive control dial.
A third issue is poor connectivity to the mainboard, which may even cause the screen to not power on. Specific to the Ender 3, the screen has three terminals on the back to which you can connect the 10-pin ribbon cable. Only one of these is correct, so simple errors can occur. Obviously, solving this is a simple case of reconnecting to the correct terminal!
In this scenario, we’re referring to the screen for the Ender 3, which is a blue LCD screen. Other printers may have more advanced colors and functionality but will likely still have a single cable connecting them to the mainboard.
As with any UI, what it displays is determined by the firmware that controls it. You can load up-to-date firmware onto the screen by downloading it onto a MicroSD card, inserting it into the printer while the machine is off, and then turning it on. The update should perform automatically, and your UI should be ready to use. This is the first thing to check if the screen is coming on but not displaying properly.
When it comes to firmware, you should ensure that you’re downloading the correct version for both your printer and the actual screen. Searching on the manufacturer’s website should give you a list of the latest firmware version, but you can also find other options on third-party sites. It’s also worth noting that if you’re considering upgrading the screen, you’ll need to check that it’s compatible with the printer’s mainboard.
As for physical faults, there could also be an electrical fault with the screen, which wouldn’t necessarily be obvious but would mean it’s unlikely to display anything. This isn’t something that you can easily fix, as the screen is similar to the mainboard in that there are no user-serviceable parts.
The only option, therefore, is to replace the screen. It’s just a case of opening the mainboard housing and disconnecting the cable, connecting the new screen, and then returning everything to its original state. New screens are usually plug-and-play, but in rare circumstances, you may need to update the firmware.
- Difficulty: Easy
- Materials and tools: Hex keys
- Safety precautions: The printer should be powered off and unplugged.
Printing Components
After looking at general printer setup and problems that can occur with its component parts and controls, we’ll turn to the printer parts that are involved in the delivery of your printed model.
The framework and mainboard of the printer control everything that leads to maneuvering the hot end and extruder, which subsequently incorporates the Bowden tube setup (in the case of the Ender 3) and print bed. As we’ve seen, with any moving part of your printer, problems and faults can happen, so let’s take a closer look at how we can resolve these.
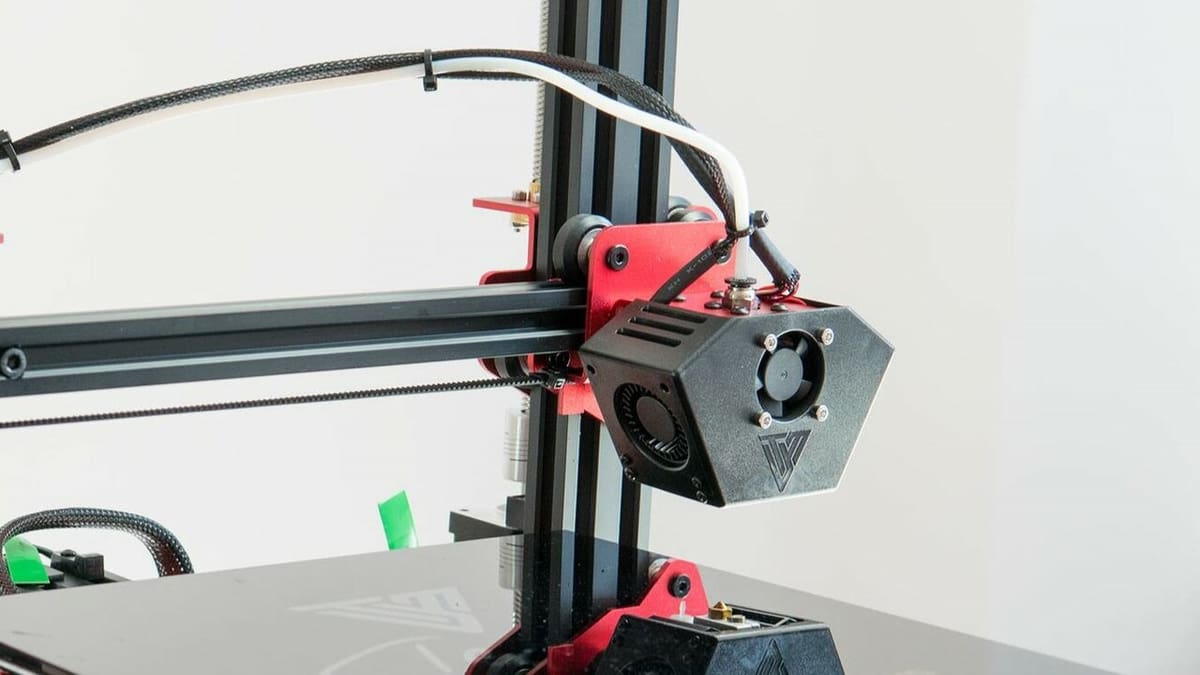
Hot End
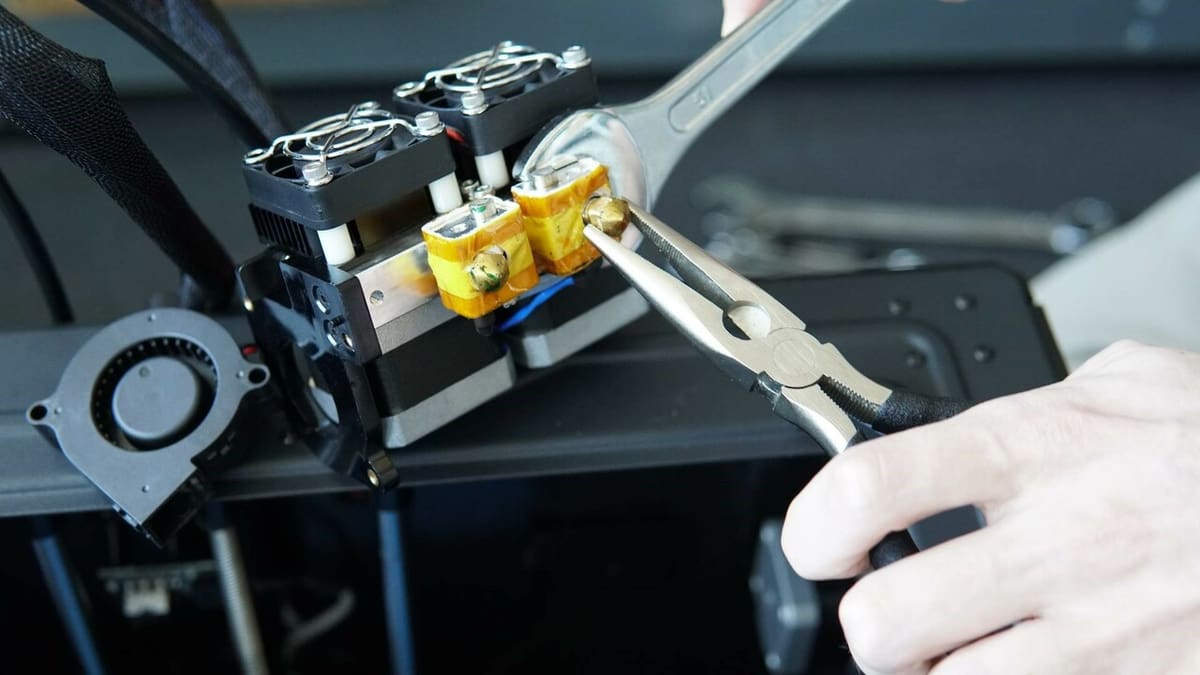
The hot end is the business end of the machine and can be a headache in the world of 3D printing! The temperature of the hot end is set to match the requirements of the filament type. The filament is then pushed or “extruded” through the hot end and deposited on the print bed to form the 3D printed object.
The whole setup is composed of the nozzle, the heating block, the thermistor, and the housing. We’ve also already discussed the two fans encasing the setup, so we won’t talk about them again.
Problems with the hot end can include a faulty thermistor or a blocked, burned, or worn-out nozzle. To go into every eventuality with the nozzle would take time due to the different materials they can be made of and different sizes. However, if you’re replacing the nozzle, it’s always advisable to have the hot end heated to a usable temperature before removing and inserting a new one. Always practice caution while completing this task.
Those issues aside, the most common might be blockage, which could be caused by a few things: over-extrusion, wrong temperature settings, or a gap between the Bowden tube and the nozzle. Again, when trying to find the blockage for the hot end, it’s ideal to set it to a usable temperature.
If you suspect a blockage, the first and simplest solution you might try is a cold (or “atomic”) pull. This essentially involves yanking a barely cooled piece of filament out of the printhead in an effort to additionally pull out any gunk that comes with it.
If that doesn’t work, the next step is to remove the nozzle and pull back any filament in the tube. Investing in a small set of cleaning tools is a good idea. These can then be inserted into the hole where the nozzle was to remove any melted or blocked filament. As a final resort, simply replace the nozzle with a new one, again doing this while it’s hot.
Any issue with the heating block, heating element, or heat break would mean a complete strip-down of the hot end setup alongside possible replacement parts and rewiring. While impossible to go into all eventualities in this case, various online tutorials are available to help, like CrealityExperts and YouTuber Callum Prints.
- Difficulty: Intermediate/Expert
- Materials and tools: Hex keys, nozzle wrench, cleaning tools, any relevant replacement parts
- Safety precautions: The hot end must be up to temperature so caution should be taken as the printer needs to be powered on.
Extruder
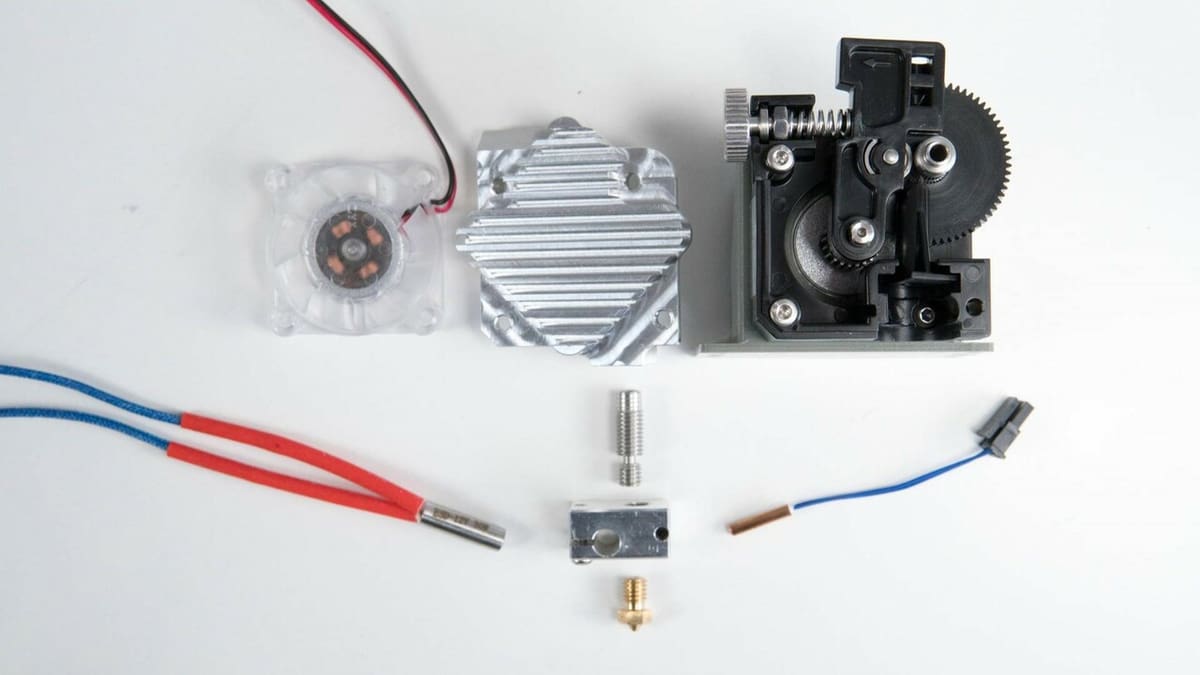
We’ve looked at replacing motors previously, but what about issues with the extruder itself? This mechanism feeds the filament into the Bowden tube for extrusion through the hot end.
All Ender 3 printers come from the factory with a cheap extruder that works okay but will eventually wear and break. The most common part to break is the extruder lever arm, which can crack.
Although fairly straightforward, this repair can be a bit fiddly as you’ll need to remove the stepper motor, as we’ve previously explained. This involves first undoing the retaining bolt for the extruder lever, which will expose all of the remaining bolts holding the extruder to the motor. Remove these and then reverse the process using the new part. Replacements would advisably be metal, and there are both official and third-party versions available.
Yet, even with a shiny new metal extruder on board, component parts can still wear and break. The most wear would probably be to the gear wheel itself. Remove this by loosening the tiny lug nuts holding it in place. If you’re lucky, this will be loose enough to remove either by hand or with a pair of pliers. If you’re unlucky, you’ll need a gear-removing tool to pull the gear from the drive shaft. The latter would then require the removal of the motor, as described earlier.
The spring can also wear, but changing this is simple and self-explanatory.
- Difficulty: Easy
- Materials and tools: Hex keys, replacement extruder gear, gear wheel, spring; possibly a gear wheel remover
- Safety precautions: The printer would ideally be turned off, but it’s not essential.
Bowden Tube
In setups where the extruder isn’t mounted to the printhead, the Bowden tube is what delivers the filament from the extruder to the hot end. It’s visible and consists of three parts: the tube itself and a connector at each end.
Usual faults or problems come from blockages caused by several factors, such as a pinched tube, air in the tube, the end not being a straight cut, or a loose connection. Each of these is pretty easy to resolve.
A tube cutter will ensure a straight edge at each end, thereby preventing any air ingress. The connection should be tight and fit straight up to the hot end nozzle at one end and the extruder hole at the other. A small clip is required on the connectors to ensure that the tube can’t be pulled out easily. The connectors’ teeth can become worn, so a replacement might be advisable if the tube keeps coming loose.
If you identify any of these problems, following the above processes should solve them.
Of course, an alternative to the basic Bowden extrusion setup could be replacing it altogether with a direct extrusion setup. This would essentially eliminate the problems faced by the length of the tube and thereby lessen the likelihood of blockages, for example. A direct extrusion unit is an upgrade rather than a straight repair, and it’s advisable to consider the time and money against improvement. You may also need to update the firmware and adjust the Z-stop sensors in some cases to make it fit.
- Difficulty: Easy
- Materials and tools: Possibly replacement tube and connectors, tube cutting tool
- Safety precautions: Care should be taken when cutting the tube with a sharp blade.
Print Bed
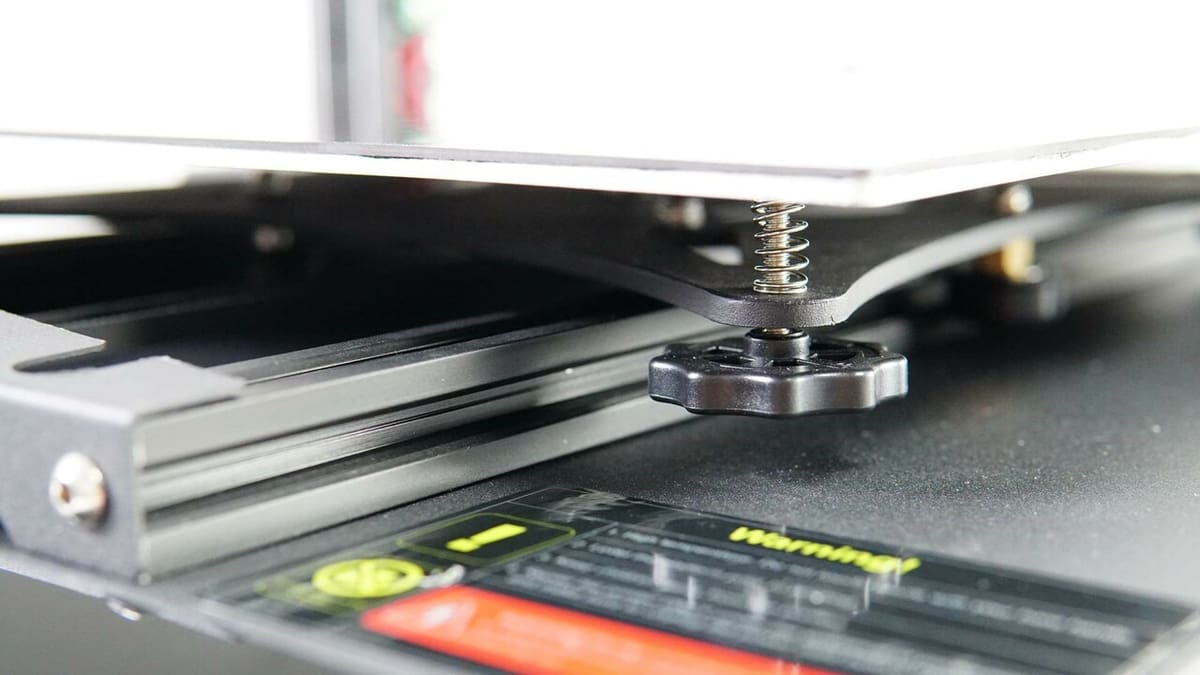
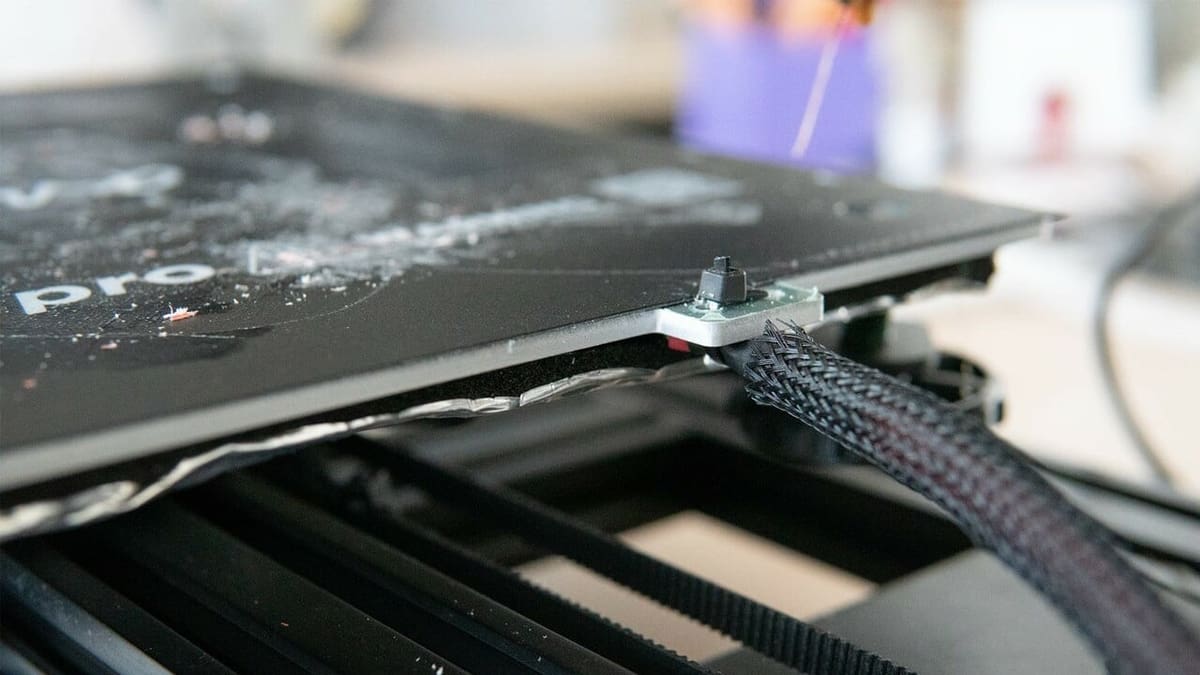
The print bed is the literal base for your prints, and it’s essential to get the first layer right to achieve a successful model. A heating element underneath the bed is thermostatically controlled by the mainboard to reach the required temperature. The heating of the bed is important to ensure good adhesion. Possible problems could be that the print bed fails to heat or has become damaged or even warped.
When we’re talking about the heat bed, this is the heated platform upon which the print surface sits. If the print surface becomes damaged, then it will simply need replacing, and this would just be a case of swapping the old one for a new one.
If it’s failing to heat, then it’s likely a fault with the heater itself and would therefore need a full replacement. However, a fairly common problem seen in some new Ender 3s is that the heater wires are connected with reverse polarity. This is similar to the problem we highlighted in “Mainboard”. The issue would mean opening up the mainboard cover and identifying and reversing the wires to the correct positions.
If the heating element is faulty, it would require replacing the whole bed setup, which is a fairly major deconstruction process. For ease, it would be best to disconnect the printer from the power completely and then turn it upside down. Remove the bed leveling wheels completely and then the bolts holding the bed to the Y-axis carriage. The heating element is attached to the underside of the print bed, so you can remove it at this point. For the rest of the setup, take everything away and ensure it’s disconnected from the mainboard.
Then, as with most repairs or replacements, it’s a case of reversing the process and reassembling everything. The testing process involves turning on and heating the bed and ensuring everything works as it should with a test print.
- Difficulty: Expert
- Materials and tools: Hex keys, multi-tool/spanner, cable ties, cutters, replacement parts
- Safety precautions: The printer should be off and disconnected from the power; care should be taken when inverting the printer.
As a final note to all the repairs discussed in this article, it’s always a good idea to make sure the print bed is properly leveled before carrying on. This may not seem necessary for replacing something like the Bowden tube, but even minor disruptions to the printer can cause the bed to become un-level.
License: The text of "3D Printer Repair: How to Fix Your Machine" by All3DP is licensed under a Creative Commons Attribution 4.0 International License.