Let's Get Started
Most logos are generated as an image, rather than just text, which provides a challenge to render onto a 3D model. This article will show how you can use commonly available and free software tools — specifically Microsoft 3D Builder and Microsoft Paint (although any basic image editor will do) — to firstly transform a logo into a 3D Model and then print it.
Preparing the Logo
The most difficult thing about the majority of logos is that they are designed for packaging and other 2D mediums. The artist generally does their best to emulate a 3D environment, using color and shading to create an image that fools the eye into thinking it is 3D.
When you attempt to turn this into an actual 3D printable image, the first step is to clean up the image and simplify it.
We will use the example of a set of items to be used in an upcoming tournament.
Step 1: The image selected should be as large as possible. As for any raster, or pixel-based, format, increasing resolution is possible only with a degradation of image quality, but decreasing resolution experiences no such loss.
The free Paint program allows you to use fill and erase tools to clean the edges and remove or recolor areas, and a large image can be reduced to the size required to print with clean edges and no degradation. Our example logo has yellow shading and black shadow to pop the text from the screen and give a 3D appearance, which needs to be removed to make it suitable for 3D printing.
Step 2: The first stage is to use the bucket (or fill) tool to fill in the letters, to give a solid image to print.
Step 3: The next step is to remove the highlights and shadow plus add any additional text/image items for the final print. Compared to the first image, it looks rather plain, however, the high contrast and simple edges allow a cleaner transfer to 3D and better scaling.
The 3D Model
The processed image is now ready to be added to the model.
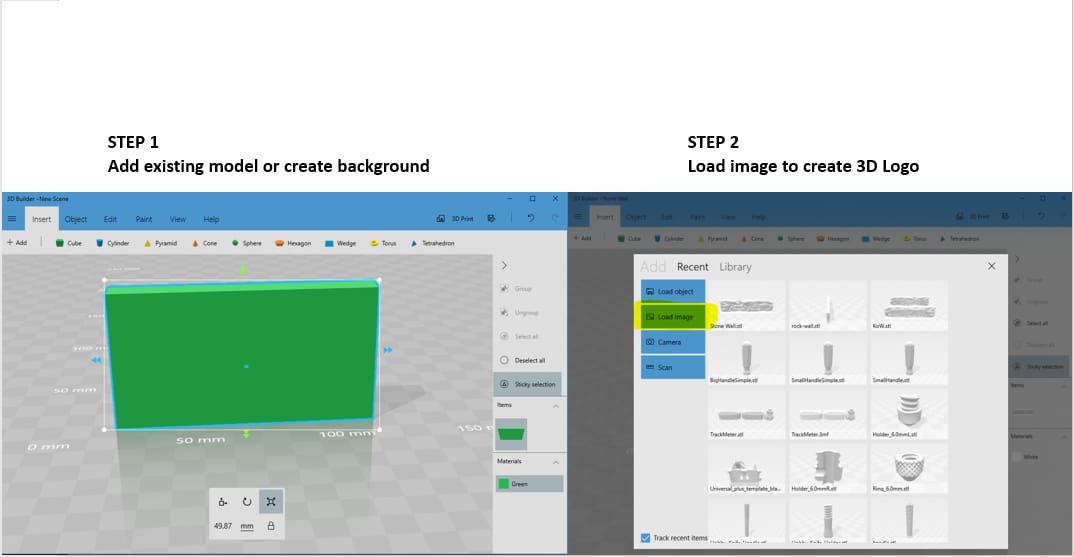
Step 1: Open 3D Builder, add the target model that will hold your 3D Logo or create a background cube to place the 3D Logo onto.
Step 2: Use the +Add function to input your processed image by selecting the Load Image option as shown highlighted in the screen capture.
Import the Logo Image
With your backing prepared, it’s now time to import the logo itself.
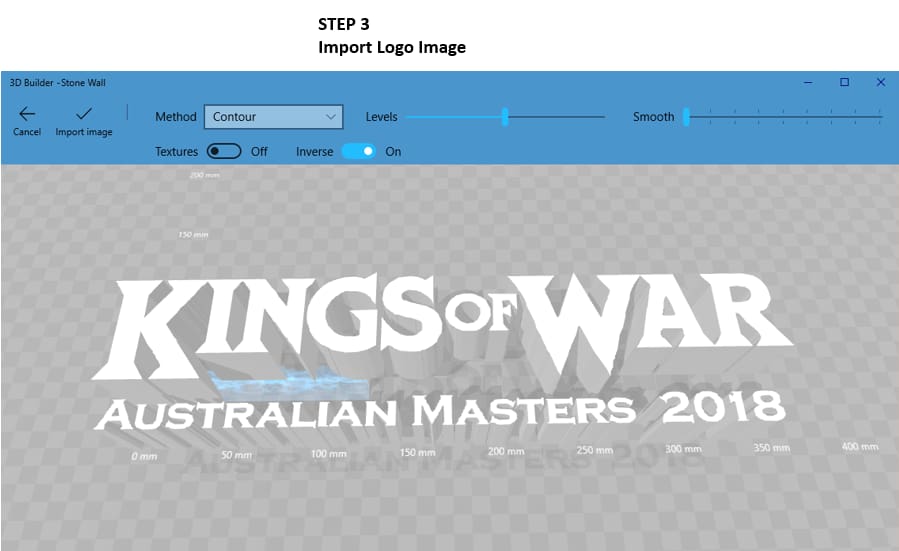
Step 3: Select the Method for the import, and adjust the image with the various controls to provide the required result that you want to be printed. Note that you may need to experiment with a few control options to get the desired result.
The controls are:
Contour provides a solid based on the contours detected in the image. The Inverse toggle can be used to give a positive or negative solid object from the imported image. Best choice for text and well-defined images.
Height Map gives the height of the resultant solid based on the transitions of the image. Best for photos and complex images. Take note that a lot of detail is lost with a single color filament 3D Printed model.
Edge provides an outcome which just defines the edges of the imported image. Does not scale well.
Stamp. Similar to contour, but levels the image to a totally flat surface. As the name suggests, this allows the transfer of ink from a stamp pad using the resultant printed model.
Scale and Position the Logo
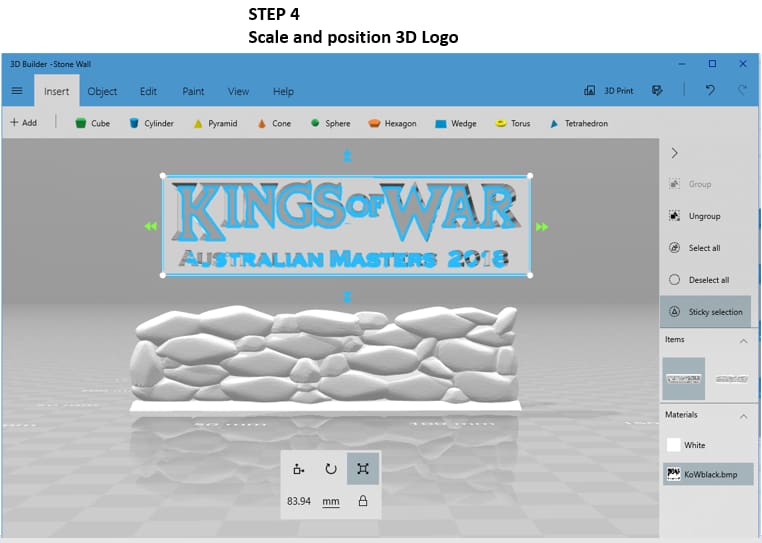
Step 4: Scale and position your newly 3D logo on the desired model. Additional model elements can also be imported at this time.
The screen capture above shows the imported image after rotation and scaling, together with the target model. The controls shown under the wall allow the position and size of the 3D printed Logo model element to be adjusted to achieve the desired result.
Print the Final Model
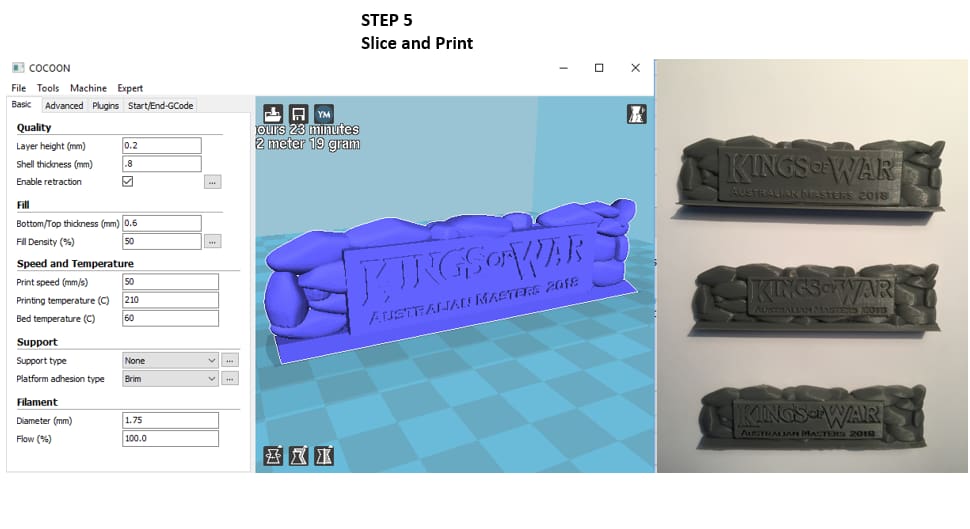
Step 5: Save the model as an .stl file, slice it in your preferred slicing software and then take the G-code to your printer and hit print. Voila! You’re on your way to 3D printing a logo.
The photo above shows the outcome of the logo printed first as positive, then as a negative, and the bottom a negative print using the original logo without the artwork cleanup and processing.
License: The text of "3D Printing a Logo: The Easiest Way and How to Do It" by All3DP is licensed under a Creative Commons Attribution 4.0 International License.