3D Scanning Camera: Turn a Camera into a 3D Scanner

Learn how to turn your camera into a 3D scanner. With an ordinary camera and some clever software, you can have your own 3D scanning camera.
But Doesn't a Camera Take Flat Pictures?
Occasionally, you might catch yourself wishing you had a digital 3D representation of a physical object. Maybe you’re making a replacement part for a broken tool, or designing a modern vase inspired by the organic form of a family heirloom. You could buy a 3D scanner for the job, but why invest in new equipment when all you need is a regular 2D camera, like the one you probably have in your pocket?
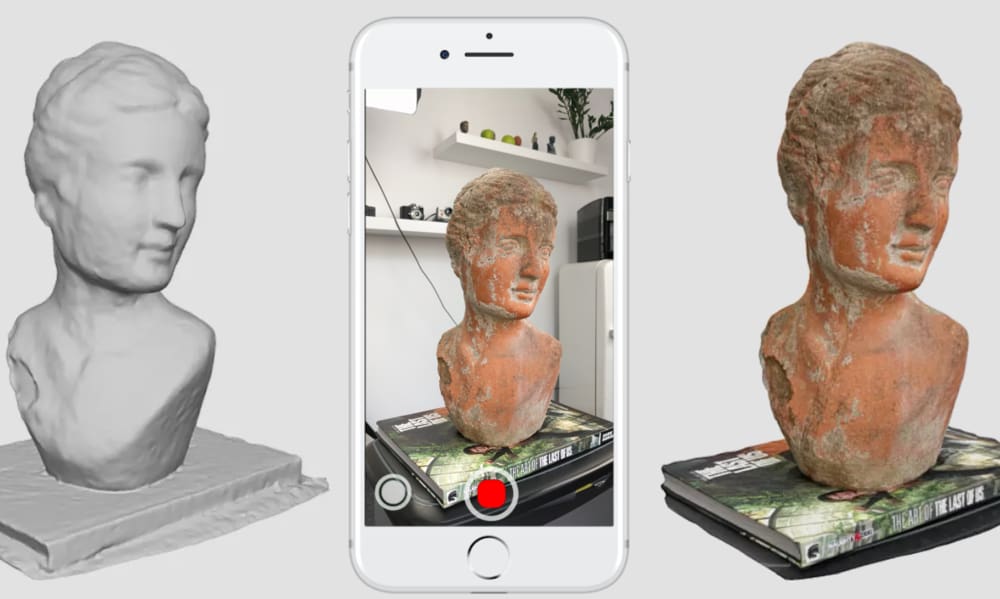
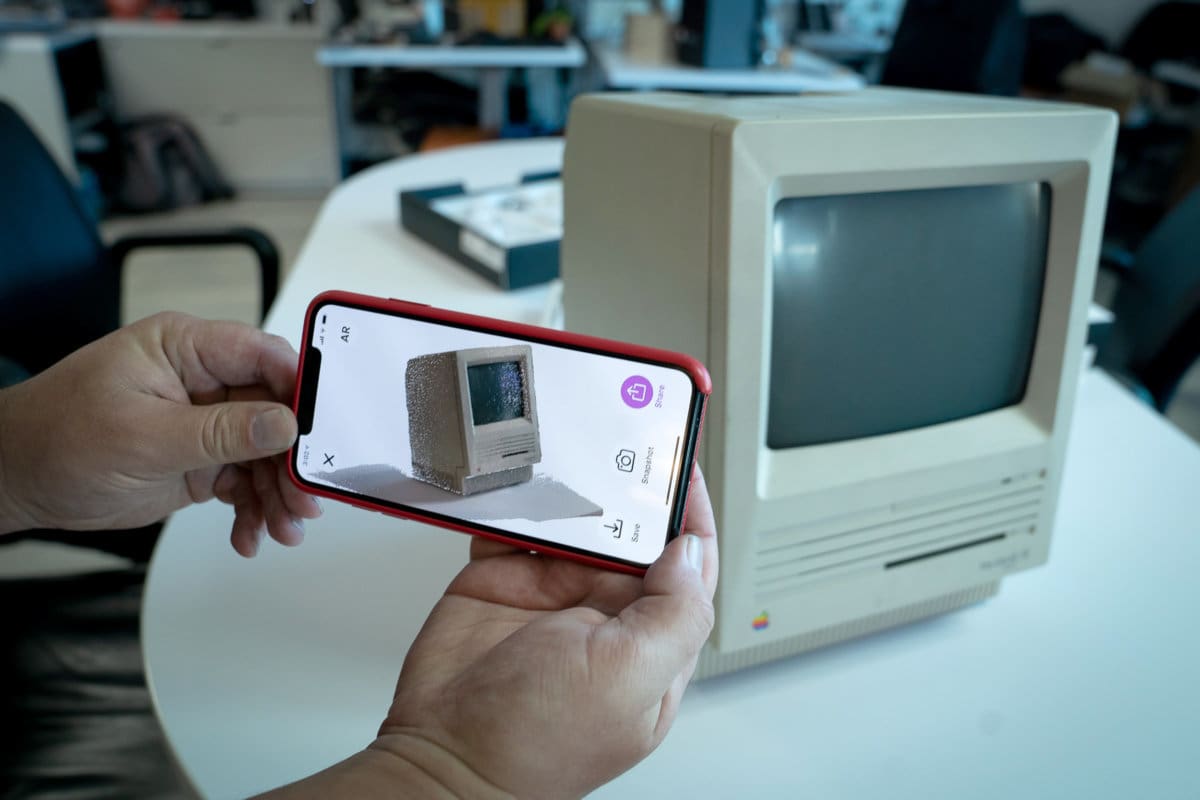
Creating a 3D scanner camera from one that takes 2D pictures is, in fact, possible – the key is angles, and lots of them. The process is straightforward: Download an app on your smartphone, snap many pictures of the same object from multiple angles, and feed them to some special software to produce a 3D design.
Of course, there are smaller details to consider in practice to optimize the scan, but the methodology is pretty simple.
Just to note, there are electronic devices on the market that work in conjunction with a smartphone or tablet to produce a 3D scan, but we’ll talk mainly about using a smartphone by itself to create a 3D scanner camera in this article.
The Catch: Accuracy
Software plays an important role in analyzing the photos you take with your new 3D scanner camera, so the software you pick will influence your exact steps. There are two main choices you have in terms of software:
- A smartphone app (usually also handles the photo-taking as well, in the app)
- A standalone piece of software (photos imported externally)
We will compare the differences between these two options later, when we talk about more specific steps, but for now it’s important to mention the similarity: their common flaw. The process of 3D scanning in general is prone to producing messy models that need to be processed before being used in animation, modeling, or 3D printing. This flaw is caused by optical factors that cannot be eliminated completely, such as shiny surfaces, hardware limitations of the camera, and less-than-optimal lighting conditions.
Thus the scanning alone doesn’t produce an absolutely tidy result. You’ll probably need to do some post-processing on the model to make it 3D printable. However, following the steps outlined here will help to reduce the post-processing needs. So, let’s start using your 3D scanner camera!
Preparing Composition and Lighting
The 3D scanning process starts before any pictures are even taken, because optimizing the physical environment where the scan will take place goes a long way towards producing a cleaner model. Just as it is in digital photography, it’s easier to get the physical shooting (or, in this case, scanning) conditions as perfect as possible, rather than fixing a bunch of issues in post-processing.
What you want in a 3D scanning site is:
- Soft lighting
- A clean background (no stray objects)
- Matte, non-reflective surfaces
Once that’s all ready, we can start the actual ‘scanning’ part of the process.
Taking the Photos
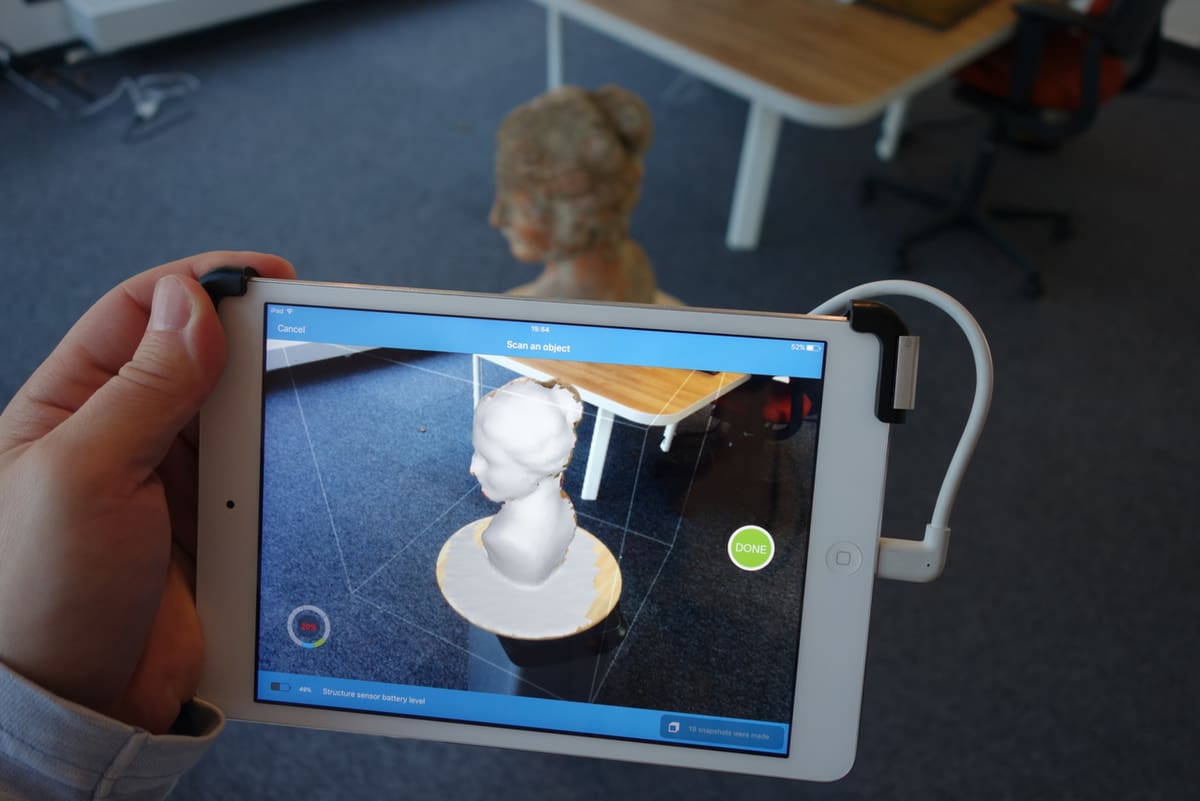
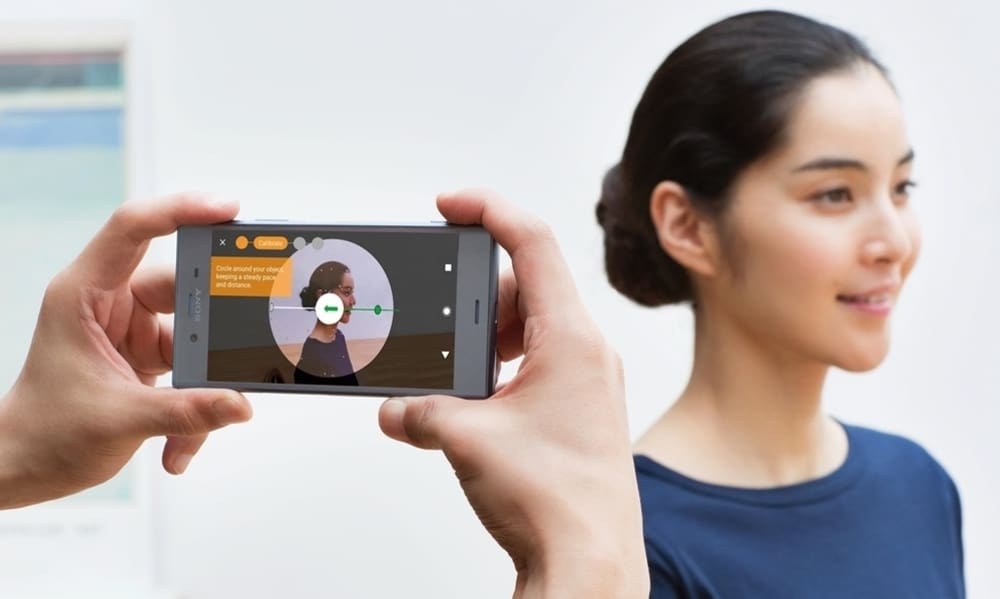
At this point, you’ll need to decide if you’re going the smartphone or desktop software route with you 3D scanner camera. Picking the smartphone route means you’ll have a more guided, straightforward experience, whereas picking the desktop software will give you more flexibility to manipulate the photos. The option you choose will depend on how accurate you need the initial scan to be, and how much effort you’re willing to invest into the process.
Taking the Photos
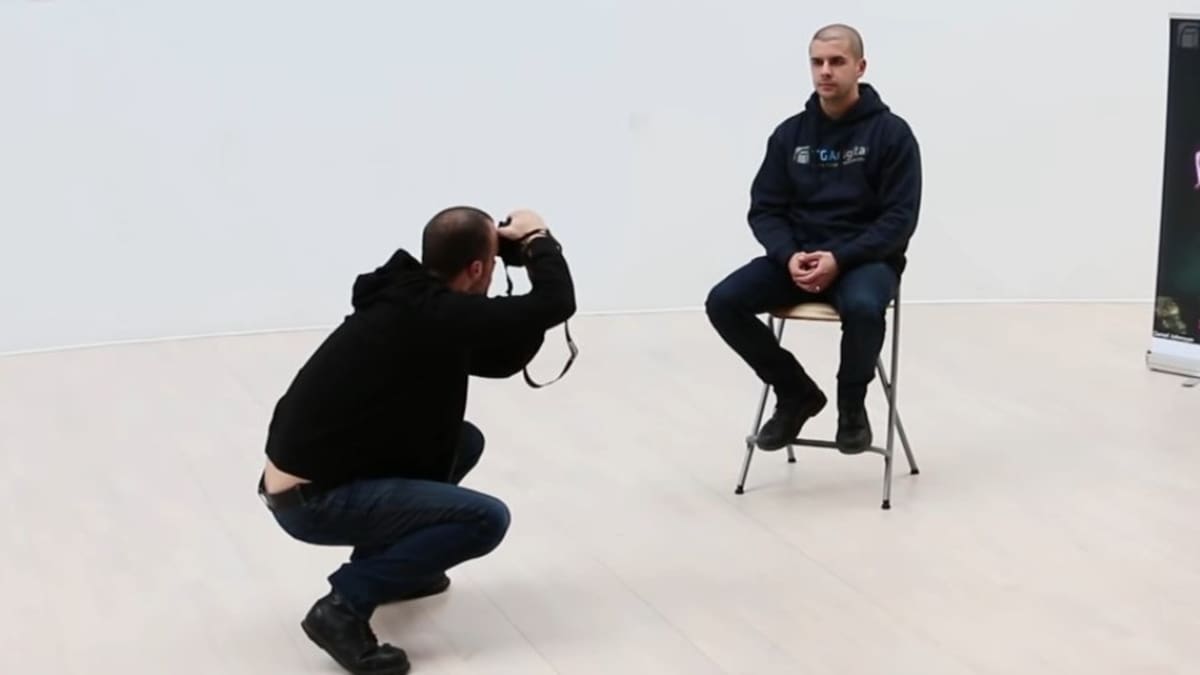
Regardless of which software you chose to use, the process of taking the photos and using the 3D scanner camera itself is that same. The process involves taking overlapping photos of the object from many different angles. One common way to do this is by walking around the object as the ‘scanning’ progresses, thus moving the camera and capturing different angles of the object to stitch into a 3D model.
It’s worth noting explicitly that you should never move the object during the scanning process. Only move yourself or the camera around it.
Don’t be afraid to repeat the pictures, especially those requiring awkward angles. After all, pointing a camera is much easier than remodeling a missing portion of a 3D model.
Software Magic
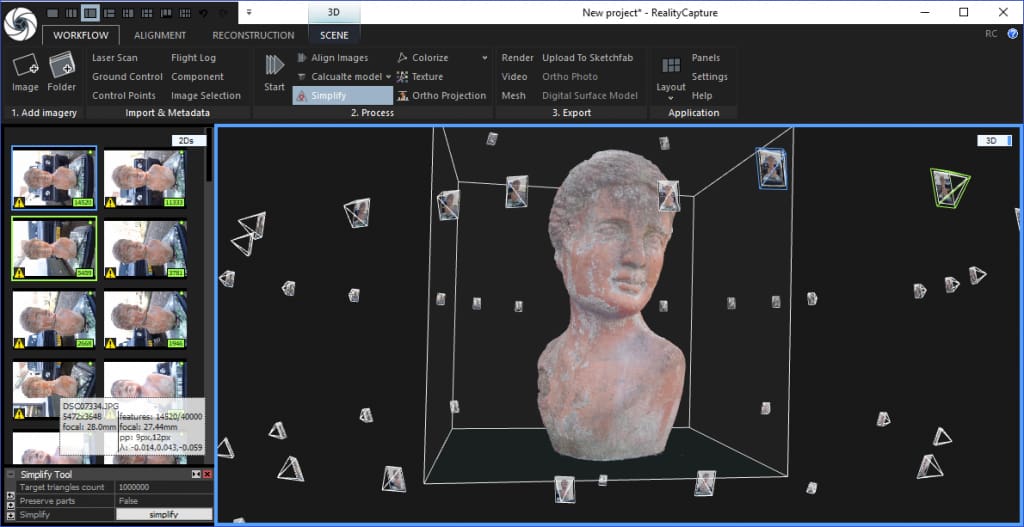
Before the Software Works Its Magic…
If you’re serious about getting a high-quality scan, you could even post-process the 2D images before feeding them to the stitching software. In this intermediary step, you could fix lighting errors, visually sharpen edges, and do other minor adjustments to assist the stitching software in better a job of capturing your object in 3D.
Time for the ‘Magic’
It’s time for the easiest part: the software work. In this step, the software processes the pictures you took of your object from all those different angles and stitches that data together to build a 3D model.
The concrete steps you’ll take to import photos and tweak settings will depend on the software you use, so we won’t cover much of that in this basic walk-through. If you’re getting tripped up by the finer details in your software, your best bet is to get a hold of the user manual for the specific software you’re using.
The Cleanup
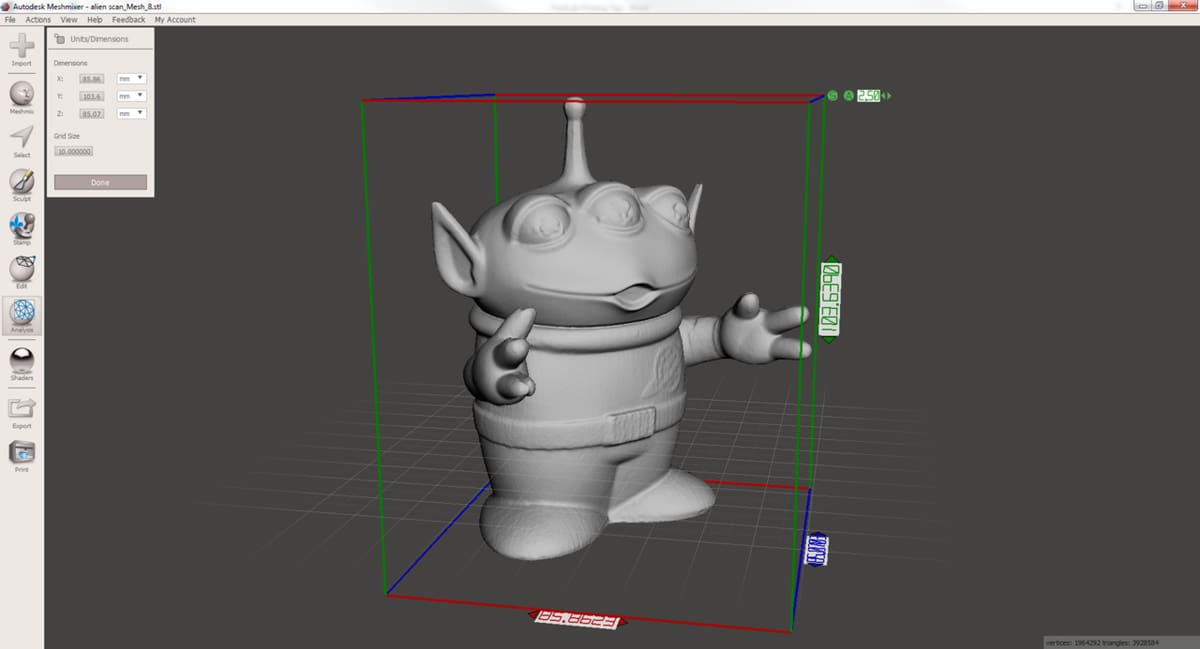
Even if you individually polished every single image to perfection before the stitching software takes over, you might still have some 3D post-processing work to do before the design is ready. There might be thin areas to thicken, holes to patch, and overhangs to address before, say, 3D printing the scanned model.
If you’re feeling intimidated by this step, Meshmixer is a good place to start. The desktop tool has been colloquially dubbed the ‘Photoshop of 3D’ because of its ability to alter and fix digital 3D designs. If you’re intrigued and dying to get started, look no further than this beginner’s guide to Meshmixer.
Conclusion: Repeat If Necessary
If you’ve been following along in this process, you’ve probably realized that the success of this type of 3D scanning relies heavily on granular, physical factors, some of which are difficult to control. As such, don’t be discouraged if you have to add a healthy dose of trial and error to get a decent result.
Even after lots of practice, you’ll eventually hit a ceiling of accuracy with using this type of a 3D scanner camera. In truth, scanning a 3D object with a 2D camera, instead of a dedicated 3D scanner, is more useful for producing less accurate digital models, either for use in fun projects or to use as a base mesh for a more complex model.
Whatever your reason for using a 3D scanner camera, you can certainly appreciate the technology that made this feat possible. After all, the barrier of entry to 3D design is drastically lowered when the tools for creating 3D models are placed, essentially, in everyone’s pocket.
Feature image source: TGA Digital / YouTube