Two Model Options

Blender and 3ds Max are 3D modeling programs commonly used by both hobbyists and professionals. They’re based on the same modeling type: polygon modeling. In this style, objects are composed of a mesh, polygons, and loops. To create a model and modify it, you directly manipulate these properties by moving, rotating, or scaling them. It’s different from techniques like sculpting, where you’d manipulate the object first and worry about the polygons later.
Both Blender and 3ds Max are used for interior design, videogame props, character modeling, and even animation and visual effects (VFX). Additionally, they both allow add-ons in their programs to increase their already extensive functionality.
Even though Blender and 3ds Max are similar in principle, they have different layouts, work modes, and tools.
The Differences, In Brief
3ds Max is design software owned by Autodesk. As it’s used by professionals to produce commercial designs and products, there’s a price tag to match. However, some independent designers make the investment for the quality it has to offer. It’s only available for Windows and you can find add-ons at Autodesk’s App Store.
Blender is also a 3D modeling software, however, it’s free and open-source, making it popular among hobbyists and beginners. It works across Windows, Mac, and Linux, and people can create their own add-ons or find existing ones in Blender Market.

Prices & Licensing
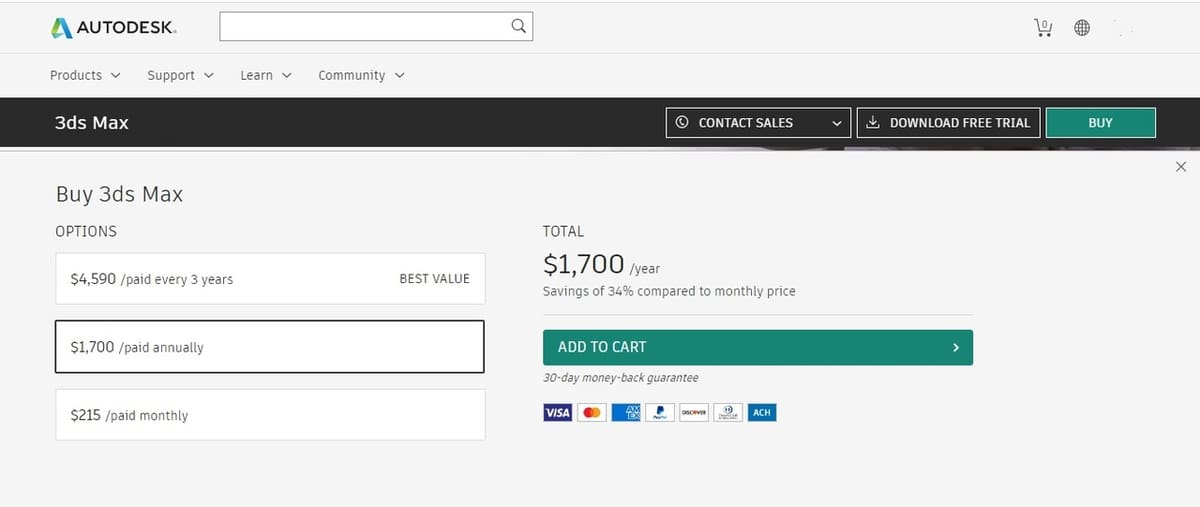
3ds Max comes at the cost of $1,700 per year, with monthly payment plans available. Like many Autodesk offerings, there’s a 30-day free trial so you can decide if it’s right for you before making a full commitment. It also has a student license, which can be accessed via your education center if they’ve purchased it.

Blender is completely free and available under the GNU General Public License. As such, you’re able to download and distribute it, and any work produced in Blender belongs entirely to the author.
System Requirements

Since in both cases you’ll be working with heavy graphics sets, a good, capable computer is recommended to avoid crashes and ensure fast performance. Having to wait every time you do an operation can be quite annoying! Additionally, for either program, you’ll need a mouse with a scrolling wheel.
3ds Max (2021)
- Operating system: 64-bit Windows 10 or higher
- Processor: 64-bit Intel or AMD multi-core processor with SSE4.2 instruction set
- Graphics card: Required
- Memory: Minimum 4 GB of RAM, 8 GB or more is recommended
- Disk space: 9 GB of free disk space, more is recommended
Blender
- Operating system: Windows (64-bit Windows 7, but newer is recommended), Mac (OSX 10.13 or newer), Linux
- Processor: 64-bit dual-core 2 GHz CPU with SSE2 support
- Graphics card: Required
- Memory: Minimum 4 GB of RAM, more is recommended
- Disk space: 8 GB of free disk space, more is recommended
UI & Layout

When you open either program, you’ll see a menu bar at the top for commands and functions, tools for translation, rotation, and scaling, and a working area called the viewport. The differences lie in how everything is arranged.
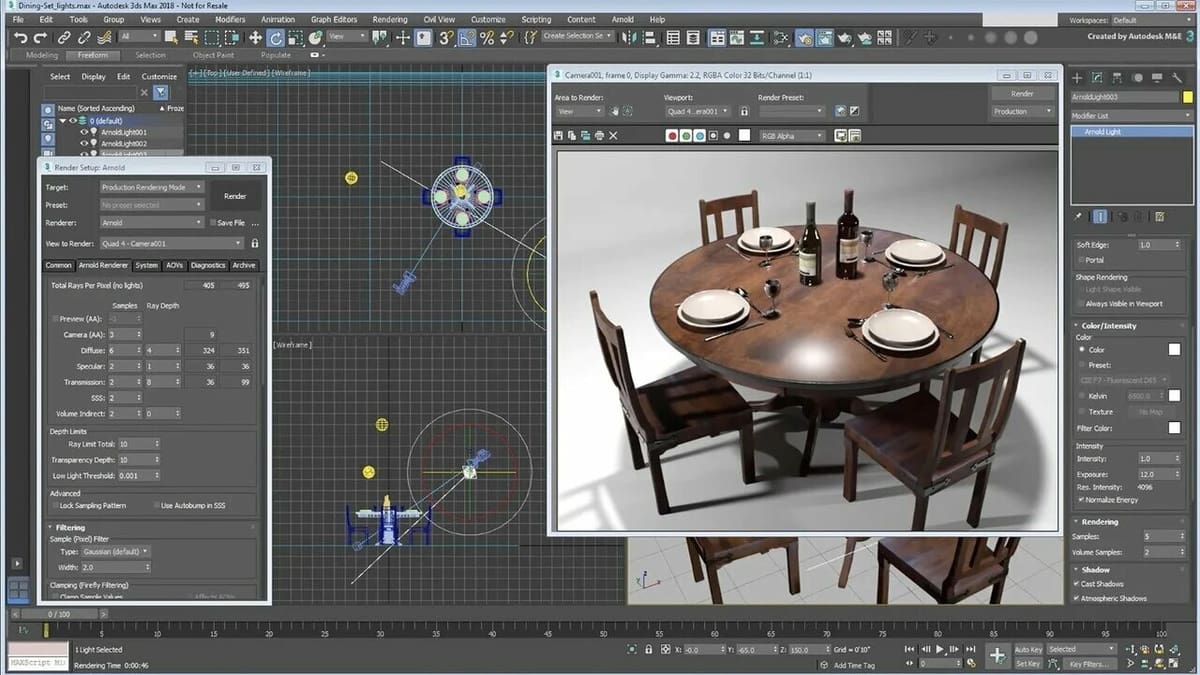
3ds Max
In 3ds Max’s menu bar on the top of the window, you can find the complete set of options and features, including to create, modify, render, and animate. Below the menu is the toolbar, where the most commonly used tools like undo, redo, and transform are displayed. Additionally, you can also find the windows menu, where you can open different functions of 3ds Max like “Material editor” and “Render setup”.
In the modeling ribbon on the left, you’ll see the necessary tools for polygon modeling. (It’s collapsable but if you expand it, you can see all the tools.) On the modify panel on the right, you can alter the parameters of the operation you’re going to make.
The viewport is where you’ll be doing your modeling and where you can visualize it. It’s divided into four sections, one for 3D visualization, and the other three are for top, side, and front views of the model.
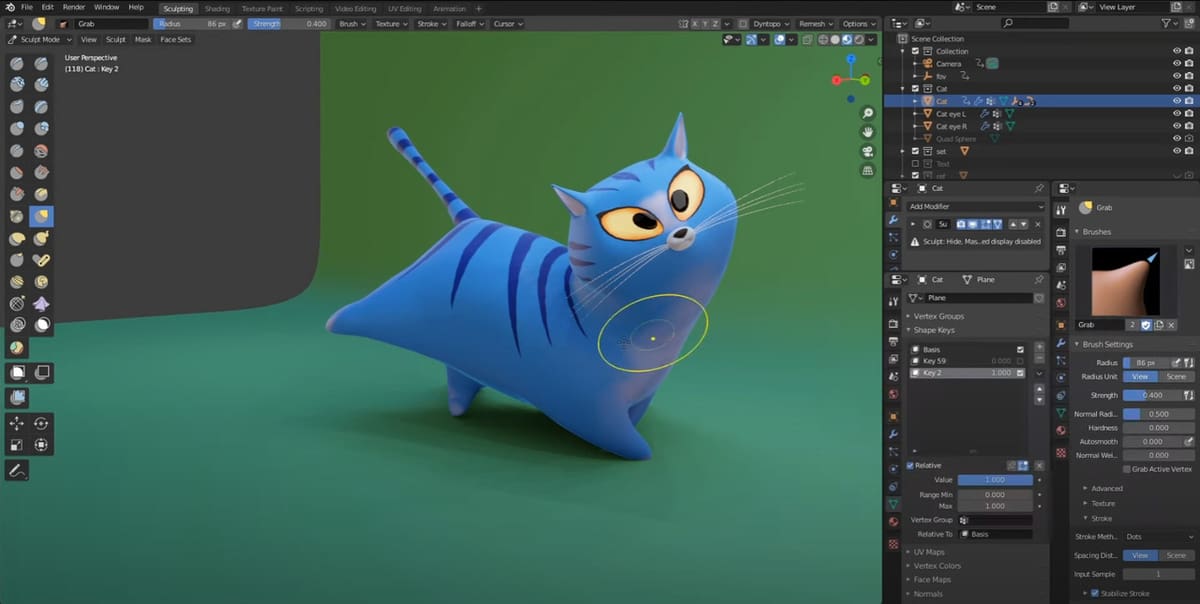
Blender
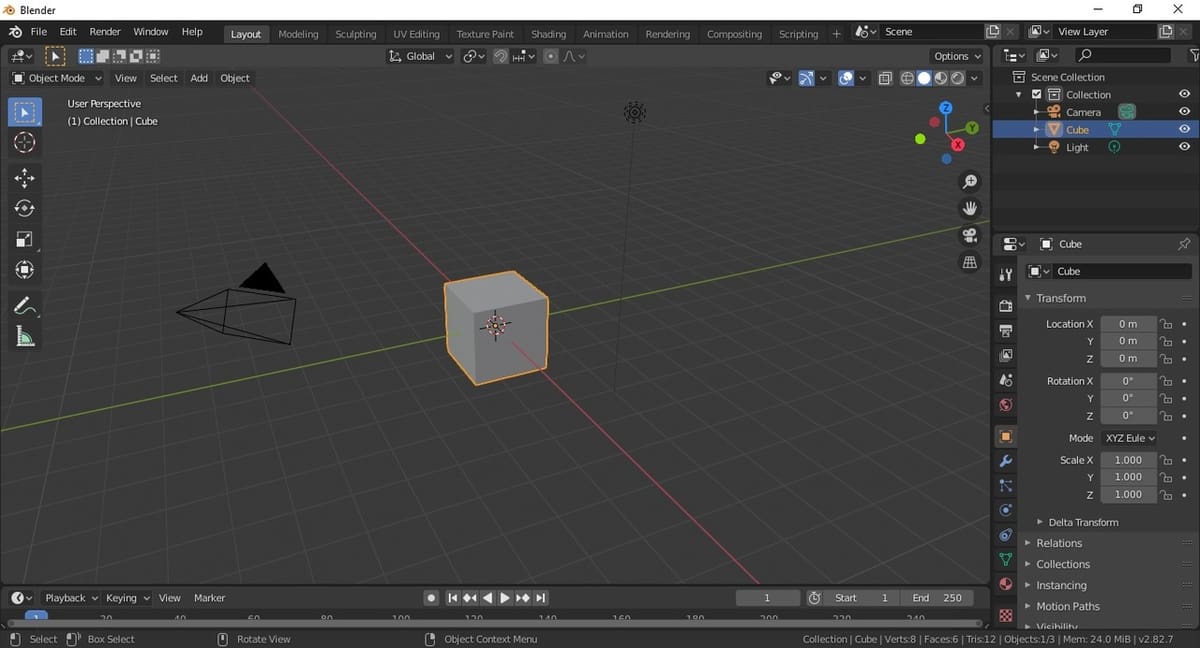
Similar to 3ds Max, at the center of the window, occupying most of the screen, is the viewport. At the bottom, you can find a status bar that shows you mouse functions according to your current context. For example, if you’re holding down the control key, it will tell you what “control + left-click” does, and if you release control, it will show you what left-click does.
Below the menu bar at the top of the screen, you’ll find tabs for the workspaces, which change the tools displayed in the rest of the program according to what you’re going to do (for example, rigging or rendering). On the right side of the window, you’ll find the properties editor, where you can add modifiers, changes the properties of a tool, and more.
Then, as floating boxes inside your viewport, you can find the transform menu on the left. This includes transform position, rotate, and scale. The properties menu on the right is also expandable. Inside the viewport and next to the transform menu are additional menus like add, which is not surprisingly used to add objects into the scene.
Features & Functions
As mentioned above, both 3ds Max and Blender have features for polygon modeling (usually called just modeling), rigging, UV lighting, animating, simulation, and rendering, but they work in slightly different ways.
3ds Max is a more complex program with more functions geared towards final quality, as it’s more used in industry settings. That said, Blender is also very complete and able to achieve full animations and renders, just not to the same efficiency standard as 3ds Max.
It’s also worth mentioning that both programs allow you to use third-party renderers, although this isn’t a common practice as the default ones work just fine. However, users who want to achieve some special effects might use a third-party renderer that’s explicitly for that desired look.
3ds Max
- Modeling: Comprehensive tools for modeling include smart extrusion, which allows you to easily extrude faces and cuts into an object without having to use an extrusion operation. It works almost like pulling out or pushing in the face you want to extrude.
- Shading: 3ds Max uses an exclusive programming language called OSL (Open Shading Language) to adding shadow via their OSL Map tool. It’s a graphic environment to place and set up the shadows’ behaviors. You can make your own shadow maps, use prefabs, or download existing ones from the internet.
- Material editing: You can create and edit materials, as well as use default ones. A material defines how an object reflects and refracts light, so it can greatly impact the appearance of your creation.
- Animation: There are specialized tools depending on the type of animation you want to do. For example, character animation, movies and VFX, or video games. 3ds Max also uses controllers, which are tools charged with handling the interpolation of the animations and storing that information. Additionally, you can establish hierarchies of objects that, for example, make the “children” objects inherit the behaviors and parameters of the “parent” object.
- Simulation: Fluids such as water, fire, oil, lava, and even groups of objects, like balls in a ball pit, can be simulated. The software gives them physical properties like mass, speed, and direction, so that they’ll interact with other objects in the environment in a way that makes sense.
- Rendering: 3ds Max’s rendering engine is called Arnold. It uses GPU rendering, which makes it fast, but it also means you need a good computer with a graphics card. There’s a preview option to see the rendered result in a separate window, avoiding the need to reload every time. When installing 3ds Max, Arnold will be selected by default. However, you can choose to not install it and use a third-party renderer instead.
Blender
Working in Blender is greatly based on keyboard shortcuts. Learning these shortcuts will significantly improve your workflow!
- Modeling: The modeling workspace has many menus to add objects and transform them. Similar to 3ds Max, it has the scale function (hotkey ‘S’) and the extrude function (hotkey ‘E’), which lets you easily extrude faces. However, these don’t work to extrude cuts: for that you’d need to use modifiers. Adjusting objects in Blender is based on modifiers, which change an object’s geometry, merge it with another object, increase the number of elements in the mesh, and so on.
- UV unwrapping: This allows you to unwrap your object’s mesh into a plane so you can create textures specific to the model and ensure an adequate fit.
- Sculpting: Sculpting is a method of modeling that digitally replicates the traditional method of modeling with clay. Blender has its own sculpting workspace with 20 brushes capable of doing different operations to the object, such as pinching, flattening, and pushing.
- Animation: Blender has a separate workspace for Animation. Here, you can convert static models into movable, animated objects through rigging. It has character animation as well as independent animation for the scene as a whole. Camera tracking can also be applied to your current animation or even existing ones, where you can change the camera’s path.
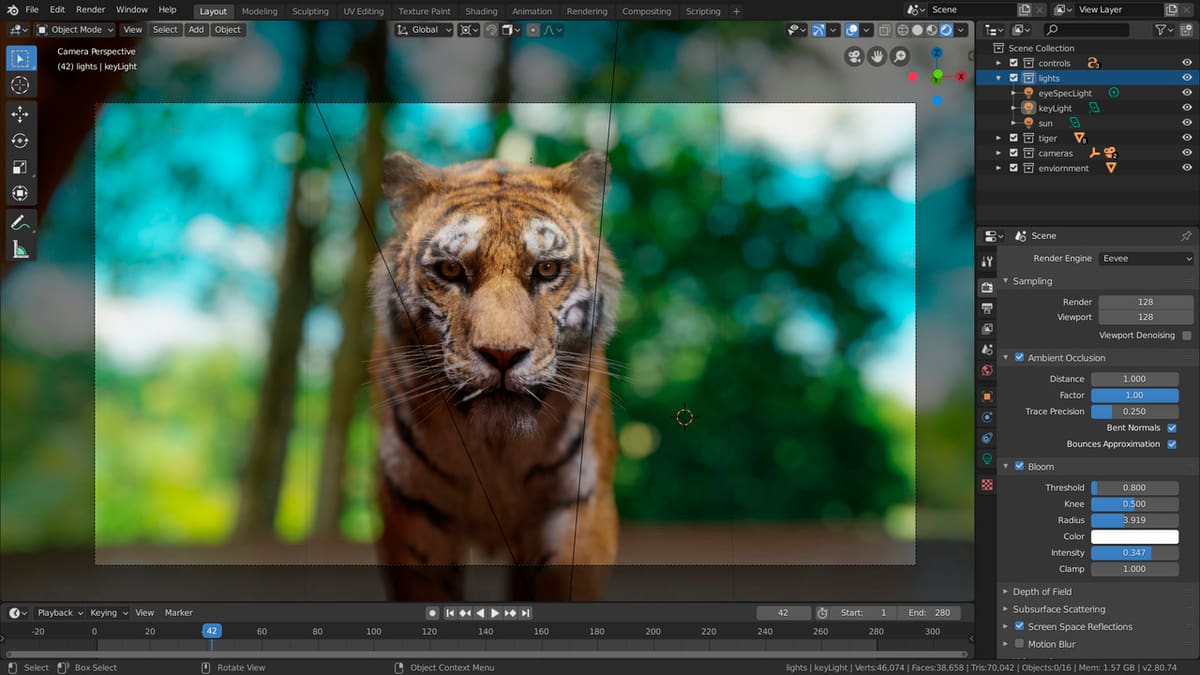
- Rendering: Blender has two rendering engines: Cycles and Eevee. These use GPU rendering for maximum efficiency.
Use Cases & Applications

3ds Max is widely used in professional, industry settings and there are many cases where it’s been used for large-scale projects, for example, in developing the very realistic-looking Game of Thrones videogame. It can also be seen in the VFX of videos, including trailers, shorts, and even full-length movies. Check out 3ds Max in action in the CGI from the “Ford vs Audi” short, as well as animated shorts like this cool ball slicing animation.
Blender is used by many hobbyists for different applications including modeling and animated shorts because it’s free and has extensive capabilities. Additionally, Blender is often used to model figurines that will be later 3D printed. People use it to simulate things such as fire, water, smoke, and lightning, and even how clothing moves on figures. It’s also possible to model characters like this cool Lapras or create animated shorts like Agent 327 Operation Barbershop.
Company & Community Support
Both Blender and 3ds Max have official resources for learning and extensive documentation, as well as countless tutorials and guides available online.
3ds Max
The Autodesk Knowledge site has an abundance of resources including help with installation, learning the basics for beginners, and documentation for more complex procedures. A simple search on YouTube will produce many introductory tutorials. Finding more advanced ones can be more difficult, as complex techniques are often taught in formal learning environments.
Blender
Blender also has its own support site where there’s documentation and tutorials. In their community forum, you can ask questions that are answered by experts or other community members. Non-official video tutorials are also available online. For advanced or complex knowledge, there’s Blender Market, where experts offer their skills.
Final Thoughts
As it’s free and more beginner-friendly, Blender would be the logical option for hobbyists, beginners, and people who want to design models for 3D printing. In addition to it being easier to learn than 3ds Max, it’s (slightly) less demanding on your computer, meaning you don’t need a top-of-the-line machine for using Blender.
However, if you want to do animation, modeling, or VFX professionally, it might be better to learn and invest in 3ds Max. Knowing this software can be more useful in a professional setting and will serve you well in the long run.
Lead image source: Autodesk via YouTube
License: The text of "3ds Max vs Blender: The Differences" by All3DP is licensed under a Creative Commons Attribution 4.0 International License.
CERTAIN CONTENT THAT APPEARS ON THIS SITE COMES FROM AMAZON. THIS CONTENT IS PROVIDED ‘AS IS’ AND IS SUBJECT TO CHANGE OR REMOVAL AT ANY TIME.