The Best Raspberry Pi Ham Radio Projects

Ham radio enthusiasts have found many uses for Raspberry Pis. Read on for some fun radio Raspberry Pi projects!
Hands down, the Raspberry Pi is an amazing open-source device. Technology hobbyists implement it in many projects, from sending instant messages to making retro video games. Now, it’s being used for projects for a hobby that may be unfamiliar to some: amateur (ham) radio.
Worldwide, there are around three million ham radio operators, often referred to as hams. They communicate over designated radio waves using two-way radios, homemade equipment, antennas, repeaters, the internet, and even via satellites orbiting the earth.
Many ham radio operators have been incorporating Raspberry Pis into their projects. This is because these little single-board computers (SBC) have many benefits, including being easy to implement and portable – eliminating the need for heavy, stationary, and expensive equipment. Thanks to something called software-defined radio (SDR), computers and SBCs can be used for radio communications.
In this piece, we’ll present some cool ham radio projects that use the Raspberry Pi. It should be mentioned that if you plan on making some of these projects, you’ll need to follow your local radio laws, especially when transmitting over the airways. It might also be a great benefit for you to get a ham radio license through the Amateur Radio Relay League (ARRL). This way you can use the designated frequencies dedicated to ham radio operators.
Ultimate Raspberry Pi Build

Raspberry Pi-based portable rigs are nothing new in the amateur radio world, thanks to the wide availability of USB software-defined radio (SDR) dongles at a low price. However, this particular rig stands out from the rest.
Instead of using an SDR dongle, the designer repurposes an old Yeasu radio, strips it to the bare essentials, and connects it to a Raspberry Pi through a simple yet functional USB sound card. The result is a portable setup that’s highly reliable and perfect for field ops! Additionally, it’s remotely accessible to allow greater flexibility.
It’s not a simple project by any means, but the author goes through the entire build thoroughly. So, it shouldn’t be too hard either. If you have an old radio lying around, definitely give this project a try.
- Difficulty: Intermediate
- Designer: Off-Grid Ham Radio OH8STN
- Project page: YouTube
- Key components: Raspberry Pi 4, USB audio codec (sound card), donor radio, power supply
QRP Go Box
Low-power amateur radio operation is popular among ham radio enthusiasts. Referred to as “QRP” by radio hams, the term is a vestige of early 20th-century telegraph communication and was used to signify low power operation.
QRP operation generally means transmission 5 W and under for Morse code and other data or 10 W PEP for voice. Operating with low power has its advantages: simpler equipment, portability, and practicality in emergency situations. There are even a number of contests worldwide that promote QRP operation.
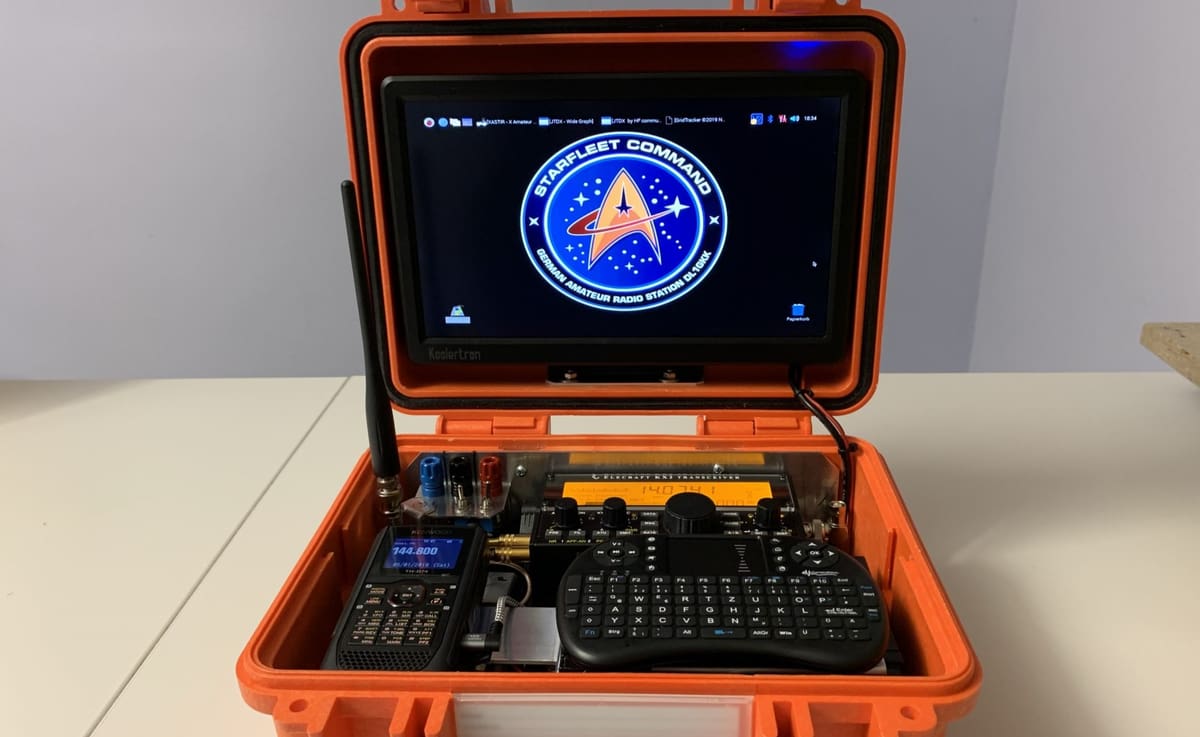
It has also piqued the interest of radio hams who have penchant for DIY projects, and many have built the equipment themselves. The designer of this project brings together commercially available products as well as equipment designed by other ham radio enthusiasts to build a portable QRP radio station.
This compact station features a Raspberry Pi 4, an Elecraft KX2, a Kenwood TH-D74, GPS, a monitor, mini wireless keyboard, and a real-time clock, among other components. The designer provides extensive instructions for programming the Raspberry Pi. There are some challenges associated with this project, namely heat accumulation in certain situations and compatibility issues with the Raspberry Pi OS, but the designer proposes a few solutions in the project brief.
- Difficulty: Advanced
- Designer: Karl-Heinz Krawczyk
- Project page: DL1GKK
- Key components: Raspberry Pi 4, Elecraft KX2, Kenwood TH-D74, GPS, real-time clock, small satellite dish, magnetic loop antenna, dipole antenna, monitor, wireless mini keyboard, 12-V battery
RTL-SDR Scanner
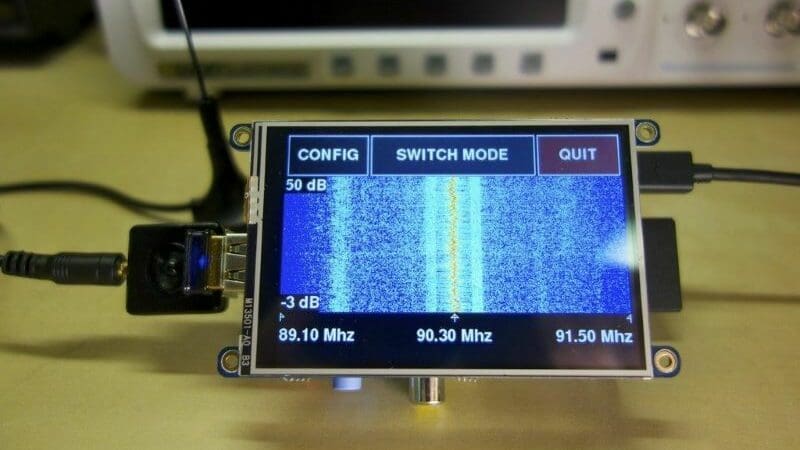
Explore and monitor the radio waves around you with this radio scanner! This simple project introduces you to SDR. With this project, you can monitor and display information about surrounding radio signals such as their intensity – measured in decibels (dB) – along with the frequency. You can also choose between displaying the information on graphs such as a frequency graph or a waterfall display.
Pre-built SD cards are available with the program already written on them if you’re not savvy with Raspberry Pi programming. Though the project’s designer recommends the first-generation Raspberry Pi models B+, B, or A, these have since been superseded by newer-generation SBCs. You might want to try this project with models such as the Raspberry Pi 5 or the Raspberry Pi 4, which has backward-compatible software that promises to work on older projects as well.
- Difficulty: Beginner
- Designer: Tony Dicola
- Project page: Adafruit
- Key components: Raspberry Pi, RTL-SDR receiver, 3.2″ PiTFT display
Cyberdeck

Cyberdeck builds always have that cool factor, don’t they?
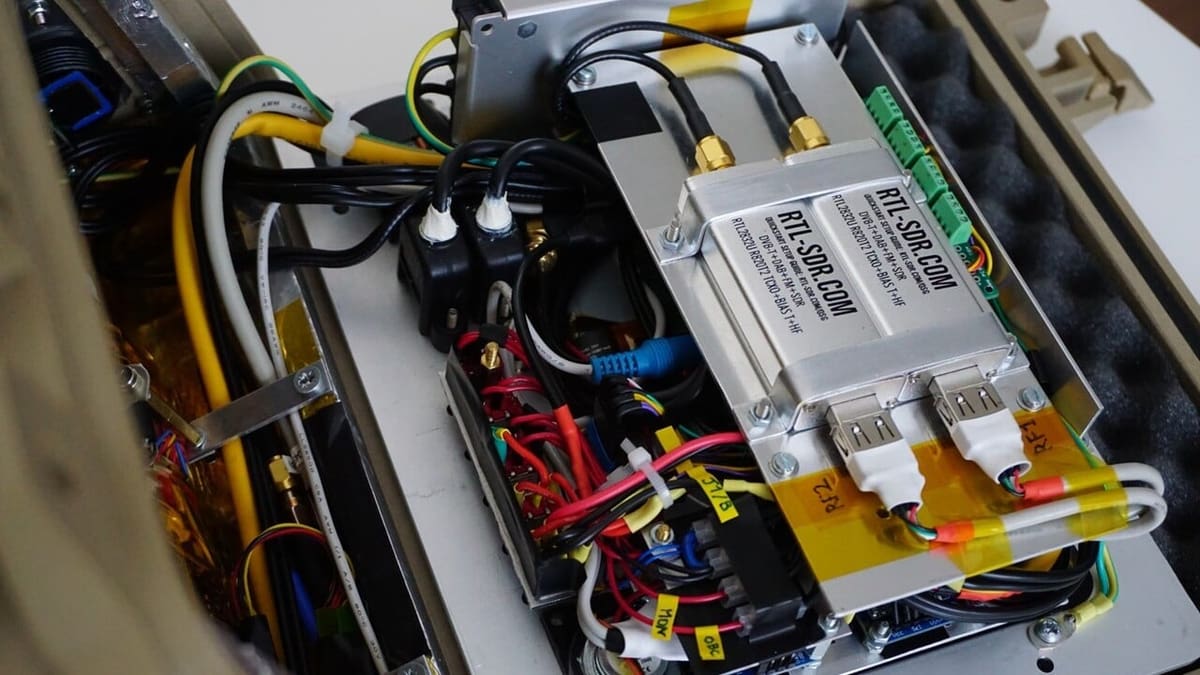
This well-engineered SDR Cyberdeck takes it up a notch by seamlessly combining form with function. We have already featured the QRP Go Box, which comes in a similar form factor but only focuses on low-power RF operations. This rig, however, aims to be an all-in-one portable station that can handle much more.
With a long list of features, the author has designed this as a self-contained unit capable of handling any operational situation where RF communication or monitoring is required. Monitoring radio bands, air and marine traffic, or even weather balloons, this rig covers it all.
What really sets it apart though is its portability: Everything is integrated into a shoebox-sized rugged case that’s small enough to fit in your backpack. Plus, the internal powerbank keeps it running for over 8 hours, making it the ultimate dream setup for radio operators who need to work off the grid often.
The project documentation is great if you already have plenty of experience with setting up Raspberry Pi and SDR modules. However, since the build isn’t really broken down into individual steps, we would only suggest advanced hobbyists to attempt this.
- Difficulty: Advanced
- Designer: Tom Mladenov
- Project page: Hackaday
- Key components: Raspberry Pi 3 Model B, RTL-SDR modules, GPS module, 7″ touchscreen, battery pack, antennas
Ham Clock
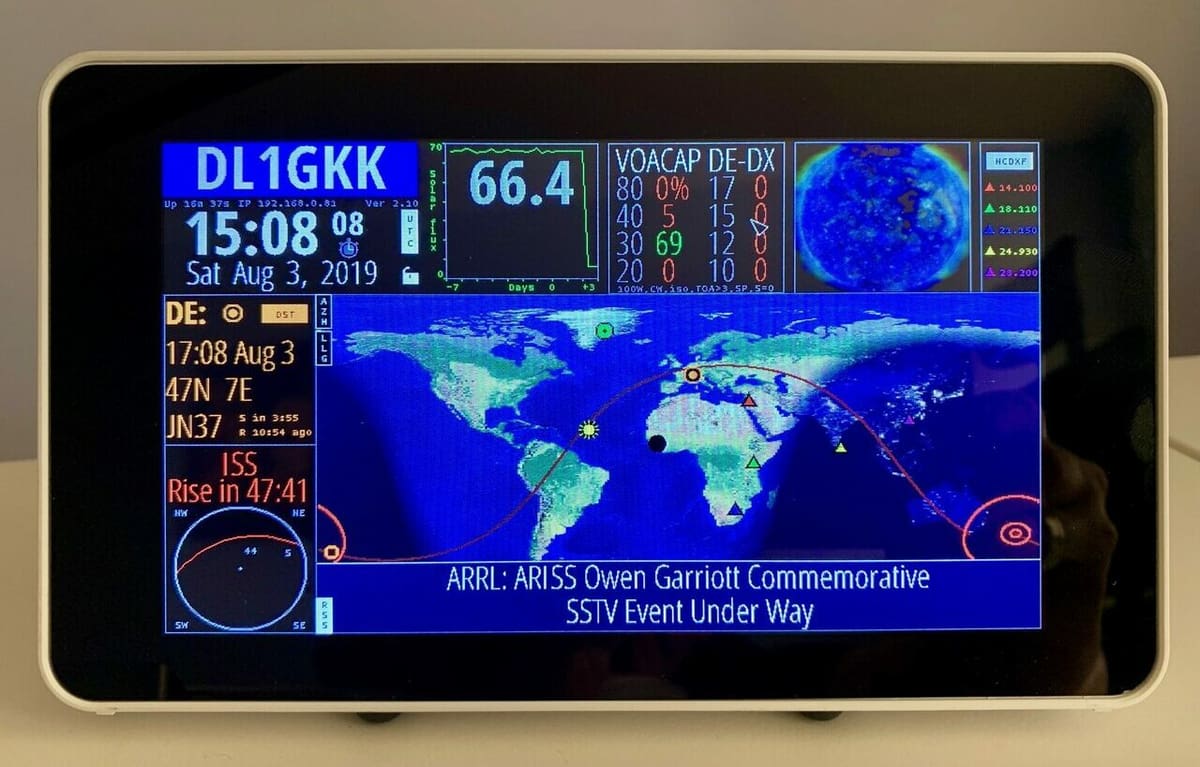
Want to switch over from your boring alarm clock? With this easy project, you can create a clock that tells you not only the time but also the weather, solar flux, DX spot reporting, locations of satellites as well as the ISS, all on a touch screen interface.
All this information is greatly useful for ham radio operators when they’re trying to make contact. Plus, it makes for a really cool display. In addition to the instructions from the Clear Sky Institute, there are various video tutorials that provide helpful guidance.
- Difficulty: Beginner
- Designer: Elwood Charles Downey (WB0OEW)
- Project page: Clear Sky Institute (instructions in the “Desktop” tab)
- Key components: Raspberry Pi 3 Model B+ or 4 Model B, a display, an enclosure if using an LCD screen
WSPR Node
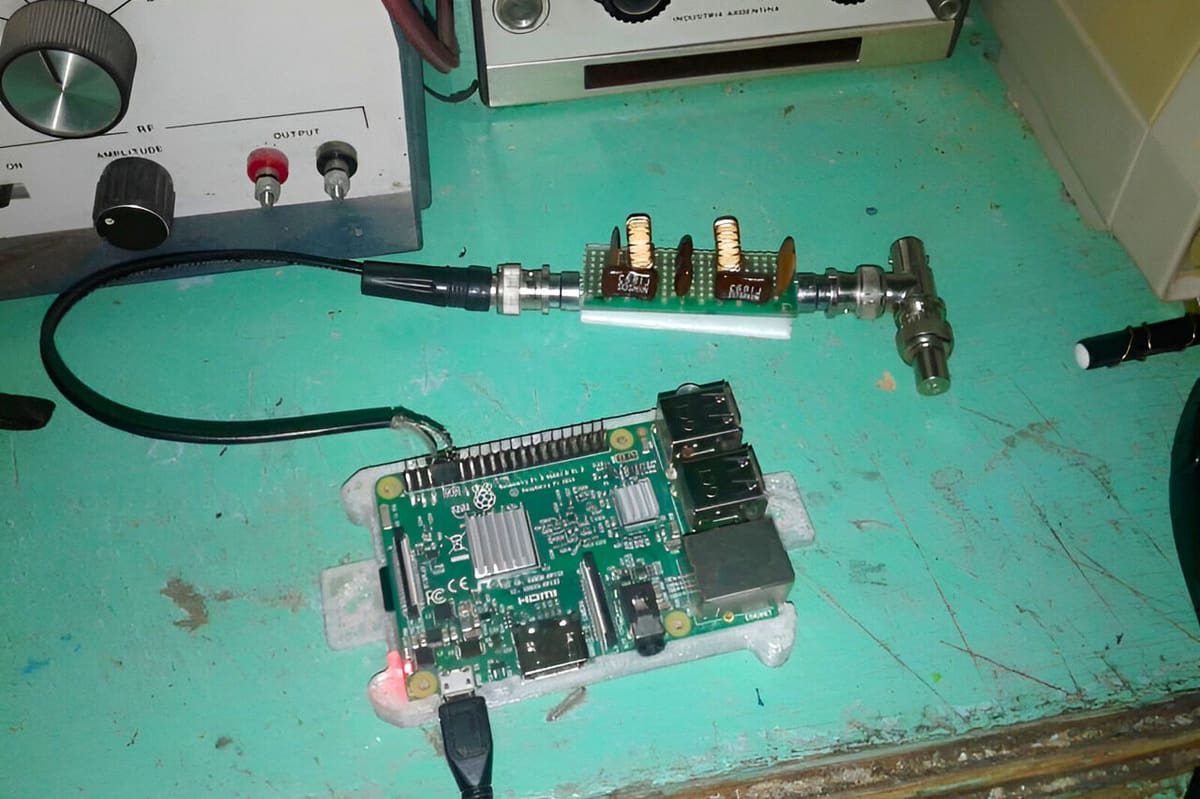
WSPR stands for “Weak Signal Propagation Reporter”, a protocol used to test how much distance you can cover by using very low-power transmission. It works by transmitting a signal, typically the station’s call sign and transmission power. The signal is then received by other WSPR stations around the world that receive the signal and report it back to a central database – for example, WSPRnet – where it’s aggregated and visualized.
In this Instructable, the project’s creator describes how you can make your own WSPR node easily with a Raspberry Pi, a low pass filter (which you have to design and build yourself), and an antenna (which can be a piece of wire in the beginning). It’s important to note that you’ll need to tinker a bit with the filter design and antenna. Regardless, it’s a really fun project that allows beginners to explore long range communications with maximum efficiency.
If you’re looking for a weekend project, make sure to check this one out. There’s also a similar project on GitHub that also lists plenty of reference documentation, which can come in handy.
- Difficulty: Easy
- Designer: lofi-adhocracy
- Project page: Instructables
- Key components: Raspbery Pi 3 Model B, power supply, optional oscilloscope for testing the signal output
Pi-rate Radio
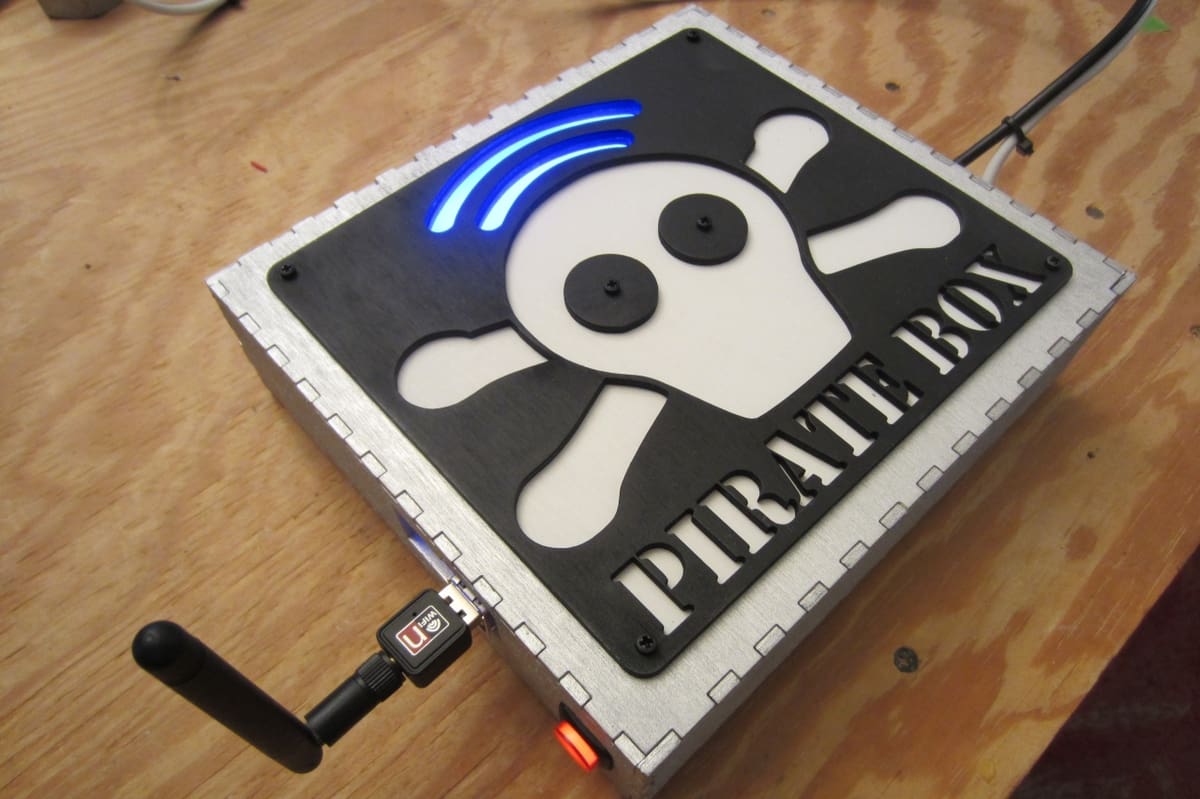
The Raspberry Pi is a pretty powerful device – so powerful that with just a piece of jumper wire, you can transmit signals over the airways. This is what’s called pirate radio, and it’s so named because, depending on what frequencies you play on, you could cause interference with another transmitting station such as a local FM radio station. This is why you have to be careful with the amount of power you’re transmitting, as you could cause harmful interference and break local laws.
Fortunately, the Raspberry Pi, though powerful, shouldn’t be too much of a concern because it’s not strong enough to cause too much damage. This project’s parts list includes a first-generation Raspberry Pi, which has been superseded by newer models. Give this project a try with one of the newer-generation Raspberry Pis.
- Difficulty: Beginner
- Designer: Gus
- Project page: PiMyLifeUp
- Key components: Raspberry Pi, Adafruit Perma-Proto half-sized breadboard, push-button switch, plywood
FlightRadar24
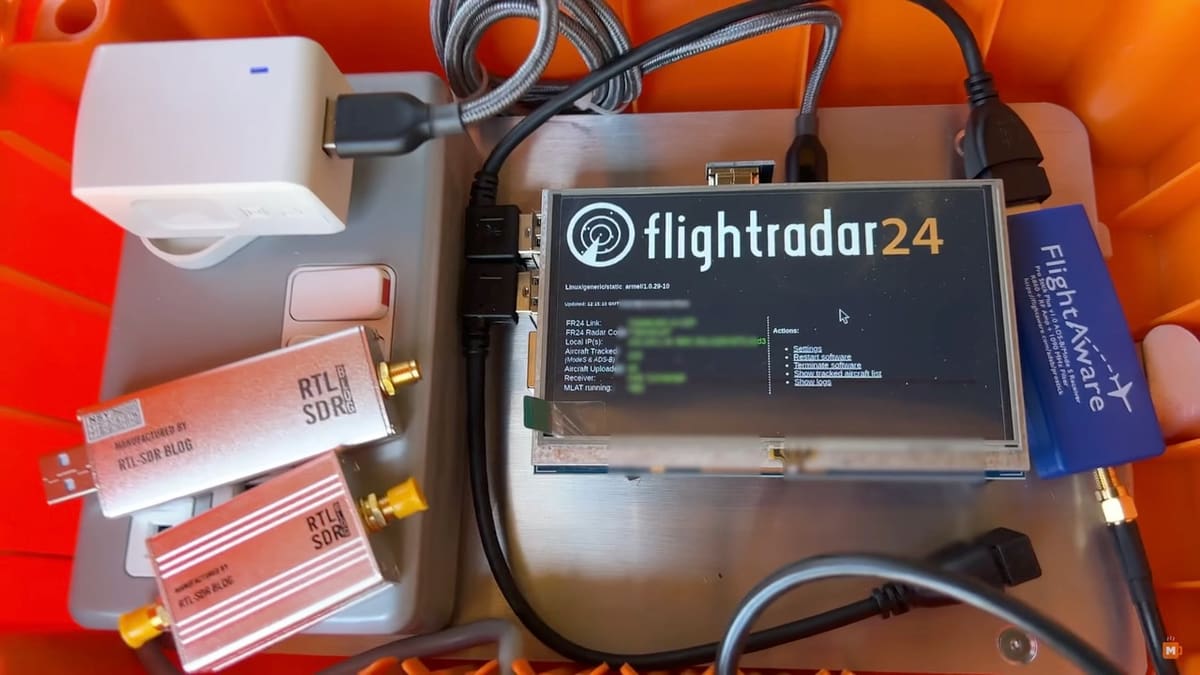
Flightradar24 is a live aircraft tracker that displays real-time information like location and speed on their platform. A major source for this data is Automatic Dependent Surveillance-Broadcast technology, which is used by aircraft to broadcast flight information such as current location and speed.
Hobbyists around the world contribute to FlightRadar24 by building their own ADS-B receivers, which send flight data back to the central server for aggregation. This project does just that using a Raspberry Pi, an SDR dongle, and a few other components.
Making the receiver isn’t very complicated per se, although it can take quite awhile to set everything up. If you have the time and an interest in aviation – by all means, go ahead and build one.
- Difficulty: Intermediate
- Designer: Mike Makes It
- Project page: YouTube
- Key components: Raspberry Pi Zero W, 3 Model B+, 4 Model B, SDR dongle, FlightAware Plus dongle, 5-inch touch display, antenna
Satellite Tracker
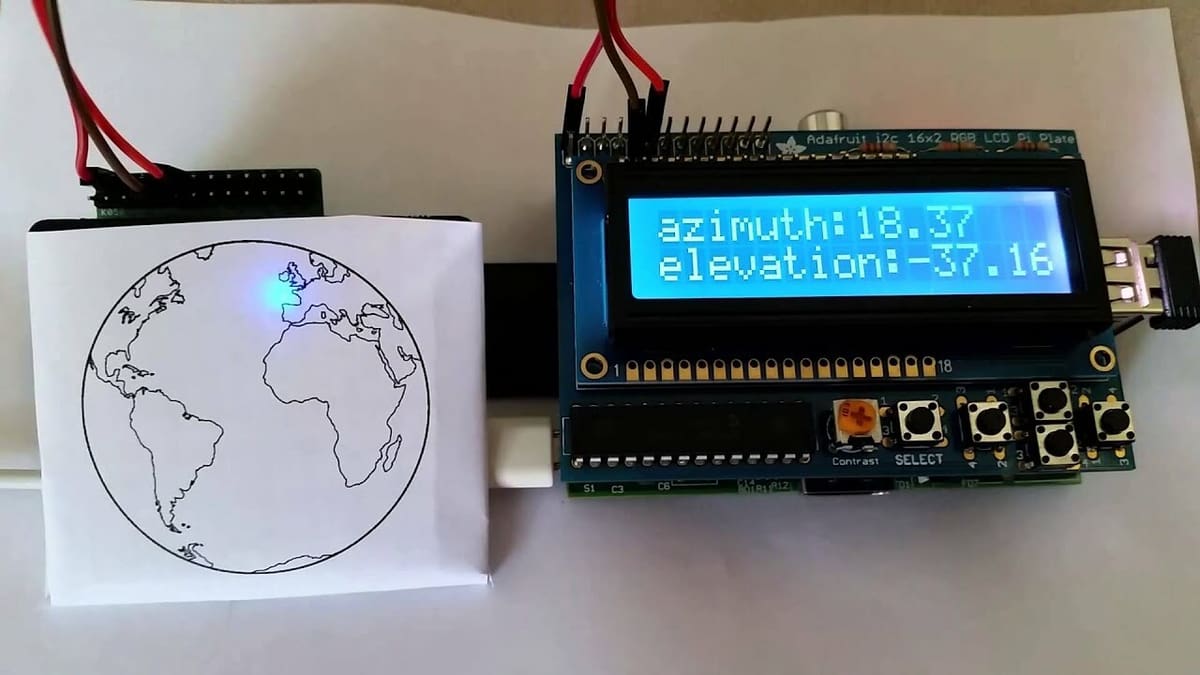
Want to reach the edge of space with your Raspberry Pi? Ham radio operators use satellites to both communicate and receive data from satellites. Ham operators also build their own satellites called CubeSats that they send to space.
This project will require some way to display the location of a satellite on a map in real-time, but the results are worth the extra hardware!
- Difficulty: Intermediate
- Designer: fkemmerer
- Project page: Our Ham Station
- Key components: Raspberry Pi 3 Model B+, Adafruit 3.5″ PiTFT Plus touchscreen display, Pibow PiTFT case, heatsinks, 8-GB or larger MicroSD card
R2Cloud Project
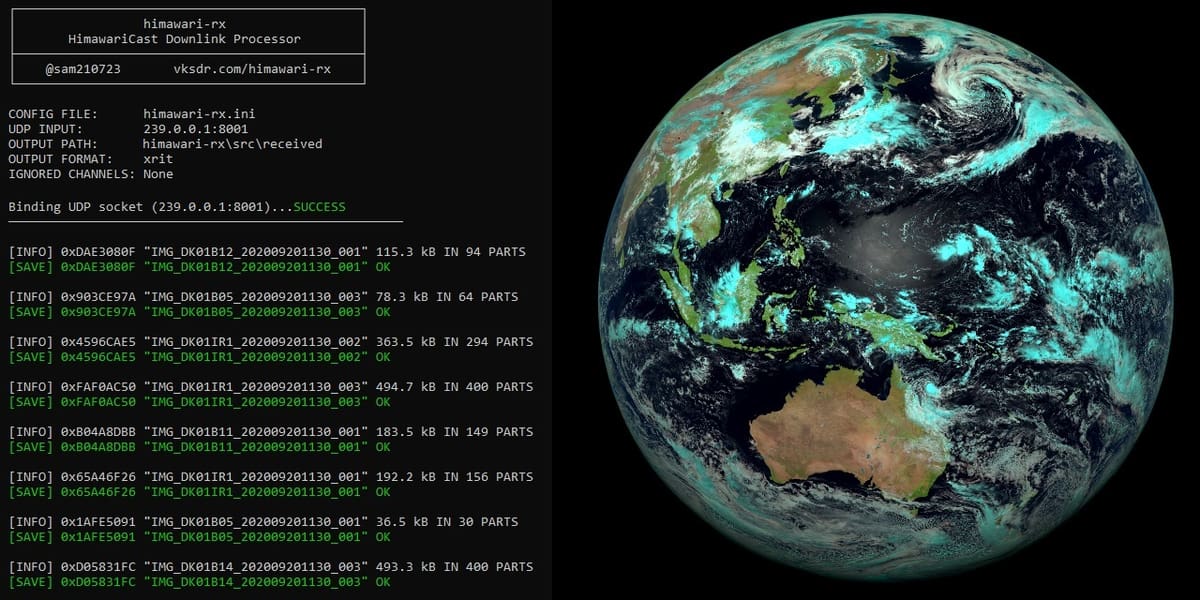
With free software that can be downloaded to the Raspberry Pi, you can obtain pictures of Earth from satellites orbiting above. Along with images, you can also receive telemetry data and satellite statuses. The R2Cloud Project was created by a hobbyist and is maintained on GitHub.
- Difficulty: Intermediate
- Designer: Dernasherbrezon
- Project page: Github
- Key components: Raspberry Pi (2, 3, 3 B+, or 4), discone antenna, RTL-SDR, PlutoSDR
Drones
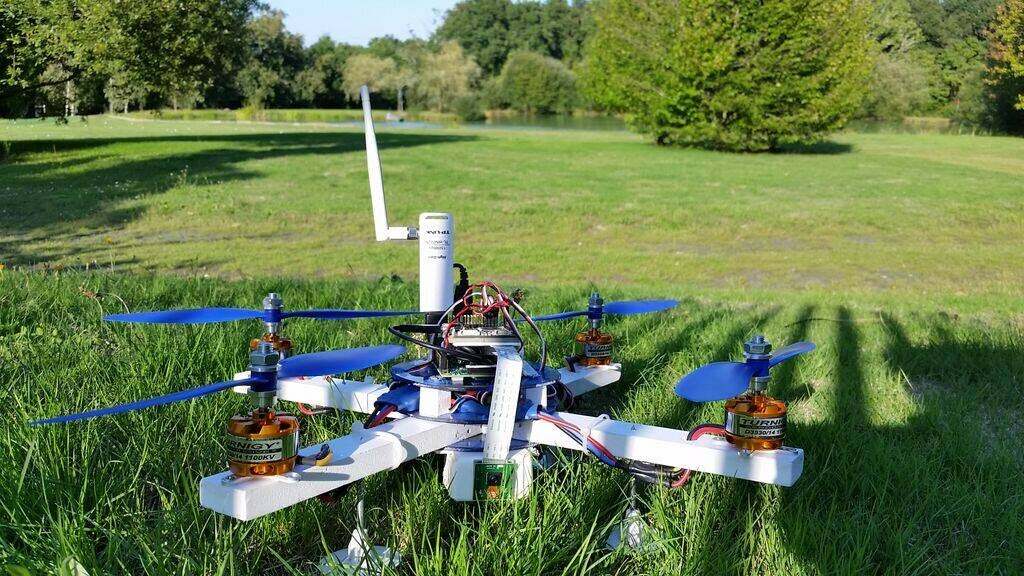
Ham radio operators also like to use their knowledge of radio for RC projects such as cars, planes, and aerial drones. With a little tweaking, you could even build your own swarm of drones. This project is a little more advanced because it requires building (or 3D printing) a frame for your drone, along with more sensors and motor control systems. For an even bigger challenge, some hams have implemented their drones to act as repeaters for emergency communication.
This project’s parts list also includes a first-generation Raspberry Pi, which has been superseded by newer models. Give this project a try with one of the newer generation Raspberry Pis.
- Difficulty: Advanced
- Designer: reglisse44
- Project page: Instructables
- Key components: Raspberry Pi, MultiWii, drone frame, propellers, four motors, four ESCs, power distribution board, camera module, Wi-Fi key, remote control, RC receiver
License: The text of "The Best Raspberry Pi Ham Radio Projects" by All3DP is licensed under a Creative Commons Attribution 4.0 International License.