AnkerMake Slicer: All You Need to Know

Based on PrusaSlicer, AnkerMake Studio is a relatively new slicer on the scene. Read on for all you need to know about this software!
Today, many fused deposition modeling (FDM) 3D slicers are accommodating the ever-changing needs of hobbyists with new settings and features. However, the productivity and usefulness of a slicer depend on a variety of different factors.
One of the up-and-coming slicers currently gaining popularity is AnkerMake Studio, which is an initiative of Anker Innovations, a leader in smart charging technology. AnkerMake Studio is the official slicer for the company’s flagship product, the AnkerMake M5 printer, and offers remote printing control and real-time streaming, among other features.
Although AnkerMake Studio is still new on the 3D printing scene, early adopters have found it a useful tool due to the fast printing speeds, the precision it offers, and clean finishing. AnkerMake Studio is open source and incorporates many features from other leading slicers, like Bambu Studio and PrusaSlicer, the latter of which it’s based on.
In this article, we’ll explore how to download, use, and get the most from this slicer’s unique feature set. We’ll also take a look at the support available and some alternative options you may want to consider. Let’s get started!

System Requirements & Installation
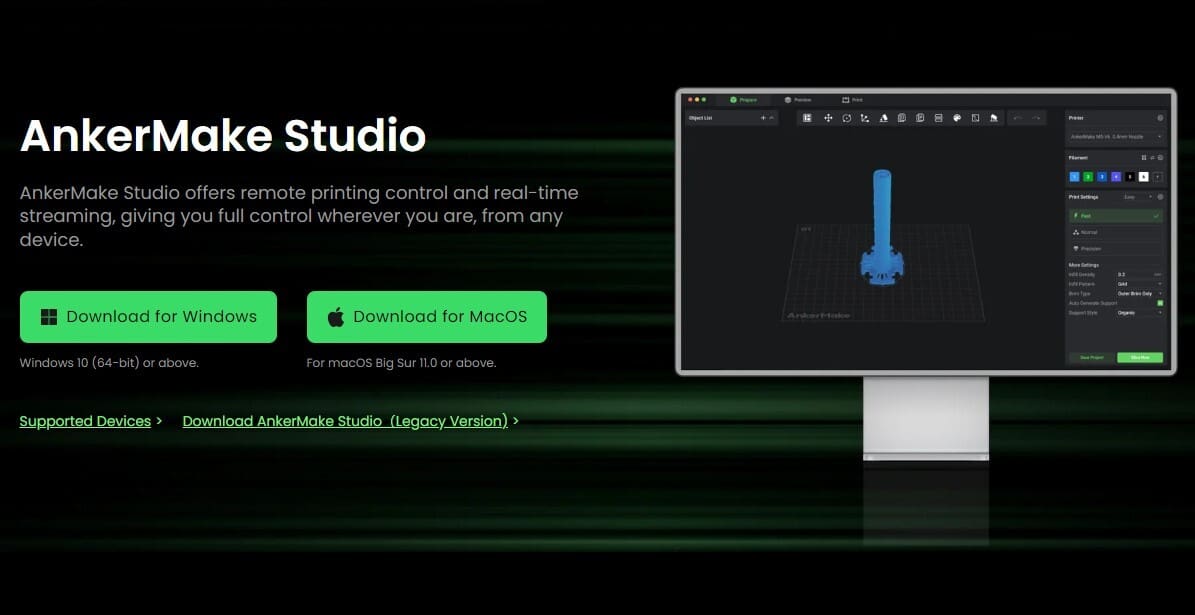
Because of its open-source nature, AnkerMake Studio is free to download and use for Windows 10 (64-bit) and above, and MacOS (Big Sur 11.0 and above). The latest stable release, v1.5.22, is available on GitHub. The AnkerMake Studio Installer is a .exe or .dmg file (for Windows or MacOS, respectively). It functions as a wizard setup assistant that facilitates installation.
For a smooth installation and user experience, the device you wish to install the software on must meet minimum requirements. Let’s take a look at the product manufacturer’s recommended specifications based on the different OSs:
Windows
- CPU: Intel Core i5 CPU or above
- Graphics: GTX1650, OpenGL 3.3 or above
- RAM: 8 GB or more
MacOS
- CPU: 2.8 GHz Quad-Core Intel Core i7
- Graphics: Radeon Pro 555 2 GB
- RAM: 16 GB, 2133 MHz LPDDR3
UI & Layout
AnkerMake Studio’s user interface (UI) is fairly intuitive and makes it easy to access the program’s features.
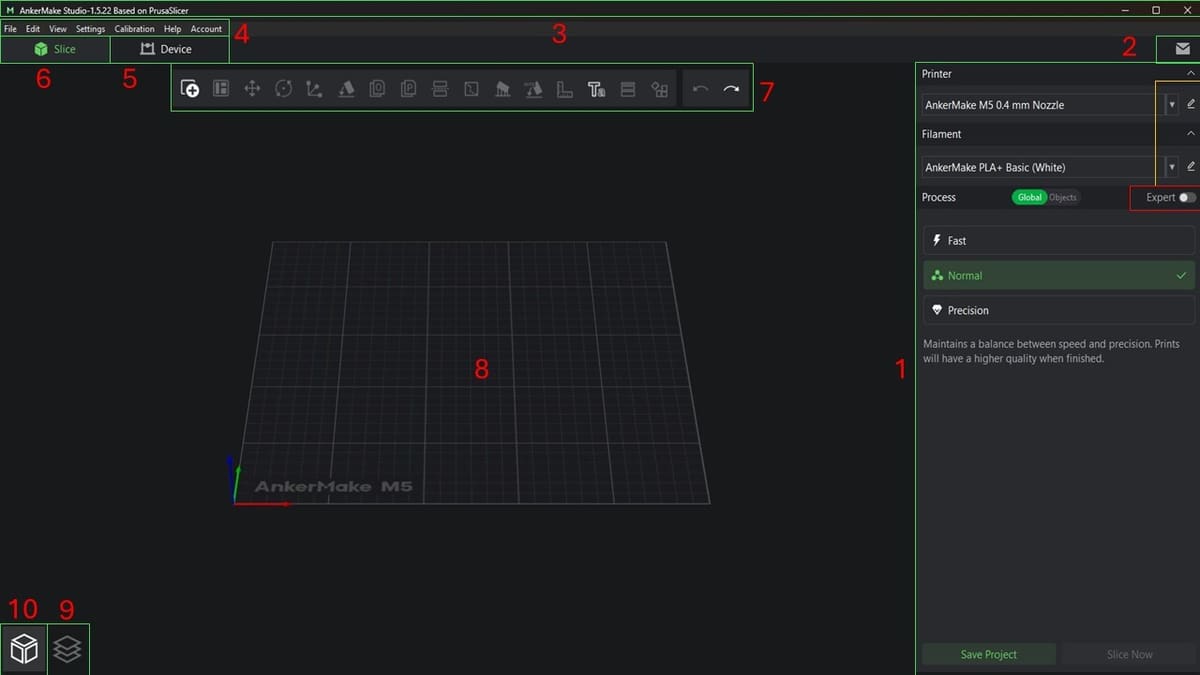
Right-Hand Panel (1)
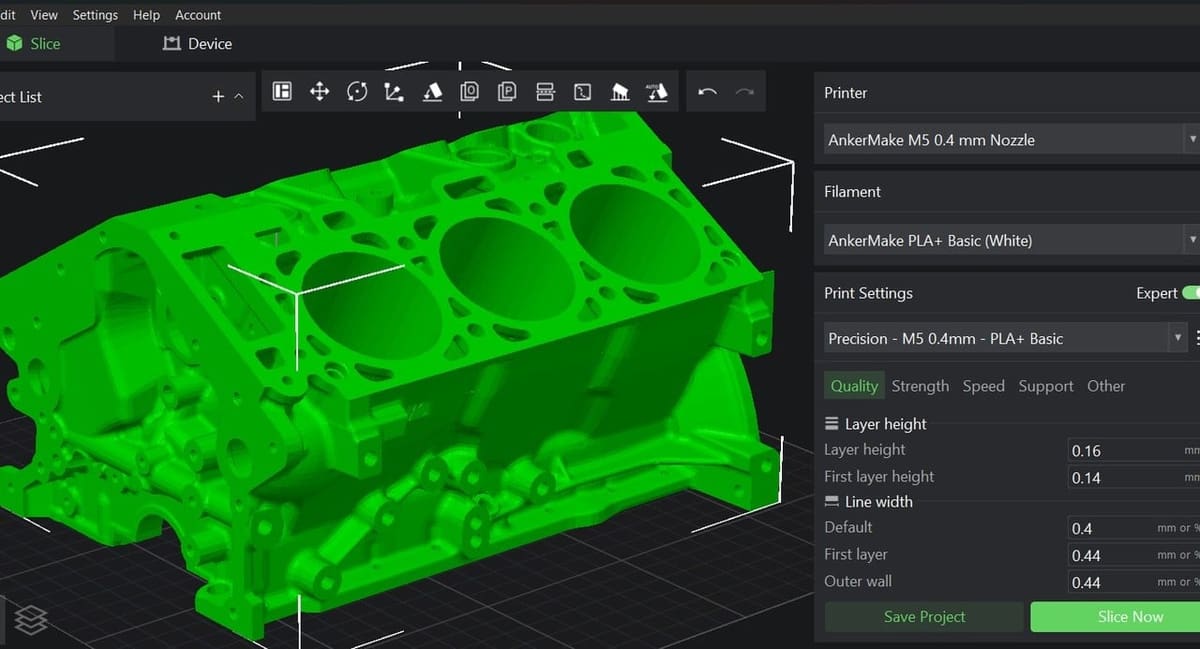
Here you’ll find the majority of the features you’ll use within the slicer, including the printer settings, filament settings, and process configuration options. Both the printer and filament settings can be customized via the custom profile yellow pencil icon. You’re provided with the option to configure the printing process as global or object-based, and, at the same time, switch between print presets (fast, normal, precision). There is a provision for the red expert mode, which unlocks your ability to control the quality, print speed, print strength, print support, and some unique features like generating Verbose G-code or processing the output G-code through custom scripts.
Feedback & Help (2)
This section provides the ability to share your software logs with AnkerMake via the feedback feature. The release note button also allows you to view the release notes from the latest release hosted on GitHub.
Title Bar (3)
This carries information about the title of the project, the file currently loaded or being worked on, and details such as the version and name of the software.
Top Menu Bar (4)
From here, you can directly select menus like File, Edit, View, Settings, Calibration, Help, and Account. Each contains a variety of options to control the model or file. For instance, under File you can find the option to repair your STL file or to initiate a slicing command. View contains seven views, like ISO, with each assigned a number (0–6). You can also manipulate the printing setup through the Calibration tab, which provides direct access to control the flow rate, temperature, pressure, and includes the possibility to initiate a retraction test.
Device View Tab (5)
This tab enables the device control and monitoring environment. Here, you’ll find “My printer tool box”, which tells you the number of printers linked to your account on AnkerMake. You’ll also find a section called “Monitor”, which is for the flagship M5 printers, and allows you to monitor your print in real-time. It also has a control section and a progress bar to track your print job.
Slice View Tab (6)
This is the default tab for AnkerMake Studio. Apart from the title bar, top menu bar, Feedback and Help, every other section discussed in the UI is only made available and accessible when you’re in the Slice view.
Toolbar (7)
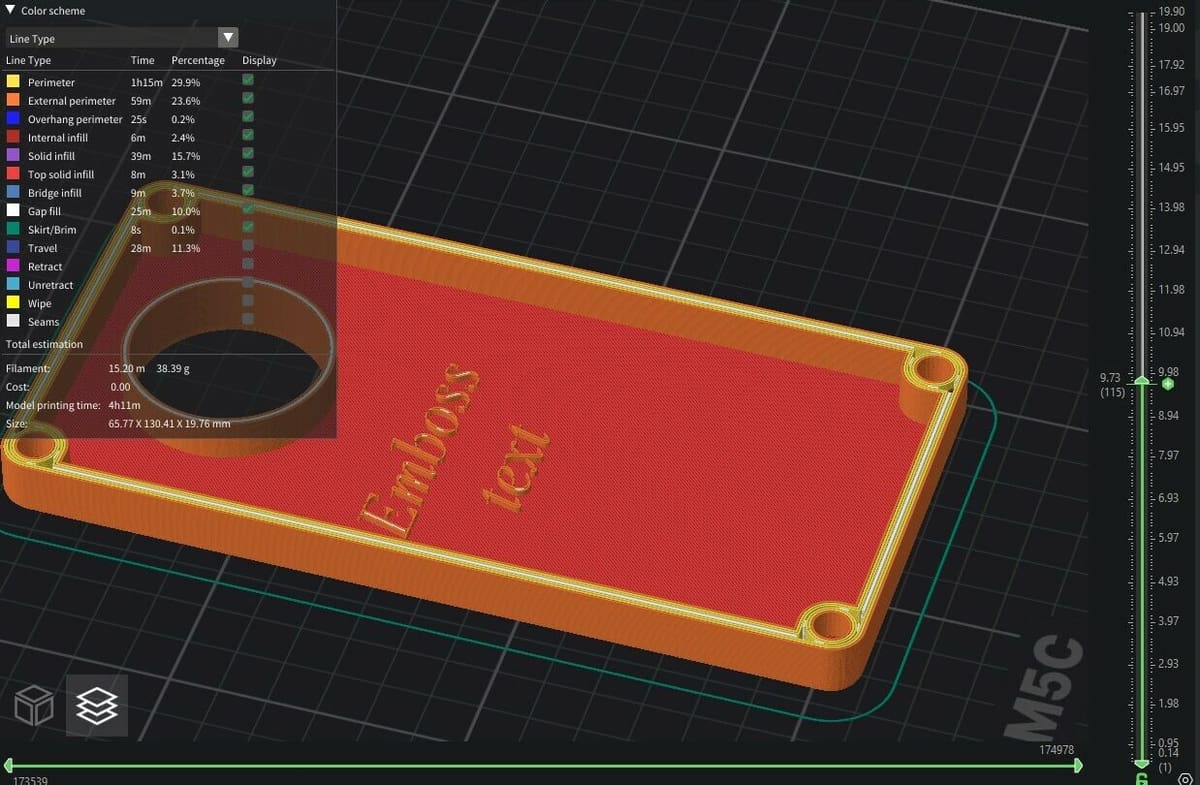
The toolbar is a powerful section of AnkerMake Studio, and this is because you’ll find the majority of tools responsible for manipulating and editing the model here. For example, you can arrange and scale, paint seams, measure, and emboss text on the model(s), to mention just a few.
Workspace (8)
This is where you can see how the features you apply affect the model. You can select the model you wish to manipulate directly and can also apply some features to specific parts, such as support locations.
G-Code View (9)
This allows you to initiate a detailed inspection of your print layer. You can analyze the G-code that constitutes the current print you’re working on.
Object View (10)
This is the default view of AnkerMake Studio, and it allows you to directly interact with the model. You can’t be in the G-Code view and the Object view at the same time, though.
Features & Functions

AnkerMake Studio provides some amazing features that you can’t find (at least for free) in other slicers. The slicer provides a great level of customization and control over your FDM prints. Let’s dive into some of these features!
Model Manipulation
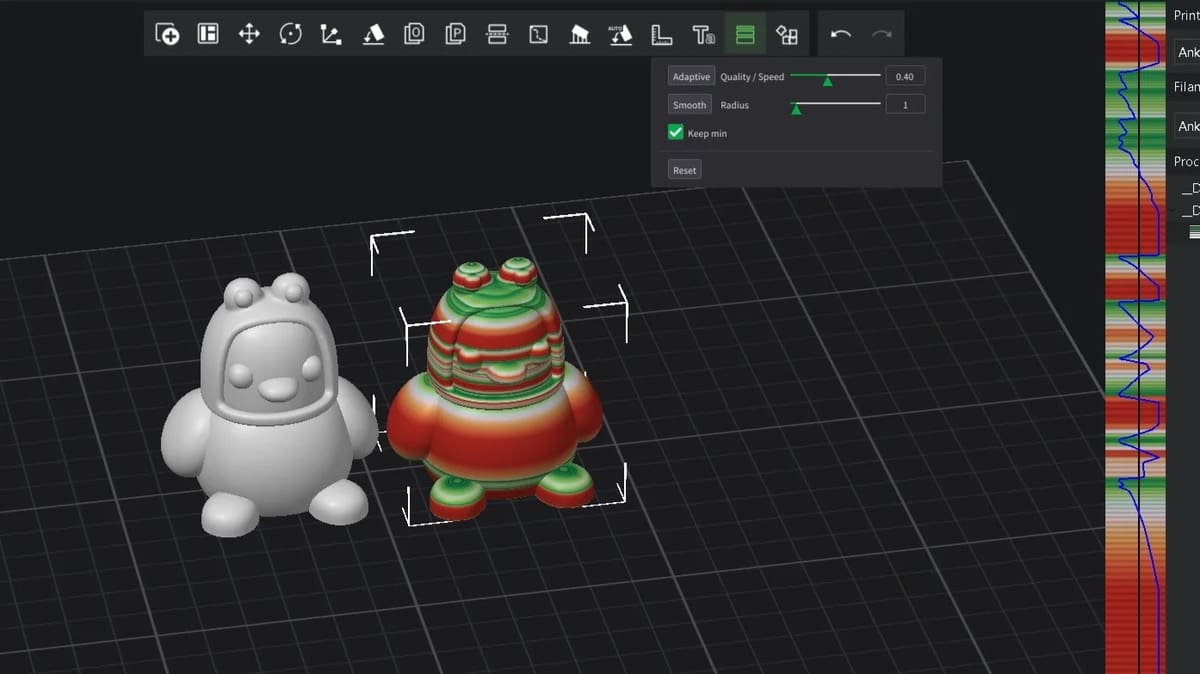
In terms of model manipulation, AnkerMake Studio shares some common features across other slicers, like the ability to move, rotate, auto-arrange, add an instance (duplicate), and scale a model. You can also directly emboss text on the model, as shown in the image above, which can’t be done in many slicers, and you can easily set variable layer height and measure the model’s features. The dovetail cut mode is also not as widely available in other programs. This tool is located within the cut feature and helps you ensure a strong connection between cut parts.
When manipulating models in this slicer, there are default options to make slicing easier. For instance, the “place on face” feature lets you specify the face (plane) of your model that will be placed on the print bed, and the slicer will automatically arrange the model. If you get stuck or confused, the “Auto Bed” feature can suggest the best orientation.
Especially for aesthetic purposes, the Z seam can be controlled (enforced or blocked), by painting the section of the model you want the seam to run along. The paint brush has a color assigned to it, which indicates an enforced or blocked seam, and you can modify the size of the paint brush to your preference.
Remote Printer Control & Real-Time Monitoring
When you switch to the Device tab, you’ll notice the “My Printer” toolbox. Think of this as a centralized location to manage all the printers connected to your AnkerMake account. You’ll be required to log in to your account in order to add printers. You can then send G-code directly to your machine to initiate printing, and can then remotely adjust the nozzle and bed temperature, extrusion and retraction, and Z offset.
Remote control is also possible through your smartphone (with Android or iOS) via the AnkerMake App.
For the AnkerMake M5, real-time monitoring via the cloud is available, and there’s also the possibility of AI monitoring. The current layer of the actual, physical print is compared with the AI-simulated image of the print layers generated when the model was sliced. This can lead to alerts that the expected results aren’t being met so that you can confirm how to proceed.
Support Generation
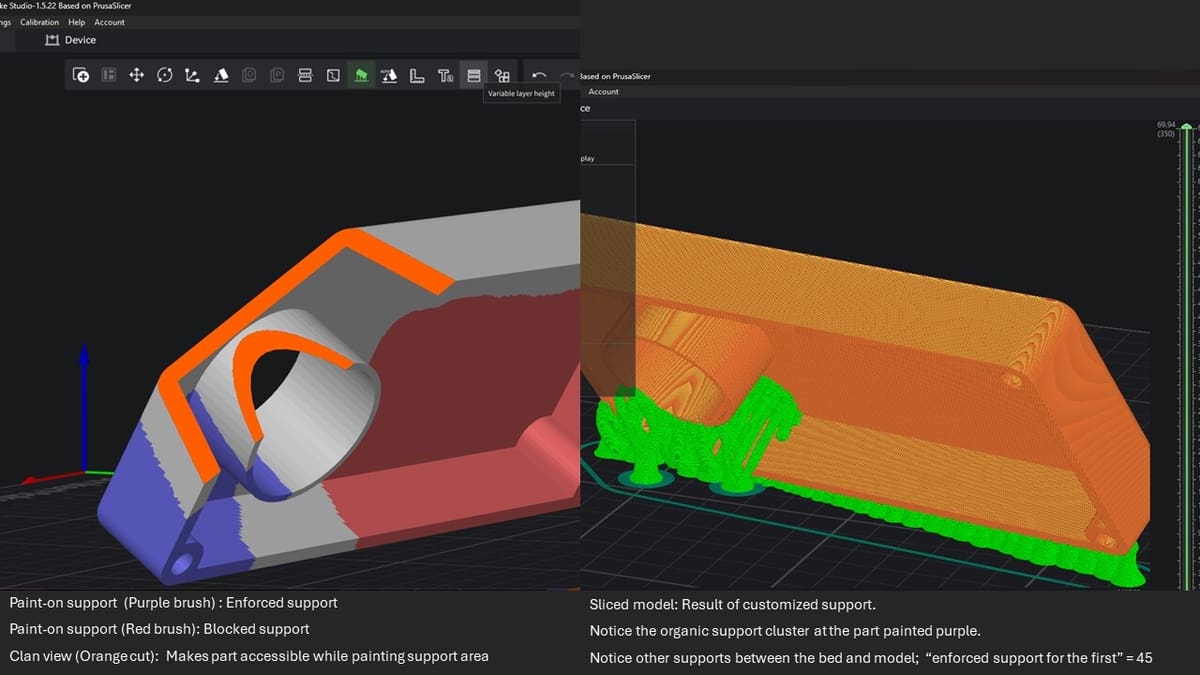
Generating appropriate supports for your prints is usually a concern for makers. AnkerMake Studio includes all the necessary support settings.
First, in the right-hand panel, after toggling “Expert” settings, under the Support tab check the “Generate Support Material” option. From there, you can select different features to manipulate the supports on your model. For example, you can select grid, snug, or organic supports, generate supports everywhere or only on the build plate, and adjust density and thickness settings. From the toolbar, you can also select the option to pain on the supports (with a few subsettings).
“Enforce support for the first” generates support material for a number of layers you define. This can be useful, as it helps solve adhesion issues while placing supports on areas of your choice.
Calibration Tools
From the Top Menu, you can easily access and work with temperature calibration, rate of material extrusion (flow rate), pressure (related to print quality), and retraction. AnkerMake Studio has additional calibration tests for advanced users, such as setting the maximum flow rate. These tools help you obtain accuracy and precision and result in higher-quality final prints.
Printer & Filament Settings
AnkerMake Studio includes some handy printer and filament settings to help ease the printing process. This section is comprised of presets (filament and printer types) and custom profile settings. Although the custom profile applies to the filament and printer, the options differ.
While the printer section allows you to customize things like the G-code and machine limits, the filament section allows for a complete overview of the filament used, showing variables like density and cost. You’ll be able to customize the filament, cooling, filament overrides, custom G-code, notes, and dependencies here.
Process Setting & Expert Mode
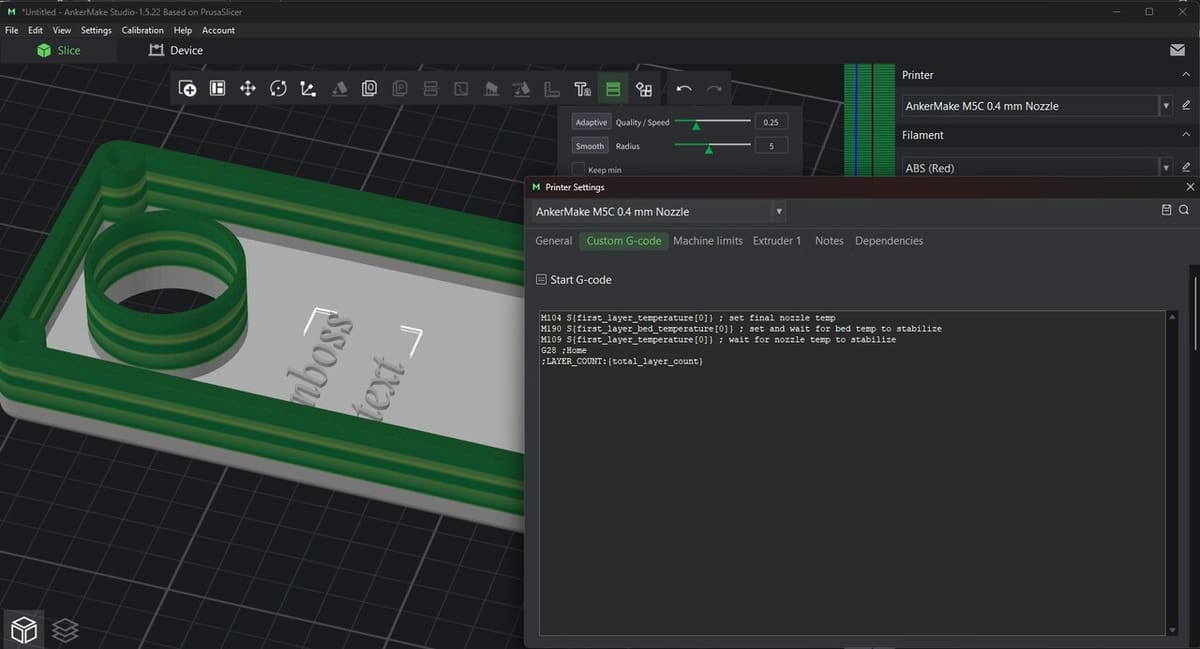
Sometimes, unique 3D printing problems arise, and the conventional settings within the slicer can’t help. Therefore, we need to customize both the settings and the generated G-code. To do this, you’ll need to toggle the “Expert” mode.
Under the “Objects” tab (for Process, instead of “Global”), you can specify settings for a selected model rather than having the same settings apply to all models.
Additional Expert features include Verbose G-Code, with which you obtain a commented G-code file with each line explained with descriptive text, and the possibility to label print moves in the G–code with the object they relate to.
Assembly View
One feature you don’t come across in many slicers is the Assembly View option, which is located on the toolbar. It allows you to visualize the different components that make up your design. Makers and designers can appreciate this tool when working with or loading models with multiple parts.
When initiated, you get a new viewing window, in which you’ll see all of the model’s parts. From there, you can manually inspect the model using the section view scroll bar. You can also find the volume and size of the entire model.
User Experience
AnkerMake Studio is generally easy to use and understand, especially if you’re just sticking with the presets. There are also helpful notes that appear as you hover your mouse over a specific feature or tool, making it easy to learn what it does and how it impacts your model.
The Expert mode is filled with configurations that can make or mar your prints, so you should be sure of how to use these specific settings before activating them for your printer or model.
According to some users, this slicer is typically problem-free and simple. However, others report some frustration with the lack of customer service available. There is a help menu located directly in the slicer, so hopefully you can use the Feedback tool if you run into any issues.
It’s more likely that users of AnkerMake Studio own an AnkerMake printer for a smoother 3D printing experience.
Company & Community Support
If you need to contact AnkerMake directly, you can do so through email, telephone, or the chat tool, which is available on their product support page. You can learn about and keep up with all things AnkerMake on their official blog and the Studio guide, which helps users familiarize themselves with the ins and outs of the slicer. If you run into any specific issues, you can get in touch with the hardware and software team for support.
In terms of community support, you can check out the active Discord channel. There’s also the AnkerMake subreddit, where you can ask questions if you run into any issues and get help from other users. A Facebook page for the AnkerMake M5 3D printer can also come in handy to share questions or to offer help for those needing it.
Use Cases & Applications
If you need a significant level of customization and control over your printer, slicer, and printing outcome, AnkerMake Studio is a good option. This slicer combines useful features from other slicers, such as PrusaSlicer, Bambu Studio, and Orca Slicer.
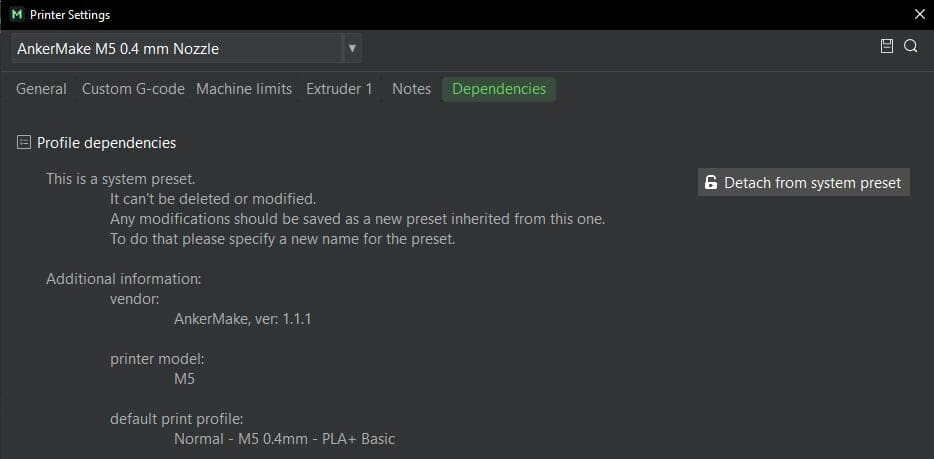
This allows you to use AnkerMake Studio with a variety of different FDM printers, such as Prusa machines. And if the default profile of a machine isn’t there, you can create or load custom printers by simply clicking on the “Detach from system preset” button.
Although there aren’t many sample prints on the official community site, you might find some inspiration from the official AnkerMake site, including miniatures and costumes. The slicer supports over 30 different types of PLA filament, along with other options like ABS, PETG, and TPU.
Because of the many available default settings and features, as well as its user-friendly UI, AnkerMake is a good option for beginners who don’t need to get into the small details as they’re learning to navigate the 3D printing world – especially if they own an AnkerMake printer they want to connect to via the cloud or with the AnkerMake App. And this streamlined workflow can also be what more advanced makers are looking for, as they can opt to tweak more advanced settings.
Alternatives
The following alternatives share some similarities with AnkerMake Studio, such as free licensing and highly customizable features. However, they also offer some unique differences. Let’s take a closer look!
PrusaSlicer
PrusaSlicer is an open-source program that can integrate seamlessly with a variety of printers, including AnkerMake machines. The relationship between PrusaSlicer and AnkerMake Studio is prominent, as the latter is based on PrusaSlicer.
In addition to many shared settings and tools, a visible similarity is the G-code viewer, which is identical.
One of the main differences between both slicers is that PrusaSlicer is also available for Linux (in addition to Windows and MacOS), which isn’t the case for AnkerMake Studio.
UltiMaker Cura
UltiMaker Cura, originally designed by David Braam, is popular, open-source software known for high-grade printing and compatibility with a wide range of file types. Cura’s Marketplace makes it stand out as a go-to tool for plug-ins. These enhance the Cura’s capabilities, offering greater customization over other open-source slicers.
For instance, the Barbarian Units extension allows users to easily convert model units from inches to metric, while the ThingiBrowser plug-in allows users to insert 3D files from online repositories into their slicer. There are also business-oriented tools, like the use of the Power Cost plug-in to estimate the power cost of the sliced model. There are about 52 such plug-ins or extension in Cura’s market, at time of writing. While this truly sets Cura apart from most other slicers, at time of writing the only default printer profile from AnkerMake is the M5, so a bit more tweaking will be necessary if you’ve got a different machine in your setup.
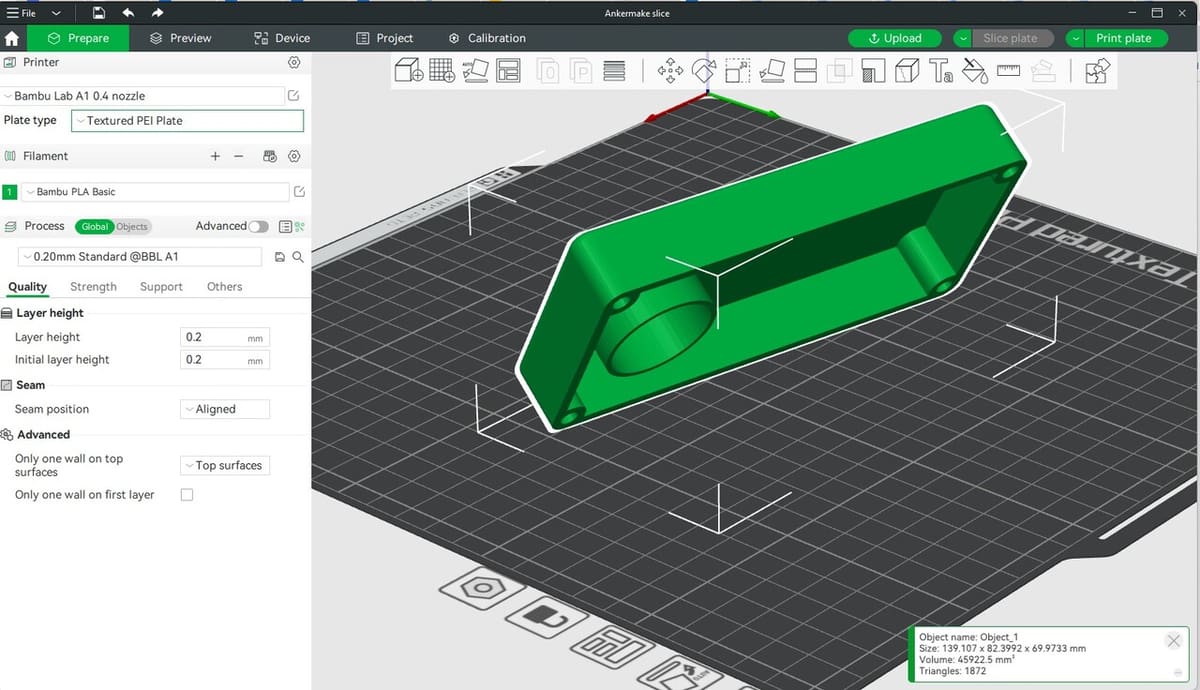
Bambu Studio
Bambu Studio is another alternative to AnkerMake Studio. This slicer is based on PrusaSlicer, just like AnkerMake. This explains the similarities in features like real-time remote monitoring of prints, the G-code viewer, and advanced controls and features. Both slicers support mobile phones for real time controls, too.
One of Bambu Studio’s primary features is its project-based workflow. This tool offers the ability to build out several plates worth of prints and create a project plan, including the total filament used, filament cost, printing time per plate, and total print time. Bambu Studio also supports Linux operating system, unlike AnkerMake. The latest release of Bambu Studio includes default printer profiles for the AnkerMake M5 and M5C.
License: The text of "AnkerMake Slicer: All You Need to Know" by All3DP is licensed under a Creative Commons Attribution 4.0 International License.