The Best Artillery Sidewinder X2 Upgrades & Mods

While the Artillery Sidewinder X2 upgrades the previous model, we can do better. Read on to find out what we recommend!
While the Sidewinder X1 surprised us with its capabilities, it still had some issues. With the X2, the poor wiring of the first model has been improved, but several flaws still remain.
With a few simple tweaks, we can improve a machine to get a better experience and results. That’s where this article’s user-created upgrades come into play. There are plenty of options available for the Sidewinder X2, both available to buy and DIY.
Read on to find out our top picks for upgrading the Sidewinder X2!
To Buy
Although some of these mods and upgrades may not be gentle on the wallet, they can save you from many wasted prints!
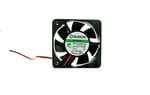
5015 Radial Fan
One of the major areas of improvement for the Artillery Sidewinder X2 is the part cooling. Since the X2 comes with a 4020 radial fan for cooling, this issue can easily be addressed by using a better cooling fan.
We recommend a quality 5015 radial fan for faster printing and better performance, especially when paired with a better cooling duct. Just be sure to get the right version: The stock fan receives 24 V.
- What does it improve? Allows for higher printing speeds and better overhang performance
- How much does it cost? ~$20
Bi-metal Heat Break
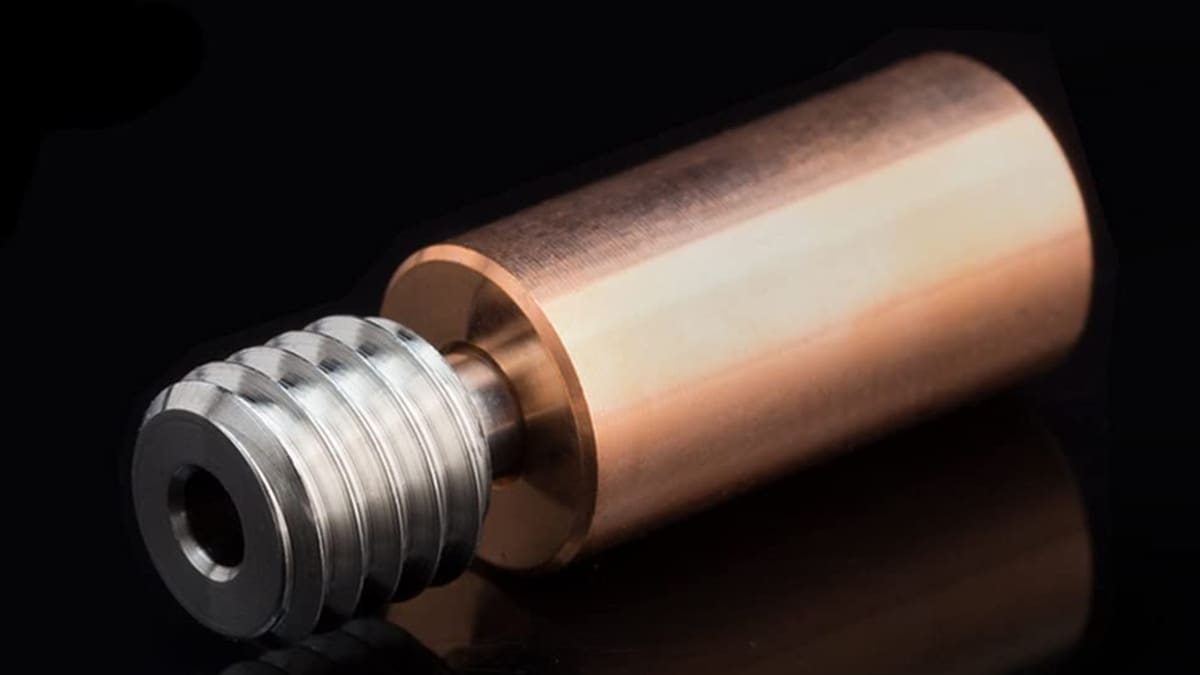
The Artillery Sidewinder X2 comes stock with a PTFE-lined heat break, which limits printing temperatures to 240 °C. The PTFE heat break is also prone to wear over time and therefore will eventually need to be replaced.
A bi-metal heat break replaces the stock part and allows for higher printing temperatures as well as a better thermal performance from the printer.
- What does it improve? Increases durability, enhances thermal performance, and allows for higher printing temperatures for higher flow rate
- How much does it cost? ~$20
Nozzle Upgrades
While the Artillery Sidewinder X2 comes with a Volcano-style hot end, it still comes stock with a standard brass nozzle. You can choose to take advantage of the Volcano hot end’s faster flow rate with a wider nozzle or use a hardened steel nozzle to print more exotic materials!
If you need help deciding which nozzle is best for your needs, refer to our nozzle guide to figure out what works best for you.
- What does it improve? Enhances print quality and speed, as well as allows for a wider variety of materials
- How much does it cost? $40-$100
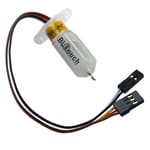
Genuine BLTouch

The Artillery Sidewinder X2 comes with a BLTouch clone already installed, but some users report poor performance and reliability issues from the provided probe. Luckily, the original BLTouch can be installed with some changes to the wiring.
The original BLTouch is another one of the most common 3D printed upgrades and for good reason as it makes bed leveling consistent and easy. If you also run OctoPrint on your machine, you can control the probe with custom scripts.
- What does it improve? Makes the printing process quicker and more reliable
- How much does it cost? ~$40
PEI Magnetic Build Plate

The glass bed on the Artillery Sidewinder X2 suffers from inconsistent heating in the corners, especially under the leveling screws. This can be fixed with another common upgrade – a PEI magnetic build plate.
A favorite among build plate materials, a PEI magnetic bed has many benefits and is easy to use. It fixes the heat spread issue of the stock bed, the textured plate provides excellent part adhesion, and its flexible nature makes removing prints a snap. Just be sure to double-check the size to ensure that it’ll be the right fit for your printer.
- What does it improve? Enhances heat spread on the bed, allowing for better part adhesion, print quality, and easier removal of the print
- How much does it cost? ~$30

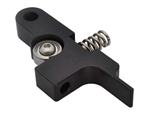
Metal Extruder
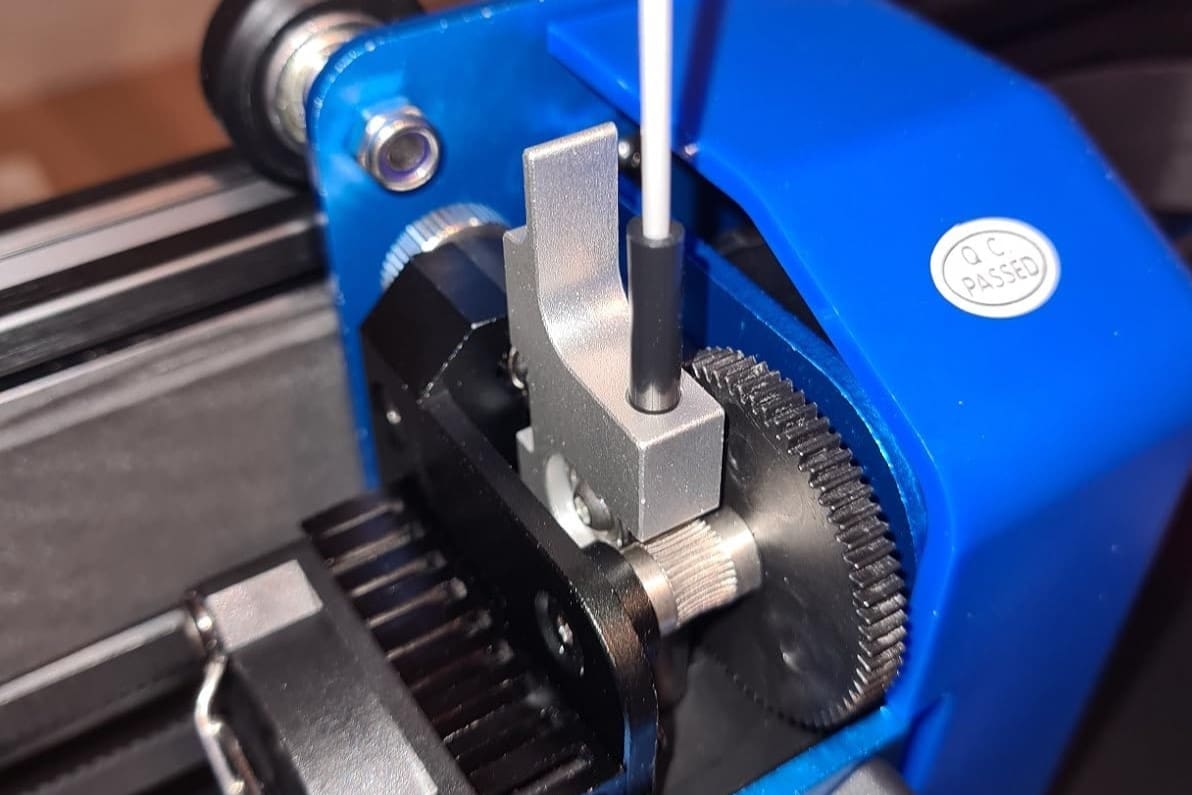
One of the most common complaints about the Artillery Sidewinder X2 is about its plastic extruder idler breaking over time. The part is big and under stress, so it’s easy to see why it should be upgraded to something more durable.
You have two options when it comes to this part: You can buy a metal version or print spares to have on hand in case of a failure. Keep in mind that the printed versions will not be nearly as durable as the metal upgrade.
- What does it improve? Increases the reliability of your X2 printer
- How much does it cost? ~$10 or free if you go the DIY route
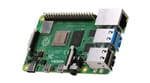
OctoPrint
Despite its easy-to-use software, the Artillery Sidewinder X2 doesn’t offer remote printing or any monitoring functions. This is where OctoPrint shines. One of the most popular 3D printer upgrades in general, OctoPrint allows you to remotely control your machine, among many other useful features.
To run OctoPrint, you need a Raspberry Pi and OctoPi.
Using OctoPrint on your 3D printer allows you to start prints remotely, monitor them, and also control other printer components via special plug-ins.
- What does it improve? Allows you to remotely control your printer and its various functions
- How much does it cost? ~$100, depending on the Raspberry Pi model
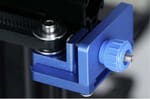
Belt Tensioners

Layer shifting is arguably one of the most noticeable issues a 3D printer can have, resulting in unusable prints with offset and unsightly layers. Unlike many modern 3D printers, the Sidewinder X2 doesn’t come with built-in belt tensioners to help you prevent layer shifting. Luckily, you can purchase some third-party belt tensioners for under $30.
According to the manufacturer, certain belt tensioners are fully compatible with the Sidewinder X2 as well as other variations of the printer (e.g. X1). You can install these belt tensioners by removing the machine’s stock belt pulleys, looping the belts through the new tensioners, and attaching the assemblies to the machine with T-nuts. Once installed, you can use the thumbscrews to adjust the belt tension as you see fit!
- What does it improve? Allows you to control the belt tension to prevent issues like layer shifting and overwear on the belts
- How much does it cost? ~$27
To DIY
All you’ll need for these next upgrades and mods are some filament, basic hardware, and a bit of patience while they print!
Z-Axis Stabilizer Rods
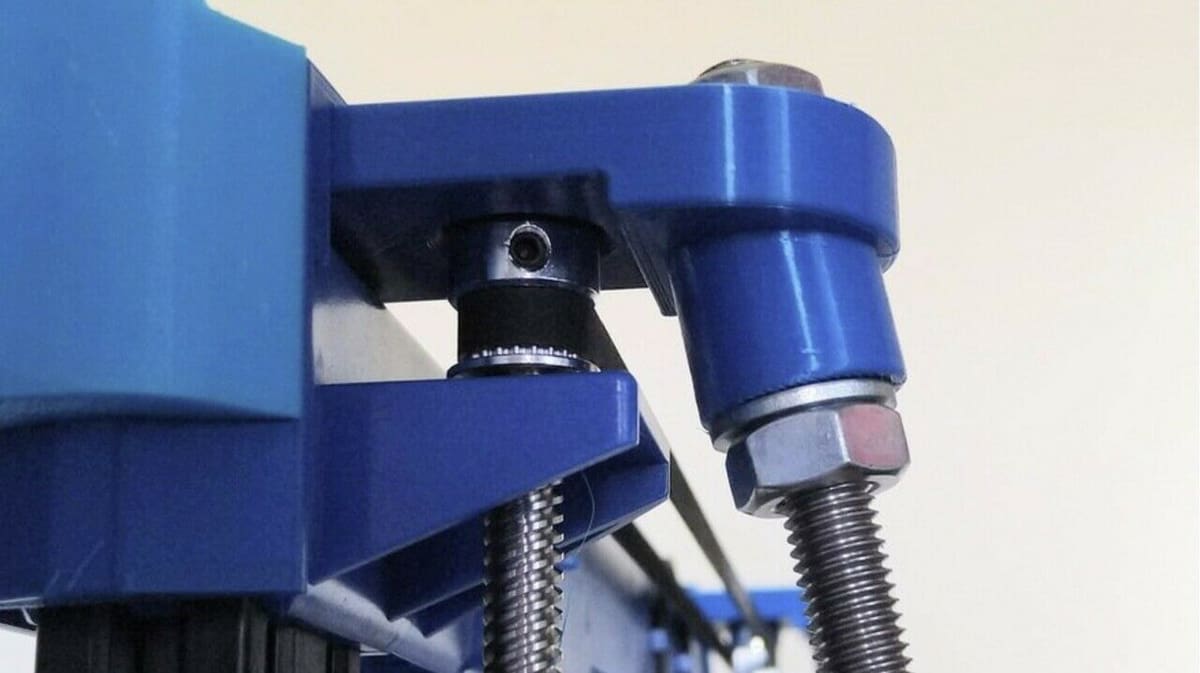
One of the most notable issues with the Artillery Sidewinder X2 is its instability along the Z-axis, which can cause a host of print quality issues such as Z banding and nozzle collisions. Adding stabilizer rods helps prevent these issues by securing the top of the Sidewinder X2 frame so it doesn’t shake when the printer is moving.
As seen in the image above, this upgrade comprises a handful of 3D printable parts as well as some additional hardware, such as two 595-mm threaded rods, a few M10 nuts and washers, and some M5 screws. Luckily, the designer provided a lot of helpful information on the project page, so printing, assembling, and installing these Z-axis stabilizer rods shouldn’t be complicated. For printing, the designer listed that they printed the necessary parts in PLA and PETG with an 80% infill density and a 0.2-mm layer height.
- What does it improve? Reduces Z wobble by stabilizing the Z-axis gantries on the printer
- How much does it cost? $5-$15 for filament and some basic hardware
- Where to find it? Thingiverse
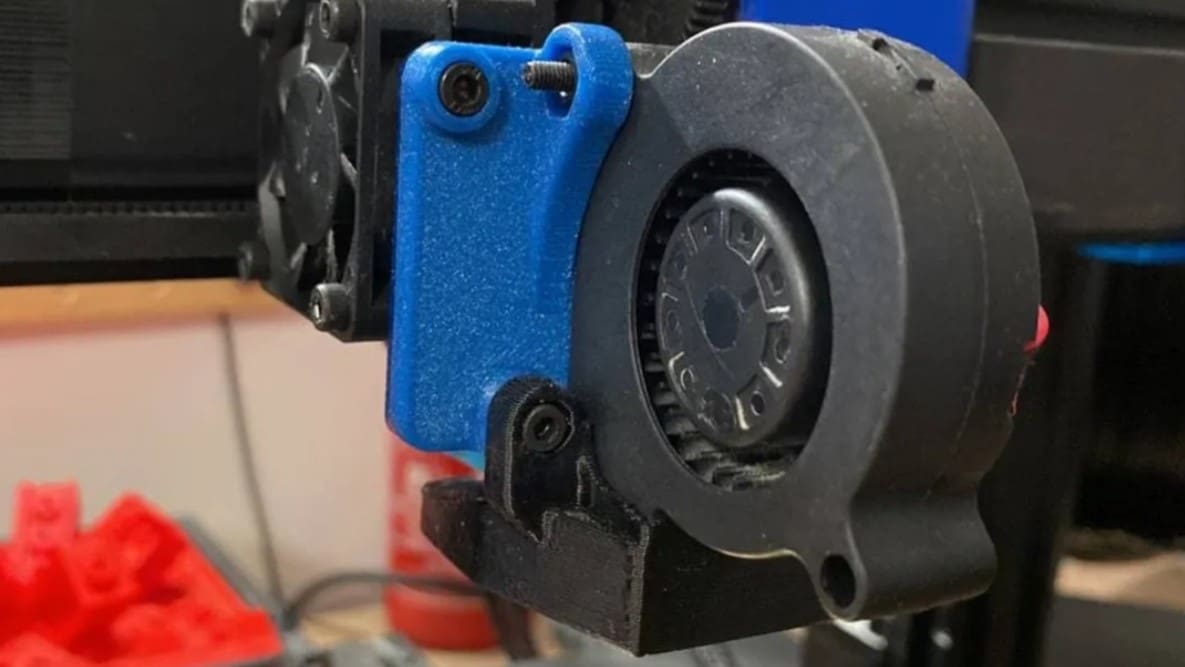
Cooling Duct
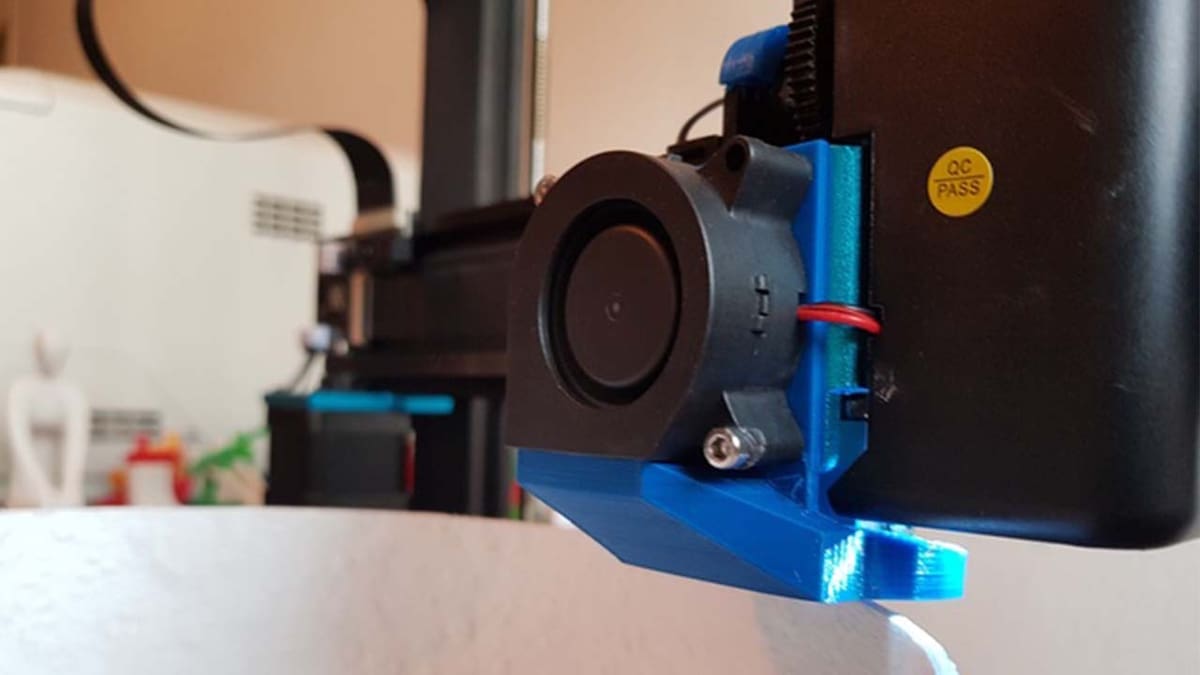
This upgrade goes hand in hand with the previously mentioned fan upgrade to improve part cooling performance. A better cooling duct directs the air and cools the printed part more effectively.
It’s important to print this part in heat-resistant plastic, such as ABS or PETG to not risk it warping or deforming while in use. The part recommended here is a remix of the Prusa MK3S cooling shroud, so it’s a design proven to work well.
While the design is meant for the X1, at least one maker states that they have successfully set it up for the Sidewinder X2, including the stock BLTouch.
- What does it improve? Enhances print quality, overhang performance, and part cooling
- How much does it cost? Only the cost of some M3 mounting bolts
- Where to find it? Thingiverse
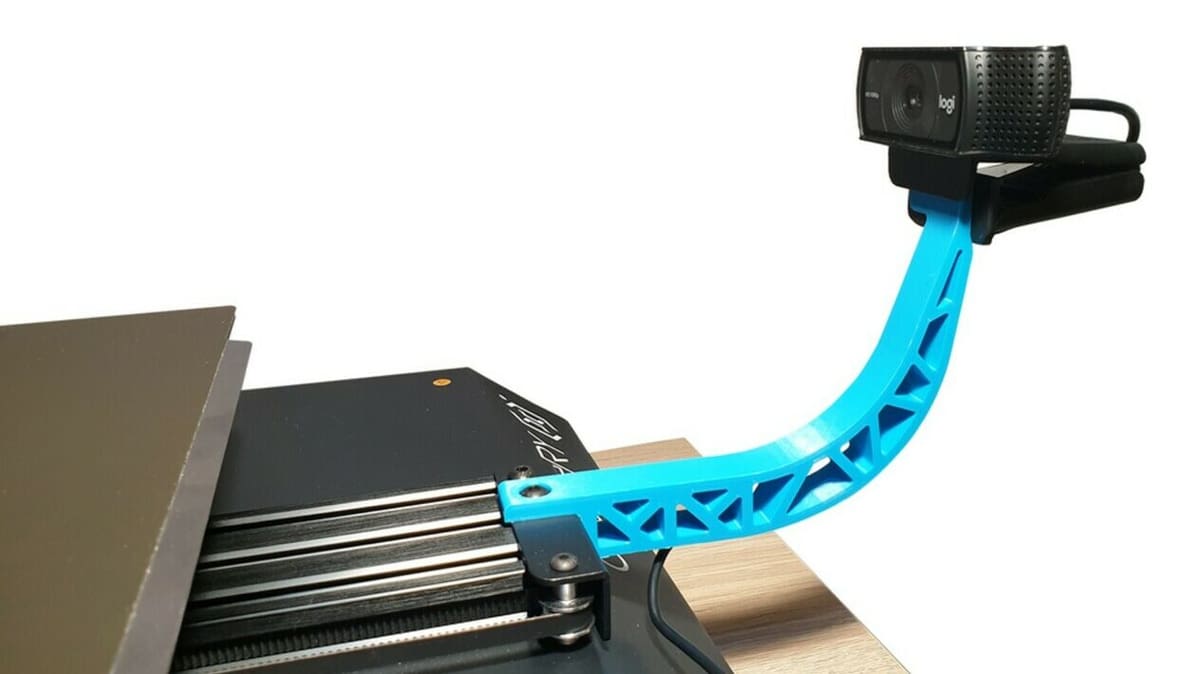
Light Bar
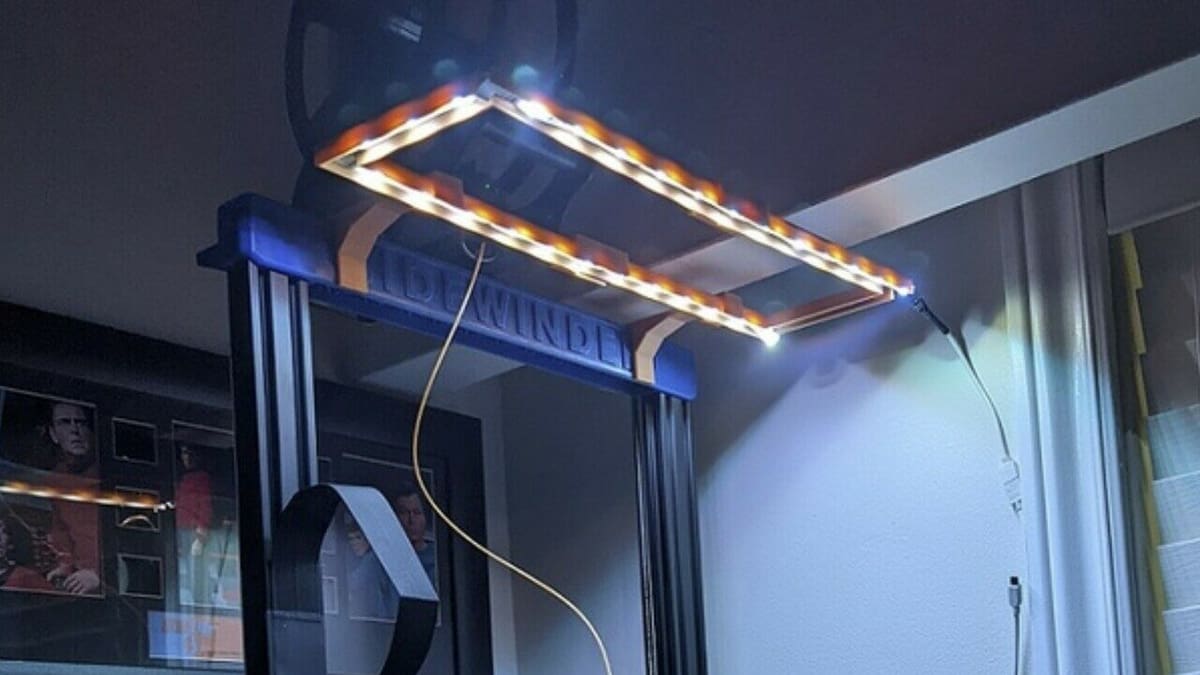
Lights are perhaps one of the most useful upgrades you can add to a 3D printer, as they make repairing and starting prints much easier once the sun goes down. As the Sidewinder X2 doesn’t come with pre-installed lights as many newer 3D printers do, you can purchase a light bar and 3D print a mount.
This specific 3D printable mount is meant to work with LED light strips and its overhead placement illuminates the Sidewinder’s print space extremely well. Based on the images from the maker, the LED strips can be adhered to the underside of the 3D printed frame which snap fits onto the top aluminum extrusion on the machine. As for printing the mounting parts, the designer listed that they used PLA filament with a 20% infill density.
- What does it improve? Provides light over the print space, making it easier to watch the printing process and work on the machine at night
- How much does it cost? $5-$15
- Where to find it? Thingiverse
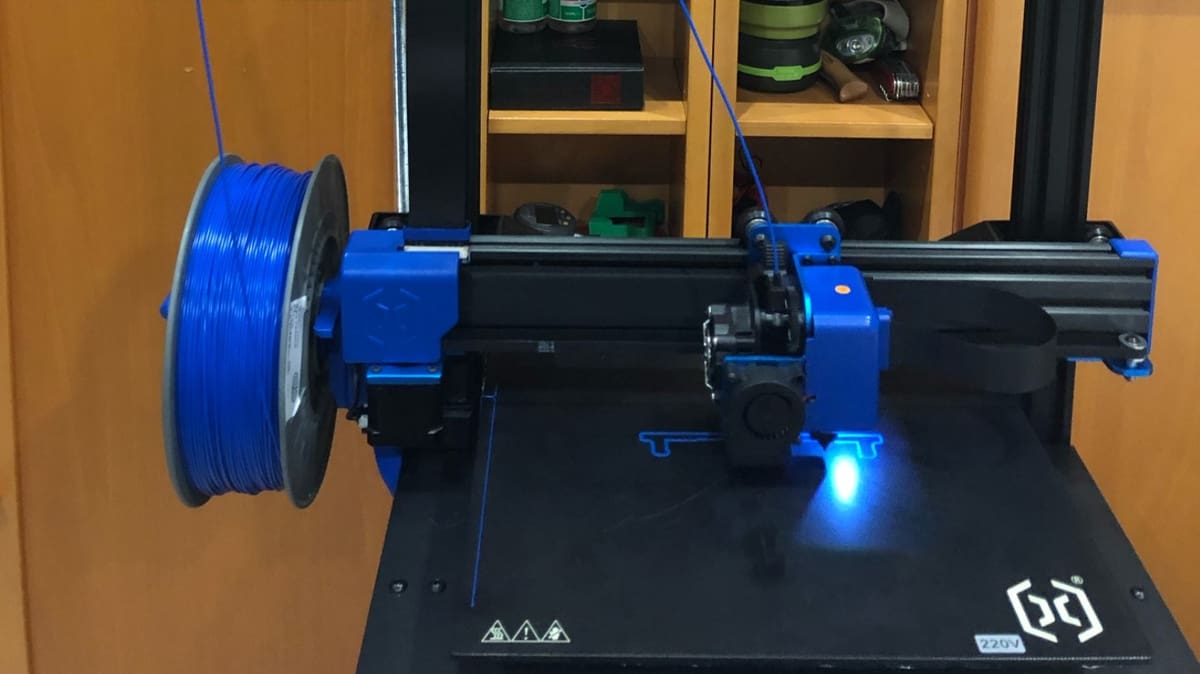
Side Spool Holder
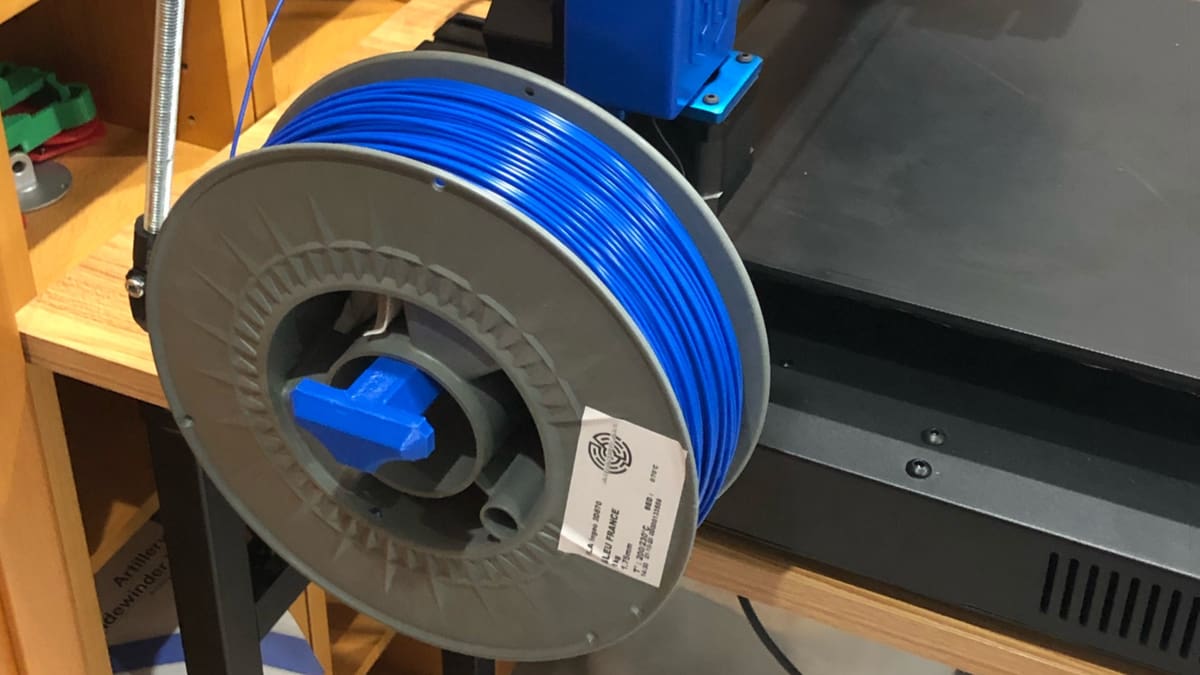
The Artillery Sidewinder X2 comes with a rather unique (*ahem* not that good) top spool holder that uses rollers to keep the spool in place. While it’s an improvement over the first version, it could still be better in terms of location.
Since the X2 is already a large machine, moving the spool to a more traditional side-mounted position makes it more compact and allows you to save some precious space as well as (debatably) reduce ringing.
- What does it improve? Reduces space requirements and decreases weight on top
- How much does it cost? Only cost of filament
- Where to find it? Thingiverse, Cults
Vibration Damper Stand
All 3D printers produce and absorb vibrations that can hinder the quality of prints by causing issues like ringing, ghosting, and even layer shifting. Vibration dampers are a useful upgrade for the Sidewinder X2, especially since users have noted that it’s a rather unstable machine. This vibration damper stand uses 3D printed parts to hold foam Nerf balls at the feet of the printer to absorb vibrations from the machine, hopefully leading to better prints.
On top of the small 3D printed mounting pieces and the foam Nerf balls, you’ll also need a few M5 screws and nuts to attach the prints to the bottom of the Sidewinder X2. While the maker didn’t provide written instructions for assembling the foam ball vibration dampers, a handful of insightful images on the project page will help with this process. Additionally, the designer listed a few of the print settings they used, including a 0.2-0.3-mm layer height and an infill density between 20% and 30%.
- What does it improve? Dampens the vibrations coming to and from your 3D printer to minimize the effect of ringing and ghosting on your 3D prints
- How much does it cost? Only the cost of filament and some screws
- Where to find it? Thingiverse
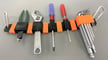
Toolbox
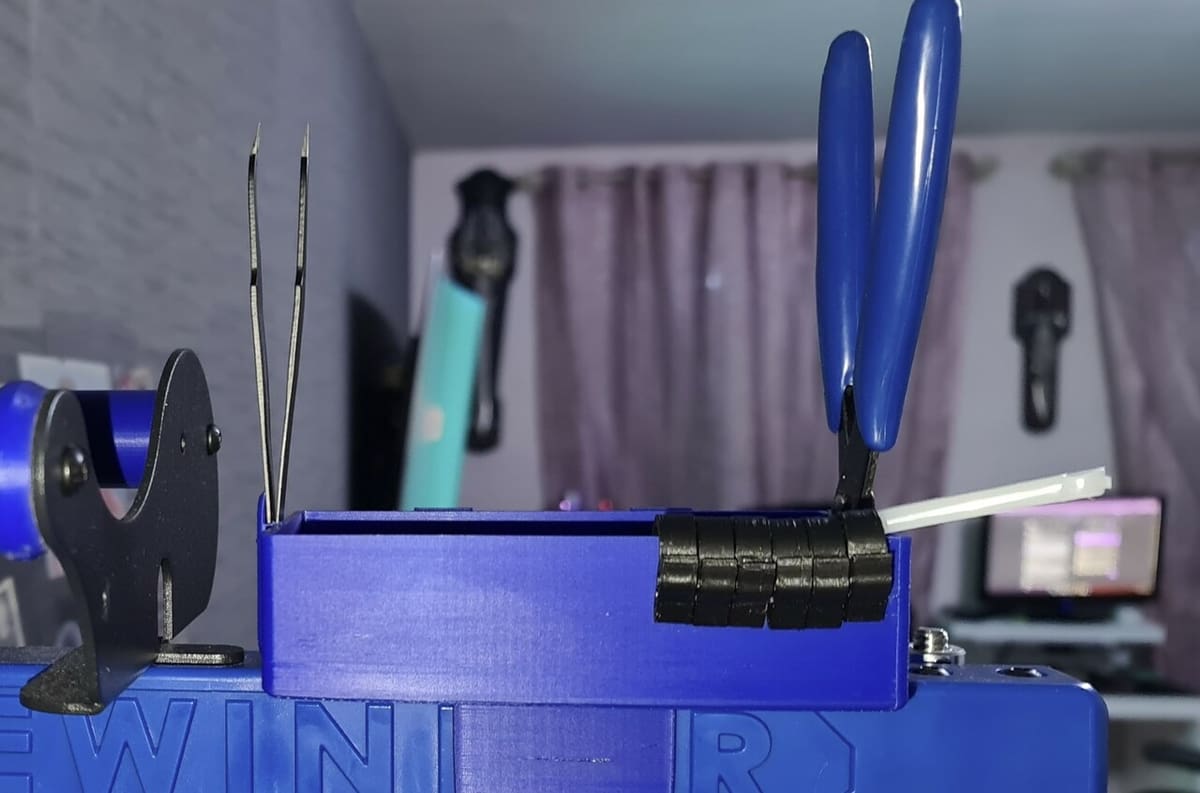
Want to keep your Artillery Sidewinder X2 looking clean and organized? This 3D printable toolbox is a great way to organize the various tools and spare parts that come with the Sidewinder X2 so you don’t lose them and to get your workspace looking well-kept.
The designer didn’t provide much information about this toolbox, but it’s clear that the upgrade consists of a single 3D print that attaches to the top frame piece of the Sidewinder X2. The model also has a special section for holding the sharp pliers that come with the printer!
- What does it improve? Keeps your tools and spare parts organized
- How much does it cost? Only the cost of filament
- Where to find it? Cults
Bed Handle
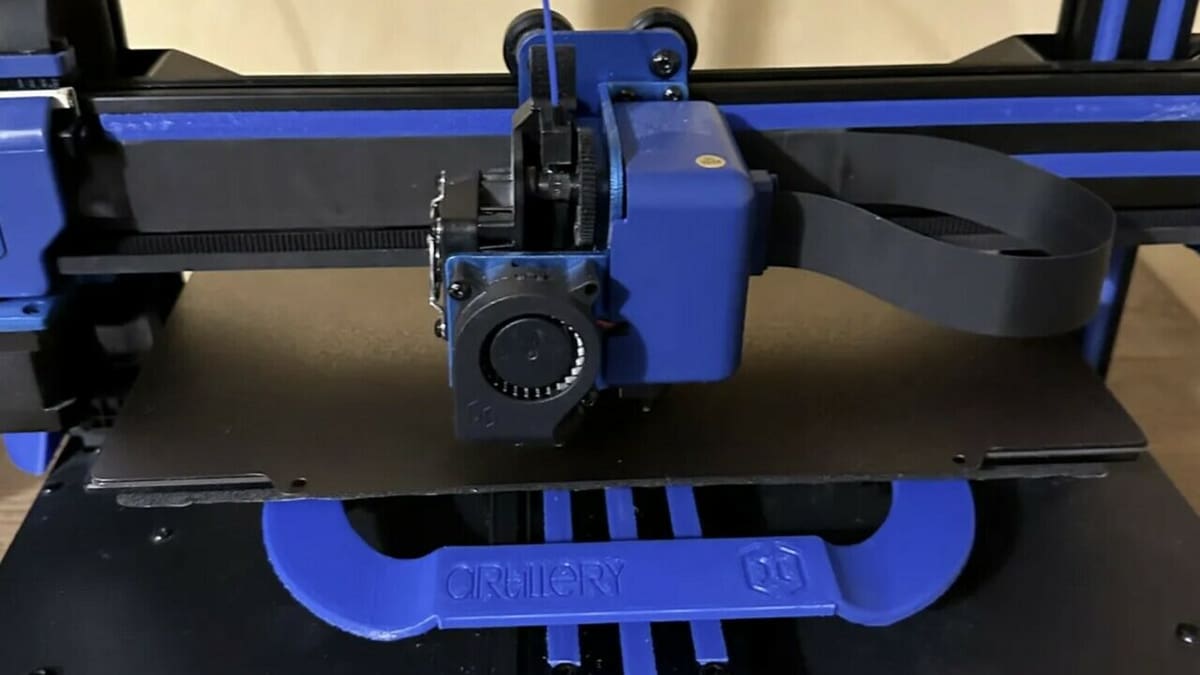
A bed handle makes it safe and easy to move the print bed and it’s one of the simplest upgrades you can add to a 3D printer. This project includes three different 3D printable bed handles, all designed specifically for the Sidewinder X1 but confirmed to work by makers for the X2, each design with slightly different features, such as a text inscription or a camera mounting hole. All options attach to the Sidewinder’s bed leveling screws.
Printing the bed handles should be very easy given the creator of this project provided some of the settings they used for a successful print. These include activating support structures as well as using a 0.2-mm layer height and a 30-50% infill density.
- What does it improve? Easily move the print bed without directly touching it
- How much does it cost? Only the cost of filament
- Where to find it? Printables
License: The text of "The Best Artillery Sidewinder X2 Upgrades & Mods" by All3DP is licensed under a Creative Commons Attribution 4.0 International License.
CERTAIN CONTENT THAT APPEARS ON THIS SITE COMES FROM AMAZON. THIS CONTENT IS PROVIDED ‘AS IS’ AND IS SUBJECT TO CHANGE OR REMOVAL AT ANY TIME.