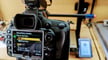
Unless you’re really into Benchys, most 3D models will take more than a few hours to print. And while you’re likely to be away from your 3D printer at some point during the print process, you’ll still want to be able to keep a close eye on your creation. The main ways to watch your prints are through software, a camera, or both.
Having a monitoring camera installed is a practical way to regularly check on your soon-to-be 3D print in case it goes south. If an unfortunate print failure happens, these cameras can also be very handy to check what went wrong and when.
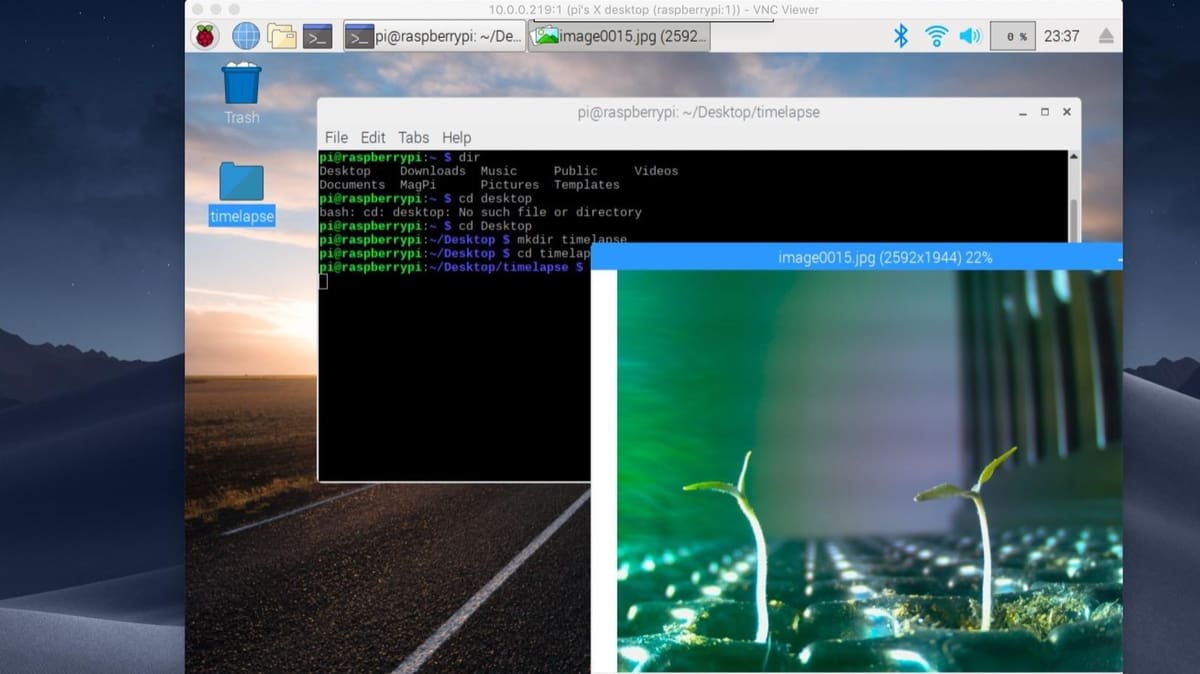
In addition to supervising prints, cameras are also used for documenting the printing process and perhaps even creating cool time-lapse videos. They’re fairly easy to make once a camera is set up.
For this guide, we’ve selected the best cameras on the market that work great with 3D printers. Before we jump into the list, we’ll go over some things we kept in mind during our selection process. Depending on your situation and needs, you may value these features differently.
Considerations
While there are many suitable cameras for monitoring and recording 3D printing, the ones we’ve chosen are the best based on the following criteria:
- Compatible with a Raspberry Pi: This is by far the most popular hardware for monitoring and controlling 3D printers. Since we’re looking for practicality, the cameras must plug-and-play with a Raspberry Pi and whatever software you’ve chosen.
- Community support available: Because most cameras aren’t manufactured exclusively for working with 3D printing software, you won’t get proper support from manufacturers. Thankfully, the 3D printing community is here to help you through any installation and setup issues. Therefore, the cameras must be known and used widely by the community.
- Popular: We wanted cameras that people have explicitly tested for 3D printing. Also, we favored models where you can very easily find suitable printable setup mounts and brackets for a range of 3D printers.
Software Options
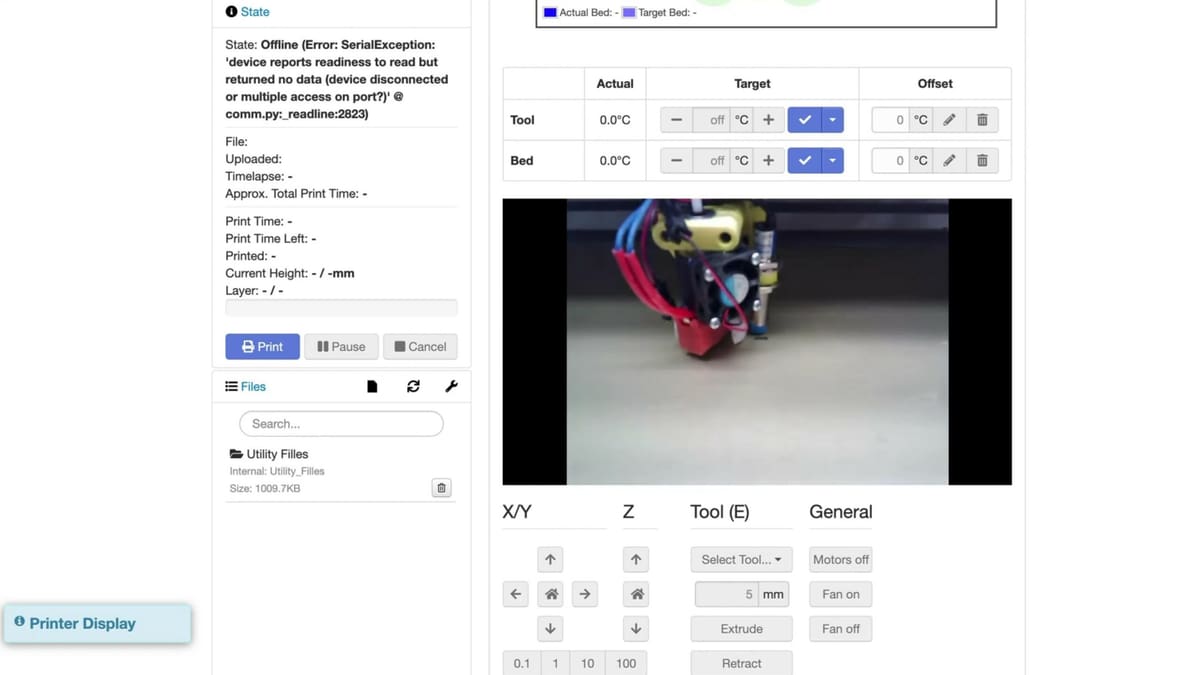
Even if you have a good camera, you’ll need a way to access its video feed so you can monitor your print. Perhaps the most popular option is OctoPrint, a system that uses a single-board computer (e.g. Raspberry Pi) connected to your printer to allow you to remotely control your machine’s components. You can hook up your camera to your host computer’s USB port or camera interface port and watch it over your online OctoPrint interface.
There are, however, alternatives to OctoPrint. Other remote interface options include the following:
- AstroPrint is similar to OctoPrint not just in name but also in functionality. It uses a single-board computer to host a remote 3D printing control server. The software’s remote digital interface supports a webcam stream, which can be set up by plugging a camera into the host computer and following a few other steps. The biggest difference between AstroPrint and OctoPrint is that the former is more of a purchasable product rather than an open-source kit.
- Creality’s Wi-Fi Box is a pre-made remote printer control server. It’s a lot less expensive than building your own OctoPrint server, and it has a USB port that you can use to attach a compatible camera. After setting up the box, you can view your webcam stream from the Creality Cloud app, where you can also slice and send prints as well as perform other actions.
- Repetier Server is a remote printer control program that works with printers running Repetier, a special flavor of 3D printer firmware. The server, like other OctoPrint-like programs, runs on a single-board computer connected to your machine. After configuring the program, you can install the camera and view the stream through the server’s corresponding web page.
- Duet Web Control is the corresponding remote 3D printer control application brought to you by Duet3D, a popular manufacturer of high-quality 3D printer mainboards. Similar to Repetier, setting up a camera feed on Duet Web Control requires a special configuration. However, in the end, you’ll be able to view your webcam’s stream over the default remote interface.
Lastly, if your 3D printer is close to your desktop or another stationary computer, you can plug it in directly to a personal computer (e.g. nearby laptop, PC, or a spare Raspberry Pi board). Using a special webcam monitoring program like AtHome Video Streamer, TeamViewer, or Splashtop, you can remotely access the stream to monitor your 3D printer if the camera is in the right position.
Now that you have some options for using the camera to watch your 3D printer, let’s get into the camera options!
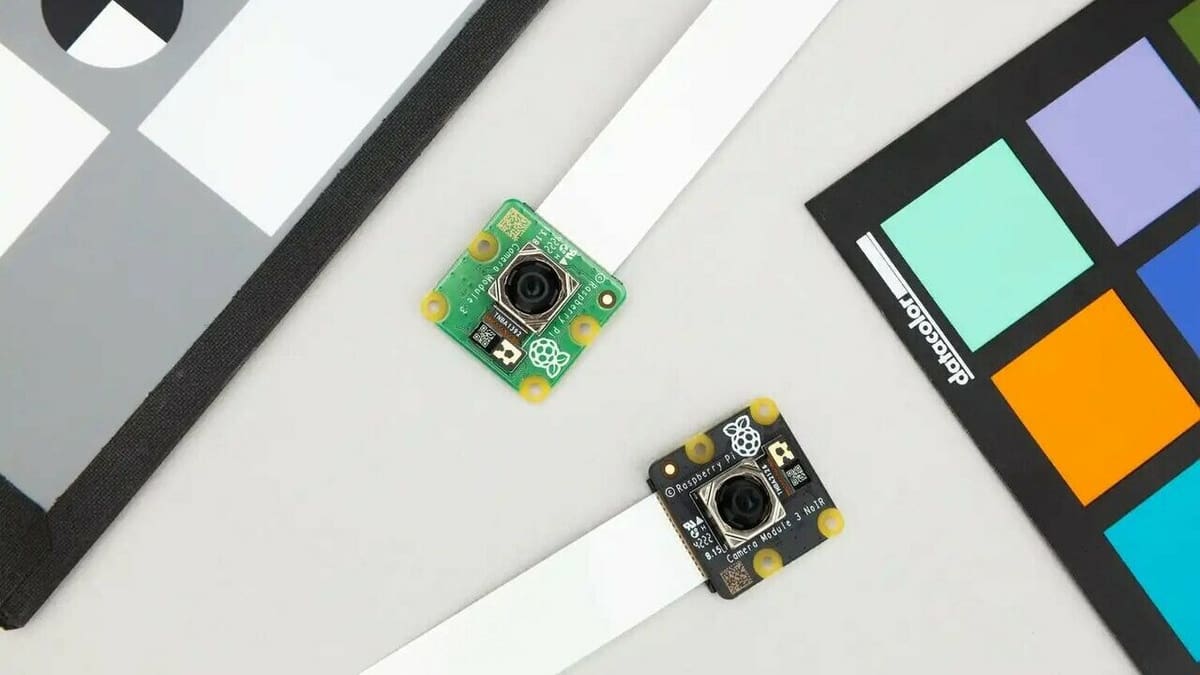
Raspberry Pi Camera Module 3
As mentioned, one of the most popular ways to control and monitor 3D printers is by using OctoPrint on a Raspberry Pi.
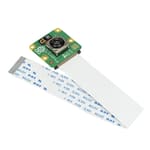
The Raspberry Pi camera module V3 is specifically designed to work with the Raspberry Pi, and it’s comes with either a standard lens with a 75-degree angle of view or a wide lens with a 120-degree angle of view. This camera is tiny compared to most webcams at 25 x 24 x 11.5 mm for the standard lens and 25 x 24 x 12.4 mm for the wide-angle lens. Both lenses come in regular versions and NoIR versions for shooting in the dark.
This little camera has a great resolution too, supporting 1080p video at 50 frames per second (fps), which is an upgrade from the 30 fps of the camera module V2. With the V3, you’ll also get a nice autofocus feature rather than the manual adjustment focus of its predecessors. Combined with the new high dynamic range (HDR) mode to capture more realistic colors with shaper contrast, these upgrades ensure your printer looks more photogenic than ever before!
Since this is about as bare-bones as a camera can get, many users have shared printable mounts and stands. Some were designed more as protective housing, while other designs allow you to directly mount onto your printer to get a front-row seat to your print’s progress.
- Manufacturer: Raspberry Pi
- Connection type: Ribbon cable (compatible with a Raspberry Pi, usually included when you buy it)
- OctoPrint compatible: Yes
- Video resolution: 1080p at 50 fps
- Focus: Autofocus
- Price: ~$25 for standard lens, ~$35 for wide lens
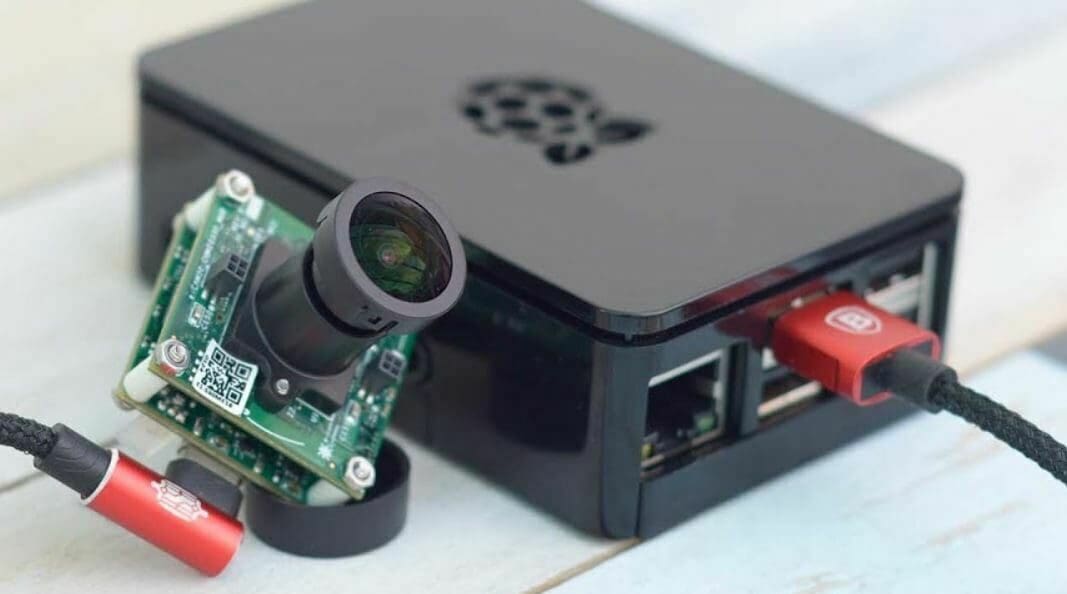
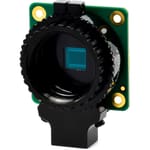
Raspberry Pi Camera Module HQ

The Raspberry Pi High Quality (HQ) Camera is an excellent choice for people looking to make high-quality time-lapses. The 12.3 MP Sony IMX477R sensor is quite impressive compared to other common camera modules.
This camera is also much more versatile, considering you can swap between a wide-angle or telephoto lens depending on your needs. Keep in mind that this module doesn’t come with either of these options, so you’ll need to pick one or both up as well in order to get this camera working. You can choose between an M12 or CS mount version that allows you to use third-party 16-mm lenses as well.
Considering the cost, this camera is probably best suited for more advanced users who are comfortable changing the settings and adjusting the focus. At least the built-in tripod mount will make positioning the camera easy.
- Manufacturer: Raspberry Pi
- Connection type: Ribbon cable (compatible with a Raspberry Pi, usually included when you buy it)
- OctoPrint compatible: Yes
- Video resolution: 1080p at 50 fps
- Focus: Adjustable
- Price: ~$50 (a separate purchase of a lens is required)
Logitech C270
The Logitech C270 is by far the most used monitoring camera for 3D printing enthusiasts. It’s Logitech’s entry-level webcam, shooting at a resolution of 720p at 30 fps. While it comes as an autofocus camera, there’s a way of adjusting the focus manually with a manual focus hack.
The C270 comes with a built-in mount, but it’s often replaced by 3D printed setups that allow for much more flexibility. This camera is so popular that there are literally hundreds of printable mods and mounts available, like Thingiverse user WarHawk’s collection of models.
- Manufacturer: Logitech
- Connection type: USB
- OctoPrint compatible: Yes
- Video resolution: 720p at 30 fps
- Focus: Fixed
- Price: ~$26

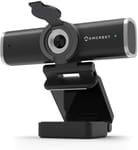
Amcrest AWC195-B
The Amcrest AWC195-B provides amazing value with its image quality, long USB cord, and 90-degree angle of view. While the 1080p at 30 fps spec isn’t the best on this list, it will certainly be suitable for monitoring your printing progress. The ease of setup and the price are also nothing to complain about!
In addition to a built-in privacy cover, this camera comes with a stand that can be mounted easily around your printing setup or directly on a tripod. The USB 2.0 cord is ~175 cm (5’9″) long, making it convenient to set up and reposition anywhere you may need. Reviewers say that the camera performs well under low light, and though not decked out with a bunch of features, it’s a reliable option that will get the job done.
- Manufacturer: Amcrest
- Connection type: USB
- OctoPrint compatible: Yes
- Video resolution: 1080p at 30 fps
- Focus: Fixed
- Price: ~$26
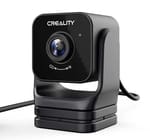
Creality Nebula Camera
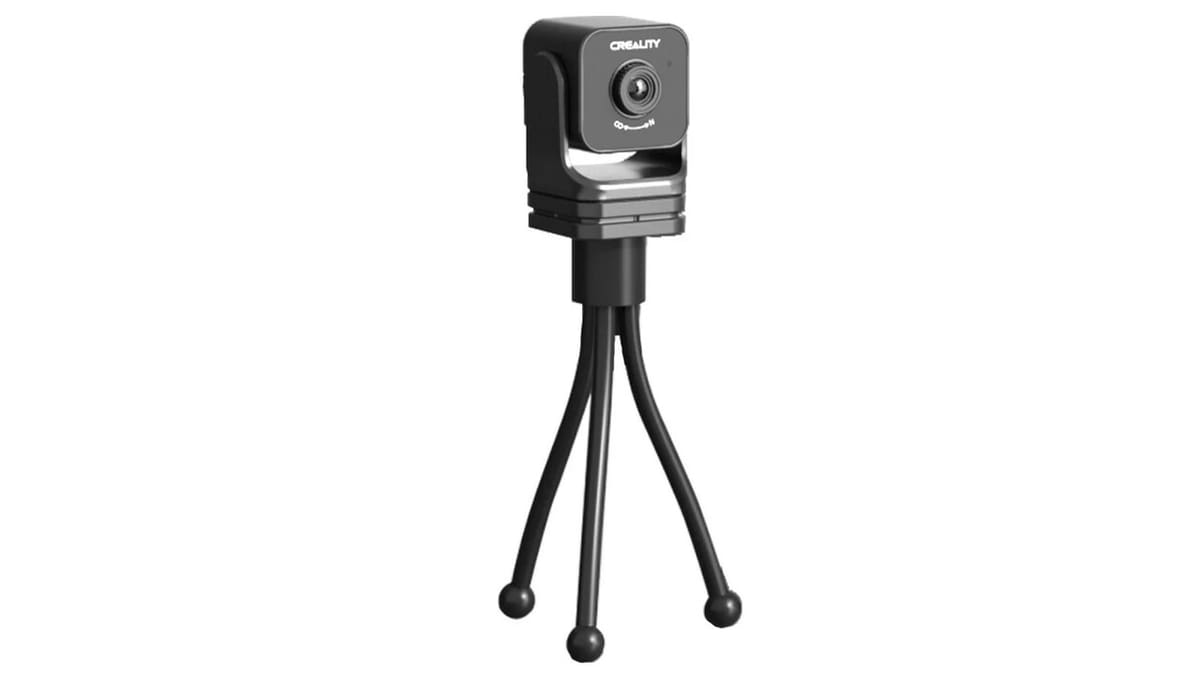
Creality continues to invest in solutions that meet the expectations of the most demanding and creative users. With the Nebula, Creality went above and beyond with a camera that can replace the use of OctoPrint in some cases. In addition to remote monitoring features, it includes characteristics like time-lapse recording, manual focus adjustment, and even spaghetti detection for printing failures and night vision. This provides a more accessible and useful experience for less tech-savvy users who, in the past, would have needed a DIY solution, complex and limited installations, or a printer with these features.
What makes the Nebula special is the combination of low cost, compatibility, advanced 3D printing-focused features, and broad framing flexibility. Combining the tripod with the horizontal and vertical rotation of the camera makes it easy to achieve various angles. It’s something that can take you to the next level without having to worry about overly complex configurations.
The compatibility of this model is not limited to printers using Creality’s Nebula Pad, as it can also be used with virtually all new-generation Creality printers using the Sonic Pad.
- Manufacturer: Creality
- Connection type: USB
- OctoPrint compatible: No
- Video resolution: 1080p (fps not specified)
- Focus: Manual
- Price: ~$27
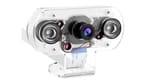
MakerFocus IR Camera Module
The MakerFocus IR camera with a 5-MP OV5647 module is a great choice for people looking for a straightforward option on a budget. The most notable feature is its infrared night vision capabilities as well as a light sensor to automatically activate it in the dark. That’s perfect for people who don’t want to worry about keeping the lights on while printing!
Reviewers like that this camera is plug-and-play for OctoPrint and compatible with any Raspberry Pi board. The ease of setup thanks to the included cover and mount means you can get started even faster. After it’s up and running, you’ll be able to monitor your prints with a 75-degree angle of view and 1080p resolution. One thing to keep in mind is that this camera doesn’t have autofocus like some other camera modules, so consider how important that is to you.
- Manufacturer: MakerFocus
- Connection type: Ribbon cable (compatible with a Raspberry Pi, usually included when you buy it)
- OctoPrint compatible: Yes
- Video resolution: 1080p at 30fps
- Focus: Fixed
- Price: $15-$25
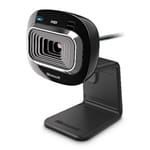
LifeCam HD-3000
LifeCam HD-3000 boasts widescreen (16:9) video at 720p and up to 30 fps. Its built-in stand makes positioning it near your printer easy. The lenses provide an optical zoom at a maximum of 4x.
This webcam is of good value and a solid choice to reliably monitor your 3D printer. And if you trust Microsoft, you’ll be purchasing a product that’s got a reliable manufacturer behind it.
- Manufacturer: Microsoft
- Connection type: USB
- OctoPrint compatible: Yes
- Video resolution: 720p at 30 fps
- Focus: Fixed
- Price: ~$40
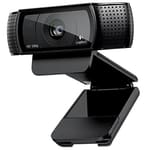
Logitech HD Pro C920
The Logitech HD Pro C920 is one of the most well-regarded webcams available. It shoots and streams in full HD at 30 fps. Its five-element glass lens makes sure that your printer will be crystal clear on film. It also comes with different mounting options, including a built-in standard tripod screw.
This is also an ideal camera for recording a time-lapse of the printing process. The C920’s 15-megapixel output produces incredible high-quality still images as well.
If you have a few extra dollars to spare in your camera budget, you may want to upgrade your purchase to the Logitech C922, a slightly different version of the C920. Due to enhanced firmware, the C922 can run either 30 fps at 1080p or 60 fps at 720p (the C920 stays at 30 fps). This allows you to run a smoother video feed at reduced image quality, costing only ~$10 extra.
- Manufacturer: Logitech
- Connection type: USB
- OctoPrint compatible: Yes
- Video resolution: 1080p at 30 fps
- Focus: Variable with autofocus
- Price: ~$67
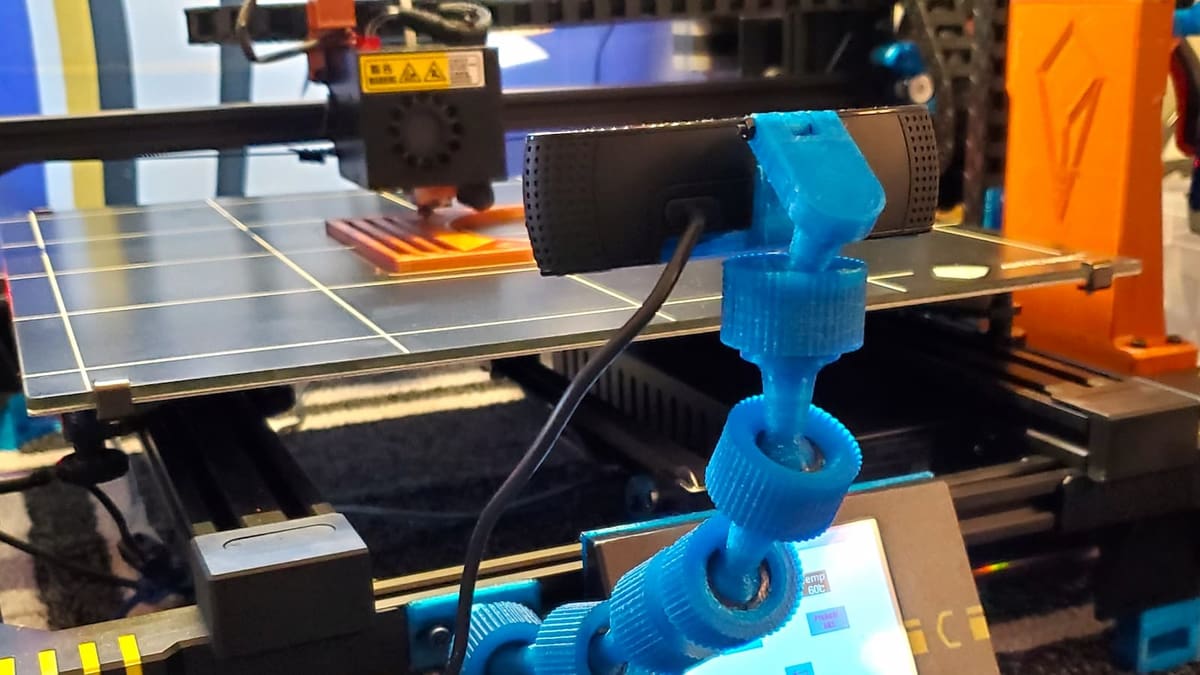
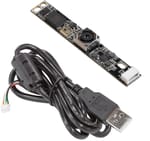
Arducam IMX179 8MP
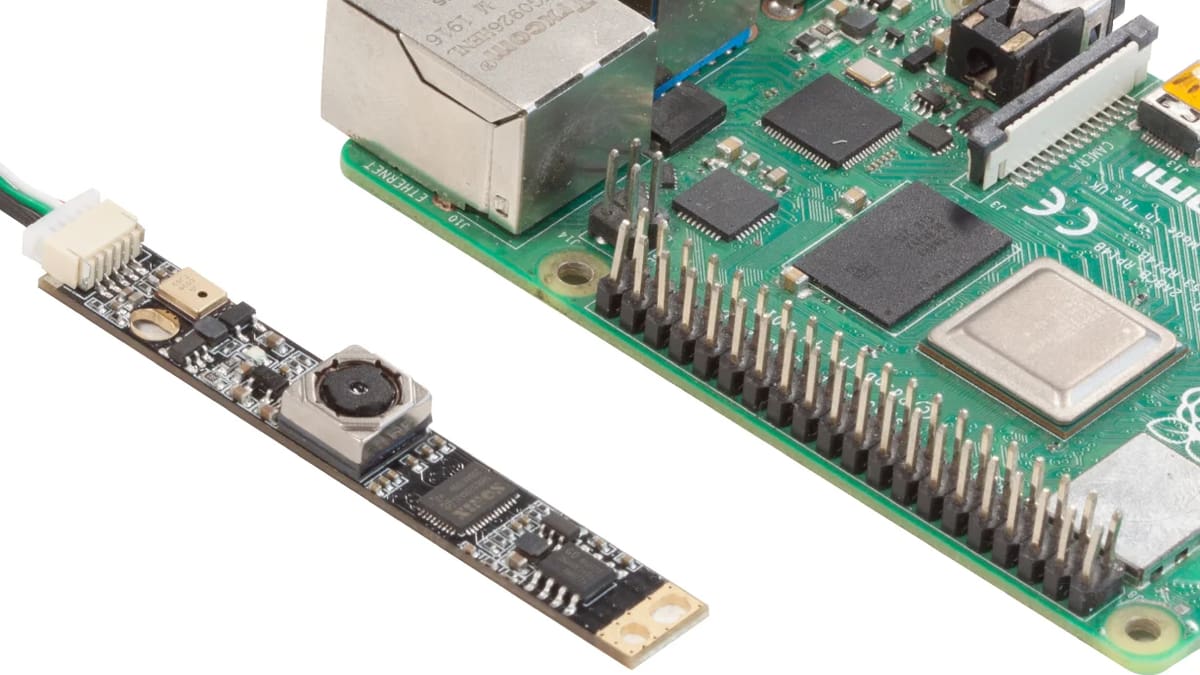
These small and unassuming “bar” shaped cameras have caught on recently given that they have a good form factor to attach to 3D printers, laser engravers, and other such tech. The simple design can fit snugly against a 20-mm aluminum extrusion on your 3D printer, especially when paired with one of the many 3D printed housing designs available.
These camera modules are affordable and powerful, and they’re available in a couple of varieties: One features an 8MP Sony IMX179 sensor module, and the other includes a 5MP Sony OV5648 sensor.
The most common ones, like the Arducam option highlighted here, use an autofocusing lens as well, making them even more easy to deploy without the hassle of maintaining and tweaking the camera for its specific working conditions.
They’re compatible too, as they feature a simple USB connection and have a “driverless” plug-and-play operation. They are very likely to play nice with your Raspberry Pi, acting just like any other USB webcam. These are overall a good choice, especially if you’re looking for a cheaper alternative to the Raspberry Pi HQ Camera.
- Manufacturer: Arducam
- Connection type: USB
- OctoPrint compatible: Yes
- Video resolution: IMX179: 4K at 15 fps, 1080p at 25 fps, OV5648: 1080p at 30 fps
- Focus: Autofocus
- Price: IMX179 ~$40, OV5648 ~$30
Alternative: Old Smartphone
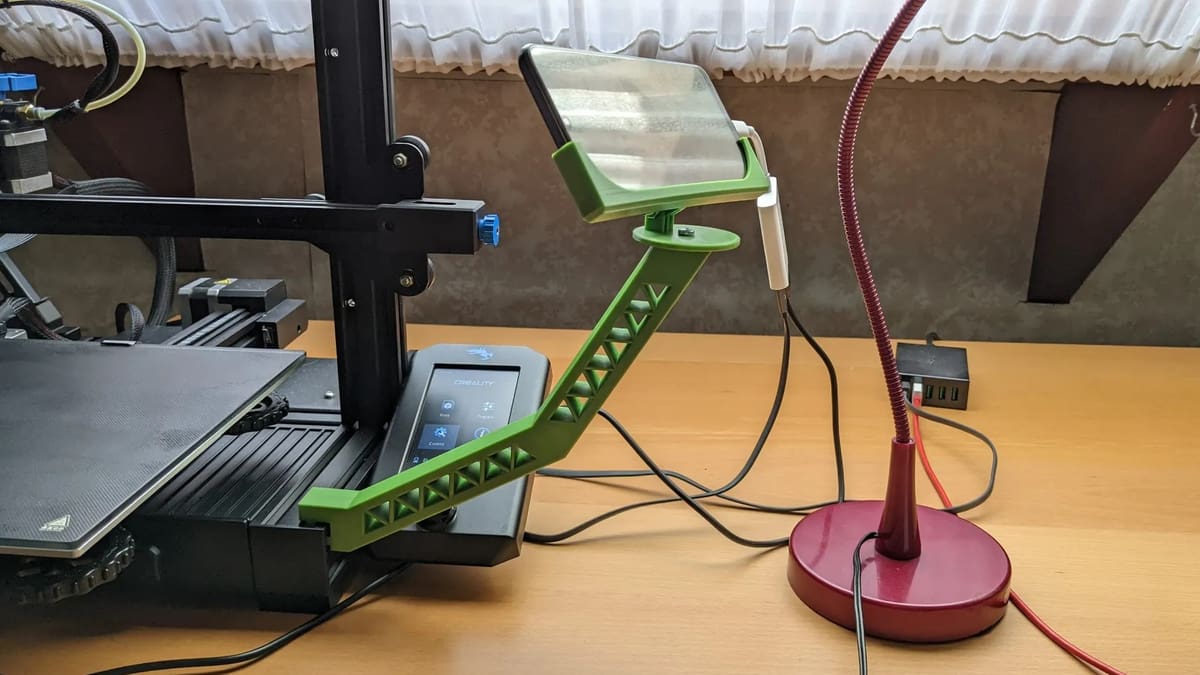
Some might say that the best camera is one you already have. A lot of us have old smartphones lying around, so why not put them to good use? You’ll just need to install a webcam app.
There are a lot of choices available, but some safe bets are ipCam ($2.99) on iOS or IP Webcam (free) on Android. And if you’re wondering whether it’s OctoPrint compatible? The answer’s yes.
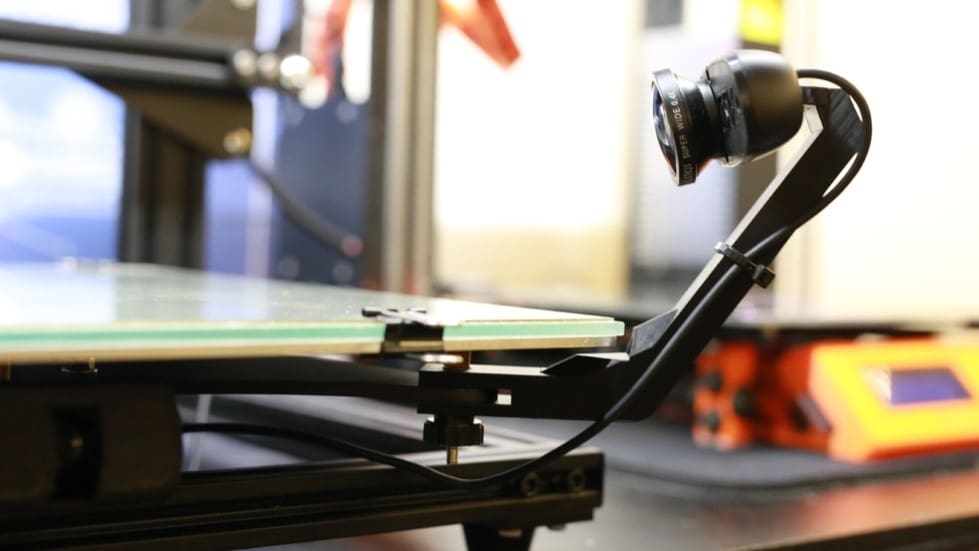
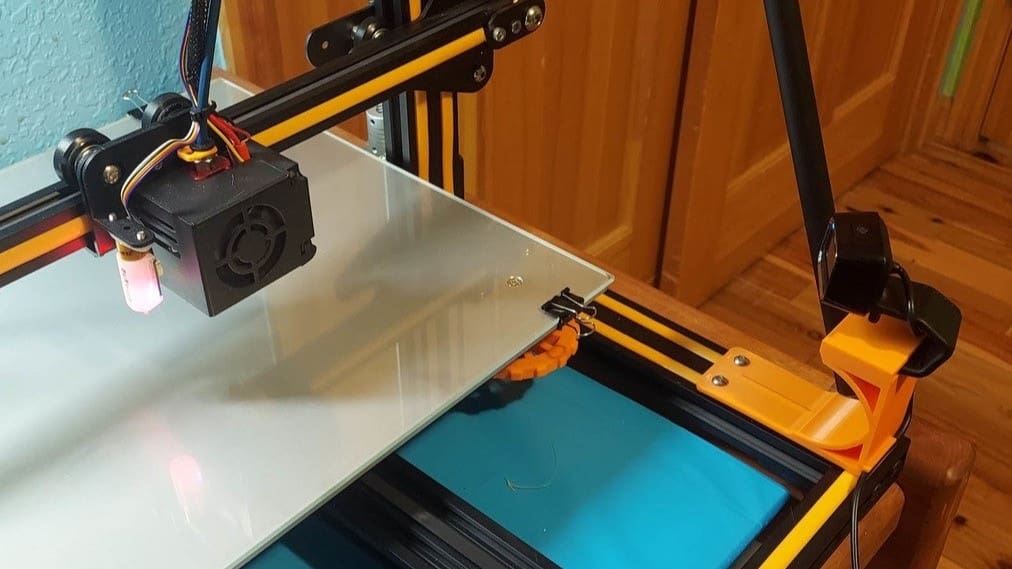
Nozzle Cameras
Knowing what the nozzle on your 3D printer is up to isn’t always easy. However, it’s important to understand how the material is being deposited onto the bed if you want to achieve high-quality prints. A nozzle cam can help you get as close as possible to your prints. Keep reading for some nozzle cam options for your printer!
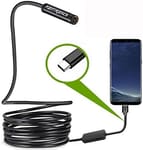
Fantronics Borescope
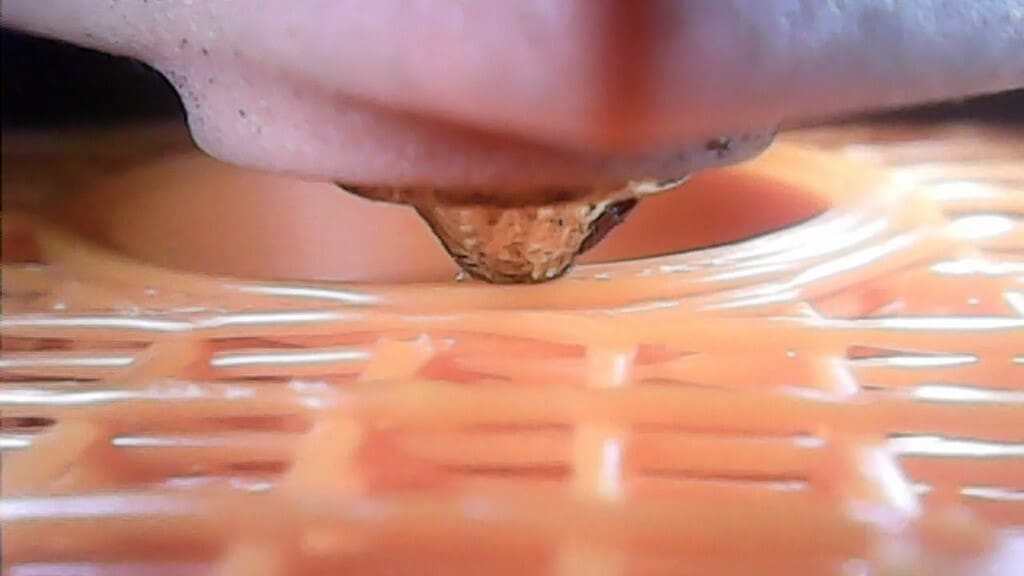
In this nozzle cam tutorial, more than 40 different endoscope and lens models were tested over several months. Chilicoke, the tutorial’s creator, noted that the first major challenge for testing was finding space to place the camera without hindering the 3D printer. Despite trying numerous options, only 10 of them showed nice image quality. Ultimately, only the Fantronics brand was recommended. The reasons for this choice include the ease of access to electronic components, a good field of view, color balance, and nice resolution.
To use the Fantronics borescope as a nozzle cam, you’ll have to delicately cut it open using a Dremel to extract the camera. After removing bulky and unnecessary parts like the LED ring, glue, and insulation, what remains is a small camera module that chilicoke adapted to a small female micro USB connector. A test should be performed to check if the camera still works and to adjust the focus for a close-up view. Options with focus adjustment and external lenses were also tested, but the results were very similar, and both can be applied.
In the video, chilicoke applies this solution to a Voron 2 printer and provides a STEP file for reference on Thingiverse.
- Manufacturer: Fantronics
- Connection type: USB
- OctoPrint compatible: No
- Video resolution: 720p (fps not specified)
- Focus: Fixed
- Price: ~$20
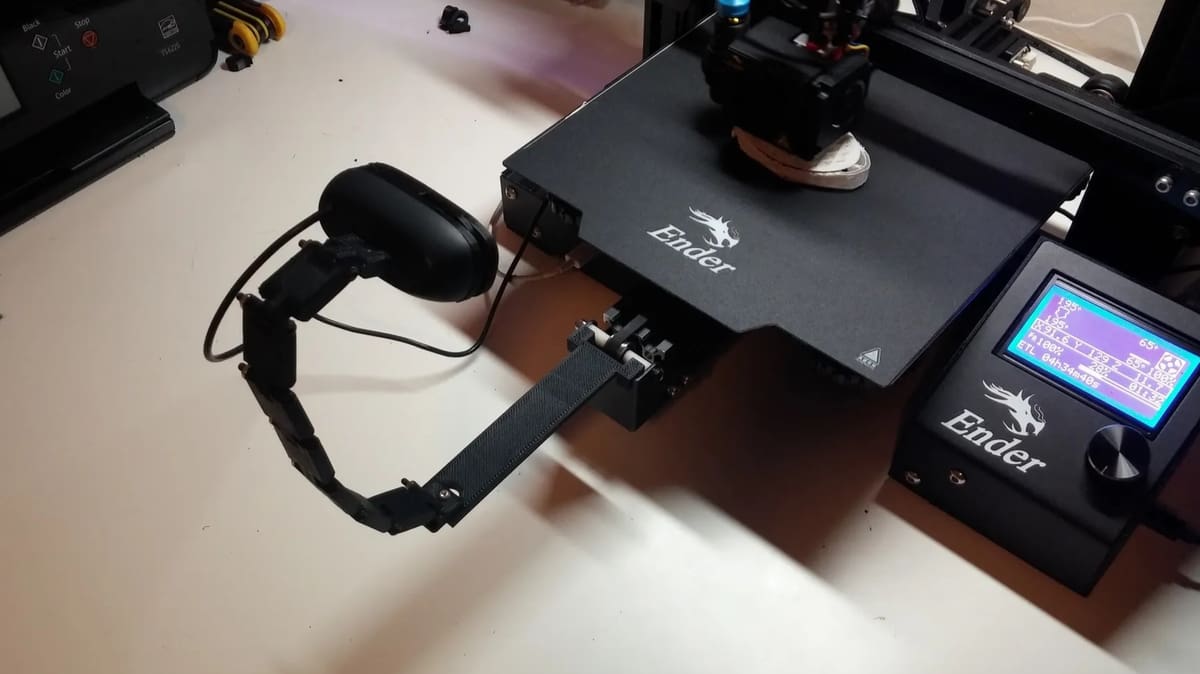
3DO Nozzle Cam V2
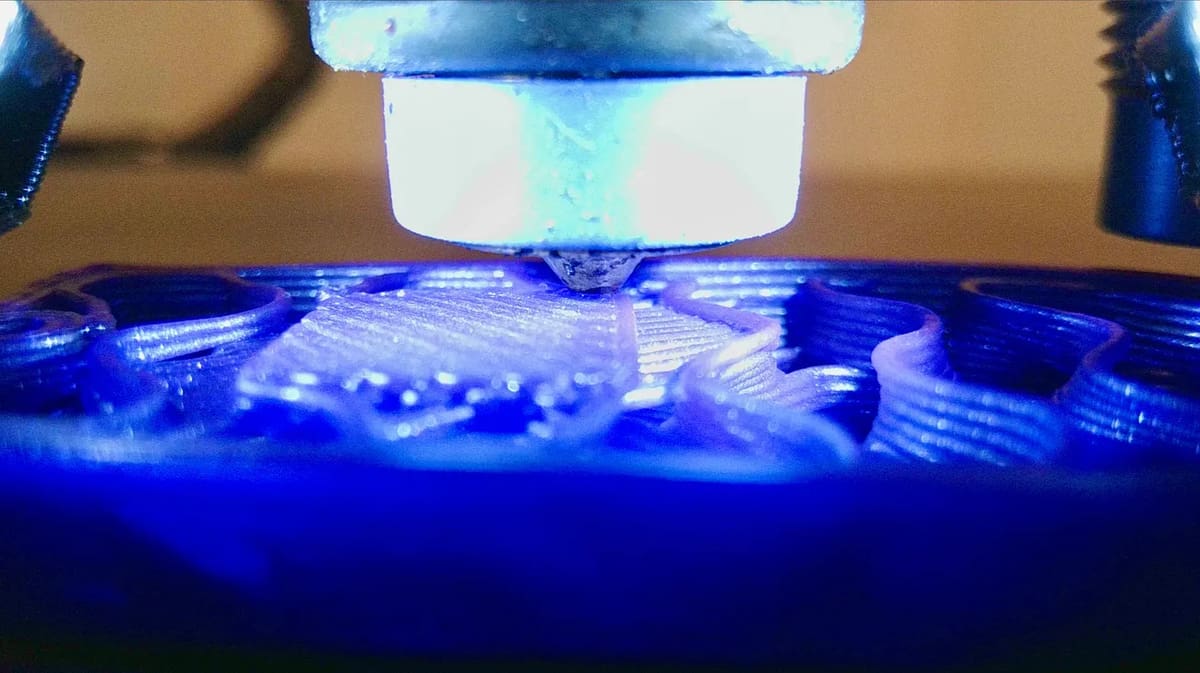
3DO has been trailblazing the nozzle cam market, and they have finally released their improve V2 version of their Nozzle Cam. A small camera with high image quality is essential to properly observe the FDM printing process. The V2 improves their original product by making the ribbon cable detachable, allowing for different lengths to be swapped out, greatly improving compatibility for different printers and toolhead assemblies. They also integrated the illumination LEDs into the camera itself, making for a much cleaner, all-in-one design.
The 3DO nozzle cam uses the Sony IMX258 sensor and is easily recognized by Windows and native programs like OBS Studio. It’s a perfect option for time-lapse video and use with compatible printers, such as the EVA 2.4, EVA 3, Prusa i3 MK3, Prusa Mini, Voron Stealthburner, and VzBoT. The sensor is separated from other electronic components by a heat-resistant flat cable, making installation simple. You won’t have to destroy a metal endoscope casing with this option.
The key feature of this camera is its heat resistance of up to 65 °C, commonly found in heated chambers. However, in tests, it withstood temperatures up to 70 °C for 48 hours without any issues. These characteristics make it a great option for adapting to other printers as well. You can buy the camera, driver board, and USB cable separately or as a kit from 3DO. To learn all the details about this accessory, check out the GitHub page.
- Manufacturer: 3DO
- Connection type: USB
- OctoPrint compatible: Yes
- Video resolution: 4K at 30 fps, 1080p at 60 fps
- Focus: Fixed
- Price: ~$60 for the camera only, ~$75 for the kit
License: The text of "The Best 3D Printer Cameras" by All3DP is licensed under a Creative Commons Attribution 4.0 International License.
CERTAIN CONTENT THAT APPEARS ON THIS SITE COMES FROM AMAZON. THIS CONTENT IS PROVIDED ‘AS IS’ AND IS SUBJECT TO CHANGE OR REMOVAL AT ANY TIME.