The 30 Best 3D Printer Projects for Kids

3D printing will shape the future… so why keep it to grown-ups? Check out some of the best 3D printer projects for kids!
Admit it, when you brought that 3D printer into your home, your better half was suspicious. And since your partner might still be critical about the value of your new hobby, the projects in this article give you an excuse to say, “It’s not just for me, it’s also for the kids!”
If your kid is eyeing that magical printing box of yours, why not 3D print something together? Because designing, choosing a print, and constructing is way more fun when you do it with someone who is as enthusiastic about it as you are. With 3D printing projects, kids can be creative while having fun – and hopefully learn something in the process, too.
You can start the learning process by exploring 3D printing models printed with different parameters, print-in-place 3D models, and demonstrating a few ways they can improve their 3D printed models using various filaments and paints. Taking this into consideration, here are some simple projects for 3D printing with your kids.
If you and the kids are short on time given all of their extracurriculars, but you still want to get them something unique, try Craftcloud. You can have your kid’s favorite toy printed in the material and color of your choice and delivered straight to your door! (But… you’ll have to come up with a better excuse to justify your 3D printing habit.)
Functional
First up, we’ll take a look at some projects that will allow kids to learn as they print and encourage them to pick up some new skills afterwards: playing an instrument, birdwatching, baking, gardening…
Pokémon Cookie Cutters
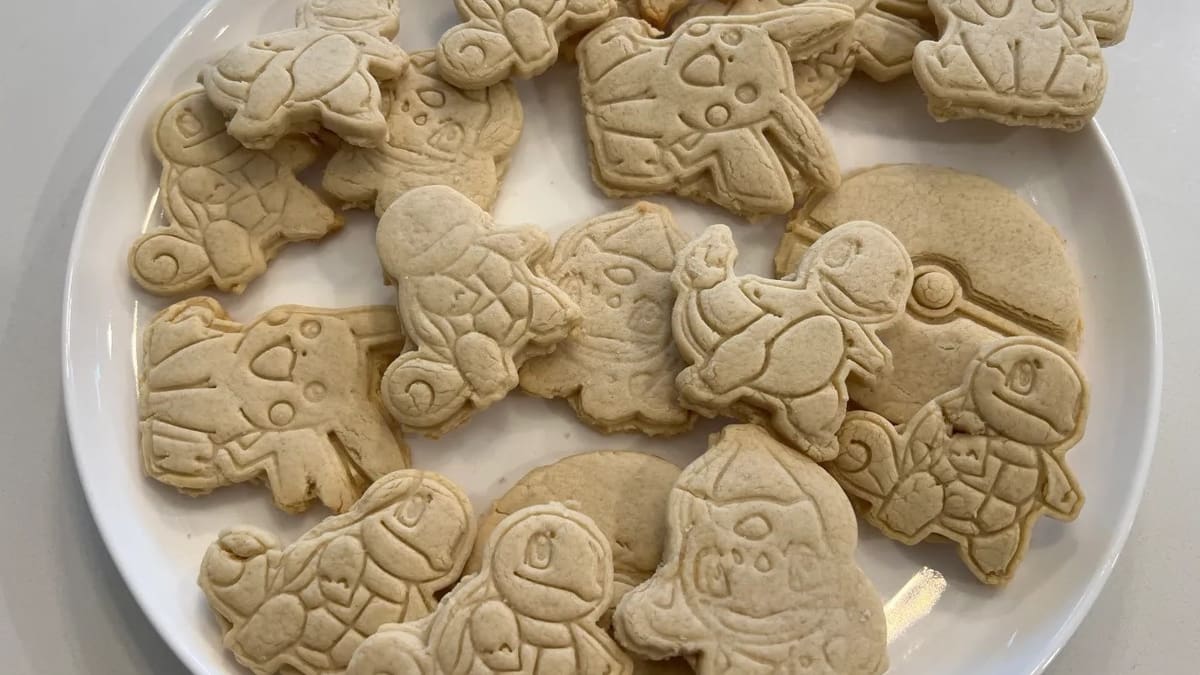
Cookies and Pokémon. Need we say more?
Well, maybe just a little technical suggestion, like print them in food-safe filament and consider other 3D printing food safety tips, but apart from that, come on, really, what a deliciously nerdy family project. It’s Pokémon-shaped cookie cutters!
- Who designed it? korniton
- How printable/popular is it? This set has 57 makes already, and the author has two more parts with different characters.
- Where to find it? Printables
Modular Hairband
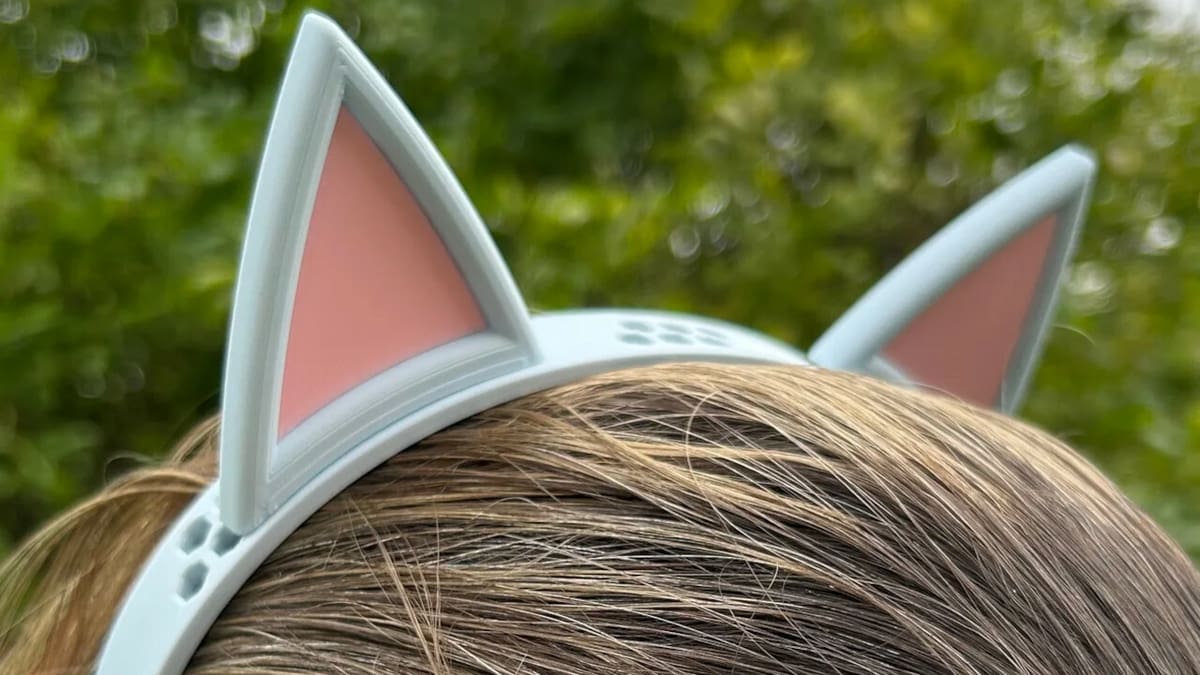
Here’s a hairband that you can print with your kids. The hairband and attachments print separately, so you can mix and match for some extra fun. There are six add-ons (the cat ears are super adorable!) and a separate hairband file, so you can easily print each part in different colors.
In addition, there are also blank snaps available in small and large sizes. You can print these to attach another 3D printed model or other crafting materials to the headband.
The author recommends a 0.2-mm layer height and using a brim if any issues pop up. They also used the variable layer height in PrusaSlicer for extra smoothness.
- Who designed it? Kadows
- How printable/popular is it? There are over 1,100 downloads and 18 documented makes with great feedback from makers.
- Where to find it? Printables
Spirograph
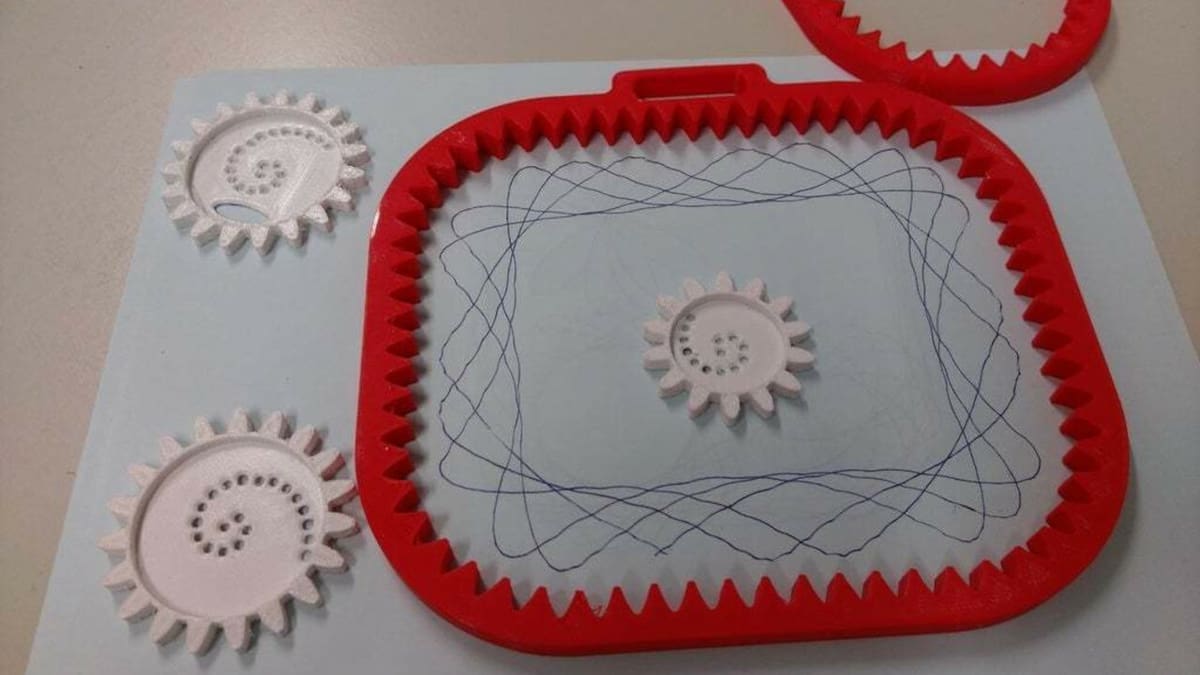
This next print is a remix of a hugely popular spirograph kit with thicker parts that are easier to handle. This one should be pretty easy to print. In fact, it might be easy enough to be your kid’s very first print. If they’re not ready to set the infill or send the G-code to the printer just yet, they can always have fun choosing the colors!
Making the actual drawings with the spirograph is a fun, artistic activity in itself, so even if they don’t participate in the making, this set is a great gift for any young child.
- Who designed it? BePrint (remixed from 3Domas)
- How printable/popular is it? This simple print has over 17,000 downloads so far, and 9 makes have been shared on Thingiverse.
- Where to find it? Thingiverse, Cults
Scissors for Kids
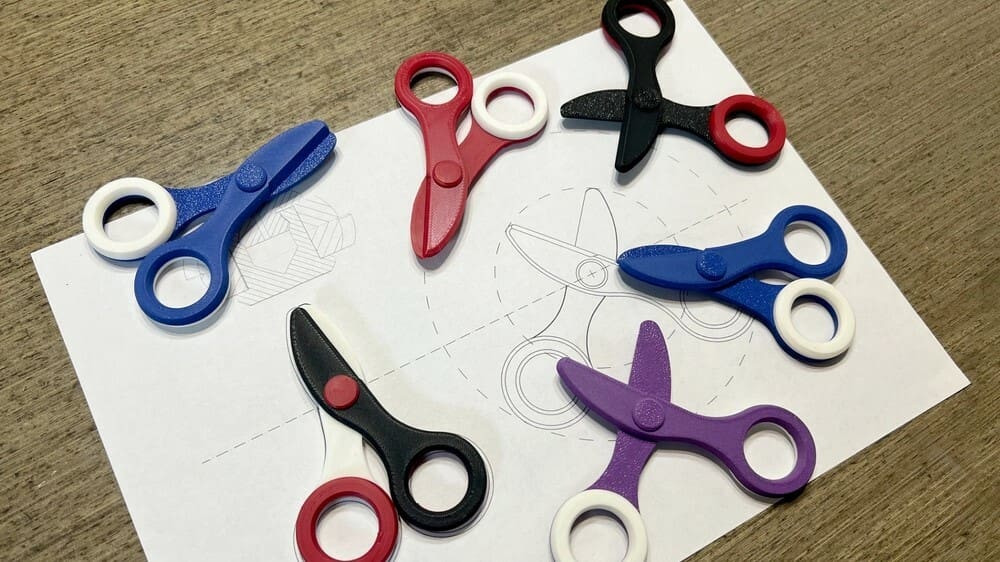
Who said cutting paper couldn’t be an exciting adventure? With 3D printed scissors for kids, fun is guaranteed! These scissors are more than just a cutting tool; they’re an opportunity for little ones to dive into the world of creativity in a safe and exciting way.
With rounded tips and plastic parts, they’re specially made for small and curious hands. Plus, you can customize them with vibrant colors or even add some funny designs to make the experience even more captivating. With these scissors, cutting paper becomes an adventure full of laughter and discoveries!
First, make sure to use the right material and color (the designer recommends PLA Tough or PLA-CF). Second, when assembling the pieces, apply even pressure to ensure everything fits perfectly. Some users suggest using a flat surface to press the handle parts, ensuring stable and sturdy assembly. And don’t forget to follow the safety guidelines!
Although these scissors are designed with children’s safety in mind, there are always risks associated with printing and improper use. With these tips in mind, you’ll be ready to create your own customized scissors and provide hours of safe fun for the little ones!
- Who designed it? wuguigui
- How printable/popular is it? This fun tool has 177 prints and around 500 downloads, according to MakerWorld, and it’s easy to see why.
- Where to find it? MakerWorld
Ukulele
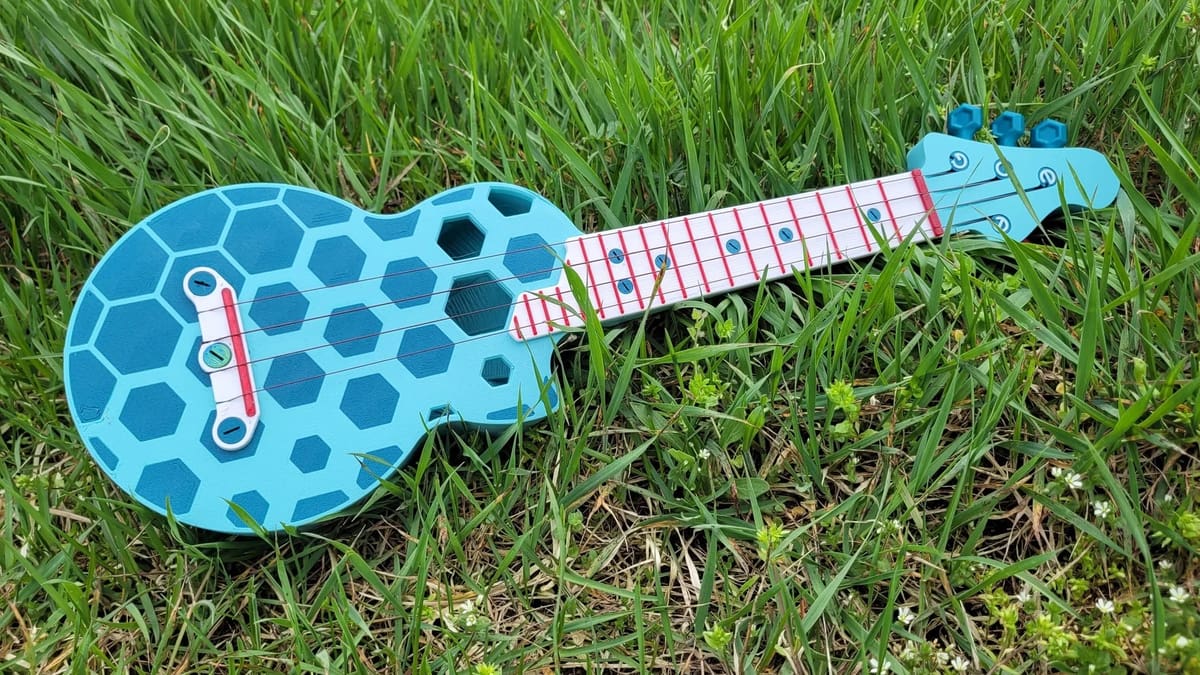
This ukulele is a challenging project, but that hasn’t stopped makers all over from getting it right.
It’s a great-sounding instrument, so you needn’t worry about it not meeting your expectations. We know that because the author uploaded his rendition of Stand By Me on his printed ukuleles.
You can print the whole thing in PLA, but the author recommends using PETG for the internal rod and the small threaded parts. And if the variety of files and parts makes you think you’ll also need to use supports or glue, skip the thought! This ukulele was designed while keeping in mind an easy print and assembly with just the printed parts. Note that your printer needs to be very well calibrated, though.
- Who designed it? Tomek
- How printable/popular is it? This ukulele has an impressive 140 documented makes so far.
- Where to find it? Printables

Kazoo
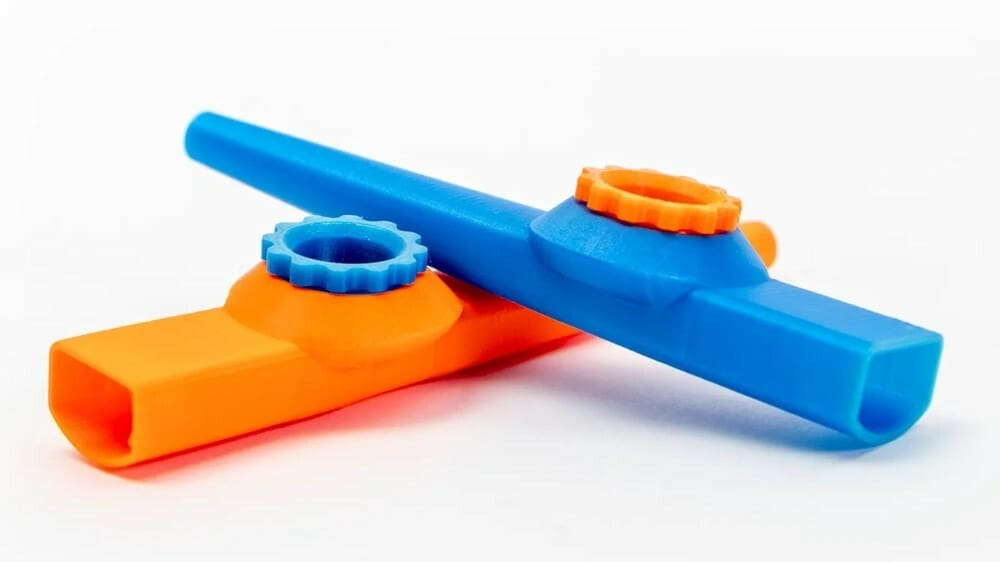
If you’re thinking about printing toys that catch children’s attention, consider the Kazoo as a vibrant and fun choice! This 3D printable model offers a unique way to provide delightful entertainment for little ones.
With a simple membrane and a few plastic pieces, you can create a classic musical instrument that will guarantee laughter and funny sounds. Additionally, the user community praises its printing ease and final result, making it a popular choice for parents and educators looking to add a touch of creativity to kids’ projects.
Now, if you’re eager to get started, reproducing the Kazoo is as simple as following a few basic steps as provided by the designer. Before that, make sure you have all the necessary materials on hand, including a thin membrane (different materials will lead to different sounds) and the 3D printed parts. You can find recommendations from makers on different materials they opted for, for the membrane, which can be useful to check out.
With these guidelines, you’ll be ready to print and assemble your own Kazoo in no time, providing endless hours of joy for the kids!
- Who designed it? PistonPin
- How printable/popular is it? Over 400 makers have printed these, according to MakerWorld, and the shared makes show some fun color combinations to inspire you.
- Where to find it? MakerWorld
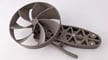
Pull Copter
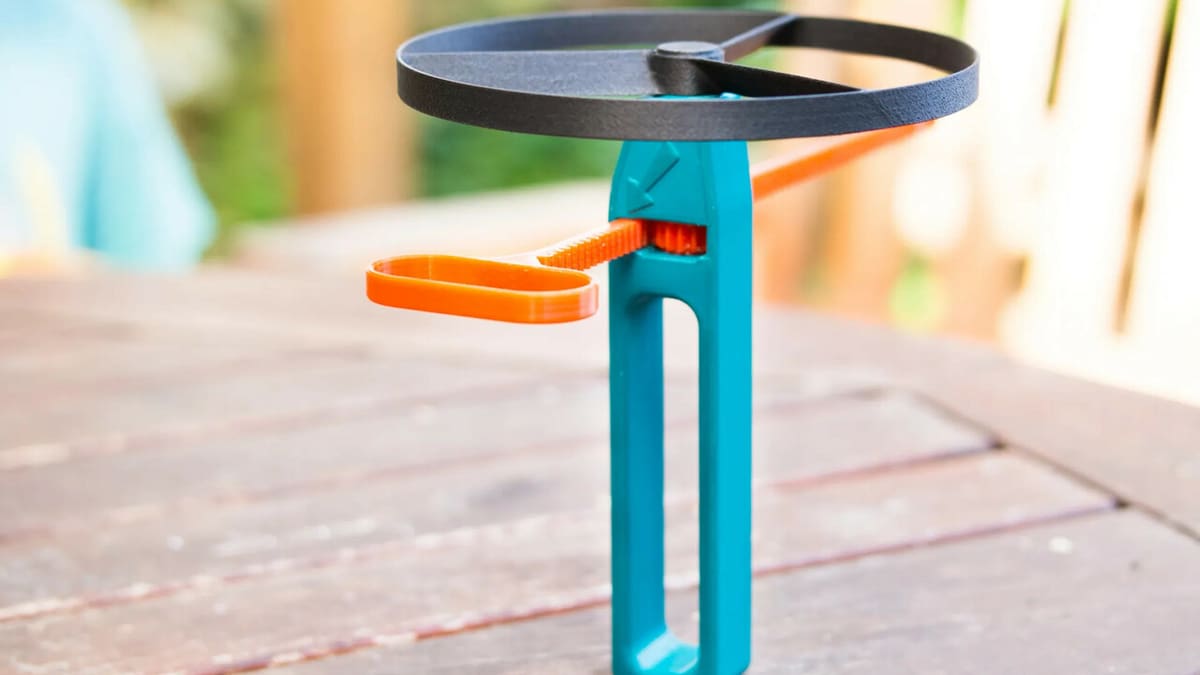
You pull, it copters. This is a pretty simple toy, but the multiple versions make it a fun project for everyone.
The project is well-documented, with the author recommending four or more perimeters for the axle and a low layer height of 0.15 mm for the propeller. There are several handles and propeller designs to choose from.
You can print all of the parts without supports, and then place a small drop of glue between the axis and the gear to secure them together.
- Who designed it? MeisterEdel
- How printable/popular is it? 769 makers have documented their prints, and the results look amazing!
- Where to find it? Thingiverse, Printables
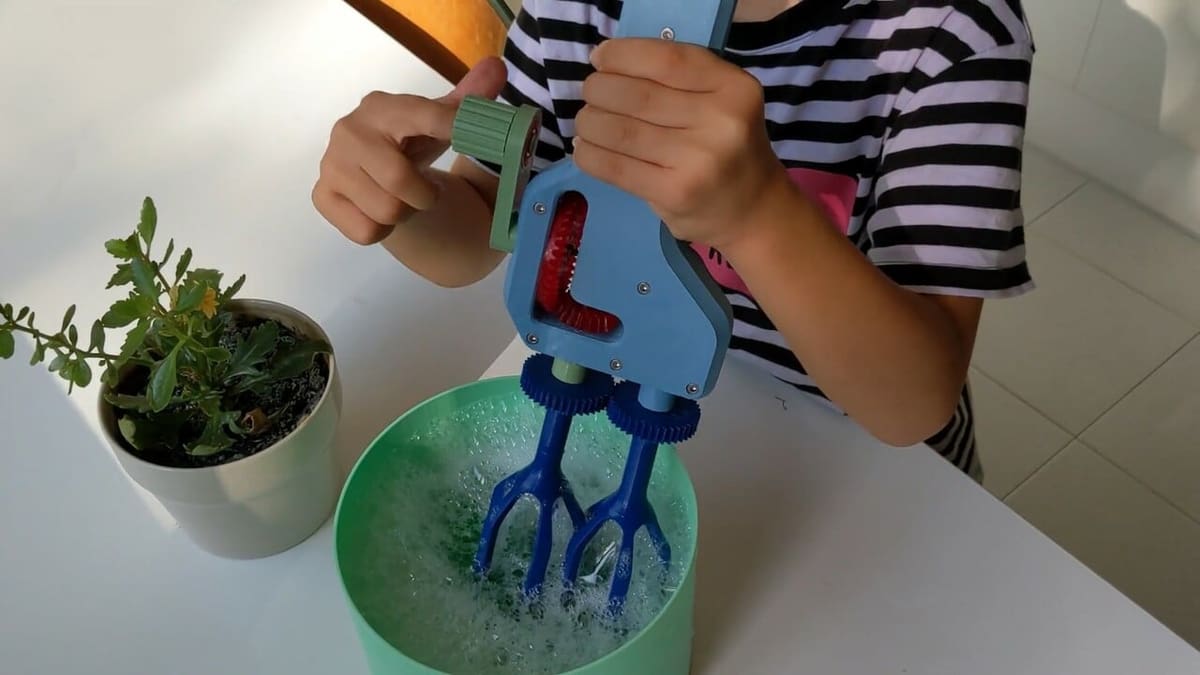
Rotating Machine
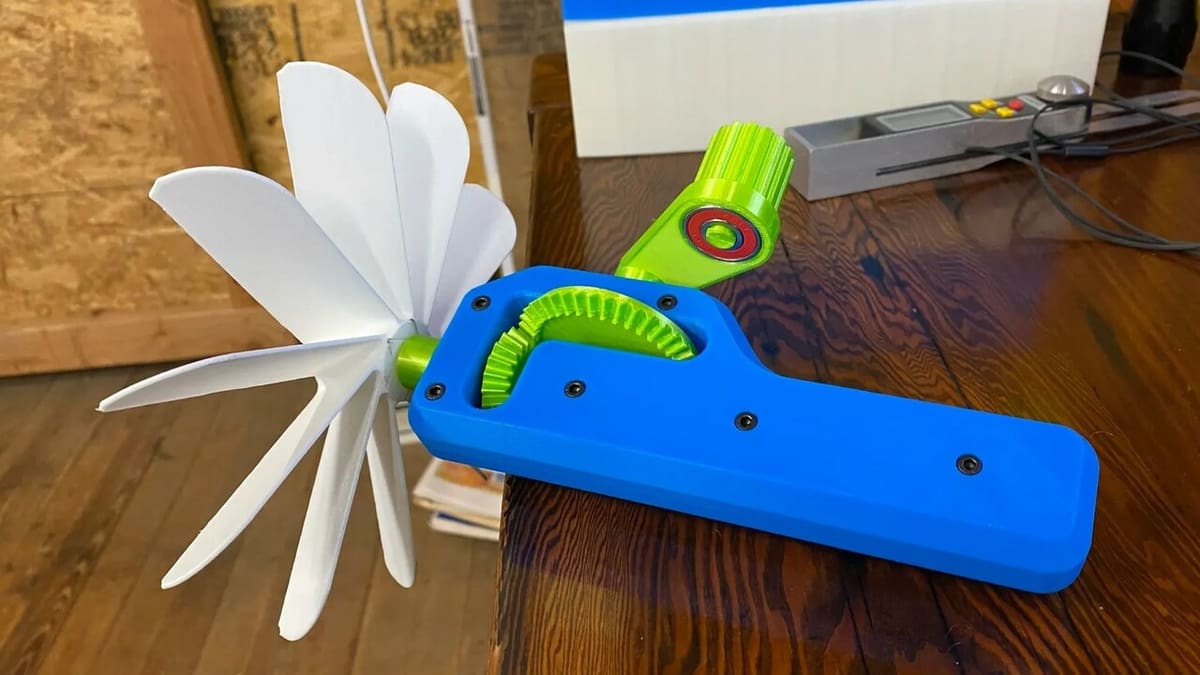
This next model is an all-in-one rotating machine with interchangeable tools for many different kinds of uses. These include a fan tool, kitchen mixer, massage tool, fishing reel, and more. Your kid will never get bored with this machine!
There’s a sturdy crank handle and a few gears that rotate the top of the tool and whatever attachment you choose. This machine also has a double whisk attachment, which kids can use in the kitchen. Just be sure to use a food-safe filament. This project is a great learning project for kids by showing them how to put 3D printed models to use in real-world scenarios.
- Who designed it? pachek
- How printable/popular is it? This project has around 683 downloads, 235 likes, and 10 posted makes – pretty popular, if you ask us.
- Where to find it? Printables
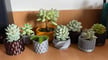
Geometric Stacking Planter
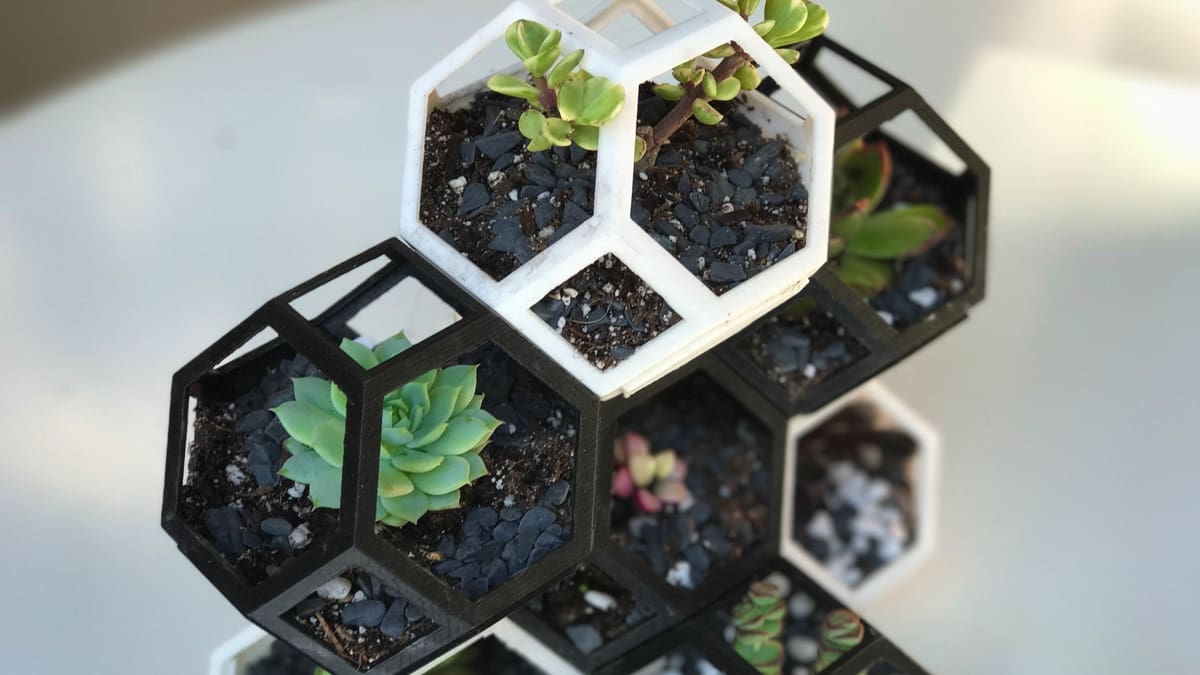
What a great design for a planter! Kids will love the modularity of it. Come to think of it, forget about it, Junior, the grownups are keeping this one.
We recommend PETG filament for that extra water resilience, but if you’ve got that perfect color PLA (we’re looking at you, half a roll of marble filament that’s been sitting on the bottom of the spool pile for way too long), go ahead and use it! Just make sure to get that wall number high.
- Who designed it? printfutura
- How printable/popular is it? The “plantigon” has 6 documented makes and over 18,200 downloads!
- Where to find it? Cults
Robotic Hand
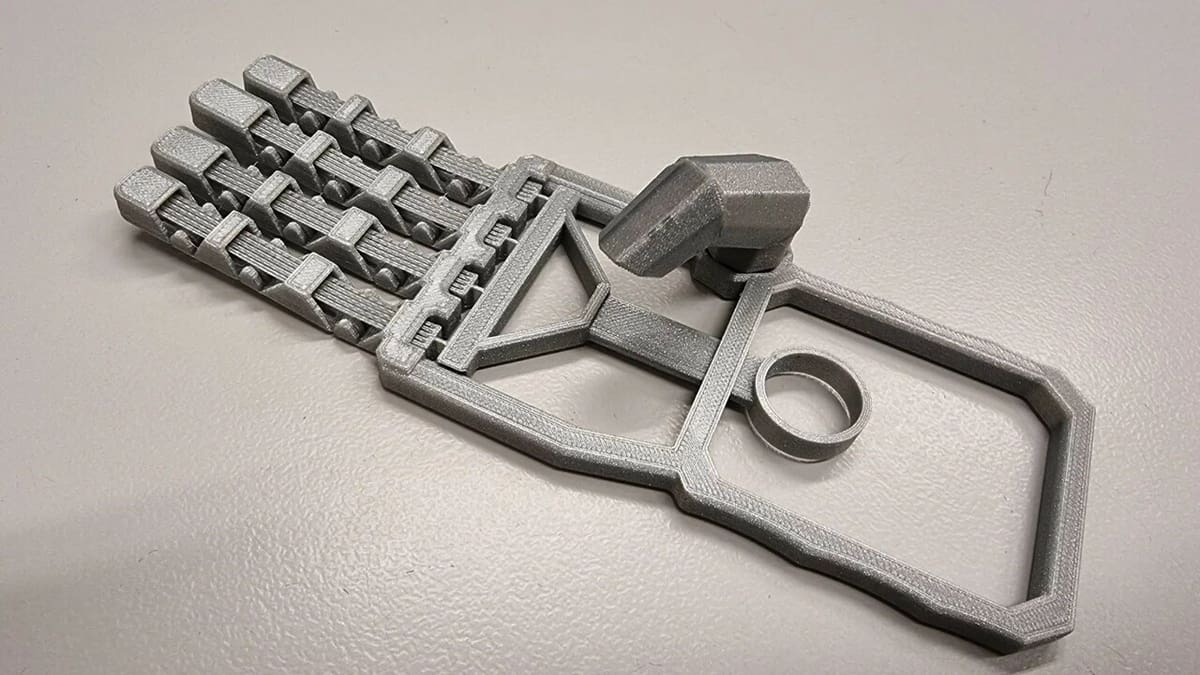
This robotic hand is a print-in-place project, which means that the frame, tendons, fingers, and joints are all printed at the same time. All you have to do is pull the ring in the center to articulate the hand’s fingers so that your children can dress up or play as robots.
When printing the hand with PLA all at once, the tendons tend to break easily. To address this issue, the designer has included a separate file for an individual tendon. As a result, if a tendon breaks, you can easily print a replacement.
Finally, the print settings reported in this make are a good starting point for your own successful 3D printed robotic hand. The only minor issue you may encounter is that it can be a bit tricky to free and rotate the thumb.
- Who designed it? Cisco
- How printable/popular is it? There are 18 posted makes for this toy on Printables. Many makers prefer PETG over PLA because the tendons printed on the hand in PLA tend to break after a few pulls.
- Where to find it? Printables
Sphere-O-Bot
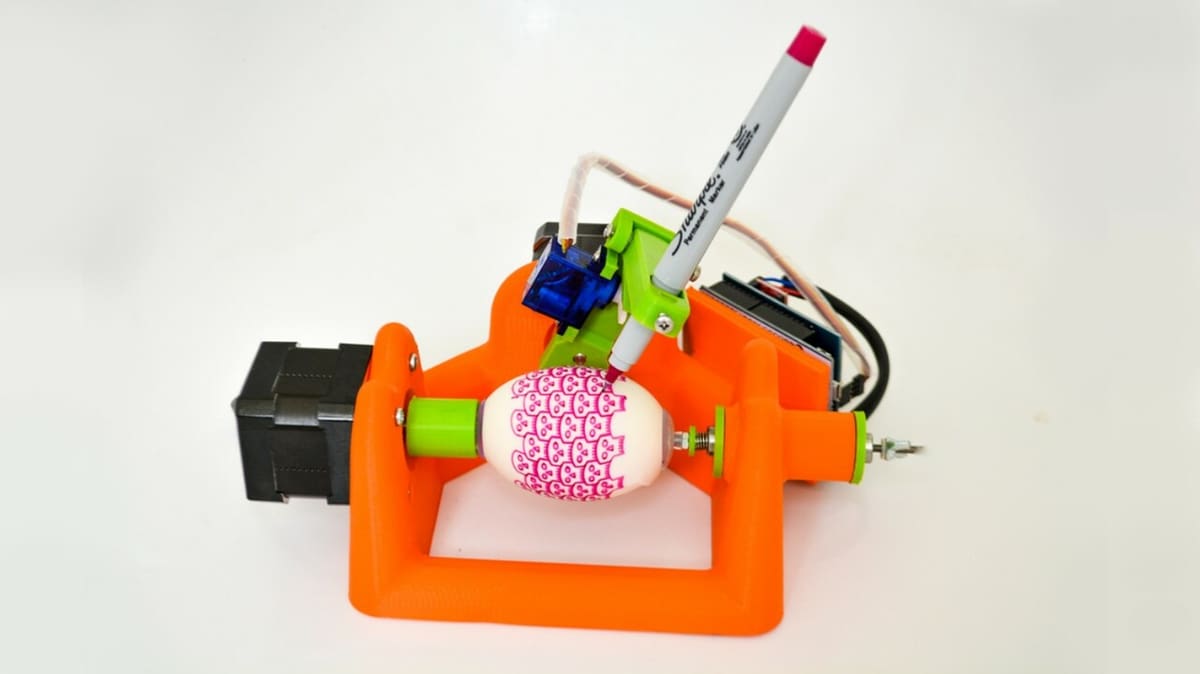
Sphere-O-Bot is a compact, fun, and interactive robot inspired by the original EggBot. It’s easy to set up and use, as it’s completely open source, and as the name implies, this robot is great at creating art on spherical or egg-shaped objects.
Other possible objects you can decorate are ping pong balls, light bulbs, and golf balls – anything similar in shape and size can work. Use this little robot to help any child get an introduction to basic robotics while providing a creative outlet. Although this is ideal for decorating Easter eggs, be sure to also break it out during the holiday season to decorate spherical Christmas ornaments! With a bit of work, you can easily program it to draw many different shapes and patterns.
The designers have provided a comprehensive assembly guide to help you in building your own bot. This also includes a guide to draw and plot a few basic designs to get you started on your Sphere-O-Bot journey!
- Who designed it? jjrobots
- How printable/popular is it? This impressive bot has nearly 48 makes, 25 remixes, and over 100,000 downloads.
- Where to find it? Thingiverse
Candy Machine
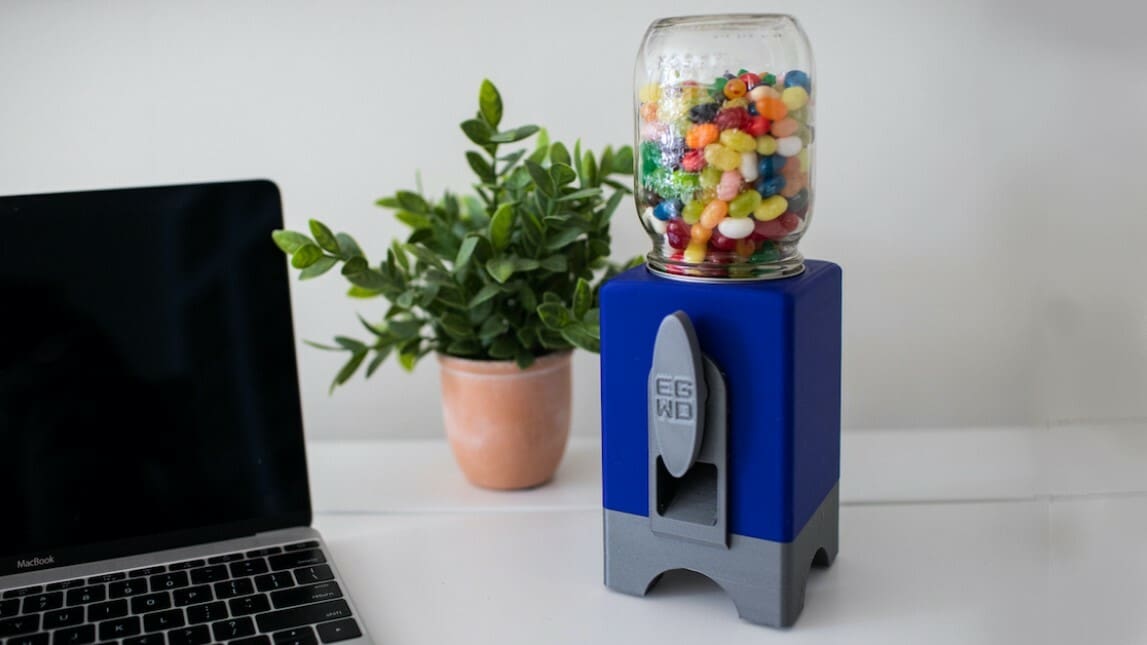
This is a mason jar candy machine that dispenses candy and is reminiscent of classic gumball machines. All you have to do is twist the knob, and candy comes dropping (free of charge)!
To make this, you’ll need a mason jar to store the candy, a pen spring, rubber tabs, screws, and hot glue. For the print settings, the maker recommends a 0.2-mm layer height and 20% infill. For an easy construction experience, the assembly video of this machine can be used as a reference.
- Who designed it? edgewoodmodern
- How printable/popular is it? This candy dispenser has more than 4,000 downloads, with a total of 40 makes.
- Where to find it? Thingiverse
Klöts
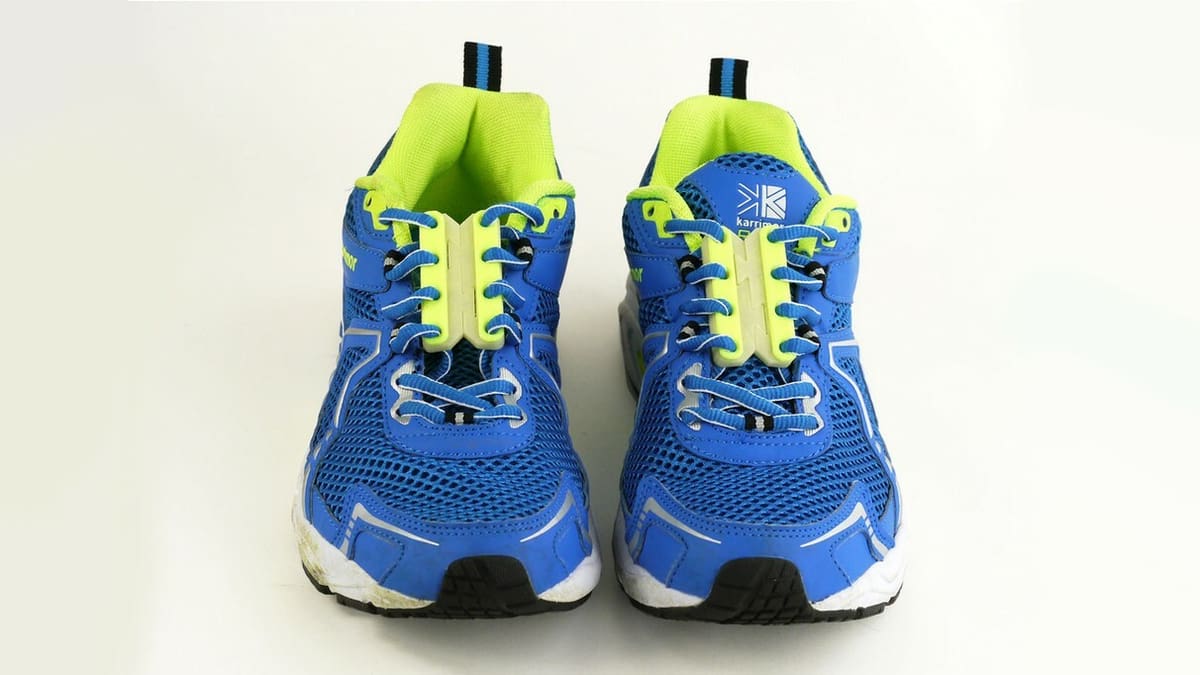
Klöts are 3D printable quick shoe ties that eliminate the need to untie and tie your shoelaces. They tie your shoes faster, maintain the same tension, and leave no unnecessary ends of shoelaces hanging around (which can cause you to trip). Plus, you can customize them to match each pair of shoes.
The Klöts come in three sizes: one for kids, one for medium-sized shoes, and the last for boots and adults. Once your children use Klöts, they’ll never want to tie their shoelaces again.
- Who designed it? Kart5a
- How printable/popular is it? This is a very popular project on Thingiverse with more than 163,000 downloads, 140 makes, and 22 remixes.
- Where to find it? Thingiverse
Birdhouse Feeder
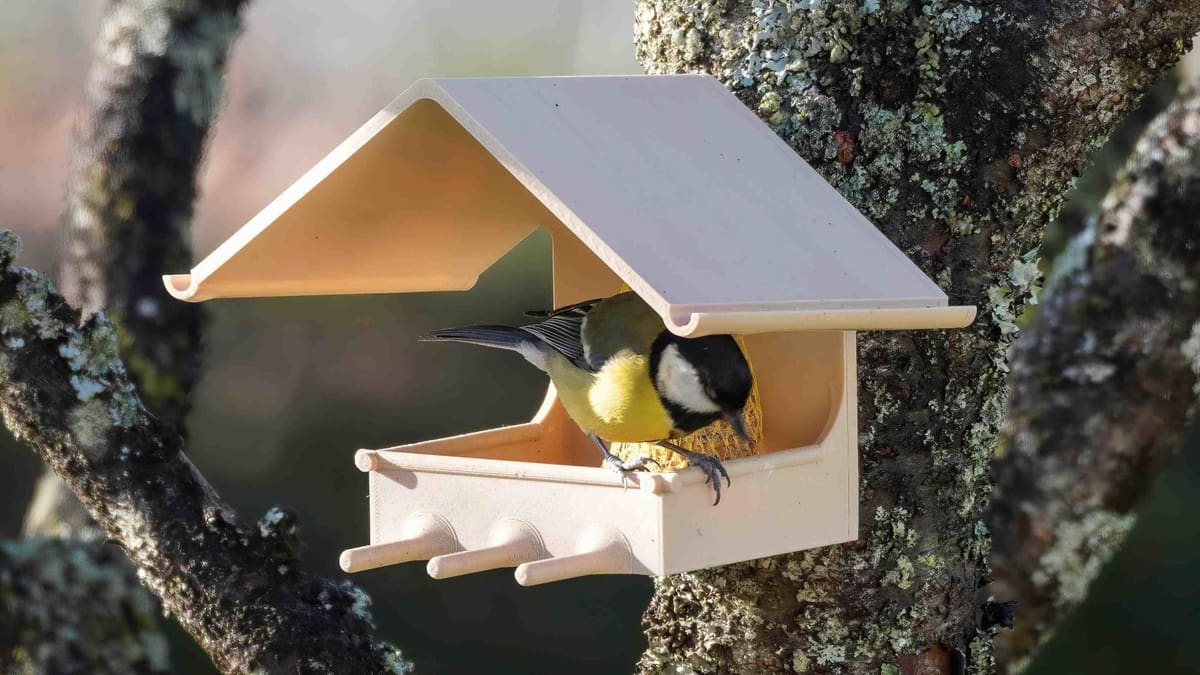
This cute birdhouse feeder is perfect for any backyard. It’s a super easy print, no assembly required, and once it’s set up, you and your young ones can learn all about birds.
For added outdoor durability, consider printing in PETG or even ASA, although it’s not essential unless directly exposed to sunlight. If PLA’s good enough, then some wood-filled options will deliver a cool, rustic outcome.
If you want to add another activity to this project, make a fat ball with your kid. It’s just lard and birdseed.
- Who designed it? iphonecesbron
- How printable/popular is it? There are 4 beautiful makes on Cults and the design has been downloaded over 2,100 times.
- Where to find it? Cults
Toys
Next, let’s take a look at some fun 3D printing projects that will provide endless hours of fun well after they’ve been replicated.

Minecraft Pig Kit Card
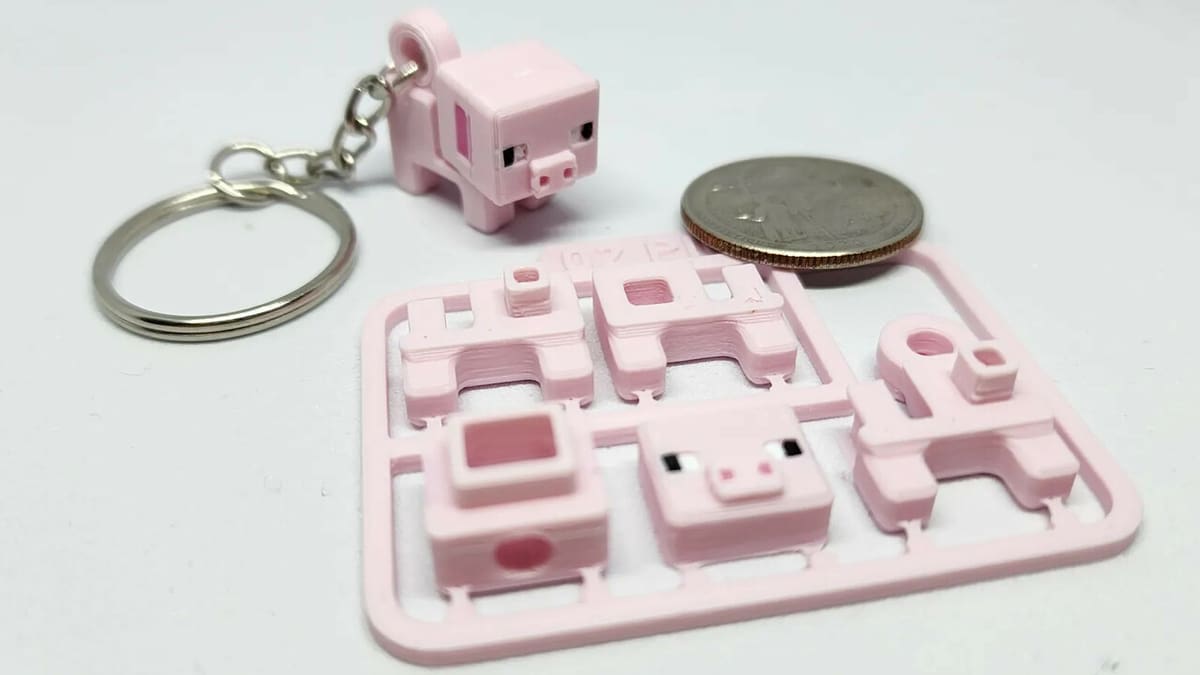
Minecraft pigs are awesome. Pork chops, experience, rides, what can’t they provide us with? Kids can now assemble them in real life, with this 3D printable kit card. It’s a simple print that doesn’t require supports. Just add some glue and maybe white and black dots for the eyes, and you’re golden! You can assemble it and use it as a toy or turn it into a keychain.
If you want to expand and turn this into a bigger project, the author has a diorama builder kit that is the perfect complement. And if Mr. Bacon ever feels lonely, you can always make him some new friends.
- Who designed it? chiz_m
- How printable/popular is it? Kit cards have become very popular, and this one is no exception with 76 shared makes.
- Where to find it? Printables
Basketball Mini Game
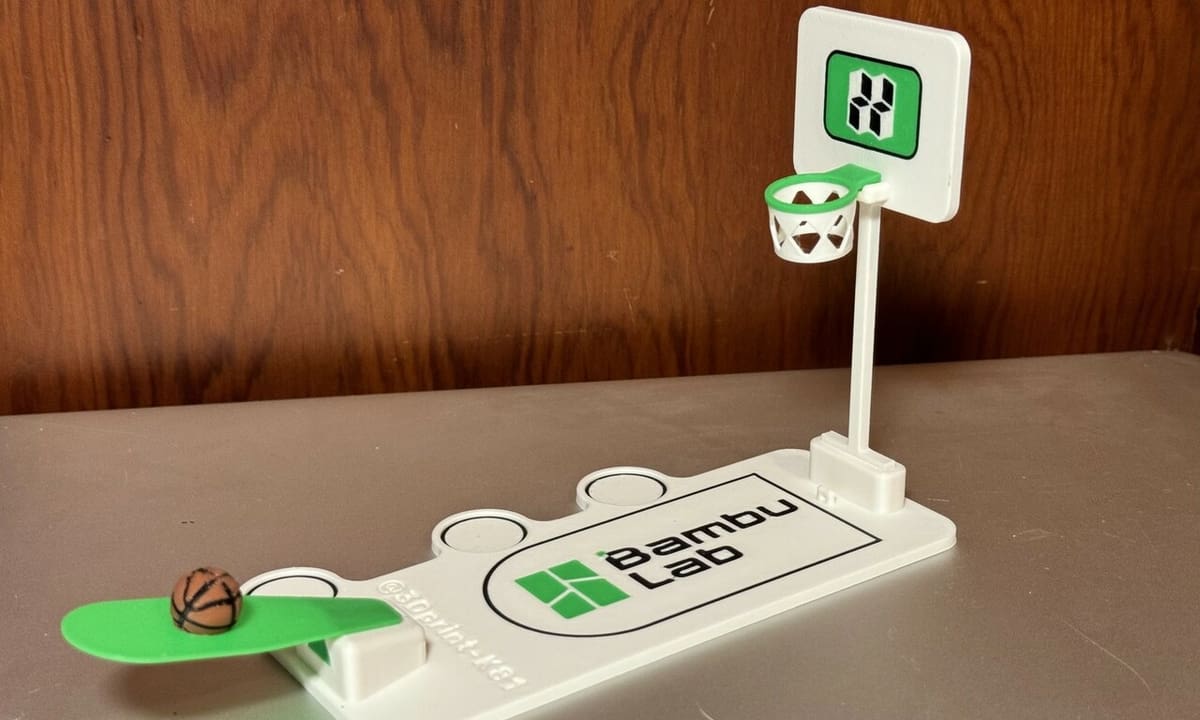
In an increasingly digitized world, the search for innovative ways to entertain children is constant, and that’s where this 3D printed miniature basketball game comes in.
This game not only provides interactive fun but also promotes the importance of sports practice from an early age, challenging children to compete fairly and aiming to enhance their motor skills while having fun. Imagine the smiles on the faces of the little ones as they try to make the basket, focused and excited, without external pressures or judgments. It’s more than just a simple game; it’s an experience that promotes physical and emotional development in a light and relaxed manner.
To replicate this game, simply follow the printing instructions provided by the designer and let the magic happen. These include 0.2-mm layers, two walls, and 15% infill, which should make for a quick and straightforward printing experience, while positive feedback from users confirms the ease of assembly and the quality of the final model.
Additionally, adding a string to tie the ball facilitates recovery after each shot, making the game even more dynamic. Therefore, if you’re looking for a unique way to encourage sports and fun at home, don’t hesitate to print this miniature basketball game.
- Who designed it? 3Dprint-K81
- How printable/popular is it? This challenging and creative toy is divided into simple parts and has 658 prints and 613 downloads according to MakerWorld.
- Where to find it? MakerWorld
Toy Cannon
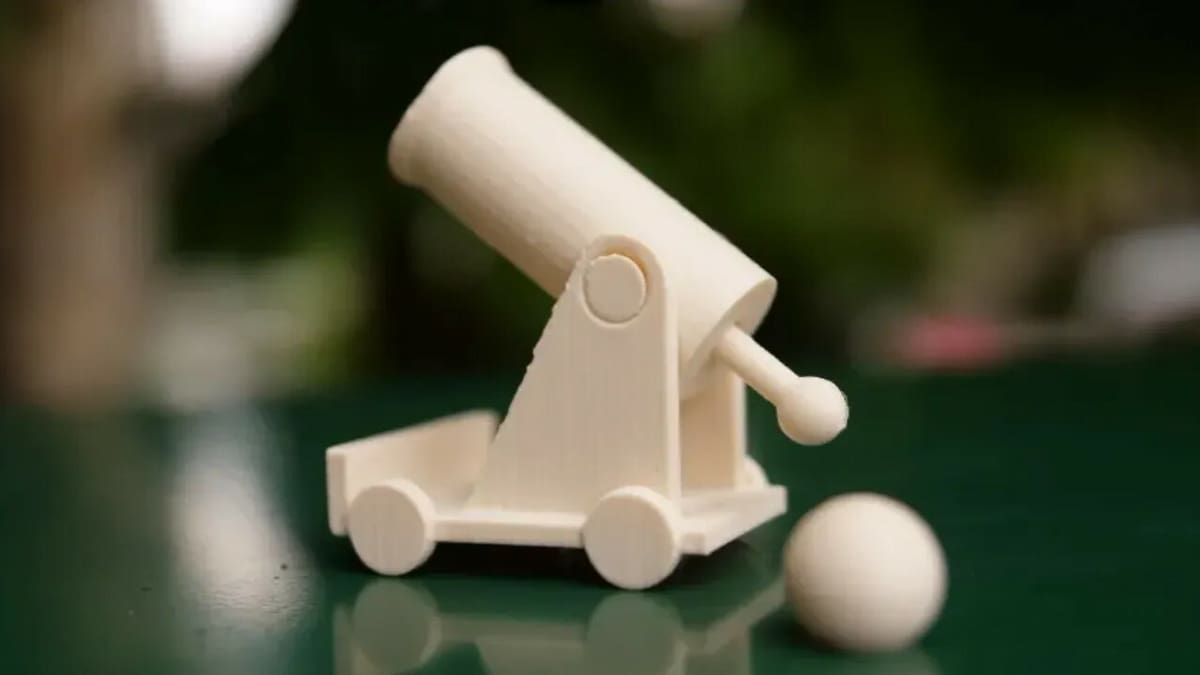
Here’s a working, print-in-place, hinged, multi-version, actively developed, toy cannon. Phew, that’s a lot!
You gotta see it to believe it. Better yet, print it and see it in person. Initially you might have to give it a few twists and pulls to get it going, but it should be a relatively straightforward print.
Choose from two different spring strengths (the weaker one is for kids), and print different projectiles as well as a horizontal target for easy gaming. There’s also a giant version that shoots Nerf darts and another that autoloads the projectiles. Even the tiny keychain shoots!
- Who designed it? Makkuro
- How printable/popular is it? This cannon is a hit with around 420 shared prints so far.
- Where to find it? Printables
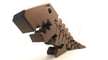
Tinkerplay Velociraptor
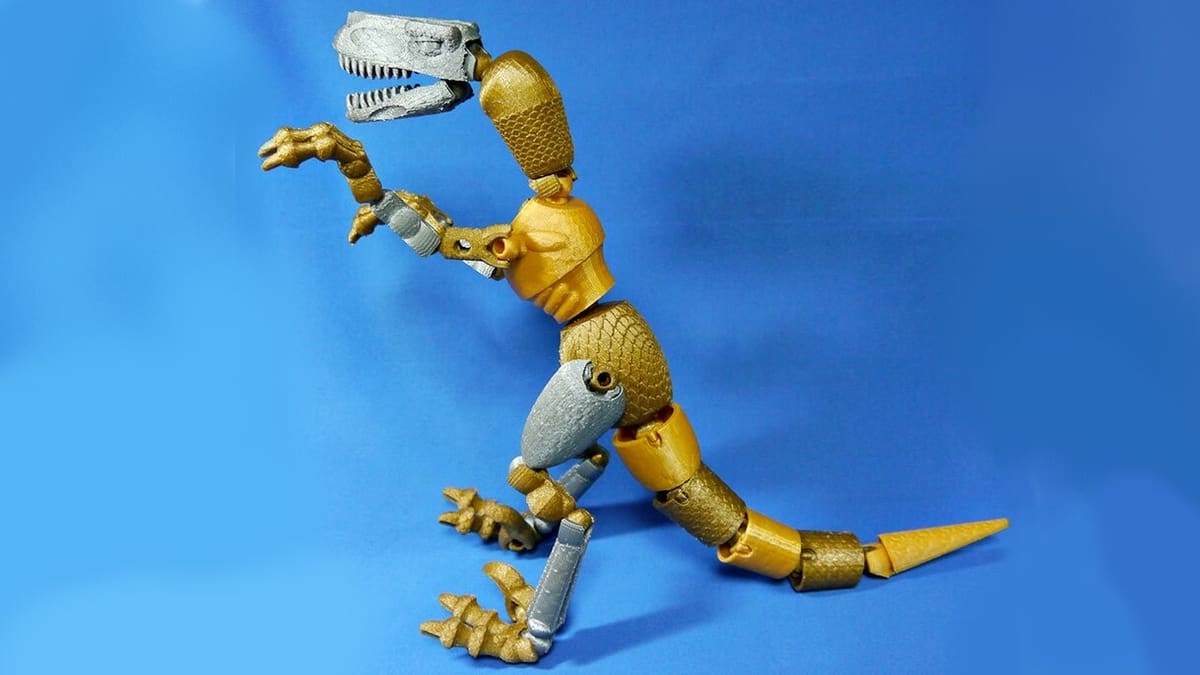
This is not an easy print, as it consists of multiple 3D printed parts, but it really is worth it. If your child is interested in dinosaurs, this is the perfect 3D printing project because it’ll result in a fantastic articulated toy.
One fun idea is to print multiple dinosaur parts using various colored filaments so that body parts can be mixed and matched to create dinosaurs with unique personalities. Then again, like the model’s designer, you can stick with metallic silver, copper, and gold colors for the body parts to give it a robotic look.
The designer has printed this velociraptor with a 0.2-mm layer height using PLA and nylon at the joints for durability and reinforcement. However, you can easily print all of the parts using PLA.
- Who designed it? shiuan
- How printable/popular is it? This toy has over 1,000 downloads, 162 likes, and 2 makes.
- Where to find it? Thingiverse
Butterfly Automaton
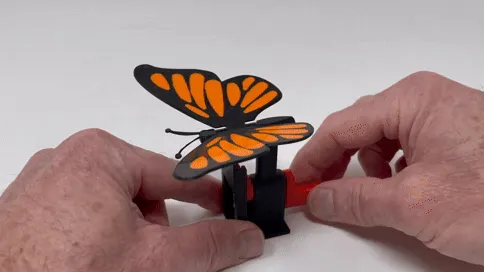
This design is a pretty butterfly automaton that’s operated manually through a crank and is entirely 3D printed – no extra parts or components needed.
The maker has even shared a video that shows a digital rendering of the 3D model in movement as well as the movement of the completed print for easy visualization and understanding. Kids will love to have this on their shelf to play and fidget with.
One thing to keep in mind is that the model requires high-precision printed parts to properly fit together and move smoothly. Alternatively, some post-processing techniques could help you out here.
Marble Maze
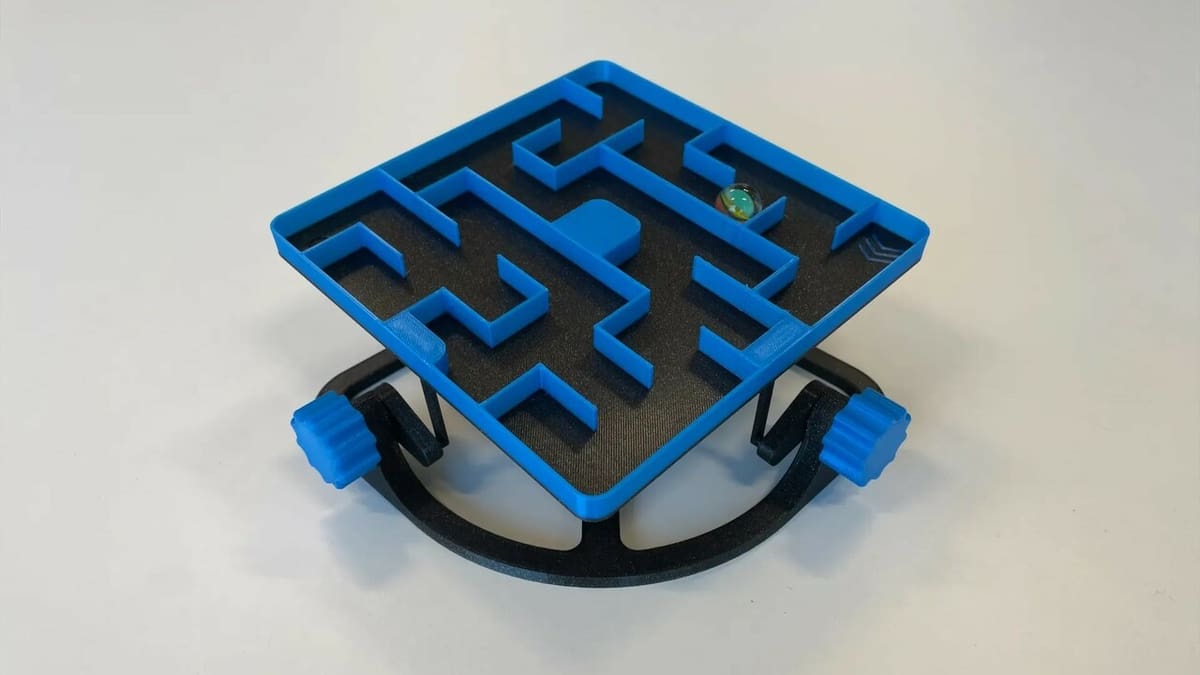
This is a snap-together maze that requires no glue or hardware for assembly, making it a perfect project for kids. Choosing the color for the maze is up to you, but if you’re looking for print settings and information about the assembly, the maker has provided them in depth.
If your kids get the hang of this maze and can complete it without difficulty, you can print this remixed version, which adds a bit of a challenge by introducing holes in the platform. So be careful where you lead the marble: Either you’re safe, or you’ll need to start all over again!
- Who designed it? ericman314
- How printable/popular is it? With 99 successful makes and more than 7,200 downloads, this maze is quite popular on Printables.
- Where to find it? Printables
Marble Castle
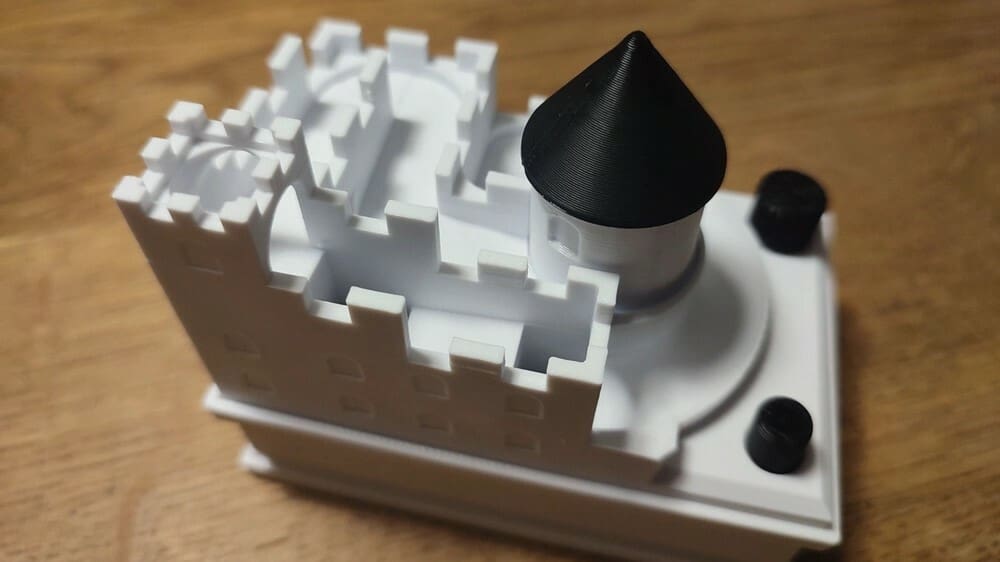
In the world of 3D printing, choosing the next project can be as thrilling as opening a toy box! And if you’re looking for something to delight the little ones, this marble castle is the perfect choice.
This fun toy is easy to print and even easier to assemble. With a simple push of a button, the marble climbs the stairs, while turning the knob makes the castle spin, allowing the marble to continue its journey. It’s a fun and interactive way to keep kids entertained while stimulating creativity!
Now, if you’re ready to dive into this magic and bring this enchanted castle to life, here’s what you need to know. First, make sure you have the correct print settings: a layer height of 0.2 mm, 2 outer walls, and 15% infill should do the trick. You’ll also need some simple items like a pen spring, a steel ball measuring 7-10 mm, and a small rubber band – two small magnets can help keep the moving parts in place, although they’re optional.
With this fun model, youngsters can not only have endless fun after the castle’s been built, but you can also walk them through how all the parts fit together and go over the mechanics that lead to dazzling results.
- Who designed it? BamBam Design
- How printable/popular is it? According to MakerWorld, this fun and clever design has 1,100 prints and around 800 downloads.
- Where to find it? MakerWorld
Train Track Set
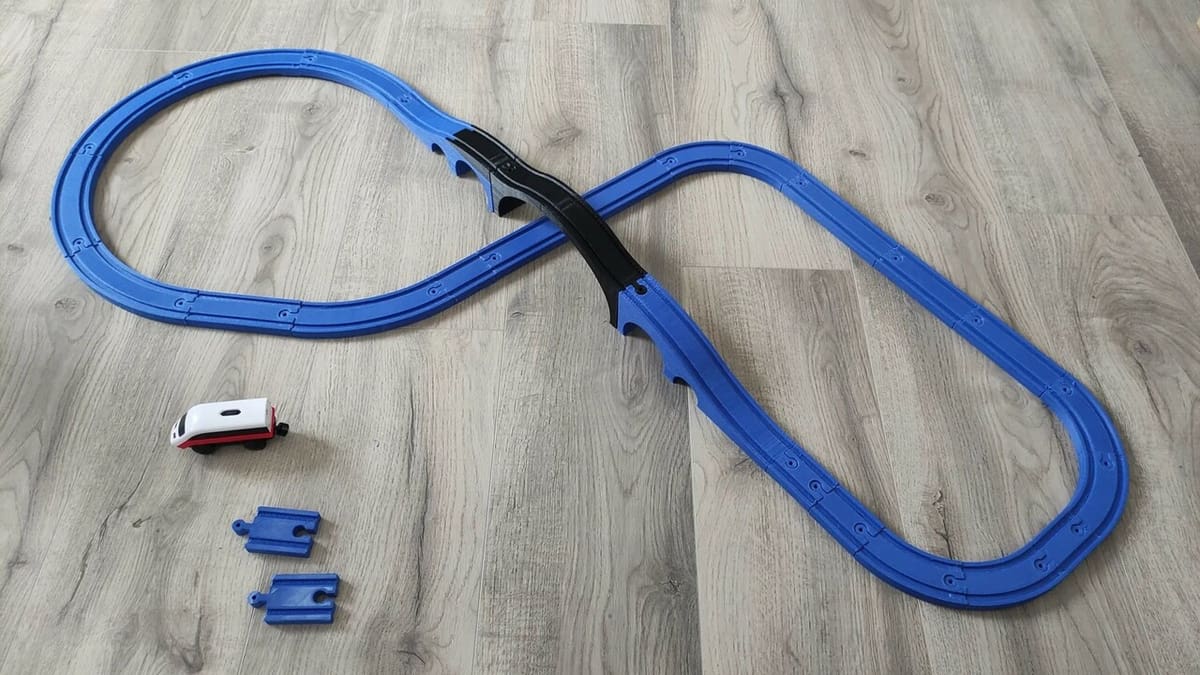
This is a train track set that can be useful for kids who have toy trains but are looking for new and unique pathways to travel. These tracks are specifically made for the typical wooden toy trains, and there are many different track pieces to choose from.
Even if you don’t have a wooden or any other toy train, the designer has also provided a 3D printed train set that fits perfectly to these tracks. There is a variety of train cars to print, from a passenger car to a tanker wagon.
Back to the track set, this project includes 50 individual and unique pieces, including straight tracks, curved tracks, switches, crossings, viaducts, and bridges. With this track set and various different train cars, your kids can make a new train route every day. The possibilities are almost endless!
- Who designed it? MichalFanta
- How printable/popular is it? Printables reports over 4,300 likes, 7,500 downloads, and 84 successful makes.
- Where to find it? Printables
Cereal Box Townhouse
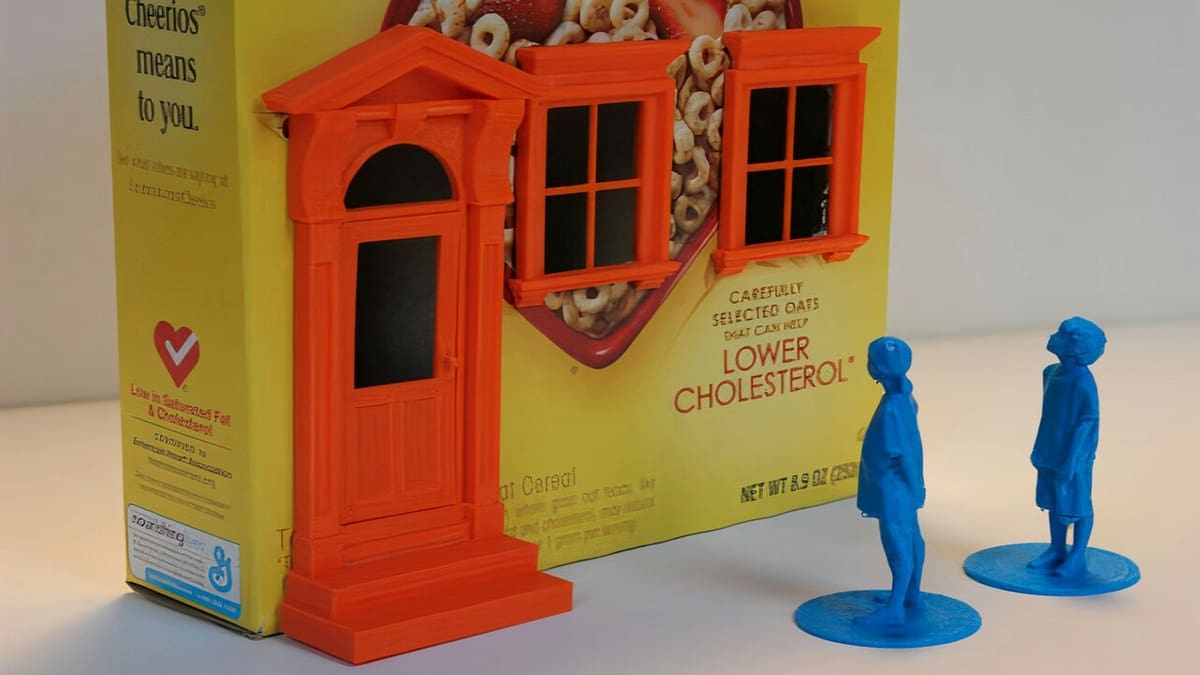
Short on money for a dollhouse? Or maybe looking to create your own unique neighborhood? Just take an empty cereal box, 3D print the door and some windows, color the box if you want, and there you have a great toy to play with!
Many makers on Thingiverse have added additional features, such as a garage, a balcony, and a farmhouse entrance to their own cereal box house. Try out other boxes that are otherwise bound for the paper bin to give your new dollhouse neighborhood some architectural diversity, if you will. If you create different houses with all these unique features, you can build your own cereal box town or city.
You can even place miniature figures and other tiny items around your houses, such as a few garden chairs and tables, which will undoubtedly bring your town to life.
- Who designed it? dadhoc
- How printable/popular is it? 15 people in the Thingiverse community have shared their take on the Cereal Box Townhouse.
- Where to find it? Thingiverse
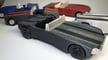
Racecar & Wrench
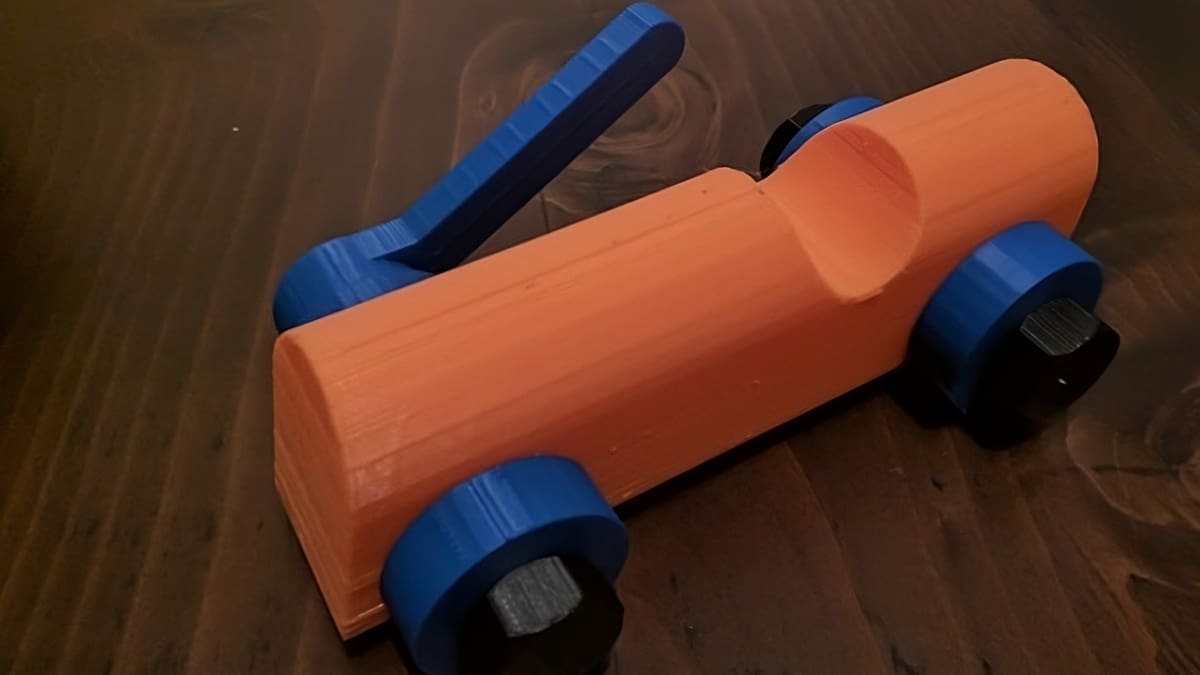
Racecars are great gifts. Always have been, and always will be. But you know what makes them even better gifts? Being able to take them apart.
If we’re being technical here, they all have that ability, but we mean on purpose.
There’s nothing quite like the sheer delight of disassembling a car and then triumphantly putting it back together. Gearheads of the world, unite!
- Who designed it? geordielad
- How printable/popular is it? There are six fun makes, and they clearly show that the more colors, the merrier!
- Where to find it? Thingiverse
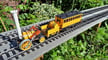
Fire Truck
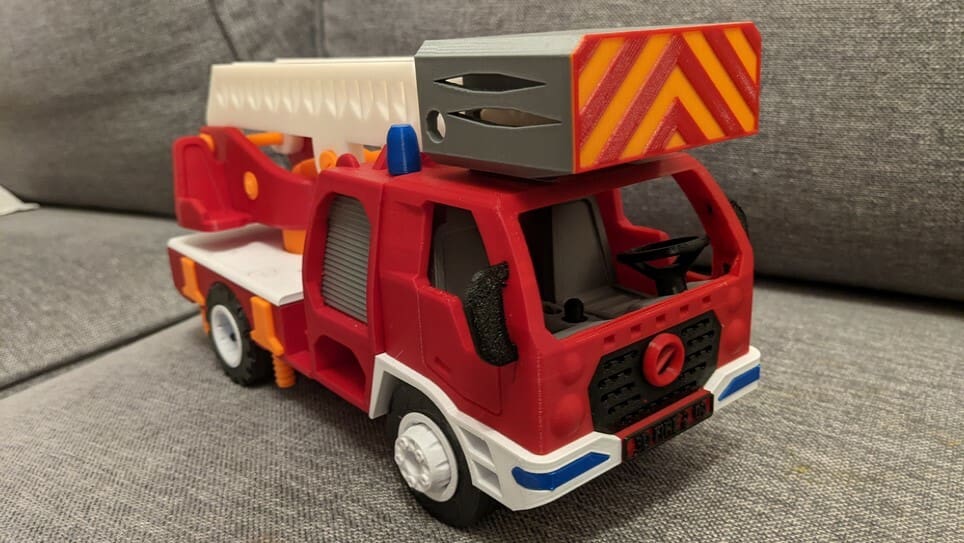
A simple and totally 3D printed fire truck toy with movable parts, such as rotating wheels and an extendable ladder that makes the truck quite life-like. This is a great toy to keep watch over your new cereal box townhouse neighborhood!
This print does require some building, so the maker has shared images on Thingiverse that show the step-by-step assembly of the truck, which is quite easy to follow. The maker also shared that his model was printed using PLA with a 0.2-mm layer height and 15% to 20% infill.
- Who designed it? sasha19md
- How printable/popular is it? 21 makers in the community have printed this toy truck and shared their takes, which has received over 43,000 downloads.
- Where to find it? Thingiverse
Party Glasses
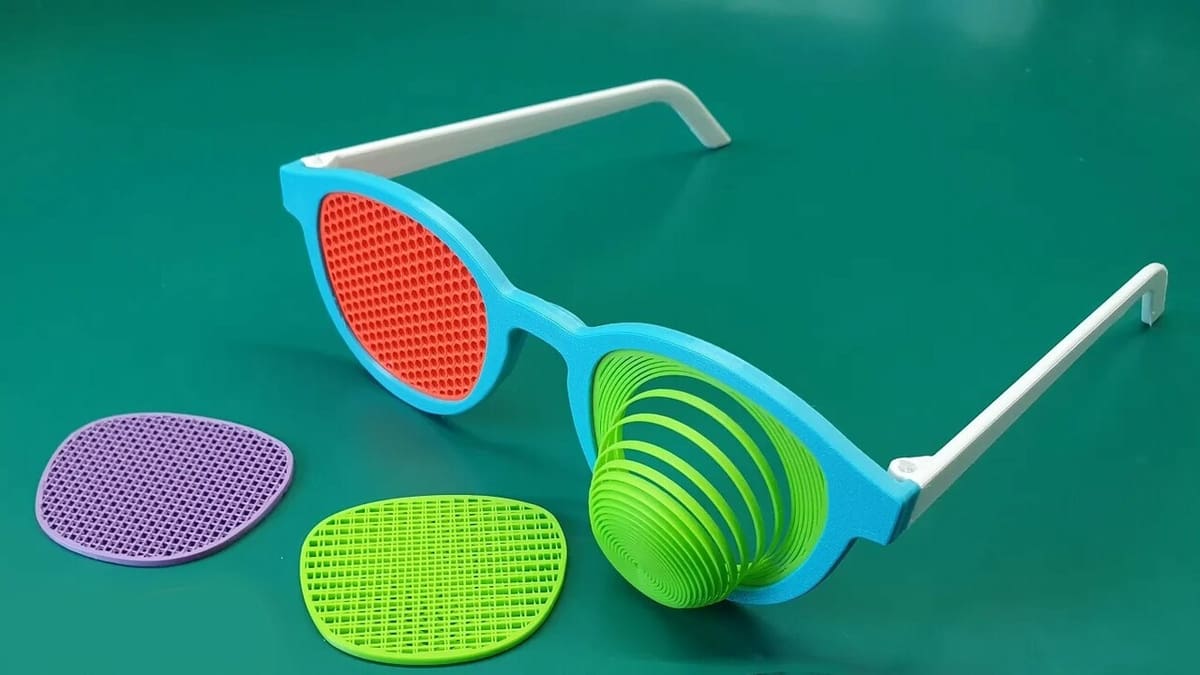
These are a one-of-a-kind pair of glasses with interchangeable lenses that come in various sizes or can be scaled to fit the wearer.
As you can see, the various lens designs are due to the use of different infill patterns and densities used to print them. Not only that, but you can also add your own custom design, such as any pattern, word, or art, similar to the one posted by ricky0351 that has “Cha-Cha” written on the lenses.
The designer recommends printing the glasses with PETG at a 50% infill. The lenses can be printed in PLA with your preferred infill pattern and percentage but with zero top and bottom layers. With these, your child will be the star of the party!
- Who designed it? __sh
- How printable/popular is it? These glasses have over 400 downloads, 2 remixes, and 3 recorded makes.
- Where to find it? Printables

Sea Duck
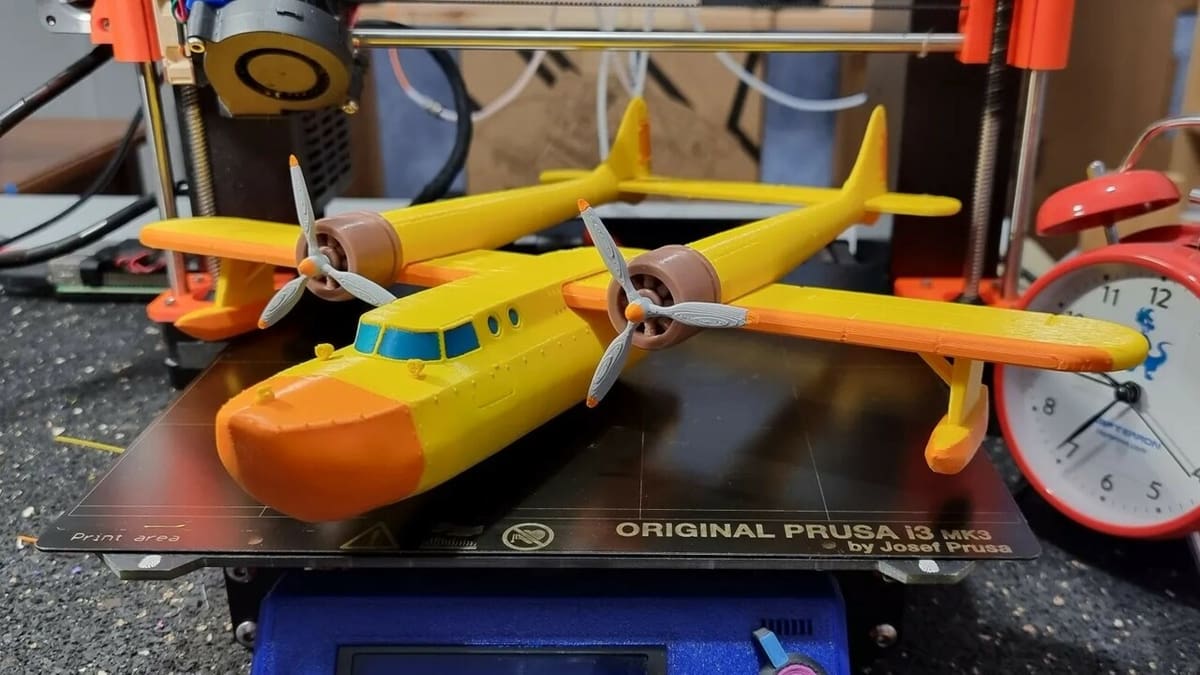
Those who are familiar with Sea Duck know that it’s an aircraft from the animated show called TaleSpin. This is a simple model plane that’s completely 3D printed. Plus, it can be painted, which can be a fun activity for the kids.
Sea Duck is a seaplane that can take off and land on water, hence the floats and ship-like design of the plane. Since there are no suggested print settings, you can experiment and play around to get the perfect 3D print. Several people from the community have shared their makes, so this shouldn’t be a difficult project. Just don’t forget some paint to make it your own!
- Who designed it? Grafit
- How printable/popular is it? With more than 1,200 downloads, 570 likes, and 20 makes, this plane model is quite popular on Printables.
- Where to find it? Printables
Slinky Machine
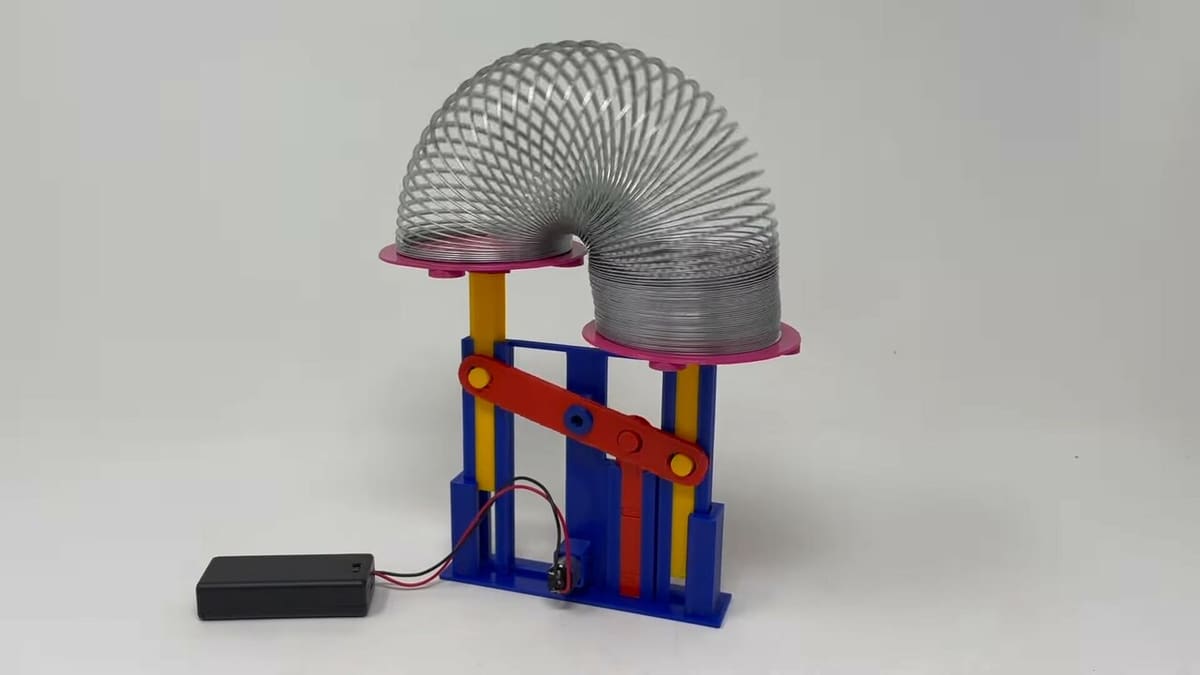
When the slinky moves from one hand to another or goes tumbling down a flight of stairs, one thing is for certain – it’s quite fun to watch.
This mechanism takes out any manual effort of putting the slinky in action. The machine has motors, batteries, magnets, and 3D printed parts – all to keep the slinky in motion forever! Or at least until the battery runs out.
You can follow the complete guide to building this machine on Instructables. For the 3D printed parts, the designer suggests a 0.15-mm layer height and 20% infill for a successful print.
- Who designed it? gzumwalt
- How printable/popular is it? Instructables reports over 5,200 views, 72 likes, and 3 makes for this machine.
- Where to find it? Instructables
Finger Skateboard
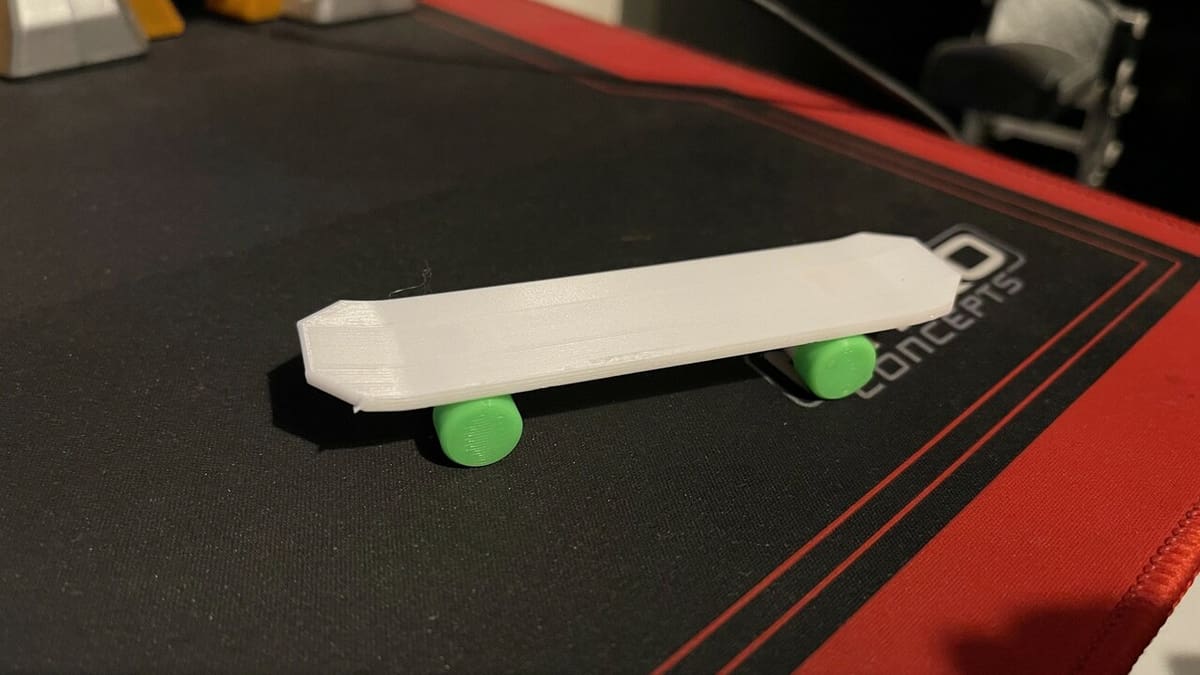
The Finger Skateboard is a small and fun toy that has captivated children and adults alike with its precise assembly and easy 3D printing. With its pieces designed to fit perfectly, this toy doesn’t require glue thanks to the small tolerances and intentionally snug fit. Plus, it’s a joy to print, assemble, and play with!
Kids will love customizing their own decks and wheels, while adults can also enjoy the nostalgia of a fun pastime. It’s a perfect way to spend time and practice your 3D printing skills while having fun!
Make sure to use supports for the board during printing, but the axles, axle inserts, and wheels don’t need any. Additionally, round the axle part with 0% infill and 1 perimeter to avoid seams. A layer height of 0.1-0.2 mm is recommended for best results, but if you’re not sure of what settings to go for, feedback from other users can offer valuable insights into specific adjustments and printing experiences as well.
Remember to have fun during the printing, assembly, and, of course, playing experiences!
- Who designed it? MeisterEdel
- How printable/popular is it? With 1,100 prints and 1,400 downloads per MakerWorld, this is one popular and easily printable model.
- Where to find it? MakerWorld
FingerDigger
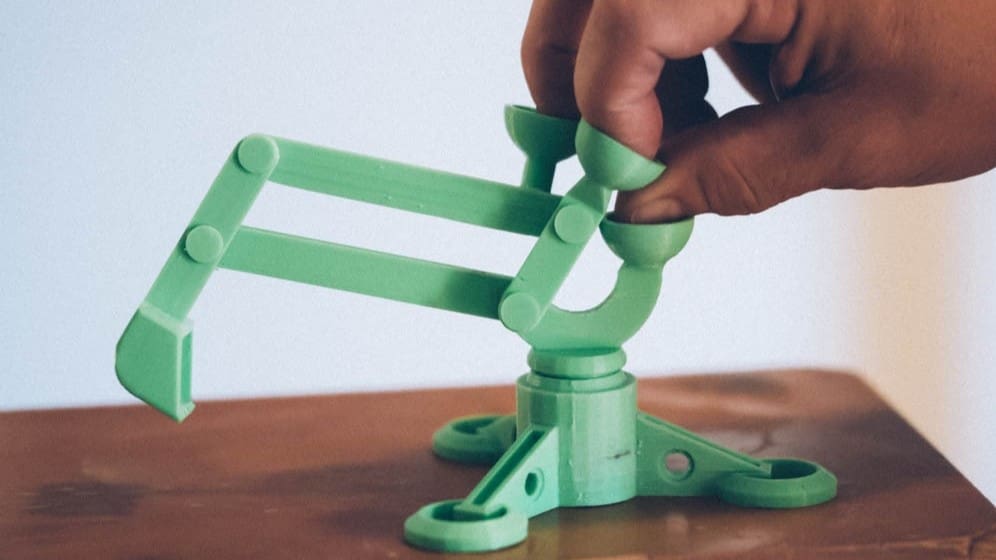
This model is a scaled-down version of the popular sandbox digging toy made totally from 3D printed parts and the ability to control its movements with your fingers.
Once all of the parts are printed, all you have to do is press fit some pegs into the links, arms, and axle to assemble this digging toy. Under supervision, your kid could easily do it as well.
You can seek fossils in your potted plant, pick Skittles from the floor, or dig in the cat litter box (yuck!). Alternatively, you can print a larger version and take it outside to the sandpit. Your children and their friends will surely have fun with a few of these prints.
- Who designed it? Zippitybamba
- How printable/popular is it? From its over 24,000 downloads, this toy has 51 makes and 7 remixes.
- Where to find it? Thingiverse
License: The text of "The 30 Best 3D Printer Projects for Kids" by All3DP is licensed under a Creative Commons Attribution 4.0 International License.