There are nearly limitless modifications for 3D printers floating about the internet. Most of them are useful (at least to some people), and many of them can be printed at home. We’ve narrowed it down to a list of upgrades that should work on just about any 3D printer.
But where to start? Each printer is different and what you want to achieve with it will largely dictate which upgrades or modifications are most important to your application. Here, we’ve attempted to provide a sampling of highly useful and popular modifications that serve to improve the quality of your prints, upgrade your printing experience, and provide the best peace of mind you can have while doing so.
We’ve even got ideas to completely swap out a part or expand your printer’s capabilities.
In addition to describing the different upgrades and mods, we’re including how easy (or challenging) it is to replace or add them to your setup, where you can find them, and how much they can cost.
If you see a printable upgrade you like, but your machine needs some work before it’s ready to print its own mods, try a service like Craftcloud. With partners around the world ready to print and ship your new parts, you can focus on what’s important (like color-coordinating your printer accessories).
Print Quality
First up are mods that will physically improve the quality of prints from a given printer. Such mods could be hot-end related, like fan ducts, as well as stability upgrades like belt tensioners.
Nozzle
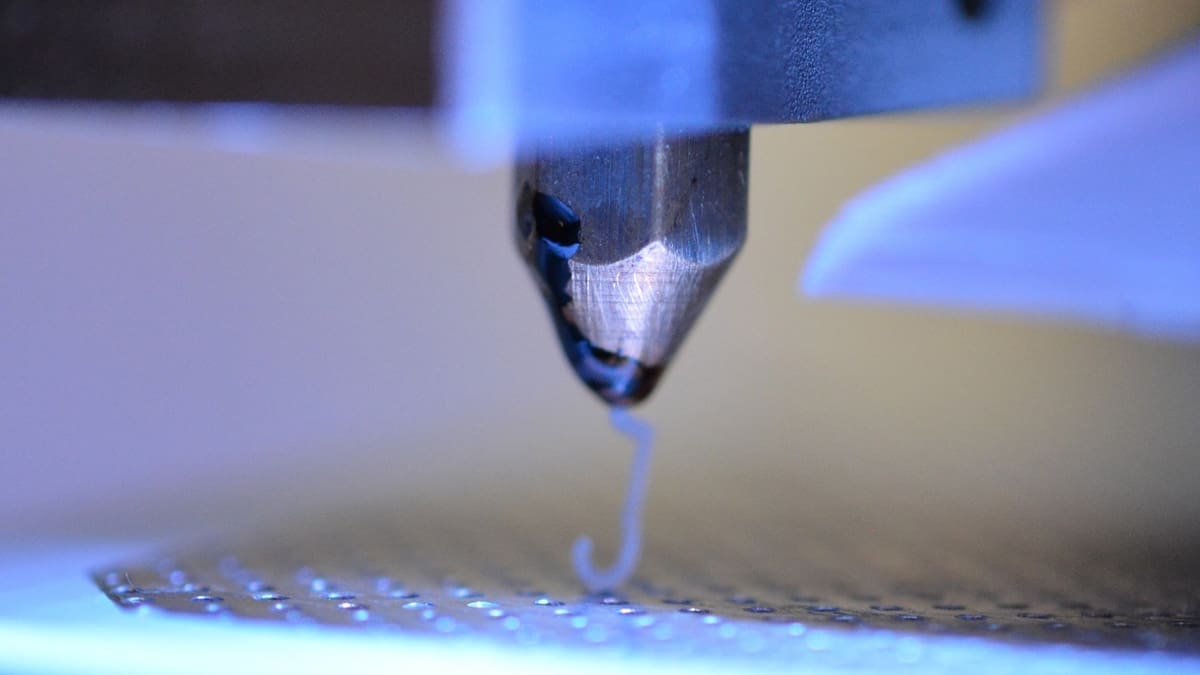
If you stop to think about it, your printer’s nozzle is really a consumable part. It needs periodic cleaning and eventual replacement. It’s also an important aspect to consider when thinking about print quality, print speed, and filament material. Nozzle material and inner diameter can have a dramatic impact on your final printed pieces.
When people talk about nozzle sizes, they usually mean the bore size or inner diameter of the nozzle. The current industry standard for most consumer 3D printers is 0.4 mm. Generally speaking, larger nozzle sizes will give faster print times and will have fewer issues with abrasive filaments. Smaller sizes will give higher precision and detail but are limited in speed and even in some materials, although supports can be easier to remove. Consider getting sets in various sizes to swap out as needed.
Nozzles also come in different materials such as brass, stainless steel, and even hardened steel. Brass is the most commonly used and works well with most filaments that are non-abrasive and don’t require super-high temperates. Stainless steel can tolerate higher temperatures than brass, up to 500 °C, and does better with abrasive materials like carbon fiber and wood-filled filaments. More costly than the others, hardened steel nozzles can withstand frequent use of the most abrasive filaments or years of use with regular ones.
- Difficulty: Easy
- Find it at: Online retailers – Creality Hardened Steel Nozzle Kit, Bondtech CHT, Olsson Ruby
- Price: ~$55 (depending on the set and characteristics)
Fan Duct
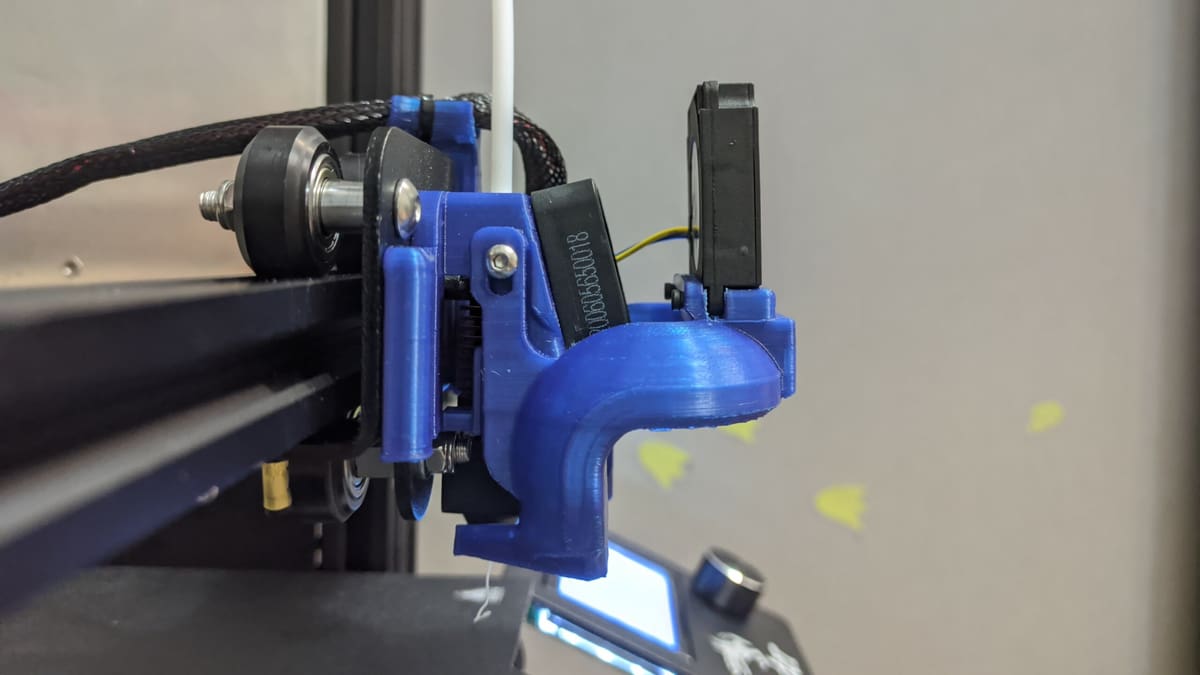
When printing with materials like PLA, cooling the molten plastic as soon as it leaves the nozzle is very important to achieving good printing quality. For this reason, one of the best upgrades for any 3D printer is a shiny new fan duct.
We like this design from Thingiverse maker dpetsel because it’s widely recognized by the community as one of the best, most reliable fan ducts that will fit a wide range of different printers.
- Difficulty: Easy
- Find it at: Thingiverse
- Price: ~$2
Filament Dryer
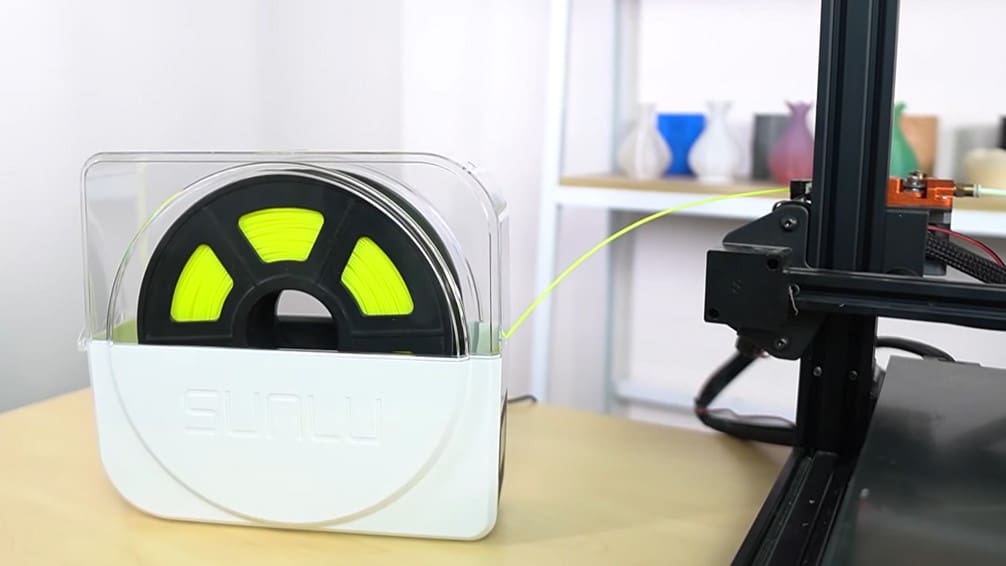
Moisture is the enemy of all filaments and can lead to real printing problems. Some filaments such as PETG, TPU, and nylon are more hygroscopic than others. Not to be confused with a dry storage box, filament dryers can actively pull moisture out of your filament. Either by heating alone or heating with desiccant, these devices reduce the amount of moisture content in your filament and thereby improve your print quality.
While some models, such as those from Sunlu and eSun, allow for the filament to be fed from the box directly to your printer while printing, these devices are only half the battle. Properly storing your filament to prevent moisture absorption in the first place is also highly important.
- Difficulty: Easy
- Find it at: Online retailers – Sunlu, Polymaker, eSun, Sovol
- Price: ~$44 (depending on the brand)
Corner Bracket

Keeping your printer frame square and sturdy is essential to maintain dimensional accuracy and to reduce wear on moving parts over time. To this end, it is a good idea to print out some corner brackets, like these from Thingiverse maker mce076, to brace the frame of your printer. As a bonus, they also help reduce Z wobble!
This design will only work with printers that use aluminum extrusions, but other designs exist for different frame types.
- Difficulty: Easy
- Find it at: Thingiverse
- Price: ~$1
Belt Tensioner
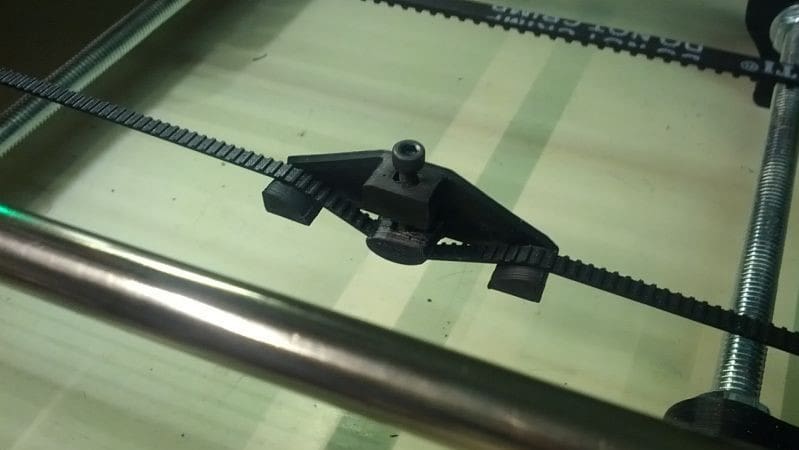
Over time, your timing belts can stretch out, and this means your prints can lose dimensional accuracy. The best way to combat this stretching is with belt tensioners.
Several designs are available for a range of printers, but we like these simple belt clips from Thingiverse maker SuperSonicFlea because they’ll work with any printer design.
- Difficulty: Easy
- Find it at: Thingiverse
- Price: ~$1
ABL Sensor
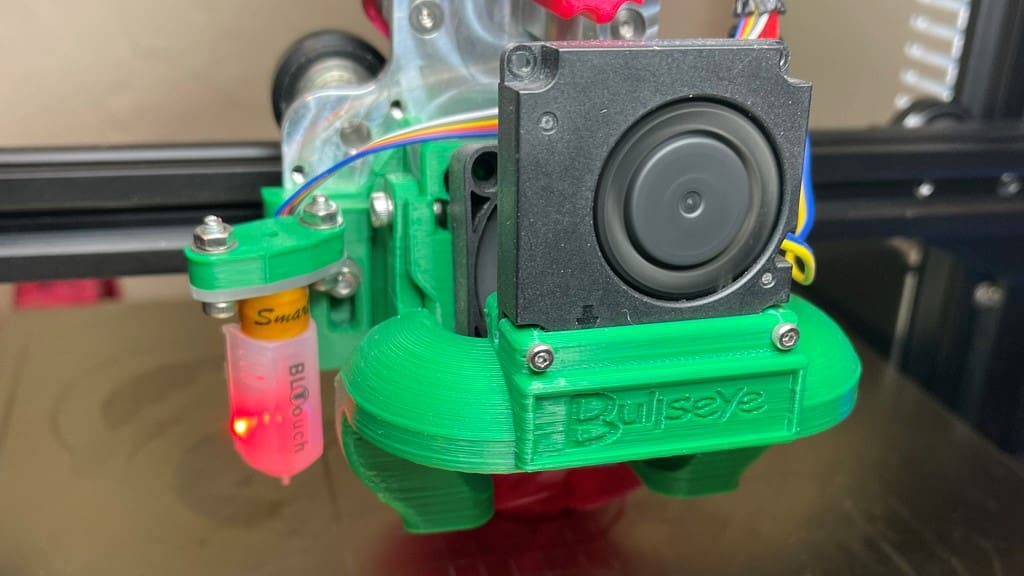
A perfectly level bed is likely the most important part of a good print. An improper level can cause a variety of problems, including (but not limited to) delamination, warping, elephant’s foot, and so on.
The best way to keep your bed as level as possible is to install an automatic bed leveling (ABL) sensor like the BLTouch or a PINDA probe. Once you’ve leveled your bed manually, the sensor is able to probe the bed and automatically account for inconsistencies while printing.
- Difficulty: Intermediate
- Find it at: Online retailers – BLTouch, Creality CR Touch, PINDA probe
- Price: ~$40 (depending on the brand)
TL Smoother
Getting artifacts like salmon skin in your prints? You should look into getting some TL smoothers for your motors. These upgrades are very inexpensive and are very easy to install, thanks to their plug-and-play setup. Your printer can get to printing top-quality parts in a jiffy!
- Difficulty: Intermediate
- Find it at: Online retailers
- Price: ~$2
Linear Rails

Most consumer 3D printers use V-slot extrusion with rubber wheels. This system was made popular by the first Ender 3 and it has become standard. Unfortunately, this wheel type tends to consume relatively fast, leading to inaccuracies in the prints. For this reason, if you want to make your machine more reliable, you should consider swapping out wheels for linear rails. They come stock on some high-end custom printers, such as Voron and RatRig machines.
You can find many projects out there for different kinds of models, and it’s one of the most popular mods for Ender 5-style machines. For this kind of printer, linear rails are even more effective compared to i3-style machines, which feature a bed that moves horizontally and limits the speed. An option that you can go for that has been tested by other community members is this 3D printable linear rail conversion kit.
This model uses MGN12H linear rails which are the most common for this kind of modification together with the MGN9H. The linear rails are installed on both the X- and Y-axis, which is a common practice. Keep in mind that if you go down this path, you’ll need to update the print head as well so it will be able to move on the new structure.
- Difficulty: Advanced
- Find it at: Amazon, Thingiverse
- Price: ~$100 (depending on the quality of the linear rails)
Experience
These mods will improve the overall experience of using your 3D printer. This type of upgrade includes items like new bed leveling knobs or a better spool holder.
Adhesive
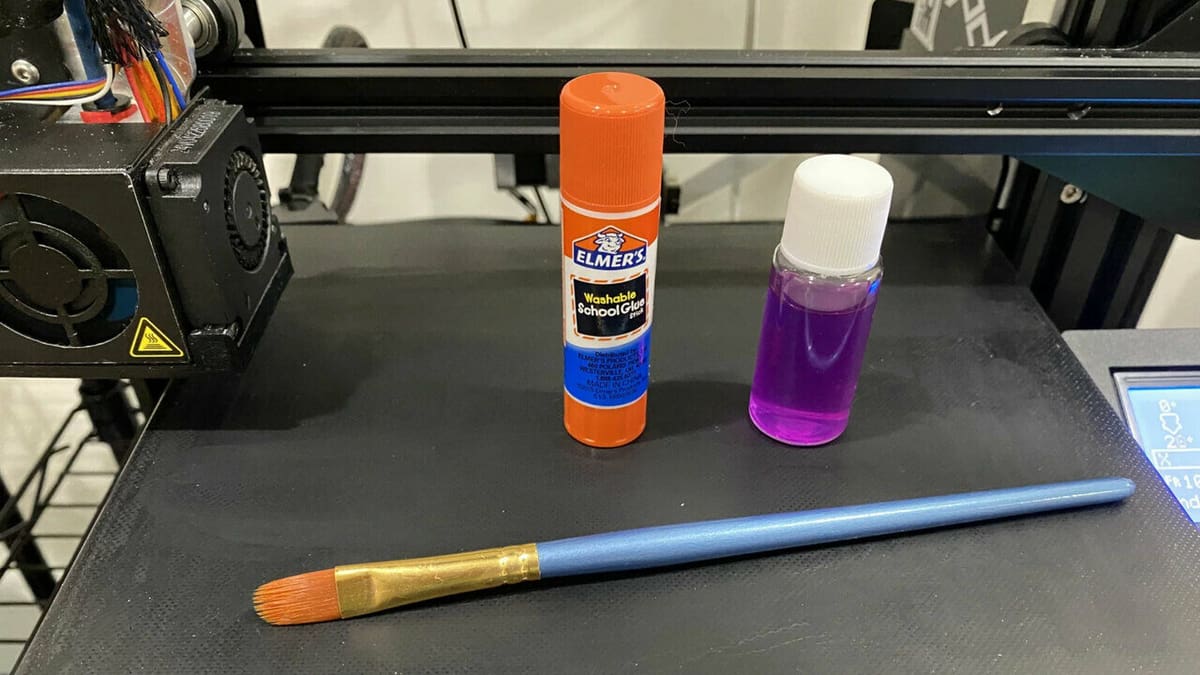
While using glue sticks and hairspray are considered blasphemous by some, others think them to be all well and good. Others swear by painter’s tape and feel it’s the only surface preparation needed. Whatever your thoughts, these generic products can vary in quality and are a bit of a hassle to use. Hairspray in particular can be damaging to your printer as overspray can coat and degrade some surfaces while also attracting dirt and debris.
One of the issues is that none of these are actually designed to be used with 3D printers. If you must use an adhesive, one designed specifically for use in 3D printing is a much better option. 3DLac, Layerneer Bed Weld, and Magigoo are among the most popular 3D printer adhesives, and many of these products have applicators that ensure you put it exactly where needed.
- Difficulty: Easy
- Find it at: Online retailers – Magigoo, 3DLac, Layerneer Bed Weld
- Price: ~$20
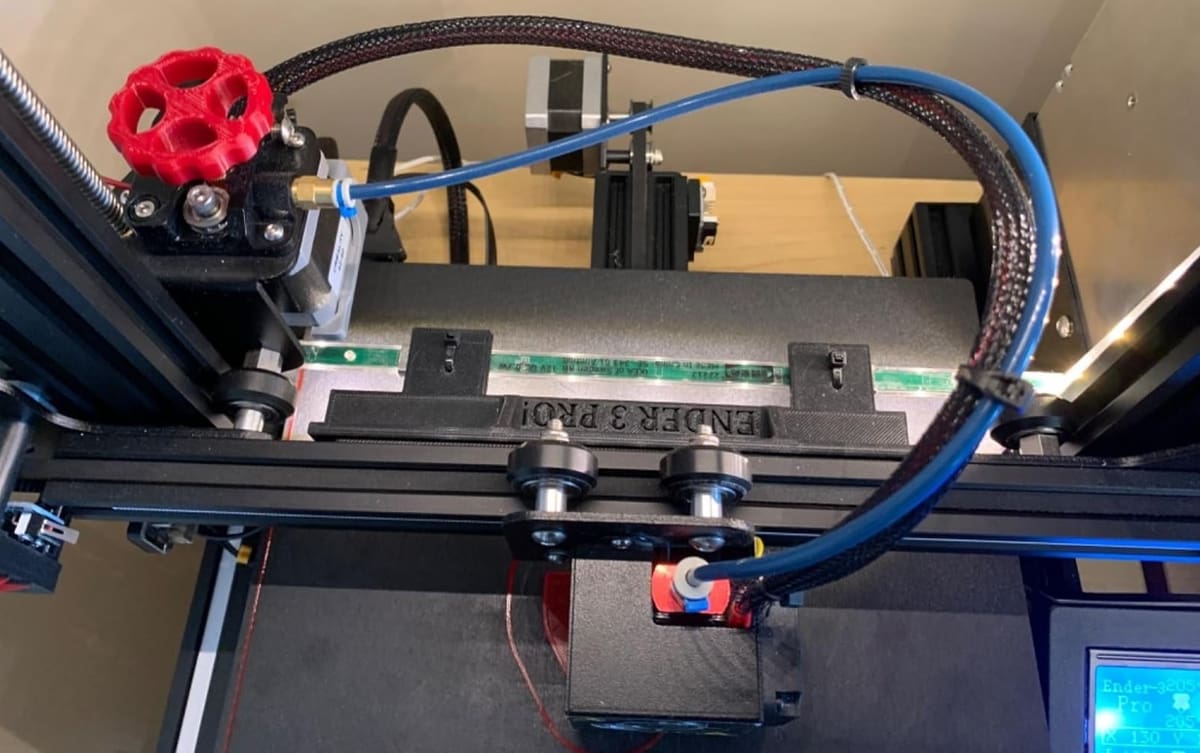
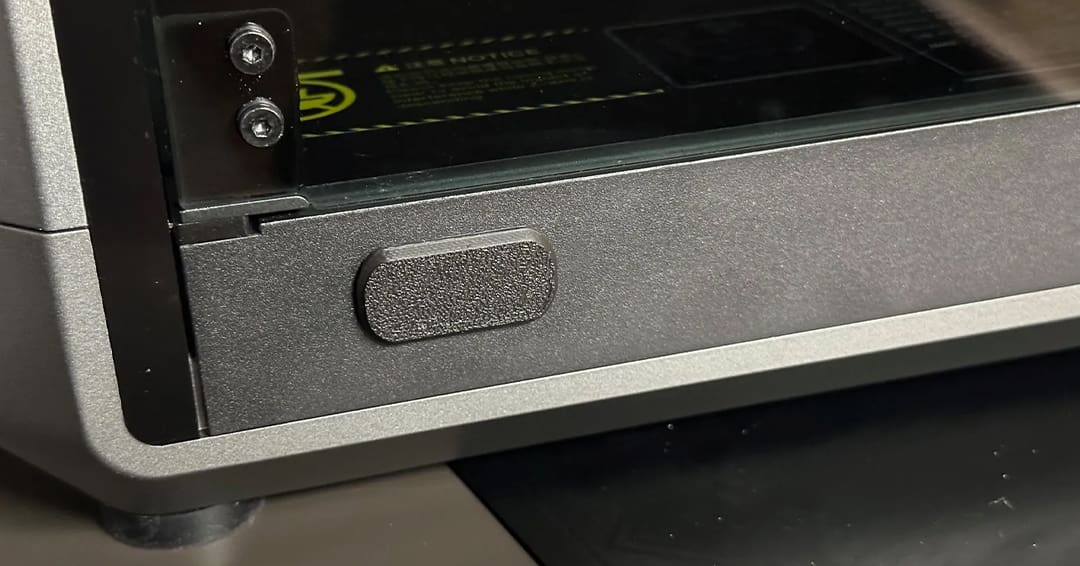
Bed Leveling Knob
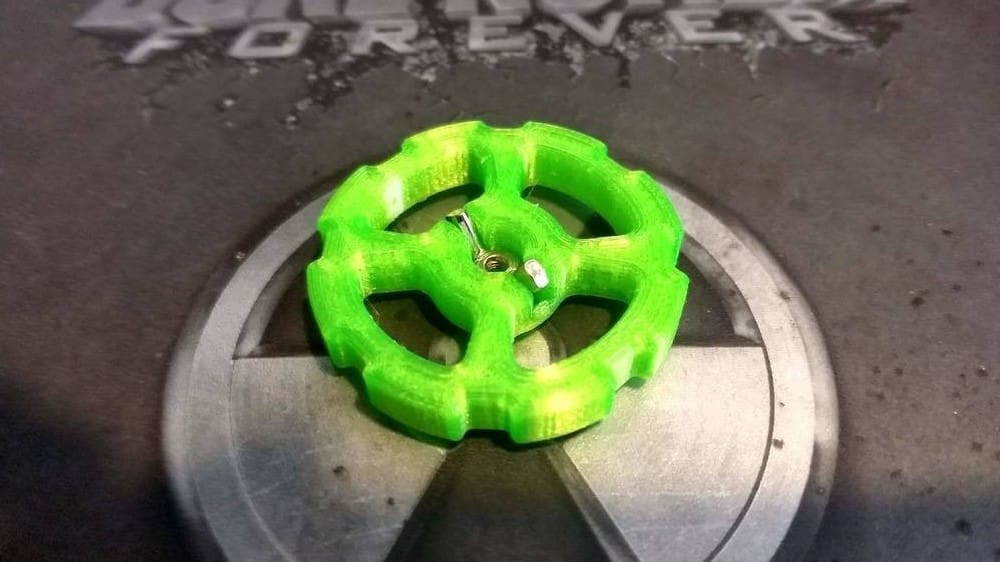
Are you tired of trying to get a nicely leveled bed with those fiddly little knobs that came in your kit? We’ve got a solution for you! These knobs by Thingiverse maker Eyegoresky are nice and big, allowing for precise, easy adjustment of your bed height. They’re designed to fit around a 3-mm wing nut.
- Difficulty: Easy
- Find it at: Thingiverse
- Price: ~$2
LED Lighting
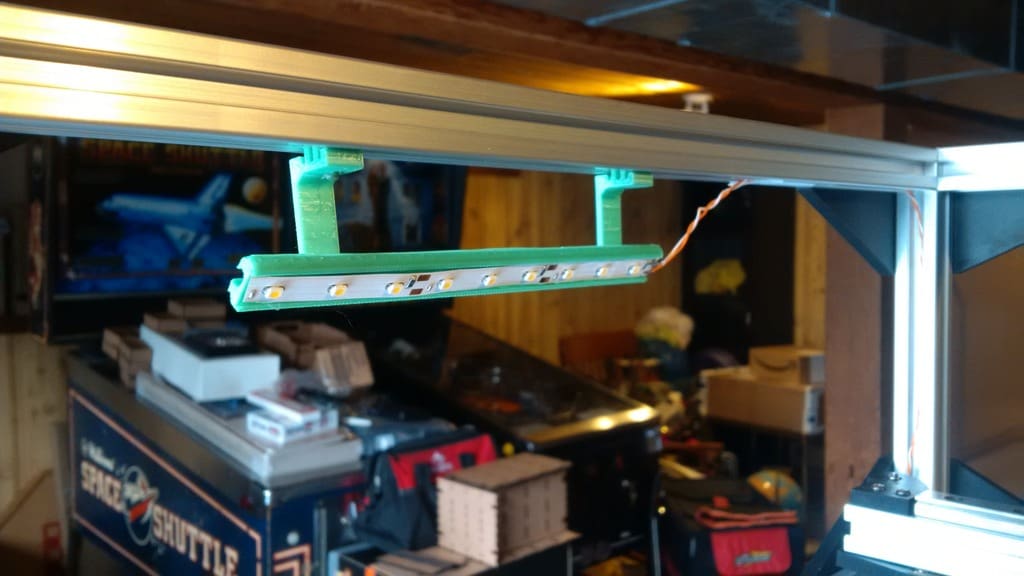
Being the rather bulky, noisy, and somewhat unsightly machines that they are, 3D printers tend to get tucked into dim corners and garages, making it hard to see all the parts. To combat this, we suggest adding a strip of LED lights to brighten up your printing experience and reduce the strain on your eyes when checking to see how prints are going.
To mount it, we’d suggest using a printed structure that attaches straight to the printer frame, though there are plenty of creative alternatives out there!
- Difficulty: Easy
- Find it at: Online retailers, Thingiverse
- Price: ~$15 (depending on the LED stripe quality)
Build Surface
Upgrading your bed surface may be the improvement your printer needs to take your prints to the next level. Options include glass, flexible, magnetic, as well as specialized textures and materials designed for use with specific filaments.
Some makers swear by glass beds for the reliability and shiny surface finish. Magnetic and polypropylene beds are also popular for their ease of part removal. If you’re looking for something like an easy-to-remove magnetic bed that also offers outstanding surface adhesion, consider a PEI system like the plates from Prusa Research.
Alternatively, there are stick-on surfaces like BuildTak that can be used multiple times and come in multipacks for easy replacement. Although they come in many sizes, some versions of these stickers can even be cut to size for any printer bed.
- Difficulty: Easy
- Find it at: Online retailers – BuildTak Print Surface, Creality Flex PEI Sheet, Prusa Smooth Spring Steel PEI Sheet, Creality Tempered Glass Build Plate
- Price: ~$25 (depending on the brand and the size)
Spool Holder
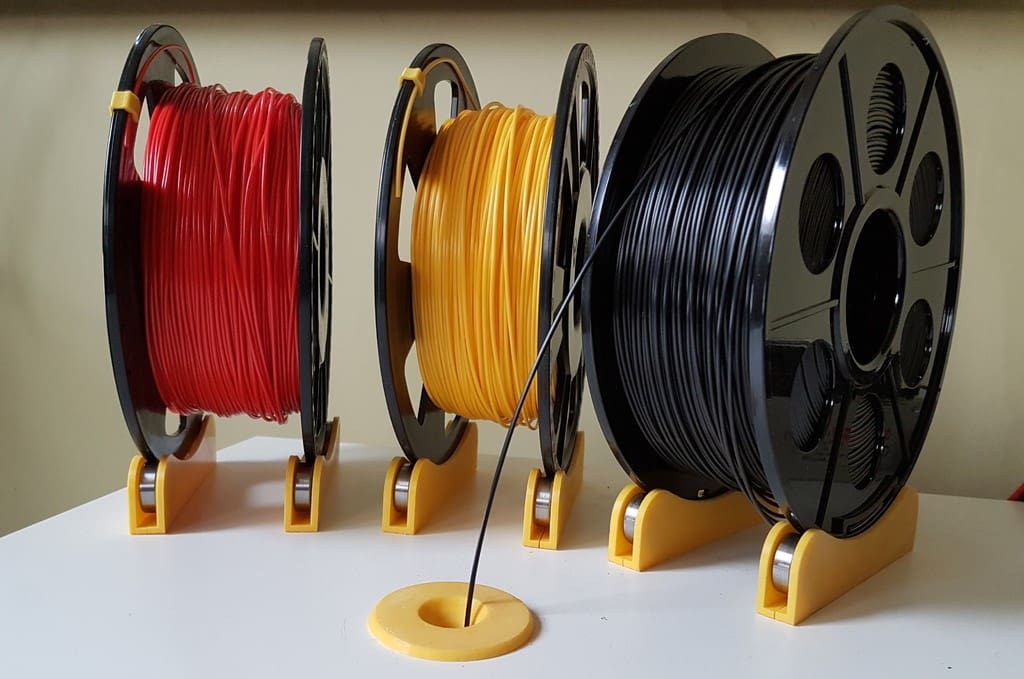
A good addition to any printer is a new spool holder. This popular design by Thingiverse maker filamentry incorporates bearings to help the filament reel roll smoothly, reducing strain on the extruder. It will fit just about any type of filament reel by adjusting the spacing. Best of all, the minimalist design makes it easier than ever to switch out your reel for a different one whenever you want! Genius!
- Difficulty: Easy
- Find it at: Thingiverse
- Price: ~$5
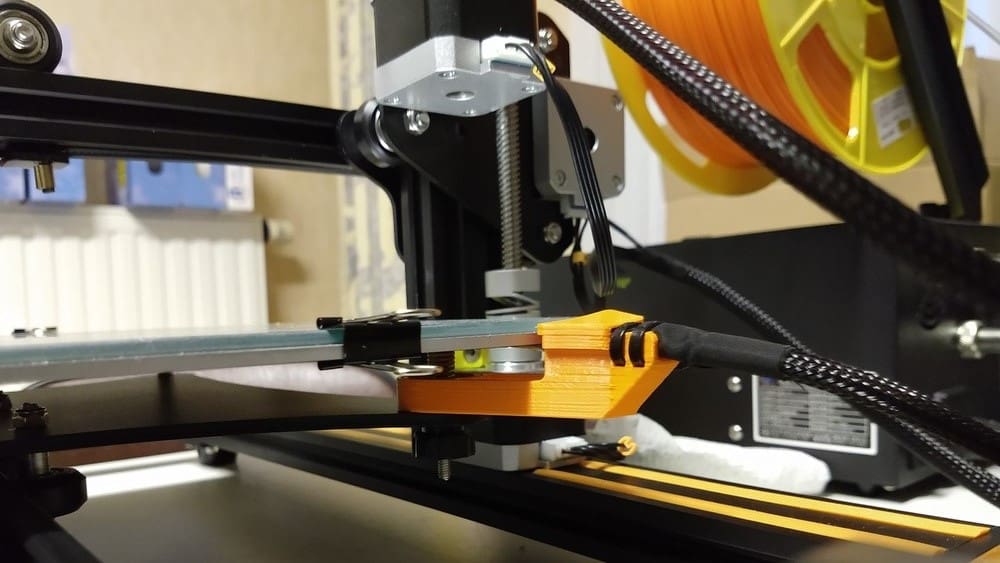
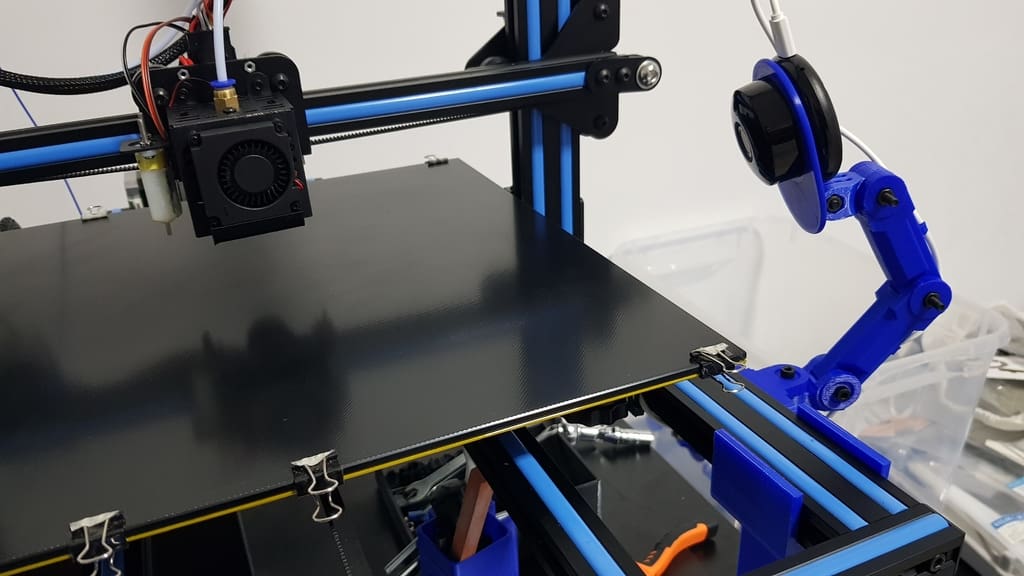
Cable Chain
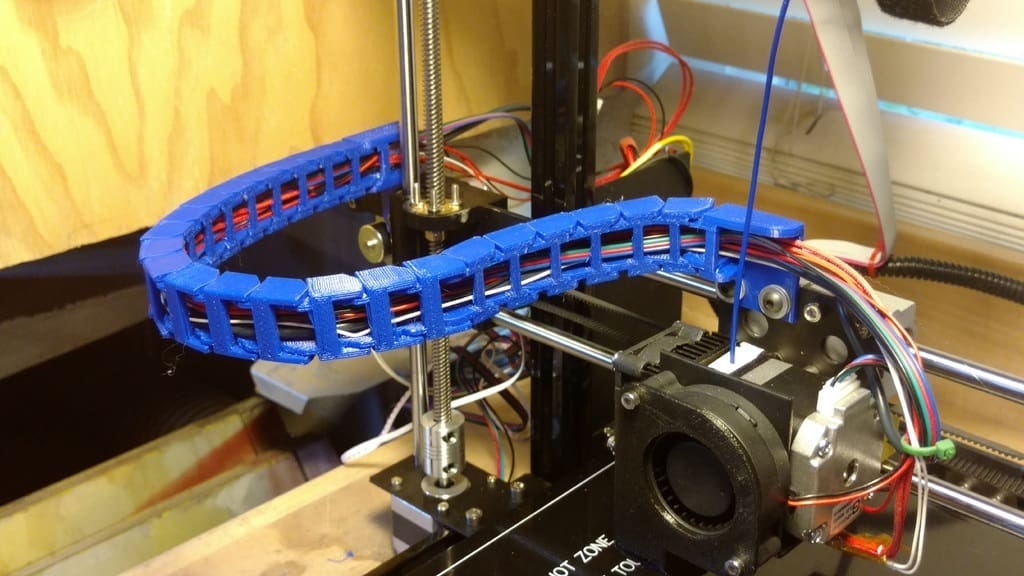
3D printers use lots of electronic components so cables can often end up tangled or messily lying all around. This can cause problems. For example, a cable can get caught when the machine moves and become damaged. To avoid this, a simple and cool solution is the cable chain. This structure protects your cables and adds style to your printer.
A cable chain can be either purchased or 3D printed. A great model that you can print is this one on Thingiverse. The chain is made up of several links depending on the length that you need. It can be installed on both the XZ-axes and the Y-axis, and it’s secured to the machine via four M2 screws. You can either use available holes on your machine or print an additional platform that fits your printer. And if the original design doesn’t work for you, there are many premade models among the 108 remixes.
- Difficulty: Intermediate
- Find it at: Thingiverse
- Price: ~$2
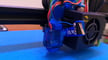
Stepper Damper
Tired of hearing those high-pitched motor noises all day? A good mod to reduce the amount of noise your printer makes is a set of stepper dampers! Not only are they relatively cheap and easy to install, but the difference in noise levels is also almost immediately noticeable.
- Difficulty: Intermediate
- Find it at: Online retailers
- Price: ~$5
Enclosure
Enclosures give your printer a more temperature stable, draft-free environment. This is particularly important for delicate prints or filaments that are prone to warping. ABS and PC, for example, are extremely difficult to print without an enclosure.
Much like printers, enclosures range from basic to highly sophisticated, with costs ranging widely to match. A simple tent-style cover could be under $60, while acrylic enclosures with full visibility could run in the hundreds.
For the DIY crowd, among the many options, the Ikea Lack table has become a popular option to print most parts yourself, while kits to build it are also available. There are also some printer-specific designs, like Creality’s Ender 3 (V2/Pro) and Ender 5 (Pro/S1/Plus), Prusa’s Mk3S(+) and MK4, and Bambu Lab’s P1P.
Whichever option you choose, keep in mind not just your printer’s size but also any peripherals you might want to keep in or out of the enclosure.
- Difficulty: Intermediate
- Find it at: Online retailers – tent-style cover, Prusa, Creality
- Price: ~$30 (depending on the project and size)
Peace of Mind
These next mods do exactly what the name suggests: They make your printer safer and more reliable. Such mods include wire strain relief brackets and mounts for webcams to monitor your prints.
Quality PTFE tubing
Most tubing in a Bowden setup gets the job done. But over time, heat and friction can loosen things up and degrade your prints, so why take that chance?
High-quality PTFE tubing offers better flexibility, abrasion resistance, and chemical resistance. It’s a small investment now that might save a print later.
- Difficulty: Easy
- Find it at: Online retailers
- Price: ~$15
Extruder Visualizer
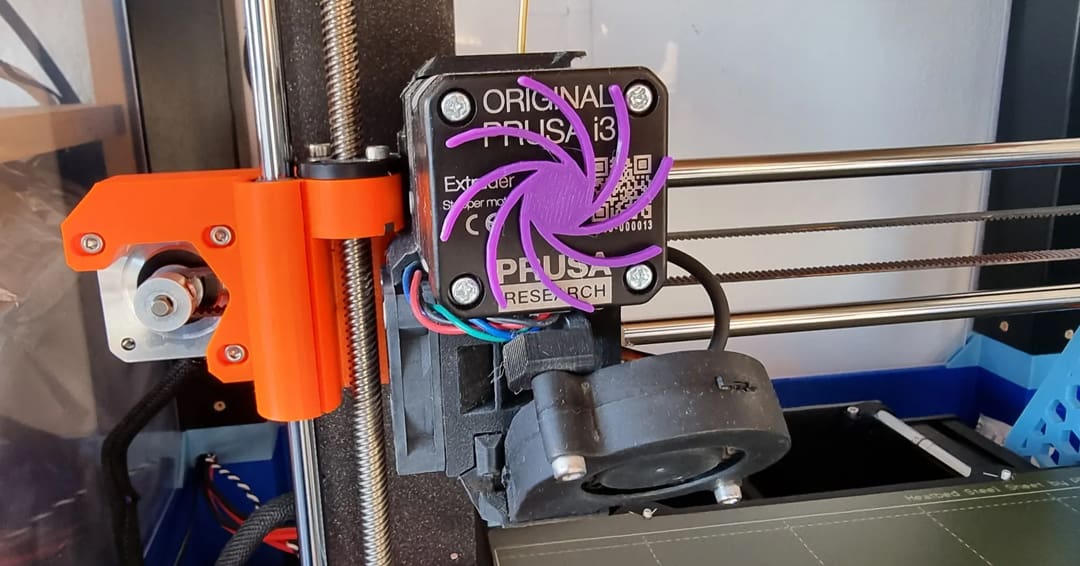
FDM printing works by depositing fused material in layers on top of each other. One of the main protagonists of the process is the extruder that pushes the filament in and out of the hot end. This next mod helps you keep an eye on this component. The extruder visualizer rotates with the extruder so you can easily know if there are problems when the visualizer isn’t working.
One of the most popular extruder visualizers out there is this model by Printables maker Cube3DWorld. Installing it is extremely simple: glue a 3-mm neodymium magnet to the printed part and the magnet will then stick to the extruder motor.
You can choose from no less than 26 models to match your style! The model was designed for Prusa’s MK2 and MK3 machines, but it’s compatible with all machines that have the extruder motor exposed in some fashion. For example, some users have shared their makes for the Ender 3 S1 and Sovol SV06.
- Difficulty: Easy
- Find it at: Printables
- Price: ~$2
Wire Strain Relief Bracket
We’d recommend investing a bit of time and filament into printing a strain relief bracket for the wires on your heated bed. This little part may not seem like much, but it will keep the wires from breaking off and shorting with the repeated motion of the bed.
There are many designs for different printer models. We’ve listed a few of the major players here, but search your favorite file repository to find one designed for your printer!
- Difficulty: Easy
- Find it at: Thingiverse – Anet A8, Artillery Sidewinder X1, Creality CR-10, Creality Ender 5, Tevo Tornado
- Price: ~$1
Drawer
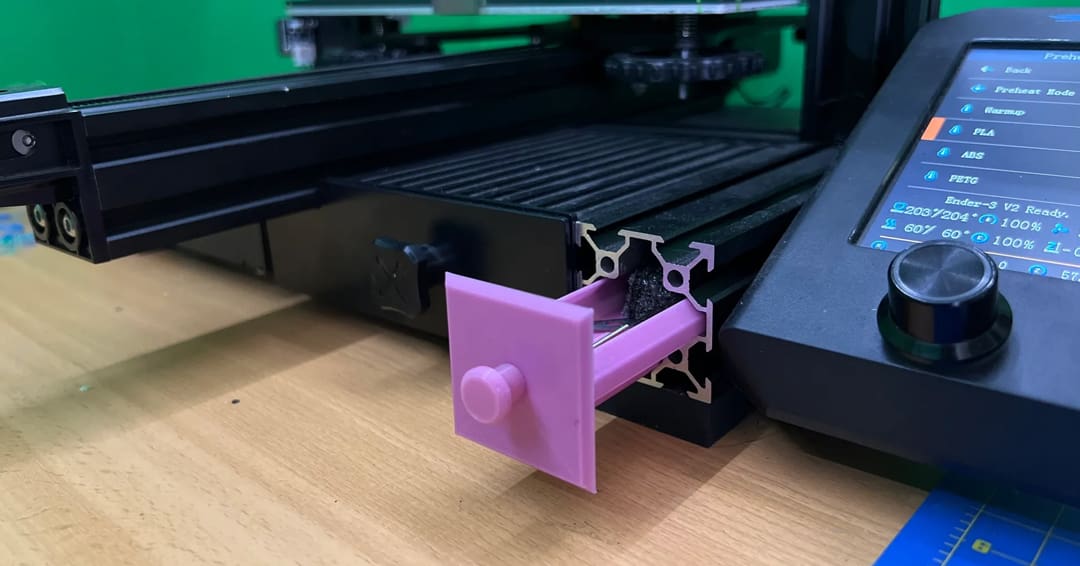
When working with 3D printers, you need lots of tools, such as pliers, Allen keys, scrapers, and more. To keep all these instruments close at hand, you can print a drawer for your printer. There are numerous models that can be conveniently stored under the printer or on its side, so they won’t take up precious desk space.
Many designers have created models for different machines, based on their frames. We like this one in particular because although the model was designed for the Ender 3 V2, it’s compatible with all the 3D printers that use 4040 extrusion frames. These structures have been used since the release of Creality’s Ender 3 and they come stock on the vast majority of the machines on the market.
Installing this is as simple as 3D printing it, taking off the cover from the extrusion, and sliding the drawer into place. You can even choose between three versions available that differ for the structure of the knob and the hardware needed.
- Difficulty: Easy
- Find it at: Printables
- Price: ~$1
USB Dust Cover
USB ports are relatively new in the 3D printing world because SD cards were widely used before them. Today, the most common workflow involves uploading the file wirelessly, so USB ports are usually collecting dust. No more with this modification!
Every USB dust cover model that you can find will get the job done, as the USB port dimensions are universal. However, we particularly like this version by SHaDoW6 that’s been downloaded over 1,270 times! It was designed for the Creality K1 (Max) but, as we have said, it’s compatible with all the machines that feature a USB port. You can choose if you’d like the Creality logo on it and how strict you desire the tolerance.
- Difficulty: Easy
- Find it at: Printables
- Price: ~$1
PSU Covering
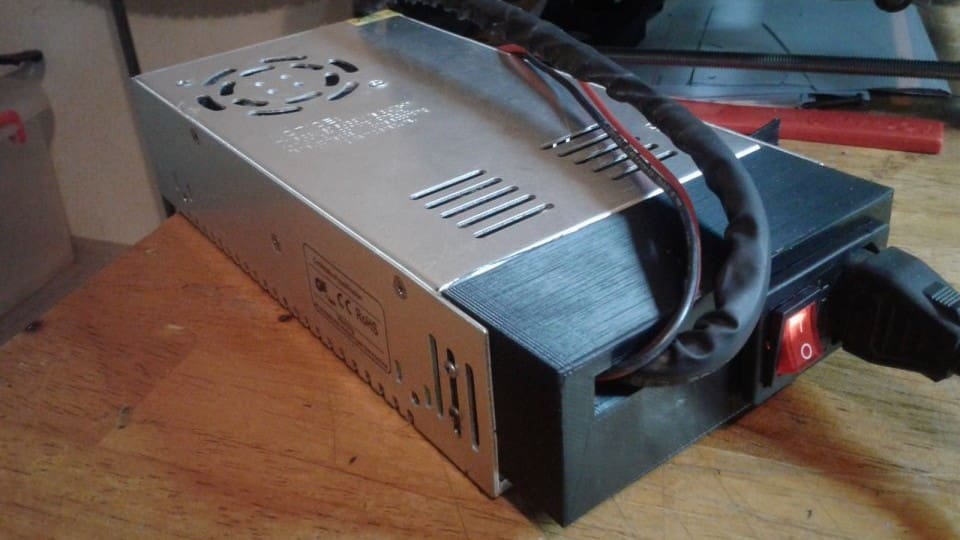
Another good safety feature to add to your printer is a cover for the PSU. Many cheaper printer kits do not come with one, and it gives the PSU a little extra protection.
A simple design like this one from Thingiverse maker beefinator will keep your printer nice and safe. It also provides a mounting point for an IEC switch, which will further reduce the hazards of mains voltage in relation to your printer.
- Difficulty: Easy
- Find it at: Thingiverse
- Price: ~$2
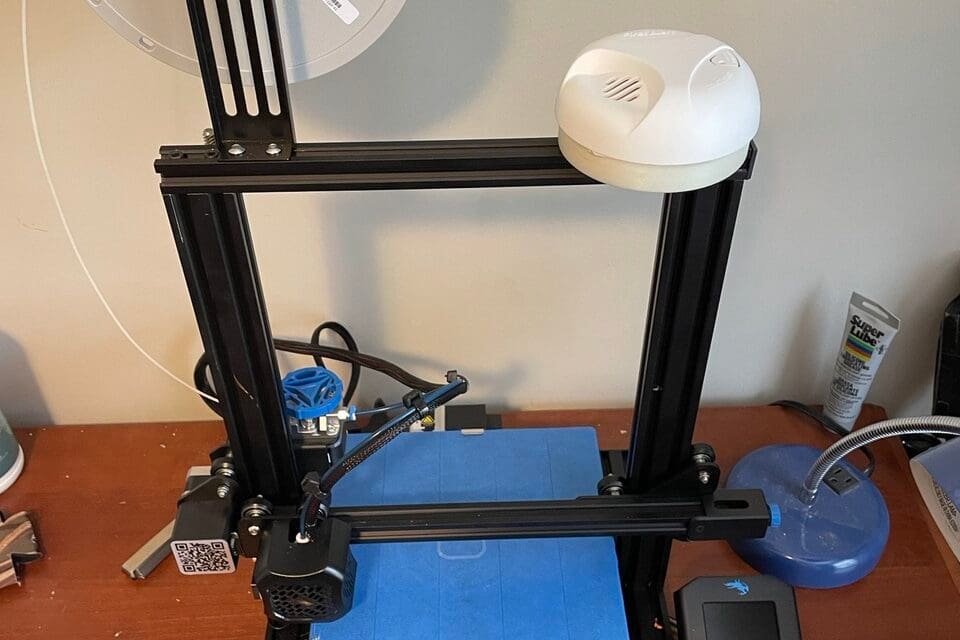
Webcam Mount
Maybe you don’t want a full Raspberry Pi setup (which we’ll go over further below), but you still want to monitor your printer using a nearby computer. In this case, a simple webcam mount can be very handy.
Various designs for these mounts exist, but we’ve picked one by Thingiverse maker RaffoSan because it’s fairly popular. It should fit most printer designs and a variety of cameras, so it’s a good starting point.
- Difficulty: Easy
- Find it at: Thingiverse
- Price: ~$3
Smoke Detector
Catastrophic print failures resulting in fires are rare, but they have happened. Be it from thermal runaway or massive piles of noodled filament from a failed print left unattended, fire is a very real threat when working with electronics and heating elements.
Even without print fails, some hot ends can go to 500 °C or more! So for peace of mind, a smoke detector should be placed near your printer or at least in the same room.
- Difficulty: Intermediate
- Find it at: Online retailers
- Price: ~$30 (depending on the brand)
Raspberry Pi
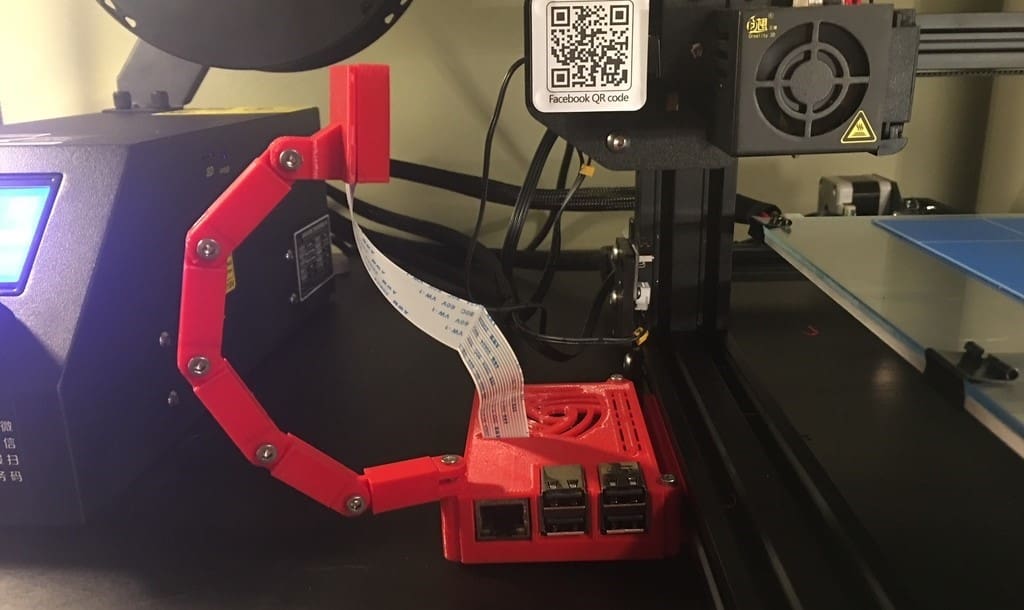
One of the most widely used systems for remotely accessing, monitoring, and controlling your 3D printers is the Raspberry Pi. These powerful little microcomputers run a version of OctoPrint that allows you to do everything from slicing a file remotely to taking time-lapses while simultaneously streaming live video.
So, if you want to be able to view your prints, check for errors remotely, and control your printer from the cloud, a Raspberry Pi might be the perfect mod for you! We’d also recommend printing out a matching case for your Pi.
- Difficulty: Advanced
- Find it at: Online retailers – Raspberry Pi 3B+, Raspberry Pi 4, Raspberry Pi 5
- Price: ~$45 (depending on the model)
Printer Rework
Finally, these mods involve completely replacing parts of the printer to improve or change their function. These sorts of mods include new extruders and control boards.
E3D V6 Hot End
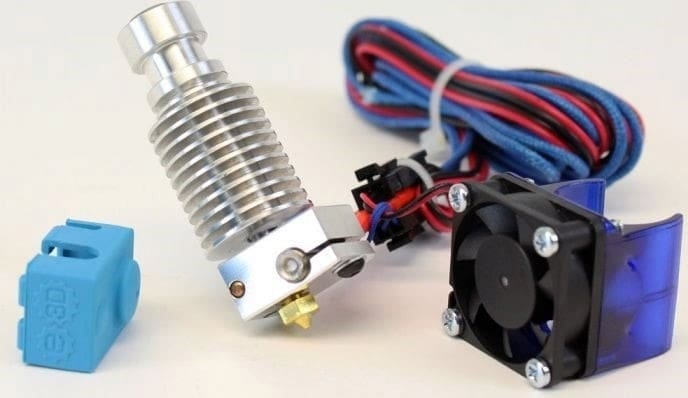
Want to expand the range of materials you can print with? An E3D V6 all-metal hot end can do this and greatly improve the performance and reliability of your printer.
A genuine V6 might not be the cheapest option on the market, but according to the community, it’s definitely worth the investment.
- Difficulty: Intermediate
- Find it at: Online retailers
- Price: ~$60 (depending on the model)
Extruder
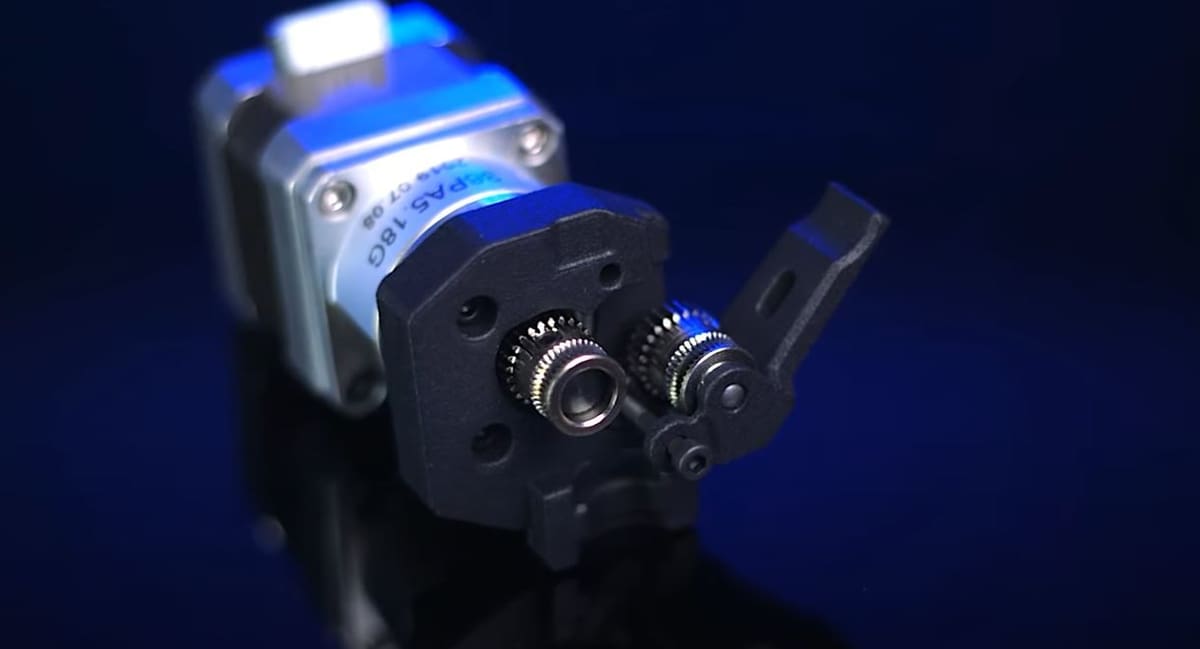
Most of the time, stock extruders are just fine for printing in everyday filaments like PLA and ABS, but what about those flexible materials? Installing a new extruder, like a Bondtech BMG or E3D Titan, will greatly enhance your printer by allowing you to print a wider range of materials more easily and accurately, without the worry of filament jams and other extrusion mishaps.
Each variety of extruder will have a different set of qualities, like torque, grip, and filament path constraints, so it’s a good idea to shop around to find what will best fit your printing needs.
- Difficulty: Intermediate
- Find it at: Online retailers – Bondtech BMG, E3D Titan
- Price: ~$110 (depending on the model)
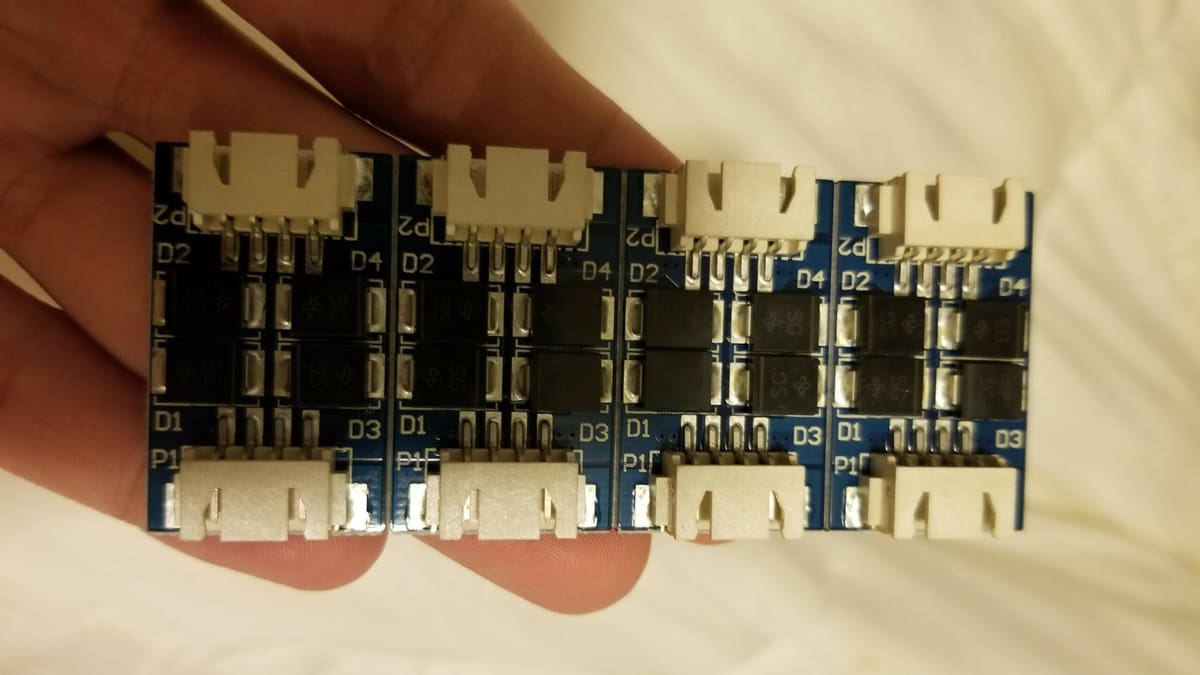
32-Bit Control Board
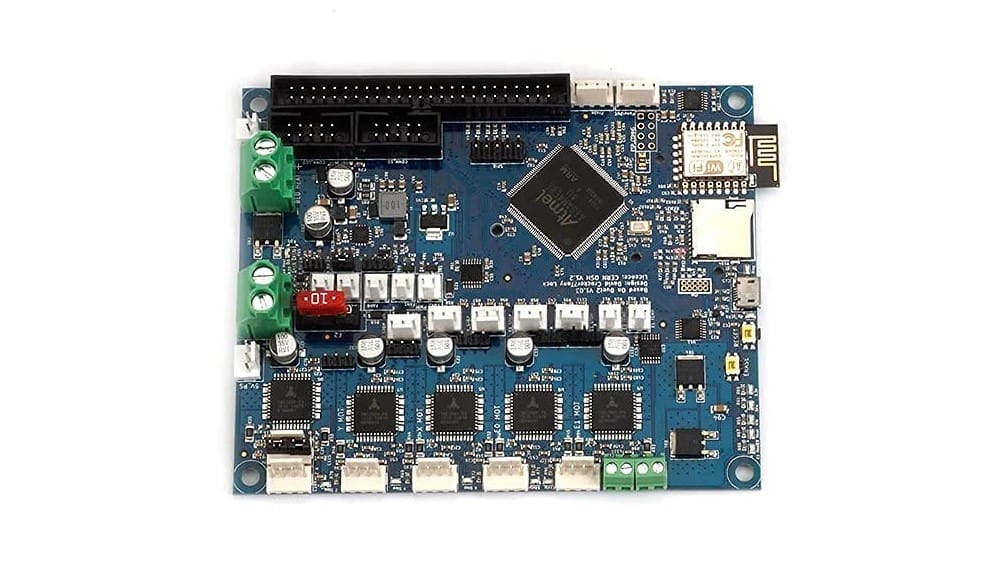
While there’s nothing wrong with a Mega 2560-based controller or similar, a 32-bit controller like a Duet 2 Wifi can greatly improve your printer’s performance. Such control boards can natively support cloud printing over internet and touchscreen interfaces, and they can also print more quickly due to their higher processing speeds.
Additionally, 32-bit controllers generally support higher quality motor drivers with smaller micro-stepping capabilities, resulting in better overall print quality. They also have generally been noted to run much more quietly and efficiently than their 8-bit counterparts.
- Difficulty: Advanced
- Find it at: Online retailers
- Price: ~$40 (depending on the model)
Multicolor / Multi-Material System
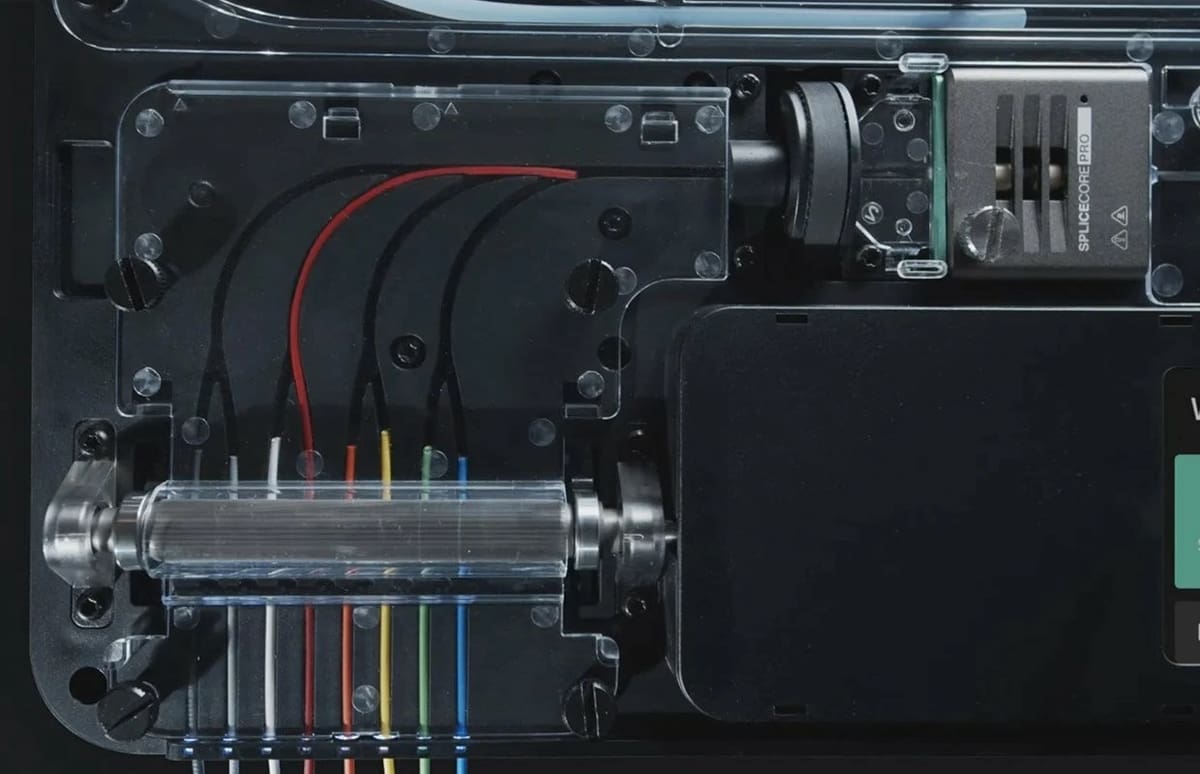
So maybe you don’t want or need to completely change your printer’s functions, but you still want a little more variety in your prints. Enter Prusa’s multi-material unit upgrade, Bambu Lab’s AMS, and standalone units like the Mosaic Palette. Such devices allow you to print in multiple colors or materials with only one extruder. Using these, you can get a range of colors and materials into a single print, allowing you to mix and match properties to your liking.
Of course, you could also consider an upgrade to dual extruders, or even something as radical as the E3D Kraken system with four separate nozzles! The only drawback of this alternative is that you need to find a way to combat oozing during your prints to ensure top-quality results.
- Difficulty: Advanced
- Find it at: Online retailers – Bambu Lab AMS, Bambu Lab AMS Lite, Prusa MMU3, Mosaic Palette 3 Pro
- Price: ~$60 (depending on the model)
Unique Extruder System

Ever wonder if you could do more than just extrude filaments with your printer? Well, you can! With mods like a pellet extruder, you can create your own special color blends, or you can install a chocolate extrusion system to enhance your workshop snack cupboard with some personalized sweets.
The list doesn’t end there, either. Depending on how much time and effort you’re willing to expend, you can also revamp your printer with a powder extrusion system for full-color printing. If you wanted to engrave or cut materials, you could consider mounting a laser or a custom CNC milling system.
Indeed, your printer can become an all-in-one manufacturing machine with just a few additional pieces of hardware. So what are you waiting for? It’s time to get creative!
- Difficulty: Advanced
- Find it at: Online retailers – Creality CV-Laser Module, Wiiboox LuckyBot Food Extruder
- Price: ~$80 (depending on the model)
License: The text of "30 Best 3D Printer Upgrades & Mods" by All3DP is licensed under a Creative Commons Attribution 4.0 International License.