Engineers are super intelligent, wonderful, highly attractive, amazingly charismatic people – and they’re adored by puppies. In all seriousness, 3D printing is an ideal vehicle for engineers to exercise their natural inquisitiveness about how things work, hone their technical making skills, and indulge their creativity.
In this article, we’ll explore 3D printed projects that require a little more thought, effort, or technical skill than a typical stand-alone “slice-and-print” model. We hope our list will inspire not just engineers but any maker keen to expand their skills and be challenged. Whether your interest is electrical, mechanical, civil, chemical, systems, biomedical, software, or aeronautical, we have a project for you.
If you see something on the list you’d like to make but don’t have the time or equipment, try Craftcloud. With suppliers around the world, the parts for your next project can be on their way in no time!
Tools & Machines
Nut Job
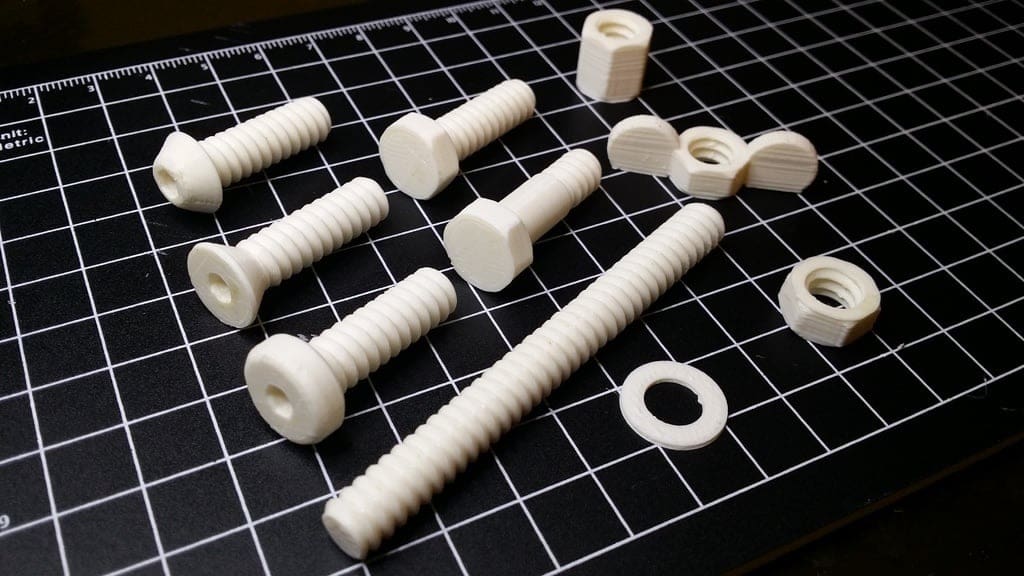
This “Nut, Bolt, Washer and Threaded Rod Factory” ranks among Thingiverse’s all-time most popular items.
Nut Job is an example of parametric design with a script that runs on Thingiverse’s Customiser or on OpenSCAD. Whichever way you go, you can specify the exact size and dimensions of the part you want, then the detailed design and modeling are automatically completed.
For the engineer, it offers near-infinite opportunities to tinker with and design parts to be used in new projects or to repair existing components. We’ve included it here not just because it’s a hugely useful tool but also because it’s a fantastic example of the power of parametric design for those new to the concept.
- Who designed it? mike_mattala
- How printable/popular is it? It’s one of the most popular items on Thingiverse with around 110 makes and thousands of remixes.
- Where to find it? Thingiverse

Hand Crank Generator

This is one of the simplest yet most interesting projects on our list. With this design, you’ll be able to convert your energy into electricity: It’s a fun project that uses magnetic fields to produce the maximum current possible by hand. The creator decided to build one himself because of the inefficiency of the hand crank generators on the market. By increasing the gear ratio and using a high-quality motor, you can produce a pretty good amount of electricity!
The designer explains in detail how it works in his YouTube video and shows how it can be used to power a mobile phone. Keep in mind that higher-grade magnets will produce more power, so if you want to maximize your output, you should do some research on the topic.
The 3D printed parts can be printed in PLA without supports. Once you have all the components, you can assemble your generator, which should be fairly straightforward. However, you’ll need to apply your soldering skills here. Once you’re done with the assembly, you can have fun experimenting with powering different things!
- Who designed it? TomStanton
- How printable/popular is it? More than 6,300 people have already downloaded it and 9 makers have published their print powering Christmas lights!
- Where to find it? Printables, YouTube
Fractal Vise
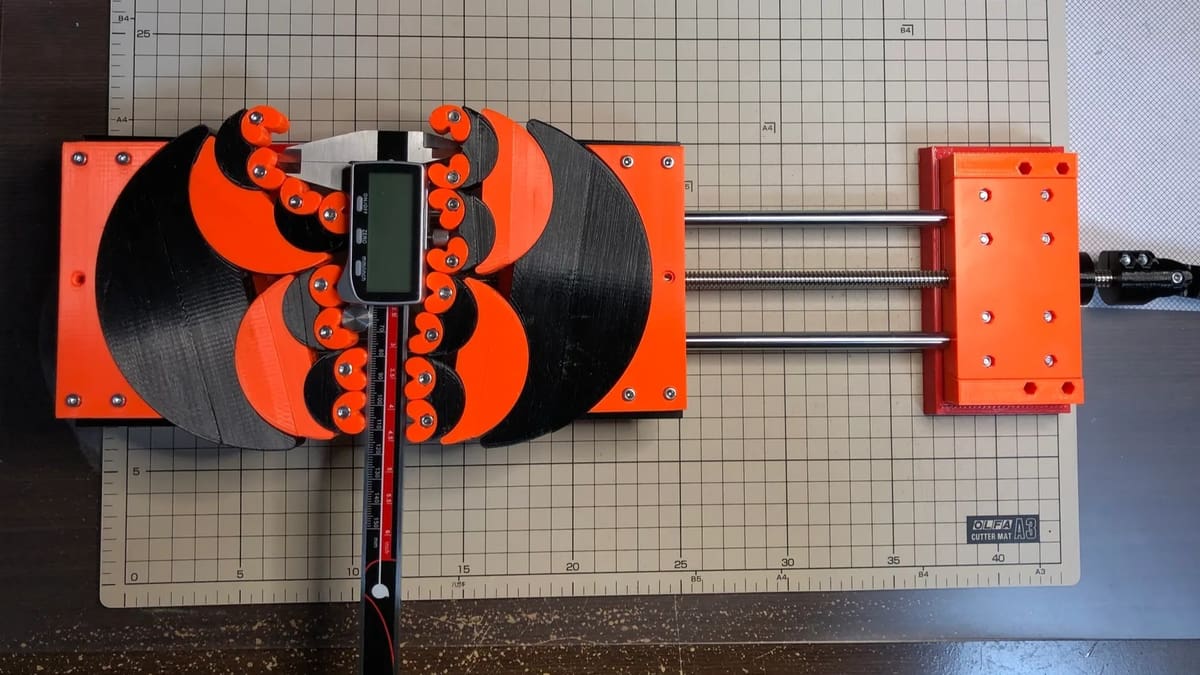
Why not use 3D printing to add some useful tools to your workshop? With this cool project, you can make a fractal vise that moves to grip almost any object. This instrument isn’t available on the market, but it’s really useful in a laboratory. The creator was inspired to make it after seeing a video about the restoration of an old version.
The designer has provided video instructions for the assembly, but you should prepare because there are quite a few parts to this vise. Following the designer’s suggestions, you can use whatever filament you like. Before printing the components, make sure to test the tolerances of the parts. You can use the B2 and C1 parts for this. All the components should be oriented correctly to print without supports.
Since tolerances are really important in this project, print all the components that present a dovetail joint at a fine layer height, such as 0.12 mm. The other parts can be printed at 0.2 mm. Make sure to also properly level your bed, since elephant’s foot can ruin the mechanism’s function.
Before starting the assembly, make sure to drill the holes that aren’t completely open – the creator designed them in this way to avoid supports. Now you can start from the big components and work your way down to the smaller ones.
- Who designed it? TeachingTech
- How printable/popular is it? Almost 7,000 people have accepted this challenge and 38 of them have published their makes so far.
- Where to find it? Printables, YouTube
Magnetic Switch
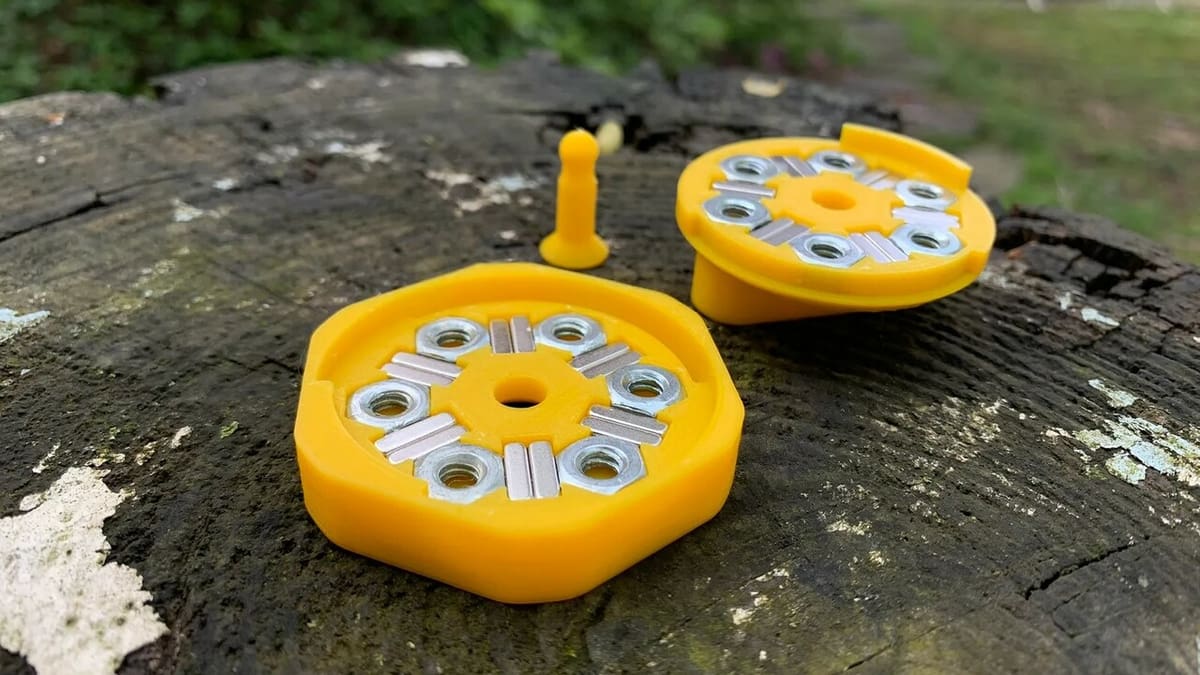
Have you ever imagined what it would be like to control the strength of neodymium magnets with a simple button? That’s exactly what this model does, and no, this isn’t a magic trick. The magnetic fields are redirected by adjusting the position of a group of magnets parallel to and directly above those in the base. It’s possible to observe that after turning it to the OFF position, the magnetic field is contained within the part, preventing it from sticking to the metal sheet. When turning it back on, the magnetic effect works immediately.
You don’t need anything too extraordinary to make one of these. In addition to the 3D printed parts with 0.15-mm layer height and a 0.4-mm nozzle on your printer, you’ll need 12 hex nuts and 24 10x5x3-mm magnets. For post-processing, you can finish with sandpaper and make everything smooth so it can rotate without friction.
In the comments, some users reported that their magnets did not achieve the desired effect. It was recommended to use nuts with a high concentration of iron and to avoid stainless steel.
- Who designed it? povsky
- How printable/popular is it? This model has already been downloaded by more than 300 people, although you can still be the first to post a make!
- Where to find it? Printables
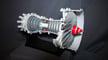
Jet Engine

Any self-respecting engineer would refer to this not as a jet engine but as a two-spool high-bypass turbofan. And quite right, too! Designed with a nod to Roll Royce’s Trent engine, this model is a thing of beauty and a stunning conversation piece.
If it’s caught your eye, keep in mind that this is no weekend project. On an Ender 3-sized build plate, for example, you can expect over 260 hours of printing. You’ll also need a few small bearings and screws to piece it all together. If you feel especially ambitious, you can find remixes that electrify the model and also instructions for versions at 60% scale.
- Who designed it? Catiav5ftw
- How printable/popular is it? A challenging multi-part build, this project is hugely popular on Thingiverse with 328 posted makes.
- Where to find it? Thingiverse
Inclined Plane Timer
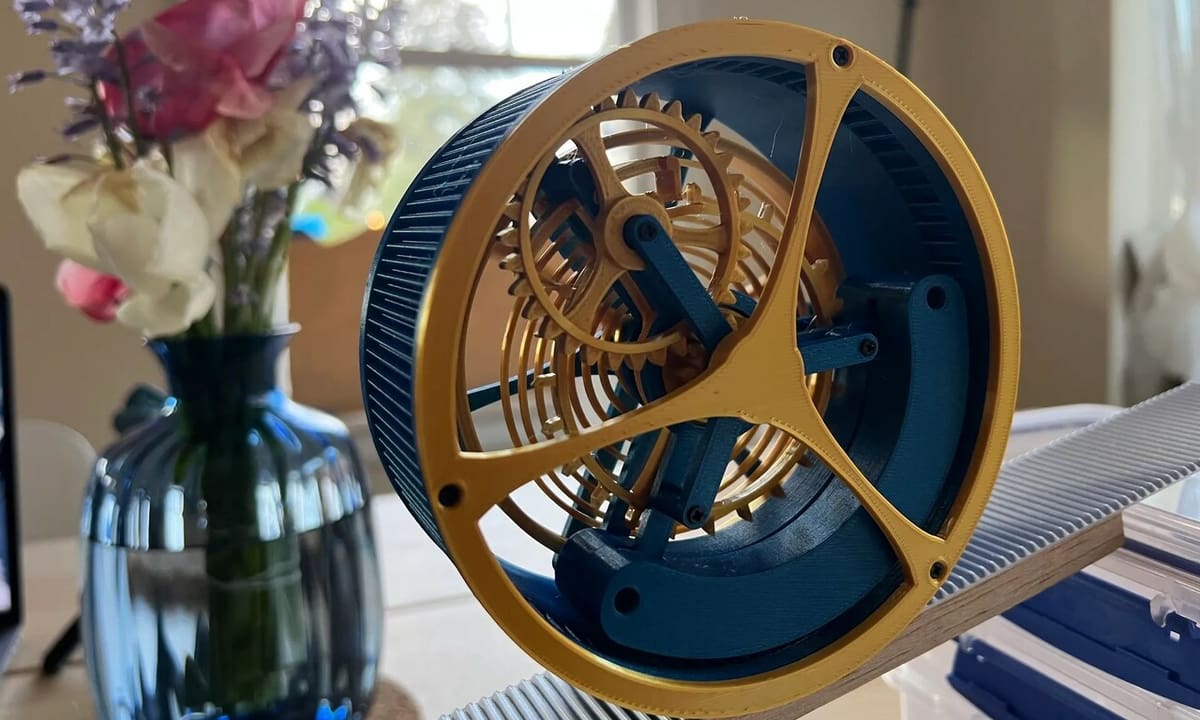
For this next project, instead of rotating the internal mechanism like for a typical watch, the outside of the cylinder rotates, creating a mesmerizing visual effect. This model is excellent for engineering students, as it demonstrates fundamental principles of physics and mechanics like exhaust regulation and the movement of the center of gravity. Assembling and adjusting this timer provides valuable hands-on experience in handling mechanical components and understanding motion dynamics.
After printing, it’s crucial to clean all parts, especially the holes, using drills, and to smooth the contact surfaces with sandpaper to ensure the rotating components are even. Follow the assembly guide video to put the device together using 2-mm long screws. To use the timer, prepare an inclined plane by adjusting its angle until the timer works correctly. On less grippy surfaces, use rubber rails or strips to prevent it from slipping.
- Who designed it? shiura
- How printable/popular is it? While it’s not very popular so far, it has complete instructions for assembly and more than 60 people have already downloaded it. One even posted a make!
- Where to find it? Printables
Five-Speed Transmission
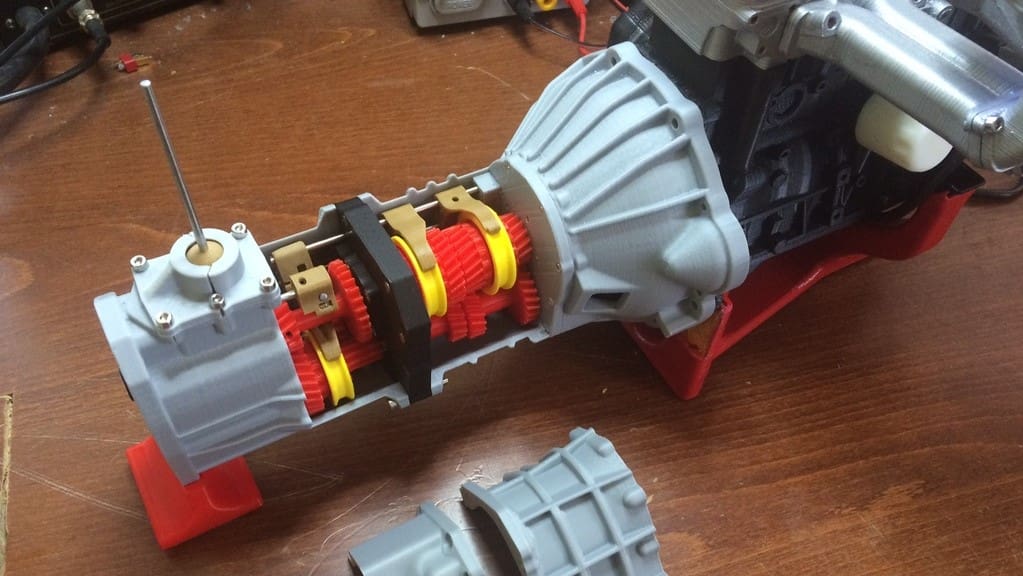
Much like the Jet Engine, this five-speed transmission is another highly complex build, but a great demonstration of gear mechanics. Designed by Eric Harrell, an engineer and car enthusiast, this design was completely reverse-engineered and modeled at a 1/3 scale. Made up of 40 parts, it’s fully functional at all 5 speeds with reverse.
In addition to the printed parts, small rods, bearings, screws, and nuts are needed to ensure it operates smoothly. To take the challenge a step further, you can even print the accompanying 22RE Toyota engine model and attach them for a complete four-wheel-drive system!
- Who designed it? ericthepoolboy
- How printable/popular is it? To date, this model has around 50 makes on Thingiverse. Eric and his work have also been featured by Adam Savage’s Tested, which has over 1.5 million views.
- Where to find it? Thingiverse
DIY CNC
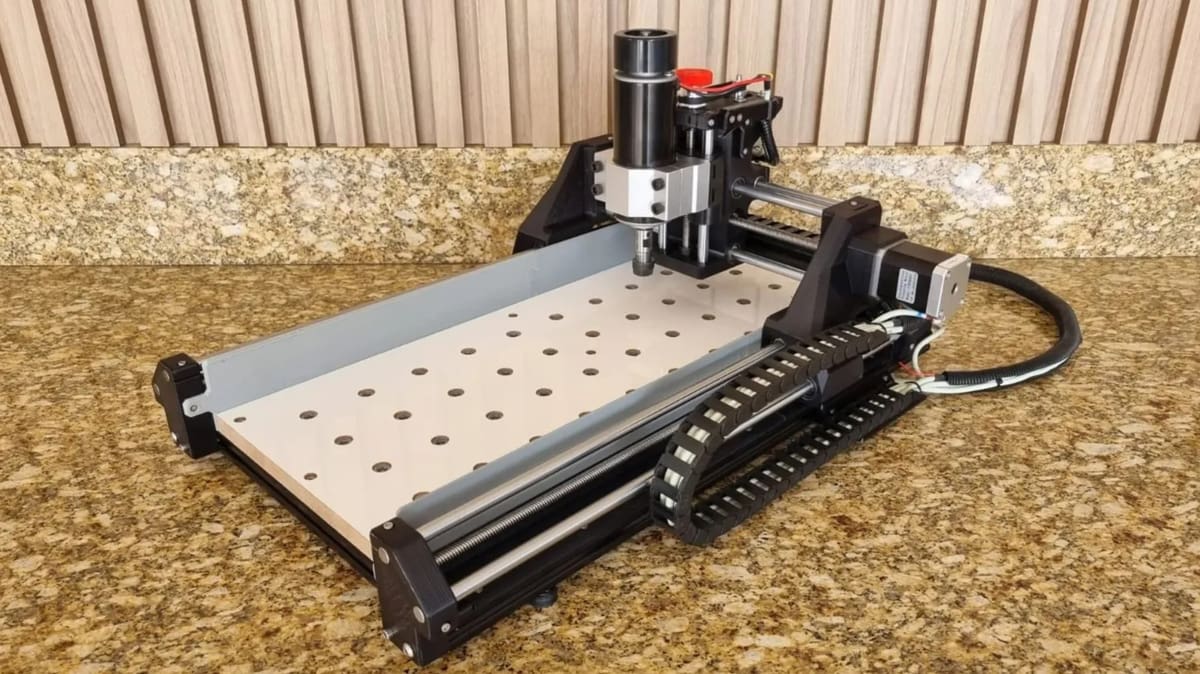
Additive manufacturing is powerful, but combining it with subtractive manufacturing can unlock new possibilities. After finishing this project, you’ll have a functioning CNC router. The creator’s main goal was to design a machine that’s both aesthetically pleasing and functional by recycling 3D printer parts.
The designer shared the entire BOM, which includes motors, aluminum profiles, and the brain of the CNC – an Arduino Uno with a CNC shield – along with lots of small components like screws. Keep in mind that this will be a challenging project since assembly instructions aren’t included. However, the STEP file is editable based on your specific components. It’ll be worth it because you’ll be able to work with many materials that aren’t common for hobbyist 3D printers, such as aluminum, wood, acrylic, and much more.
Some of the makers who completed this project shared precious tips to help. For example, you can print the parts with PLA or PETG. If you’re printing with PLA, using five perimeters and four top and bottom layers will make the pieces more durable. Keep in mind that this is quite an expensive project since it’ll cost you around $400 for a machine with a build area of 188 x 412 x 44.5 mm. If you want a bigger work area, you should increase the dimensions of the aluminum profiles and lead screws accordingly.
- Who designed it? Aviran_N
- How printable/popular is it? Over 8,300 people have downloaded this project! 13 makers have also shared their working machines.
- Where to find it? Printables
Fun & Games
CUBOTino
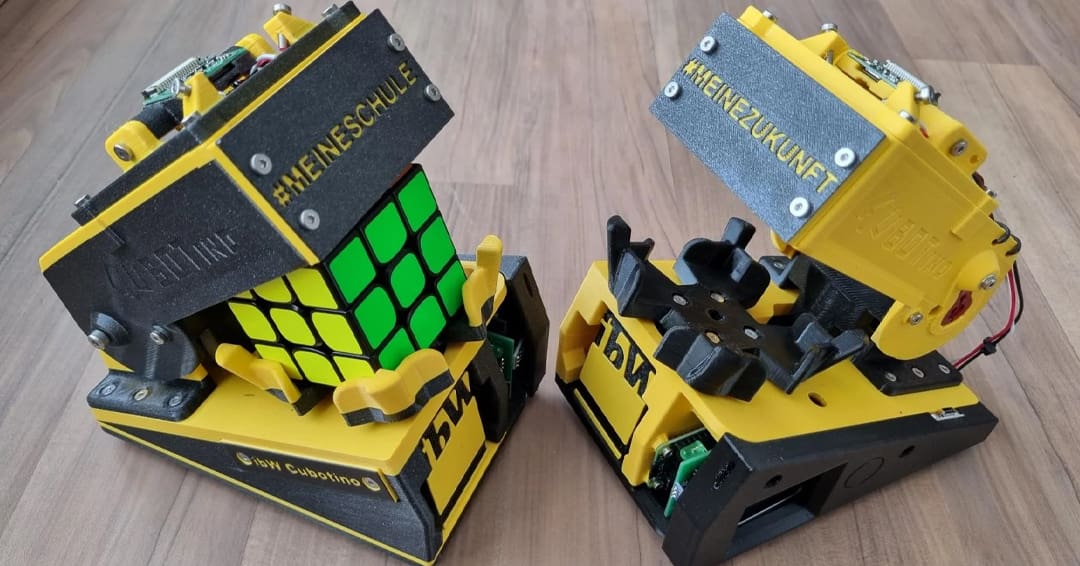
The Rubik’s cube has long been the subject of fascination (and frustration). This twisty puzzle is one of the most famous toys of all time, popular with adults and kids alike. If you’re too lazy to solve it or you want a cool machine to show your friends, this is the perfect project for you.
This cool project uses a Raspberry Pi Zero 2 with a Pi Camera, along with many other electronic components to self-solve the puzzle in less than 90 seconds. There are two additional versions available: a basic one with lower costs and complexity, and a smaller one for 30-mm Rubik’s cubes.
To build this project, you’ll need all your skills: mechanics, electronics, and programming. The 150-page manual guides you through the whole process, starting with the main power connections, then going through programming the Raspberry Pi, plus printing the pieces correctly, and assembly, as well as tuning.
The 3D printed parts should need around 700 g of filament to complete. Following the designer’s suggestions, print them in PETG using a 0.2-mm layer height at a low speed (around 40 mm/s for the outer wall and the first layer).
- Who designed it? AndreaFavero
- How printable/popular is it? Over 51,200 people have checked out this project and 48 made a self-solving Rubik’s cube robot.
- Where to find it? Instructables
DaVinci Bridge Puzzle Set
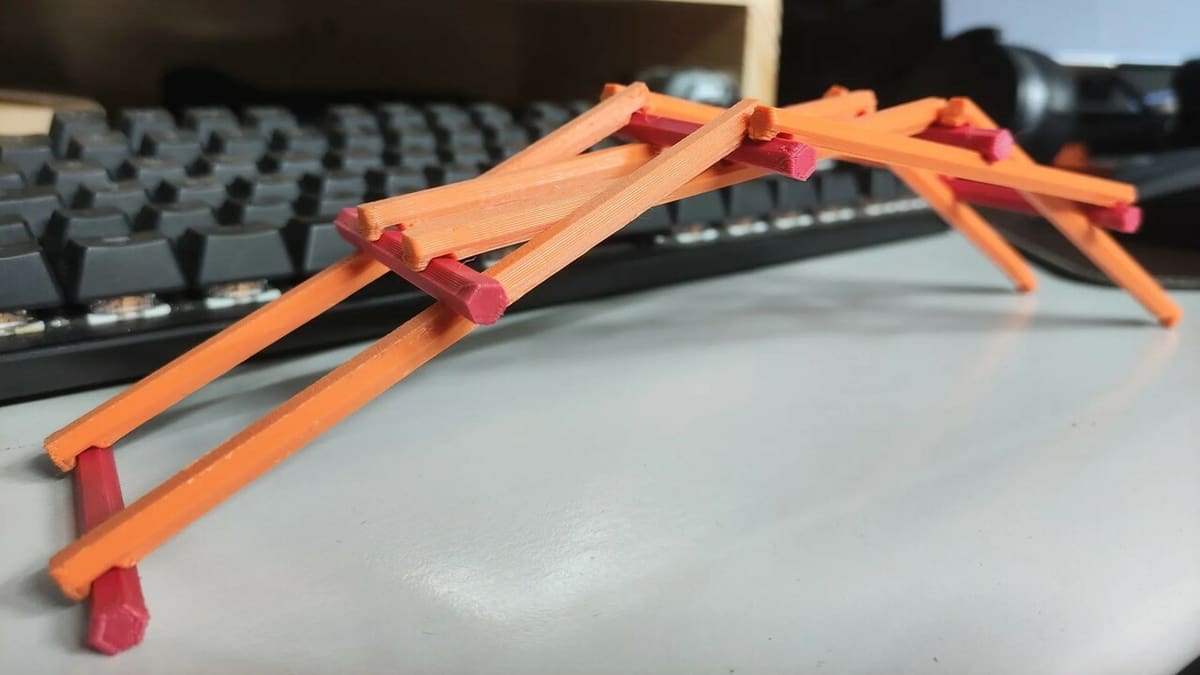
The carved log bridge, also known as the “self-supporting bridge”, is one of the many engineering projects developed by Leonardo da Vinci, one of the greatest geniuses of the Renaissance. The basic principle of this bridge is self-support. The structure is assembled so that each log or board rests on adjacent logs, creating a locking system that distributes compression forces evenly throughout the structure.
In essence, the bridge works by precisely fitting the components together, where gravity and friction hold the parts in place using nails, screws, or ropes. It may seem simple, but you need to understand the principle in order to put this puzzle together correctly. It’s possible to assemble more than two sets, but due to the angle of gravity, you’ll probably need to tie the ends together.
- Who designed it? TripleGWorkshop
- How printable/popular is it? More than 350 people have already downloaded this puzzle set and 9 left photos of their makes.
- Where to find it? Printables
RC Car

RC cars are usually quite expensive to build and repair, but thanks to 3D printing, this is no longer the case! With the help of a 3D printer, you can produce as many models as you want for only the cost of filament and a few extra items. So, what better reason to get into the RC hobby?
With this project, you’ll test your electronics and mechanics skills by building a race car from scratch. The designer has modeled the parts to fit onto a 200-mm build plate and should weigh about 800 g overall. Make sure to check the Instructables page to see the correct print orientation for the parts. Along with the 3D printed parts, you’ll need some screws, bearings, an A2212 BLDC motor, a 2-3S lithium battery, and a few other components that should be easy to source.
Before getting started, be sure to print the included test model so you can check the tolerances of the different model features. Once you have all the components, you can start the assembly process, which is divided into three main parts: the rear chassis, the front chassis, and the body assembly. If anything is unclear, you can look at the Autodesk Fusion preview of the model to check where components should go.
- Who designed it? rambros
- How printable/popular is it? Over 2,600 people have downloaded this design and 7 makers have shown off their cool cars on Printables.
- Where to find it? Printables, YouTube, Instructables
Topographic Maps & Terrains

The ready availability of detailed world map data has enabled all sorts of clever renditions of our beautiful blue planet’s surface. Not so long ago, printing detailed topographical maps involved the complex use of several software tools, but now that process has been greatly simplified.
Using SRTM data from NASA and the online tool Terrain2STL, you can quickly create STL files representing the topographical layout of areas of land virtually anywhere in the world. There are still a few considerations about how best to print these, which are covered in a separate Instructables page. This project is a fantastic example of using 3D printing to help visualize data and has many options to tinker with and optimize the final output.
- Who designed it? Thatcher Chamberlin (Instructables tutorial by TobySpartanus)
- How printable/popular is it? The Instructables page has been visited around 21,300 times. Though easy to generate, your map of choice could be tricky to print depending on the level of topological detail.
- Where to find it? Instructables
Robot Arm
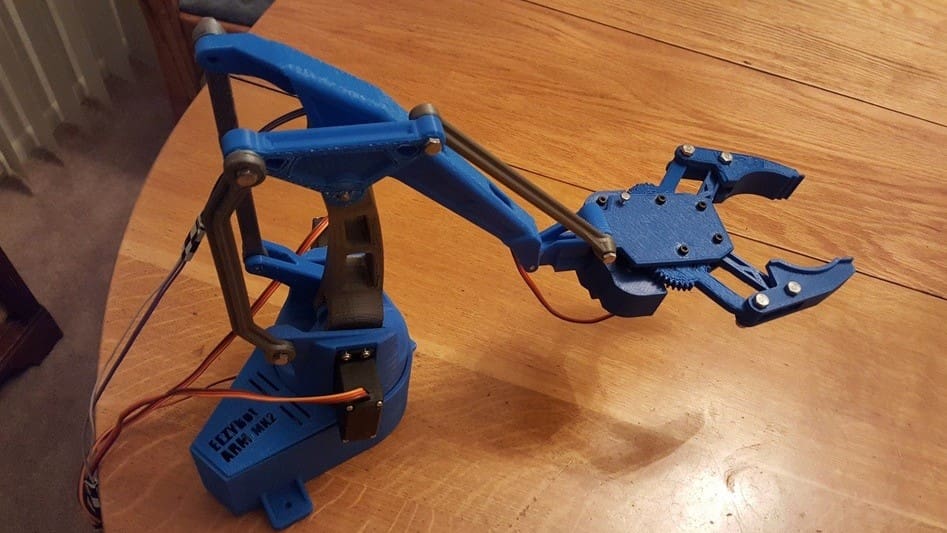
More than any other, the EezybotArm robotic arm offers not just a fun project but also a great opportunity to learn skills that can be transferred to other mechatronic projects. This second version is the evolution of its smaller, original sibling and a scaled-down version of a very popular industrial robot – the IRB 460.
This second version has a very active community of hobbyists designing and making variants and add-ons, enhancing the fun and learning. There’s also a third version that highlights the pros and cons of using stepper motors instead of servo motors, although it has less developed software.
Check out the designer’s YouTube channel for videos of the EezybotArm and other gizmos.
- Who designed it? daGhizmo
- How printable/popular is it? The original and second versions have over 20,000 likes and over 130 posted builds combined. Requiring electronics, firmware, and other non-3D printed parts, it’s an involved build but supported by excellent and well-tested instructions.
- Where to find it? Thingiverse, Instructables
Marble Maze
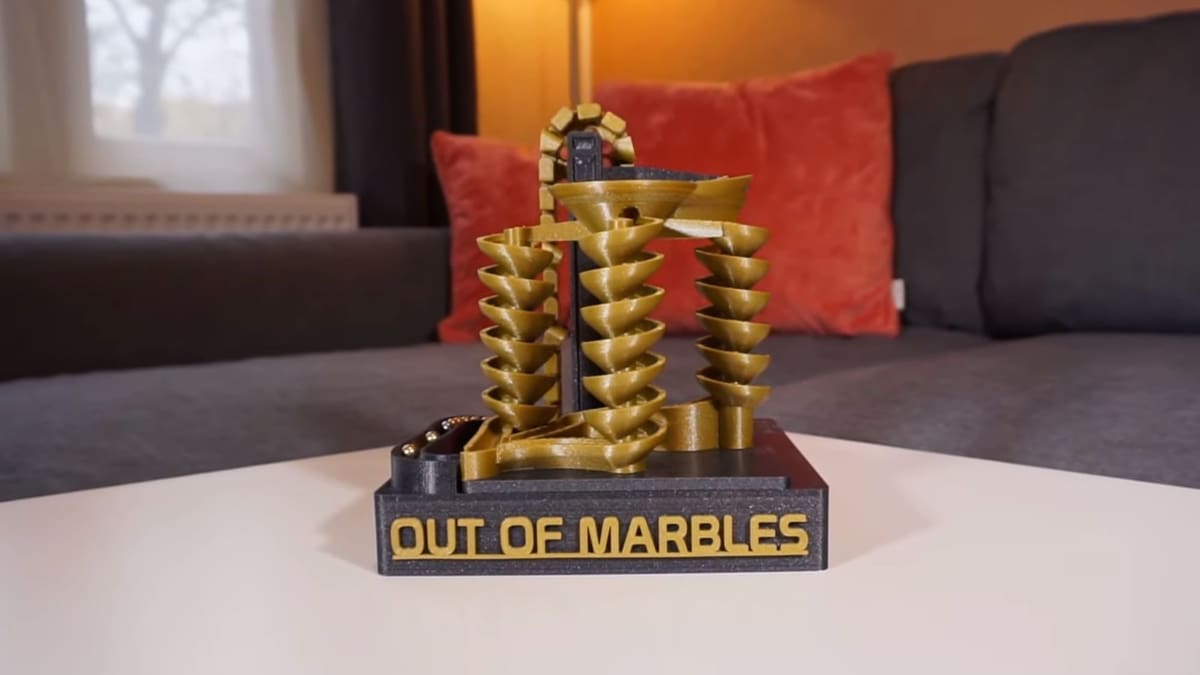
The simple idea of a machine lifting a marble or ball-bearing, then letting it roll and wind its way back down a convoluted course (again and again) is wonderfully hypnotic.
There’s an amazing spectrum of creative mechanisms to lift the marbles – worm gears, chains, robotic arms. Coupled with the ingenuity in devising entertaining ways for them to battle with gravity and obstacles on the way down, this is an awesome project. If you head over to Thingiverse and search for marble machines, you’ll find pages of design inspiration. This example has quickly become popular with a free base version and optional paid-for expansion models. Alternatively, you might consider how to expand on what you find with your own designs.
- Who designed it? Out of Marbles
- How printable/popular is it? In a relatively short period, the base design has over 780 likes on Thingiverse. The build is straightforward, well documented, and involves a little mechanical construction as well as the addition of an electric motor.
- Where to find it? Out of Marbles, Thingiverse
"Trust Me I Am An Engineer" Sign
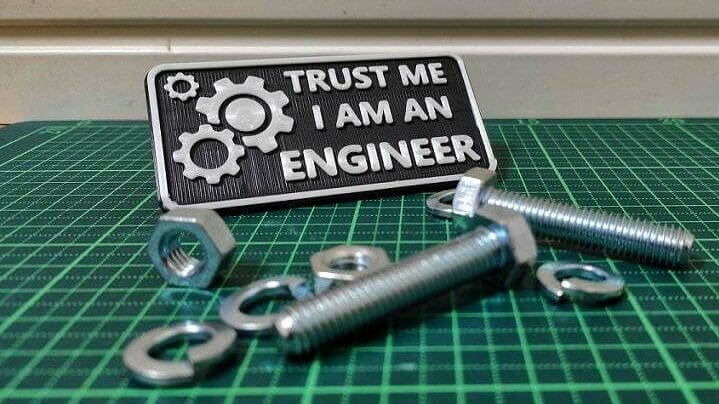
If your head is reeling from the technical possibilities of our list so far, now is the time to chill, grab a coffee, and sit down for our most straightforward project. To add more solidity to the age-old expression “Trust me, I am an engineer”, you can 3D print an actual physical sign. Go big or go small, the choice is yours.
To make the all-important text stand out, change the filament color halfway through the print – a useful trick if you’ve not tried this before.
- Who designed it? Prima
- How printable/popular is it? This is very easy to make, with over 10 makes and one remix. Every engineer should have such a sign for the avoidance of doubt!
- Where to find it? Thingiverse
Beer Bottle Opener & Counter
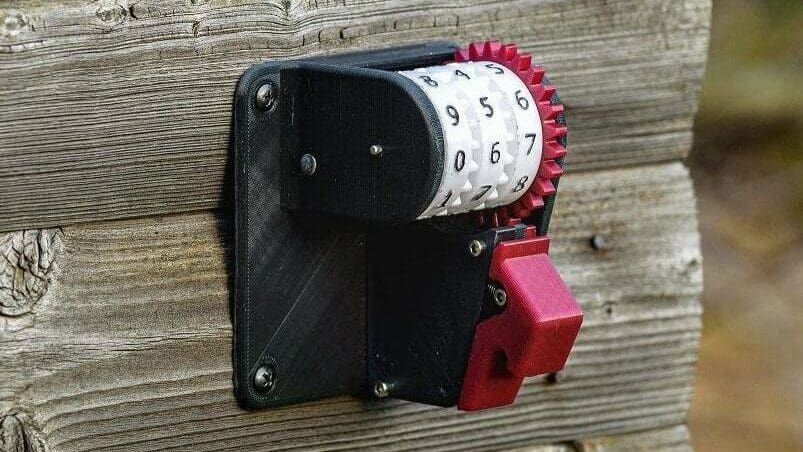
In a recent survey, “beer and homebrew” came out as one of the top pastimes enjoyed by engineers. With that in mind, mix in 3D printed parts and a clever mechanical mechanism, and this counting bottle opener has earned a rightful place on our list.
A practical item that’s interesting to make and use, this design became notorious within days of being added to Thingiverse in December 2020. Since then, the designer has added a compact version. The choice is yours.
- Who designed it? RubenMts
- How printable/popular is it? Within just eight weeks of being listed, this design made it into the all-time top-10 items tagged with beer and one of the most popular items outright on Thingiverse, and it currently has 17 makes and 4 remixes. It requires a few non-3D printed components but is easy to make – and an ideal engineering tool.
- Where to find it? Thingiverse
Inspired by Animals
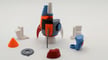
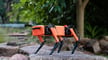
OpenDog v3

Revealed in 2016, Spot, the robot dog designed by Boston Dynamics, continues to impress those who see it online and in person. However, at a price tag of $74,500, Spot isn’t the most affordable commercial product. What if there was a way to make your own, for much less?
No maker has come closer to Spot’s design than UK-based YouTuber, James Bruton. A former toy designer, Bruton enjoys creative engineering and incorporates 3D printing into all his robotics projects. One of his longest ongoing works is the openDog, which is fully self-balancing, smart enough to climb over obstacles, and capable of image recognition. What’s even more impressive is that all the code and printable parts are open source, so you can build your own!
- Who designed it? XRobots
- How printable/popular is it? James has been developing the openDog since 2018 and continues to document his improvements. The robot’s size and features make it the most complex project on this list.
- Where to find it? GitHub, YouTube
Motorized T-rex
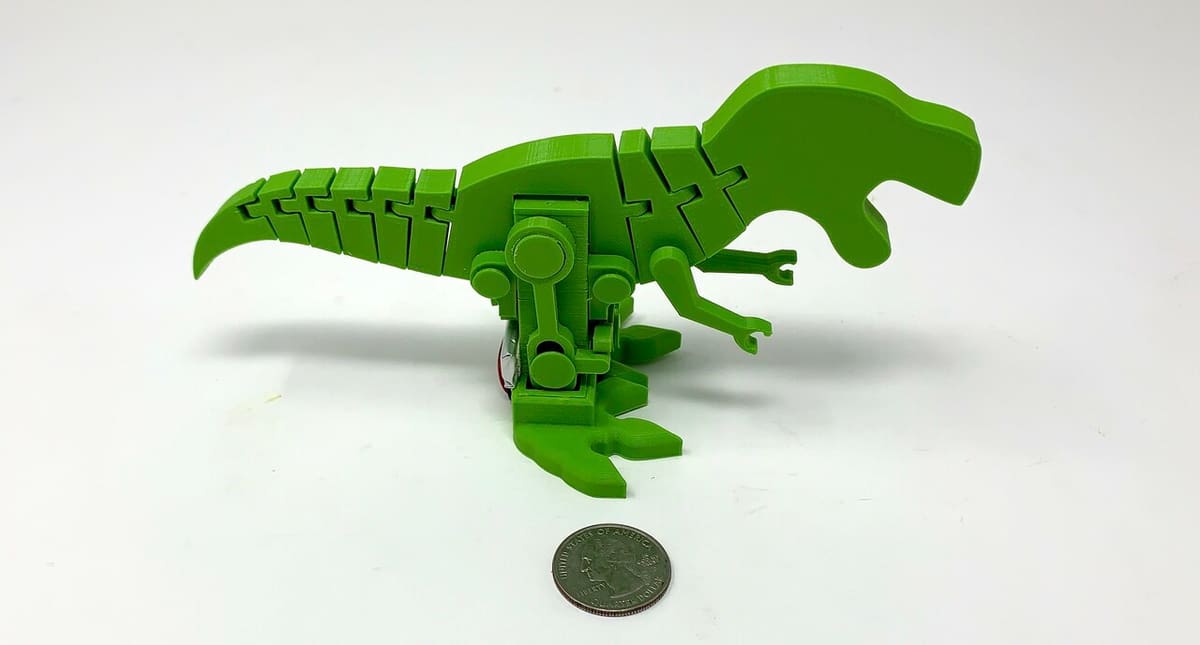
Our next project just had to be Greg Zumwalt’s brilliant motorized T-rex. Greg is a prolific designer of 3D printed mechanisms, so if you like this project, you can check out his other designs.
This inspiring model has evolved from the original compliant flexy-rex to the enormously popular print-in-place flexi-rex, and now this. The fact that it’s motorized provides a great opportunity to learn about its clever use of a vintage “pin walking” mechanism and perhaps think about how that could be repurposed for use in other models. Extensive instructions are given.
- Who designed it? gzumwalt
- How printable/popular is it? The winner of Instructables’ Robotics Contest, this project has thousands of views and excellent building instructions.
- Where to find it? Instructables, Cults, MyMiniFactory
Flying Sea Turtle

An automaton is a machine that moves in a pre-defined sequence of motion. You may have seen them in the form of basic wind-up toys or cuckoo clocks. However, they’ve been used for centuries due to their purely mechanical construction. As an engineering marvel for their time, more complex automata could closely mimic human and animal movements, which were used as a form of entertainment.
Amao Chan is a digital artist known for his fun 3D printable toys and automata designs. The flying sea turtle was inspired by the gliding motion of swimming sea turtles. When the mechanism is hand-wound, the sea turtle’s neck and fins undulate as if it were flying. According the Chan, the primary motivation for the design was to raise awareness of sea life endangerment.
- Who designed it? Amao Chan
- How printable/popular is it? With 20 parts and primarily flat or polygonal shapes, the model is fairly easy to print. On Thingiverse alone, it has over 300 makes, and the demonstration video has over 126,000 views on YouTube.
- Where to find it? Amao Chan, Thingiverse, YouTube
Miscellaneous
Triaxial Tourbillon Clock
For those looking for a challenging project that looks stunning, doesn’t need electronics and software, and also has an amazing lineage of design evolution from several earlier projects, this is for you.
You’re not going to get second-level time accuracy, so it’s best to think of this as more of a fascinating kinetic sculpture. It’s mesmerizing as it revolves and spins (see it in action). Its complex looks can be deceiving, as it’s really just a combination of several simple mechanisms in a well-engineered and integrated way.
- Who designed it? mcmaven
- How printable/popular is it? This design has been successfully made 10 times. It’s easy to print in PLA and assembly is straightforward but requires a little patience.
- Where to find it? Thingiverse

e-NABLE
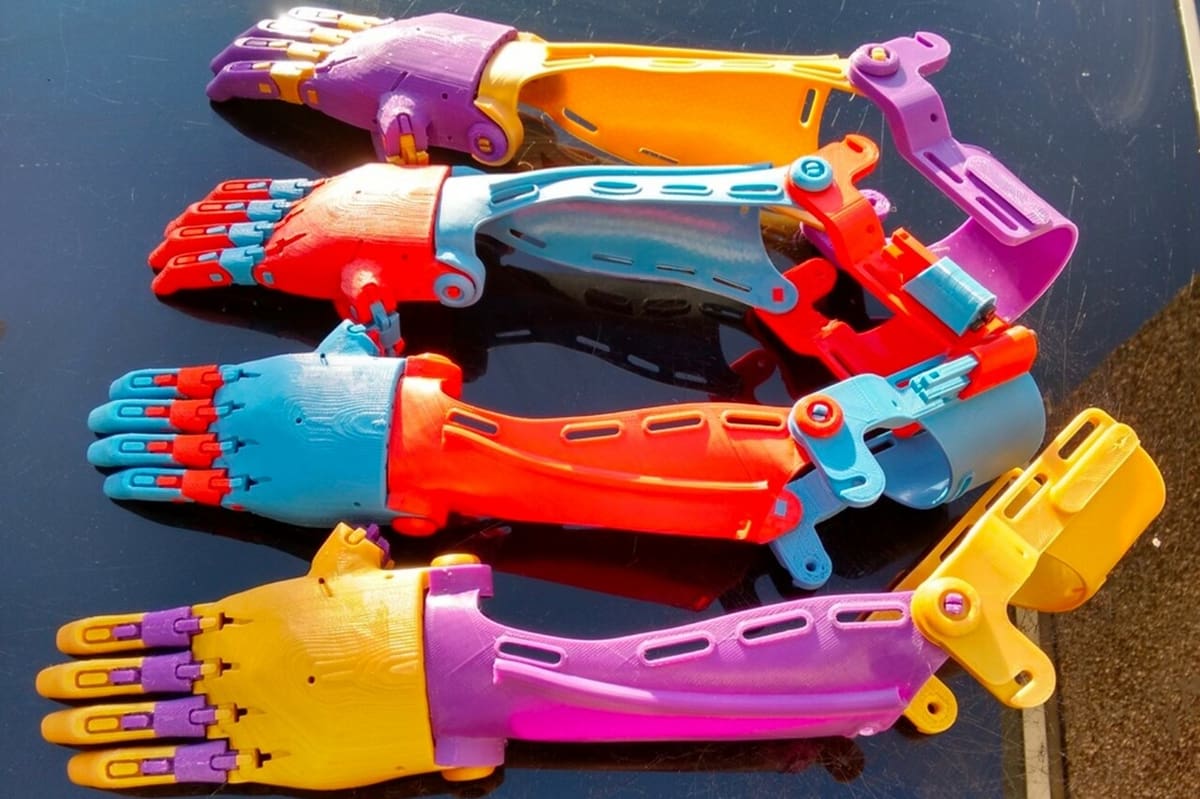
Among the many things that engineers can do, they have the power to give back to the world around them. For example, there are many noteworthy project involving bionic hands and prosthetics which can truly change someone’s life.
The e-NABLE community believes in the potential of 3D printed prosthetics and brings together volunteers from around the world to make them more accessible. These volunteers use their 3D printers to make 3D printed prosthetics for those in need, and it’s possible to find many of their projects on repositories like Thingiverse and Printables. However, it’s important to recreate these models at home with proper care and supervision.
Currently, there are customizable hand and arm models available that can be adapted for patients of all ages. To better understand how the process works and choose from different designs, you can visit their catalog. If you still can’t find a suitable project, don’t hesitate to contact the active community, which should be available to help as much as possible.
- Who designed it? Thousands of dedicated people across the world who want to use 3D printing to make a positive difference.
- How printable/popular is it? There are hundreds of open-source projects suitable for all levels of 3D printing and maker experience. If an item can make a positive difference and if it can in part be 3D printed, it’s in. Look out for design competitions, too!
- Where to find it? Enabling the Future
Dual Tensegrity
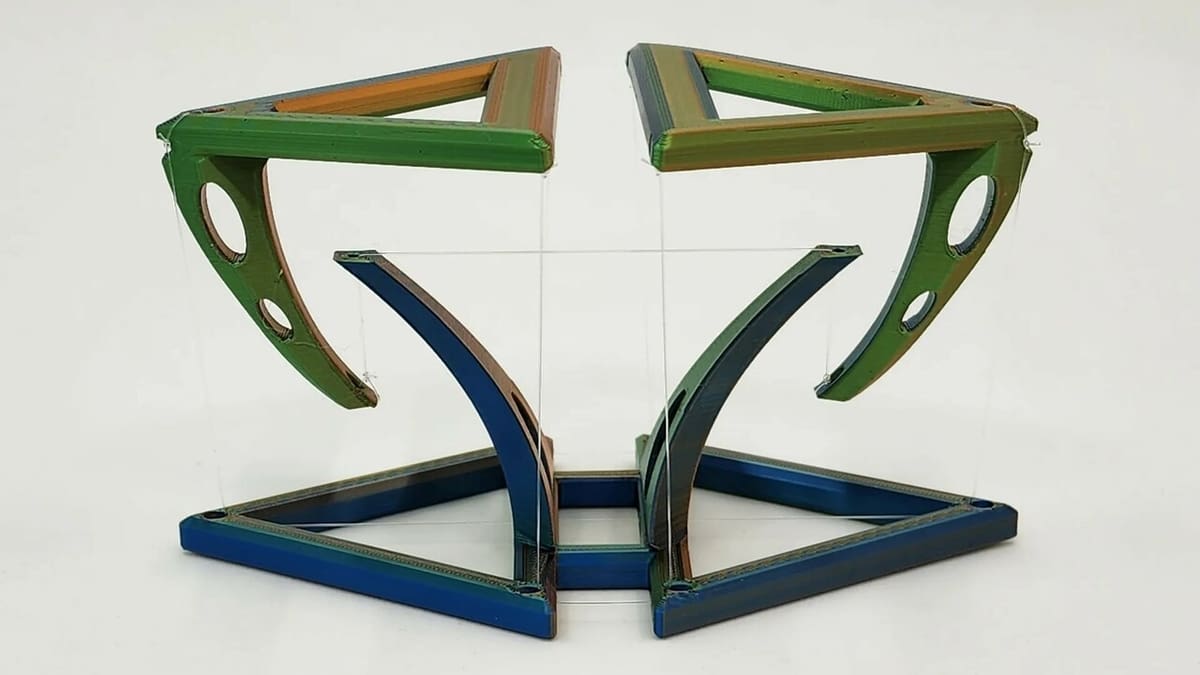
This is a complex and visually stunning structure that illustrates the principles of tensegrity engineering, where components are held together by a system of cables under tension. This model offers an excellent opportunity to explore concepts such as stability, balance, and distribution of forces. This exercise can also increase patience and attention to detail, which are essential skills in engineering.
The recommended configuration is a 0.4-mm nozzle with layers 0.2 to 0.3 mm high. The model can be printed at various scales, from 70% to 150%, depending on the user’s preferences. After printing, assembly begins by adjusting the tension of the side wires, followed by the center wire and finally the outer wire. And don’t worry, there are visual instructions in the description. It’s crucial to use high-resistance wires, such as a fishing line, to ensure stability and facilitate the assembly process.
- Who designed it? M4NU
- How printable/popular is it? With almost 1,500 downloads and 17 beautiful makes, it’s definitely a popular model.
- Where to find it? Printables
Vault Safe Box with Lock
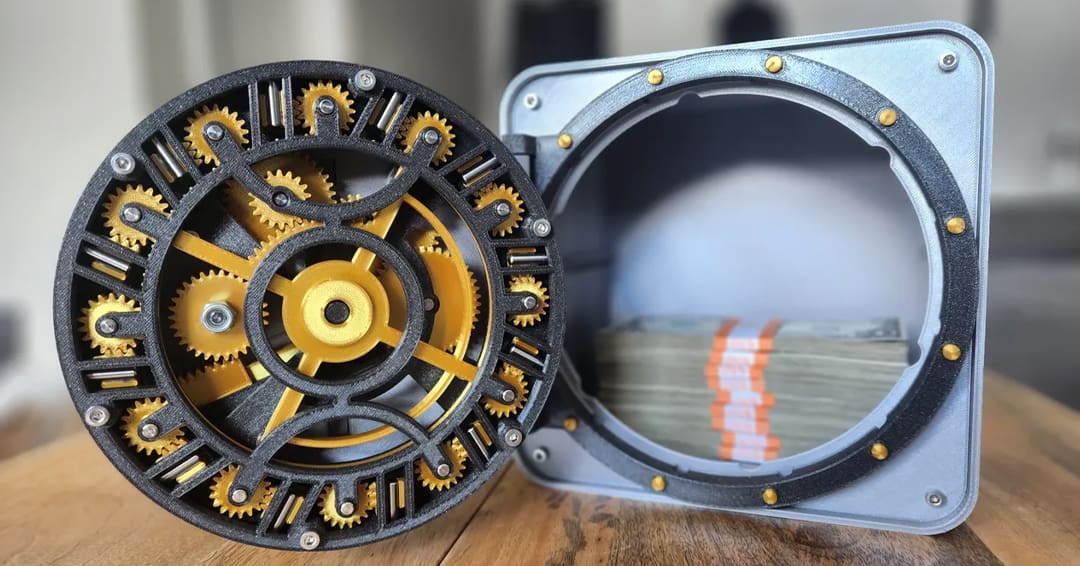
You don’t usually see the mechanics behind a safe box, but they’re a piece of engineering jewelry. With this project, you’ll be able to create a functioning vault safe box and have some fun seeing the mechanics in action. This is the evolution of the previous vault box the creator designed. Fascinated by the mechanism, he wanted to add a lock to make it a safe box.
This project requires some assembly but fortunately, the designer has published a helpful video showing how to do it. Along with the 3D printed parts – for which you can use PLA – you’ll need a lock, some screws with threaded inserts, and metal dowels.
The designer has modeled every part to avoid supports. Furthermore, he decided to use threaded inserts to be able to disassemble and reassemble everything as many times as he wanted without damaging the 3D printed parts. Although you can use 3D printed shafts, the creator chose metal shafts to increase the durability of the mechanism.
- Who designed it? RoccosStuff
- How printable/popular is it? Over 1,800 people have liked this model and 10 makers have published their works.
- Where to find it? Printables, YouTube
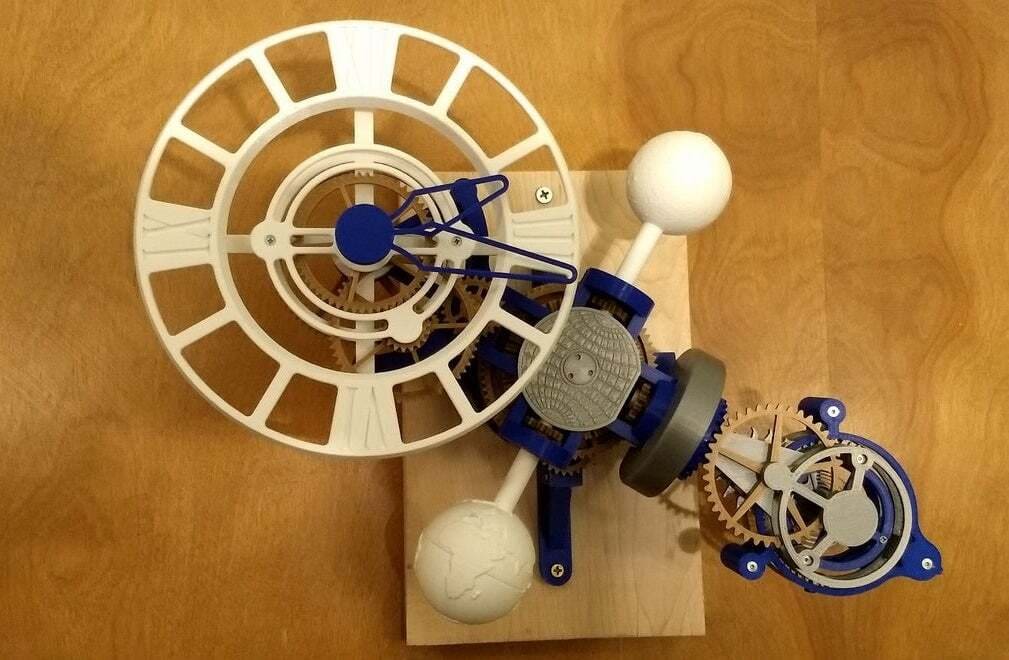
Mechanical Planetarium
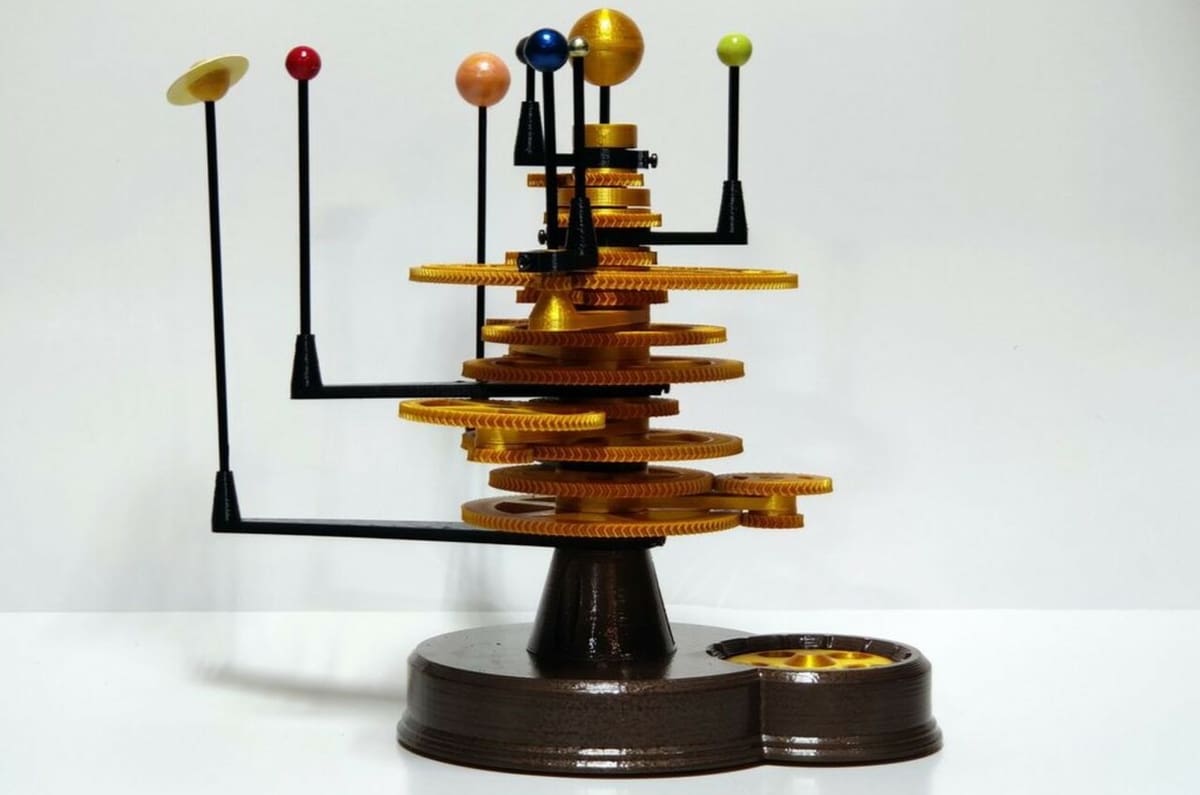
This mechanical planetarium is a neat representation of how our solar system orbits the sun. Operated by a finger dial, one full rotation of the system is equivalent to 14 days of movement. This technically challenging design was actually based on its metal counterpart, which was handcrafted by Ken Condal.
With 49 parts in the assembly, each planet’s gear has a distinct number of teeth to account for the different paces of orbit. Due to the amount of detail in this model, printing the parts with rafts and sanding them is recommended for optimal gear meshing. If printing in a single color, the organization of parts is also essential to the assembly process.
- Who designed it? Zippitybamba
- How printable/popular is it? On Thingiverse, the Mechanical Planetarium has 24 shared makes. The assembly video has over 71,000 views.
- Where to find it? Thingiverse, YouTube
Print-in-Place Spring-Loaded Box
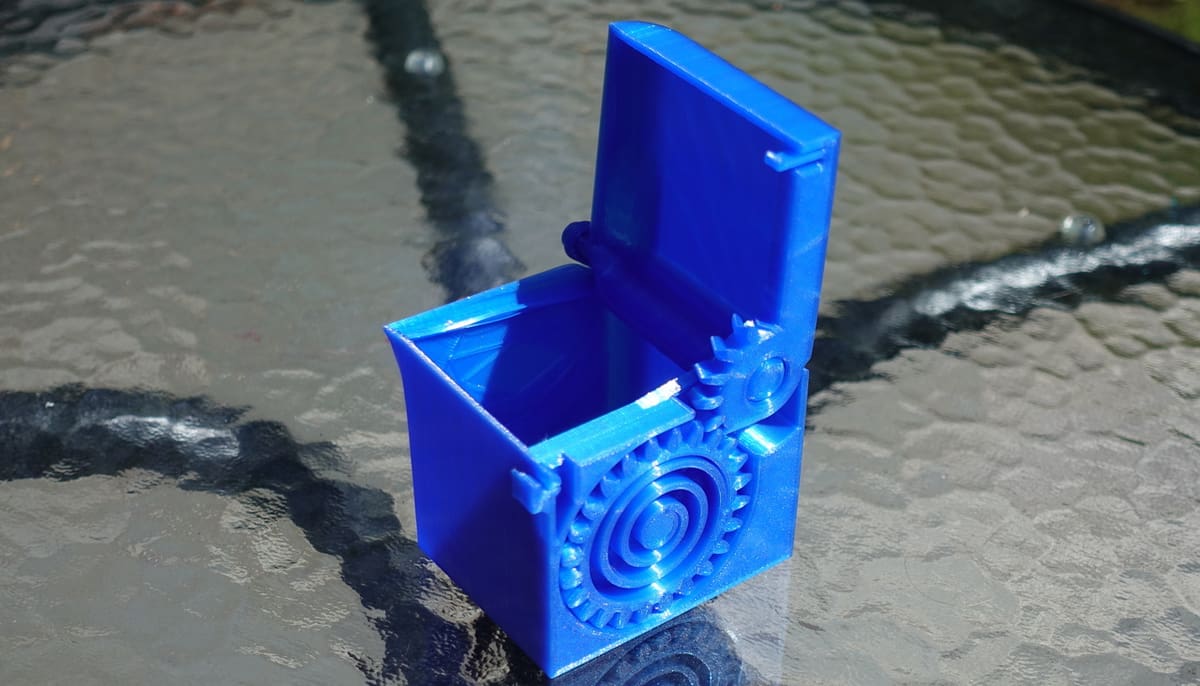
The designer of this spring-loaded print-in-place box has not only shared the model for free but also described the thinking, design choices, and tricks that went into its creation. There’s a lot to learn with this project, including how to design without supports and considerations around the spring and locking mechanisms.
- Who designed it? SunShine
- How printable/popular is it? An ingenious print-in-place project with over 130,000 downloads between Cults and Thingiverse, the clever design makes printing even this complex object straightforward. There are over 105 makes and 4 remixes combined from both sites as well.
- Where to find it? Cults, Thingiverse

License: The text of "25 Training 3D Printing Projects for Engineering Students" by All3DP is licensed under a Creative Commons Attribution 4.0 International License.