The 10 Best Arduino Mini Projects

Whether fun or functional, there's no shortage of DIY Arduino stuff. Check out these awesome Arduino Mini projects!
More than Meets the Eye
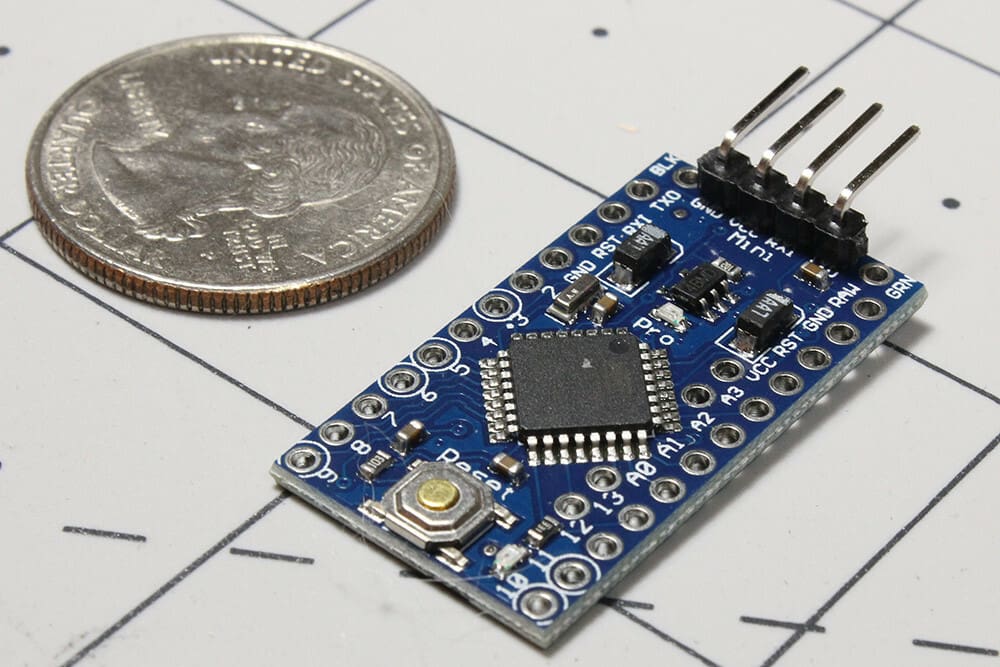
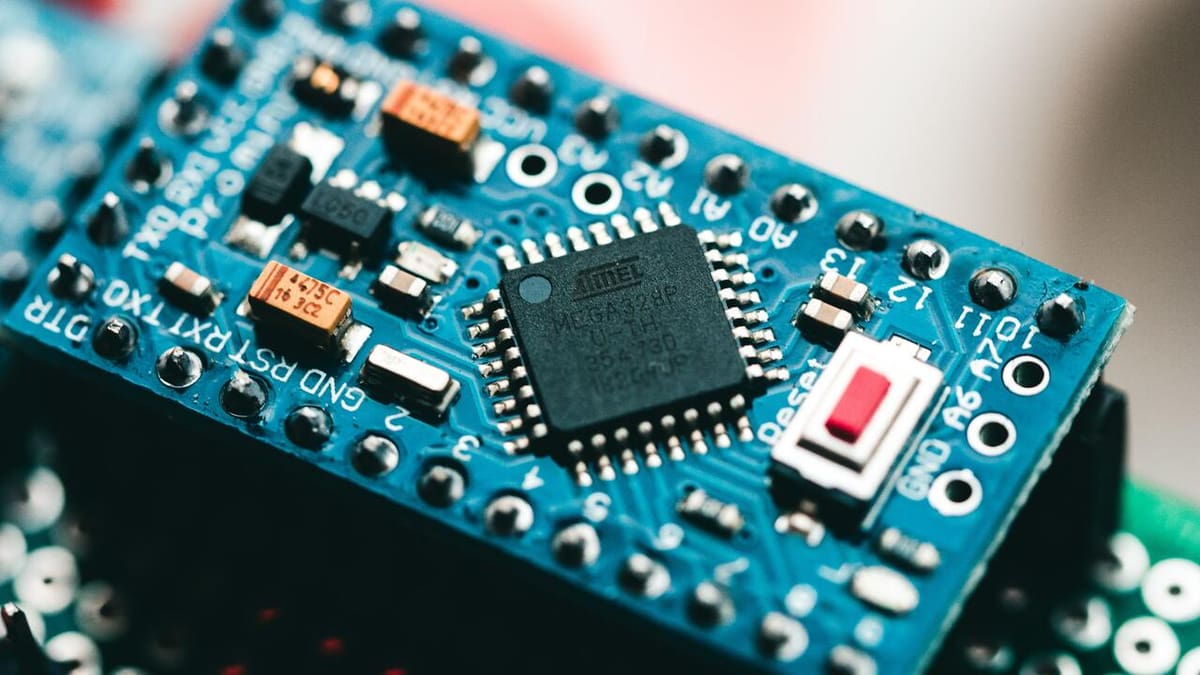
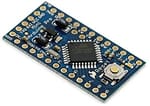
Although Arduino no longer produces the Mini, their product assortment does include two bite-sized boards: the Arduino Pro Mini and the Nano. The Pro Mini is the smallest microcontroller in the Arduino line. It’s based on the ATmega328 and has 14 digital and 6 analog pins, an onboard resonator, a reset button, but no USB port. With no way to easily hook this Arduino up to a computer, an FTDI serial adapter is necessary to flash Arduino code onto this microcontroller.
The Arduino Pro Mini is a great choice when you’re looking to minimize the amount of space your project will take. At only about 33 mm x 18 mm with no bulky USB ports, this microcontroller will fit in almost any enclosure you have. Don’t let its size fool you, though. The 8-MHz ATmega328 (or 16 MHz in 5-V variants) is more than capable of controlling most simple Arduino projects.
Now that you know a little more about it, let’s check out some awesome projects made with the Arduino Pro Mini.
DIY SMD Rework Station
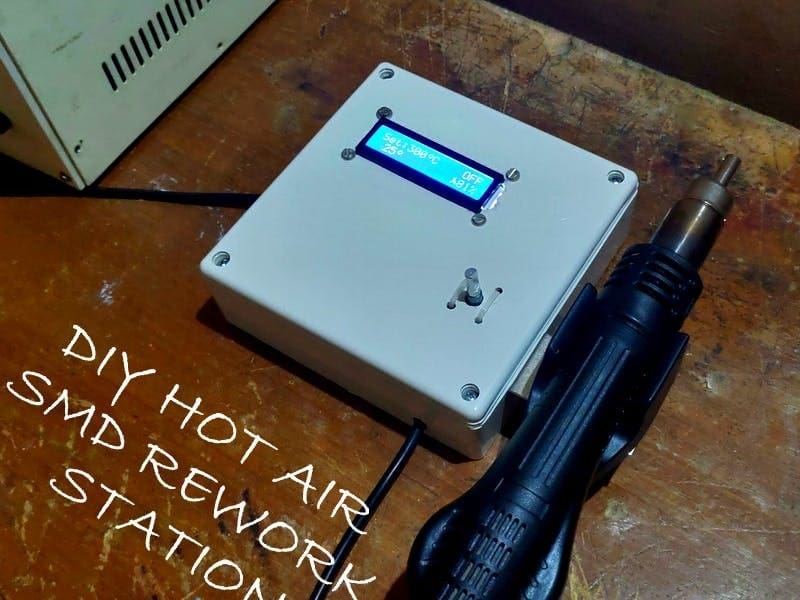
With an Arduino this small, you’ll probably be working with some surface mount components in an effort to reduce the size of your electronics projects. Chances are, you have an electronics lab bench, and this project is the perfect addition to it! Using an Arduino Pro Mini and an off-the-shelf hot air gun handle, the designers of this project put together a quick hot air station for soldering surface-mount device (SMD) components.
With the attached rotary encoder, select your temperature and fan speed, then watch the handle heat up in minutes! This project uses a simple PID algorithm to moderate the temperature of the air coming out of the nozzle. The handle also has a simple switch to turn off the heater as soon as you put it down.
- Difficulty level: Intermediate
- Who made it: sfrwmaker
- What you’ll need: 16×2 LCD display, rotary encoder, hot air gun handle and holder, through hole components
- Where to find it: Arduino Project Hub
Power & Energy Meter
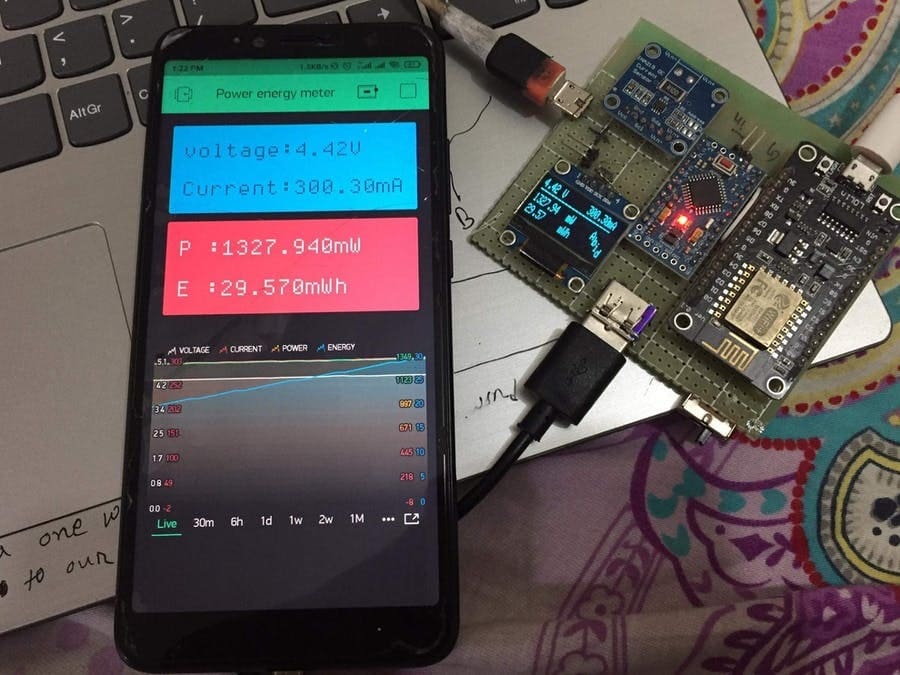
This project is another useful tool for your electronics workbench! It’s a voltage and current meter that connects to the Blynk IoT platform.
Centralized around the INA219 current sensor module, the project uses the Arduino Pro Mini to measure voltage, current, power, and energy from the input terminals on the sensor module. The measurements are displayed on a simple OLED display, and the ESP-12E relays that information to a Blynk service that you set up on your phone. The result is a robust and simple power meter and a slick graphical interface for your electronics projects!
- Difficulty level: Intermediate
- Who made it: abid_hossain
- What you’ll need: ESP-12E NodeMCU, INA219 current sensor, 0.96″ OLED display
- Where to find it: Hackster
Smart Glasses

Turn your Arduino into a second set of eyes! This project uses a custom PCB from JLCPCB and a couple of ultrasonic sensors to “see”.
The custom PCB is in the shape of a pair of glasses and houses some vibration motors and an MP3 player module. When the ultrasonic sensors detect an obstacle, the corresponding vibration motor will begin to vibrate, and an audio cue will play through the MP3 player module.
- Difficulty level: Beginner
- Who made it: B45i
- What you’ll need: HC-SR04 ultrasonic sensor, DFPlayer, slide switch, vibration motor, custom PCB
- Where to find it: Arduino Project Hub
Flip Dot Clock
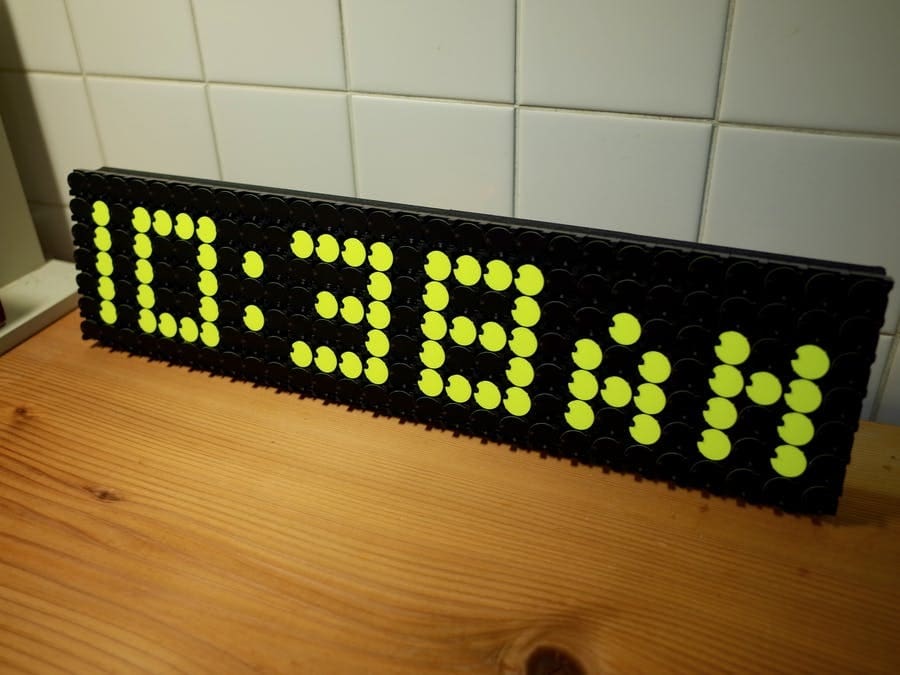
If you’re looking for an interesting timepiece to add to your portfolio of projects, look no further. This project displays time using a unique flip dot display rather than a traditional LED-driven seven-segment display.
The flip-dot display uses electromagnets to flip a matrix of small colored discs to display a pixel. Using a DS1307 real-time clock module, the Arduino Pro Mini can keep time, and the RS485 module flips the display to the correct time when necessary. The designer has provided the full Arduino code and a picture of the necessary wiring for anyone who’d like to recreate this project.
- Difficulty level: Intermediate
- Who made it: iizukak
- What you’ll need: RTC DS1307 module board, XY5 flip-dot display panel, linear regulator, RS485 module, 24-V AC adapter
- Where to find it: Hackster
DIY Roomba
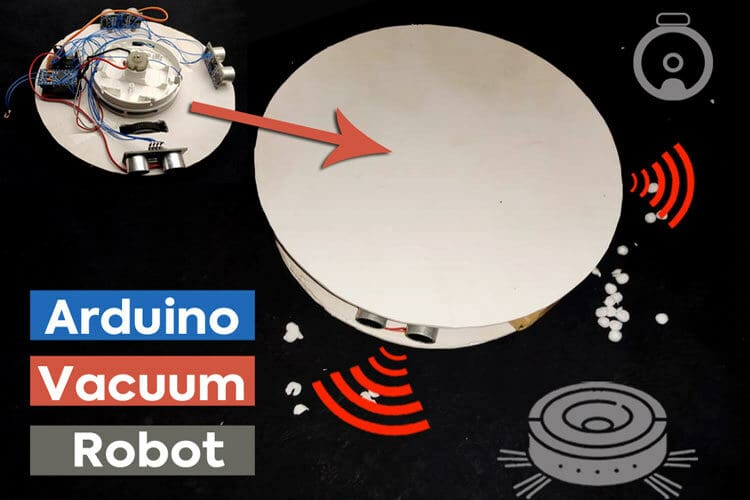
Why buy a Roomba when you can make your own? This project takes a mini handheld vacuum cleaner and builds an autonomous robot around it. Using simple ultrasonic sensors and a pair of brushless motors with wheels, this robot continuously traverses the ground, picking up bits of debris as it goes.
When it hits an obstacle, it simply turns to avoid the obstacle and keeps going! It even has a simple IR sensor for detecting stairs. The project page takes you step by step through the process of building this project. Its in-depth explanations and clear pictures are incredibly helpful, as is the inclusion of the project’s full code and a video.
- Difficulty level: Beginner
- Who made it: Rajesh
- What you’ll need: HC-SR04 ultrasonic sensor, L293D motor driver, 5-V N20 motors, LM7805 voltage regulator, 7.4-V lithium-ion battery, IR module, generic portable vacuum cleaner
- Where to find it: CircuitDigest
DIY TV Ambilight

This beautiful project is a DIY version of Philips Ambilight feature for televisions! The Ambilight shines RGB LEDs around the sides of the TV, matching the colors to the screen. The result is an impressive viewing experience that isn’t contained solely to your screen.
The project has only four components, and it’s fairly easy to implement on any TV. While a full guide is not available, Dan Fein has provided an image of his wiring as well as his code. Other more in-depth guides for similar builds can be found from YouTuber GreatScott.
- Difficulty level: Beginner
- Who made it: Dan Fein
- What you’ll need: WS2812B LED strip, 1000 µF capacitor, 5-V power supply
- Where to find it: Hackster
Wireless LED Hearts
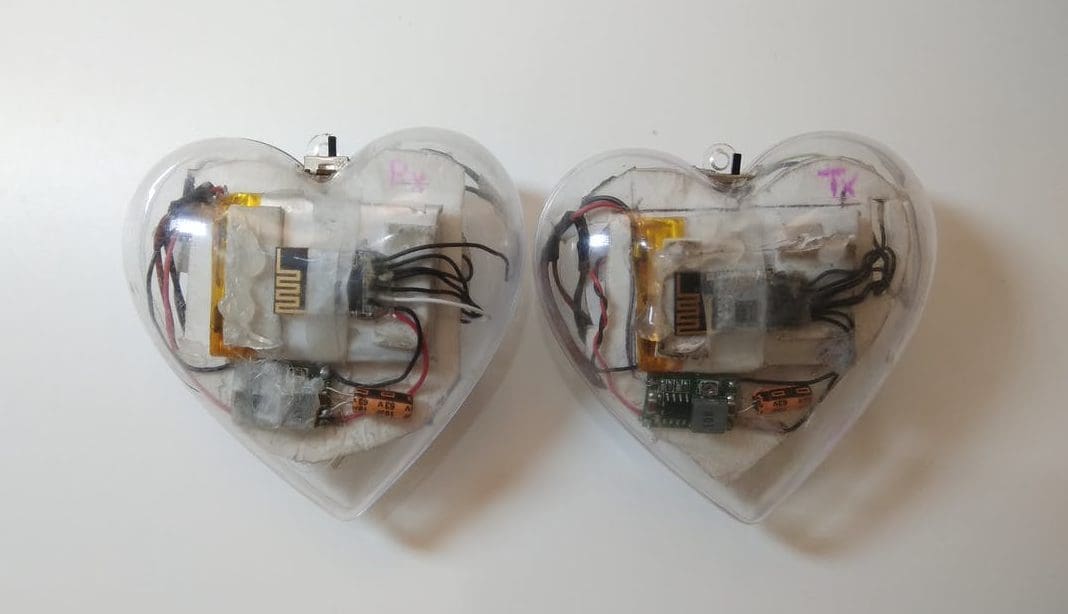
Looking for a unique gift for a significant other? Look no further! This project uses a pair of custom PCBs, an NRF24L01+ wireless module, and some LEDs to make a heart-shaped trinket that blinks like a heartbeat! Only when the trinkets are in proximity to each other will they begin beating in time.
The NRF24L01+ modules used for wireless communication can achieve a range of 40 to 50 meters. A full guide and explanations for their component choices can be found on the project page.
- Difficulty level: Intermediate
- Who made it: AdiK
- What you’ll need: 5-V step-up voltage regulator, 1,000-mAh LiPo battery, NRF24L01+ module, slide switch, custom PCB
- Where to find it: Arduino Project Hub
RC Boat

Don’t throw away that styrofoam yet! This project uses styrofoam as the body of a small RC boat. With a 433-MHz transmitter and receiver as well as two motors with propellers, the boat uses differential thrust to turn and navigate through the water.
This guide also takes you through the making of a simple four-button remote control. For such a simple RC boat, this tutorial is fairly in-depth, exploring the wireless transmission protocol with HT12E/D encoding modules. For those looking for a challenge, give this toy boat a go!
- Difficulty level: Intermediate
- Who made it: Rajesh
- What you’ll need: 433 MHz transmitter and receiver, HT12E and HT12D, push buttons, L293D motor driver, 9V battery, 7805 regulator, DC motors
- Where to find it: CircuitDigest
Magnetic Puzzle
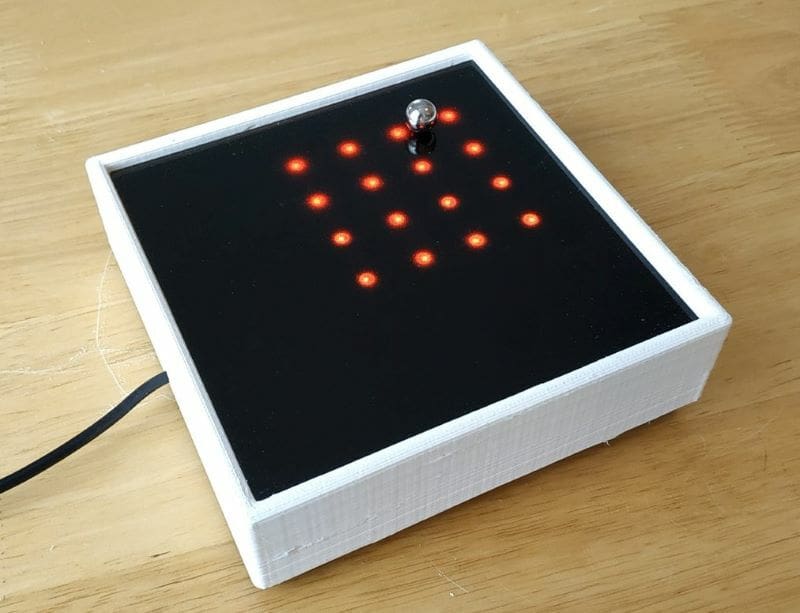
This puzzle is a great first project for any new electronics enthusiasts! By using a matrix of reed switches, a magnetic ball can be placed on the puzzle and tilted to an LED to score a point. Complete the puzzle by tilting the magnetic ball to all the LEDs on the board.
This simple puzzle is fairly easy to put together, and the designer has created a comprehensive tutorial! A full wiring guide, explanations, and 3D printing files are provided.
- Difficulty level: Beginner
- Who made it: andrei.erdei
- What you’ll need: Reed switches, WS2812 RGB LED strips, 8Ω miniature speaker, 3D printer
- Where to find it: Instructables
Firebending

Allen Pan – Sufficiently Advanced is one of the best YouTube channels for makers! It features some incredible projects, from actual cutting lightsabers to a real-life Mjölnir hammer. With a nod to the animated series Avatar the Last Airbender, Allen Pan turns firebending into a reality with a pair of wrist-mounted flamethrowers!
By using an Adafruit LIS3DH accelerometer, the flamethrowers can detect a punch, which triggers the solenoid to release pressurized butane gas! A USB arc lighter is then activated, igniting the gas into a fireball. Allen Pan has made a whole video covering his invention, so check it out!
- Difficulty level: Advanced
- Who made it: Allen Pan
- What you’ll need: Adafruit LIS3DH accelerometer, plumbing pipes, butane canister, USB arc lighter, solenoid valve
- Where to find it: Arduino Project Hub
Lead image source: harrisonbroadbent via Unsplash
License: The text of "The 10 Best Arduino Mini Projects" by All3DP is licensed under a Creative Commons Attribution 4.0 International License.
CERTAIN CONTENT THAT APPEARS ON THIS SITE COMES FROM AMAZON. THIS CONTENT IS PROVIDED ‘AS IS’ AND IS SUBJECT TO CHANGE OR REMOVAL AT ANY TIME.