The Best Arduino Projects for Engineering Students

If you want to make an Arduino-based final year project, read on for the best Arduino projects for engineering students!
Studying engineering requires one to digest a lot of science, but theory and calculations aren’t everything. One of the most useful skills you’ll need to acquire is real-life experience, whether that’s in a job or with personal projects you take on to help hone your skills. Here, we’ve gathered 15 interesting projects that should aid with learning and practicing different aspects of engineering, all built around Arduino development boards.
With student budgets in mind, we’ve selected projects that use similar Arduino boards, so you won’t need to purchase too many parts to try a range of projects. Additionally, we’ve included projects that vary in area of focus so you can choose the field that interests you most. Finally, we especially tried to make sure that the instructions for wiring and coding were clear and easy to follow, making it easier to understand the processes and pick up some skills.
So, now that we know what we’re in for, let’s get to the list!
Robotic Car
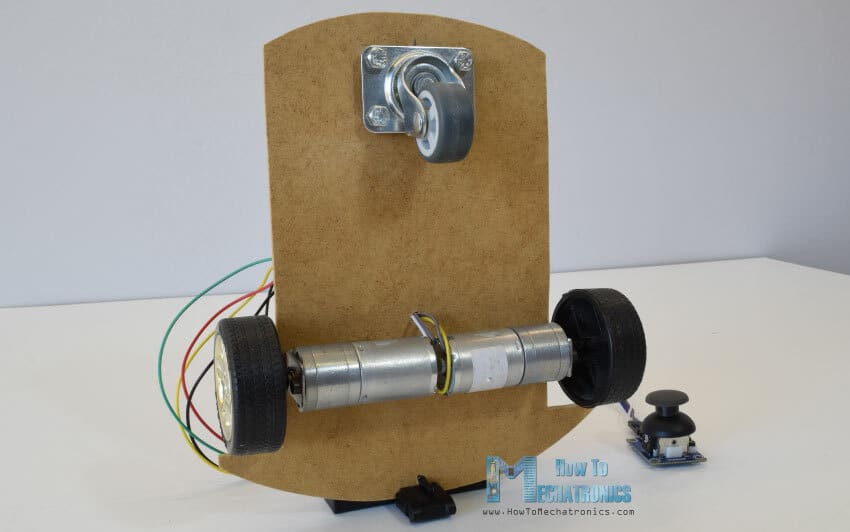
The idea of making your own robotic car sounds cool to anyone, but beyond that, this tutorial takes you through some useful basic principles that you can use in future projects.
Following this tutorial, you’ll employ pulse-width modulation (PWM) to control the speed of a DC motor, as well as wire an H-bridge to correctly switch your motor’s direction without causing a short circuit. It also introduces the concept of drivers, which are controllers for specific functions, and it explains in great detail how to connect the required driver for the project, both to the motors and the Arduino.
Finally, knowing all these principles, the tutorial applies them to a robotic car, which you can control with a joystick using an Arduino Uno. The instructions are clearly laid out on the project website, but if you’d prefer to follow along with a video, they’ve got you covered!
- Designer: Dejan
- Project pages: HowToMechatronics, YouTube
- Core components: Arduino Uno, L298N driver, 12-V DC motors, joystick, 12-V power supply
- Difficulty: Beginner
Remote Control Pneumatic Cylinder
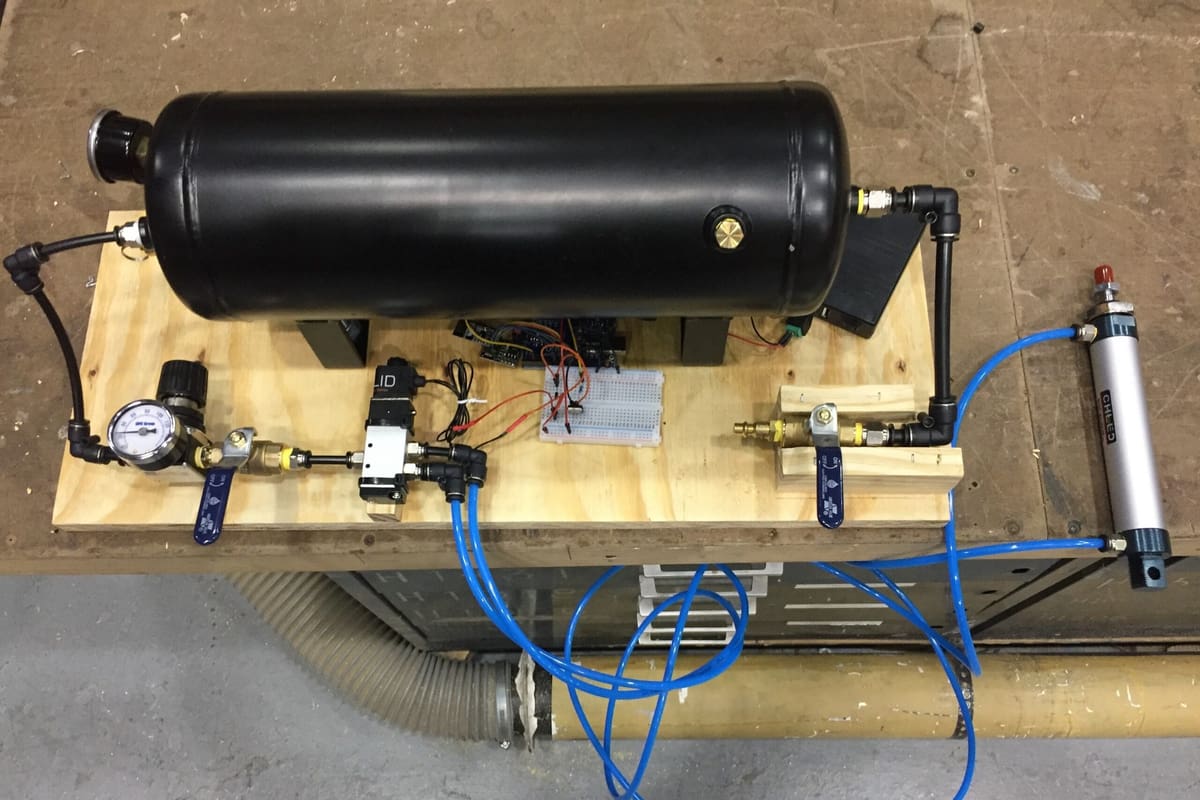
Pneumatics is a branch of engineering that turns the energy from compressed air or gases into mechanical movement, allowing machines and devices to perform specific tasks. Pneumatic systems are everywhere, including vehicles, construction tools, and medical equipment, among other uses. For students interested in this area of engineering, this project is just for you.
According to its creator, the objective is “to control a solenoid connected to a pneumatic cylinder remotely via RF transmission”. On the hardware side, the RF transmission is achieved with a couple of Arduino Unos and nRF24L01 wireless modules, and the project documentation walks you through creating the client-server system required for transmission.
The client and server Arduinos “talk” to one another, triggering the release of air into the pneumatic cylinder. In the project photos, the creator demonstrates the system by shaking a can of soup, but we’re sure you’ll come up with some more compelling end uses.
- Designer: Jdsii
- Project page: Instructables
- Core components: Arduino Unos, nRF24L01 2.4-GHz wireless modules, 10-kΩ resistor, TIP120 Darlington transistor, rectifier diode, power supply, air cylinder, 12-V solenoid, regulator, air tank, valves
- Difficulty: Advanced
High-Speed Photography

High-speed photography is a technique that uses precise electronic control to take high-quality images of fast motion. Common examples include a drop of water hitting a surface, a glass breaking, and a chipmunk landing in a tree. This project is especially useful for electronics students interested in image tracking and analysis.
In this tutorial, the creator takes you through adapting a camera for high-speed photography using an Arduino Nano, a breadboard, and a bit of code. It’s not that hard, and the results look very high-quality. Plus, you’ll learn about image data. However, do keep in mind that you’ll need a camera to be able to recreate this project.
There’s a YouTube video for you to follow along, all the code is on GitHub, and the full bill of materials is available from the creator’s website. Easy!
- Designer: Matt Richardson
- Project pages: YouTube, GitHub, Matt Richardson
- Core components: Arduino Nano, camera, opto-isolator, breadboard, push button, resistors
- Difficulty: Intermediate
Arduino IC Tester
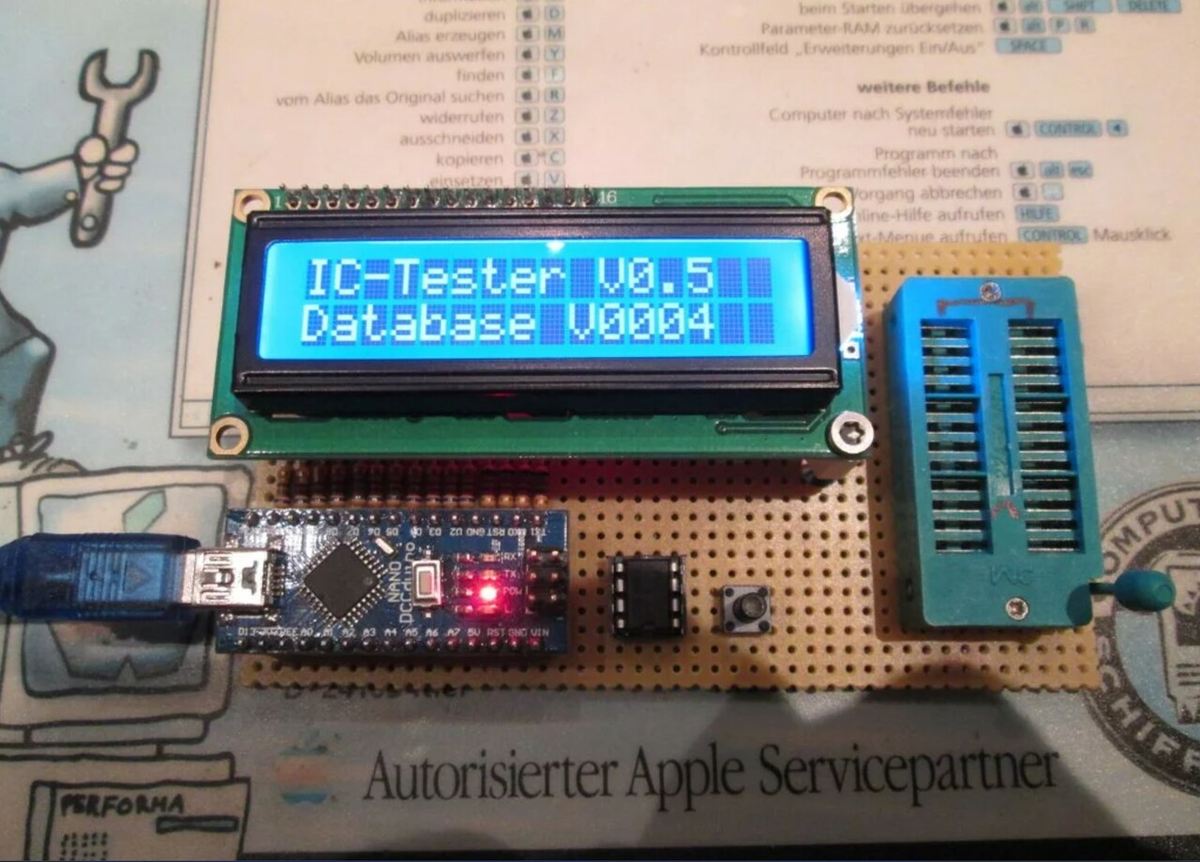
Semiconductor test equipment, also known as IC tester, is used to ensure a device works as it should. Micoronics Japan Co., which manufactures IC testers, defines them as “a system for giving electrical signals to a semiconductor device to compare output signals against expected values”.
After some misadventures with commercial testers, the designer of this project decided to create their own Arduino-based IC tester. Not many components are required. Test data is stored in an EEPROM and displayed on an LCD display; more detailed test results are sent from the Nano to a connected computer.
As engineering students often have to design different kinds of hardware that require microchips, a custom-built IC tester would surely come in handy. Four Instructables users have already made it.
- Designer: JorBi
- Project page: Instructables
- Core components: Arduino Nano, LCD display, LCD I2C converter, 680-Ω resistor, I2C EEPROM AT24C512, a switch
- Difficulty: Easy
Ultrasonic Sensor Robot
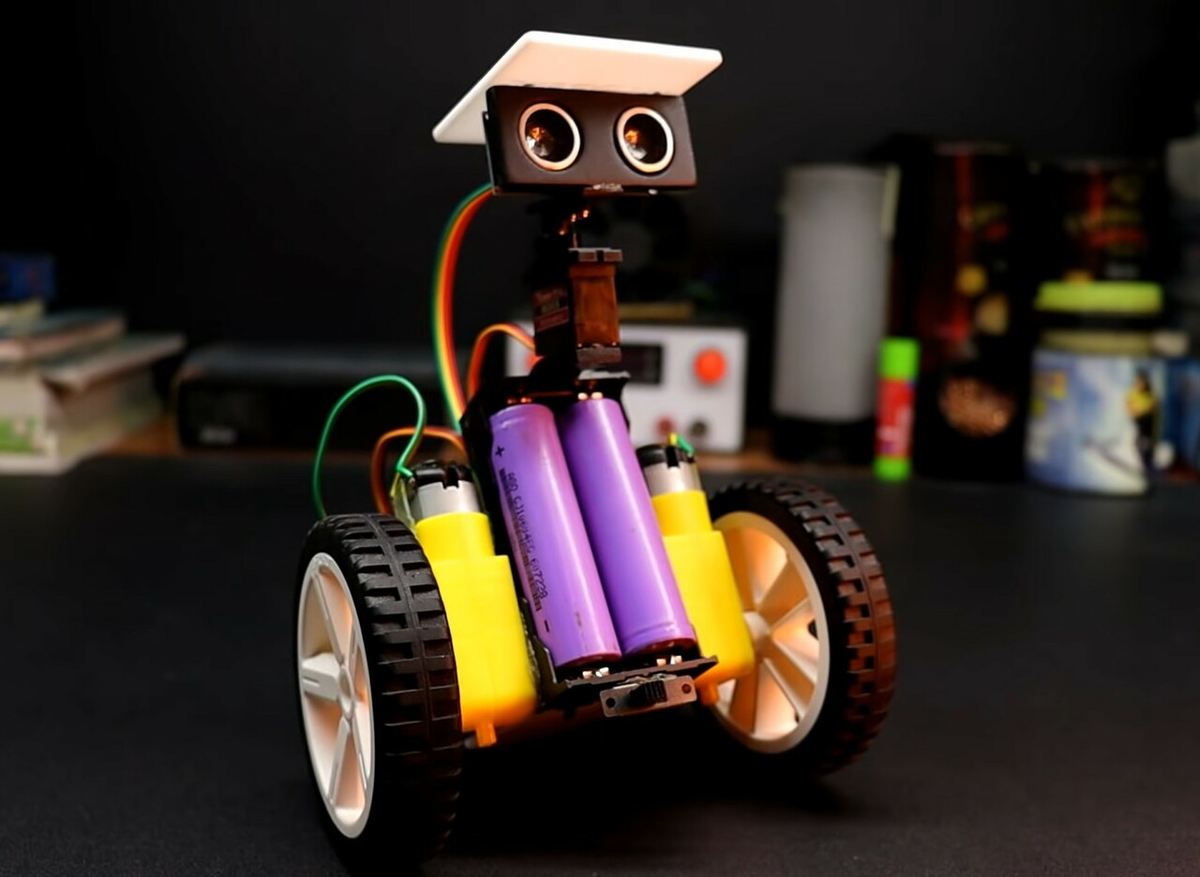
Ultrasonic sensors have revolutionized the capabilities of Arduino-based robots by unlocking new dimensions of awareness and precision. These sensors operate on the principle of sending high-frequency sound waves and measuring the time it takes for waves to bounce back. When installed in Arduino-based robots, the sensors allow them to navigate through the environment more efficiently.
This project uses the same idea and is very simple to build. Along there’s a video demonstrating the build, the creator also provides links to the circuit diagram and code.
- Designer: DIY Builder
- Project page: YouTube
- Core components: Arduino Uno, motor driver shield, ultrasonic sensor, servo motor, 18650 Li-on batteries, battery holder
- Difficulty: Easy
No-Contact Temperature Sensor
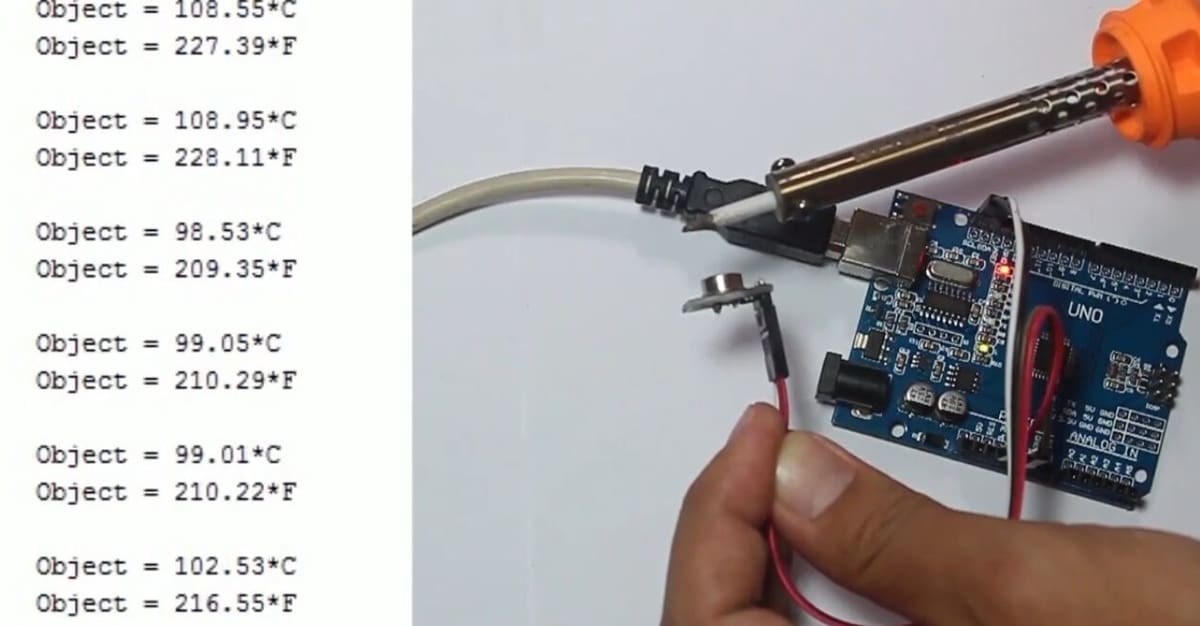
This project uses an MLX90614 sensor attached to an Arduino to sense the temperature of specific objects (as opposed to the ambient temperature, which we’ve got a device for later on). The sensor measures the infrared emitted by an object to tell its temperature. It’s a simple device but also very useful, and it’s the same technique used by the thermoguns that became widely used during the Covid-19 pandemic.
This project would be especially relevant for mechanical engineering students interested in thermodynamics or electrical engineering students learning about control. Temperature measurement can have many applications for many different complex projects, so it’s a useful tool to get your head around. The creator does a good job explaining how to read the code and how to connect the sensor, and there’s a great video to show you how it’s done.
- Designer: miliohm
- Project pages: YouTube, Miliohm
- Core components: Arduino Uno, MLX90614 sensor
- Difficulty: Beginner
Automatic Traffic Lights
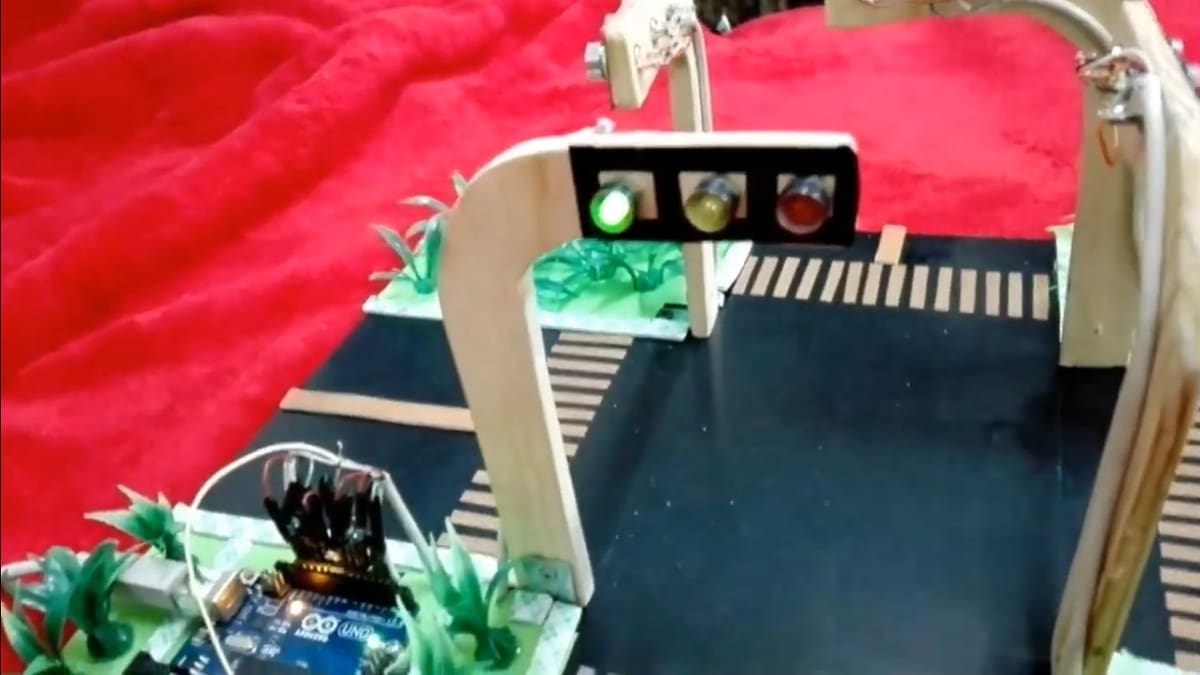
Building automatic traffic lights is a very common project when getting started in mechatronics. It’s useful in its simplicity because it teaches basic control logic, such as “on” and “off” and temporization. It’s a great practical example, as it very closely emulates how real traffic lights work by simply coordinating timing and using delays.
There are many similar projects out there, but out of all of them, this is the one we found to be the most replicable at home, as it doesn’t use too many components, and the simple mechanics are explained very clearly.
- Designer: Genius Technology
- Project page: YouTube
- Core components: Arduino Uno, red, yellow, and green LEDs, 270-Ω resistors
- Difficulty: Beginner
Flying RC Plane
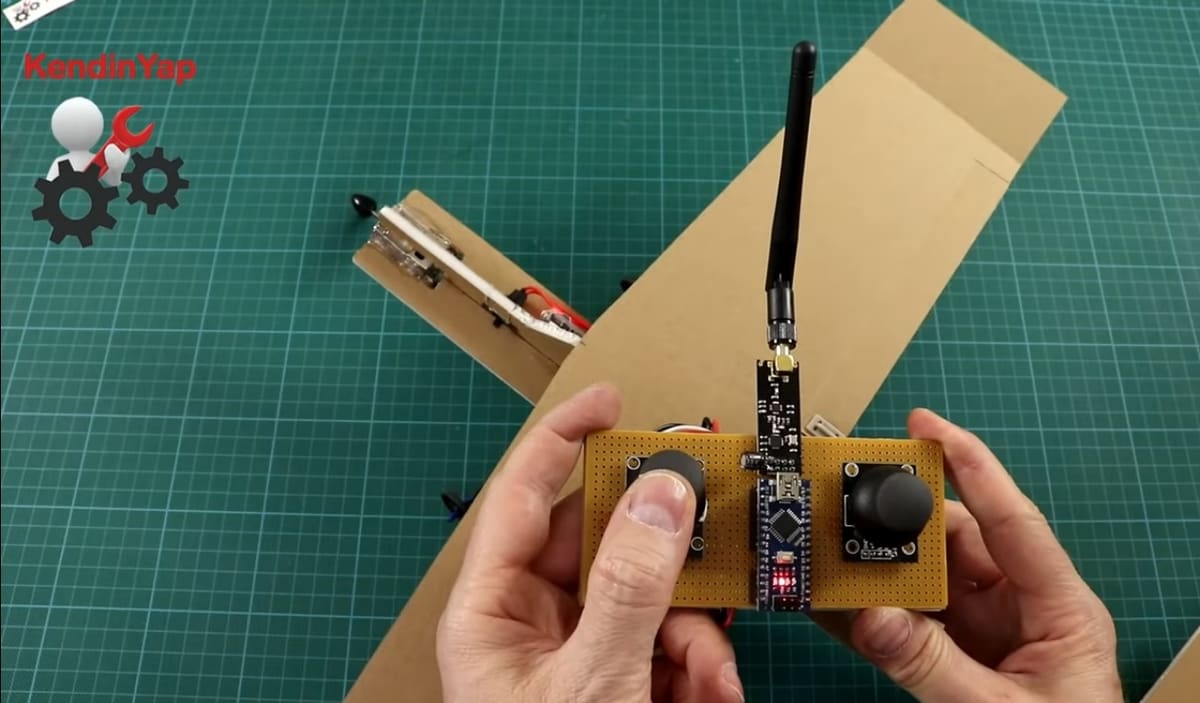
Flight dynamics is one of the many fields of specialization in mechanical engineering. Building a model airplane is useful to understand the principles of flaps, winglets, tail movement, and so on. And flying your own self-made plane makes it worth the effort to construct!
This tutorial takes you over how to make the plane parts and how to attach the electronics to make the plane move. In a separate video, available in the description, the author also shows how to make the radio controller for the plane. All the materials and the code can be found in the description of the video.
- Designer: KendinYap
- Project page: YouTube
- Core components: Arduino Nano, Arduino radio controller, micro servos, kraft foam board, DC motors, propellors
- Difficulty: Advanced
3D Printed Photogrammetry Scanner
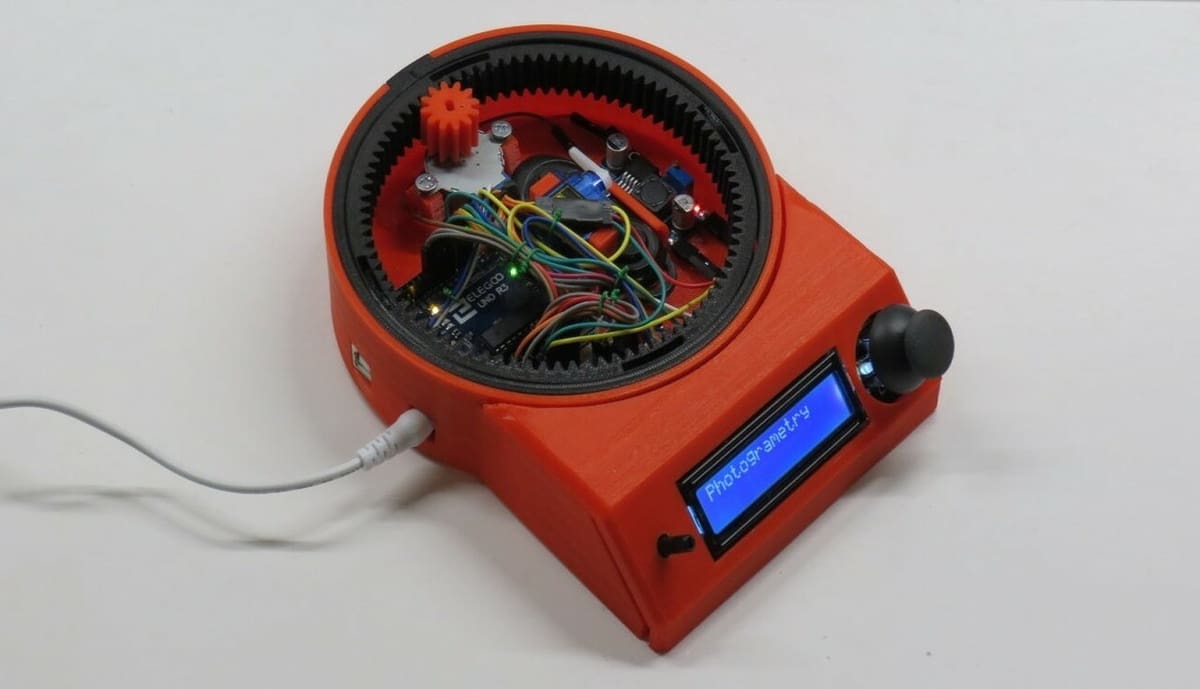
Photogrammetry is a 3D scanning technique that consists of taking pictures of an object from many angles and then overlapping those pictures to generate a 3D image. It’s an incredibly accessible technology, as you only need a good resolution camera, and most smartphone cameras these days will do the trick!
As such, you can have a photogrammetry scanner on your phone simply by downloading an app. This project combines Arduino and 3D printing to create a rotating table that will make acquiring those photos even easier.
To be able to make this project, you’ll need some 3D printed parts. If you don’t have a printer of your own, try Craftcloud to have the parts printed and delivered to your door! Aside from the time it takes to print the parts, constructing and using the finished rotating table is very simple, and it has 23 successful makes on Thingiverse.
- Designer: Brian Brocken
- Project page: Thingiverse, YouTube
- Core components: Arduino Uno, 9-g servo, 1602 LCD screen, joystick, stepper motor, Bluetooth remote
- Difficulty: Intermediate
Automatic Light Intensity Control
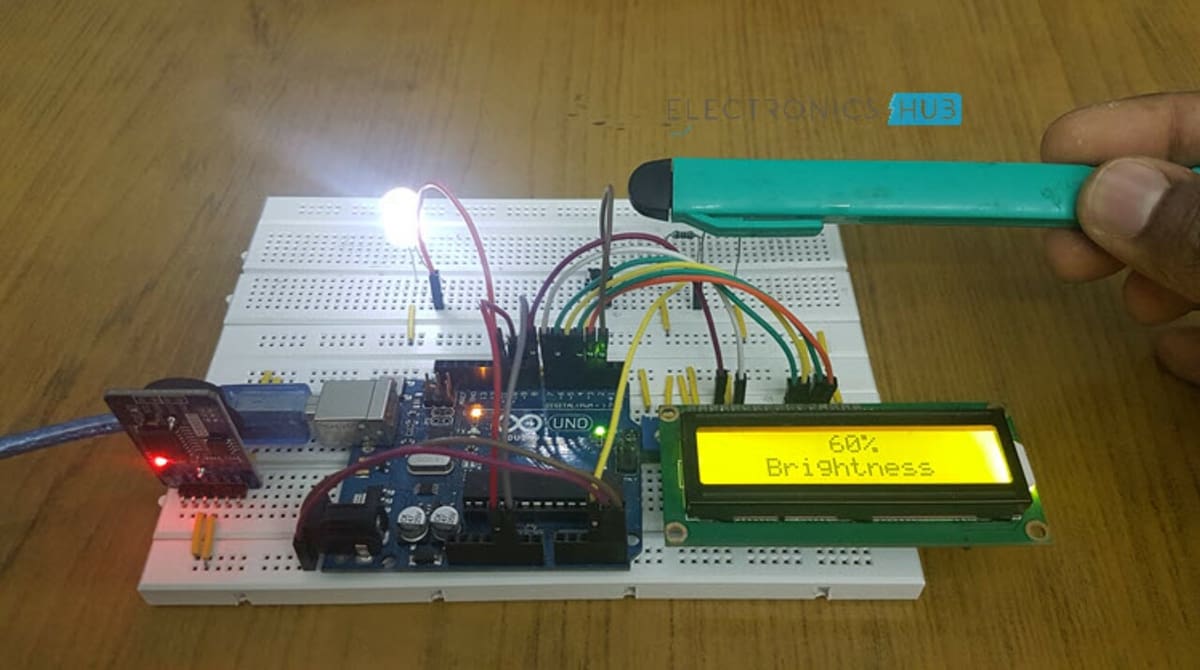
This project automatically controls the intensity of streetlights depending on ambient light conditions. The intensity of light will be high when ambient light is low and low when ambient light is high. The objective is to save on unnecessary power consumption. It’s a great project for engineers interested in power systems.
The project has two modes: RTC and LDR. In the former, street lights turn on and off automatically based on a timer. The latter controls the intensity of light based on ambient light near the LDR. Both the RTC module and LDR are connected to the Arduino, along with LED lights and an LCD display, which shows the brightness in percentages.
- Designer: ElectronicsHub
- Project page: ElectronicsHub
- Core components: Arduino Uno, DS3231 RTC module, LDR, LCD display, LED, 10-kΩ potentiometer, 10-kΩ resistor, push-button switch, breadboard
- Difficulty: Easy
Temperature & Humidity Sensor
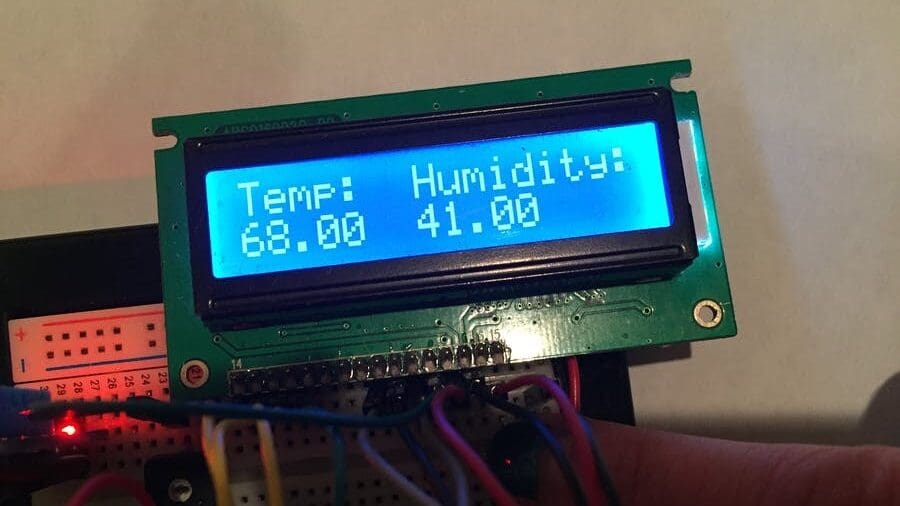
This project helps you build your own environmental humidity and temperature sensor, which is useful for meteorology applications and as an introduction to control. Since it uses a display instead of displaying directly on your computer, it’s also a good project to learn how to use and program a display. The wiring is a little complex, but the coding is fairly simple.
The project has clear instructions for the wiring, a full bill of materials, and all the code you’ll need to get it running. Many people have made it, and you can find troubleshooting in the comments.
DrawBot
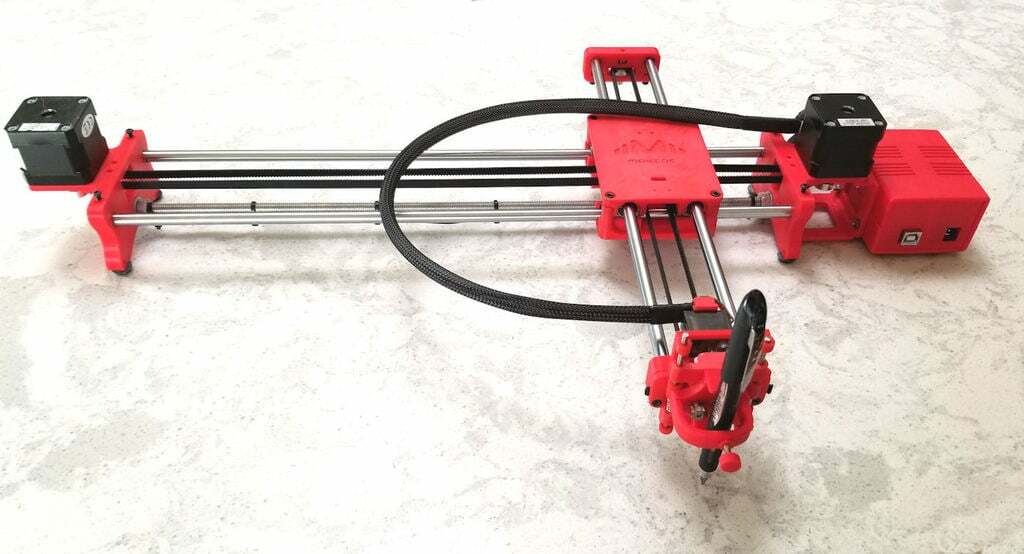
DrawBot is a controlled drawing machine that’s used to draw or write with pens, markers, or other writing implements on various surfaces. GRBL, Inkscape, Java, and Universal G-Code Sender are needed to operate the DrawBot.
Users draw in Inkscape, and an Inkscape extension called “MI GRBL Extension” translates the drawing into G-code, which is then sent to the robot via Universal G-Code Sender. The Arduino must run GRBL firmware.
This project is a great hobbyist project for aspiring engineers to learn. The coding as well as the mechanical operation of the arm are quite fascinating, and the project overall can satisfy students’ artistic flair.
- Designer: henryarnold
- Project page: Thingiverse
- Core components: Arduino Uno, CNC shield, A4988 stepper drivers plus jumpers, 12-V 2A wall transformer, limit switches (optional), Nema 17 stepper motors, linear rods, SG90 servo
- Difficulty: Easy
Hand Gesture Robotic Arm
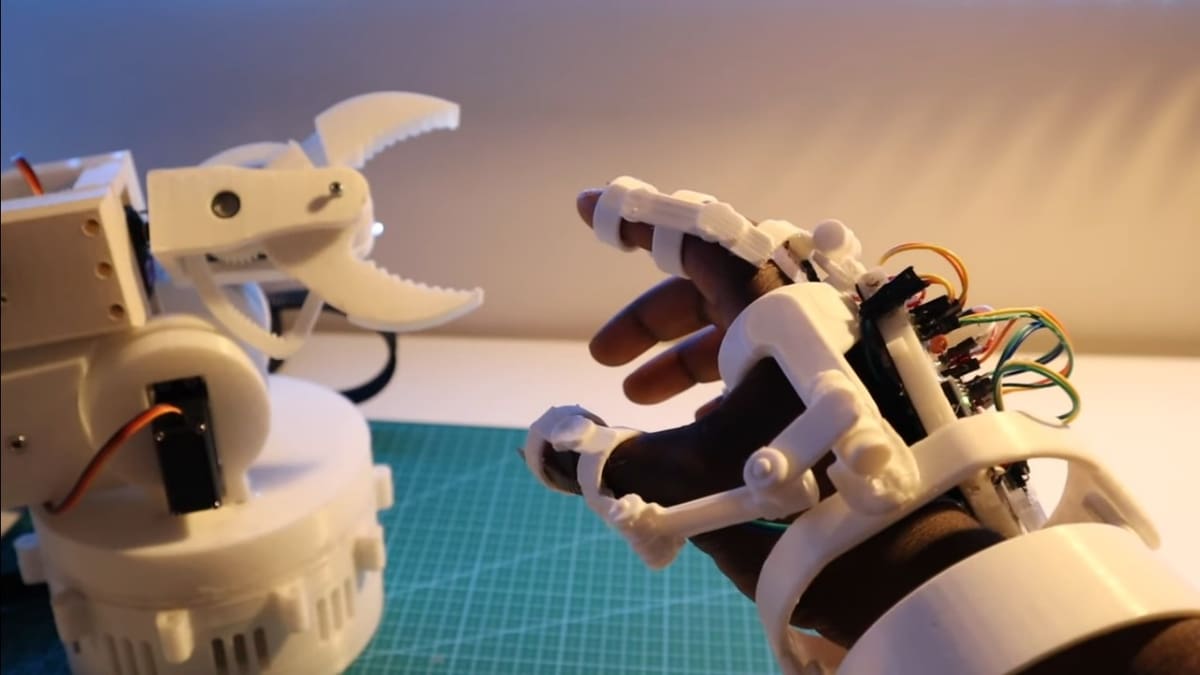
A hand-gesture-controlled robotic arm? It sounds like sci-fi, but it’s actually very doable thanks to this project’s clear instructions. A robotic arm is one of the most impressive mechatronic projects you can make, but this project breaks it down for you to recreate. The way the arm is controlled is truly mind-blowing. Be prepared to impress your friends!
The materials you’ll need and the steps to follow are very clearly explained, so it’s a well-rounded project. This is another device that uses 3D printed parts, so consider using a printing service if you don’t have your own machine.
- Designer: Eben Kouao
- Project page: YouTube
- Core components: Arduino Uno, servo motors and drivers, HC-05 Bluetooth receiver, breadboard, accelerometer, flex sensor
- Difficulty: Advanced
Electronic Drums
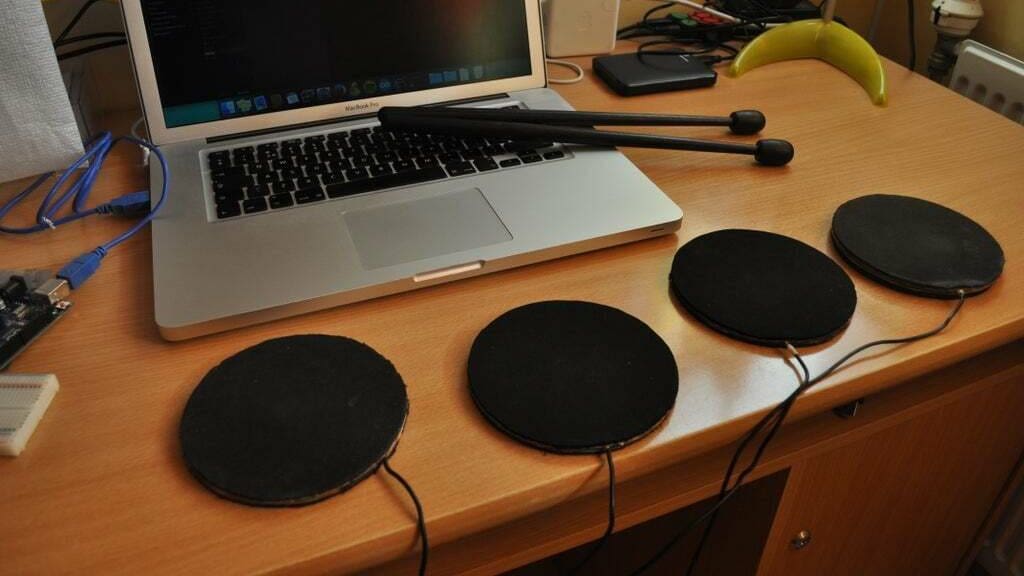
This project is a little different from the others on our list in that it’s music-oriented and less technical to assemble. But it deals with some interesting concepts, like amplification, and it has more interaction with your computer, which brings a new element to learn about. It also tackles sound treatment, which is another branch of electrical engineering.
As is typical for Instructables, the project has a full list of materials as well as clear instructions and diagrams. The drum pads themselves are ingeniously constructed from CDs cushioned by mousepads with piezo sensors underneath!
- Who designed it: anouskadg
- Project page: Instructables
- Core components: Arduino Uno, mouse pads, 1-MΩ resistors, breadboard, CDs, piezo sensors
- Difficulty: Intermediate
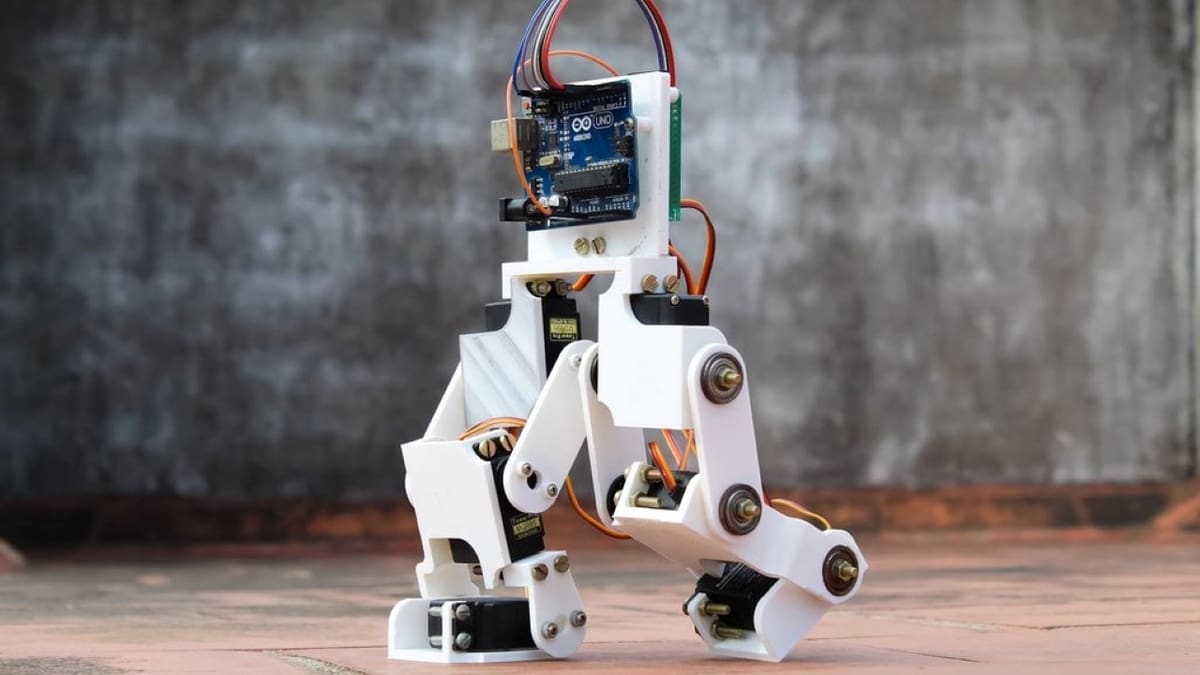
Robotic Biped
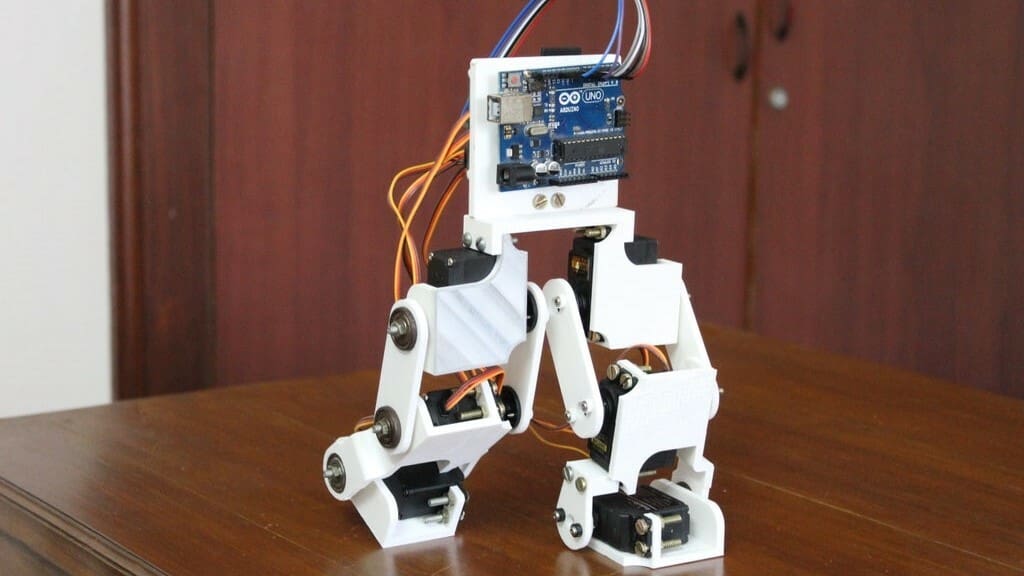
This adorable-looking robot is an interesting project to make, though a bit more involved than some others on our list. It’s a multi-disciplinary construction, and there’s a lot to learn from it. It’s related to biomechanics, kinematics, mechatronics, and obviously electronics, and all of it is well-explained. The project certainly looks impressive, but amazingly, it’s not even that complicated to replicate!
Something especially interesting about this project is the level of detail included in the explanations. It explains the lengths used with respect to kinematics, and it gives the equations of movement defined by the length of each limb to explain how they were designed. This kind of extra information is right on par with engineering studies, especially mechanics. Once again, keep in mind you’ll need to have access to a 3D printer to recreate this impressive biped.
- Designer: Technovation
- Project page: Instructables
- Core components: Arduino Uno, MG995 servos, perfboard, skateboard bearings
- Difficulty: Advanced
Lead image source: Technovation via Instructables
License: The text of "The Best Arduino Projects for Engineering Students" by All3DP is licensed under a Creative Commons Attribution 4.0 International License.