
Bambu Lab P1P Enclosure: All You Need to Know

Bambu Lab's P1P printer is a powerful machine, but it lacks an enclosure. Read on to discover if a Bambu Lab P1P enclosure upgrade is for you!
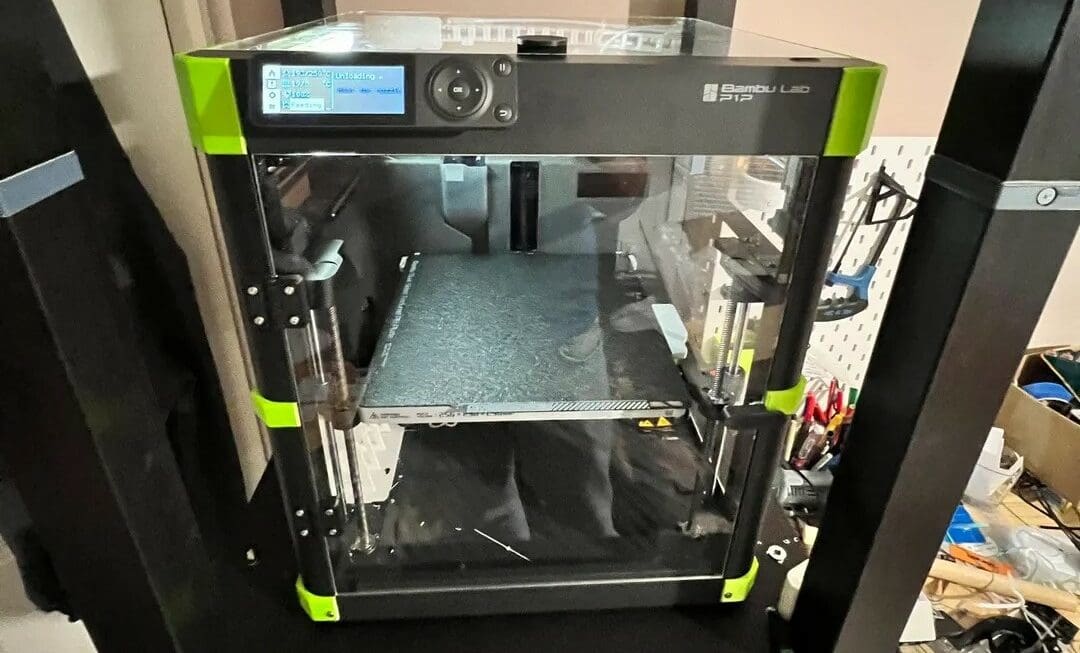
The Bambu Lab P1P offers fast and high-quality prints at an affordable price tag. It may be Bambu Lab’s budget printer, but it still brings a lot to the table, including incredible print speeds, advanced bed leveling capabilities, and easy-to-use features.
Among its impressive features, the P1P can reach printing temperatures of 300 °C and a heated bed temperature of 100 °C. In addition, it can achieve speeds of up to 500 mm/s and acceleration of 20,000 mm/s². Paired with features like automatic bed leveling and semi-automatic belt tensioning, this printer seems like the complete package.
However, one noticeable thing the P1P lacks is an enclosure. While you technically don’t need to enclose the printer, an enclosed build zone can help you print with a full range of materials and achieve more consistent print results. Without an enclosure, the P1P can print common materials like PLA, PETG, TPU, PVA, and PET with ease, but that is the ceiling. Keep in mind that to get a fully enclosed P1P, you’ll need a door and top cover as well.
In this article, we’ll take a look at the benefits and potential issues that come with adding an enclosure to the Bambu Lab P1P before checking out some specific enclosure options. Read on to see if an enclosure would make for a valuable upgrade to your P1P!
Benefits of an Enclosure

An enclosure offers many benefits, both in terms of 3D printing performance and safety. Let’s take a look at how adding an enclosure to your P1P can give it a boost.
Functionality
As mentioned, an enclosure can improve a 3D printer’s performance, particularly when it comes to printing tougher materials like ASA, ABS, and nylon. These materials are known for their excellent mechanical properties, but have a reputation for warping and shrinkage. Enclosures can help solve these common problems by increasing the ambient temperature or the temperature of a given build area.
Raising the ambient temperature allows an FDM print to cool at a slower pace. This gradual shift in temperature prevents warping, and the uniform cooling prevents delamination and print failures.
Another way an enclosure can improve the functionality of the P1P is by reducing dust. Dust is common in many workshops, coating tools, parts, and printers alike. When dust reaches the print bed, it makes proper bed adhesion challenging, leading to failed prints.
An enclosure is a great solution for blocking out unwanted particles that can quickly gum up motors, axis rods, and electronics.
Safety

In addition to improved functionality, adding an enclosure offers important safety and usage benefits. Curious hands or adventurous pets can easily hurt themselves or a machine if proper safety precautions are not taken during the 3D printing process.
High visibility enclosures (which we’ll get into more below) are great ways to keep an eye on prints while protecting yourself and others from the hot end and heat bed.
Noise can also be a big concern for those thinking about buying a 3D printer, and an enclosure can help cut down on the sounds of whirring fans, beeping displays, and turning motors. Bambu Lab forum user maruccimike60, who installed the ARC enclosure on his P1P, found that noise levels greatly decreased.
For those without well-ventilated spaces, fumes can be a large factor in purchasing a 3D printer or choosing which materials to print. For example, ABS produces unpleasant fumes that can cause headaches and eye irritation. An enclosure helps reduce harmful emissions like VOCs and particulates.
Considerations & Potential Issues

As seen above, enclosures offer several important benefits. However, they do not come without their downsides. Here are a couple of considerations to keep in mind when adding an enclosure to the P1P.
High Temperatures
When printing with materials like PLA, TPU, or PETG, it can actually be worse to have a high ambient temperature. Increased temperatures can soften PLA too far up into the hot end, leading to clogging. Reddit user suit1337 recommends opening the top panel of the enclosure when printing PLA with an enclosed P1P.
Build Plate
Another consideration to keep in mind when adding an enclosure to your P1P is the build plate. If you’re printing high-temperature filaments like PC, Bambu Lab’s High Temperature Plate will help you maintain proper bed adhesion.
On the other end, cooler filaments like PLA will require the Bambu Lab Cool Plate. When to use which plate has been a topic of discussion in forums like Reddit, in which many users have provided helpful insights to newcomers.
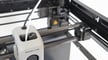
Cooling Fan
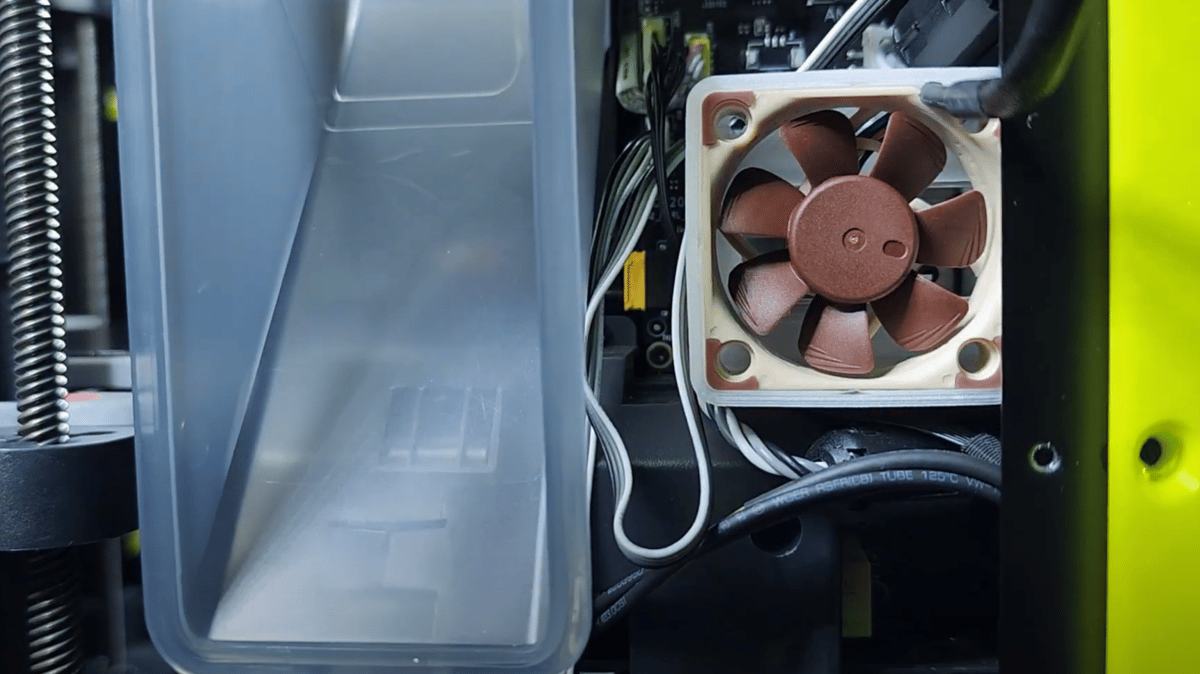
The next issue is specific to the P1P. The motherboard is passively cooled on this printer, meaning it doesn’t have its own fan. Instead, it relies on a heatsink that cools down from contact with cool air.
Since adding an enclosure will increase the ambient temperature and prevent cooling from taking place, potential damage could occur from overheating. To remedy this problem, a fan must be installed with the enclosure. The only kit on the list to provide a motherboard fan is the official Bambu Lab upgrade kit. For other kits, you’ll need to source your own fan.
The most popular fans are the official Bambu Lab 5V or the Noctua 5V NF-A4x10. The Noctua fan requires a four-pin connector, which may need crimping if the original pins can’t be transferred to the new connector.
Once acquiring either of the 5V fans, the installation process is simple but does require a basic understanding of electricity. Be sure to power off and unplug the P1P before any and all maintenance. A video kindly posted by Nano3dlab shows the correct wiring for the fan, and other user-uploaded guides provide further information about the upgrade.
The only other piece required is a 3D printed adapter to go over the preexisting heat sink. A word of warning here: Users have reported two different sizes of heatsink, one at 39×22 mm and the other at 38×20 mm. Measure beforehand to print out the correct size. A successful upgrade will result in a running fan that, when powered up, blows air onto the heat block and prevents it from overheating.
Options
If you’ve decided that adding an enclosure to your P1P is a necessary upgrade, the good news is there are plenty of options to choose from.
If you’re reading this before purchasing the P1P, keep in mind that Bambu Lab’s P1S 3D printer offers all the same functionality, complete with fans, an enclosure, an enhanced tool head cable, and an activated carbon filter, for just $100 more. This is the same cost or less than many aftermarket enclosures.
If you’re already an owner of the P1P, the next step is to decide whether or not you want to print the enclosure parts yourself. Most of the enclosure options listed below will require a dedicated spool of filament and heat-resistant material. To withstand higher ambient temperatures, thrutheframe, the creator of the ARC enclosure, recommends printing your enclosure out of ABS or ASA. PETG is the bare minimum, as anything below it will soften and deform in the heated chamber.
While some of the following enclosure options require lengthy assembly times, others are a quick upgrade with minimal fuss. Many include nice bonus features, such as removable side panels, AMS compatibility, or easy venting. Now, let’s get into the options!
P1P to P1S Upgrade Kit

The official enclosure kit Bambu Lab is designed to be a comprehensive upgrade for the P1P, basically converting it to a P1S. The kit comes with an auxiliary part cooling fan, chamber temperature regulator fan, and a control board fan, making it especially easy to protect the motherboard from overheating.
You won’t need to worry about 3D printing any parts, as everything you’ll need is included. The kit arrives with detailed guides, instructions, and community support, making it the most comprehensive option on our list of options, but also the priciest.
- What’s included: Includes fan and all panels and pieces needed to enclose the printer
- AMS compatible: Yes
- Price: ~$150

ARC Enclosure

Originally created by thrutheframe, the ARC enclosure was designed with an emphasis on strength and sturdiness. It’s customizable and capable of adapting to user requirements. You can download the 3D printable parts on Printables, where you’ll also find the complete BOM and further assembly instructions.
Several retailers offer ARC enclosure kits, including 3DSourcerer at Amazon, which include the necessary panels and screws. Users will then need to print and assemble their own frame with the provided hardware. You can see a complete list of retailers in the project description on the Printables page.
Keep in mind that this can be a lengthy build, with over 200 pieces in the kit. The ARC enclosure typically uses around 1 kg of filament to print.
- What’s included: Acrylic panels, screws, brass inserts, magnets (3D printable frame and fan not included in purchaseable kit)
- AMS compatible: Yes
- Price: ~$100 (for kit)
Voxel Vision Enclosure Kit

The Vision enclosure is an all-in-one kit that provides the necessary hardware, tools, and printed pieces with pre-inserted threads and magnets. Basically, it includes everything you need to seamlessly enclose your P1P.
The magnets form a convenient latching system that allows the front, side, and top panels to be removed. This is the least restrictive option, allowing users full access to the print bed and an unobstructed view of their prints thanks to the high visibility acrylic panels. Detailed instructions are included on the product page.
- What’s included: Includes all required printed pieces, hardware, and tools (fan not included)
- AMS compatible: Yes
- Price: ~$136
Lite Enclosure
This minimalist 3D printable kit from CraftySven on Printables includes all the panels and hardware you’ll need to enclose the P1P, requiring only about 700-800 grams of filament to print the frame. The creator recommends using a brim while printing to ensure proper bed adhesion.
While the enclosure does not have removable side panels, it does permit high visibility with a very thin frame. Plus, you can print it in two different colors, allowing for an eye-catching enclosure. The creator is also responsive in the comment section on Printables, in case you run into any issues during the printing process.
- What’s included: Hardware, panels (frame and fan not included)
- AMS compatible: Yes
- Price: Files are free, hardware and panels are ~$66
Igloo Enclosure Kit

Last but not least, the DIY kit designed by Caaarrrllllll on Cluts provides 3D printable files for the frame with purchaseable panels sold separately. The Igloo uses large side windows for high visibility, but the side panels are not removable. You’ll need to source your own hardware and print your own frame, which should take around 1.5 kg of filament.
One unique feature of this particular enclosure is the 270-degree door that can swing out of the way. This makes it easy to print PLA, perform maintenance, and remove prints with the door out of the way.
License: The text of "Bambu Lab P1P Enclosure: All You Need to Know" by All3DP is licensed under a Creative Commons Attribution 4.0 International License.
CERTAIN CONTENT THAT APPEARS ON THIS SITE COMES FROM AMAZON. THIS CONTENT IS PROVIDED ‘AS IS’ AND IS SUBJECT TO CHANGE OR REMOVAL AT ANY TIME.