The K1 series is one of the newest offerings from renowned 3D printer manufacturer Creality. It attempts, among many things, to bring high-speed printing to the masses.
If you’ve recently purchased a K1 3D printer, you may be wondering which slicer to use to get the best prints possible. PrusaSlicer is a great, feature-rich, and open-source option that’s developed and maintained by Prusa Research. It’s able to turn 3D models into G-code that your printer can understand, and it offers a long list of settings.
The Creality K1 and K1 Max are both great printers, and PrusaSlicer is an exceptional slicer, so how can we bring them together? In this article, we’ll discuss the best slicer settings to get your K1 (Max) up and running with PrusaSlicer. From making the most of your machine’s speed to producing high-quality parts, let’s get right into it!
Starting Point
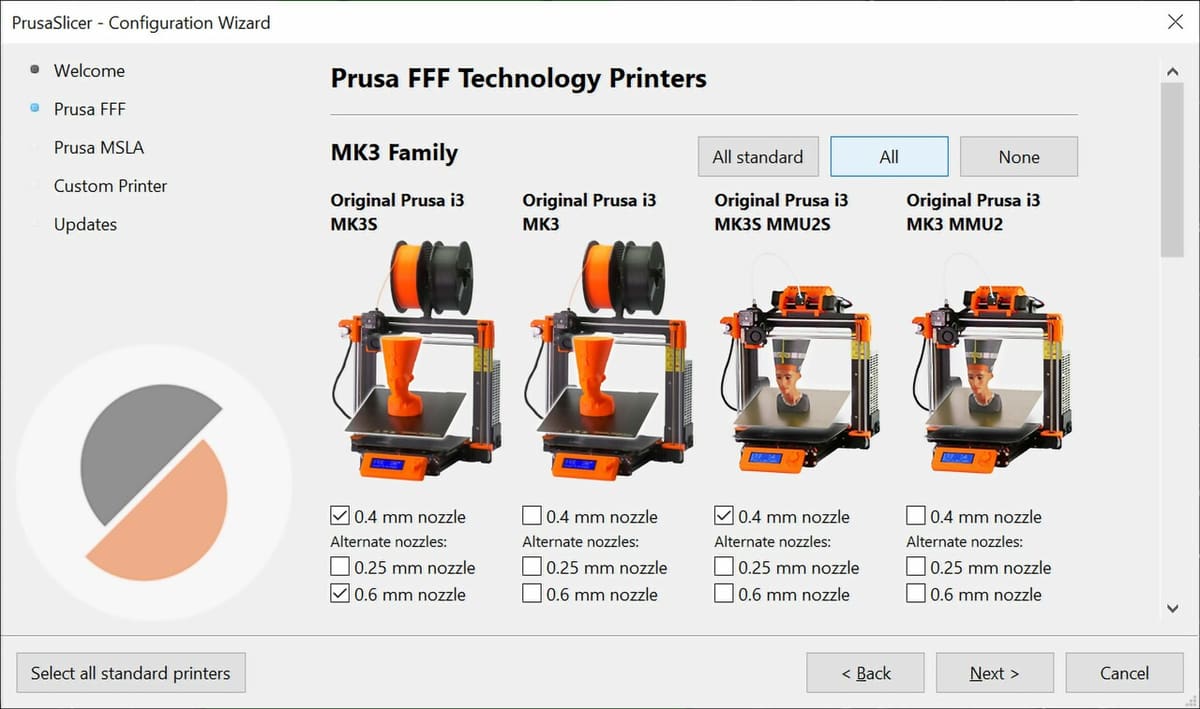
One of PrusaSlicer’s top features is the Configuration Wizard, which allows users to download tested, community-made profiles and configurations for a vast array of printers.
Unfortunately, at the time of writing, PrusaSlicer doesn’t have a default profile for the K1. But this doesn’t mean the wizard will go unused!
After launching the Configuration Wizard, which can be found under the Configuration tab in PrusaSlicer, skip to the Custom Printer section. Check “Define a custom printer profile”, enter a custom name if you wish, and then click Finish.
Once you’ve created a new profile from scratch, ensure that you’ve switched PrusaSlicer into Expert mode. This is required to view all of the settings we’re going to cover below.
Speed
Printing speed is the biggest and most obvious change from your typical Ender 3 (and many other generic printers); the K1 is much faster. While it supports going all the way up to a blazing 600 mm/s, this speed probably won’t produce the best quality parts.
The same can be said for acceleration. While the maximum acceleration on the K1 is 20,000 mm2/s, setting to this value may again leave much to be desired when it comes to quality. A more moderate value of 12,000 mm2/s works better for elements that don’t require strict quality standards, such as infill and travel. A value of 5,000 mm2/s works great for all other sections, keeping things quick while still delivering good-looking parts.
If you’re really trying to achieve high speeds, you can increase the accelerations for settings such as perimeters, but be aware that you may observe a decrease in quality.
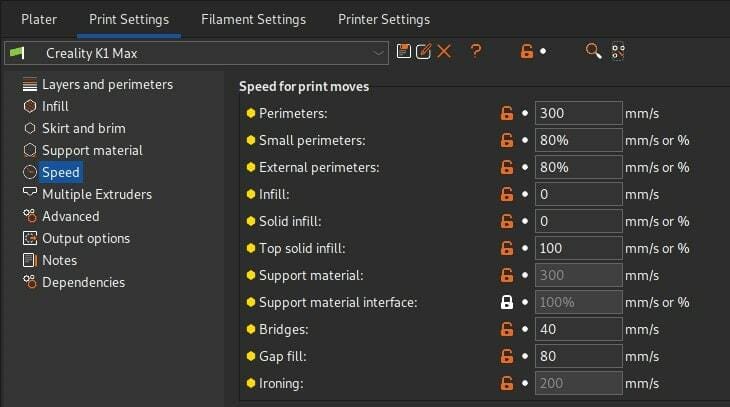
Most users choose to strike a balance between quality and speed for their parts. For many, and Creality, 300 mm/s is this happy medium, and it works well as both a perimeter and support speed. You may want to set external perimeters to somewhere around 70-90% of the perimeter speed to ensure good-looking parts, but this isn’t strictly required.
Bridges should be printed between 30-50 mm/s to obtain good-quality overhangs. Additionally, both the first layer speed and gap fill can be set anywhere from 60-100 mm/s. Stick to the lower end if you tend to have adhesion issues. Travel speed can be set to the maximum speed of the K1, 600 mm/s, since it doesn’t have much affect on quality.
Summary
- PLA: 200-300 mm/s
- ABS: 200-300 mm/s
- PETG: 180 mm/s
- TPU: 80 mm/s
Auto Speed
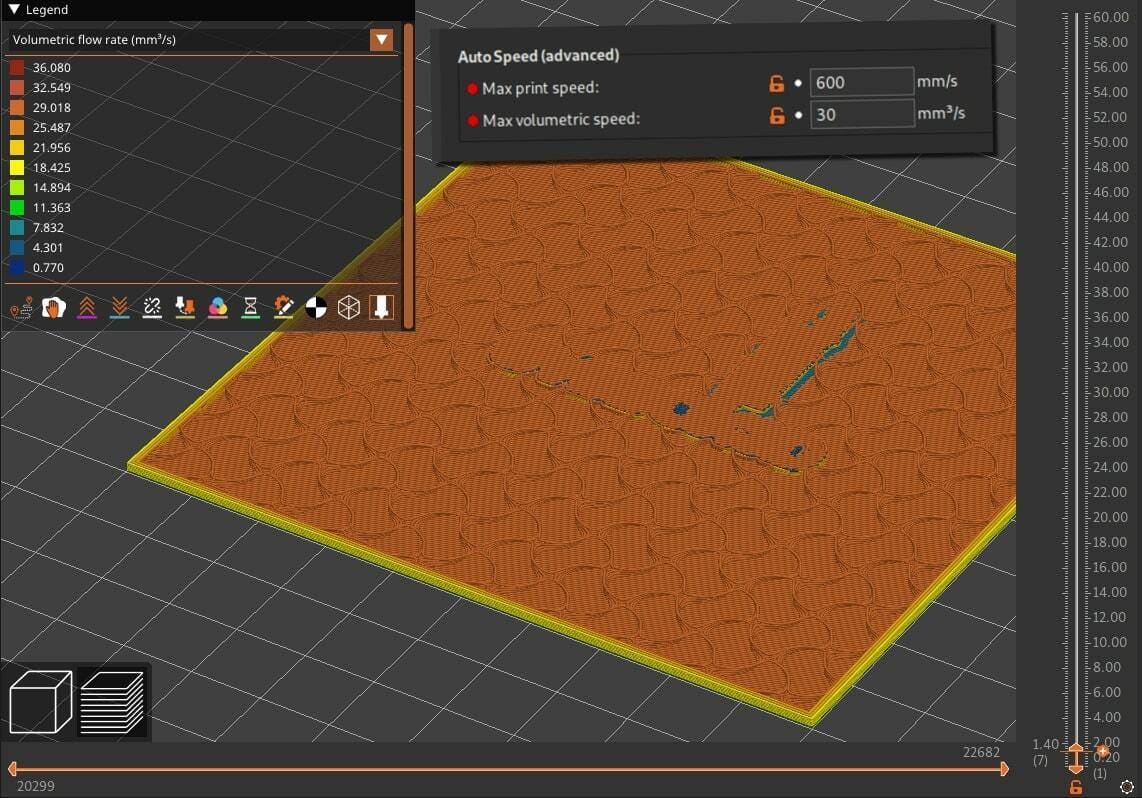
You may have noticed we skipped over infill speed settings. That’s because PrusaSlicer has a very useful tool called Auto Speed that we can use for these elements. This setting will calculate the speeds necessary to keep constant extruder pressure. This moderates the speed so as to max out the K1’s flow rate, seeing as infill doesn’t exactly have to look good, in most cases.
Therefore, setting “0” in your infill settings, then specifying your maximum allowable print speed (600 mm/s is fine) and maximum flow (a bit below the actual max, around 30 mm3/s is good) will enable Auto Speed when slicing. Do note that while many filaments can keep up with 30 mm3/s, if you experience any extrusion issues such as your extruder gears skipping, you’ll have to either decrease this volumetric speed for your filament or increase the temperature, which we’ll cover later.
Additionally, while these speeds have been reported to work fine for most users with materials other than PLA, such as ABS or PETG, if you experience quality issues when printing these other filaments, you may want to consider stepping down your speeds in 25-50 mm/s increments for features such as perimeters and lowering the maximum flow rate in 2-5 mm3/s increments.
Retraction
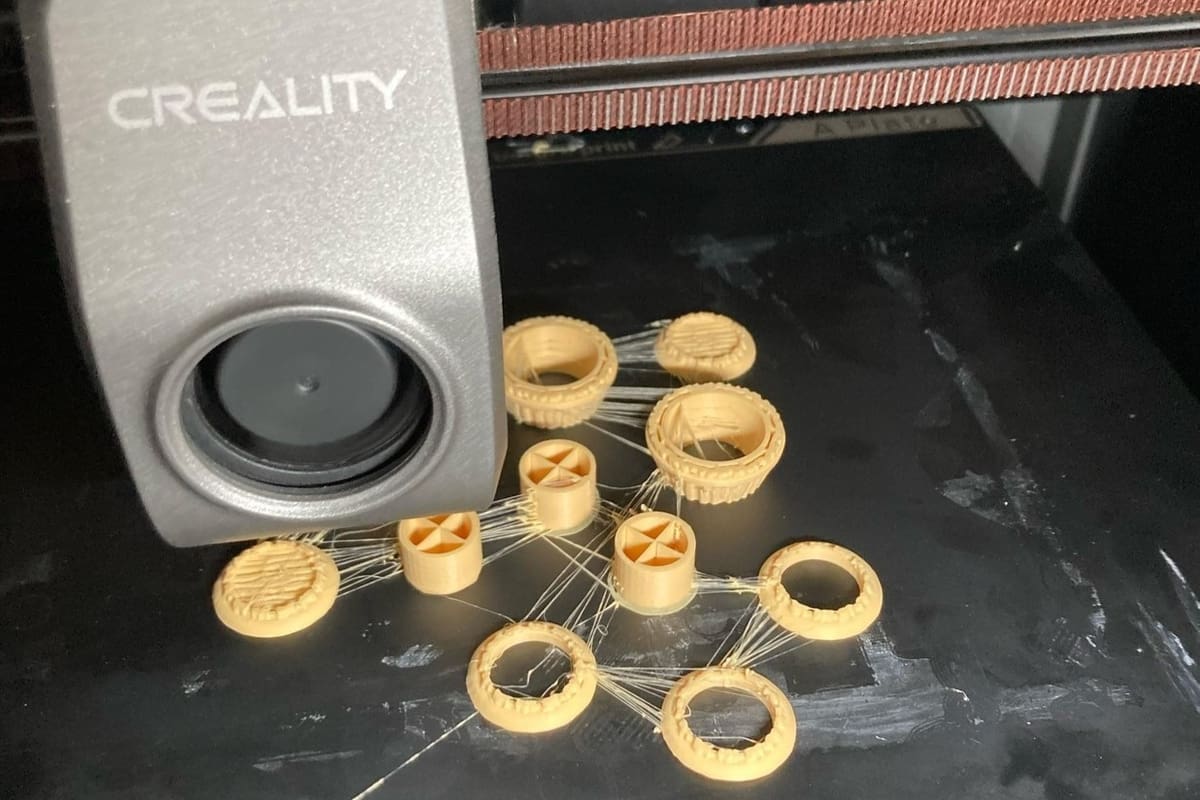
Retraction varies based on many factors, including but not limited to the current filament in use and any upgrades that have been applied to the printer.
A good baseline retraction for the K1’s direct extruder is a 0.5-mm distance at 40 mm/s speed, but users have also reported good results all the way from a 0.3- to 0.1-mm distance and 20-100 mm/s speed.
PrusaSlicer also supports overriding retraction settings based on the current filament profile selected. This means that you can tune retraction separately for all the different filaments you plan on using if need be. The baseline provided should work decently well for most common filaments, but feel free to experiment!
Additionally, prints seem to exhibit better results with a slightly lower extrusion multiplier, typically around the 0.95 mark. We recommend setting this multiplier, and if you experience any signs of under-extrusion, it’s best to return to a multiplier of 1.0.
Summary
- PLA: 0.5 mm at 40 mm/s
- ABS: 0.5 mm at 40 mm/s
- PETG: 0.5 mm at 40 mm/s
- TPU: 0.5 mm at 30 mm/s
Temperature
With the K1, temperatures may be a bit on the hotter side to successfully attain high speeds without encountering extrusion issues. These temperatures can and do change depending on the filament manufacturer and the model you’re printing. Filament manufacturers will suggest specific printing temperatures for their filament, and this is typically a good starting point when creating your print profile.
Keep in mind that factors like nozzle size and speed will also affect the printing temperature, so we recommend first printing a temperature tower when trying out a new filament. This will help you dial in the best temperature for your set up.
Summary
- PLA: Hot end 230 °C, bed 50 °C
- PETG: Hot end 250 °C, bed 70 °C
- ABS: Hot end 260 °C, bed 100 °C
- TPU: Hot end 220 °C, bed 70-75 °C
Cooling
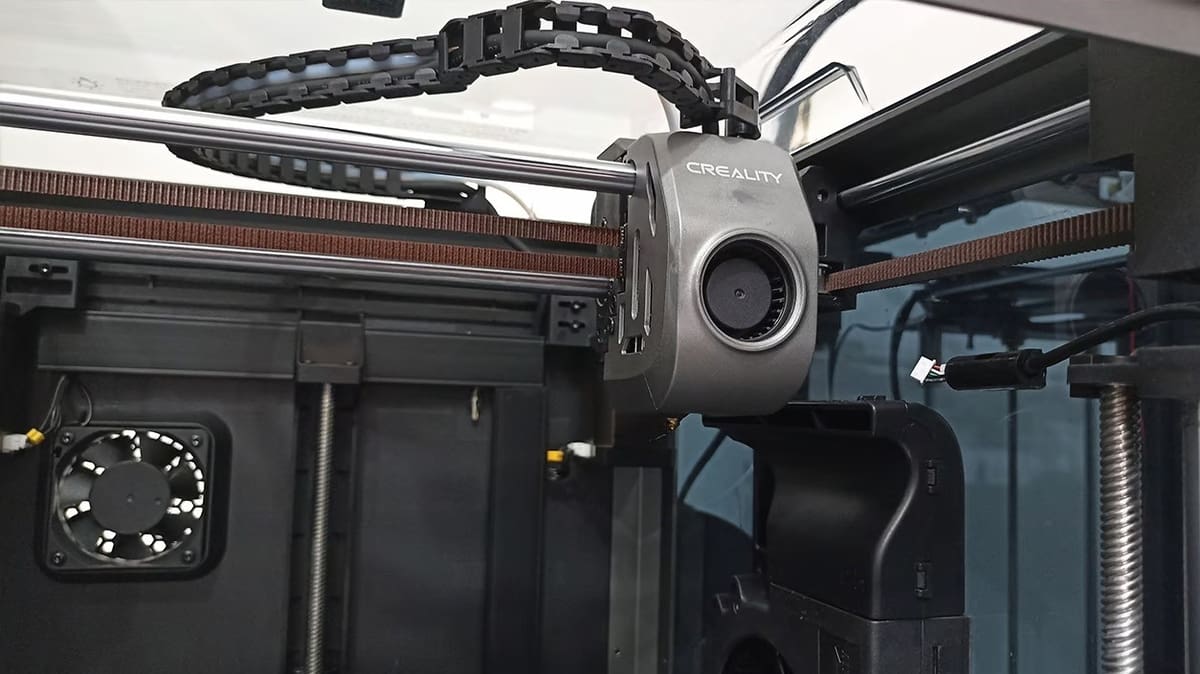
On the topic of temperature, once the filament leaves the nozzle, you’ll want it to solidify! And it needs to do this quickly, before the nozzle makes another pass on the next layer.
Therefore, cooling is very important to get high-quality prints, especially when printing at high speeds and high temperatures with the K1. When printing PLA, turn your part cooling fans on all the way, open the door, and take the top off so that heat build-up won’t negatively affect print quality. For ABS and TPU, you’ll want to turn off all fans, keep the door closed, and preheat the chamber to 40 °C before starting to print. As for PETG, it’s best to keep the door closed, set the chamber temperature to 40 °C, and set the fan speed to 20-40%.
Note that the K1 comes with an auxilliary side-mounted blower fan to provide extra cooling capacity, but by default this fan won’t spin when using slicers like PrusaSlicer or Orca Slicer. However, this can be remedied by using PrusaSlicer’s handy G-code substitutions!
- Head to Print Settings on the top menu bar, then find G-code substitutions under Output options.
- Click Add to create a new substitution.
- For Find, enter “^M106 S(d+)$”
- For Replace with, enter “M106 P0 S$1nM106 P2 S$1”
- Check the boxes for Regular expression and Case insensitive.
That’s it! Your auxiliary fan should now mirror your toolhead cooling fan.
Summary
- PLA: 100%
- ABS: 0%
- PETG: 20-40%
- TPU: 0%
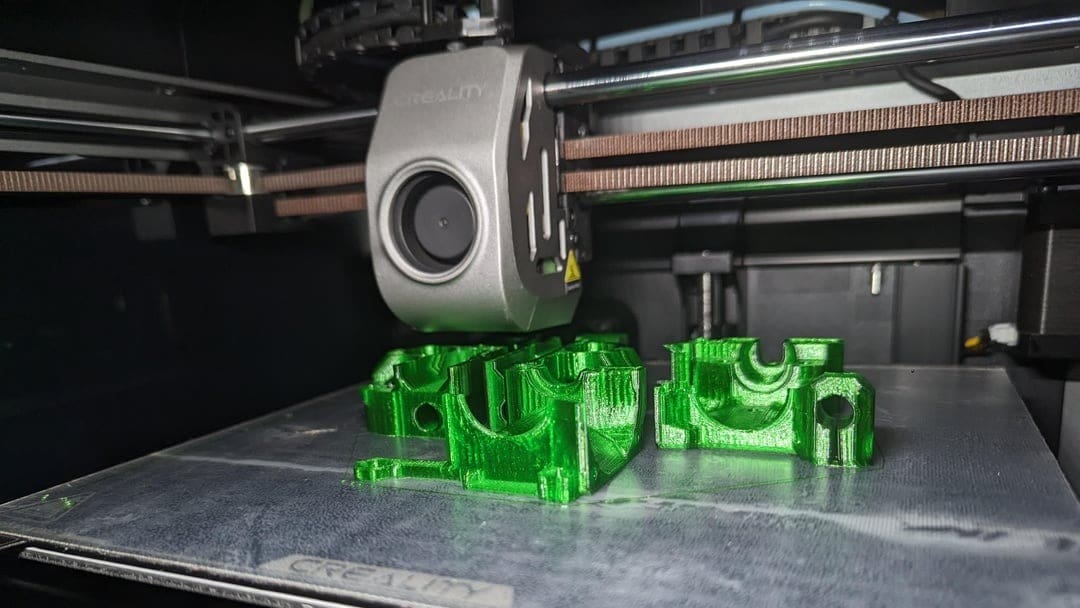
Infill & Perimeters
The type and amount of infill, as well as the number of perimeters, directly affect both print time and part strength. Typically, a higher infill percentage and more perimeters correlate to a longer print time, but your part will also be stronger.
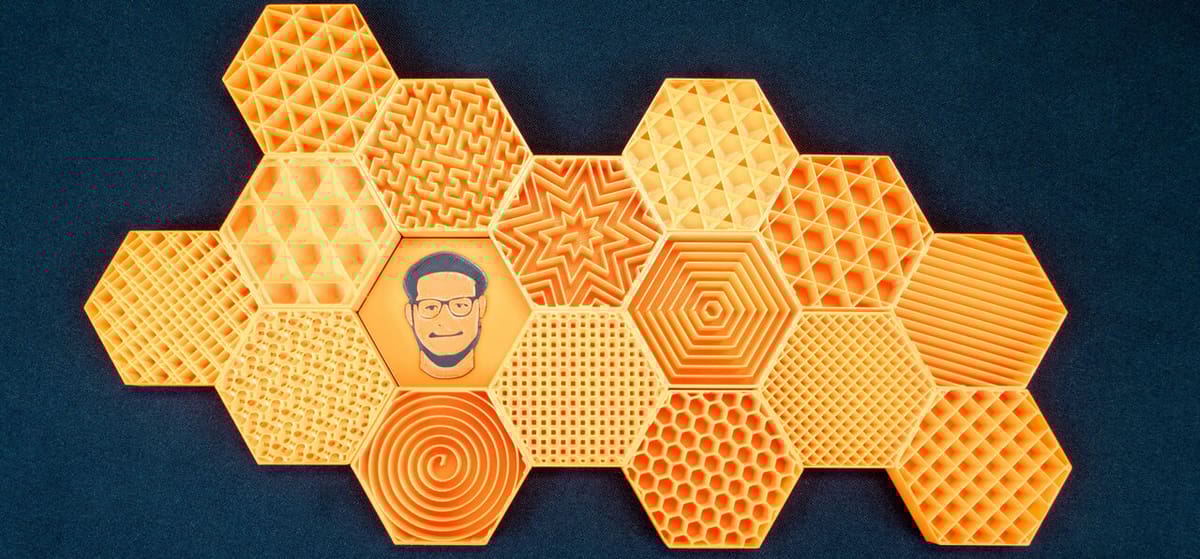
There’s also the question of which infill pattern to choose. Gyroid is a great choice for many parts, as it provides high strength at quite low infill densities (10-25%). Other patterns, such as grid and rectilinear, are solid choices for fast prints that don’t have functional requirements.
A similar story goes for perimeters (under Vertical shells) and solid layers (under Horizontal shells). More perimeters will result in more filament use and longer printer times but also a stronger finished part.
2-3 perimeters and 3-4 top/bottom layers should be sufficient for most parts. You can always add 2-3 more to each if you need more strength, along with increasing the infill or using a stronger pattern.
Summary
- Decorative prints: 0-15%, 0-2 perimeters, 0-2 top/bottom layers
- Standard prints: 15-50%, 2-3 perimeters, 3-4 top/bottom layers
- Functional prints: 50-100%, 4+ perimeters, 5+ top/bottom layers
Layer Height
Layer height refers to the amount that the bed moves down after every layer, or quite literally, the height of each layer the printer makes. Smaller layer heights can be beneficial for detailed parts. Layer lines will be less noticeable, and more detail will appear in the final model the smaller the layer height is.
However, printing with smaller layer heights will result in longer print times, as there are simply more layers to print. As such, larger layer heights can be used for parts that don’t require much detail.
0.2 mm is the standard layer height and works for most prints. 0.10-0.15 mm is suitable for more detailed prints and 0.25-0.30 mm for non-aesthetic prints that don’t require finer detail.
Summary
- Fine detail, slow: 0.1-0.15 mm
- Coarse detail, fast: 0.2+ mm
Tips & Tricks
Here are some additional tips and tricks that can provide an even better experience and integration between your K1 printer and PrusaSlicer.
- Start and end G-code: Modify your start and end G-codes to be compatible with the K1. These can be found in Printer Settings > Custom G-code. This will ensure that the K1 will prepare for your print properly (heat up, run its leveling routines, and so on) and also end correctly by shutting down heaters and cooling down. You’ll enter “END_PRINT” into the End G-code field. In the Start G-code field, enter the following:
M140 SM104 S0START_PRINT EXTRUDER_TEMP={first_layer_temperature[0]} BED_TEMP{first_layer_bed_temperature[0]}
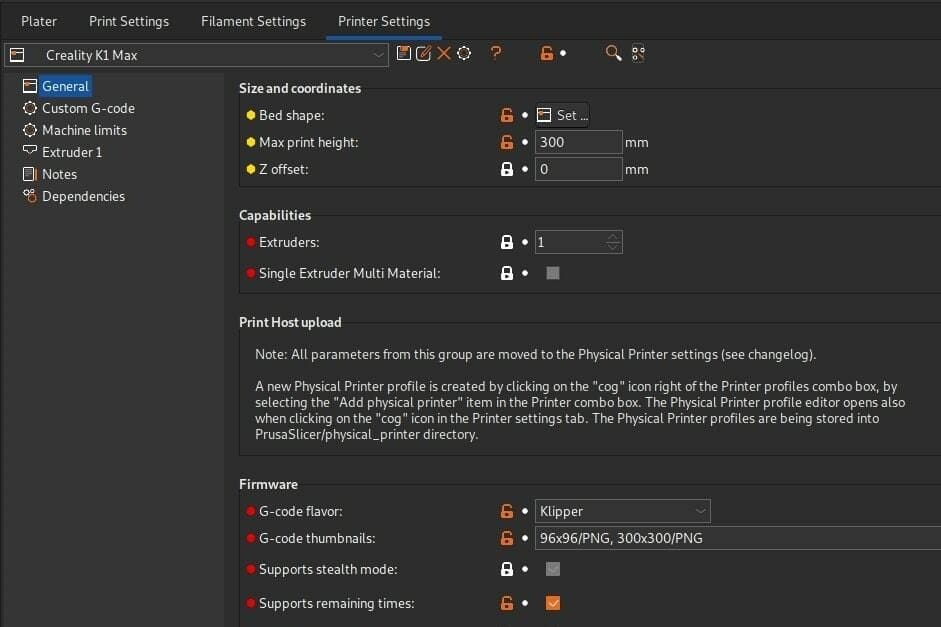
- Klipper: Make sure to select Klipper as your G-code flavor, in Printer Settings > General > Firmware > G-code flavor. This will tell PrusaSlicer to generate G-code aimed at specifically Klipper, which reduces the chances of incompatible G-code not being understood by your K1.
- Build volume: If you have a K1 Max, be sure to change your build volume within PrusaSlicer to take advantage of that extra space. This can be done in Printer Settings > General > Size and coordinates. Be sure to change both your horizontal dimensions (Bed shape) and your vertical dimension (Max print height) to 300 mm.
- Machine limits: Modify the machine limits to better reflect the K1. This won’t result in any changes to your print but will improve PrusaSlicer’s built-in print time estimations. You can do this in Printer Settings > Machine limits. Fill in the K1’s maximum values, which are 600 mm/s print speed (feedrate) and 20,000 mm2/s acceleration.
- G-code thumbnails: Enable G-code thumbnails to allow print previews to show up on the printer’s screen and in its web interface. To do this, head to Printer Settings > General > Firmware and enter “96×96, 300×300” into the G-code thumbnails textbox.
License: The text of "The Best Creality K1 (Max) PrusaSlicer Settings" by All3DP is licensed under a Creative Commons Attribution 4.0 International License.