The Best Cura Plug-ins of 2024

Plug-ins for UltiMaker's Cura take an already great slicer to a whole new level. Check out our top picks for the best Cura plug-ins!
Cura is UltiMaker’s powerful slicing software for 3D printers. It’s undeniably among the most popular slicers, combining ease of use with flexibility.
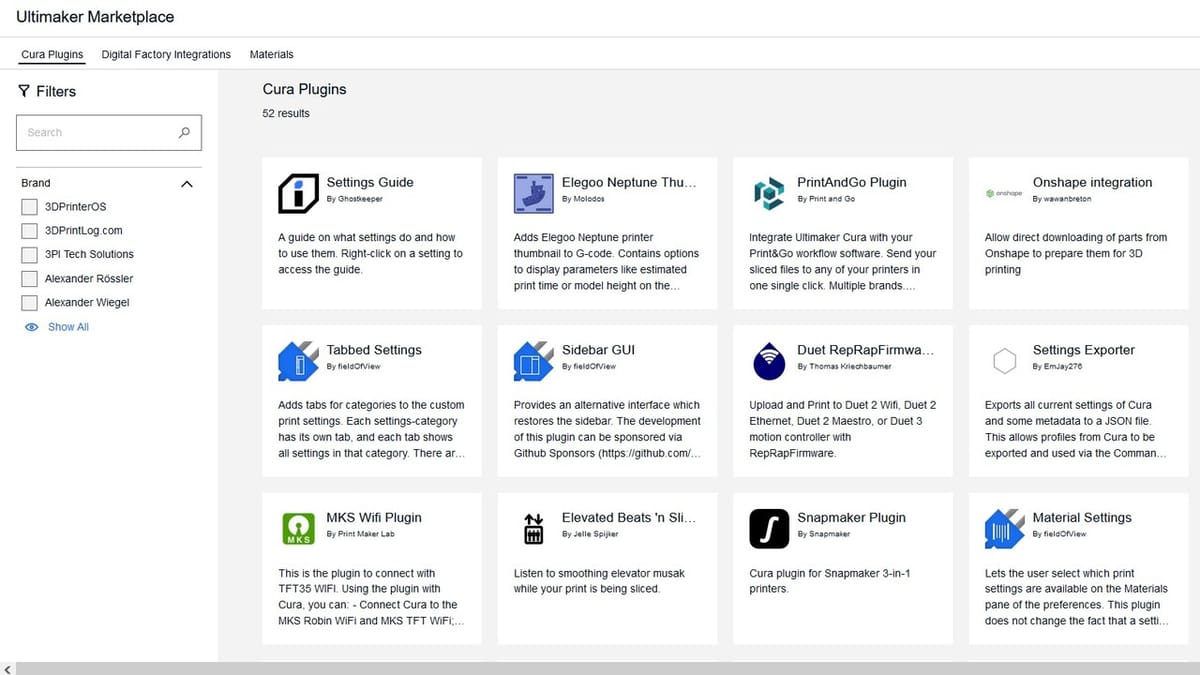
But why stop there? Cura plug-ins add extra functionality to the already well-fleshed-out user experience. The add-ons are available for download through the Marketplace built into newer versions of Cura.
From adding extra detail about the different settings to simplifying the loading of certain models, there are plenty of options to choose from.
Here are our picks of the must-have Cura plug-ins to enhance your workflow!

Considerations
We went through all of the plug-ins available in the Marketplace and picked the best based on the following considerations:
- Easy to use: We chose plug-ins that easy to use and help simplify the slicing process without requiring an advanced level of technical knowledge.
- Improved print quality and efficiency: We favored plug-ins that have a direct impact on print quality or the efficiency of the slicing process. For example, they can ensure correct adhesion of the first layer, which is essential to avoid print failures, or optimize the use of materials and calculate costs accurately, which is especially important for commercial users.
- Popular: The community can’t be wrong. We took into account the popularity of the plug-ins. Frequently downloaded plug-ins are signs of their usefulness to makers’ 3D printing workflow.
OctoPrint & Moonraker
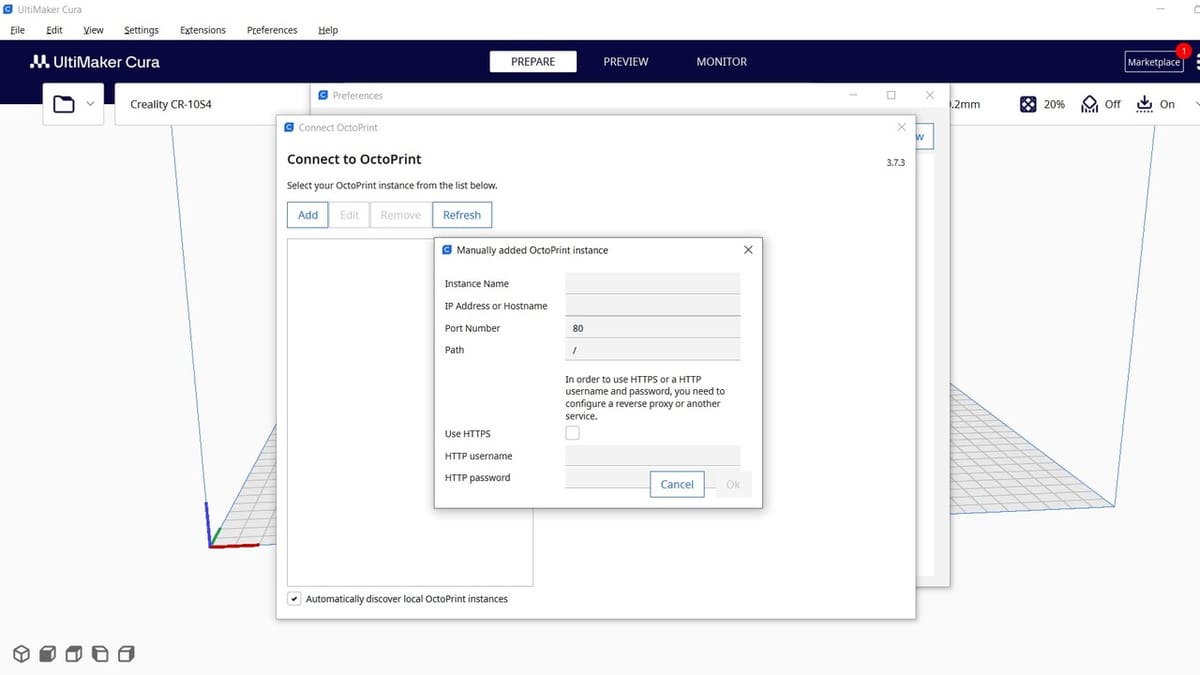
Adding remote connectivity to your printer is one of the most popular upgrades, as it enables access and control for machines through a connected single-board computer (SBC) like a Raspberry Pi board. With OctoPrint or Klipper (through the Moonraker Web Server), you can control many aspects of your printer, like motor movement, temperatures, and even the actual printing process.
When set up, you can use the remote control features through the corresponding web interface. Both programs allow you to monitor your 3D printer from a connected webcam.
The OctoPrint Connection plug-in integrates OctoPrint features inside the slicer. With this plug-in, you can watch your webcam stream, move the printhead, set temperatures, and, of course, send prints straight from Cura to your printer remotely.
The Moonraker Connection add-on is limited to uploading files only (with the possibility of starting the print directly), while the rest of the key features are controlled through the web interface.
- Plug-in: OctoPrint Connection, Moonraker Connection
- Creator: fieldOfView (OctoPrint), emtrax (Moonraker)

Startup Optimiser
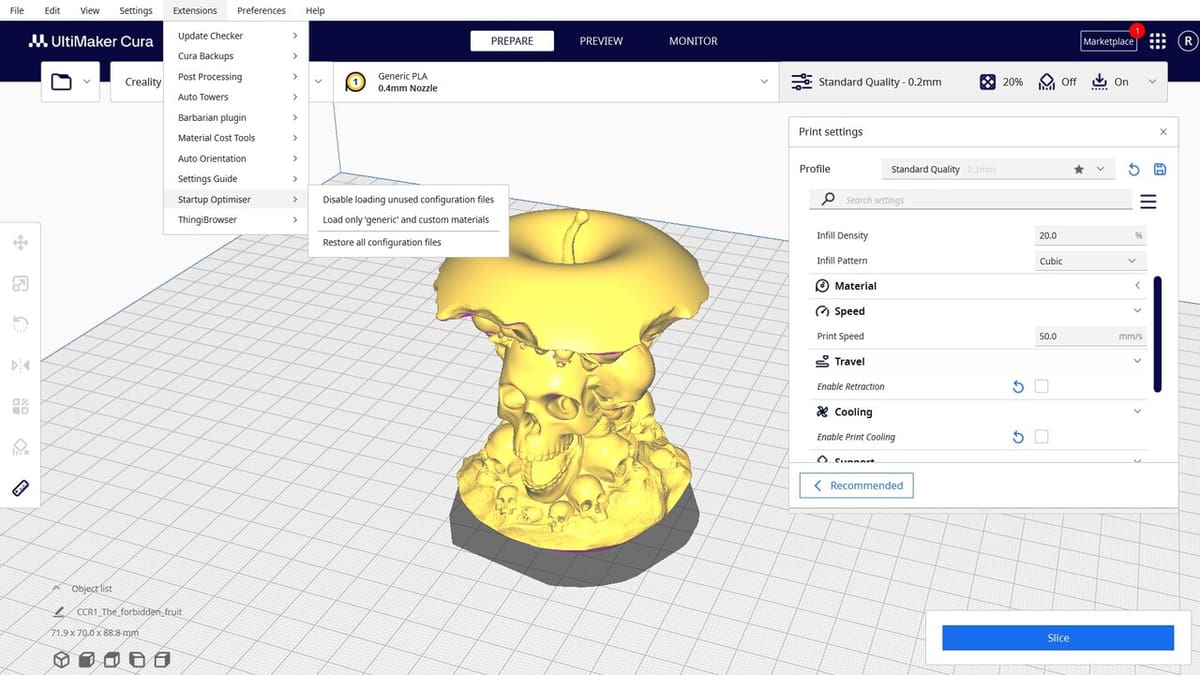
Cura can be slow when loading all the plug-ins at startup. While it doesn’t take ages, it can be annoying in the long term. Especially for those who have installed plug-in after plug-in.
The very basic script of Startup Optimiser removes the printer definitions as well as the profiles specific to UltiMaker’s owners from the autoload list. By doing this, the load times are drastically sped up.
And if you ever need to add a certain printer’s profile, you can always restore everything, create the profile, and activate it again.
- Plug-in: Startup Optimiser
- Creator: fieldOfView
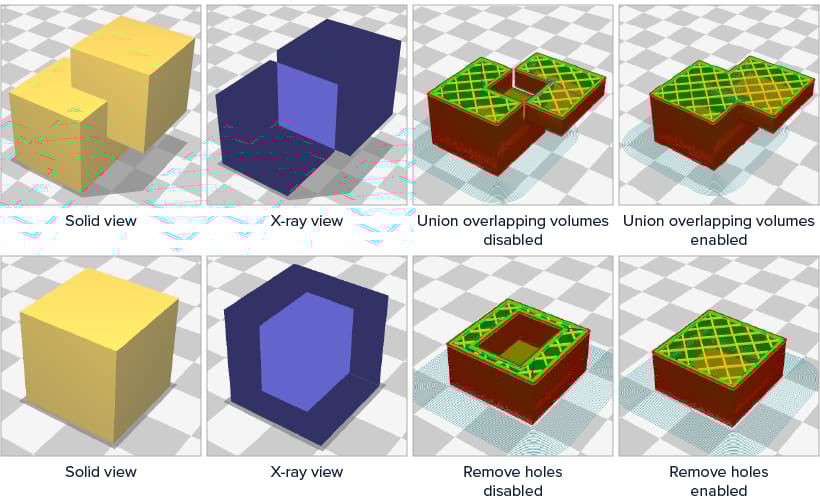
Settings Guide
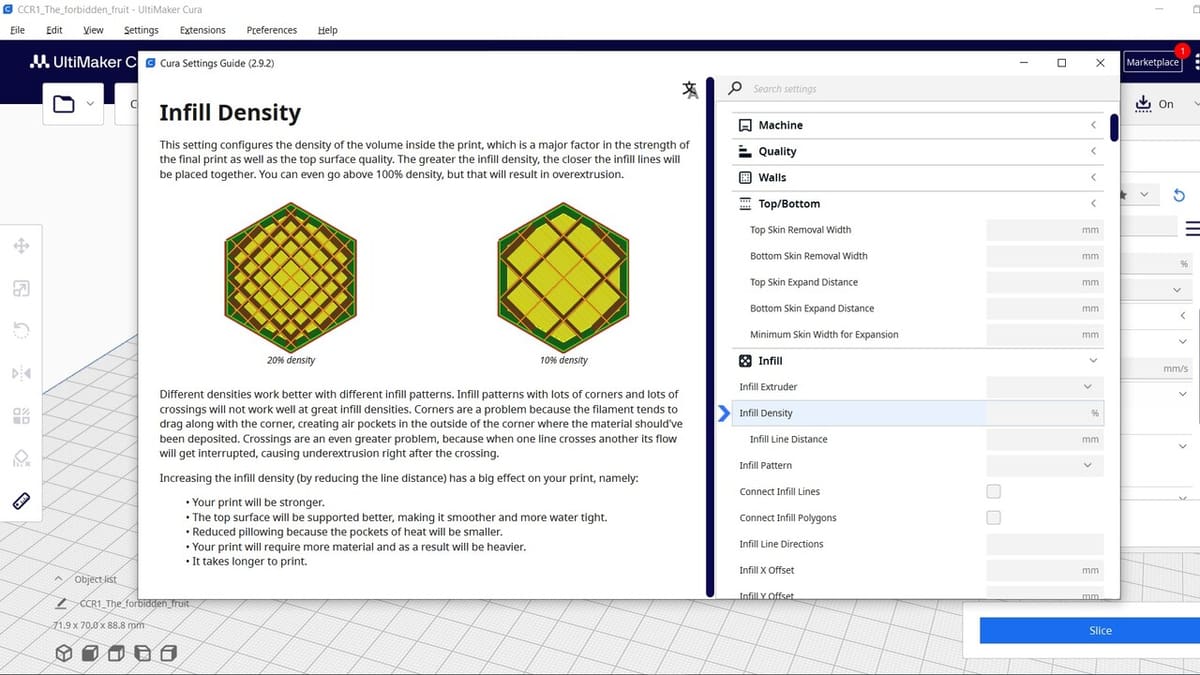
Cura’s “Recommended” interface is incredibly simple and intuitive, but UltiMaker doesn’t tie you to just that; you have the option of tweaking every single setting for the best printing experience possible.
What do all of these little settings do? Well, that’s where it can get confusing. The Settings Guide plug-in is a tool from Ghostkeeper that explains each setting in detail, with helpful images to illustrate key points. That way, you’ll know exactly where you’re headed.
For anyone looking to tinker with detailed settings, the Settings Guide is the perfect handbook.
- Plug-in: Settings Guide
- Creator: Ghostkeeper
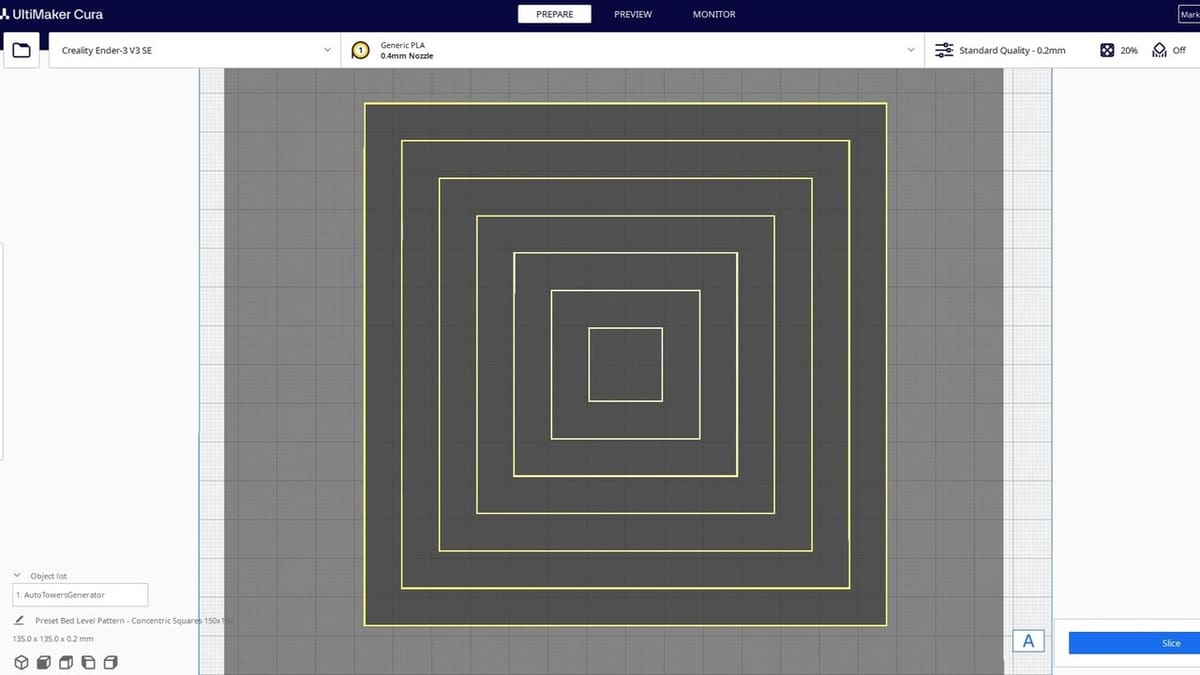
AutoTowers Generator
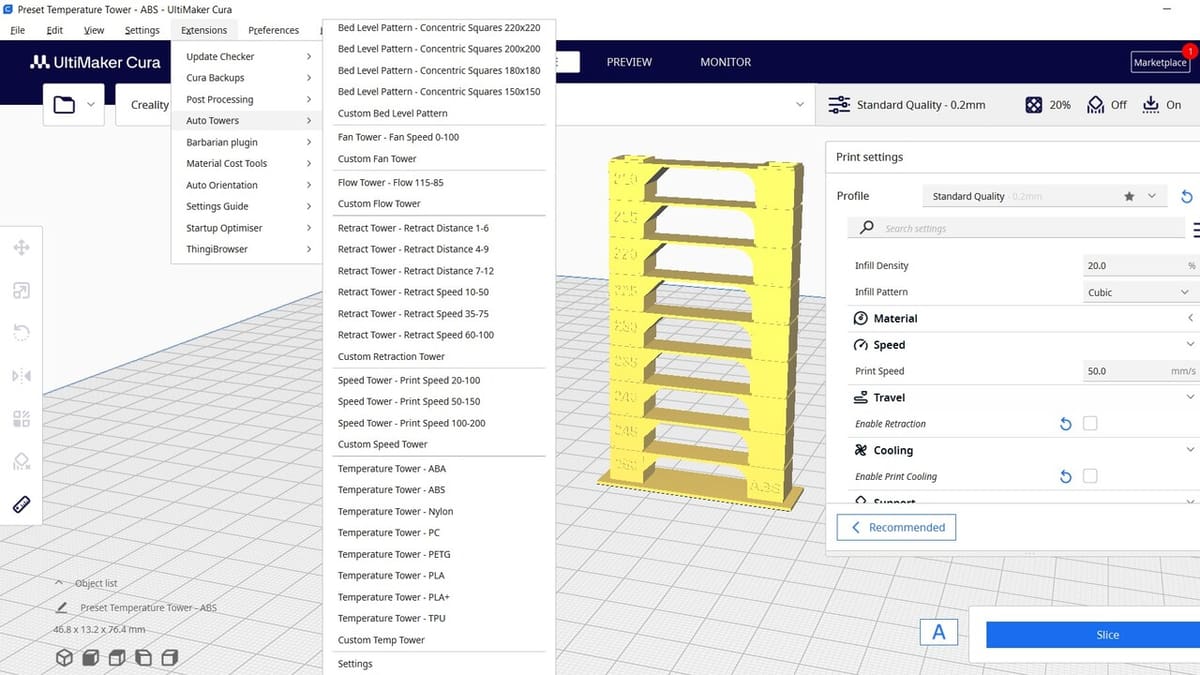
If you’re venturing away from PLA in your printing projects and trying new materials, you’ve probably noticed that finding the ideal settings can be a bit more challenging, especially for materials like ABS and PETG.
To help you find the right settings, the AutoTowers Generator allows users to test different print presets for temperature, speed, retraction, flow rate, temperature, and cooling using automatic test prints. There are also various bed leveling patterns.
Instead of having to manually set these print characteristics for each layer of the test model, the plug-in automates these values and parameters so that the G-code automatically switches between them on the right layers. There’s confusion among some users about whether or not to adjust any of the settings after selecting a test model. The plug-in automatically adjusts the settings based on the test tower, so all you need to do is select the test you want to do, then press Slice.
It’s also possible to create your own custom towers, but you’ll need OpenSCAD software to do so.
- Plug-in: AutoTowers Generator
- Creator: Brad Kartchner

Auto-Orientation
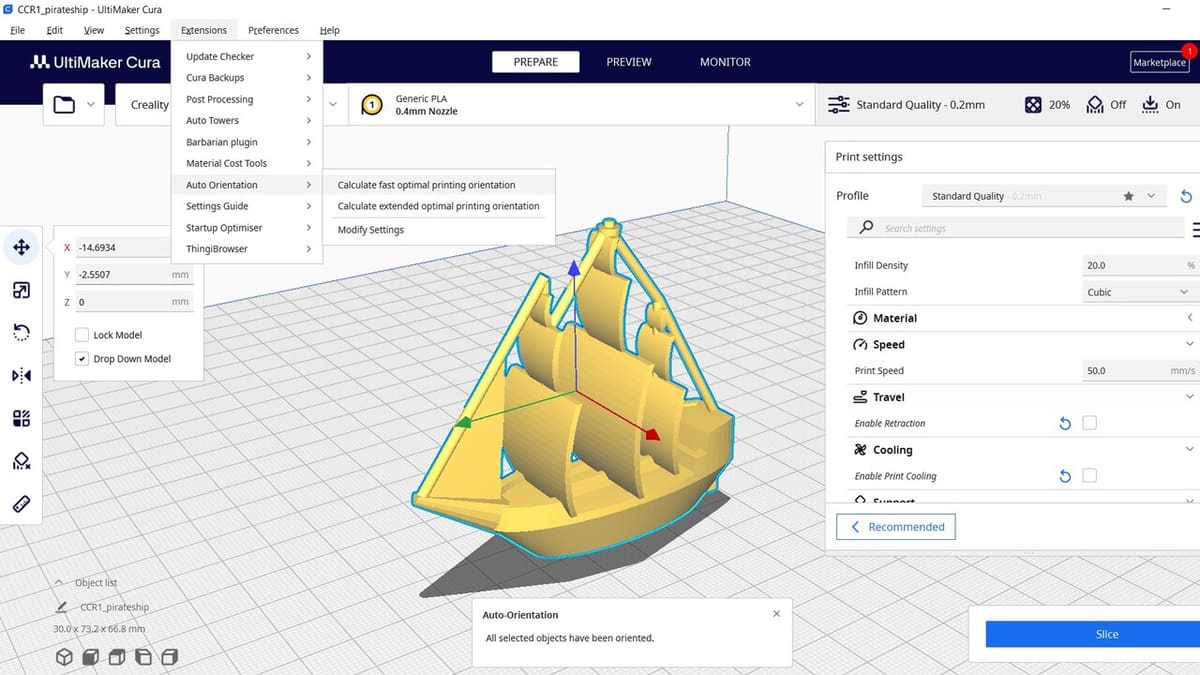
By virtue of how FDM 3D printing works, overhanging areas don’t fare too well when printing. As such, proper orientation of your model can greatly reduce print times, decrease failure rates, and save hassle in post-processing.
If you’re less experienced with orienting prints, the Auto-Orientation plug-in is a great way to get started. It automatically calculates how to minimize overhangs for your models, decreasing the need for supports.
Auto-Orientation will simplify your slicing workflow and help you develop an intuition for part orientation.
- Plug-in: Auto-Orientation
- Creator: nallath
Mesh Tools
Sometimes when slicing and preparing a part, an error pops up regarding the model not being watertight. This means that Cura detected some issues with the mesh, be it a missing face, an unconnected angle or polygon, or simply a hole. Manually stitching and fixing the mesh can be a long and imperfect job.
The Mesh Tools plug-in gives you the chance to analyze and repair the model directly in Cura, without the need to use STL repair software. Among the many options, you can fix simple holes to make the part watertight, or recalculate the model’s position and normals. (This last one is very useful in cases where overhangs are present but not visible.) Additionally, Cura can check and fix every model upon uploading it or randomize the object’s location to avoid wear on the same part of the build plate.
- Plug-in: Mesh Tools
- Creator: fieldOfView
Barbarian Units

We’ve all been there: stuck in imperial units but needing metric. It’s not a big deal, but it can be irritating when you don’t feel like doing the conversions.
Barbarian Units was made just for this. When you import a model designed in the wrong units, scale them properly with just one click.
You might not have to use it often, but this plug-in will prove a godsend.
- Plug-in: Barbarian Units
- Creator: nallath
ThingiBrowser
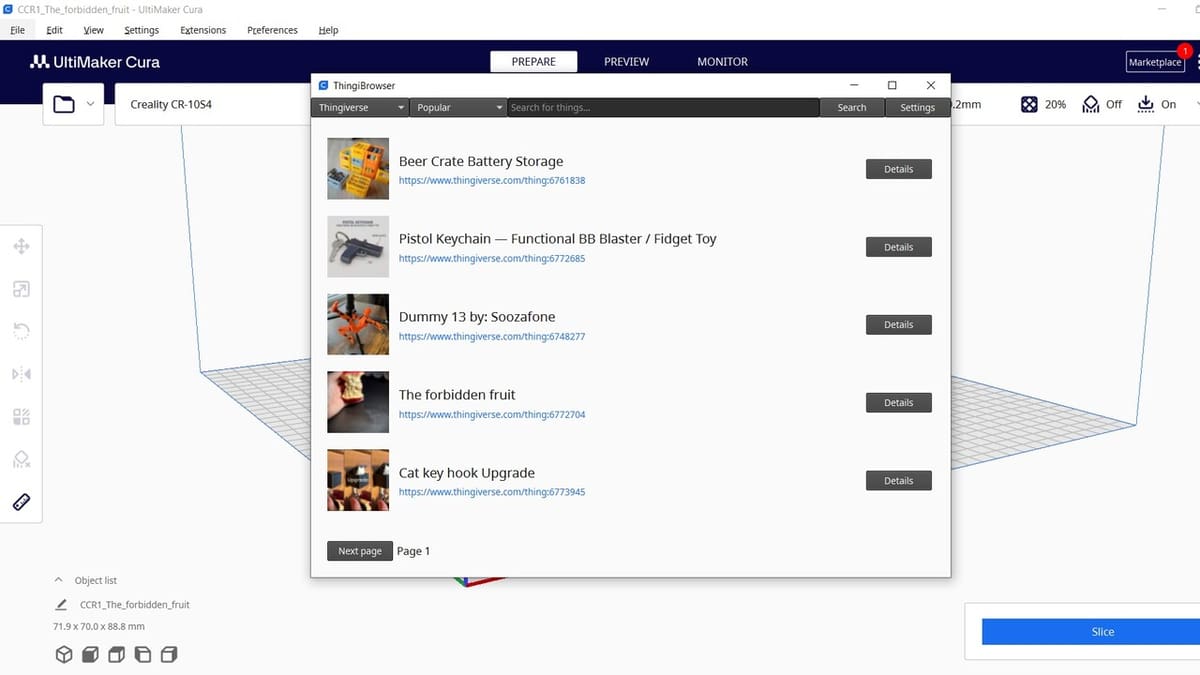
Thingiverse is one of the most popular online 3D model repositories for 3D printing. Home to over 2.3 million free designs, it’s a great resource for finding a model to slice and 3D print.
The ThingiBrowser plug-in helps consolidate the programs you have to use by integrating a Thingiverse search directly into Cura. This allows you to upload 3D models to Cura, right from the site, without needing to switch to a separate web browser.
ThingiBrowser isn’t only for Thingiverse, though. It also allows you to find models from MyMiniFactory, another popular repository. To find your saved models, you can log in to either site through ThingiBrower’s settings page.
- Plug-in: ThingiBrowser
- Creator: Chris ter Beke
Material Cost
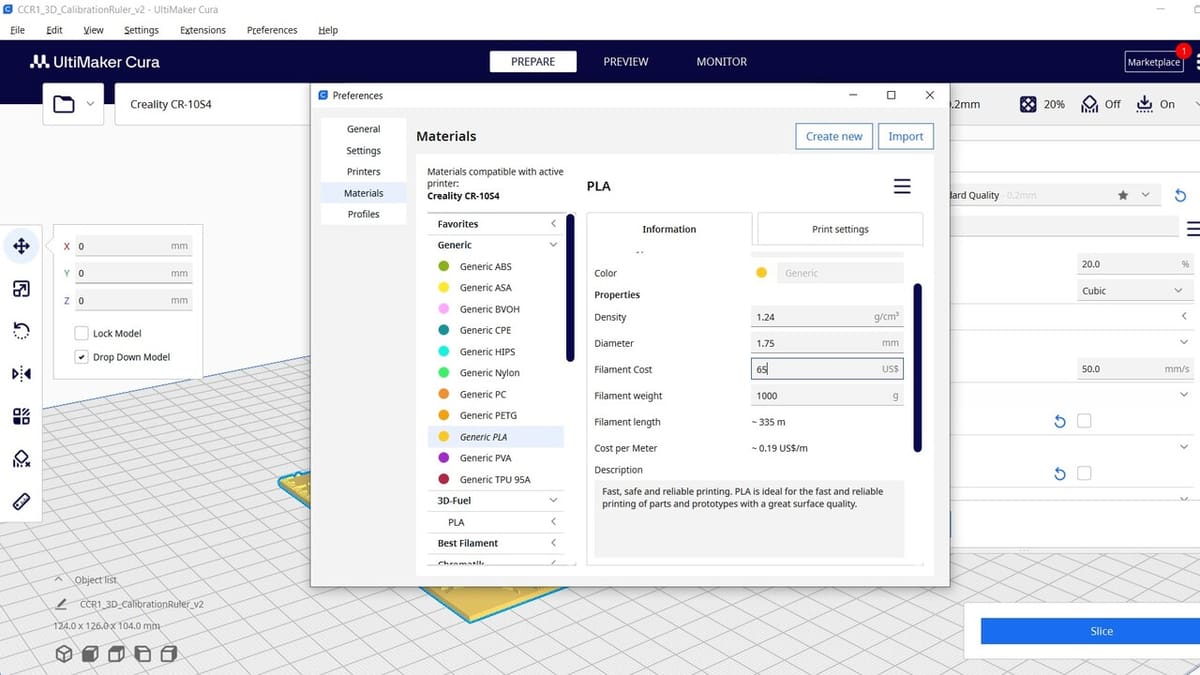
Having a precise estimate of the cost of each print is important for 3D printing businesses and makers alike. Keeping track of how much filament is left helps avoid interruptions mid-printing. It’s also key if you want to sell your models and need a reliable way to quote them.
The Material Cost Tools plug-in gives you the possibility to manage spool weight, cost, and other factors, on a per-material basis. While you can crunch numbers without needing the plug-in, with it, you can export or import other material profiles.
The ability to import weights and prices is especially useful if you consider that prices vary from country to country and that the default Cura values don’t necessarily match what you have access to. And maybe you’ve got a setup with other makers, with whom you want to share this information directly. If you deal with a multitude of materials, individual changes may also be taxing and time-consuming. Uploading a file that will automatically update the information can help.
Of course, you need to have each spool defined and categorized in the printer’s settings tab.
Keeping an eye on costs and material use can be confusing and even daunting, but it’s much easier this way.
- Plug-in: Material Cost Tools
- Creator: fieldOfView
Arc Welder
Many different commands go into printing a 3D model, including straight and curved movements for the printhead, defined by the G0/G1 and G2/G3 G-code commands, respectively. Sometimes Cura (and other 3D slicers) generates a series of connected straight movements, but this action would be better performed as an arc.
The Arc Welder plug-in converts consecutive straight movements into G2/G3 arcs. According to the developer, the main goal of doing so is to prevent stutter in printer movements caused by buffering from the mainboard that adversely affects print quality. This plug-in should also result in smoother 2D curves on 3D prints.
Once activated, there are a few Arc Welder settings that should appear. Settings like resolution, maximum arc radius, and dynamic precision allow you to adjust how arc welding is performed.
- Plug-in: Arc Welder
- Creator: fieldOfView
Z Offset Setting
Z offset is one of the most important settings for 3D printers, defining how far above or below the homed Z-axis the nozzle should be. Even if you have a perfectly level and flat print bed, the first layer might not stick to the bed if your Z offset is too low or too high.
Despite being an important feature, Z offset is usually set in the printer’s firmware and can only be controlled from the printer’s LCD display. The Z Offset Setting plug-in adds a feature in Cura for adjusting the Z offset in your slicer profile. This allows you to set different Z offset distances for different slicer profiles, which is great for when you print with multiple materials (e.g. PLA doesn’t generally need as much space as PETG).
- Plug-in: Z Offset Setting
- Creator: fieldOfView
Bonus: Cura Backups
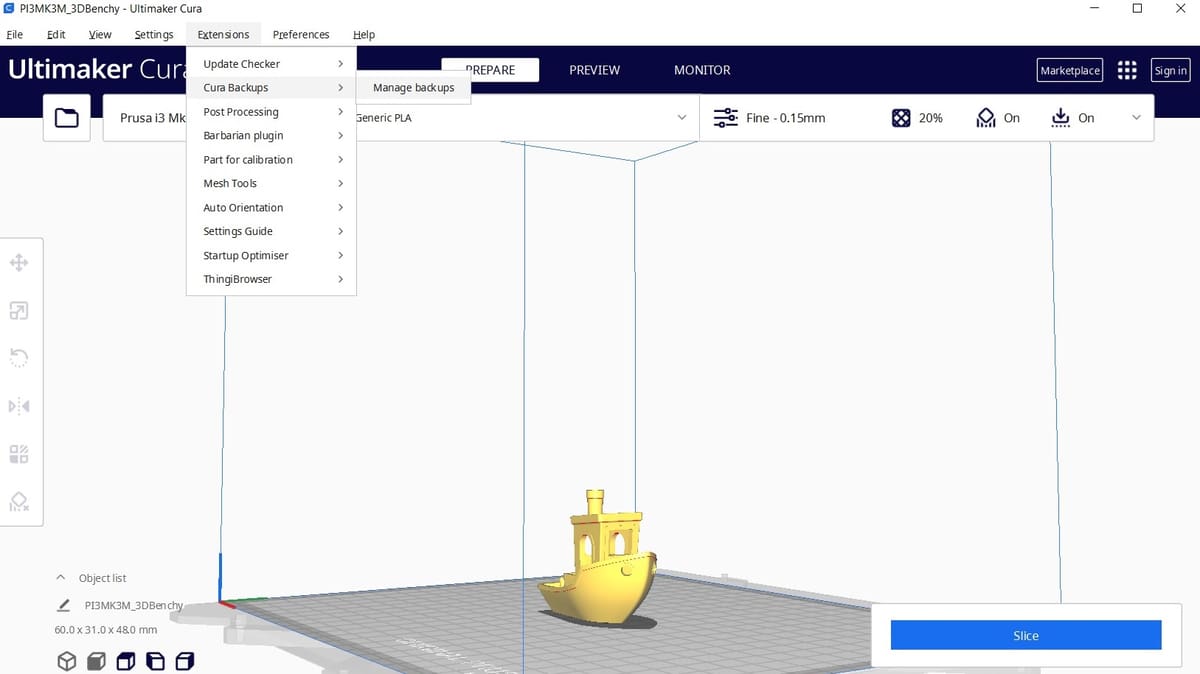
Our last pick isn’t even technically even a plug-in, it’s already accessible in Cura (assuming your software is up to date).
Cura offers incredible flexibility when tuning material settings, but the configurations are always stored locally on your computer. That’s no longer the case with Cura Backups. This extension syncs your profiles through UltiMaker’s encrypted cloud servers, allowing you to access and edit your settings from anywhere in the world. Regardless of what computer you’re on, you have full control over a centralized, synced set of configurations just by logging in.
Cura Backups is essential for anyone who wants to keep their settings organized and accessible when printing from multiple computers. To use it, simply click “Extensions > Cura Backups > Manage Backups”. If you’re signed in, this will take you straight to your backup history.
- Extension: Cura Backups
- Creator: UltiMaker
License: The text of "The Best Cura Plug-ins of 2024" by All3DP is licensed under a Creative Commons Attribution 4.0 International License.