The Best DIY 3D Scanners

3D scanning doesn't have to be expensive. Read on to create your own affordable yet accurate DIY 3D scanner today!
What does Superman have in common with the dystopian society portrayed in Philip K. Dick’s novel A Scanner Darkly? If you instantly thought about the shared ability to scan everything and everyone, then we’re both thinking along the same lines. How cool would it be to have the power to scan people and things for ourselves?
Well, now you can. 3D scanning involves converting real-life objects into digital 3D models. The technology has had a significant impact on various fields, from dentistry to archaeology. And it’s now becoming more and more accessible on a commercial level.
In this article, we’ll provide a quick overview of the various kinds of 3D scanning before going on to some of the most interesting DIY or quick-assembly 3D scanner projects that you can utilize yourself.
Many of these projects heavily rely on 3D printed parts. If you don’t have access to the necessary equipment, consider Craftcloud. By leaving it to the professionals, you’ll have access to the design of your choice, a wide selection of materials, and delivery to your door.
And now, let’s learn a bit more about how this technology works before we try it ourselves!
How Do 3D Scanners Work?
While there’s no simple answer to this question, we can narrow it down to three main methods. We explain them in more detail toward the end of our article on the best 3D scanners, but let’s quickly go over the most important details.
Photogrammetry
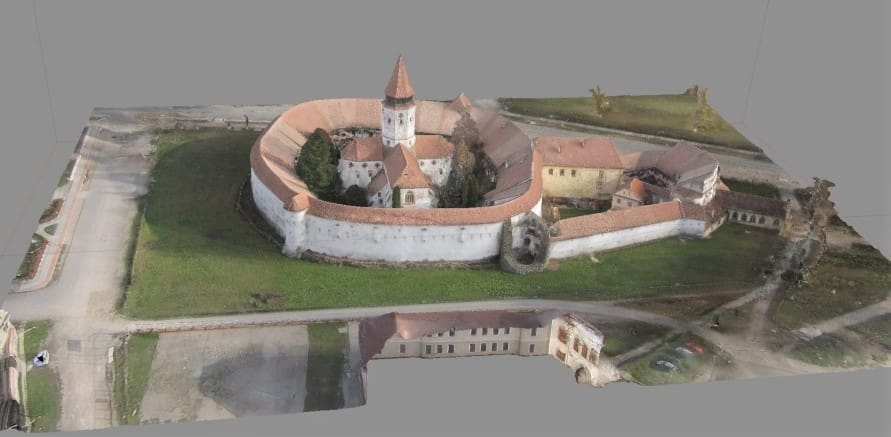
This scanning method involves taking pictures and converting them into a 3D model. This is by far the most affordable way to 3D scan an object. While some professional long-range aerial scanners can easily cost hundreds of thousands of dollars, you can just as easily use cameras suspended from balloons, kites, or drones to achieve professional-quality results for a fraction of the cost.
With a DSLR camera or even just a smartphone, all you have to do is take photos of an object from every angle (even the top). A good number of photos might be about 50, and it doesn’t matter if there’s some overlap. Once all the pictures have been fed into software, it’ll get to work patching all the pieces together for the completed model. However, depending on the software you’re using, you may need to do some editing before you can use the model for anything like 3D printing.
Given how easy and accessible this method is, you can expect most of the DIY scanners in this list to be based around photogrammetry.

Laser Scanning
The technology involved here is simply amazing. Basically, the system points a laser at an object and calculates the exact distance from all surfaces, recording all the necessary contours and recesses, before feeding this information back to your computer. Once the model is complete, it’s ready to use however you like, though once again you might need to do some repairs before it can be printed.
Although less popular in the DIY world, a couple of the options below do make use of laser scanning.

Direct Scanning by Smartphone
Smartphones can also do more than photogrammetry, depending on the model. A handful of the most recent generation of smartphones include what are called time-of-flight (ToF) sensors in their camera setups. This is an exciting bit of tech that incorporates the use of infrared lasers to record the depth and definition of the object you’re scanning.
After you’ve finished taking one continual recording of the object (you need to either circle it or hold the camera still while the object slowly spins), you can export it as a 3D model. ToF technology is relatively new, but once it gets a foothold, perhaps after a few more updates, it’ll be a real game-changer.
Examples of devices already using ToF cameras include Samsung’s Galaxy Note 10, which comes with a built-in scanning app, the Huawei P30, and the iPhone 12 series.
So, now we know the technology options, let’s look at the scanners!

The $30 Option
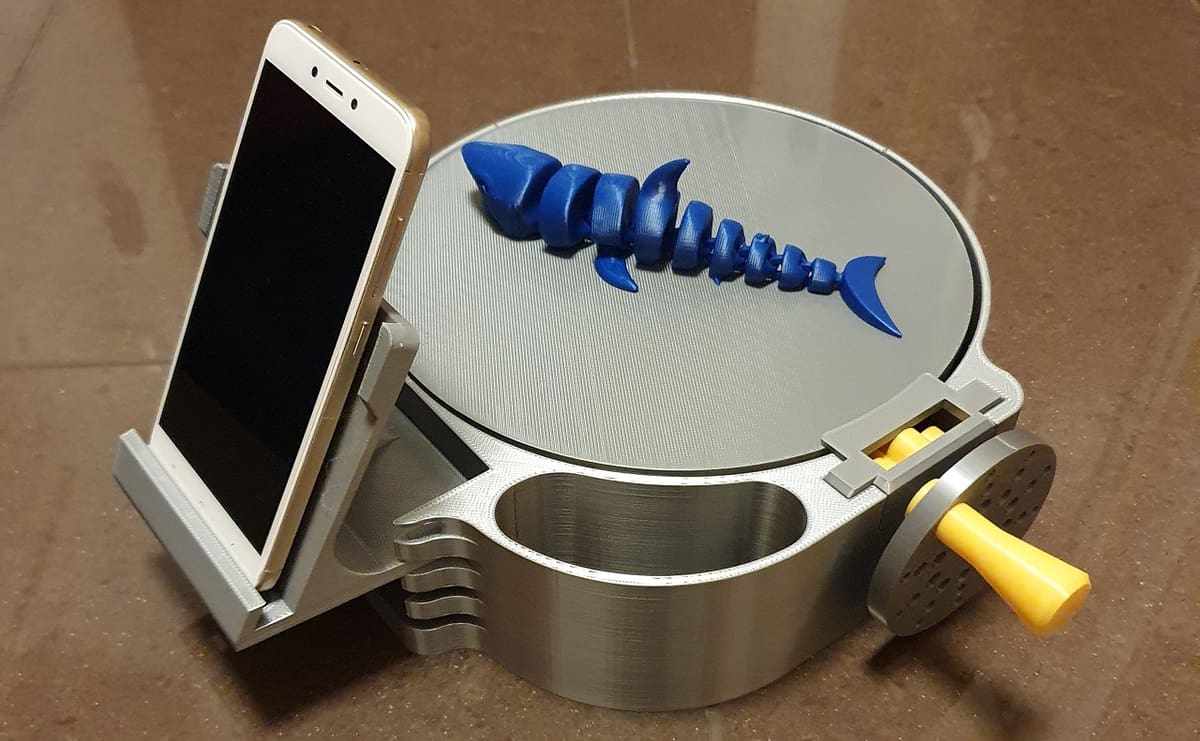
The $30 3D scanner is one of the easiest 3D scanner projects you can build. The basic idea is to use 3D printing to create two components: a hand crank-operated turntable, which rotates an object, and a dock that holds your smartphone in place.
To complete the setup, you’ll need to connect a headset with a volume button to your smartphone. Then, install the button in a special slot under the hand crank. As you turn, the mechanism will press the button and trigger the smartphone camera, taking 55 photos for every full rotation of the object being scanned.
The numbers say a lot about this 3D scanner turntable. The design by Dave Clarke (daveyclk) has been downloaded more than 670,000 times from Thingiverse, with 139 posted makes and 25 remixes. While the files are all free, $30 is the designer’s estimate of how much this project will cost to print, assuming $25 per kilogram for filament.
Since no motors or electronics are used in this design, you don’t need any kind of driver (or connection to your computer). However, you’ll need photogrammetry software to convert the photos you’ve taken to a 3D object. The designer suggests using 3DF Zephyr for this task.
- Materials needed: All you need for this simple DIY scanner is a smartphone, a headset, and some 3D printed parts.
- How it works: An object is placed on a turntable and turned via a hand crank. As it turns, photos are taken for assembling a scan.
- Total cost: The only cost is filament, estimated at $30.
- Designer: daveyclk
Infinite Resolution
This project brings a level of versatility because it will work with any camera, not just a smartphone.
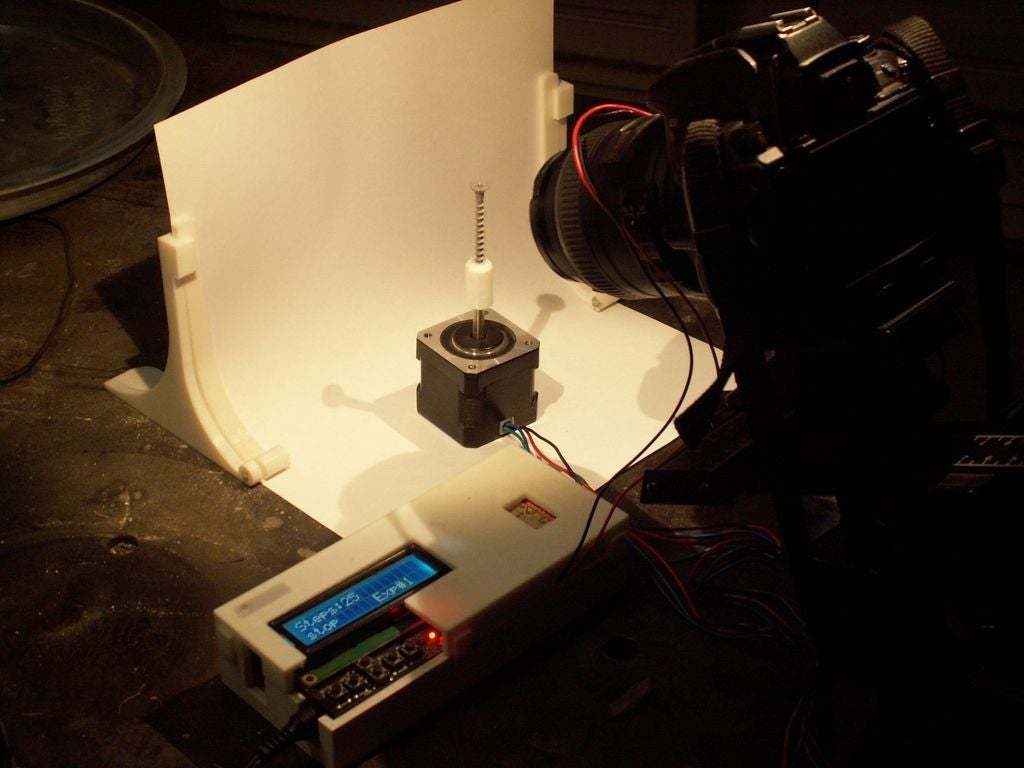
The Infinite Resolution Scanner uses an Arduino board to step a turntable. Simply place an object on the board, mount your camera, and activate the project. Once it’s finished, you’ll have a set of high-quality object photos that can be fed into the photogrammetry software of your choice.
The project also integrates an LED that flashes when the stepper motor steps, automatically triggering the mounted camera. This means you don’t need to manually move the turntable or take photos.
A step-by-step guide to building and using the scanner as well as importing and cleaning up the files is provided by the creator on Instructables. You can find alternatives for the Arduino case, mounting clip, rotating platform, and software at Cults.
- Materials needed: Several parts are needed for this project, with the main ones being an Arduino Mega (or another model), a stepper motor, and an LCD shield.
- How it works: Similar to other projects, you place the object on a rotating platform and take pictures. (Any camera will do.)
- Total cost: Around $65 is good value for the high quality that’s possible with this scanner.
- Designer: shapespeare
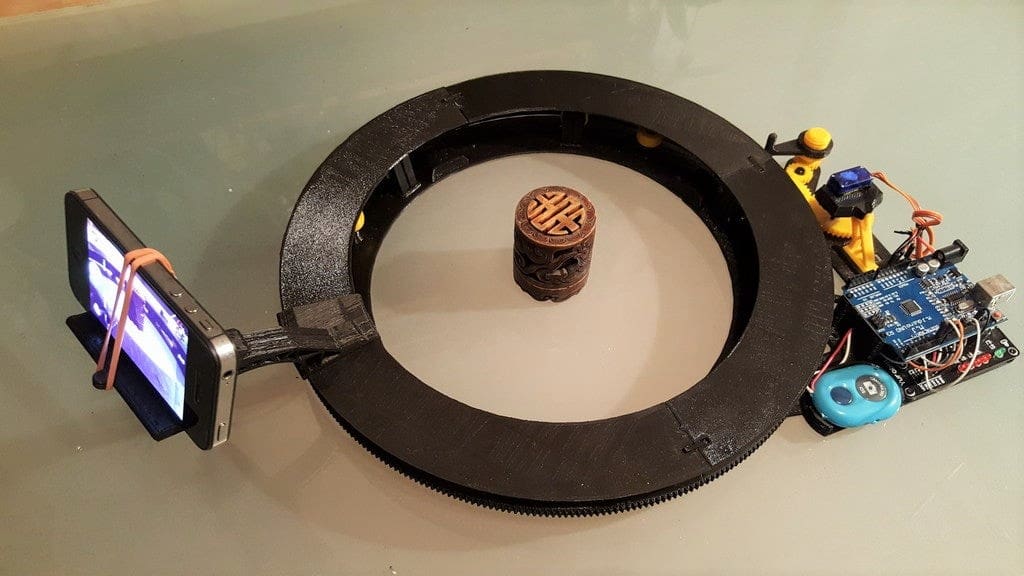
Smartphone
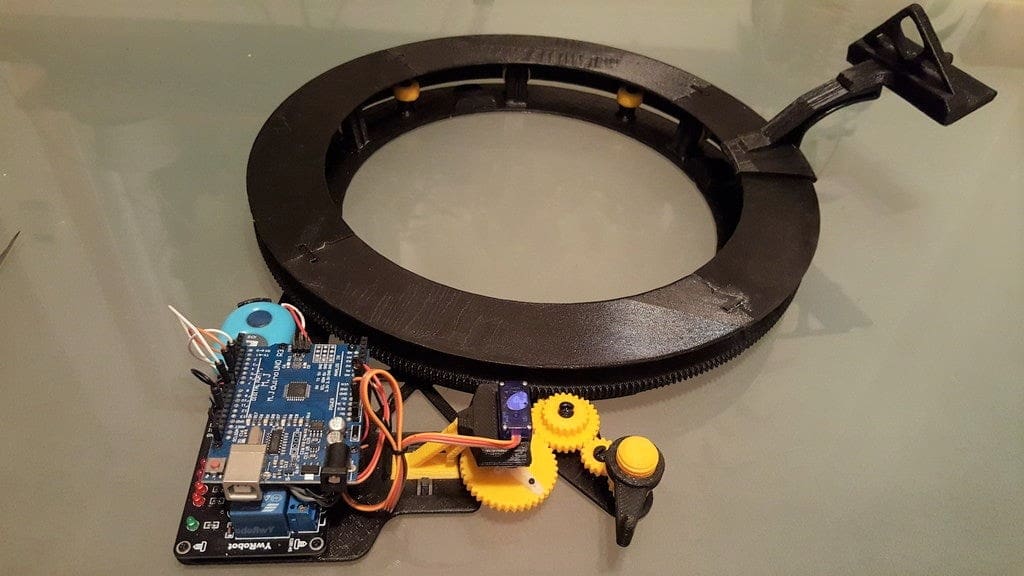
This 3D scanner is a bit different from the previous setups, though it still relies on 3D printed parts. Here, the object to be scanned is fixed in place while the smartphone rotates around it. It’s a bit more complex than the hand-cranked design, using an Arduino Uno and a servo motor to drive the platform.
You’ll be docking your phone on a platform that’s 380 mm in diameter. At each step of rotation, the phone’s camera is remotely triggered through Bluetooth.
For this design, you can download all of the files from Thingiverse, and there are three shared makes. The creator, Tomodachi1, says you’ll need about $20 worth of 3D printing filament as well as some electronics, including an Arduino or compatible board, a servo motor, and a Bluetooth remote control.
- Materials needed: You’ll need a servo motor, an Arduino Uno, and the filament for the 3D printed structure.
- How it works: The phone is rotated around a stationary object.
- Total cost: Overall it should cost between $60 and $70, which includes approximately $20 for filament and between $40 and $50 for the Arduino and servo motor.
- Designer: Tomodachi1
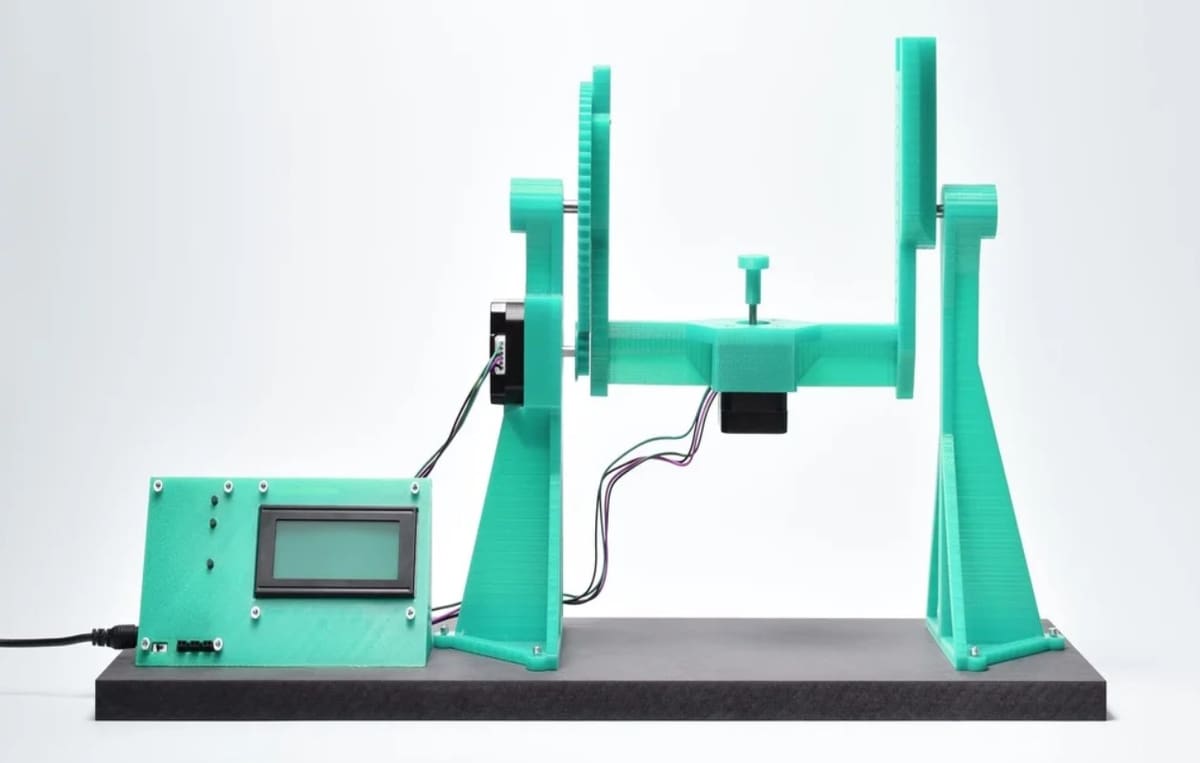
Turntable Photogrammetry
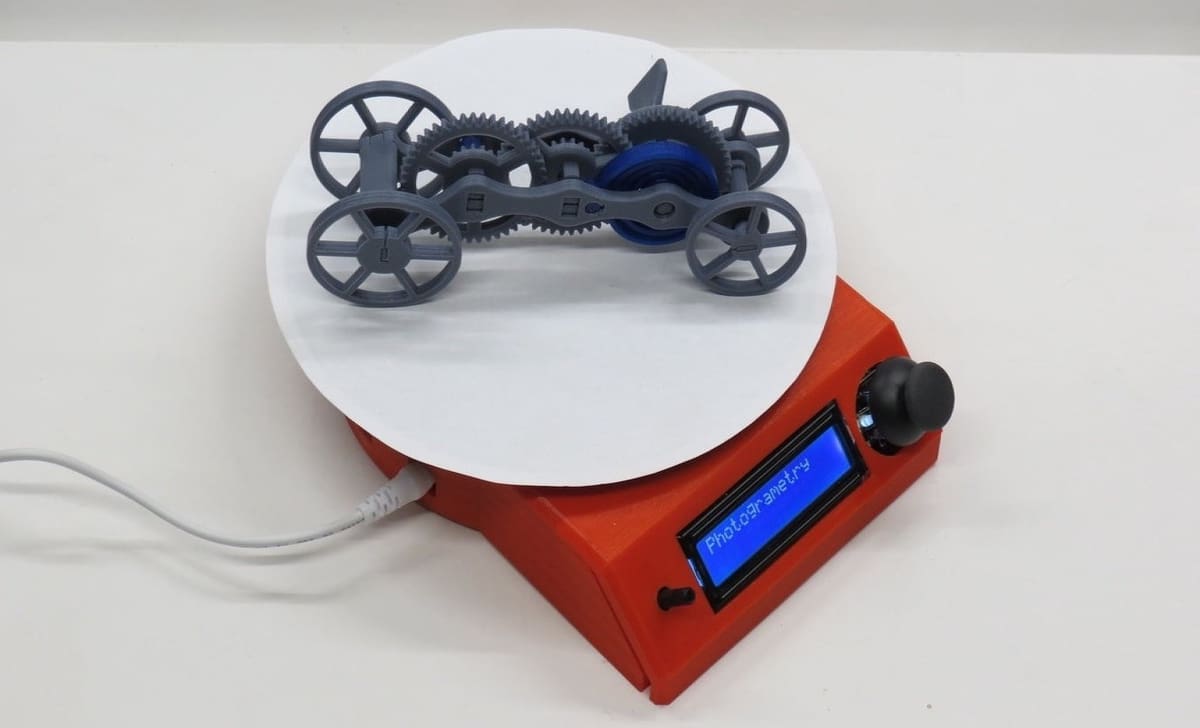
This turntable Photogrammetry 3D scanner is an improved version of a hand-cranked design. In this electronic version, the designer has implemented a stepper motor as well as an Arduino to make the rotation hands-off.
The scanning is performed by a smartphone connected to the turntable via Bluetooth, and you can set the number of stops you want the turntable to make directly on the Arduino. The smartphone takes photos at each stop, which you can then convert into a 3D image by using any photogrammetry software.
Aside from electronic elements, all parts are 3D printed, including gears and bearings, making it even more accessible and affordable (as long as you already have a 3D printer). If you want to make tweaks to the design, the editable files are downloadable for a small fee, and the creator includes instructions in video format for assembly and use.
- Materials needed: You’ll need a smartphone, a servo motor, an Arduino Uno, an LCD screen and other small components, as well as 3D printed parts.
- How it works: A phone takes photos of a model on an incrementally rotating platform.
- Total cost: This upgraded design costs around $55 to reproduce, not including the cost of filament.
- Designer: Bribro12
Distance Sensor
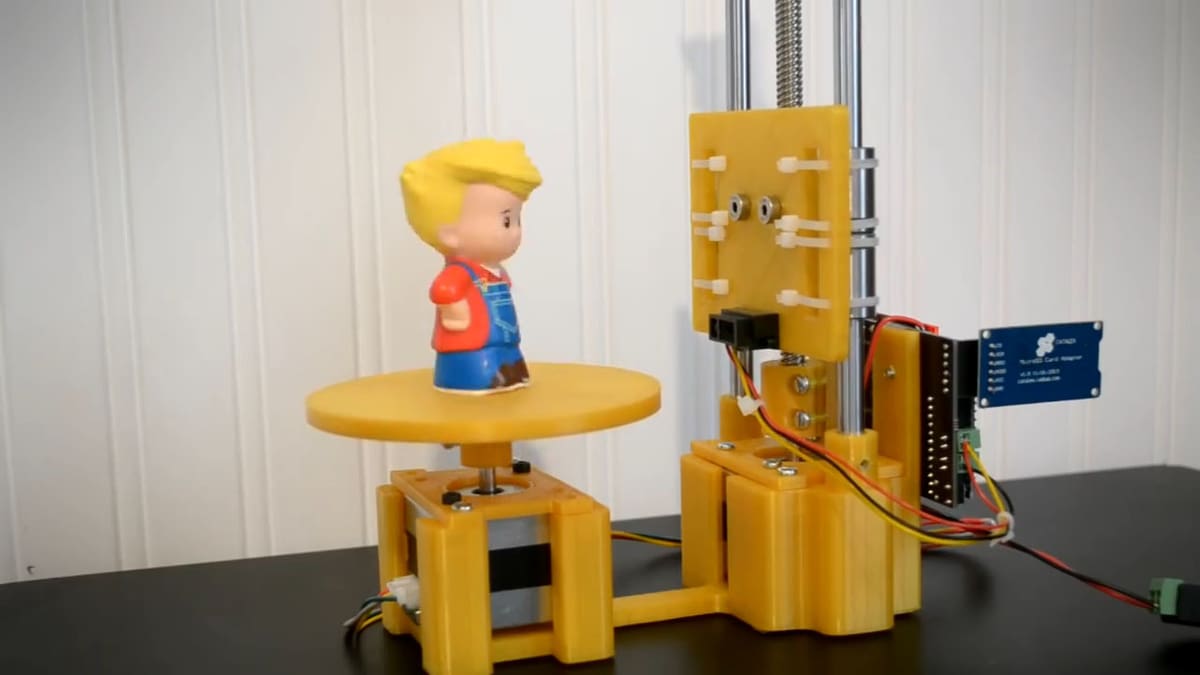
This DIY 3D scanner was created by SuperMakeSomething and consists of two simple but clever parts: a rotating scanner platform and a distance sensor attached to a threaded rod that moves via a stepper motor.
To scan an object, it’s a similar principle to fused deposition modeling (FDM) 3D printing, as the sensor measures the distance of each point in a “layer” while the object rotates. Once the layer is scanned, the stepper motor takes the sensor up a step and repeats the process again and again until the whole object is scanned. Thankfully, it’s automated, so you only have to place the object and press “start”.
The creator gives detailed instructions about the mechanical parts, printing the parts, and materials you need to buy and assemble. Then he takes you through the electronic assembly and the code for your Arduino. The printed parts are available on Thingiverse, and the complete bill of materials can be found in the video’s description.
- Materials needed: You’ll need an Arduino Pro Micro, two stepper motors, a threaded rod, and linear shafts and bearings.
- How it works: The subject is placed on the platform and is rotated while the sensor moves up layer by layer.
- Total cost: This one comes to around $80, which includes approximately $20 for the Arduino, $40 for the stepper motors, $15 for other mechanical parts, and $5 for the sensor.
- Designer: SuperMakeSomething
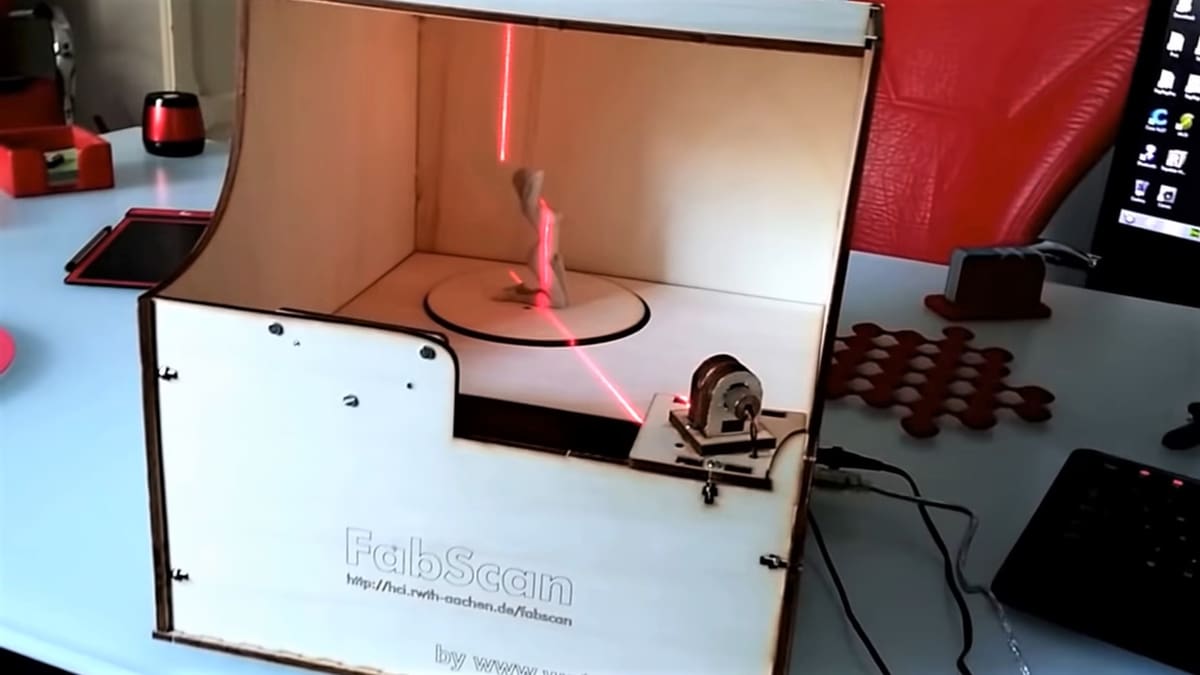
FabScan Pi
If you’re more into laser triangulation and some computation, then this DIY 3D scanner project is the one for you. The FabScan Pi is the newest version of the popular DIY scanner FabScan 3D. The FabScan project, originally developed in 2010 as part of a bachelor’s thesis, is a laser-based 3D scanner with a turntable. If you’ve made the FabScan 3D, you can make the FabScan Pi reusing materials from the first version.
This project isn’t based on 3D printed materials but instead on MDF boards, from which an enclosure and some other parts are assembled. The project’s page features a detailed list of materials and layouts for cutting the necessary pieces as well as assembly instructions. The FabScan Pi uses an additional Raspberry Pi with a camera, which gives better resolution and works as an independent device that can be controlled via a web browser. It’s worth noting that this scanner is wireless, so you don’t need the additional setup to control it via USB.
The complete instructions to build the FabScan Pi can be found on the Instructables page and the official page for the FabScan Pi. There’s also a Discord server where you can get more information on the software.
- Materials needed: This laser scanner is built from MDF. You’ll also need a Raspberry Pi with a camera attached and a stepper motor.
- How it works: A web browser is used to control a turntable and camera (attached to a Raspberry Pi).
- Total cost: Depending on whether or not you build the enclosure and which Raspberry Pi model you use, this should cost between $95 and $120.
- Designer: Developed by Mario Lukas, Instructable by janth
Silhouette
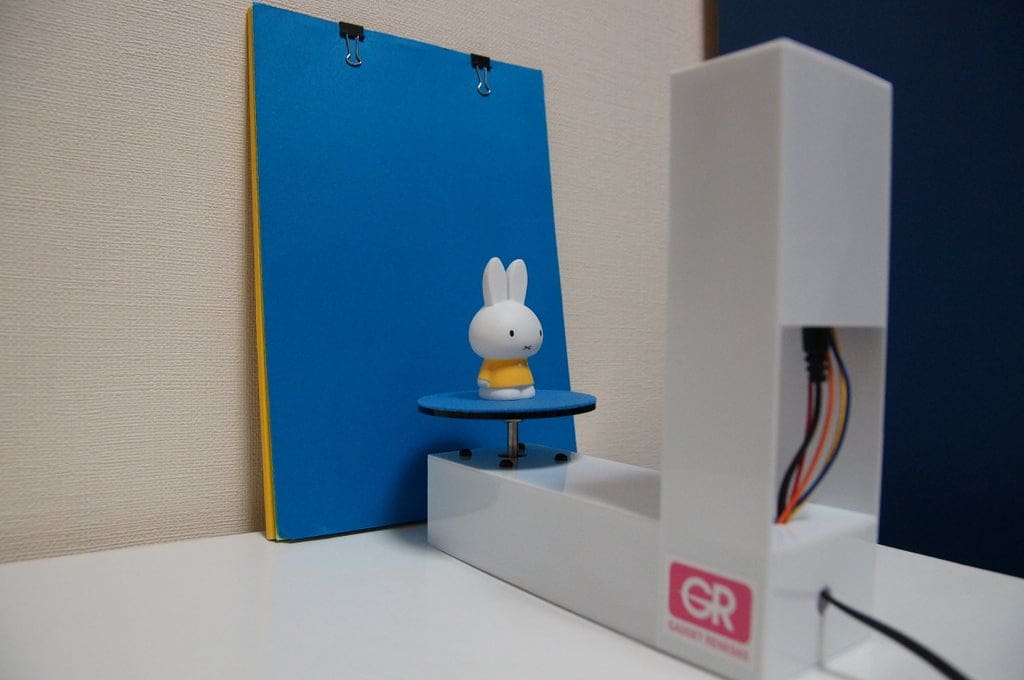
This standalone 3D scanner was designed by Jun Takeda in 2018. It’s based on the GR-Lychee prototyping board and camera and uses the “shape from silhouettes” algorithm to obtain a 3D model. The idea behind this algorithm is to take pictures of an object’s silhouette from various angles. The photos are then converted to point cloud data that represent the scanned 3D shape. A polygon mesh is then created from that data and saved to an SD card as an STL file.
Scanning is done by simply pressing a button. It doesn’t get any simpler than that! The final result is a 3D print-ready model that only needs to be sliced before printing.
The scanning resolution is more than a millimeter, so you won’t get extremely accurate results, but it’s still pretty fast and very easy to use.
- Materials needed: This project requires quite a few materials, including the GR-Lychee board and plastic sheets to build the structure. We recommended taking a look at the Instructables page for the full list.
- How it works: The machine takes images as it rotates the object against a flat background. The result will be a file that’s almost ready for 3D printing (it still needs slicing).
- Total cost: This will set you back between $150 and $200, depending on the parts you use.
- Designer: Jun Takeda
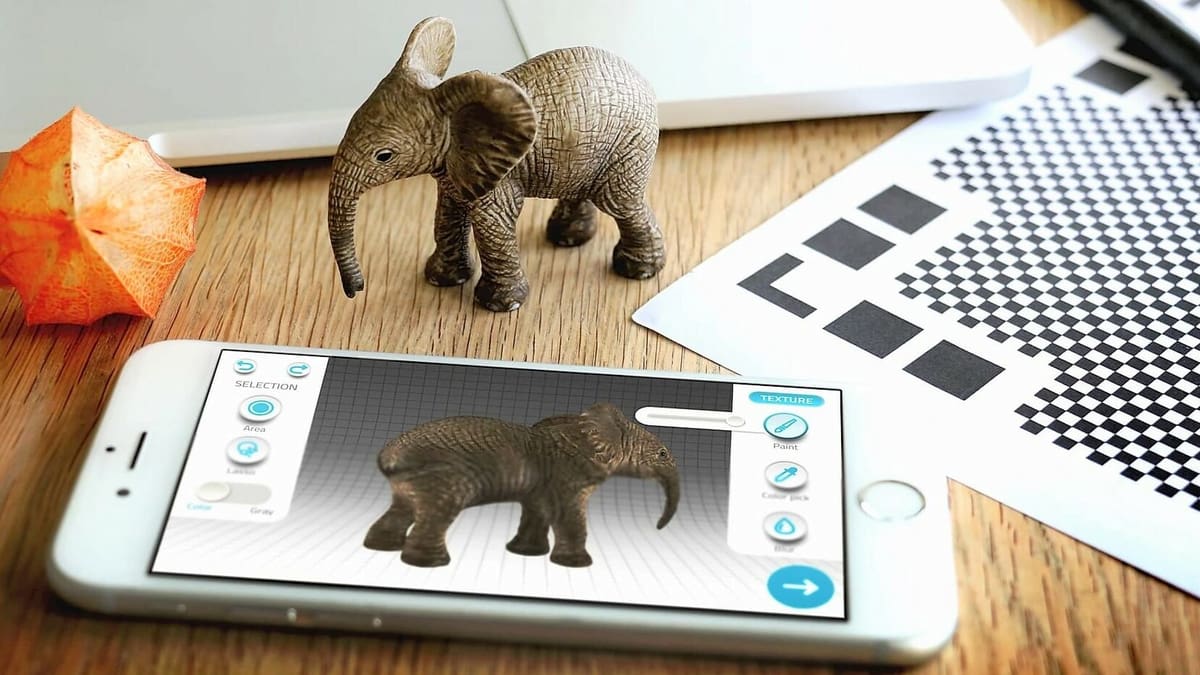
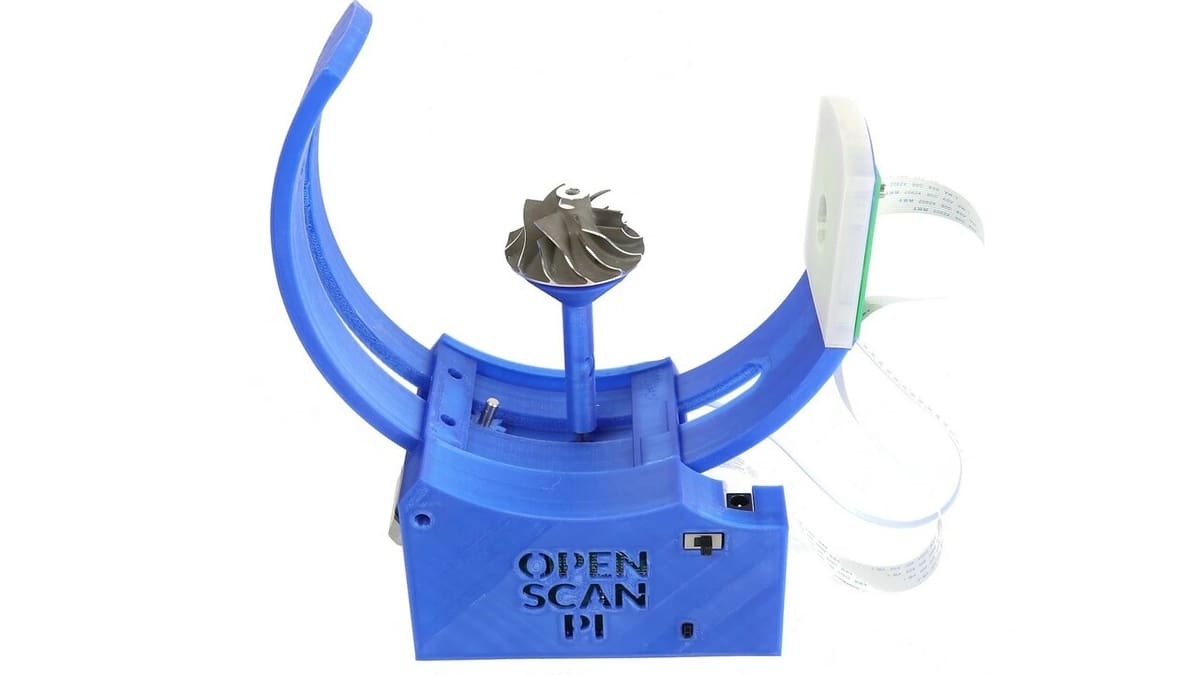
OpenScan
OpenScan is a 3D scanning system based on photogrammetry. It’s a low-cost, modular, open-source system, and though it comes without a camera, it’s compatible with various models. You can use anything from your smartphone’s camera to a professional DSLR.
Compared to other photogrammetry scanners, this one achieves a more complete scan by rotating the object around three axes. OpenScan was designed in 2018 by a German company of the same name. You can buy a fully assembled scanner in the OpenScan shop or order it as a kit.
If you decide to make it yourself, you can download all necessary STL files for 3D printing for free from Thingiverse or Printables. The designer has shared electronic schematics as well. The firmware for the Arduino Nano, which is the brain of this scanner, can be downloaded from the OpenScan site.
When you assemble or buy this scanner, you’ll need photogrammetry software to create a 3D object from the many photographs you’ll end up with after scanning. OpenScan provides a list of recommended tools. If you need help using or assembling the scanner, you can get it from the OpenScan forum or tutorials.
- Materials needed: This open scanning system will work with any camera, from a smartphone to a professional DSLR, but you’ll need the electronic components and filament if you’re printing the parts yourself.
- How it works: Unlike others, this scanner rotates the scanned object around three axes, providing a more accurate scan.
- Total cost: You can purchase a kit starting at around $120 for components, plus approximately $25 in 3D printer filament; a complete kit is about $340.
- Designer: OpenScan
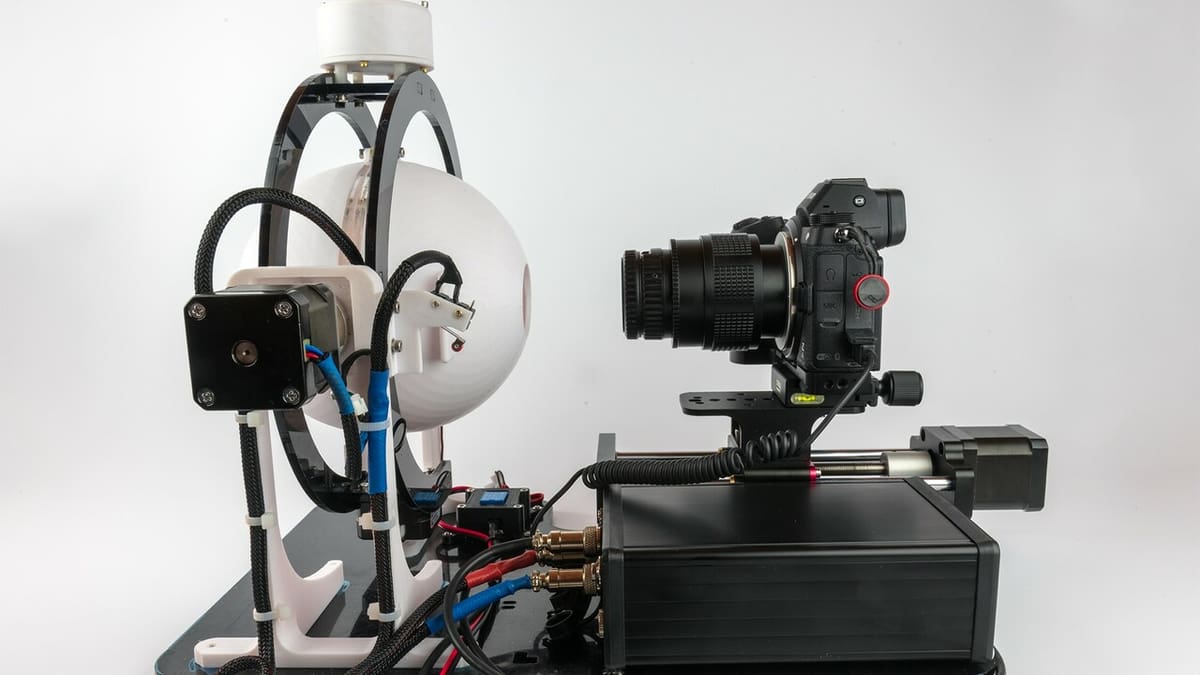
OpenScan Mini
Like the OpenScan project, but find it too large for your workspace? We have great news! There’s a mini version available, offering precision up to 0.02 mm!
In addition to requiring less filament and using nearly the same components, the Mini version includes an additional polarizer module to enhance capture quality. On the project’s website, you’ll find separate options to customize your purchase, allowing you to choose whether you want it with or without the shield and ring light, Raspberry Pi with an SD card, camera, polarizer module, and 3D printed parts. The motor, power supply, and small parts like nuts and bolts are included in any combination.
The operating principle remains the same, based on photogrammetry, but it’s tailored for miniatures. It’s essential to note that even with a good camera, surface treatment is often necessary to avoid errors on highly detailed, translucent, or highly reflective surfaces. The polarizer module helps eliminate specular highlights from the model, but surface preparation is still crucial.
For the mini version, you’ll spend around $20 more on the complete kit compared to the larger version because of the polarizer module. That said, while the complete kit is priced at ∼$370, which can be pricier than other options on this list, you’ll be able to scan pieces ranging from 80 to 100 mm.
To see this scanner in action, check out the video by Squidmar Miniatures where they share their experience comparing it to other scanners on the market. If you need it, there’s also the Darkroom Ball accessory that can help you get a cleaner scan.
- Materials needed: In addition to the 3D printed parts, you’ll need a Raspberry Pi, a camera, ringlight, cables, shield, stepper motor, stepper driver, power supply, and M3 bolts.
- How it works: The object is placed on a rotating platform and pictures are taken while the camera moves up and down to reach different angles.
- Total cost: As with the original OpenScan, you can purchase a kit starting at around $120 for components, while a complete kit is about $370.
- Designer: OpenScan
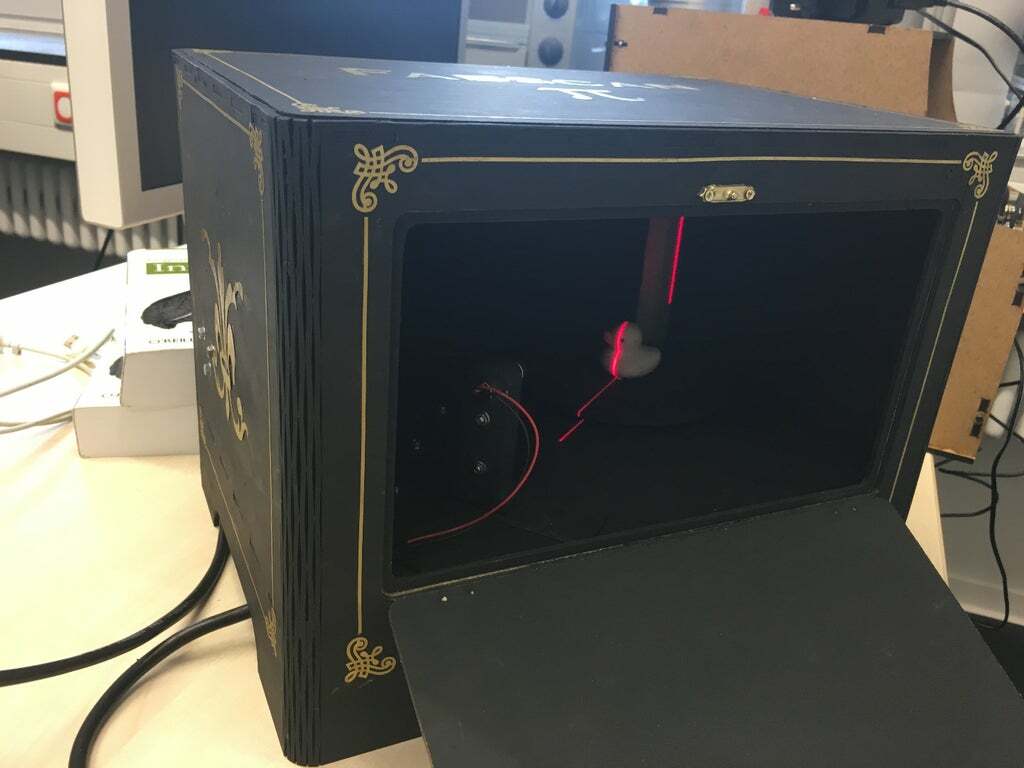
Desktop CT & 3D Scanner with Arduino
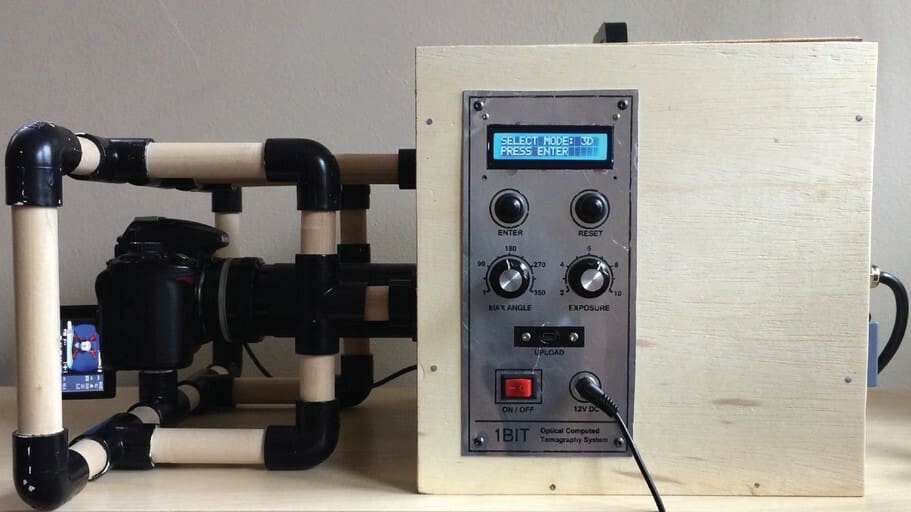
If you need to scan semi-transparent objects and have done some research on the subject, you probably know that this is a major challenge for most cheap or DIY scanners. Light control on the object being scanned is crucial when using photogrammetry. Therefore, it’s not sufficient to simply take photos haphazardly, especially when dealing with objects that are clear or highly reflective, for example.
This 2-in-1 device operates similarly to other 3D scanners that use photogrammetry. However, in addition to performing 3D scanning by illuminating the front of the object, it can also perform optical tomography of the object, reversing the direction of illumination. This type of optical tomography uses light passing through semi-transparent objects and against the camera’s lenses.
The significant difference with photogrammetry is that optical tomography allows you to obtain the internal structure of semi-transparent objects. For instance, the designer successfully scanned a slice of tomato with its seeds perfectly outlined. The device also features control buttons to make everything easier. The exposure control manages the direction and intensity of the light, switching between 3D scanning pointing forward and tomography scanning with the light in the opposite direction. There’s also a button included to control the number of exposures (photographs) taken during the automated process.
- Materials needed: You’ll need an Arduino Nano, a DSLR camera, PVC tubes, a stepper motor, H-Bridge, 16×2 LCD display, and other electronic and hardware components.
- How it works: The object is placed in a box with a rotating platform to be photographed and scanned like other devices; however, for optical tomography the direction of illumination is reversed.
- Total cost: If you already have some of the materials, such as the DSLR camera, PVC tubes, and the necessary tools, the estimated cost is between $100 and $150 depending on the parts you choose.
- Designer: jbumstead
scAnt
Another significant challenge for a true 3D scanner is small or delicate objects, such as insects. However, don’t rush to spend a small fortune on a store-bought scanner before checking out this amazing DIY option, the scAnt!
The approximate accuracy of this scanner has been measured at an incredible 0.01 mm, and it undoubtedly delivers outstanding results, as we can see from its examples on Sketchfab. Being an open-source project with high precision for small objects, this device can also capture color and use your preferred photogrammetry software.
Here, the scanning platform also moves in all three axes, and the FLIR camera has a significant focus adjustment with a slider to ensure high-quality images. While the principles are very similar to other projects, the key secret lies in the high-quality lighting and camera aligned with precise movements and ample adjustability. In this project, a FLIR Blackfly 20 MP camera with a 35 mm MPZ lens was used, and to achieve studio-quality lighting, a chamber made from two PLA shells is used as reflectors for the LEDs inside the chamber.
The applications for this DIY scanner can extend well beyond scanning small insects. Its high precision is a valuable feature for many other smaller objects as well. Despite being a DIY project, this design is quite sophisticated. However, don’t be discouraged by its complexity; it is well-documented and even comes with an assembly manual with instructions.
- Materials needed: You’ll need some laser cut and 3D printed parts in addition to a FLIR 20 MP camera, stepper drivers, C-Mount lens, LED strips, a multi-interface stepper motor controller, and some other electronic parts.
- How it works: Just like other devices based on photogrammetry, there’s a camera that takes photos from all angles while the object positioned inside an illuminated chamber is rotated on three axes.
- Total cost: A FLIR camera is about $330, but you can use DSLR (or other) cameras; for other parts, the cost is between $150 and $225 depending on the services and parts you use.
- Designer: evo-biomech
AutoScan
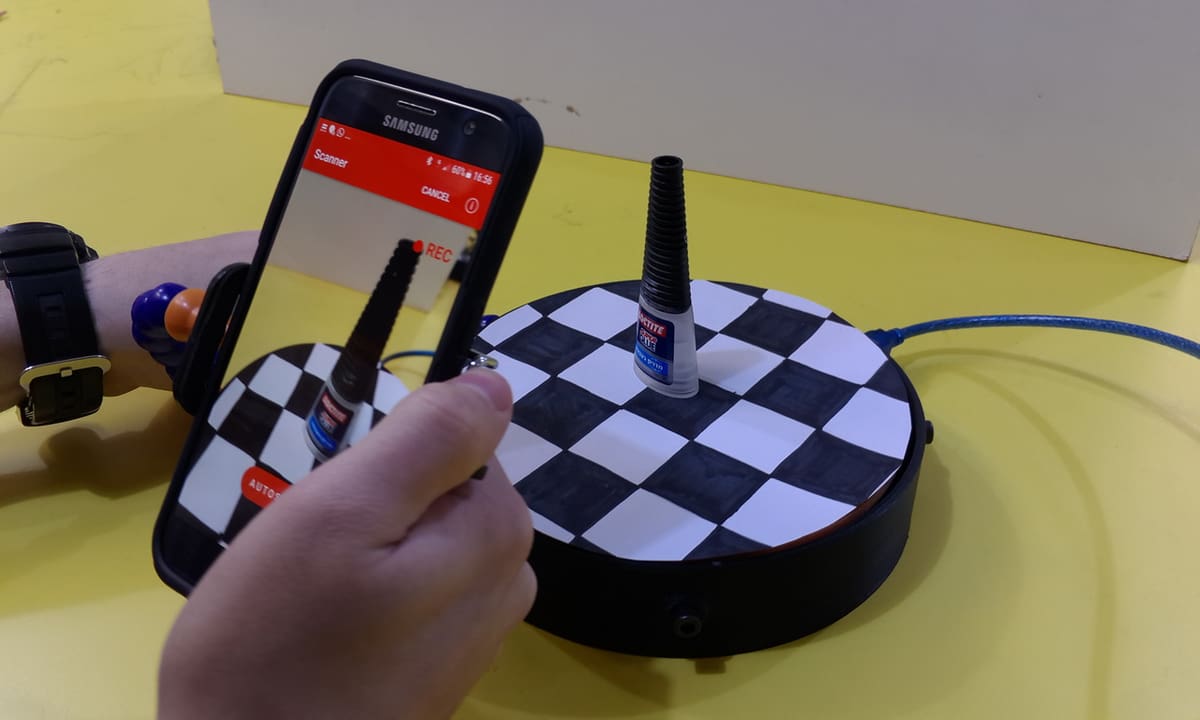
AutoScan looks like a very simple device for photogrammetry 3D scanning, but it conceals much more under the hood. It consists of two parts: a rotating scanning platform and an Android app.
The app communicates with AutoScan via Bluetooth, and the idea is very simple. Once you take a photo with your Android phone, the app will send instructions to AutoScan to turn the platform a couple of degrees. This makes 3D scanning with your smartphone easy, fast, and automatic. Unfortunately, iOS users are out of luck as this app only works on Android phones.
AutoScan was designed back in 2018 by the Hemda Makers group from Israel. Since this is an open-source project, all of the files needed for 3D printing can be downloaded from Thingiverse. The electronics are based around the Arduino Uno with a Bluetooth module. Detailed schematics and instructions can be found on Thingiverse, as well. With heaps of comments and six posted makes, you know this one can be done successfully!
- Materials needed: First of all you need an Android phone, as well as an Arduino Uno, a Bluetooth module, and a stepper motor.
- How it works: Your subject is placed on the platform and rotated gradually after every picture.
- Total cost: It comes to around $90, which includes approximately $30 for the Arduino, $20 for a stepper motor, and $15 for a line laser, plus around $25 in wires, screws, and a mounting arm for your smartphone.
- Designer: HemdaMakers
Aerial Photogrammetry Rig
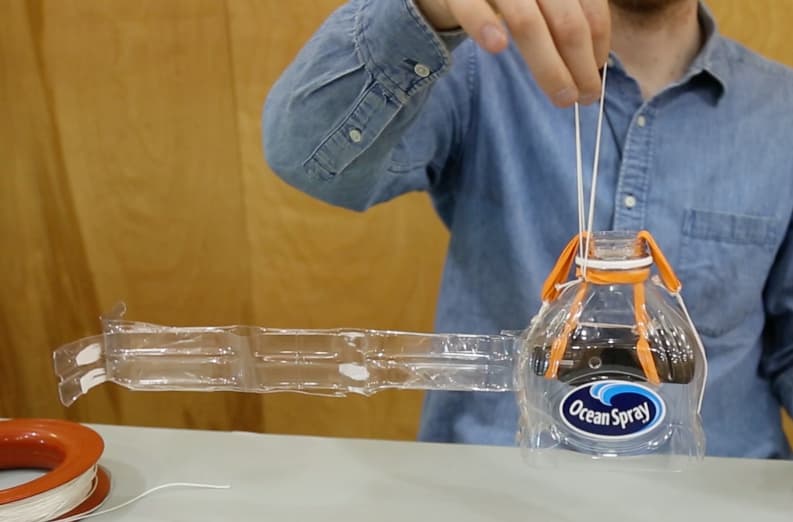
Feeling more inclined toward aerial photogrammetry? Then you don’t want to miss this! Essentially all you need is to place your camera up above your scanning target, closer to the clouds. Once you collect your images, the process of rendering the model is no different from what you would do if you had photographed pebbles by the beach using a handheld camera. Just be aware that if you’re using something more “DIY” than a drone to suspend your camera, the clarity of your final images may suffer.
To start, ensure you have a remote (infrared) shutter release system in your camera so that you can take pictures when the camera is in position. Then, to bring the camera up, you can use a drone, a balloon or, if it’s too windy, you might be better off with a kite. Naturally, you’ll need a frame to hold your camera and protect it from crashes. Have a look at this great set of instructions from Mathew Lippincott, which includes a video for further clarification.
Finally, use your favorite software to process the images.
- Materials needed: All you need is a plastic bottle, several rubber bands, and either a drone, a balloon, or a kite to suspend your camera.
- How it works: From the air, your camera takes pictures or scans of your subject.
- Total cost: Following the method that Public Lab used, the rig should only cost between $1 and $5.
- Designer: mathew
License: The text of "The Best DIY 3D Scanners" by All3DP is licensed under a Creative Commons Attribution 4.0 International License.