The Fiercest DIY BattleBots

Whether for sport or fun, DIY BattleBots are here to stay. Check out this list of destroyers that you can build with your 3D printer!
Welcome to the arena, warriors in innovation and technology! Inspired by the famous American game show, BattleBots are intense, fighting DIY robots. Basically, you can think of a BattleBot as a cross between a futuristic war machine and your most ambitious science project. We’re talking about robots custom-built to fight, with the cunning of a military strategist and the tenacity of a modern gladiator.
In a BattleBot game, you control your own robot in an arena, with three-minute rounds of action. The objective is to incapacitate or cause as much damage as possible to the opponent, using everything at your disposal. However, you’ll need to respect the weight category, as not all BattleBots are created equal. In this article, we’ll focus on Ant weight robots, which in the US can go up to 1 pound and up to 150 grams in the UK, and Beetle weight, which is 3 pounds maximum.
Before we get into some amazing BattleBot projects, we’ll go over some essential rules and considerations. Safety is the keyword and always comes first. After all, we’re talking about machines built for destruction and even small ones can be quite dangerous. In addition to robots made with 3D printing, we’ve also included some examples that don’t depend on a 3D printer, so you have more options.
If you don’t have access to a 3D printer, you can also count on Craftcloud to help you make BattleBots in a wide variety of different materials in time to win the grand prize!
Considerations
Of course, you’ll want to have fun tearing your opponents to pieces, but you need to protect yourself for combat to be fun, both during construction and during battle. Therefore, you’ll want to keep the following safety recommendations in mind when constructing your BattleBots.
- Wear Personal Protective Equipment (PPE): Always use personal protective equipment when operating machinery, handling tools, or performing tests. This includes but is not limited to, protective glasses, gloves, and, if necessary, respiratory protective equipment.
- Ensure adequate technical knowledge and experience: Avoid carrying out electrical or mechanical experiments without adequate knowledge and equipment, or the supervision of someone with experience. Many accidents happen due to a lack of preparation and understanding of the risks involved. This applies to mechanical risks and tasks like handling batteries, which explode if they’re damaged. Always handle batteries with extreme care and dispose of them properly when they’re damaged or worn.
- Perform incremental testing: When assembling your BattleBot, perform incremental testing on individual parts rather than assembling everything at once. This helps identify and fix security or performance issues before they become larger issues.
- Use quality materials: Use high-quality, durable parts and materials whenever possible. Avoid reusing defective or worn parts, especially in the case of batteries.
- Stay safe: Keep all activities related to building, testing, and battling the robot in a controlled and safe environment. This will reduce the risk of injury to you and others around you. Even though motors are designed for toys, they can still reach considerable speeds and forces. Treat your battlebot with respect and care, recognizing its destructive potential. It’s also good to keep in mind that projectiles, explosives, or radio frequency interference are not allowed, as to keep the playing field level and safe.
By following these steps, you’ll finally be able to enjoy the exciting experience of bringing real exterminators to life, but in a safe and controlled environment.
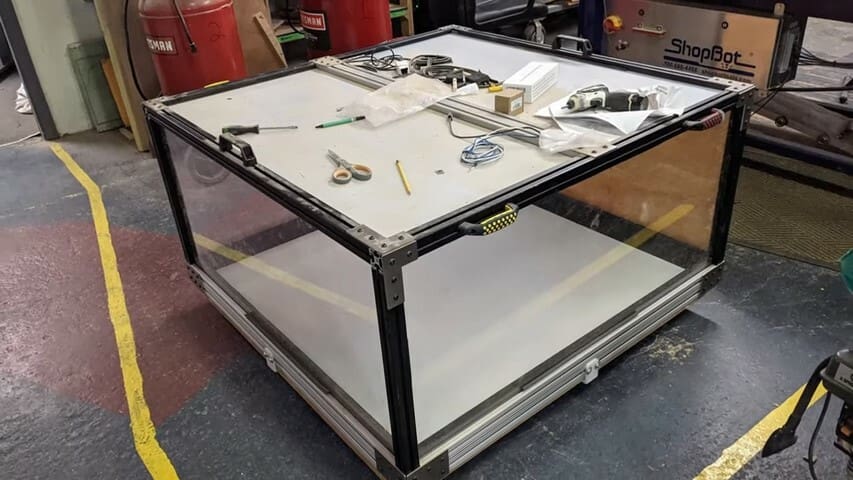
Speaking of environments, we cannot leave out two essential things for anyone who intends to dedicate themselves to a BattleBot project: a test box and a combat arena! You can make your own fully customized options, but consider the Test Box and Combat Arena shared by Team Just ‘Cuz Robotics on YouTube as good examples.
Now without further ado, let’s meet some worthy opponents!

Horizontal Spinner
The Horizontal Spinner is not only the name of the first BattleBot on our list, but also one of the most widely used combat weapon concepts. This project combines many design features that allow you to beat your opponent with violent blows and at the same time be prepared in case things turn upside down. The wheels, which are larger than the chassis, help this fighter react even after it has been turned over, avoiding a knockout.
The designer notes that this is not a project for complete beginners. Despite its simple appearance, this fighter can be quite dangerous and you’ll need an arena that offers adequate protection. The weapon is made of titanium and is 3 mm thick. In total, seven files are available for downloading, including one for a 3D printed engine cover and one for laser cutting acrylic. In addition, a complete BOM list is provided. To print the parts, the designer used 30% infill, a 0.2-mm layer height, and no additional supports.
- Who designed it? emancarrillo
- Which weight category? 150-g Antweight
- Where to find it? Thingiverse
Blackspin
The Drum Spinner, also known as BlackSpin, features a weapon that has gained prominence in arenas around the world. With its compact and efficient design, this bot is capable of hitting its opponents with a strong right hook, delivering powerful and strategic blows. The structure has been carefully designed to fit New Zealand Antwight arena weight and size regulations (100×100 mm). You can check out this gladiator in action in the video shared by Combat Robotics NZ on YouTube.
Unfortunately, some links are unavailable in the instructions, but there is a list of all the components used and the models for 3D printing are still available. If you have some experience, you can replicate one without issue. The printing recommendations include a 0.2-mm layer height and 25% infill. It’s also recommended to set the walls to 2.5 mm and the arms to 5 mm wide for greater strength. For the drum, a 3-mm wall thickness and 35% infill with a symmetrical pattern are used to maintain balance.
- Who designed it? JC2017
- Which weight category? 150-g UK Antweight
- Where to find it? Thingiverse
Flipper
Who doesn’t dream of lifting up their opponent with just one hand in the middle of a fight? Well, this small and impressive robot promises to take down any opponent with just one arm. Turning opponents and throwing them against the arena’s traps until they are knocked out is this fighter’s main skill.
You’ll find assembly tips and instructions, along with a complete BOM list that will help you replicate this fighter at home. You won’t need many extra tools, making it a great option to start with. Instead of brushless motors, it uses a servo motor to activate the mechanical arm. To print the pieces, make sure to use 0.25-mm layer height and 25% infill.
- Who designed it? emancarrillo
- Which weight category? 150-g UK Antweight
- Where to find it? Thingiverse
Bulldog
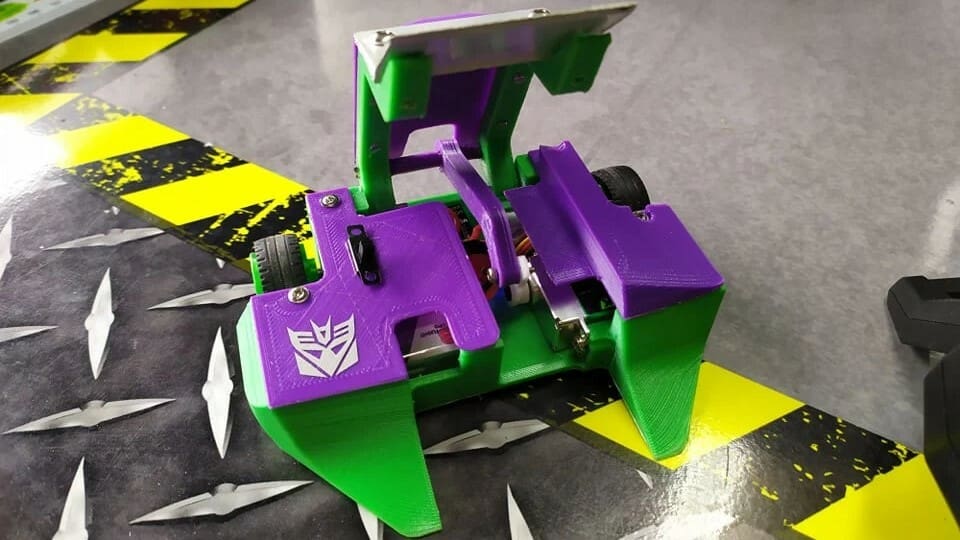
If you’re looking for a fighter who can land that direct, knockout punch to send the audience into a frenzy, this next BattleBot might be your chance. The designer gave it the name “Bulldog” because Bulldog ants are one of the deadliest ant species in the world.
Using a vertical spinner, Bulldog shows exuberant violence as he hits his opponents in the arena and destroys them without mercy. To get an idea of just what your bite can do, watch this demonstration video shared by Brian Brocken on YouTube.
In the photo above, you can see that it’s also possible to use an aluminum sheet in addition to the 3D printed parts. PLA was used to build the chassis, but you can also try stronger materials like PETG or ABS. Keep in mind that some details may be separated between the three different repositories, where you can find the files and detailed instructions.
- Who designed it? Bribro12
- Which weight category? 150-g Antweight
- Where to find it? Hackster, Hackaday, Thingiverse
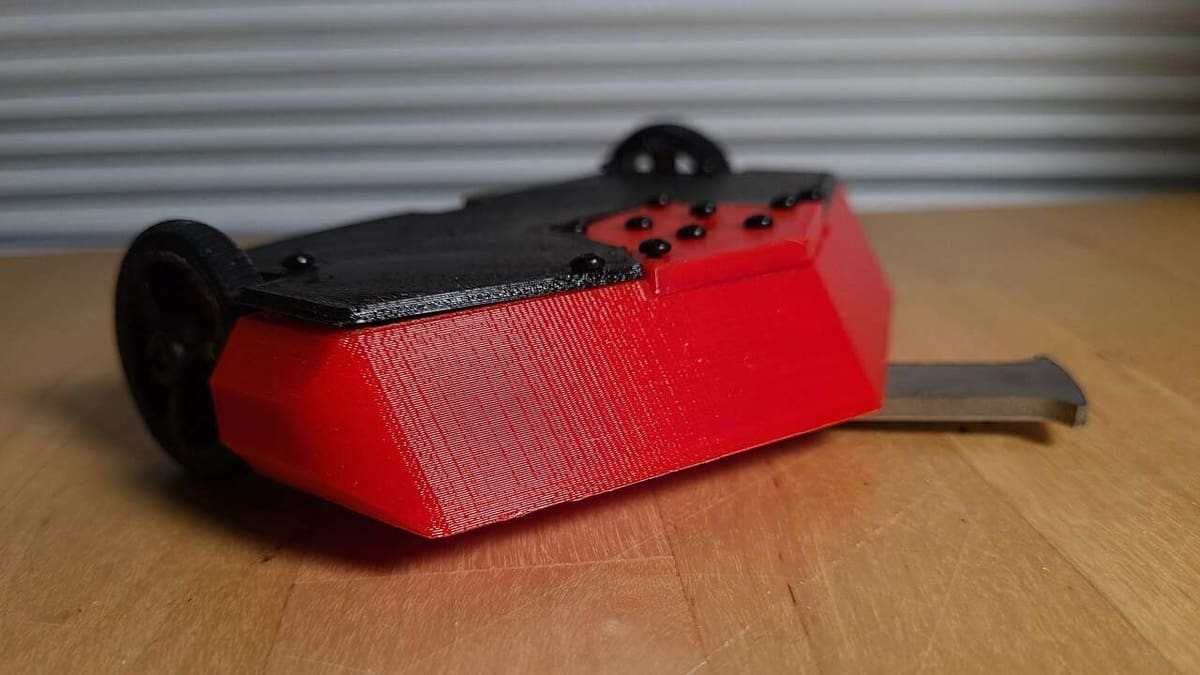
WedgeBot HRH
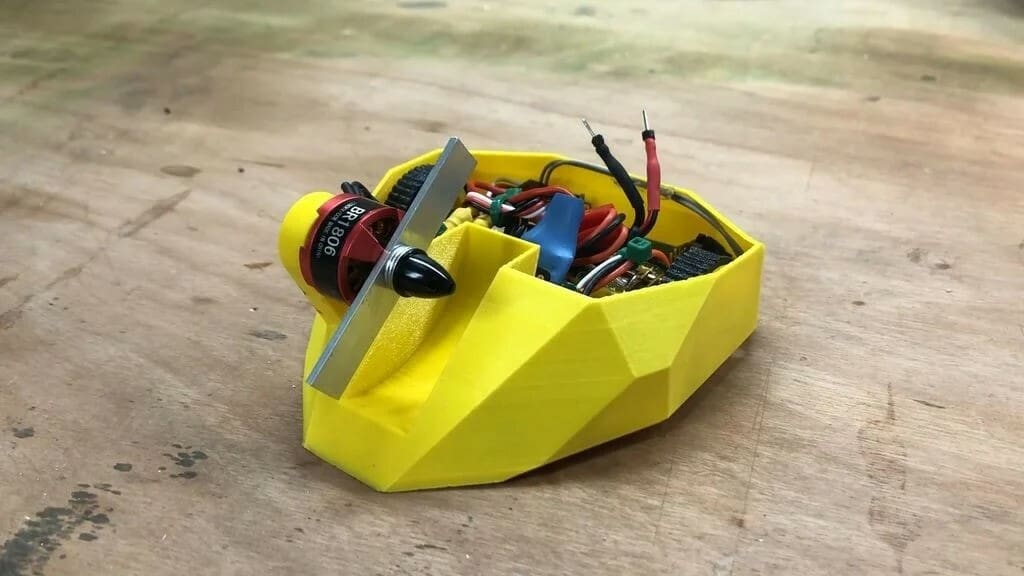
This next bot can change the game when you least expect it. The stealthy opponent is capable of taking down his opponents in a single blow. If they’re left upside down and immobilized, the KO is guaranteed! The bot’s heavier weight and shape are part of the strategy, and the designer indicates that the bot is easy to make, durable, and affordable, as it does not require many parts.
An important point is that this bot can only be assembled when printed in TPU, as the motors are fitted into the chassis. The flexibility of the material is what allows the motor to slide into its final position. If you’re looking for something simple to start with, this is a great choice. Go ahead and make one of these to upset your opponent, and remember the designer’s tip that it can also be used as an excellent mobile doorstopper once retired from the arena.
- Who designed it? Johannes
- Which weight category? 3-lb Beetleweight
- Where to find it? Printables
Hammer
Up next, this design is also quite popular with BattleBots fans. It uses a hammer as a weapon to strike blows until the opponent’s screws are loosened and collapse is imminent. The chassis is similar to the Horizontal Spinner option on our list. The difference is that it features titanium wedge armor to resist low blows. It’s also possible to make wedges with 3D printing, but the designer recommends increasing the height on the Z-axis to make them more resistant.
The STEP file is also provided for those who want to make design changes and there’s a curious remix that promises to be one hell of a Heartbreaker. It’s possible to print the hammer too, however, to make this warrior more deadly it is recommended to make it out of aluminum, steel, or order it from a service like Craftcloud. For print settings, 0.2-mm layer height and 20% infill are recommended, and you can also refer to the complete BOM list.
- Who designed it? emancarrillo
- Which weight category? 150-g Antweight
- Where to find it? Thingiverse
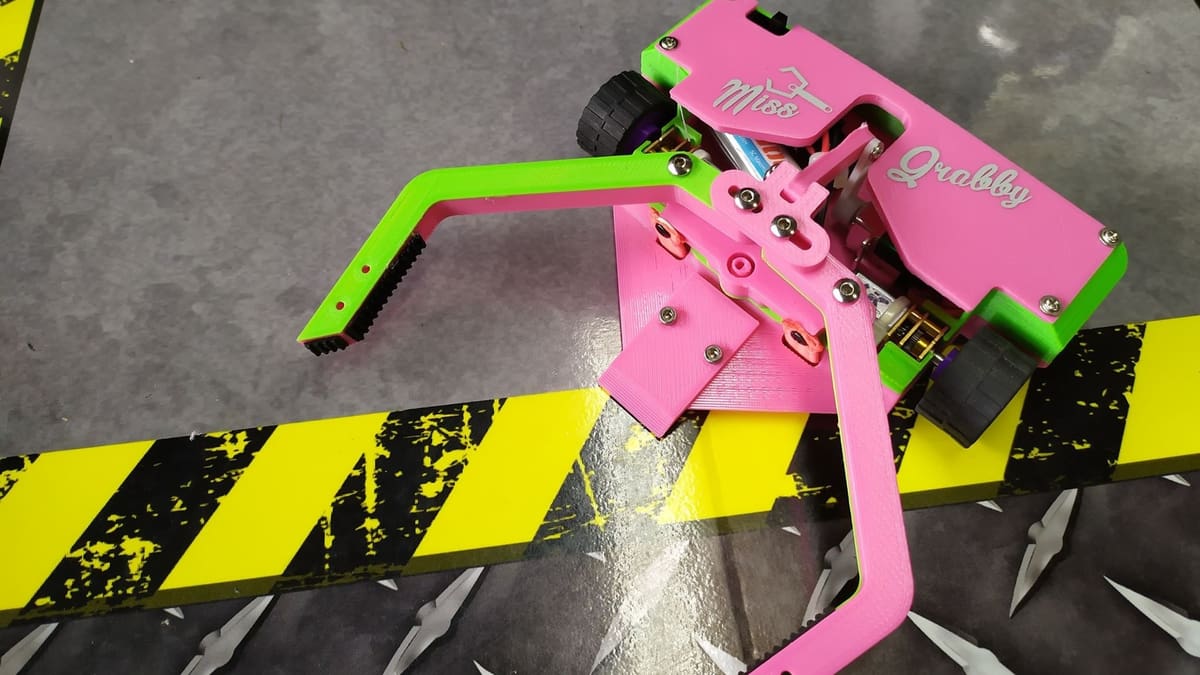
Grab & Lift
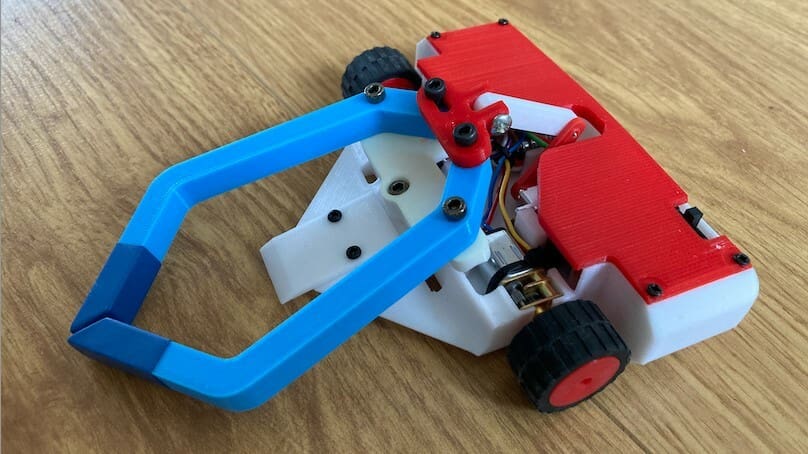
Among the rules applied to most robot arena combats, one of them is that to win, you’ll need to put your opponent out of action. This can be done by destroying the opponent, turning them over, or simply grabbing and lifting them up. For this purpose, these claws are very welcome. Unlike some other opponents on the list, this warrior was not made for violent combat with destructive opponents, but rather for opponents who are more technical fighters.
Although it’s not as simple a project as other items on this list, this BattleBot is not difficult to build, and a complete BOM list is included. For printing, brackets are not necessary to print the files, as they’re designed to bridge the gap if necessary. However, be sure to print two arms for proper assembly. You can also have some fun and make your own personalized model, as shown in one of the makes.
- Who designed it? emancarrillo
- Which weight category? 150-g Antweight
- Where to find it? Thingiverse
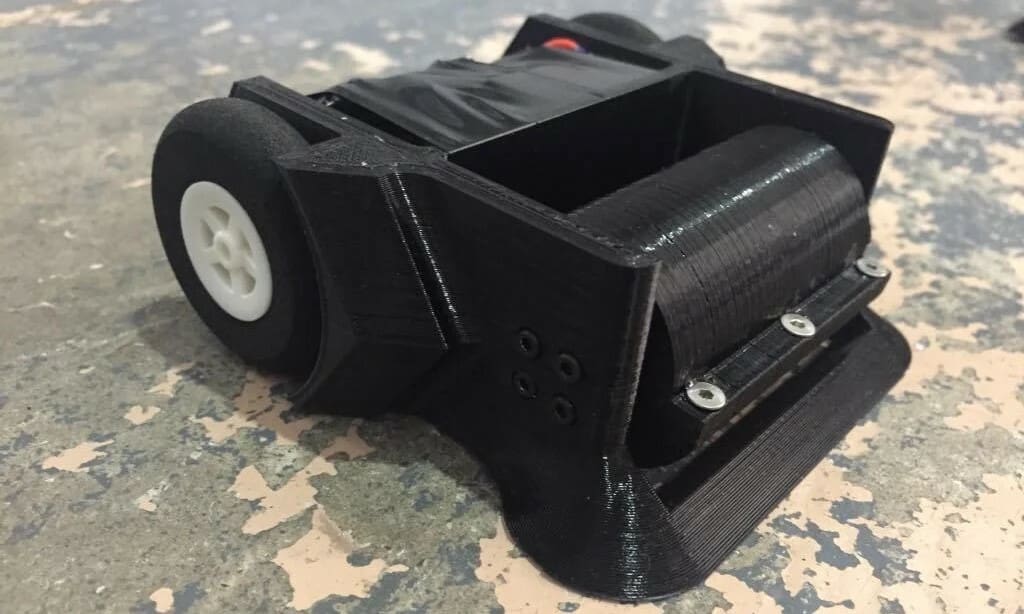
Proto
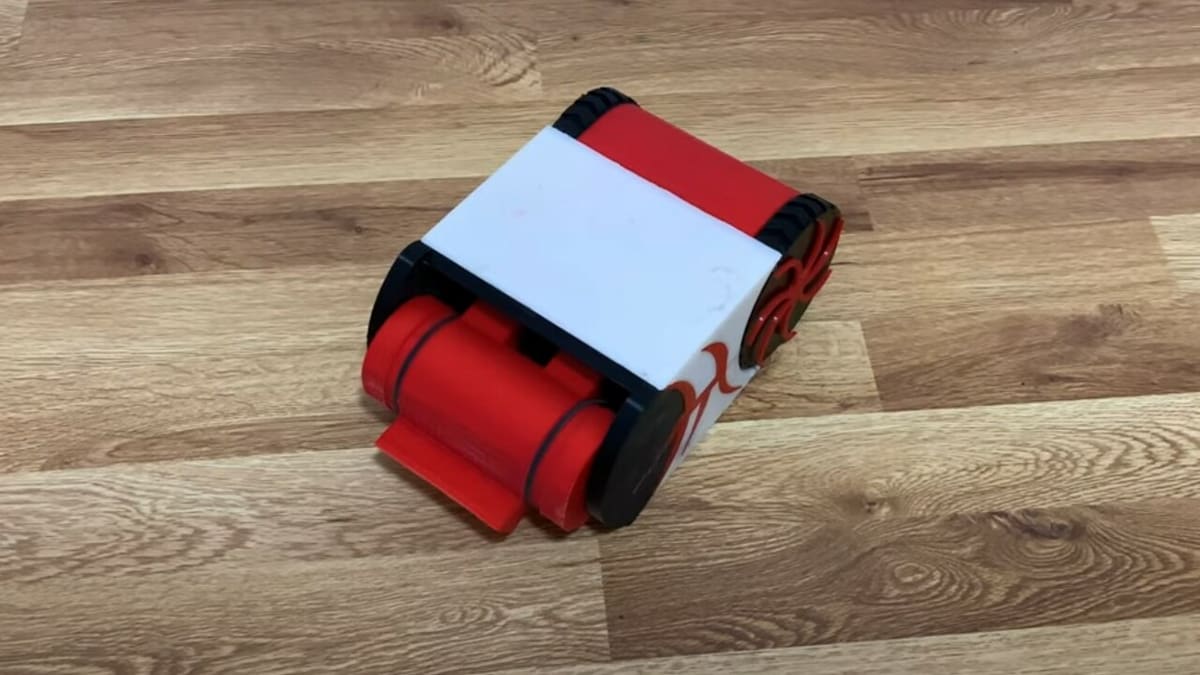
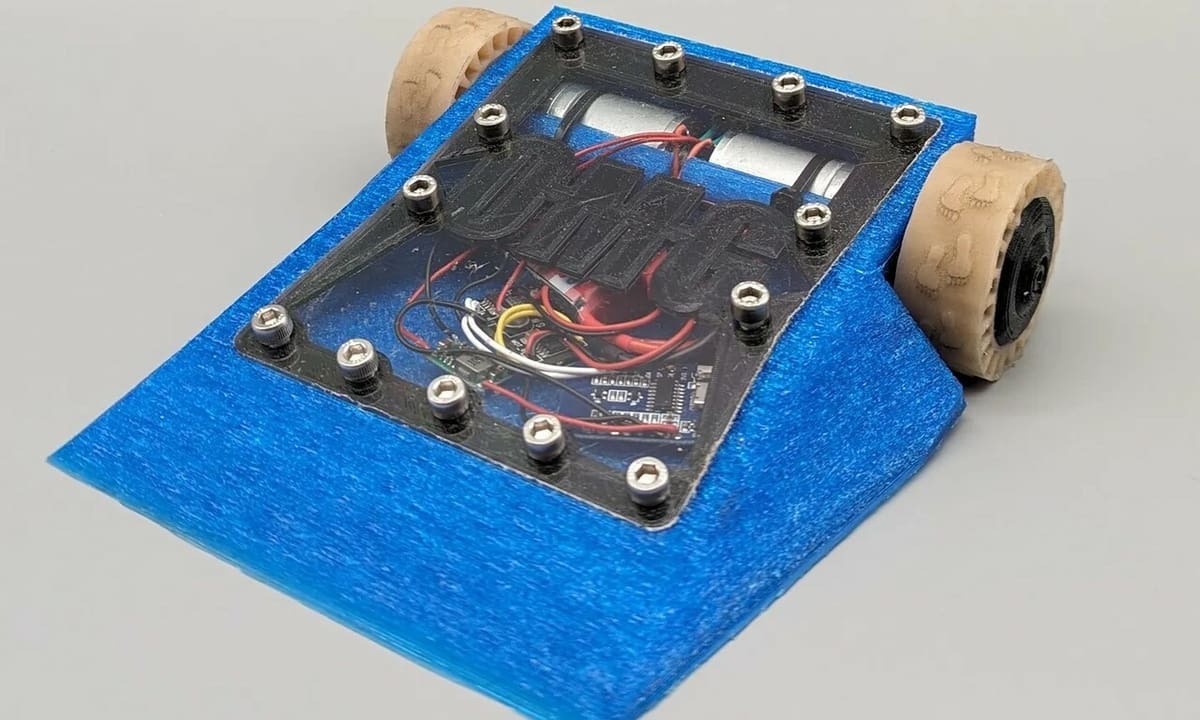
The Proto mixes the violence of a BattleBot Drum Spinner into a chassis that looks a lot like a steamroller. This mix of weight and strength can be a great combination in combat. The designer refined his design until he obtained something powerful and at the same time easy to maintain, which is why only some parts are glued and others are held in place by neodymium magnets.
To replicate this BattleBot, you’ll find a complete list of materials and instructions on the Instructables page. It won’t be very complicated to make, as there’s just a little electronic soldering and some parts are held together with glue. Despite some of the new pieces being rather expensive, the designer believes the final result is worth it in the end. You can check out the robot being tested in this video or on the instructions page.
- Who designed it? gusflus
- Which weight category? Not specified
- Where to find it? Instructables
Algos
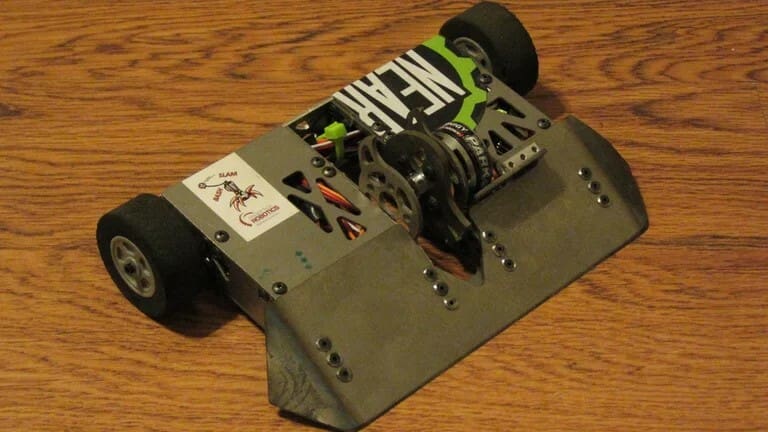
This is another robot with a powerful weapon capable of reducing combatants to bits and bolts. The Algos uses a vertical spinner with sharp teeth, but instead of the teeth hitting the opponent from top to bottom, it does the opposite. It presses whatever it grabs against its chassis, thus devouring parts in its path. In addition to the main weapon, this BattleBot also has a reinforced, wedge-shaped titanium chassis for passive attacks.
For the construction process, the chassis parts were cut using a pressurized water jet, and tempering processes were used to harden the axles. The wedge received a special anodizing effect to make it colorful. You can check this out on the project page and see a photo of the champion trophy after six undefeated battles.
- Who designed it? MikeNCR
- Which weight category? 1-lb Antweight
- Where to find it? Instructables
Plifter
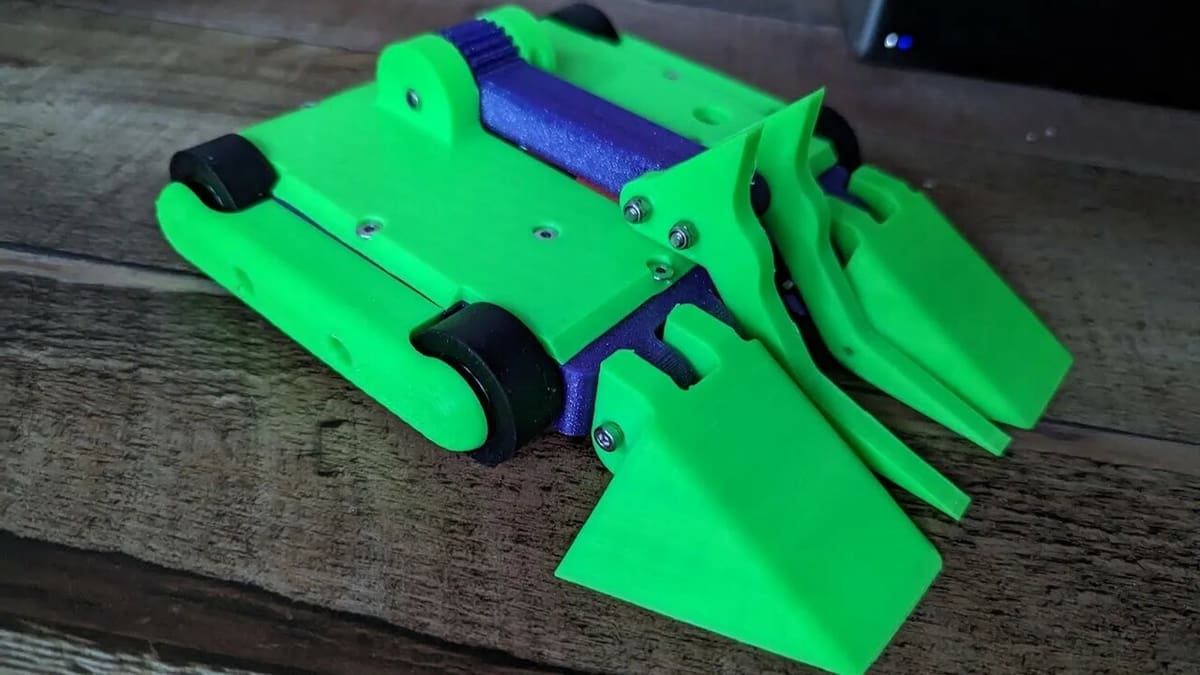
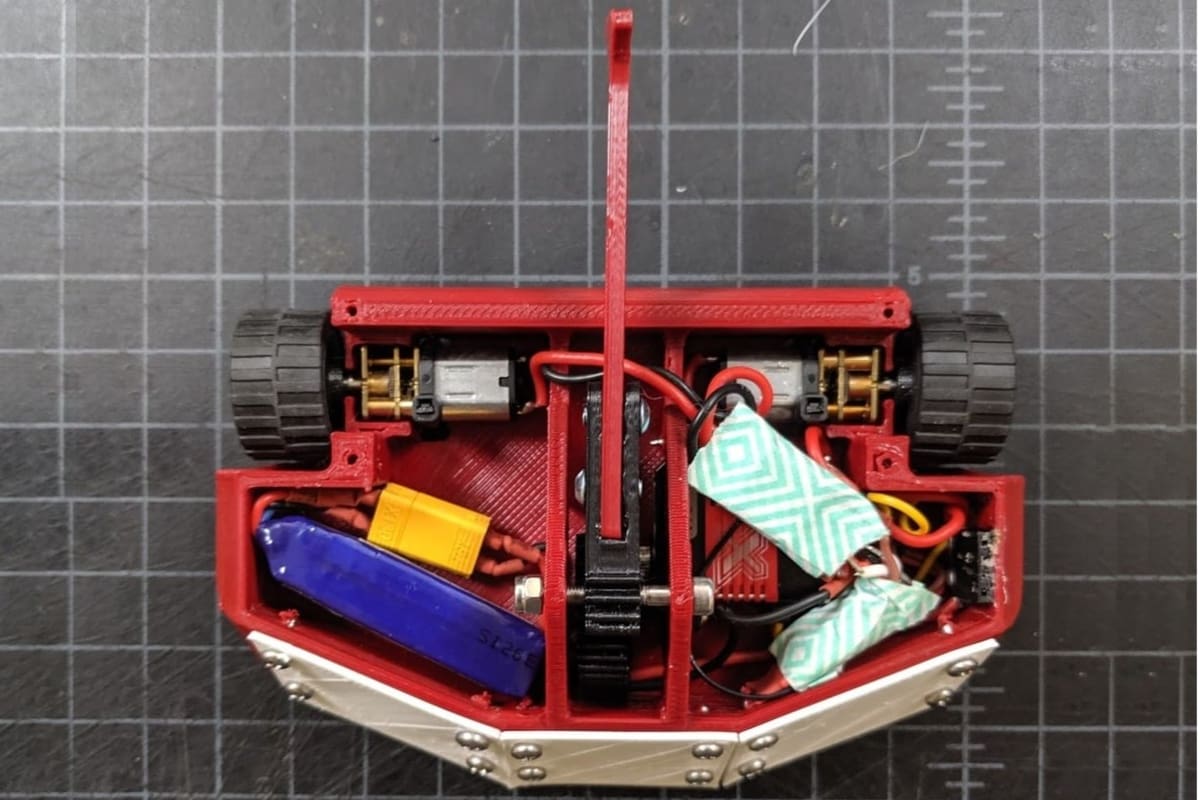
The Plifter is a fighting robot designed to take on any challenge in the ring. Equipped with four 1400 RPM N20 motors, this robot is an agile and powerful machine capable of fast and precise maneuvers. Additionally, it features a Kingmax KM1203 MD servo for precise control, and a Malenki Nano receiver and ESC set for smooth, efficient operation. Its 2S 300mAh LiPo battery provides the energy needed to power your aggressive moves, while its Solarbotics RW2i wheels guarantee traction and stability on the battlefield.
To build the Plifter, you’ll need several M3 screws of different lengths, M3 brass inserts, 3-mm bearings, and lots of zip ties for fastening. If you’re new to combat robotics or an RC hobbyist, you’ll also need a compatible AFHDS2A transmitter like the Flysky FS-i6. The assembly instructions are quite simple, with the wiring part being largely self-explanatory. The modular design allows for custom modifications, such as the inclusion of a modified cover to accommodate a standard 9V alkaline battery for those who prefer not to use lithium polymer batteries. The complete list of materials is available on the model page.
- Who designed it? Burnout
- Which weight category? 1-lb Antweight
- Where to find it? Printables
License: The text of "The Fiercest DIY BattleBots" by All3DP is licensed under a Creative Commons Attribution 4.0 International License.