Educational 3D Prints: Models that Make Kids Smarter

Make learning and teaching fun with 3D printing! Read on to find the best educational 3D prints out there to help in any academic path.
Fused deposition modeling (FDM) 3D printing has been growing in popularity over the last few years thanks to machines becoming more accessible and their ease of use, as well as the wide variety of materials and their availability. FDM setups can be used for different purposes, from wall art pieces to toys, plus replacement parts and kitchen gadgets – your creativity is the limit!
3D printers are great learning tools that can be used both by pretty much anyone, no matter their field of studies or their age. Many schools have already added such devices to their setups and organize workshops for their students.
After talking about the best 3D printed school supplies, in this article, we want to focus precisely on the learning aspect of what can be printed on these machines. Read on to discover the best educational 3D print out there!
And if you find a model or two you like (or you know you’ll need for yourself, for your class, or for your kid), but your setup is on holidays, check out Craftcloud. In just a few clicks, you’ll be a step closer to having an educational 3D print on its way to your doorstep.

Map of Europe
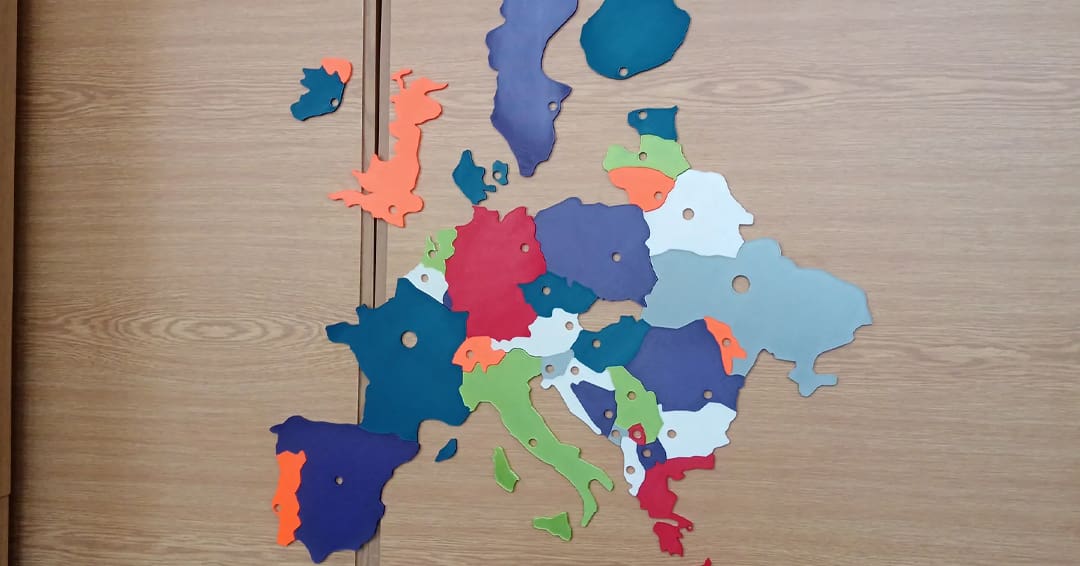
There are so many countries! These can be difficult to memorize at times – plus to locate – so why not make it fun to learn them? This 3D print is the perfect way to teach Europe’s structure. The model is made up of all the European states and it’s a fun puzzle to put together. Furthermore, there’s a hole where the capital city is located, so it’s easy to visualize and remember.
This geographic puzzle is made up of 46 pieces. You can choose to print the whole map or only the states that you need; before printing the pieces, though, check the size of the models. As the designer has highlighted, the uploaded designs are pretty small, but you can scale the pieces up for a bigger map or wall art – just make sure to scale all the parts evenly, otherwise they won’t fit together.
And last but not least, 3D printing the countries in different colors will make it easier to tell them apart. You can even add bits of information for each related to the hues, like the Netherlands being orange, in reference to the current reigning house (the House of Orange-Nassau).
PLA should do the trick, but check that your machine is well calibrated before you get started if you’re planning on printing various countries that are meant to fit together.
- Who designed it? Jan3ku
- How printable/popular is it? Over 630 people have downloaded this model and 2 makers have shared their beautiful prints.
- Where to find it? Printables

Magnetic Braille Cells

Reading and writing is not the same for everyone. One of the coolest things 3D printing can do is give someone who is visually impaired the freedom to make their own words. These magnetic Braille cells do just that!
To assemble this set, you’ll need 3-mm spherical magnets which are placed into designated side pockets. Although the designer includes printable pins, they recommend using 5-mm shelf pins instead. The designer argues that they provide better tactile feedback.
Several different sizes of the Braille cells are available, but the designer is available to make other sizes if requested.
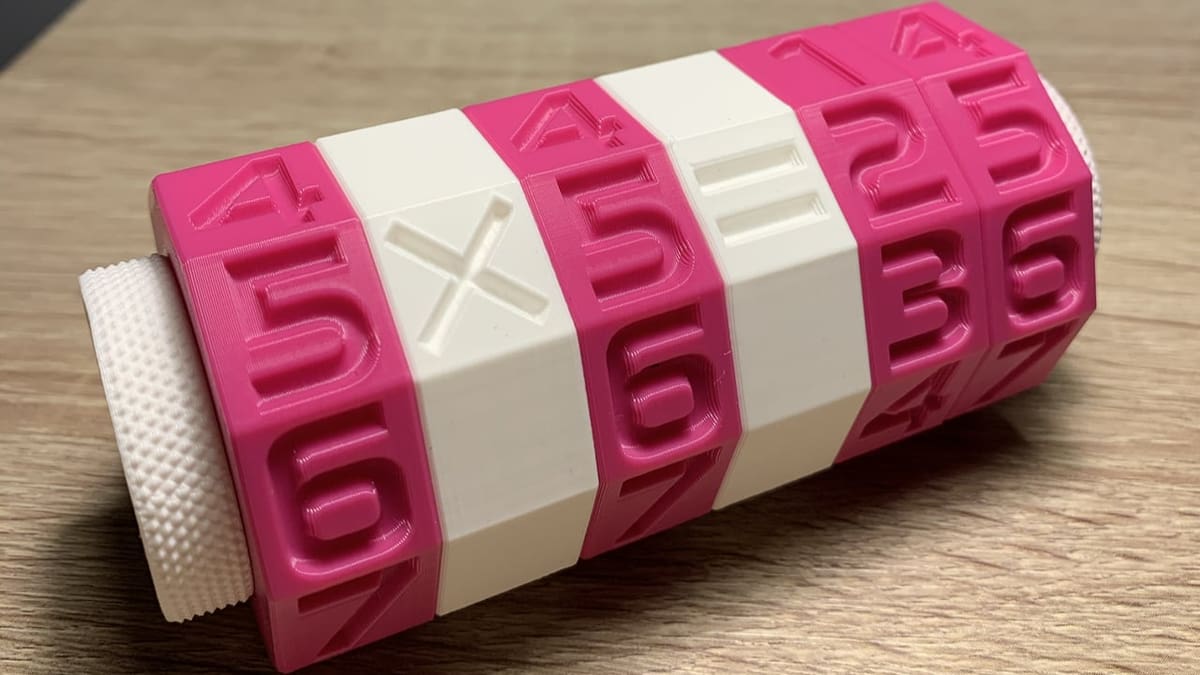
Math Spinner
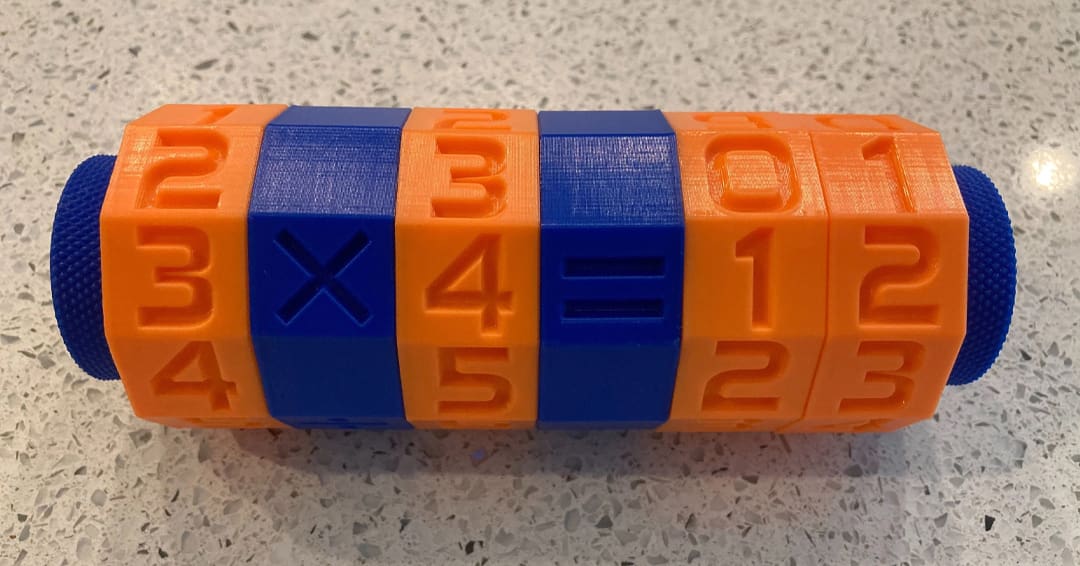
Math concepts are abstract, which is why young kids might find them boring. Here is a way to make them fun! With this math spinner, kids will enjoy learning basic math operations, such as additions, subtractions, multiplications, and divisions. Print the pieces with bright colors and the game is done!
This math spinner consists of spins, a 32-mm PVC tube, and end caps. You can print as many numbered spins as you want, the important step is cutting the pipe long enough to accommodate all the 3D printed components.
The designer chose to print it with ABS at 0.2-mm layer height. Since it doesn’t need to be super strong, you can use 10% infill. If you also opt for ABS, you can replicate Ivan B’s result by smoothing the model with acetone. This process makes the print surface similar to store-bought toys.
- Who designed it? pauloblank
- How printable/popular is it? Over 46,000 makers have downloaded this model for their kids, with more than 50 sharing their versions on both sites combined!
- Where to find it? MyMiniFactory, Thingiverse
Fraction Puzzles
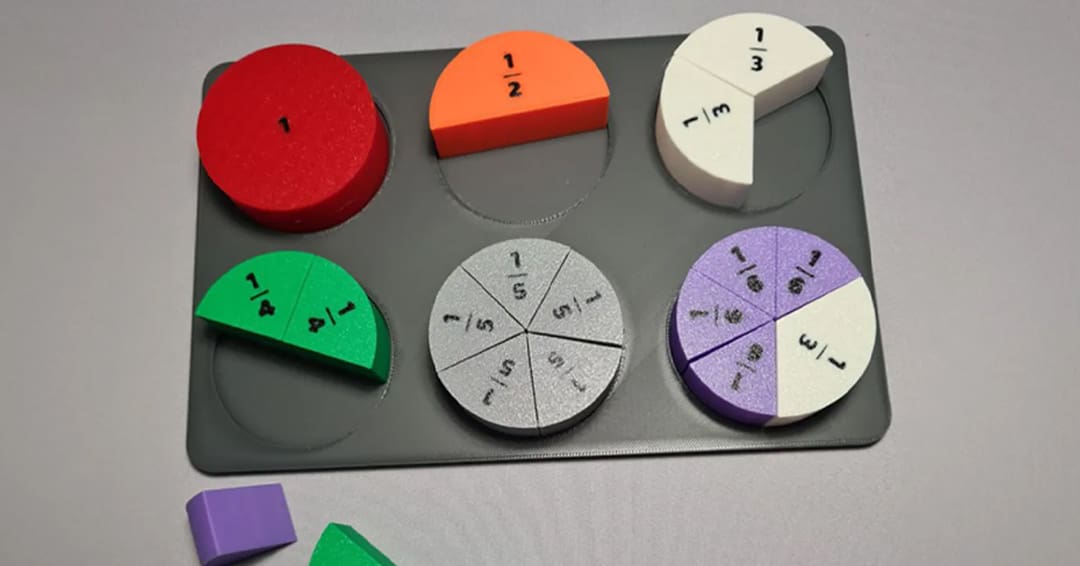
Fractions are much simpler to learn and teach when you visualize them. Here’s the best way to do it: A cool 3D printed fraction puzzle. The plate includes fractions from 1/2 to 1/6, and it’s super easy to print.
You don’t need any particular setting to successfully print this model, but if you want to emulate the designer’s print experience, you’ll need a multicolor unit or printer. If you own a Bambu Lab machine with the Automatic Material System (AMS), you can use one of the uploaded print profiles that have already been tested by the community.
And if your setup includes the A1 Mini, you don’t need to worry about any changes in settings – the designer included specific profiles for the smaller build plate as well.
- Who designed it? Aruba3D
- How printable/popular is it? This model has been saved in over 250 collections and, according to MakerWorld, over 315 makes have been printed.
- Where to find it? MakerWorld
Geared Planetarium

An orrery is a fascinating device that reproduces the position and motion of the planets in the Solar System. The sun is at the center of the model (thanks, Copernicus!) and by rotating the base gear, you can make all the planets move. One rotation of the gear represents 14 days of the planets’ movement. It also features a central gear that gives you a reference to better understand the cycle during a solar year.
To assemble this, you’ll need some screws and bumpers to use as feet for the bottom of the planetarium. This model in particular is a remix of a couple of other designs, and the designer includes thorough information both from the changes made, as well as from the original designs.
This is a particularly handy version because it allows you to easily print the components in various colors. The designer included individual plates for specific colors (Mars is obviously red), and they also prepared one plate with all the planets together, for makers to print in one color and paint afterwards. Last but not least, you can follow the original creator’s YouTube tutorial of the assembly to better understand the process.
- Who designed it? Panthor
- How printable/popular is it? According to MakerWorld, over 600 makers have printed this model, with many sharing their beautiful prints.
- Where to find it? MakerWorld

Cell Model

Cell structure is one of the most important topics in biology; you can easily memorize it with this model!
While the design was initially created to be printed with the Palette 2 (a multicolor device), it’s also possible to print the 15 parts individually and then glue them together.
To print this educational model, you can use PLA with 15% infill and two walls, as the designer suggested. To match the cover photo, you’ll need three colors: yellow, light blue, and orange. Alternatively, you can take inspiration from the other makes that have been published and use multiple colors for the different parts.
You can also check out the pocket version of this model, designed by the same company, so you can carry knowledge with you.
- Who designed it? MosaicManufacturing
- How printable/popular is it? This model is quite popular, with over 60,000 downloads between the repositories!
- Where to find it? Cults, MyMiniFactory, Thingiverse
Frog Dissection Kit

Ah, frog dissection, an iconic part of biology class! Maybe we can skip the “ew”s this year with this 3D printed frog dissection kit from MakerBot. The files allow you to print a life-sized frog with six organs, and it even comes with a lesson plan! It simulates the dissection process without the unpleasant smell and, more importantly, animal cruelty.
As with the human anatomy model, it’s recommended to print the organs in different colors.
- Who designed it? MakerBot
- How printable/popular is it? With over 21,000 downloads, 54 makes, and 7 remixes, this design is great news for frogs.
- Where to find it? Thingiverse
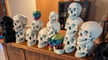
Magnetic Skull

The human skeleton is made up of 206 bones (plus a few more when we’re born, but they get fused together over time). That’s quite a list of parts to learn!
If you study or teach anatomy, this model can help you with the skull. The design includes 18 pieces that are connected via magnets, so you can easily assemble and disassemble the model. In case you’re confused, you can check out the YouTube tutorial on the assembly that the designer has shared.
The most involving part of this project is working with the magnets. You’ll need over a hundred of them! Specifically, 66 1/8″ x 1/16″ and 36 1/4″ x 1/8″ cylindrical magnets. The creator suggests cleaning the magnet spots with a 1/8″ or 1/4″ drill bit to ensure that the hardware sits where it’s supposed to.
Plus, a little bit of post-processing will be required, as many parts will need the use of supports.
You can also find similar models from the same author for other parts of the human body, such as the brain or the heart.
- Who designed it? DaveMakesStuff
- How printable/popular is it? Many teachers and students have appreciated this model, which features almost 30,000 downloads and around 50 makes shared on Thingiverse alone.
- Where to find it? Thangs, Thingiverse
Human Anatomy Model

Books are important, but sometimes they don’t hold student’s attention as much as a colorful 3D model. So, supplement this term’s health-related textbooks with a 3D printed human anatomy model! It could even make for a cool class project.
The designer created the model so that it requires as little support as possible. The assembled model is almost 1 meter high, and the designer recommends printing each organ with a different color filament.
- Who designed it? paullaster
- How printable/popular is it? At least 13 makers are using this 3D print to learn the ins and outs of human anatomy, as seen in the shared makes.
- Where to find it? Thingiverse
DNA Model

The magic behind DNA is captivating; how a few simple, teeny tiny structures can create life is awesome. With this model, you can understand one of the most fascinating concepts of science. The design features nine pieces that can be assembled together to create a DNA model as big as you desire! Furthermore, the designer has also uploaded a dedicated stand to easily display the model.
The model is made up of backbones, the Adenine-Thymine and Guanine-Cytosine couples, and phosphate groups that complete the double helix.
To print the parts you’ll need some supports, in particular in the holes required for the assembly. Make sure to remove the supports and maybe smooth the parts a bit before putting them together, to avoid issues. Each base features a pin that should snap into place into the backbone hole. Push them together gently to prevent breakages.
The designer has also provided the OpenSCAD file in case you want to customize the model.
- Who designed it? mkuiper
- How printable/popular is it? On Thingiverse alone, this model has been downloaded over 60,000 times!
- Where to find it? Printables, Thingiverse
Tensegrity Structure

The best way to grasp physics is to see it in action! This model is perfect to teach a fascinating concept: Tensegrity. This allows the creation of structures that seem to levitate. The trick is in the balance of tension and compression, and this project allows you to experiment with it!
The model prints without supports and the strings are created using your machine’s bridging capabilities. For this reason, you should follow the designer’s instructions and use a 0.4 mm nozzle at 0.16 mm layer height to obtain clean strings. Before printing it, though, it’s important that you test if your machine can handle a bridge of this length – make sure to check it with an appropriate test.
In just a little over an hour, you can have a 3D print that appears to defy physics, but actually takes advantage of tension and compression.
- Who designed it? rafa__
- How printable/popular is it?
- Where to find it? MakerWorld
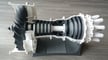
Archimedes' Screw

Archimedes’ screw is a fascinating mechanism that takes its name from its creator, Archimedes. The screw is a brilliant way to transport water from a low height to a higher one, and to also do this in reverse. Today it’s used in many mechanical devices, such as concrete mixers and plastic reforming machines, so this design is perfect for engineering students.
The model is made up of 15 parts, with the main one being the blade. This is the most difficult component to print since it features a spiral shape. For this reason, you’ll need supports to successfully print it. The other pieces shouldn’t represent much of a challenge.
Assembly is quite straightforward, and you can use the diagram that the designer has uploaded as a reference to put the device together.
- Who designed it? Urulysman
- How printable/popular is it? Over 525 people have already downloaded this model. Will you be the first to share a make?
- Where to find it? Cults
Periodic Table

The periodic table is one of the most important items of every Chemistry course. With this model, you can create a 3D version of it! The design consists of tiles that represent each element. Every square features a hole on the back where you can glue a 5 x 1-mm magnet, so you can easily put every tile on a magnetic surface and create a beautiful periodic table.
To obtain the same bicolor effect as the designer, you don’t need a multicolor printer or unit. In fact, you can pause at layers and swap the filament when the text is meant to be printed. For example, if you use a 0.2-mm layer height, you’ll need to add a pause to your G-code at layer 21.
The creator has also uploaded the OpenSCAD file, so you can customize the model to suit your needs. You can modify the dimensions of the tiles or adapt the magnet hole to your hardware.
- Who designed it? jfedor
- How printable/popular is it? Over 1,330 people have downloaded this model from both sites, and a make has been shared on Printables.
- Where to find it? Printables, Thingiverse
(Stella Locker contributed to this article.)
License: The text of "Educational 3D Prints: Models that Make Kids Smarter" by All3DP is licensed under a Creative Commons Attribution 4.0 International License.