Painting PETG, PLA & Other Plastics – 4 Methods

Painting 3D prints can be challenging. Check out our guide to painting plastics like PETG, PLA, ABS, nylon, and more.
Even with the possibilities of multi-material extruders and the stunning array of filament colors out there, you may find yourself looking to paint some of your 3D prints. The most common reason to do this is to improve how the print looks, especially if you’ve got an FDM 3D printer, which builds the model using layers of filament. The way a part is printed creates a surface textured with characteristic horizontal lines.
When finishing your model, the small cavities between the layers can be sanded down, filled in, or both, with the aim of a smoother surface. Painting is a way to smooth the surface texture and will also help to protect the model from the environment.
In this article, we’ll take you through the different methods of painting your 3D print, before (hopefully) answering all your nitty-gritty questions about painting and how to do it best. Read on to perfect your prints with paint!
Preliminaries
In order to achieve the best paint job possible, there are a few things you can do even before applying the first coat of paint.
Preparing the Model
You can make finishing and painting a lot easier as early as 3D modeling and slicing. The following are some factors to keep in mind:
- Model geometry: Consider the shape and size of your model. Your tools have to be able to reach the areas you want to sand or paint.
- Tiny features: If you plan on painting and sanding a part with small details, be sure to design them sturdy enough to be handled without breaking.
- Dimensional accuracy: Primer and paint add thickness and can totally obscure smaller details on your model. On the other hand, sanding removes material and can make your model weaker if done excessively. So, add some extra material to be sanded down to the right dimensions, or shrink some measurements to make room for primer and paint.
- Layer height: A lower 3D print resolution saves time in printing but adds time to finishing.
Mounting the Model
So, you’ve got a model ready for printing? There are a couple more things to do before applying any paint, namely mounting and priming the model.
Depending on the shape of your model, it may be a good idea to mount it prior to priming and painting it. This will hold the model steady while you’re applying coats to it and also eliminate the need to touch the model in order to coat other parts of it. Some sources recommend drilling a small hole into an inconspicuous part of the model, then affixing it to a painting block with a dowel.
There are, however, other non-destructive methods. For example, you could print a painting stand and use dowels with alligator clips to hold your model steady. Alternatively, a painting turntable could be useful, especially for painting miniatures. For those of you who are more hands-on, a plethora of painting handle designs are out there.
Ultimately, the mounting option will depend on the model’s shape and complexity. What’s more consistent, though, is when you should mount the model. Mounting makes the most sense after you’ve finished sanding and smoothing the model. Once that’s all done, it’s priming time!
Priming the Model
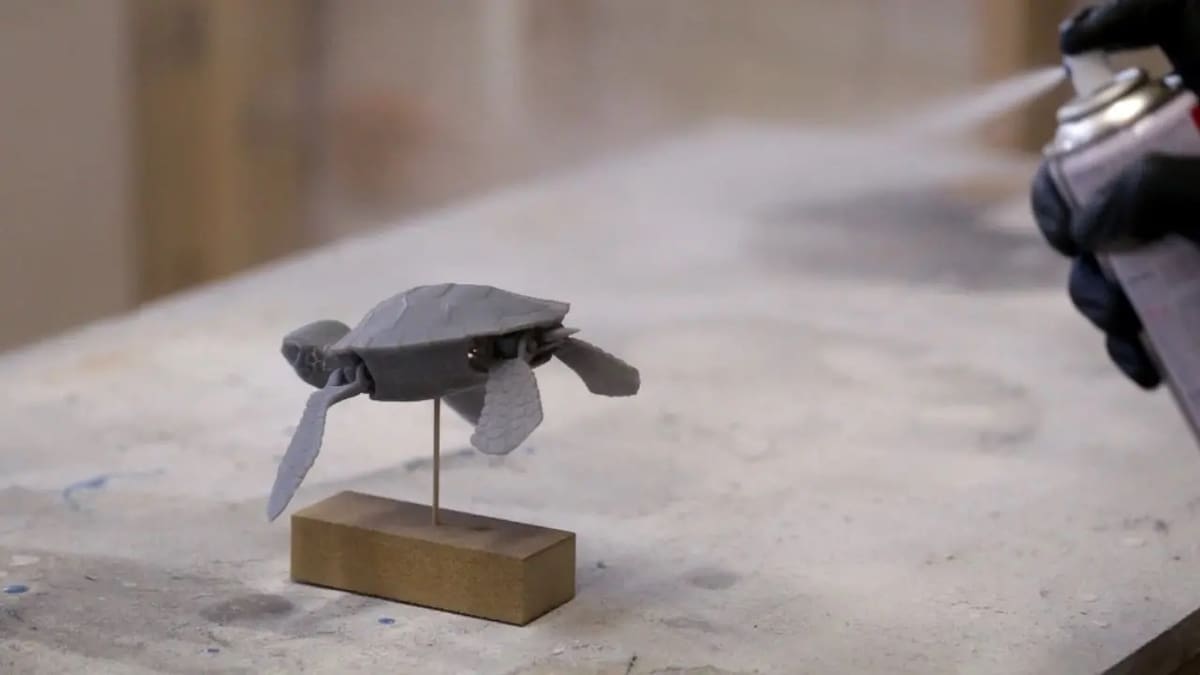
Priming improves paint adhesion. Thus, whatever painting method you choose (except dyeing nylon), using primer is a good idea.
Applying a primer is most important for PETG because it really doesn’t like paint sticking to it. While you may be able to get away with using a 2-in-1 paint and primer for PLA, be sure to get a dedicated primer for PETG to make your life much easier.
Primer Options
Spray primers are usually easiest to get good results: Two well-reviewed brands are Tamiya and Rust-Oleum.
Method
- Clean and sand your model.
- Mount it.
- Apply the primer in thin, even coats.
- Sand after the first and last coats to get a smooth surface.
- Let each coat dry according to the primer’s specific instructions.
Methods
There are several ways you can apply paint to your 3D parts, here are some of the main ones. Remember to always start with primer!
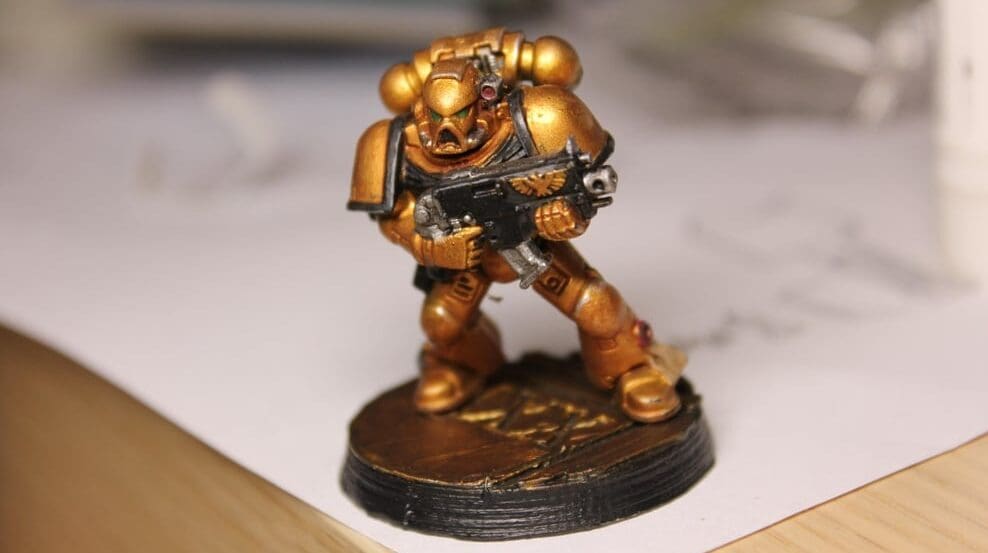
Method 1: Painting with Paintbrushes
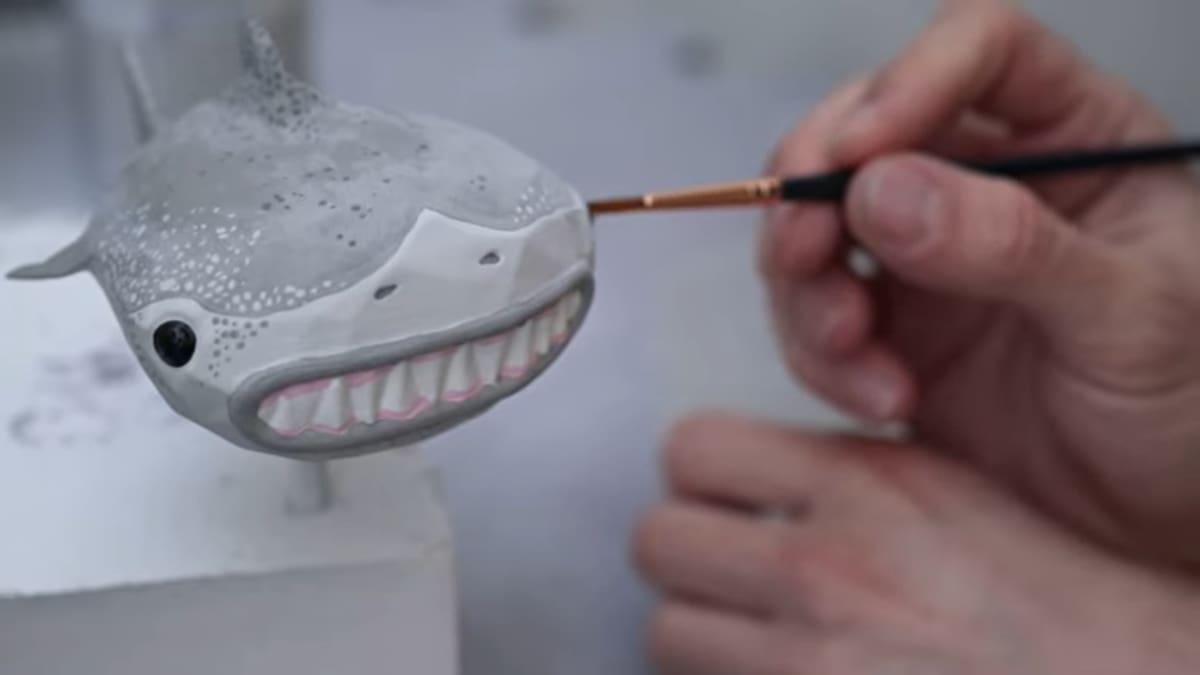
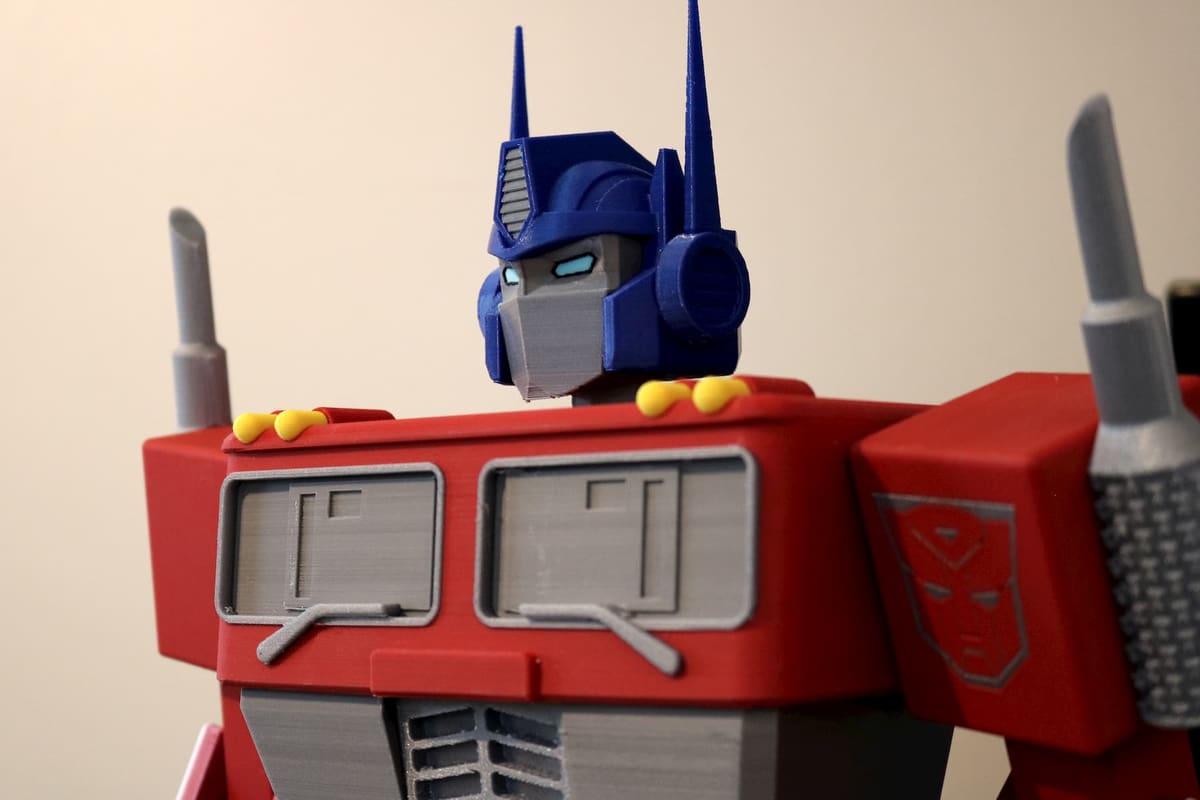
If you paint your model with a paintbrush, it’s easy to get a handmade look. This method is best for models printed in PLA, ABS, and PETG.
Paint Options
When it comes to painting with a paintbrush, you’re going to want to stick to acrylic paints.
Method
- Clean and sand your model.
- Mount it.
- Apply the paint in thin, even coats.
- Allow it to dry between coats.
Tips
- Choose a quality brush that’s stiff enough to handle the viscosity of the paint you’ve chosen to work with. The right paintbrush can move the paint where you want it to go on the surface without dragging it around too much.
- Try out a few paintbrushes first because it’s easier to get a good result with a brush that you’re comfortable with. Experiment with different bristle types and handle shapes to find what works for you. We often find ourselves using only one or two different flat brushes.
- Pause your paint job to clean the brush as soon as the paint starts to dry. Of course, you should also clean it after each use. You don’t want to leave any paint drying anywhere on the bristles.
- Always store your brush after cleaning it and rest it on the handle, not the bristles.
For a full tutorial on painting with brushes, there’s a great video from Make Anything.
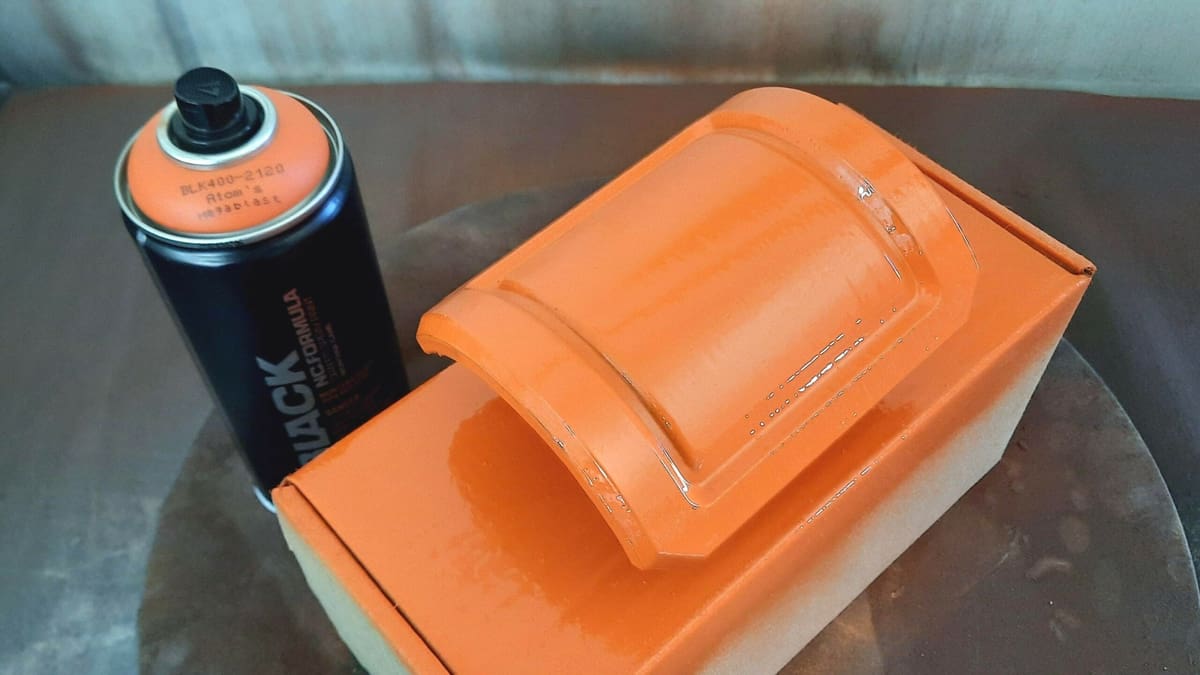
Method 2: Painting with Aerosols
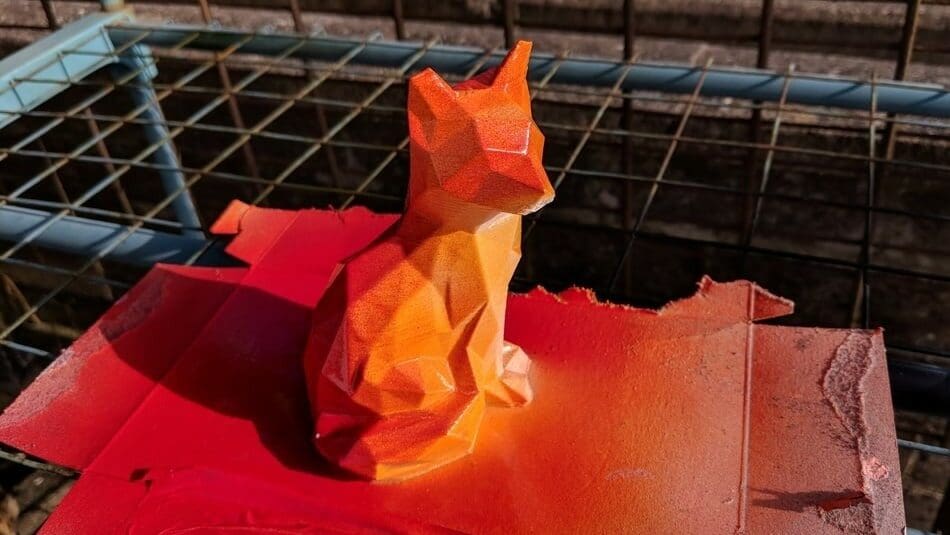
Painting with spray paints can give good results and a more uniform look. Like using a paintbrush, this method is best for models printed in PLA, ABS, and PETG.
Paint Options
Searching for spray paint, you’ll find that there are many varieties available. If you’re aiming to match a particular color, be wary of the differences between the RAL, CMYK, and RGB color systems.
Method
- Clean and sand your model.
- Mount it.
- Start spraying with the stream pointing slightly outside the edge of the object you want to paint.
- Apply the paint by spraying the surface you want to paint in slow, even strokes.
- Stop spraying with the stream pointing slightly outside the object you want to paint.
- Allow the paint to dry between coats.
Tips
- Some brands’ cans offer nozzles with different characteristics, so pay attention to the differences and which you prefer.
- Shake the can before use, for as long as the manufacturer recommends. You want the paint to come out as evenly as possible.
- Keep the nozzle clean. Usually, this is done by spraying some paint with the can upside-down at the end of each session.
- Keep the can away from open flames and store it in a cool place. (It’s a pressurized container, so you don’t want it getting too hot!)
To learn more about painting with spray paints, there’s a good overview from 3DWithUs.
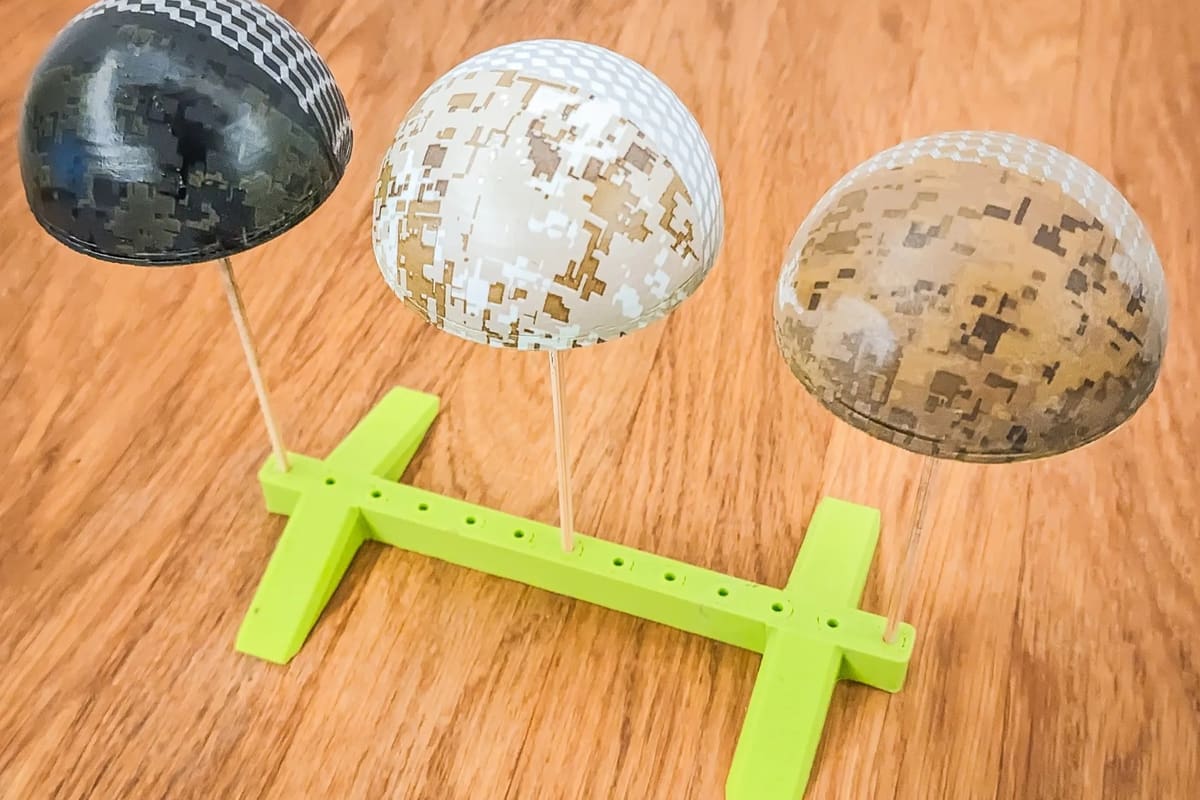
Method 3: Painting with Water
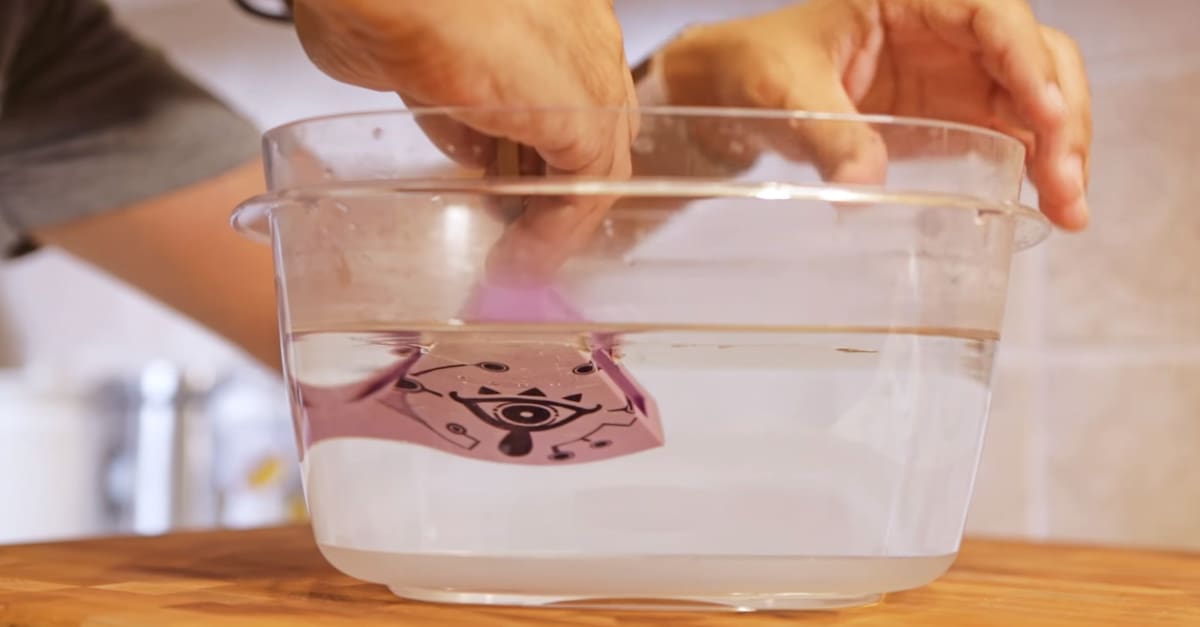
Hydro dipping may be the easiest way to cover your prints in a neat design without needing a steady artist’s hand. All you need to be able to do is apply some paint or ink to a bucket of water, then dip your part in! It works for all types of filament materials.
Paint Options
There are a few different approaches you can take for hydro dipping depending on the type of design you are after.
If you’re looking for detailed graphics, you can purchase preprinted hydrographic film at Amazon. There are lots of design options like paisley, rainbow swirls, or the galaxy. If you have an inkjet printer, you can also print your own designs on blank hydrographic film. While not strictly necessary, activator sprays made specifically for hydro dipping aid the transfer and adhesion of the ink to your part.
Alternatively, you can use regular spray paint for a tie-dyed look. The only difference is that you need to create a thick layer of paint on the surface of the water by spraying successive layers.
Method
- Clean and sand your model.
- Mount it based on the tip below.
- Add your coloring medium to a large bucket of warm water. If using hydrographic film, be sure to place the sheet slowly in the water to avoid air bubbles and apply the activator according to the manufacturer’s directions.
- Place your model in the paint film in one motion, starting with an edge and then moving downwards.
- Shake away the excess paint from the water’s surface once your model is totally submerged. Then, you can remove the model from the bath.
- Allow the model to air dry completely before handling.
Tips
- Keep in mind that this method is not ideal for parts with small details and concave features. You’ll get the best results on large, flat areas.
- Avoid fingerprints by attaching the back of your object to a thin rod or spatula with hot glue or some other removable adhesive.
- Be sure that the area of ink or paint in your water is large enough to cover the surface area of your model. Consider dipping one side at a time if you have a large object.
- If using hydrographic film, applying tape to the edges of your film can help hold the design together.
Check out Wadda’s guide for more information on hydro dipping with spray paint or the overview from Adafruit if you prefer the hydrographic film approach.
Method 4: Dyeing (Nylon Only)
For models printed with nylon filament, instead of trying to get paint to stick on the surface, we recommend dyeing. Some may ask why not PLA or PETG? Frankly, dyeing just doesn’t work that well on other materials.
Although PLA is hygroscopic and will absorb some amount of water from its surroundings, it can’t be consistently colored by dyeing. For example, the Rojava 3D Prosthetics Project wanted to achieve more realistic skin tones in 3D printed protheses, so they tested Rit’s DyeMore for Synthetics on PLA and PETG. Based on the results posted in e-Nable’s community forum, they were indeed able to achieve skin tone variations in PLA but more so in the PETG prints, and without any visible deterioration in the prints.
In the Rojava experiment, the PETG prints achieved a greater range of color change as the concentration of the dyeing solution increased. In fact, other makers have reported success with dyeing PETG, too – albeit with some dimensional changes. However, attempts to dye PLA prints to achieve rich, consistent color have not returned the desired results.
In light of the mixed results reported in the community, we still think nylon is your best bet.
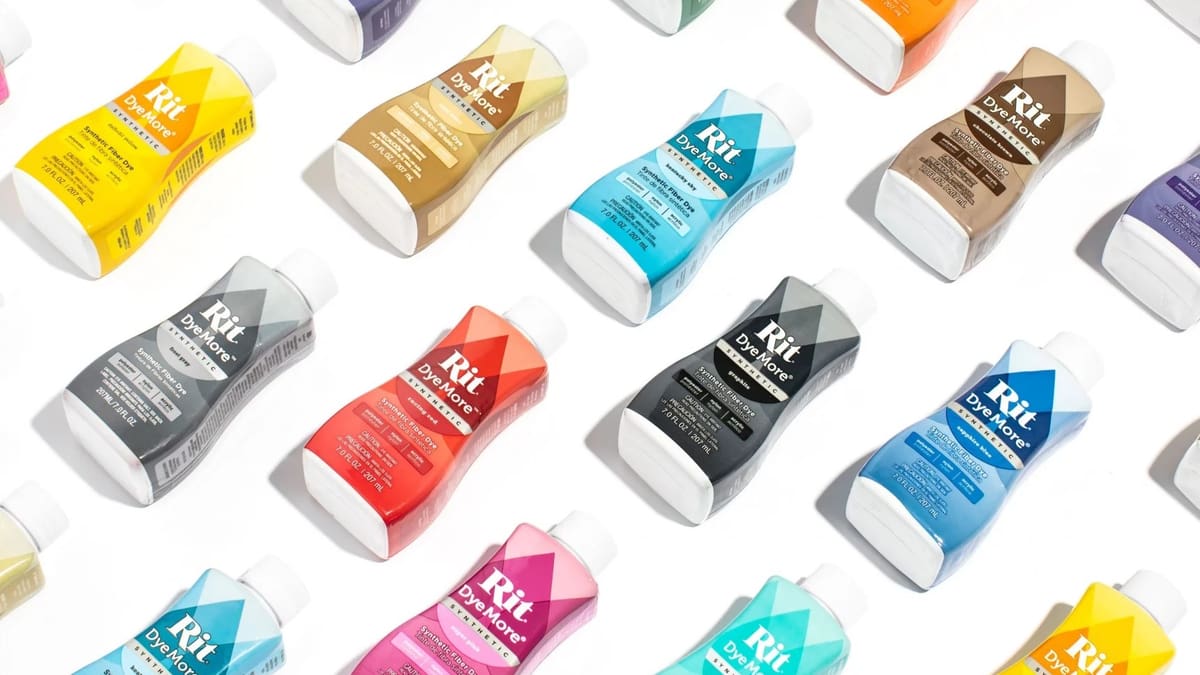
Dye Options
You have many brands of dye to choose from, but MatterHackers, for example, recommends Rit DyeMore. As long as the dye is made for synthetic fabric, like nylon, you should be fine.
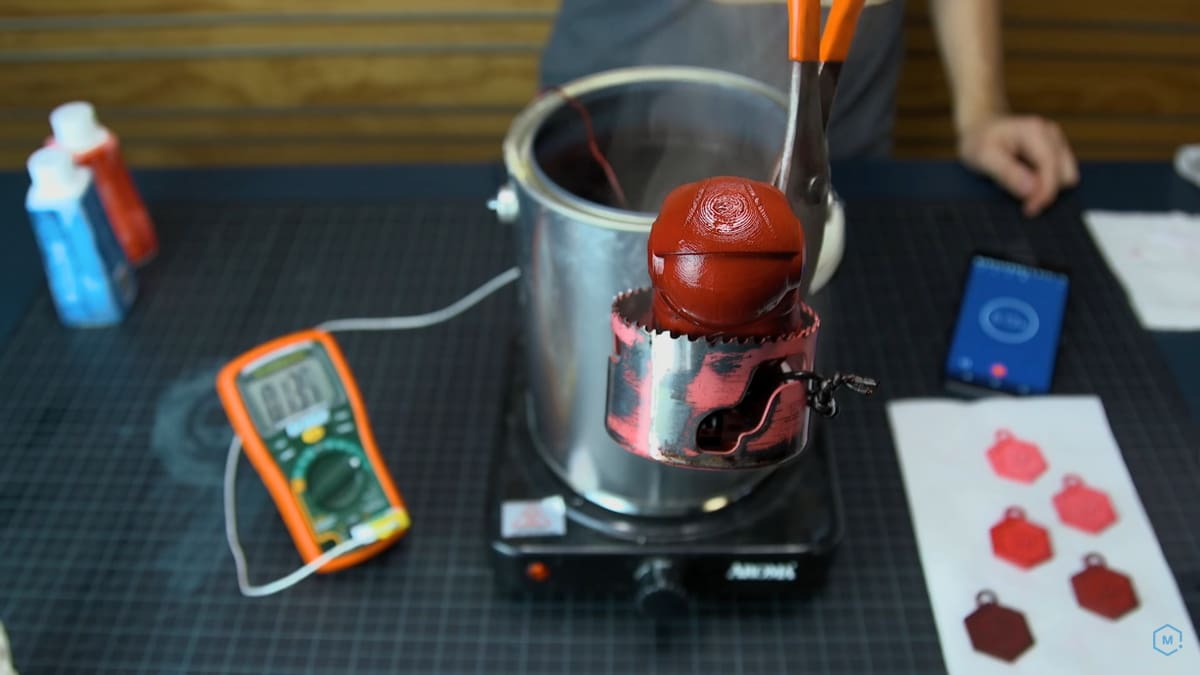
Method
- Clean your model. If sanding, keep in mind that dyeing doesn’t cover any scratches or marks on the surface of your model. Everything will be visible even after dyeing.
- Mix the dye with water and heat it in a pot.
- Use a thermometer to keep track of the dye temperature. Follow the manufacturer’s instructions, but keep the temperature below your filament’s heat deflection temperature.
- Tie a weight to your 3D print and submerge it in the pot with the dye.
- After dyeing, rinse well in a bath of cool water.
Tips
- To let the dyed color show as much as possible on your nylon 3D print, you want to use a translucent or white nylon filament when 3D printing. Darker nylon filaments are also possible to dye, but the color will be much less pronounced.
- Always read the manufacturer’s instructions for your chosen dye.
- Because nylon is very hygroscopic, it absorbs water even from the open air. That’s why you should always dry your nylon filament before 3D printing. We recommend that you dye the finished model, instead of the unprinted material.
- To make sure you get the right color, you may want to try dyeing some test prints before the actual print job.
To learn more about how to dye your nylon prints, check out the handy guide from MatterHackers.
Considerations
While the methods described above are pretty straightforward, we know the reality is that there can be lots of troubleshooting when trying to get a paint job just right.
To help you in this process, we’ve compiled a few more general tips and things to look out for while selecting your filament and selecting your paint.
Material Type
Painting FDM 3D printed models made from PLA and ABS is straightforward. PETG, however, may be harder to paint with a durable result, but the same preparations apply as with PLA and ABS. If you really need the color to stick, we would suggest printing your PETG model in the color you want it to end up, and leave it at that.
When we’re talking about FDM 3D printed nylon, it becomes much harder to get liquids like paint to stick to the surface. It’s possible to paint onto nylon, but it requires some heat treatment to maximize the surface tension and make it possible for the paint to wet. This is often done with an open flame or plasma – not something you want to do in a home environment. We believe dyeing, as described earlier, is far better for nylon.
Paint Adhesion
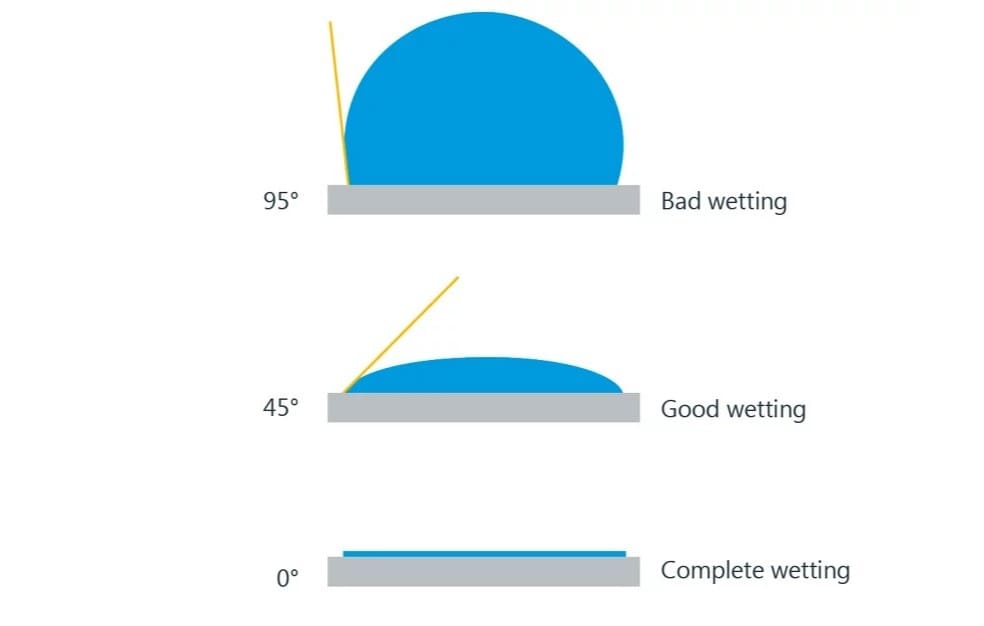
Probably the most important factor to make the paint, or any liquid substance, stick to a solid surface is the difference in surface tension between the liquid and solid. Surface tension has its own unit of measurement called dynes, or dynes per square centimeter. Values will vary significantly between different types of filament and paint.
The rule of thumb is that the surface tension of the paint has to be at least 10 units lower than that of the solid for good adhesion. That indicates we have a liquid with a high ability to wet the solid, and wetting is what we want. Using the right primer can help increase the surface tension of your model.
To get a hint of how well it wets the surface you want to paint, take notice of what shape a drop of liquid forms on the solid surface:
- Apply a drop of paint or liquid on the surface you want to finish.
- If the liquid forms a ball, it has too much surface tension to effectively wet the object, and the solid won’t be able to “pull” the liquid onto itself.
- If the liquid spreads out on the surface, forming something more like a lens, the wetting is better.
Best Practices
Always try paints, cleaning solvents, sanding, or other materials and methods on a test piece before moving on to the actual model you want to work on.
If your paint demonstrates good wetting on a test piece, but you’re still having issues with getting a nice layer on your model, there are a few things you should watch out for:
- Wear clean gloves when handling: This not only protects your skin from chemicals but also protects the surface of your model from skin oils that get in the way of paint.
- Remove contaminations before sanding: You don’t want to rub dirt into your model! Isopropyl alcohol (rubbing alcohol) on a lint-free, soft rag often works well for this. You could also use a vacuum cleaner with a soft and clean brush nozzle to remove the particles while sanding.
- Sand after priming: It’s important to eliminate any new roughness added by the primer.
License: The text of "Painting PETG, PLA & Other Plastics – 4 Methods" by All3DP is licensed under a Creative Commons Attribution 4.0 International License.