The 10 Raspberry Pi 5 Projects We Love the Most

You love the Raspi 5 and we love the Raspi 5, so we set out to find the best Raspberry Pi 5 projects. Check out our top picks!
Single-board computer (SBC) fans waited with bated breath for the much-anticipated release of the Raspberry Pi 5. At long last, it arrived!
While the new Pi 5 shares many features with former Raspberry Pi models, such as full-size USB ports and a 40-pin header, it boasts many new and exciting attributes. Some of the notable aspects of the Pi 5 include a 64-bit quad-core Arm Cortex-A76 processor, a custom RP1 I/O controller, and MicroSD card support for high-speed SDR104 mode.
We’ve scoured the internet for projects that make use of the Raspberry Pi 5’s cool features. That said, since the Pi 5 has been recently released (fall 2023), projects with thorough and complete instructions are still hard to come by. But if you’re just looking for some inspiration, check out the projects categorized as “Other”; while not fully documented, they can serve as a great jumping-off point for experienced makers.
Wi-Fi Extender
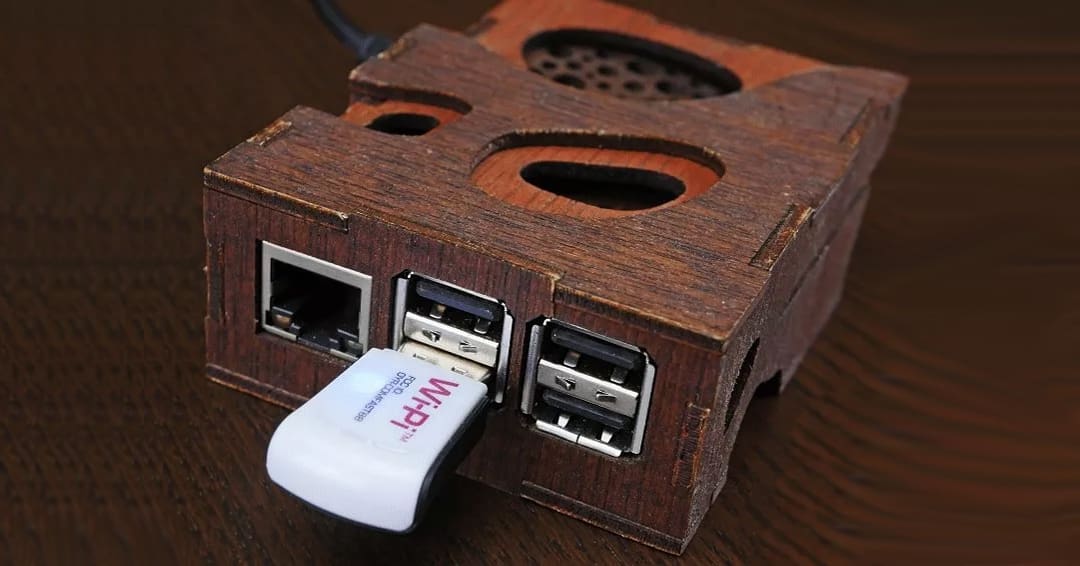
Wi-Fi can be a sore point in many homes. Especially if the connection isn’t strong, the Wi-Fi tends to reach some rooms and leave other areas of the house without (stable) internet. No more with this project! Following this guide, you can create a Wi-Fi extender with your Raspberry Pi 5 to solve this annoying problem.
A Wi-Fi extender gets its network connection from a Wi-Fi adapter. For this reason, for this project, you’ll require two Wi-Fi adapters if your Raspberry hasn’t built-in Wi-Fi, one of which must be access point capable. However, as the Raspberry Pi 5 does have Wi-Fi, you won’t need the additional hardware
To set up your Wi-Fi extender, you’ll need to have the Network Manager installed on your Raspberry Pi. Even if you’re a beginner, the tutorial includes detailed steps to help you get all the information you need from your network. The toughest part might just be deciding which case to 3D print or buy for the whole setup.
- Difficulty: Beginner
- Designer: Gus
- Project page: PiMyLifeUp
- Core components: Raspberry Pi 5, MicroSD card, power supply
- We love it because: It’s a cheap way to create a device that can help avoid an annoying problem.
DIY Night Vision Camera

Using your Raspberry Pi 5 in conjunction with a Pi camera module, this fun project allows you to build a budget-friendly night vision camera that can capture both images and videos. The output quality is surprisingly high, partially thanks to the use of a constant-current power supply to eliminate the flickering that typically plagues similar projects.
The other key to achieving high-quality video is the Raspberry Pi 5. It provides much faster CPU speed and IOPS performance, making your overall experience much smoother. You’ll also need monochromatic LEDs as the light source that can be picked up by the Raspberry Pi NoIR camera, even in the absence of visible light.
- Difficulty: Beginner
- Designer: Veeb Projects
- Project pages: YouTube, GitHub
- Core components: Raspberry Pi 5, Raspberry Pi camera module 3 NoIR, 22-pin camera cable, 830-nm LEDs, constant current power supply
- We love it because: It’s an easy project that can be customized and be used to keep an eye out for safety or fun purposes.
Edge Impulse Image Tracker
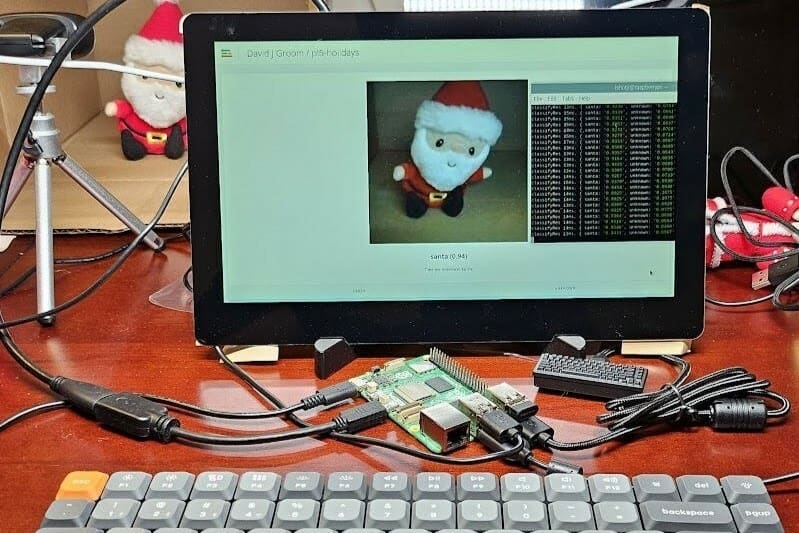
Ready to automate the task of looking out for Santa on Christmas Eve with your new SBC? This fun AI project utilizes a Raspberry Pi 5 together with Edge Impulse, popular software for algorithm training, data processing, and performance optimization. Edge Impulse is capable of advanced AI applications, so it’s a good way to dip your toes into the vast world of machine learning and AI in conjunction with your Pi 5. Note that Edge Impulse is free for students and individual developers!
This project uses the Pi 5 to run single-object image classification training based on webcam input. The process starts by first training the model with various images and manually providing labels. Eventually, the device should be able to identify the object of interest with a certain degree of certainty.
The creator notes how much easier this is to do with the new Pi 5 versus earlier models, likely thanks to the far greater RAM usage. This way, you can ensure that the “non-Santa” objects around the house will certainly not be mistaken for the man in the red suit!
NAS
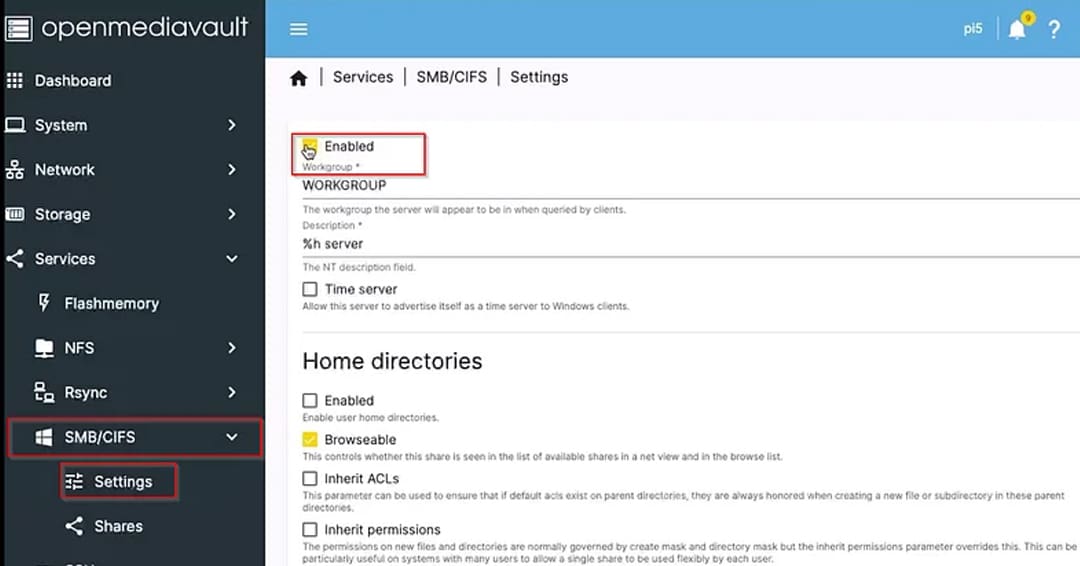
NAS stands for “network-attached storage” and, as you may have guessed, a NAS stores and shares data between multiple computers so that files can be accessed remotely. It’s like a private cloud that works as a backup and as a quick and easy way to work on projects with collaborators. This is especially useful for businesses, but also for home use, for uses like smart TV storage.
With this project, you’ll be able to realize cheaply and quickly a NAS using your Raspberry 5.
The process isn’t difficult but it can take some time to set up. The creator has provided both a written guide and video tutorial that you can follow to create your NAS, so you shouldn’t have problems arriving at the final result.
To give you an idea of what’s involved, first you’ll need to flash the MicroSD card with the Raspberry Pi OS Lite, so you can then install and set up OpenMediaVault on your Pi. Finally, you can access it and set the external drive storage with the wanted users and folders.
- Difficulty: Intermediate
- Designer: Amrut Prabhu
- Project pages: YouTube, Smart Home Circle
- Core components: Raspberry Pi 5, MicroSD card, external hard drive
- We love it because: It’s a cheap and quick way to create a NAS.
Lawny the Lawnmower
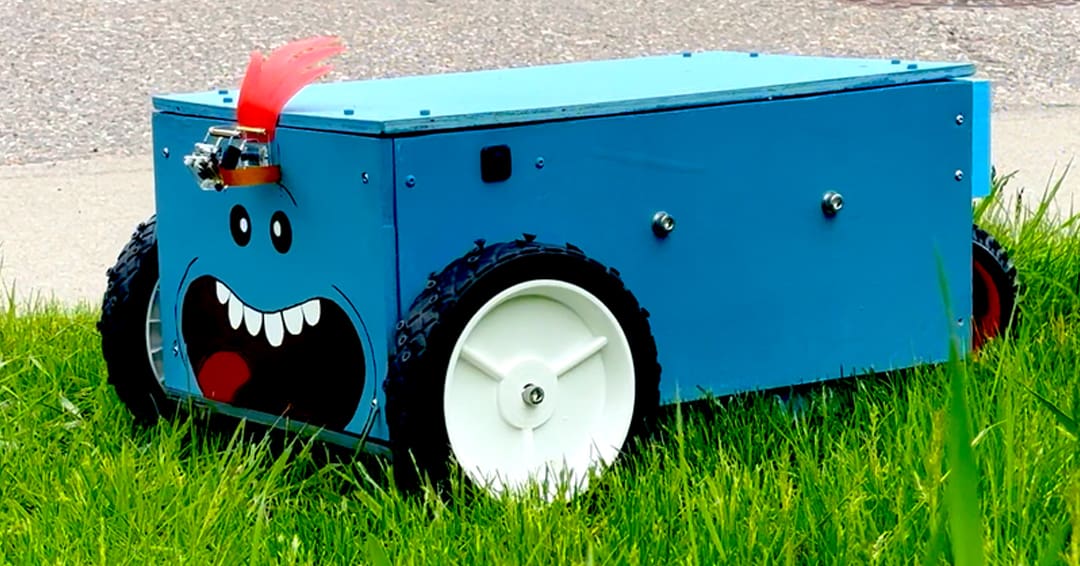
Lawn mowing can be really time and energy-consuming. It’s one of those housework chores that can’t be procrastinated on, otherwise the garden will get messy. With this project, you can conveniently cut the grass from your couch, making it a fun activity that you can do in your spare time or if you’re looking for a distraction: This lawnmower can be controlled via smartphone!
Given all it has to offer, it’s expected that it won’t be the most beginner-friendly project on the list – but it’s well worth it. The project involves numerous components. First of all, the Raspberry Pi 5 will be Lawny’s brain. Then, you’ll need a Raspberry Pi Camera to be able to control the lawnmower via smartphone, to see where it’s headed. To cut the grass, the creator chose an electric motor for the grass cutter, which you can use to connect the razor. Additionally, to move it, you need two powerful motors; the designer opted for windshield wiper ones. But all of this needs electricity, so a power bank will power the Raspberry Pi, while a separate battery will be used for the motors.
You can follow the written guide on Instructables or the video tutorial on YouTube to create your Lawny. This is for sure one of the most time-involving projects on this list, and you can also customize it to give it the look you want!
- Difficulty: Advanced
- Designer: gektor650
- Project pages: Instructables, YouTube
- Core components: Raspberry Pi 5, Raspberry Pi Camera Module 3, grass cutter electric motor, razor, windshield wiper motors, relays, wheels, 12-V 9AH battery, power bank
- We love it because: It’s a fun project to add to your home and ease your life.
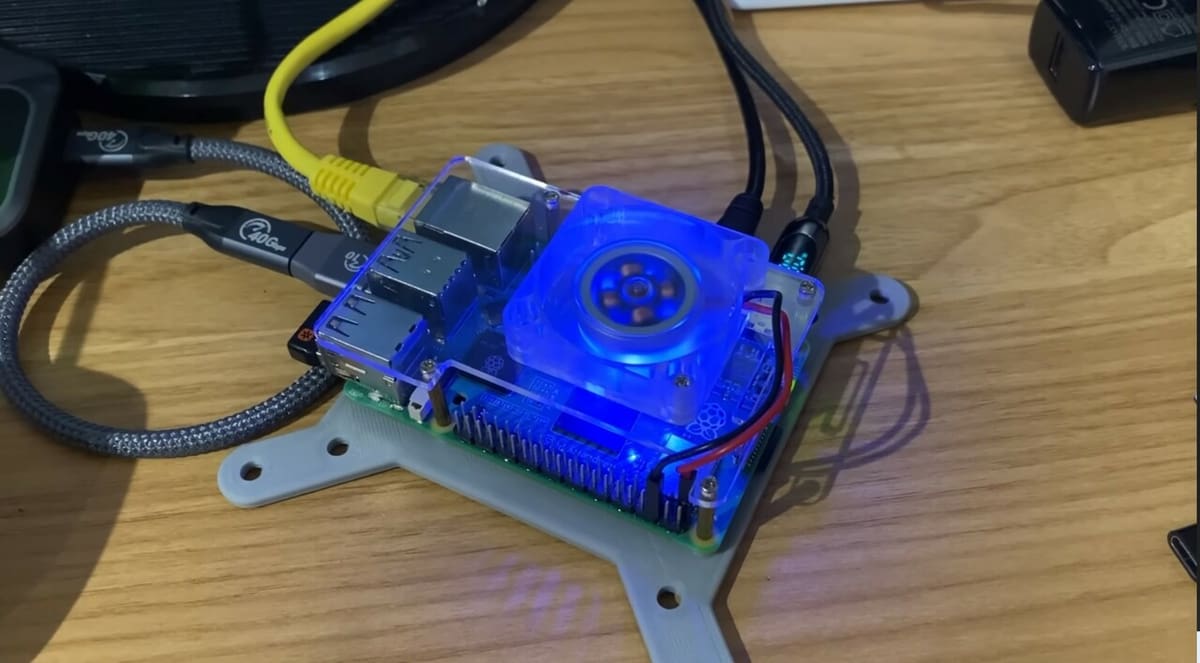
Augmented Reality Headset
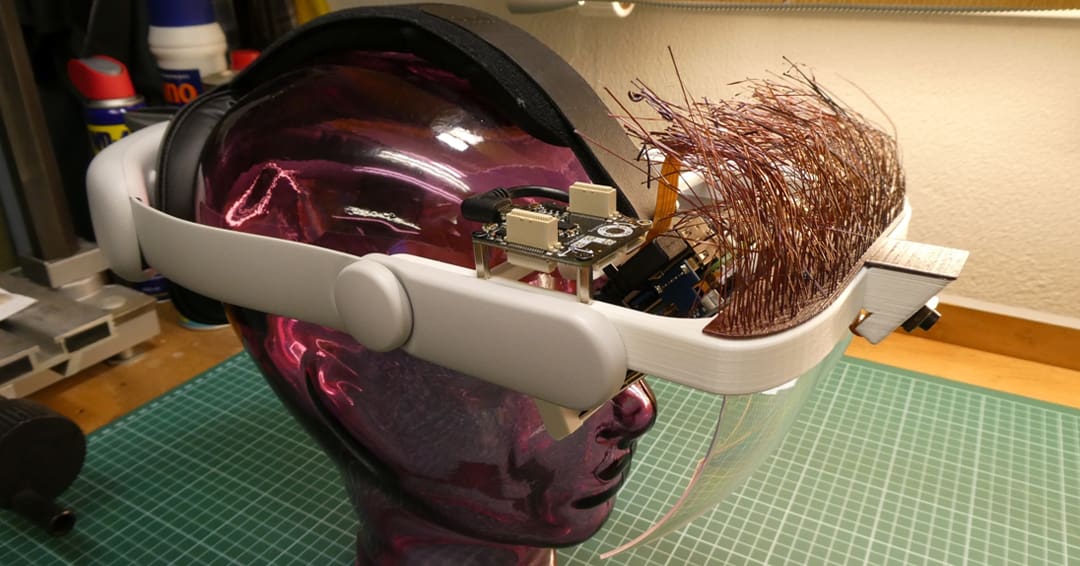
AR, which stands for “augmented reality”, keeps growing in popularity with the increasing option of devices that cater to it. It’s a unique type of experience that combines elements from both the real world and virtual environments. If you’re curious about it but find AR devices expensive, here’s the perfect project for you.
First of all, you need some 3D printed parts to create the structure of the AR headset. You can print them on your own or rely on an online service, such as Craftcloud. If you decide to print them yourself, keep in mind that you’ll need a printer with a build plate of at least 200 x 200 mm. The creator suggests opting for PLA with 30% infill and a 0.2-mm layer height.
The assembly is the most time-consuming part of the project. You can follow the step-by-step guide that the creator has published on Instructables, including useful information, such as optional parts for the build and an approximate cost of the hardware needed.
The device should work flawlessly with the provided software. If you want to customize it, you can modify it as you like, but you’ll need advanced programming experience.
- Difficulty: Advanced
- Designer: Guenter1958
- Project page: Instructables
- Core components: Raspberry Pi 5, MicroSD card, Raspberry Pi 5 cooler, Raspberry Pi Camera Module 3, VR headset goggles, AMOLED display, 3D printed parts
- We love it because: It’s a cheap way to create an AR device.
Magic Mirror

Mirrors are a part of every house and our daily routine. If you’re a maker, you can transform a simple piece of furniture into something special, like a magic mirror. This device is based on a 65″ touchscreen that will allow you to read the news, check the weather, and even play video games! This is for sure something you can brag about with your friends!
A magic mirror is made up of two main components to create the magic: a mirror film and a screen.
This project was born thanks to the fascination that the magic mirrors exercised on the designer. Since the ones available online are small, he decided to take the matter into his own hands and create a larger version.
The mirror hides the screen until the PIR sensor detects that someone is near the device and switches on the screen. The brain of the project is the Raspberry Pi 5, which allows you to customize the interface and display whatever you like, such as news, weather, or even video games with RetroPie!
- Difficulty: Advanced
- Designer: tariq.ahmad
- Project pages: YouTube, element14
- Core components: Raspberry Pi 5, Raspberry Pi 5 cooler, MicroSD card, 65-inch touchscreen, PIR sensor, RS232 converter
- We love it because: It’s a unique device that you can’t buy anywhere.
Other Projects
While these next projects may not have super detailed instructions that beginners could follow along, they can serve as great inspiration for those looking for neat things to do with the powerful Raspberry Pi 5!

NVMe SSDs
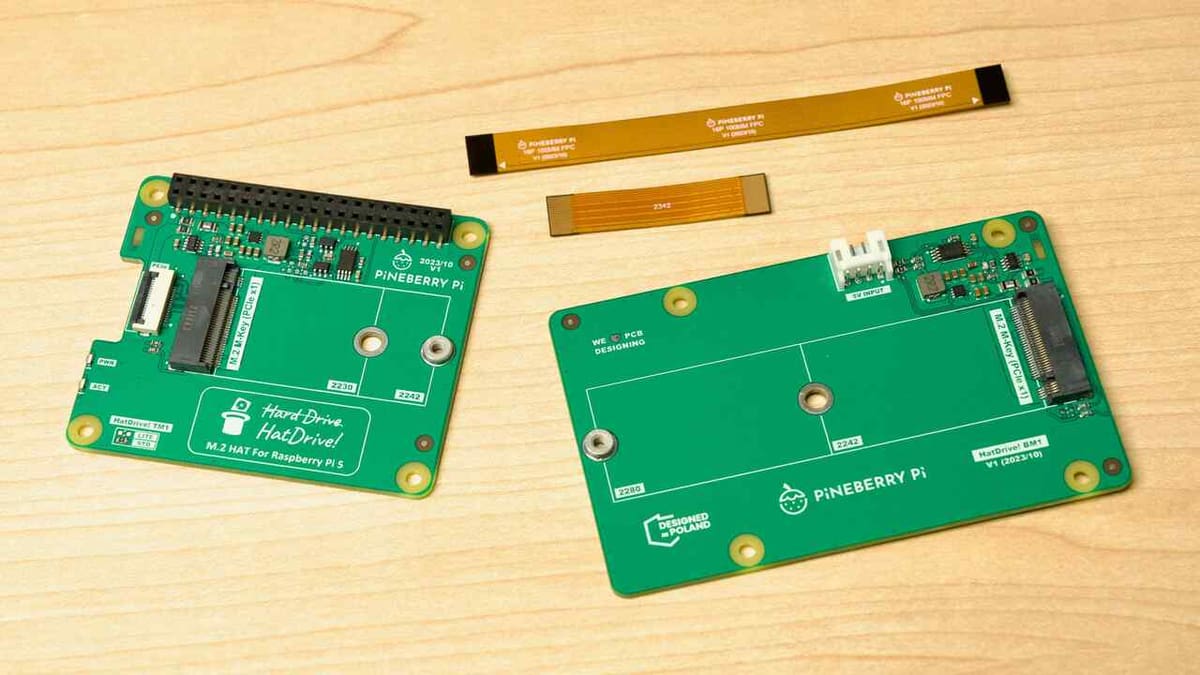
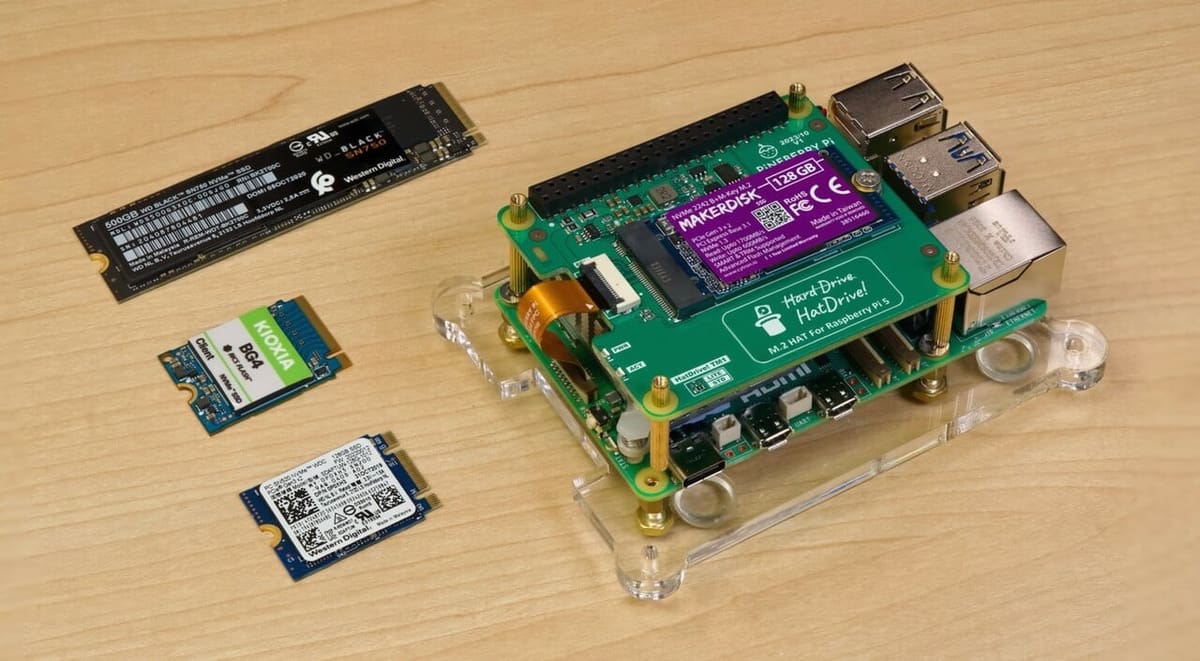
An exciting new possibility for the Raspberry Pi 5 is booting right off of NVMe instead of relying on MicroSD cards. In his YouTube video, Jeff Geerling details all you need to know about a series of HATs from Pineberry Pi called HatDrive! that use the PCIe connection on the Pi 5 to give it a major speed and stability boost.
Jeff explains that to get set up, the Raspberry Pi OS must first be flashed on the NVMe in order to boot from it, a process explained in detail on his blog. The NVMe SSD and HatDrive! can then be connected to the Pi 5 using a flexible printed circuit (FPC) for impedance control.
After the upgrade, the benchmarking tests showed much faster throughputs, making it a great upgrade for large data transfers. For more on the Pineberry Pi HatDrive, be sure to check out Jeff’s GitHub documentation.
- Designer: Jeff Geerling
- Project page: YouTube

Running Game Cube
GameCube is a classic video game home console developed by Nintendo and is very popular among gamers worldwide. In their video, creator leepsvideo demonstrates how the Dolphin emulator runs on a Raspberry Pi 5, which is exciting for both fans of the GameCube and of Raspberry Pi, as this hasn’t gone very smoothly with earlier Pis.
Some of the games tested out include Dave Mirra Freestyle BMX, Hulk, Tomb Raider, and The Simpsons: Hit & Run. Even the moderately demanding games run relatively smoothly with the Pi 5, showcasing its powerful potential.
Users seem to agree that as better cooling mechanisms are developed for the Pi 5, using an emulator will become even smoother.
- Designer: leepsvideo
- Project page: YouTube
DIY Computer
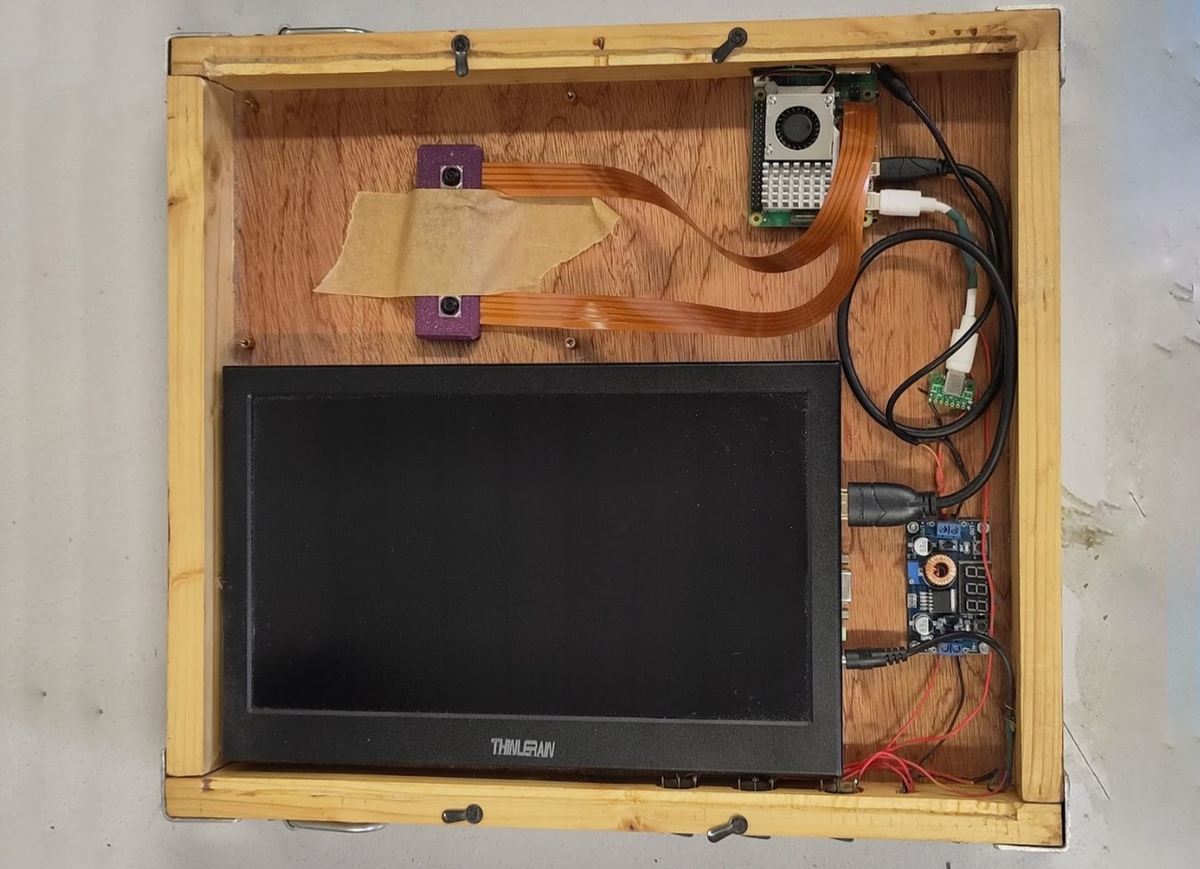
While the Raspberry Pi 4 did a decent job as a DIY portable computer, the Raspberry Pi 5 has even greater potential. Based on their original design for a portable computer (from issue 24), makers from HackSpace magazine saw the upgrade from a Pi 4 to a Pi 5 as the perfect opportunity to make improvements to the build as a whole, as reported in issue 72.
The project’s creator says key things to consider when building a DIY computer are making it ergonomic, providing suitable protection, and being sure to leave enough room for modifications and upgrades down the line.
Since the Raspberry Pi 5’s new features include much higher processing speeds with a quad-core Arm Cortex A76 processor, a DIY computer with the Pi 5 is going to give you more bang for your buck. Screens can be connected to one of its mini-HDMI ports and a keyboard and mouse can be connected via USB or Bluetooth.
- Designer: HackSpace
- Project page: Raspberry Pi

License: The text of "The 10 Raspberry Pi 5 Projects We Love the Most" by All3DP is licensed under a Creative Commons Attribution 4.0 International License.
CERTAIN CONTENT THAT APPEARS ON THIS SITE COMES FROM AMAZON. THIS CONTENT IS PROVIDED ‘AS IS’ AND IS SUBJECT TO CHANGE OR REMOVAL AT ANY TIME.