
The 20 Best Tinkercad Arduino Projects

Let the physicists ponder whether we live in a simulation, while we simulate Tinkercad Arduino projects. Check out the top projects!
Tinkercad is a free-to-use, browser-based tool for 3D modeling, electronics simulation, and coding. It’s cloud-based and accessible across different operating systems, such as Windows, MacOS, and Linux.
Tinkercad’s 3D modeling features are well known, but its expansion into circuits opens up a lot of possibilities for simulating circuits with Arduinos. This can be very handy in the prototype phase of your projects or if you’re just starting to learn about electronics!
Once you open Tinkercad Circuits, the main window displays all the components. The sidebar allows for access to common electrical components as well as generic setups for prototyping. There’s also a code panel to write code, based on the Arduino programming language.
In this article, we’ll take a look at some of the coolest Tinkercad Arduino projects available!

Education
This selection of educational projects can help empower your learning journey. Plus, you’ll have a lot of fun along the way!

Basics of Arduino
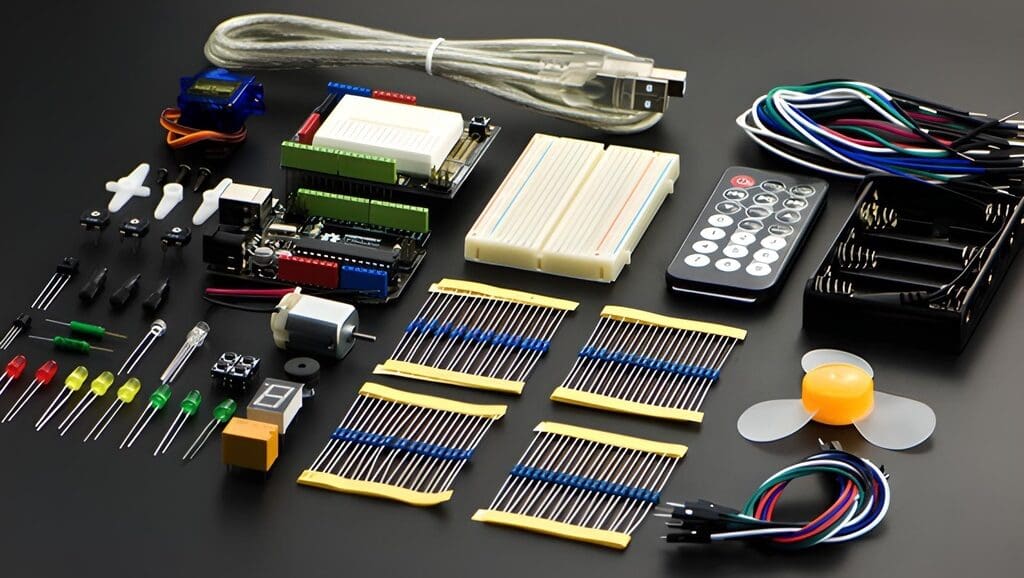
Let’s get down to business to learn everything there is to know about Arduino. Before we go over games, appliances, and even more educational tools, what better than to get started with this, the educational tool to rule them all! A kind Instructables user has assembled an extensive and comprehensive list of all the basic Arduino skills in one place.
The project comprises different sensors and applications, including step-by-steps, diagrams, and simulations, all with the help of Tinkercad so that you, too, can start building rocket ships!
- Difficulty: Beginner to advanced
- Designer: Mukesh_Sankhla
- Project page: Instructables
- Key components: Arduino Uno, breadboard, LED kit, push button, assortment of sensors
Calculator
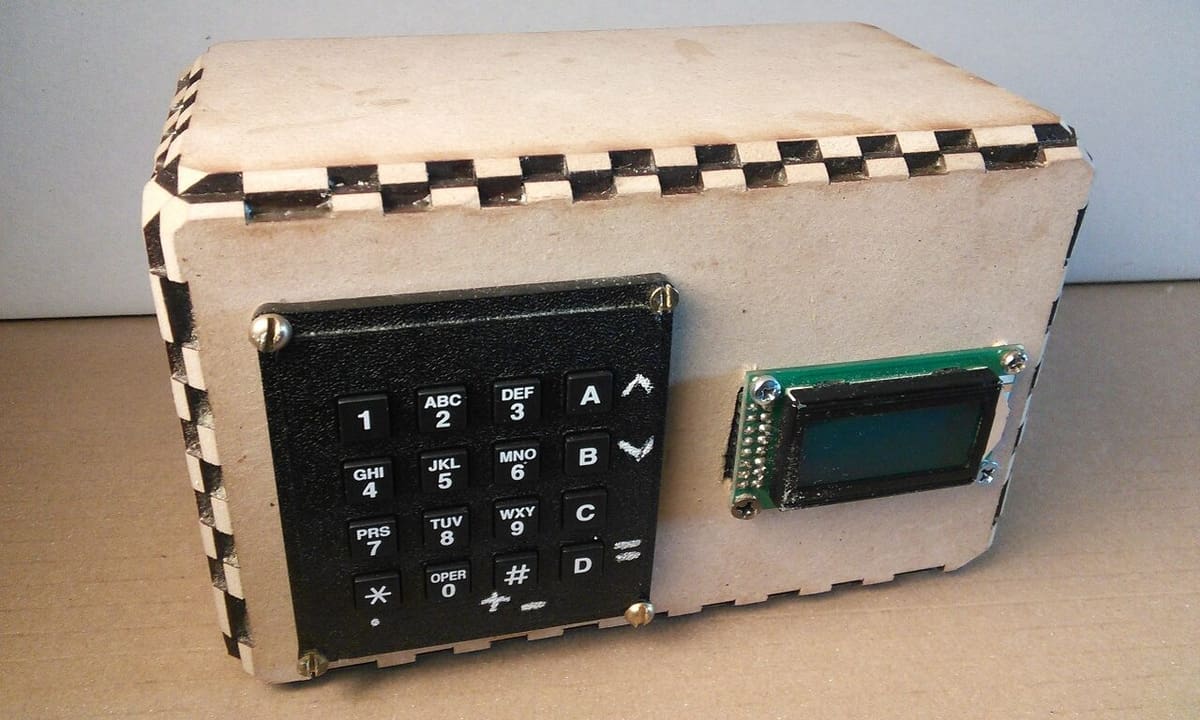
With this project, you can build a calculator that can perform simple operations such as addition, subtraction, multiplication, and division. It also utilizes common components, such as a 4×4 keypad and an 8×2 LCD screen.
Simply select a number with the keypad, then use the ‘A’ or ‘B’ button to scroll to the function you want to perform. Once the function is selected, hit the ‘D’ button. A second number can then be selected. Press the ‘D’ button once more, and you should get the answer on the second line.
The creator used an Arduino Due for this project, but they note that any Arduino will work.
- Difficulty: Intermediate
- Designer: Kale_3d
- Project page: Instructables
- Key components: Arudino Due, jumper wires, 8×2 LCD screen, 4×4 keypad, rocker or toggle switch, USB Type-A to Type-B cable, 9-V battery power plug, 1/8″ MDF, acrylic, or plywood
CPR Feedback Device
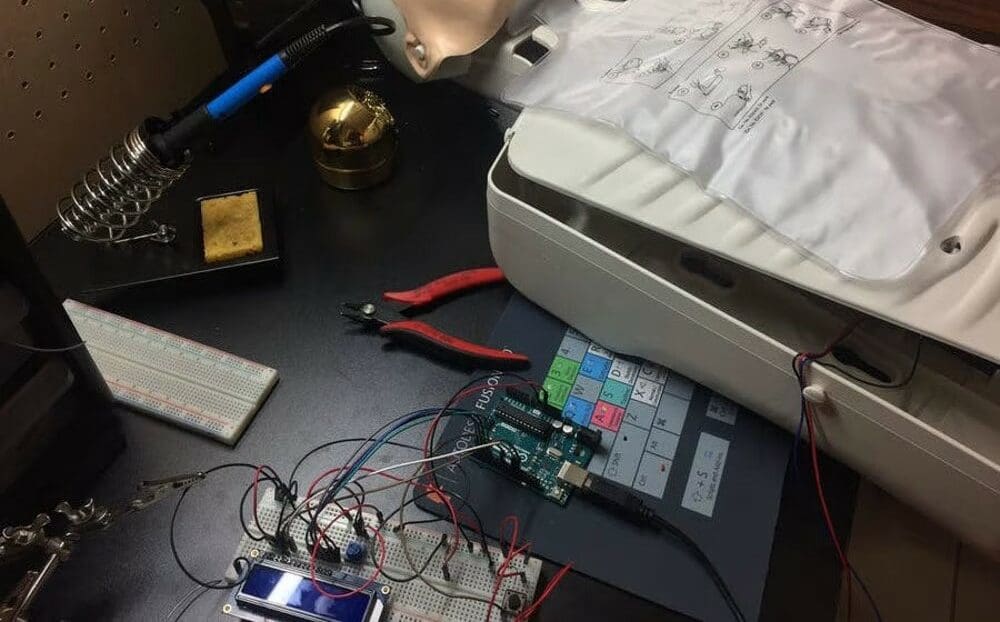
CPR is a critical, life-saving skill that requires practice to perfect. This Tinkercad project adds real-time feedback to a CPR mannequin and includes a depth and chest recoil indicator as well as a CPR cycle counter. The feedback offered in this project can aid in the learning process.
While such devices can be bought in stores, this project aims to reduce the cost involved. It uses simple components such as LEDs and a 16×2 LCD screen for visual feedback. These, as well as the other components, are connected together with a breadboard, alligator clips, and inexpensive jumper wires. Finally, the “brain” of the project is an Arduino Uno.
When the chest is pushed to the correct depth required, the pushbutton is activated and the LED turns green. On the other hand, if the correct depth is not reached, the LED turns red instead. Additionally, a force-sensitive resistor is placed on the chest of the mannequin, to detect the amount of pressure used.
- Difficulty: Intermediate
- Designer: David Escobar
- Project page: Hackster
- Key components: Arduino Uno, pushbutton switches, Adafruit standard 16×2 LCD, breadboard, Adafruit round force-sensitive resistor, LED, rotary potentiometer, Adafruit Perma-Proto half-sized breadboard
Electronic Board Games
Put your skills to the test with these fun board game projects. From classic arcade games like Snake to a Rock, Paper, Scissors battle, this collection includes something for everyone.

Ping Pong

This is a simulation of a ping pong game made in Tinkercad with the Arduino Uno. There are two pushbuttons for player 1 and another two for player 2. These buttons serve as the paddle.
For visual feedback, there are two LEDs in this project. If a player has won, the LED will turn green; otherwise, it will turn red. Additionally, a buzzer is connected to digital pin 10 that generates two beeps at the end of the game.
To go one step further, you could implement joysticks instead of pushbuttons for the paddles.
- Difficulty: Intermediate
- Designer: Sabari Kannan_M
- Project page: Instructables
- Key components: Arduino Uno, NeoPixel LEDs, piezoelectric crystal, resistors, pushbuttons, potentiometer, 16×2 LCD display, breadboard
Offline Dinosaur
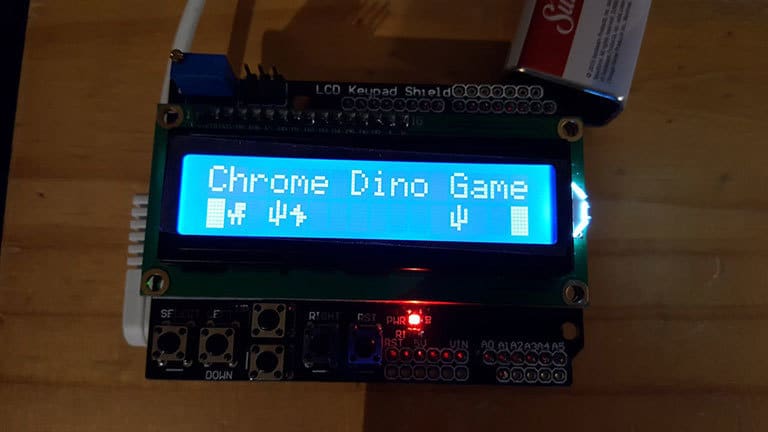
This project is an implementation of the infamous in-built browser game in the Google Chrome web browser, Dino Runner. An RGB backlit LCD screen is used as the display, and a single pushbutton serves as the controller. The player can jump over obstacles that are randomly generated within the game. Upon completion of the simulation, you may wish to create your own.
The difficulty increases the longer it’s played. For instance, the game speeds up, and the spaces between the obstacles begin to decrease. It also keeps score, and a high score is generated after the game. The project utilizes an LCD keypad shield, which has six pushbuttons instead of just a single button.
- Difficulty: Intermediate
- Designer: johnsono22
- Project page: Tinkercad, Hackster
- Key components: Arduino Uno, 16×2 LCD, DFRobot Gravity LCD Keypad Shield, jumper wires, USB Type-A to Type-B cable
Rock, Paper, Scissors Machine

This project focuses on a game older than time itself (although perhaps not older than the invention of scissors): Rock, Paper, Scissors. The mechanism is simple. You have three servo motors, each connected to one of the three options. An Arduino generates a random number from 1 to 3 and decides which sign to push forward.
To activate the functionality, the Arduino uses a distance sensor to detect you’ve put your hand in front of it to play. So far, one user has replicated this project. You’ll have to do the judging yourself, so remember: Rock beats scissors, scissors beat paper, and paper beats rock. The machine provides a random result, so it cannot cheat, and you can become a Rock, Paper, Scissors master.
- Difficulty: Beginner
- Designer: CrazyScience
- Project page: Instructables, Tinkercad
- Key components: Arduino Uno, 3x servo motors, ultrasonic sensor, on/off switch
Distance Controlled-Flappy Bird
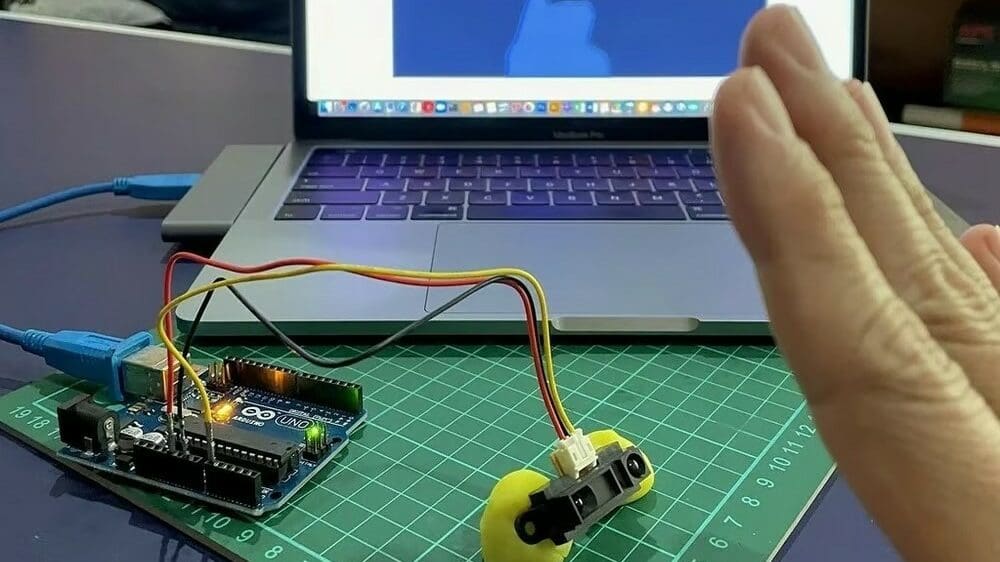
As if Flappy Bird wasn’t hard enough, now you can play it without ever needing to touch the keyboard. You only need to master one thing: Telekinesis. If that’s too hard, programming an Arduino will also do the trick. This is a great project for those who want to work on electronics and learn about software and video game creation.
The creator has provided all the instructions and graphics for the game. You can choose different animal characters or create your own.
- Difficulty: Intermediate
- Designer: Jallson S
- Project page: Instructables
- Key components: Arduino Uno, sharp infrared proximity distance sensor
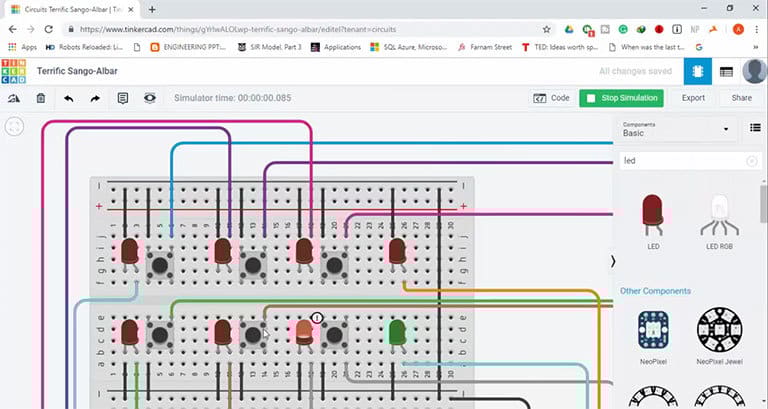
Memory
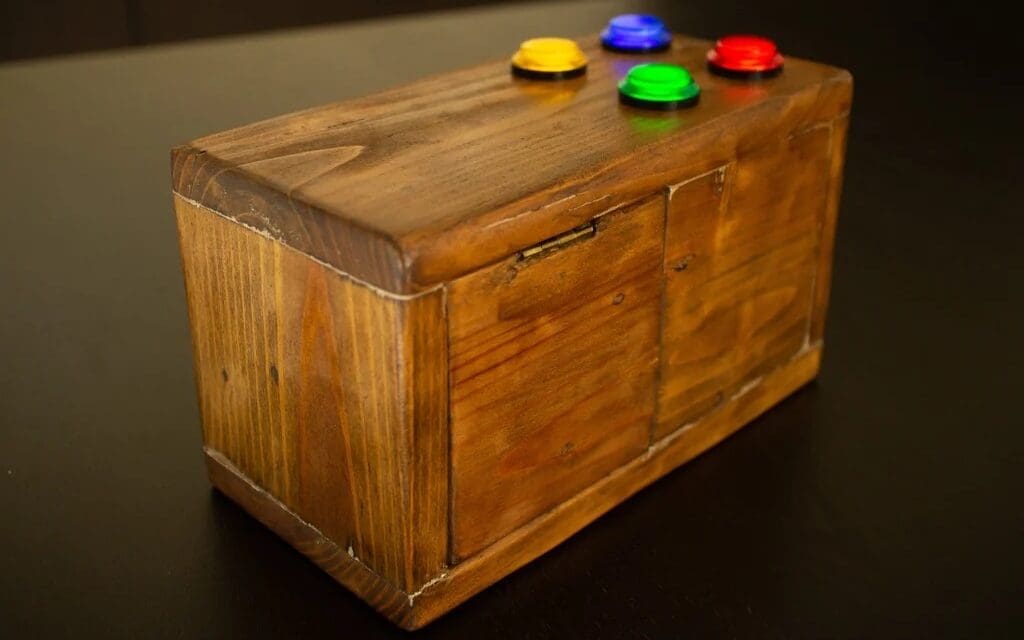
This goes by many names: Memory Game, Simon Says, or as the creator has called it, “The Memento Game”. No matter what you want to call it, it follows the same principle. To play, you press the different colored buttons in the correct sequence. The game will get increasingly harder by adding an extra move each round.
The project isn’t too complex, and the creator’s instructions are pretty funny. However, you’ll need to do some PCB soldering, which makes this project a bit more advanced due to the manual skill required. However, if you were planning on learning PCB soldering, this is a good place to start.
- Difficulty: Advanced
- Designer: artifexcreator
- Project page: Instructables
- Key components: Arduino Uno, 4x LEDs, white lightbulb, 9-V solenoid relay, 4x buttons, speaker and amplifier
Snake
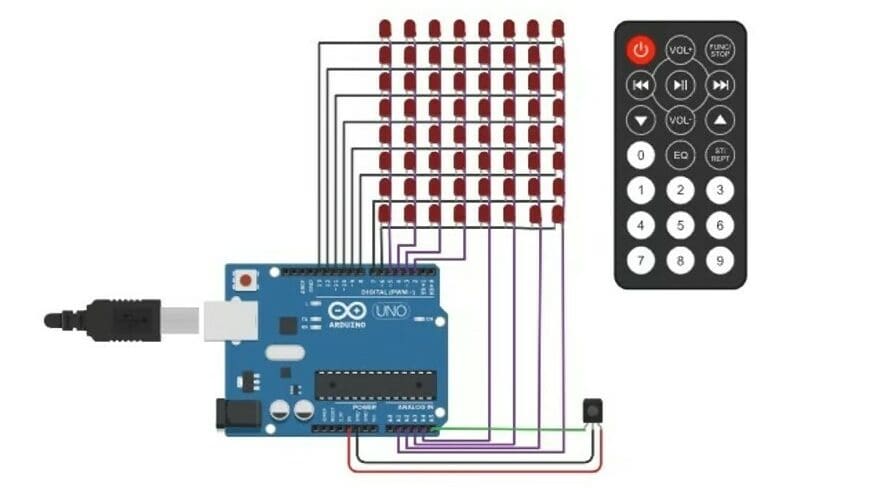
LED patterns are a popular branch of Arduino projects. With this one, you get more than just a pretty cube. You can also play the retro game, Snake! After soldering the LEDs together to make a grid, a program turns them on and off in a sequence that imitates the one used in Snake. Similarly, it lights up another LED far away to indicate the food, and as you eat in the game, the number of LEDs that make up the snake will increase.
To move the snake, you can use a cheap remote controller to control LED lights. You can find the circuit on Tinkercad, as well as simulate it in action, but the full instructions are on the GitHub repository.
- Difficulty: Intermediate
- Designer: Murilo Chianfa
- Project page: Tinkercad, GitHub
- Key components: Arduino Uno, 64x LEDs
Fun Science
Whether you want to make your own pet robot or light up a 3D printed butterfly, these science-inspired projects are sure to spark your creativity.
3D Printed Butterfly

Combine the rainbow lights of NeoPixels with 3D printing to program, design, and assemble a groovy illuminated butterfly!
In this project, you’ll first learn how NeoPixels works by programming a NeoPixel ring to light up every color of the rainbow in the Tinkercad Circuit simulator. Then, you’ll learn to customize a 3D butterfly design in Tinkercad, which attaches to a special holder that secures the NeoPixel ring to the Arduino Uno.
- Difficulty: Intermediate
- Designer: circuits
- Project page: Instructables
- Key components: Arduino Uno, 24 NeoPixel Ring, jumper wires

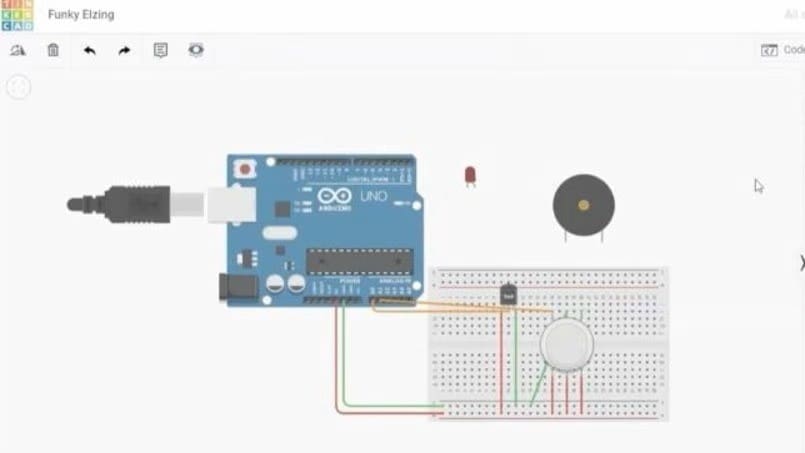
iPiano
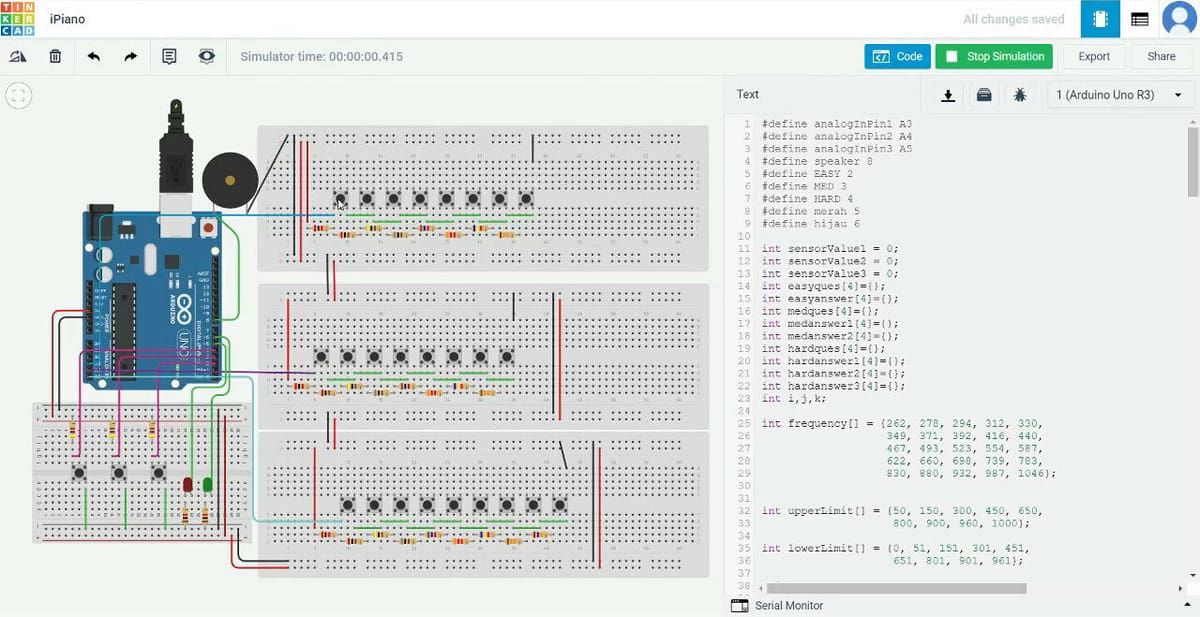
Simulate your own electronic piano with an Arduino in Tinkercad! This project has 27 buttons for two octaves, a practice mode, and two additional functions.
In practice mode, the user can press the question button, which will cause the piano to play several notes. The user must then play the notes back in the same sequence. If the answer is correct, a green LED will light up. Wrong answer? A red LED, of course, will light up.
- Difficulty: Advanced
- Designer: rheinnacyasimon
- Project page: Instructables
- Key components: Arduino Uno, pushbuttons, an assortment of resistors, piezo buzzer, solderless breadboard, LEDs
Pet Robot

Want to create a robot? This project takes you through the process of creating your own pet robot with Tinkercad’s circuit simulator. This hybrid robot and Bluetooth RC car can reach speeds of up to 300 RPM.
Please note, however, that this robot can be created on an Arduino Nano and Arduino Uno, but not a Pro Mini.
- Difficulty: Intermediate
- Designer: Akash Sharma
- Project page: Hackster
- Key components: Arduino Nano or Uno, HC-05 Bluetooth module, LCD screen, keypad, rocker or toggle switch, USB Type-A to Type-B cable, 9-V battery power plug, material that can be laser cut such as 1/8″ MDF, acrylic, or plywood

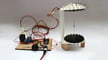
Dual-Axis Solar Tracker

This is a device that tracks sunlight through the use of light-sensitive resistors and directs solar panels to move accordingly in order to maximize efficiency. Two potentiometers are used to increase or decrease the sensitivity of the light-sensitive resistor. Alternatively, the potentiometers can be used to control the servo motors instead.
Once you’re happy playing with the Tinkercad simulation, you may want to build your own dual-axis solar tracker with an actual Arduino Uno. All the code for this project is provided on the maker’s project page, and you can compile and upload it to your own Arduino board.
- Difficulty: Beginner
- Designer: The IoT Projects
- Project page: The IoT Projects
- Key components: Arduino Uno, micro servo motors, breadboard, resistors, light-sensitive resistors, potentiometer, 3D printed parts
Automation
Automation projects can make life a lot easier by monitoring and controlling different aspects of your home. These Arduino-powered automations include a pet feeder, room temperature controller, a lighting system, and more!
Password Access Control Circuit
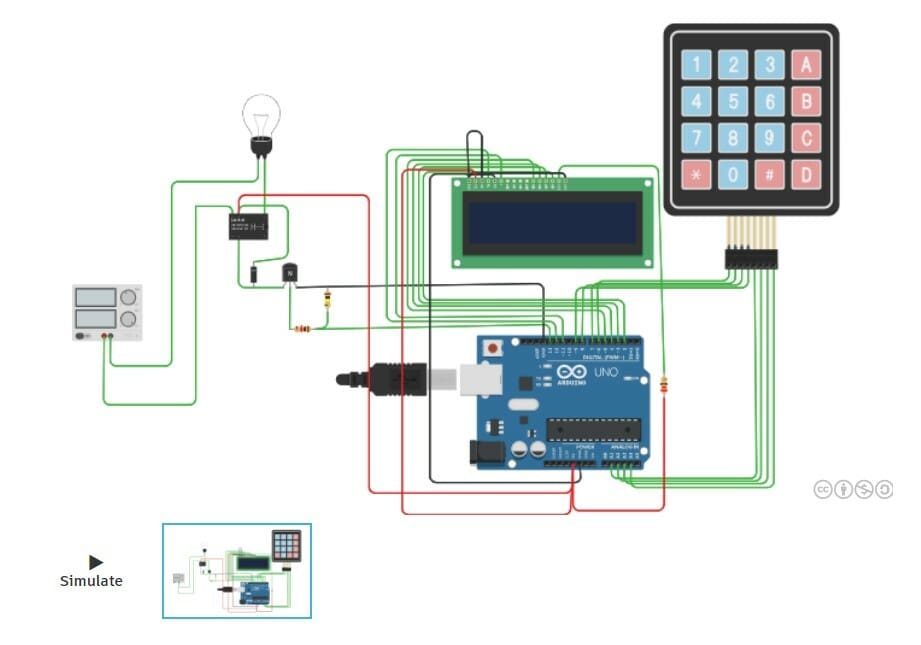
Secure your valuables with a digitally coded lock! As its name suggests, this is a password-based security system built with Arduino in Tinkercad. To input the password, a 4×4 keypad module is used together with a 16×9 LCD display. First, the LCD display prompts the user to enter a four-digit password via the keypad module. According to the code provided, this first-time password is “1234”.
Once the system has been unlocked, the message “UNLOCKED” will be shown on the LCD display. The light bulb controlled with the Arduino and relay will also light up. Using EEPROM, data, such as the correct passcode, can be saved onto the Arduino Uno. You can think of EEPROM as a small hard disk you can store data on, and it’s non-volatile memory.
- Difficulty: Intermediate
- Designer: ahmedebeed555
- Project page: Tinkercad
- Key components: Arduino Uno, 4×4 keypad module, relay, LCD display, transistor, resistors, LED lights
Room Lighting System
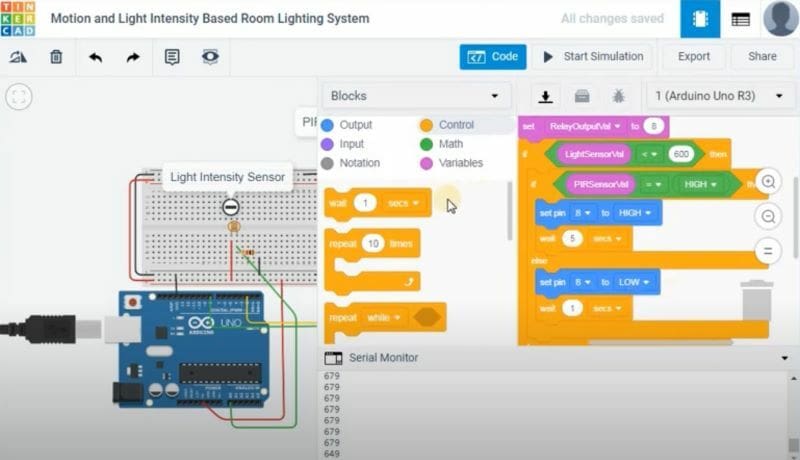
This automatic room lighting system works similarly to commercial motion sensor light systems. It basically detects movement with a motion sensor and turns on connected lights for a period of time. In the code provided in the Tinkercad simulation, the light controlled by the relay turns on for 5,000 milliseconds (5 seconds), but the user can program the duration however long they’d like.
Once this period is over, the light will automatically turn off on its own. If motion is detected again, the lights will be triggered and stay on for the specified period of time.
- Difficulty: Intermediate
- Designer: TechnicalUpdate
- Project page: YouTube
- Key components: Arduino Uno, breadboard, resistor, light-sensitive resistor, PIR motion sensor, power supply, light source
Room Temperature Controller
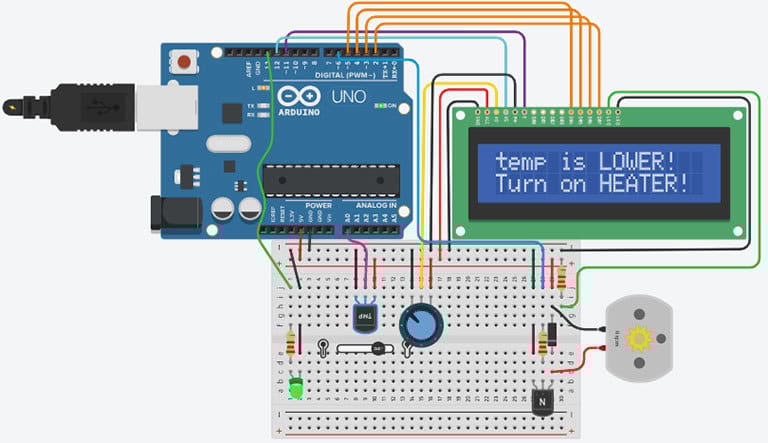
This project is an automatic room temperature system that maintains the temperature between 20 and 25 °C. When the temperature dips below the minimum threshold, feedback is displayed on the LCD screen (see the image above). It then activates the heater to turn on, warming up the temperature in the room. Once the temperature is back within the 20 to 25 °C range, it commands the heater to turn off.
On the flip side, if the temperature goes too high, the LCD screen display changes, and the system commands the fan to turn on. Once the temperature is back within the target range, the fan automatically turns off.
- Difficulty: Beginner
- Designer: Semere Beyene
- Project page: Hackster
- Key components: Arduino Uno, breadboard, resistor, Adafruit standard 16×2 LCD, LED, temperature sensor, 1N4007 high current diode, DC motor
Combination Lock
Combination locks have existed for decades, and there are plenty of products on the market that use them (briefcases, safes, and doors, for example). This project shows you how to create your own pushbutton combination lock using widely available components such as a keypad module, pushbutton switches, and an Arduino Uno.
A password of one to six digits in length can be set. When a button is pushed and the combination matches, a green LED will light up. If the combination does not match, a red LED serves as a visual indicator that the password is incorrect.
- Difficulty: Intermediate
- Designer: High Voltages and Asim Zulfiqar
- Project page: Hackster
- Key components: Arduino Uno, DFRobot Gravity digital pushbuttons, red LED, green LED, breadboard, jumper wires
Fire Alarm System
This alarm system uses an LM35 temperature sensor and an MQ2 gas sensor to detect changes in temperature and concentration of gases. For the alarm, a piezo buzzer has been hooked up to the Arduino with a breadboard, resistors, and jumper wires. For a visual component of the alarm system, LEDs are used in this build.
According to the maker, when the temperature increases, so does the voltage: 10 mV for every degree. The output of this triggers the sounding of the buzzer. The gas sensor not only detects the presence of smoke but also measures the concentration of gases. Users specify conditions in the project’s code that will determine the measurement threshold at which the LEDs light up or remain off.
- Difficulty: Beginner
- Designer: LearnElectronics India
- Project page: Learn Electronics India, YouTube
- Key components: Arduino Uno, LM35 temperature sensor, MQ2 gas sensor, resistors, breadboard, LED, piezo buzzer, jumper wires
Pet Feeder
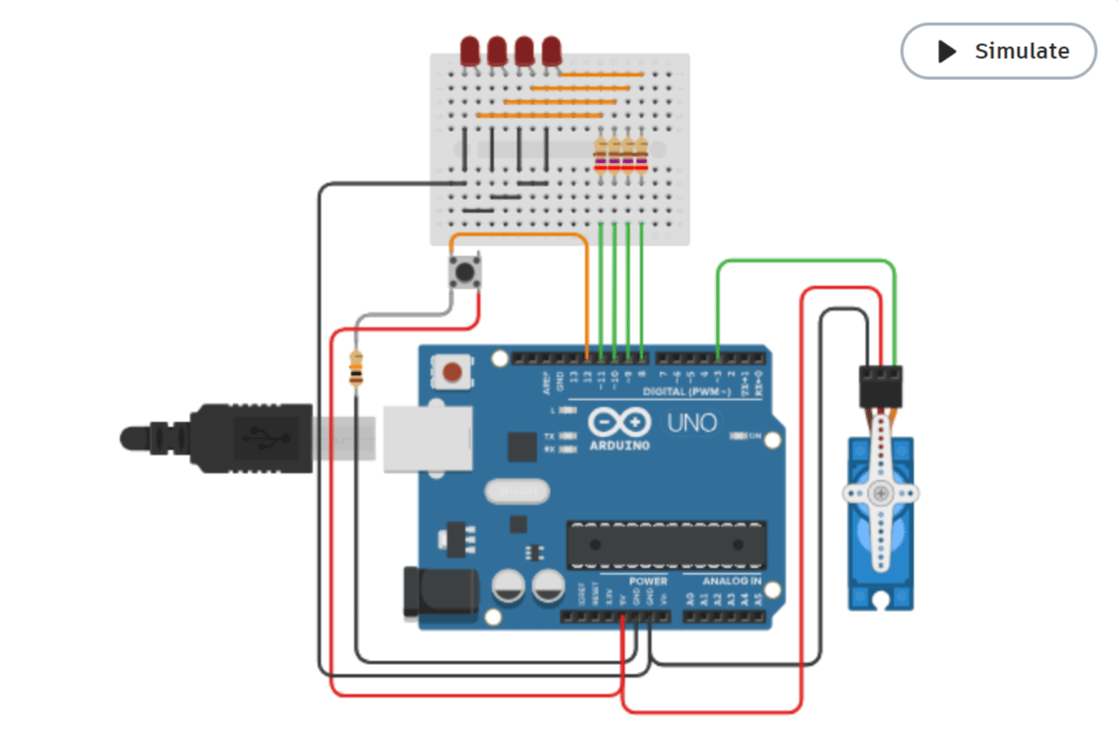
It’s an automatic pet feeder made with an Arduino Uno – well, more like a simulation of it in Tinkercad! This simple build uses a pushbutton switch to control the lid of a food container that’s connected to a servo motor. To control the amount of food dispensed, the user simply controls the servo. Other parts required for this build include LEDs, wires, and current limiting resistors.
- Difficulty: Intermediate
- Designer: gandhifp
- Project page: Tinkercad
- Key components: Arduino Uno, resistors, pushbutton switch, servo, LEDs, breadboard, jumper wires

Bi-Directional Visitor Counter
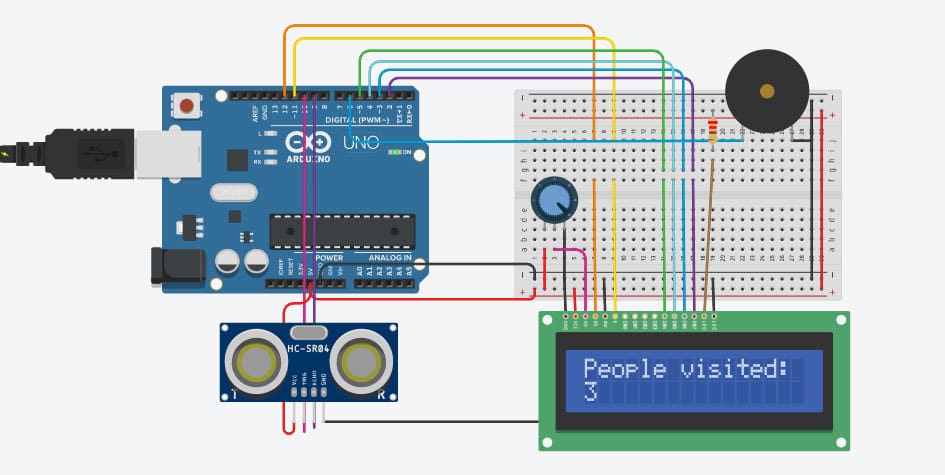
This project counts the number of visitors accessing a location in two directions. It utilizes an ultrasonic distance sensor, specifically an HC-SR04 module, in order to do so. According to its datasheet, this module provides 2 to 400 cm of non-contact measurement.
As feedback, the 16×2 LCD screen displays the number of people who have visited. Additionally, when a visitor enters the area within range, a beep can be heard from the buzzer. Some variation of this system is used in real-world applications. For example, they’re implemented in retail establishments to judge the effectiveness of marketing campaigns, building design and layout, and the popularity of particular brands.
- Difficulty: Beginner
- Designer: Mudit5246
- Project page: Instructables
- Key components: Arduino Uno, ultrasonic sensor, breadboard, 16×2 LCD screen, buzzer, jumper wires
License: The text of "The 20 Best Tinkercad Arduino Projects" by All3DP is licensed under a Creative Commons Attribution 4.0 International License.