Binary G-code in PrusaSlicer: What Is It Exactly?

Is binary the future of G-code? Read on to find out what binary G-code is, its benefits and drawbacks, and how you can take advantage of it.
G-code is found everywhere in the 3D printing world. In a nutshell, slicers transform 3D models – and any particular considerations, such as material(s) of choice, layer height, infill, and much more – into thousands of precise movement commands for 3D printers to execute.
Binary G-code is a new and useful alternative to traditional G-code that’s been presented as a way to gain efficiency and speed from slicing and the print transfer process. A new format developed by Prusa Research, binary G-code aims to improve on many of the weak points of traditional G-code, like file size, upload and processing times, and more.
In this article, we’ll go over the details regarding this new type of G-code, its pros, cons, and differences from traditional G-code, and how to use it on your printer!
What Is Binary G-code?
Traditional G-code files store G-code commands as standard ASCII text, one of the most common ways of encoding letters, numbers, and symbols into binary data. While this is especially useful if one is creating and then editing their G-code, most of the time 3D printing G-code gets generated by slicers and immediately sent to a printer, with no edits made by users.
Binary G-code aims to make G-code more efficient by storing these commands as raw binary data instead of text data. This results in many improvements to the use of G-code, which we’ll cover in the next section.
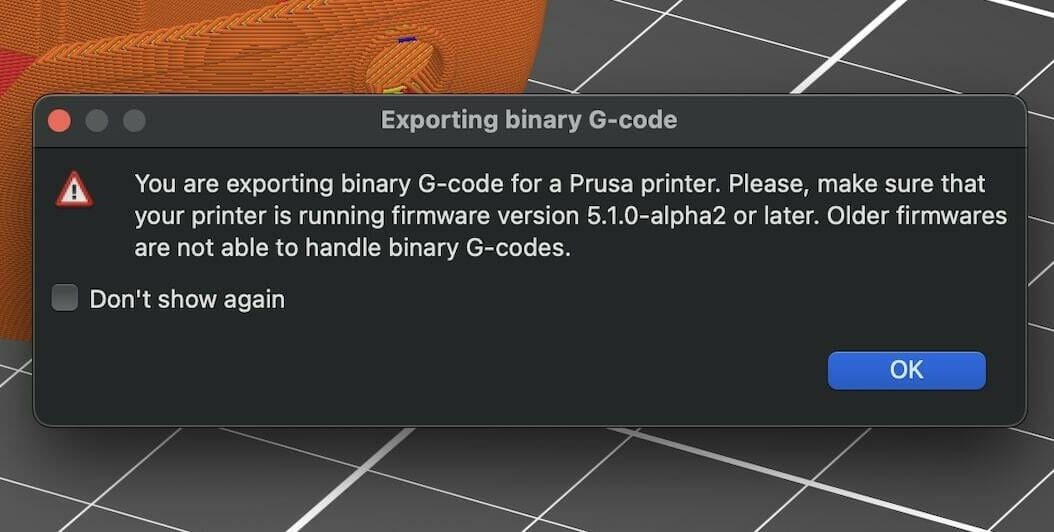
Binary G-code was introduced in PrusaSlicer 2.7.0 and is at the time of writing only supported by Prusa’s Mini, MK4, and XL printers, on firmware 5.1.0 or newer.
Pros, Cons, & Differences
Binary G-code has many advantages over the traditional text-based option, the primary one of which is reduced file size, on average almost 70% smaller! Users have praised the significantly faster wireless uploads and print starts that this allows for.
However, these reduced sizes and increased speed don’t come without drawbacks. Since the commands are no longer stored in text format, the file is made unreadable and uneditable. This makes it impossible to view and tinker with commands, which can be useful if you need to make any tweaks.
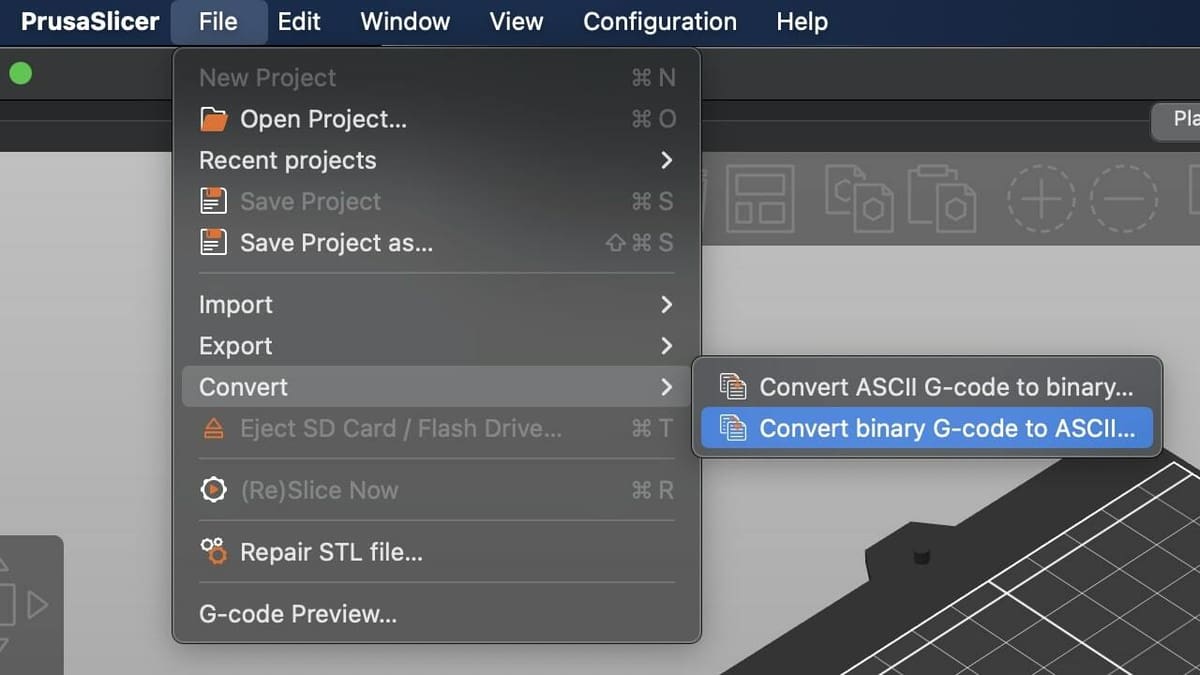
PrusaSlicer does somewhat remedy this by offering a simple tool within PrusaSlicer to convert binary G-code back to text, and vice versa. Once you have the traditional or binary G-code, under “File > Convert”, you can select which option you would like to move forward with, and the file in the new format will be created.
Another downside is that the binary G-code format has limited support as of now and is only compatible with select Prusa models, and some complementary setups (such as OctoPrint) can’t work with it. If, for example, you’re running OctoPrint with your Prusa printer, make sure that you select the traditional G-code format when exporting the file.
How To Use It
Taking advantage of all binary G-code has to offer is quite simple. First, ensure you’re using PrusaSlicer version 2.7.0 or later, as well as 5.1.0 or later on a Prusa Mini, MK4, or XL. Your current PrusaSlicer version can be found both in the title of the program or by going to “Help > System Info”.
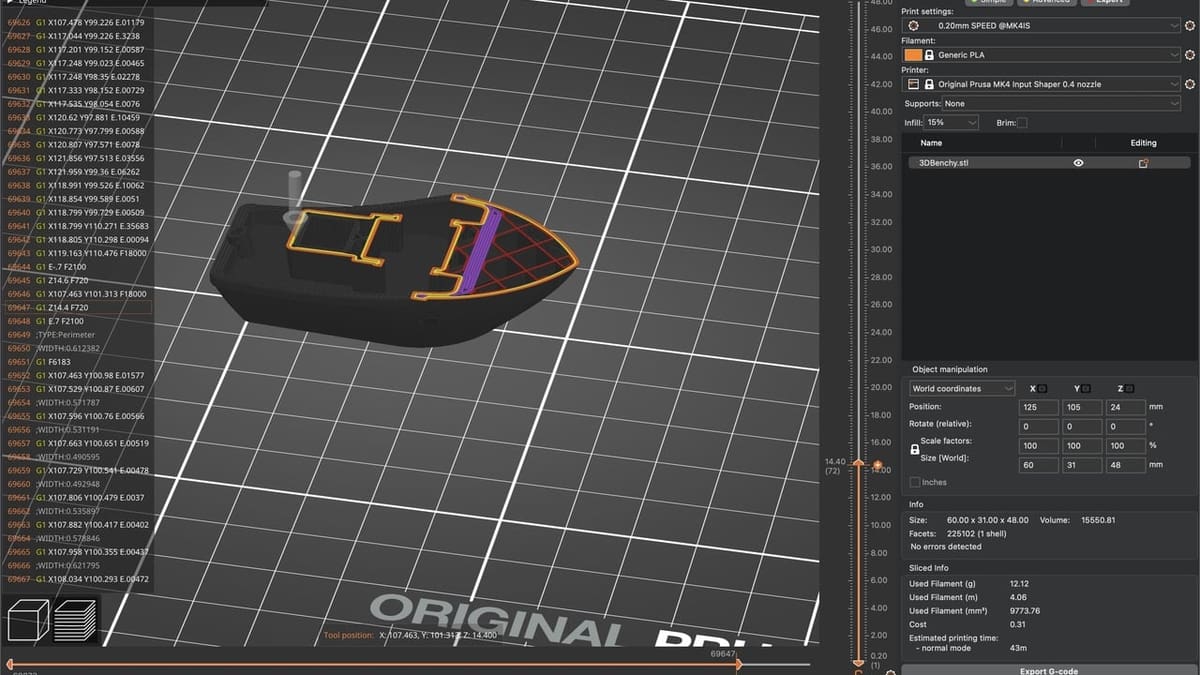
By default, PrusaSlicer will opt to export binary G-code for all 3D printer models that support it. You can verify this by exporting the G-code and ensuring the file ends in .bgcode instead of the typical .gcode.
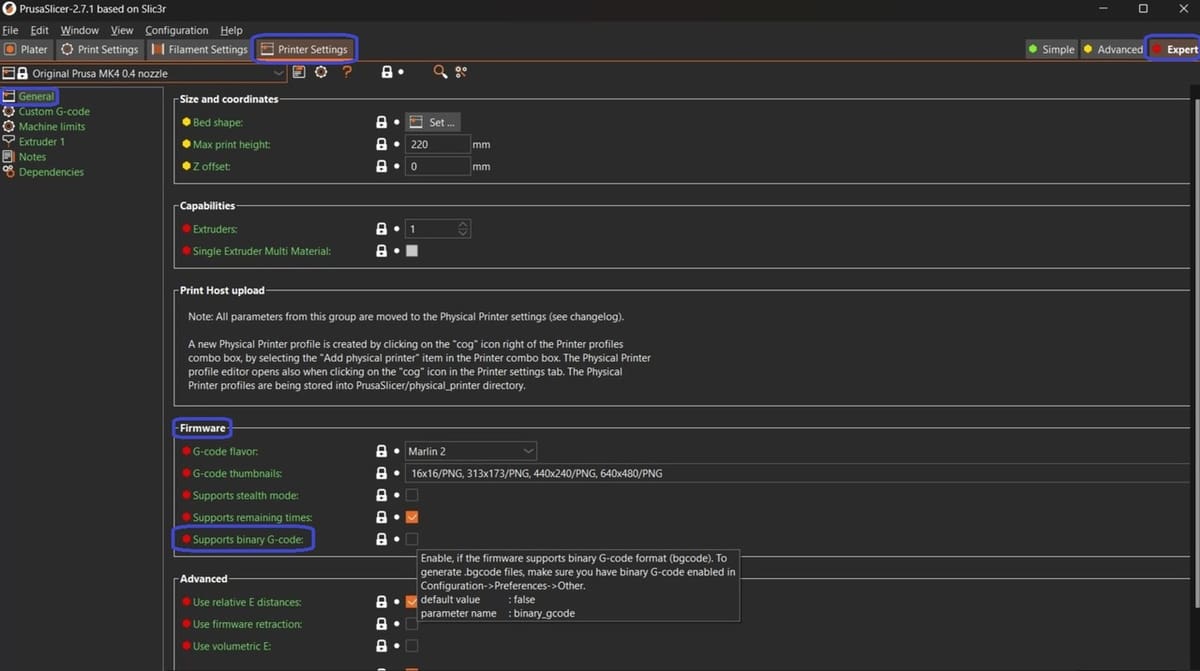
Exporting the binary format can be enabled and disabled for each print profile by selecting the “Expert” mode (which enables extra settings) and under “Printer Settings > General”, selecting or deselecting “Supports binary G-code”. It can also be disabled slicer-wide by going to “Configuration > Preferences > Other”, and again selecting or deselecting “Use binary G-code when the printer supports it”.
And that’s it! The rest of the process doesn’t differ: The printer will then read the code and – you guessed it – get to printing.

License: The text of "Binary G-code in PrusaSlicer: What Is It Exactly?" by All3DP is licensed under a Creative Commons Attribution 4.0 International License.