Blender: Sculpt Tools – Simply Explained

Take your models to the next level with detail that should be nearly impossible! Learn how to use Blender 2.8's sculpting tools!
Sculpting the Future
In the “old days” of 3D modeling, artists were limited to manually moving vertices around, which could be tedious, to say the least. As computers got faster and the demand for high-resolution models grew, so did the need for new ways of working.
Tools like ZBrush, Mudbox, and Sculptris have become an important part of many 3D artists’ workflows, allowing for many more sculptural approaches to modeling. However, all of these programs tend to be primarily focused on sculpting, and lack many of the tools for animation and rendering that one would expect from a fully-featured piece of animation software.
Meanwhile, Blender has been constantly improving its built-in sculpting tools, ever since first introducing them to the software in 2007. At this point, Blender offers an excellent set of sculpting tools that rival the special-purpose packages mentioned above, while still offering everything else you need to create professional-grade 3D content.
Follow along as we discuss adding detail, types of sculpting tools and techniques, and some interesting features of the Blender sculpting suite.
Why Sculpt?
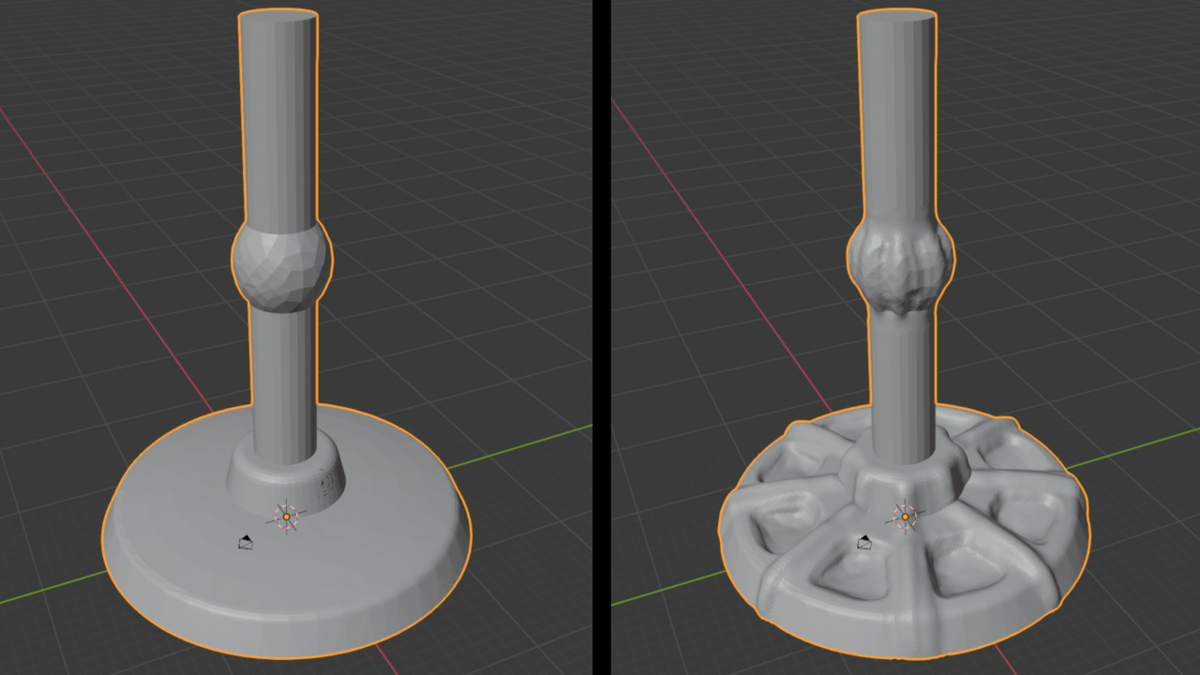
Think of a bas-relief panel, and ask yourself how you would go about modeling it. With traditional 3D CAD modeling tools, the tasks isn’t so easy, and that brings us to the main reason to use sculpting tools: to add detail directly to your model. Basically, you can use sculpting tools to add fine elements to surfaces that would otherwise be fairly difficult to edit.
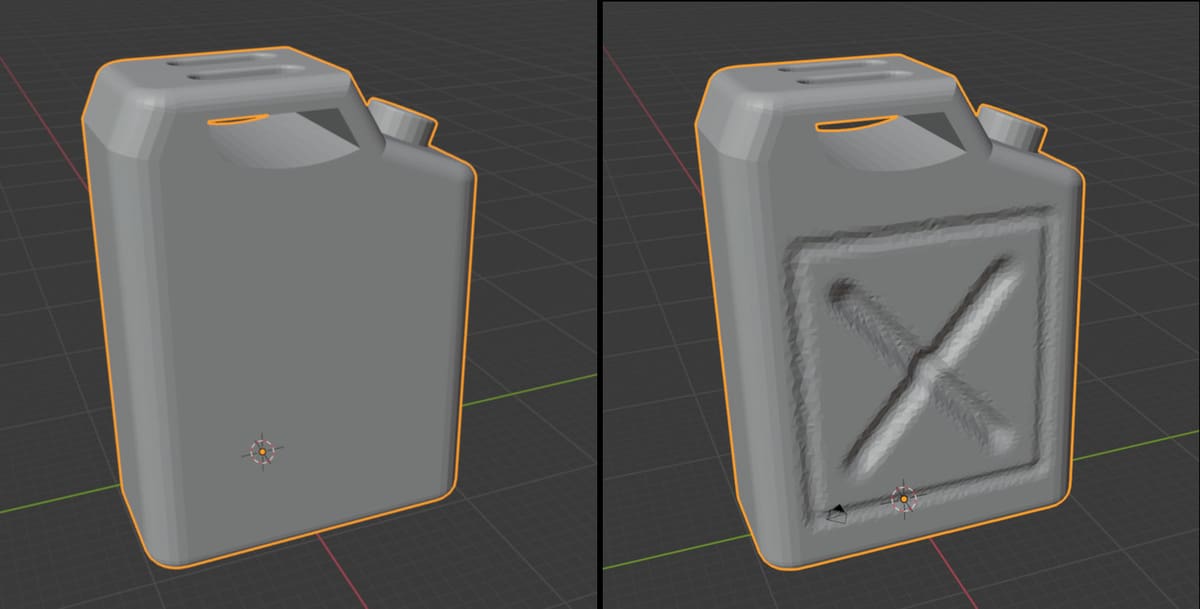
Here’s an example: The gas can model pictured above was created in FreeCAD, then brought into Blender. Then, the sculpt tools were used to add the characteristic indentations on the side, something that would have been very hard to accomplish otherwise.
First Steps

For the most part, you won’t be using sculpting tools to create models from scratch. Since they all operate on existing geometry, you’ll first need some starting geometry.
Obtain a Base Model
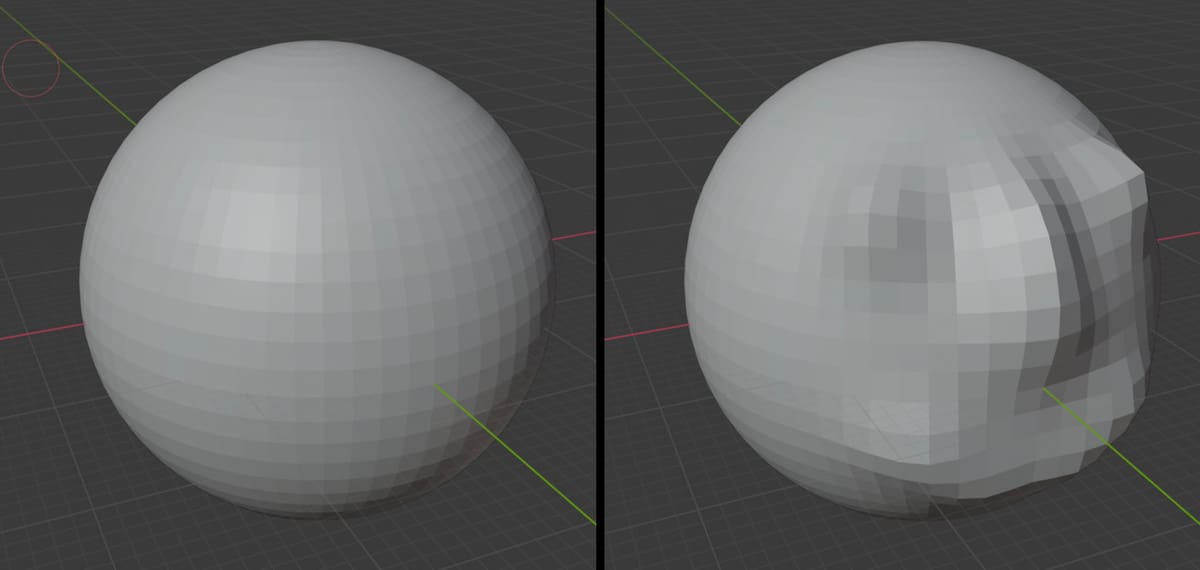
If you want to use sculpting tools as the primary way to make a model, your starting geometry might be as simple as a primitive shape. Alternatively, you can start with a model that you’ve created (as in the above example).
Either way, you’ll need a polygonal model in Blender to serve as your starting point. Note that, by default, the sculpt tools will only operate on existing vertices. Therefore, you might want to add a few subdivisions to the model before you get started.
Once you have your base model, starting to sculpt is as easy as entering sculpting mode. To do that, select “Sculpt Mode” from the mode drop-down.
Explore the Tools
By default, the “draw” tool will be selected: Click and drag on your model, and you should see the vertices rise up away from the surface.
The draw tool also allows you to push vertices into the surface of the model. To do that, hold CTRL button (Command, on Mac) while drawing.
Several other tools have a similar option, where the command or control key can be used to invert the effect of the operation.
Basic Tools
There are a number of different sculpting tools, but one thing they all share is the concept of a brush. A good way to think about this is as if you’re painting the desired effect onto the surface of your model.
Brush Settings
Although a variety of effects are available, you’ll mainly want to adjust the size of your brush and the amount of effect that it has. In fact, you’ll probably end up constantly adjusting these values as you work.
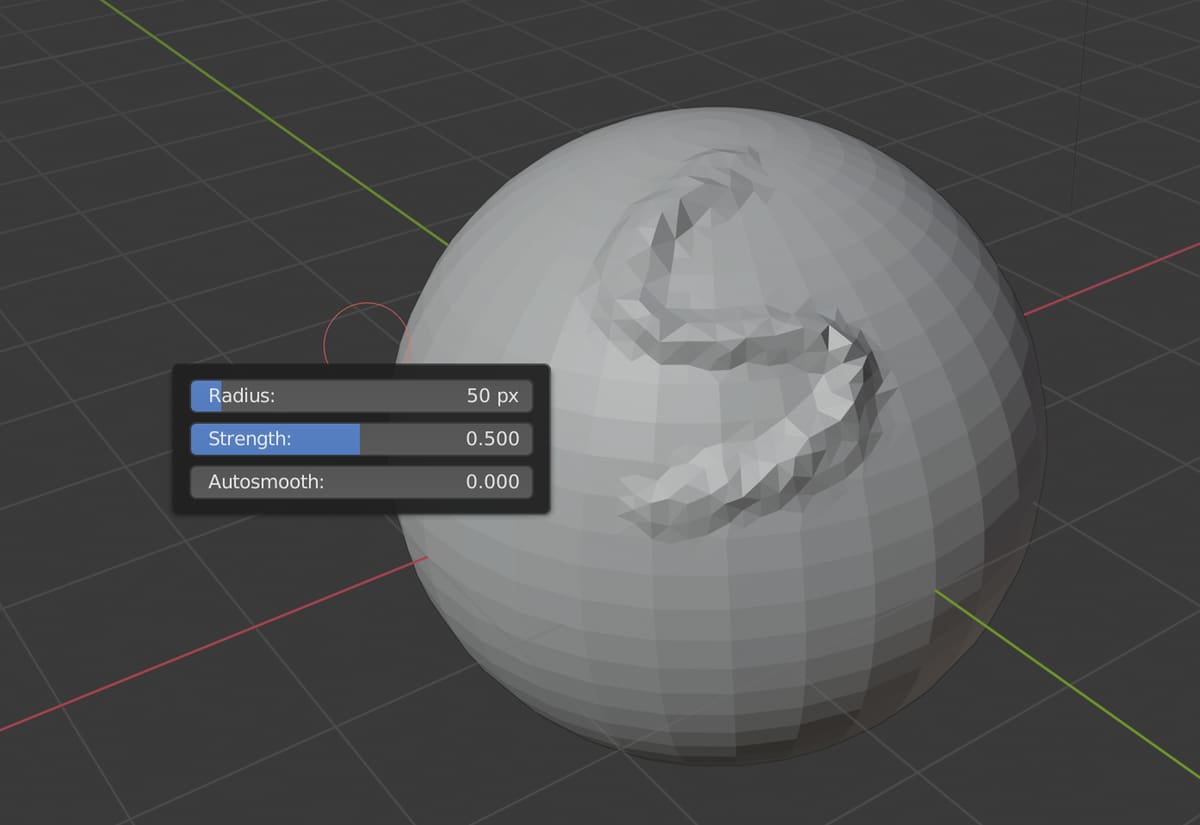
The easiest way to adjust these settings is to right-click while in sculpting mode. A dialog will appear under your mouse with draggable bars to set the radius, the strength, and (optionally) an amount of automatic smoothing to apply (this can be helpful if you’re trying to draw with a mouse).
There are many more options that you can tweak to control the effect your strokes have. To see them, look at the settings panel. You’ll find options to adjust the falloff, add a texture image, and control many other functions. We’ll take a look at a couple of them (Dyntopo and Symmetry) below.
Other Effects
Blender provides a wide range of tools to use when sculpting, but you’re likely to do the bulk of the work with just a few:
- Draw: This is likely to be your main tool, used to push and pull vertices from the surface.
- Smooth: This brush will smooth out differences between vertices, which is useful to unify the results of other tools.
- Crease: This can be used to create sharp transitions.
There are also a number of specific brushes that are less generally applicable but are sometimes exactly what you need. For example, the inflate brush can help make parts of your model look more rounded and full, and the crease brush can help accentuate hard edges. For a full list of all the available brushes, consult the Blender manual page.
Masking
It’s easy to get into situations where your changes to one part of your model might inadvertently affect other parts. Not to worry – Blender has an easy way to keep that from happening: masks.
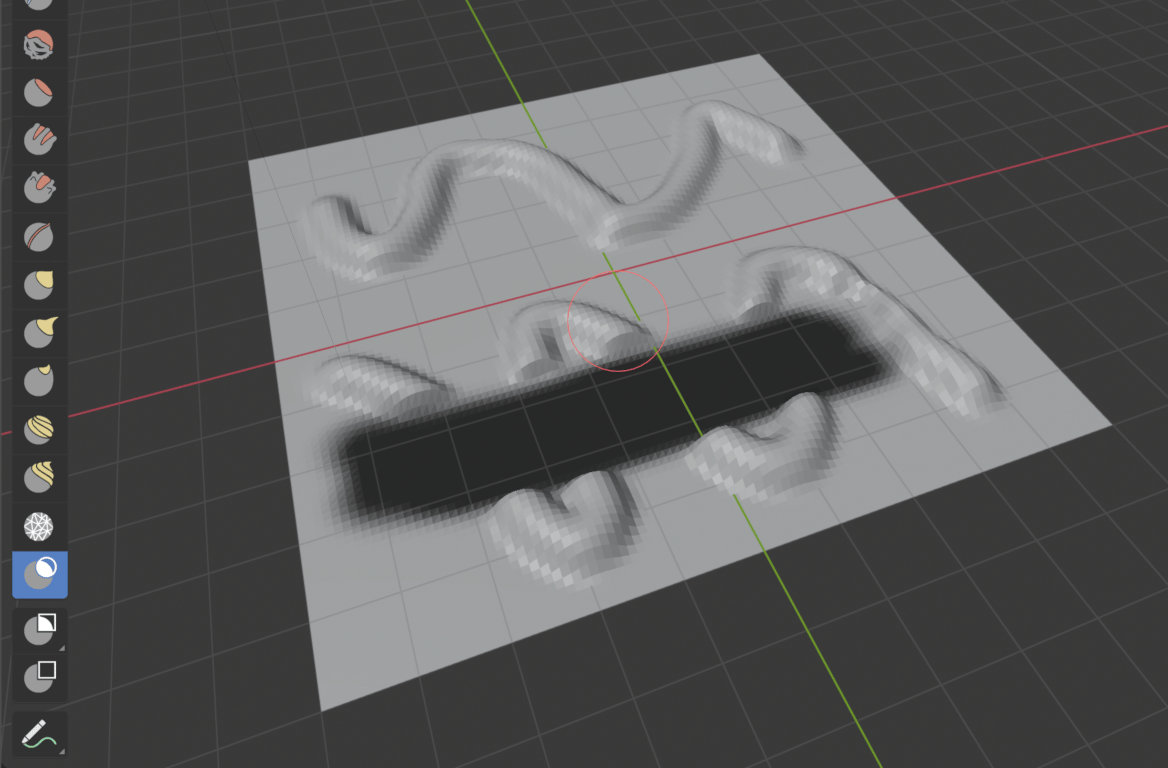
Masks allow you to limit the effects of sculpting tools by defining areas that won’t be affected. To add a mask to your model, select the “mask” tool and draw on your model. You should see a black mark appear on the surface of the model.
Note that this has nothing to do with the color on the surface, the black area is just to help you see where you’re applying the mask. Once you have a masked region, you can use any of the other tools, and you should see that the faces and vertices in the masked region aren’t affected.
To erase the mask once you’re done, you can use the mask tool in subtract mode. If you want to discard the mask entirely, you can also use the Alt+M shortcut.
Dynamic Topology
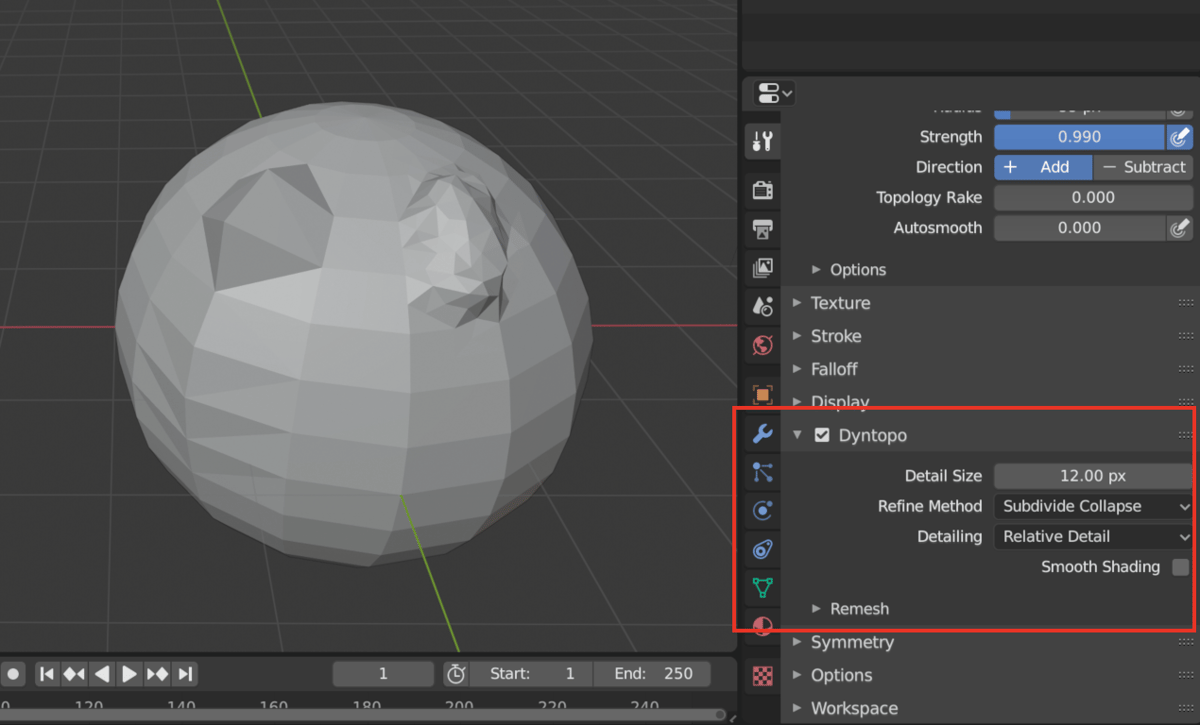
By default, the sculpt tools only operate on the vertices that are already present in the model. However, that’s often not enough to get the effect you want.
Instead, you want vertices to be added as needed to support the additional detail being created by the tool. In order for that to happen, you’ll need to enable dynamic topology, or “Dyntopo”. To do this, scroll down in the settings section and click the checkbox for “Dyntopo”.
Symmetry & Repetitions
Another powerful feature of Blender’s sculpting tools is the option to duplicate your work across the model. This can be done either as “mirror” or “radial” symmetry.
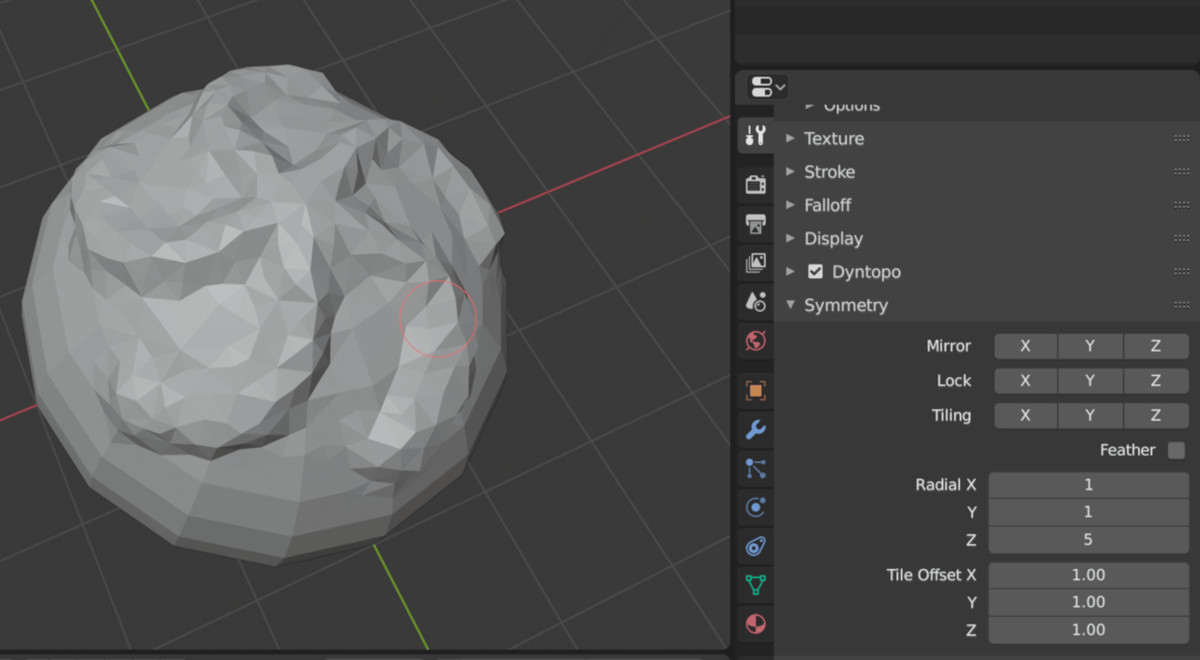
To enable these options, expand the “Symmetry” section in the tool settings. If symmetry is enabled, each stroke you apply to your model will be duplicated.
Mirror symmetry means strokes will be applied twice, once where you drew and again on the other side of the model. For radial symmetry, each stroke is applied a given number of times (specified in the options) around an axis. Having a value of 1 for radial symmetry is the same as having it disabled.
Fixing Topology

Sculpting tools are incredibly powerful, but they do have some downsides as well.
One of the most common problems occurs when the resulting meshes are very dense. Often, fine details come at the expense of thousands of additional vertices, and they’re not always laid out in the best way.
If your main focus is 3D printing, this tends not to matter too much. However, if you want to animate your model or use it in a game engine, it’s important to both limit the number of faces and ensure that your vertices are laid out in a clean and regular way.
For these reasons, sculpted models intended for animation or games generally require additional work. This work is often referred to as “retopo”, which is short for “retopology”. Basically, you use the high-detail, sculpted model as a scaffold to build a clean, lower-poly mesh.
Once you’ve done that, you can get most of the lost detail back via things like normal maps. The specifics of that process are outside the scope of this article, but if you want to know more about it, this retopology video from FlippedNormals is a great place to start.
Again, if your main focus is 3D printing, you can usually safely ignore such concerns.
(Lead image source: Adrian Herbez via All3DP)